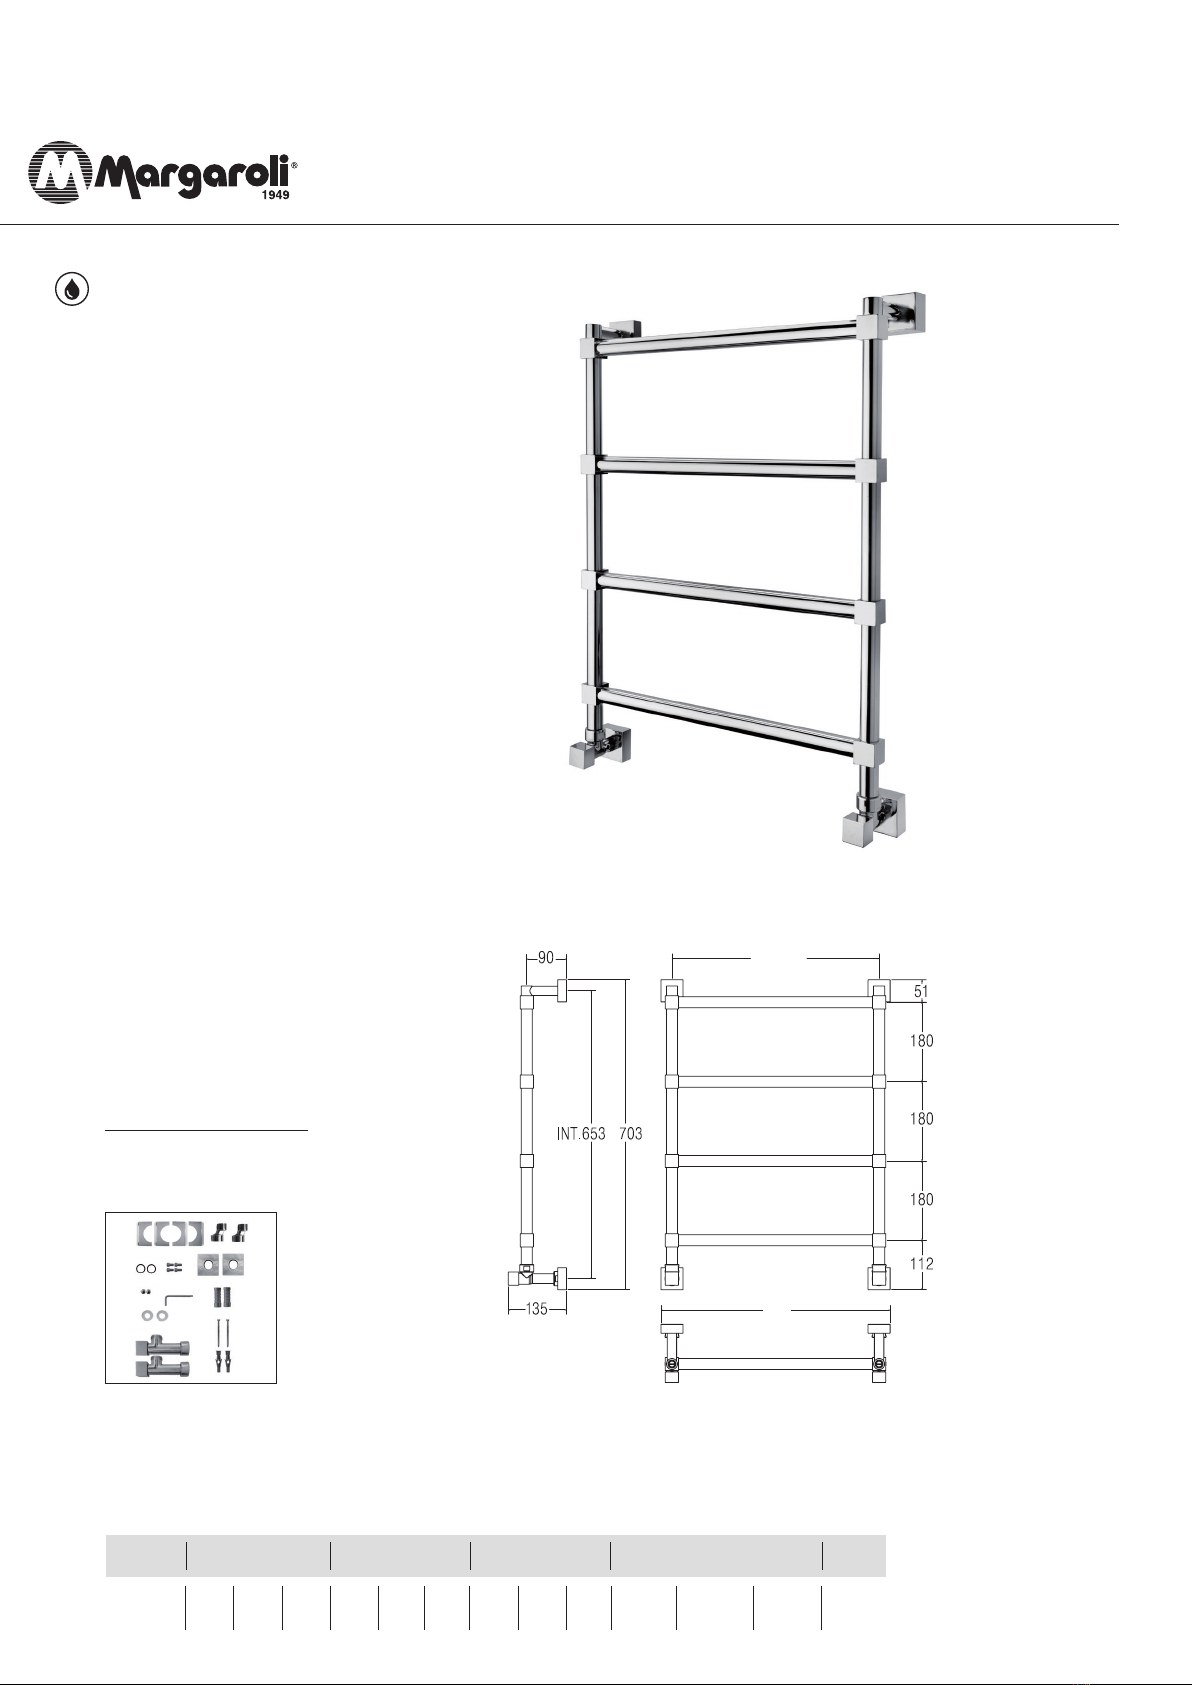
Art. 442/TQ
Materia prima: Ottone
Funzionamento: Acqua calda
Si è elaborato il seguente manuale d’uso allo scopo
di fornire le informazioni appropriate per
l’installazione e le precauzioni da adottare da parte
dell’installatore e dell’utilizzatore. Il costruttore
declina ogni responsabilità in caso di utilizzo
dell’apparecchio al di fuori delle istruzioni
fornite.
ATTENZIONE: Questo apparecchio può essere
utilizzato solo per supporto di asciugamani o simili.
L’apparecchio nel suo normale utilizzo non deve
essere caricato con un peso superiore a 5Kg
Utilizzare solo le viti e i tasselli in dotazione o
sostituirli con altre di uguali o maggiori
caratteristiche di tenuta meccanica
GRADO DI PROTEZIONE: Apparecchio protetto
contro gli spruzzi.
CONTENUTO DELLA CONFEZIONE : (vedi
immagine 1 )
(1) Chiave a brugola esagono 3
(2) Viti per fissaggio attacchi a muro M6 X 6
(2) Viti e tasselli
(2) Tasselli a muro
(4) Guarnizioni
(4) Rosoni
(2) Rubinetti
(1) Manuale d’uso e istruzioni
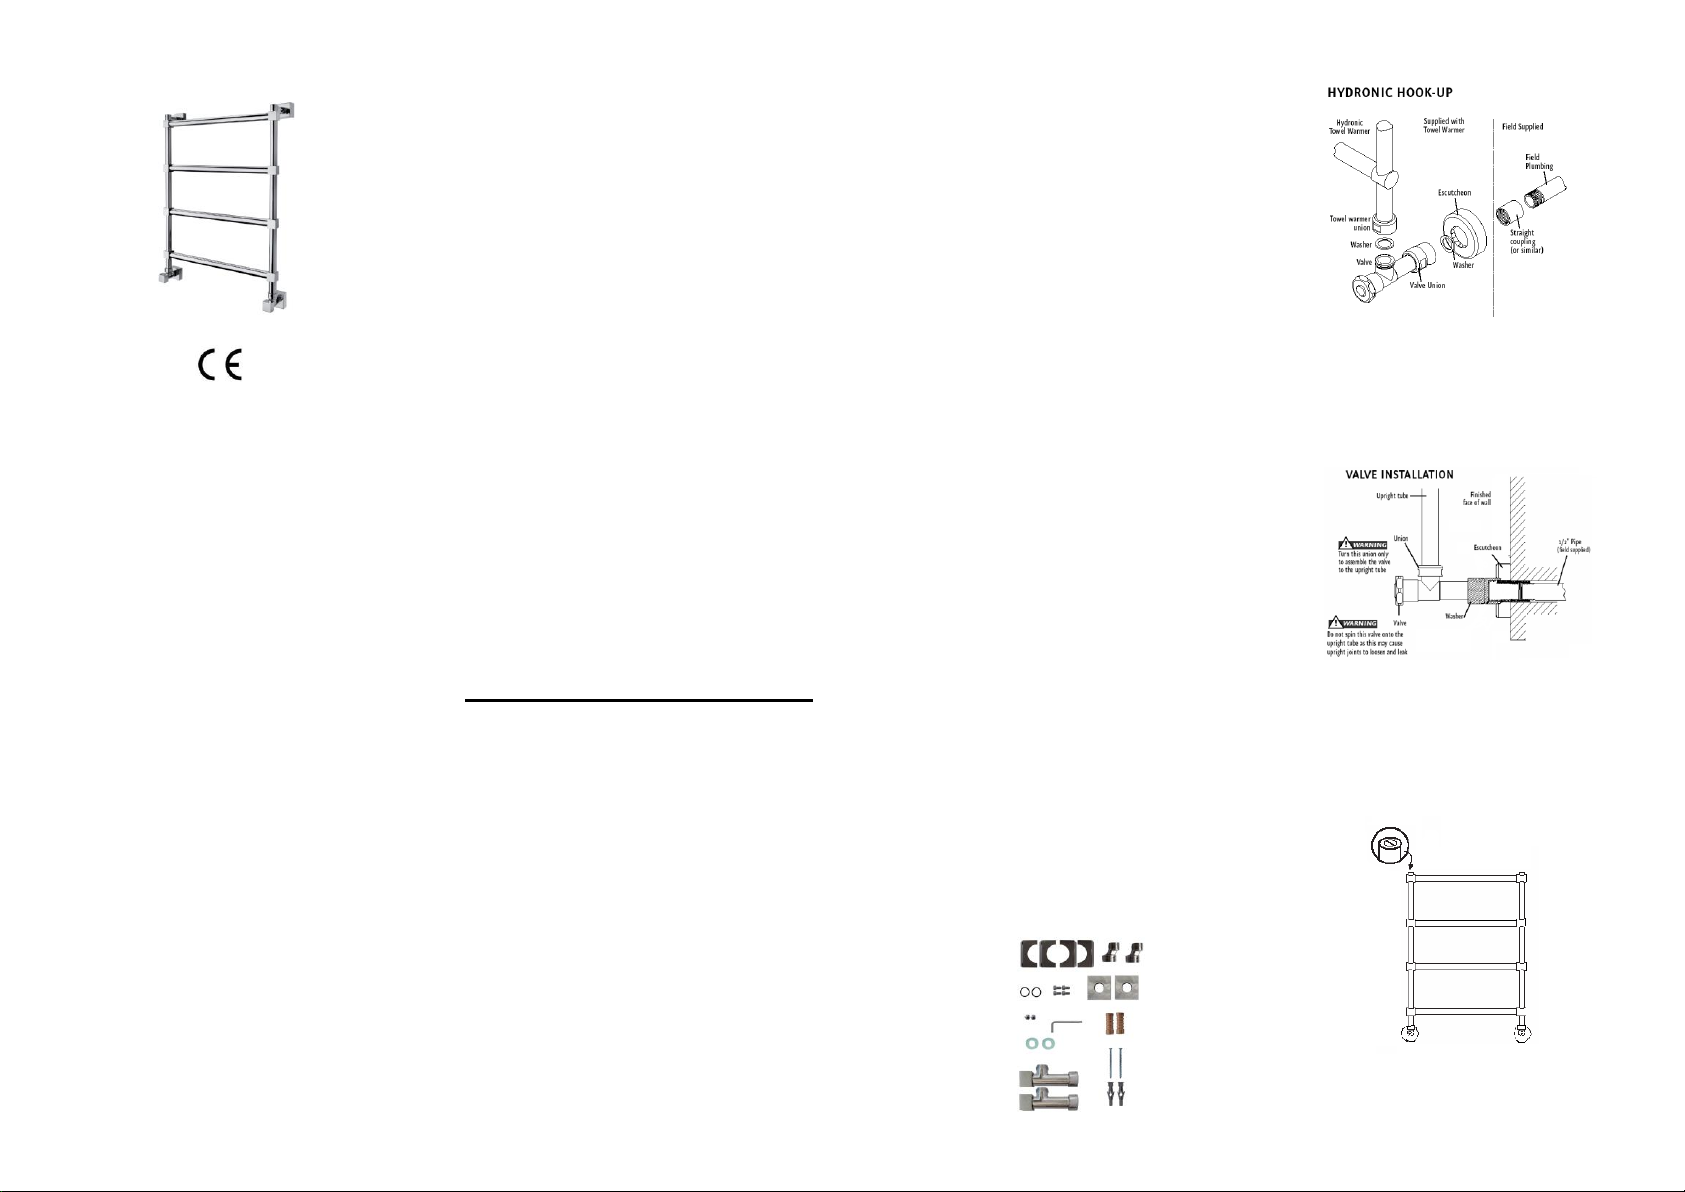
INSTALLAZIONE: (vedi disegno 2 )
1. Rimuovere lo scaldasalviette e i suoi componenti
dall’imballo
2. Fare predisporre dall’installatore due attacchi a
muro orizzontali F. da ½” con interasse di 470mm.
3. Avvitare lo scaldasalviette sui rubinetti serrando
in modo idoneo gli appositi dadi (muniti di
guarnizione) con una chiave da 29mm onde non
rovinare la superficie dei dadi stessi.
4. Ruotare ed avvicinare gli attacchi al muro
5. Posizionare contro la parete e segnare la
posizione dei tasselli.
6. Eseguire 2 fori con una punta Ø 8 nel muro in
corrispondenza degli attacchi a muro dello
scaldasalviette.
7. Smontare l’apparecchio dai rubinetti per facilitare
l’inserimento dei tasselli nel muro.
8. Avvitare lo scaldasalviette eseguendo il passo
n°2.
9. Inserire negli attacchi a muro il cappuccio
scorrevole fino ad arrivare in battuta contro il muro
e fissarli a muro serrando con la chiave a brugola
l'apposita vite.
10. Ad apparecchio installato, si consiglia di sfiatare
più volte fino a totale fuoruscita dell’aria, agendo
sugli sfiati posti alle estremità superiori dello
scaldasalviette. (vedi disegno 3)
11. Ove tutti gli elementi non raggiungessero la
temperatura di esercizio, si consiglia di ripetere
l’operazione dopo qualche minuto.
Raw material : Brass
Operation: Hot water
The following manual has been elaborated in order
to supply all the useful information for a correct
installation together with the precautions to adopt
both from installer and users. Manufacturer
declines every responsibility in case of different
uses from these instructions.
ATTENTION :This item can be only used as holder
for towels and similar garments.
This item, in normal use, cannot be loaded with
more than 5 Kg. weight.
Please, only use provided screws and dowels or
replace them with other ones equivalent or greater
in mechanical characteristics.
PROTECTION DEGREE: Squirts resistant.
PACKING CONTENTS : (see image 1 )
(1) Allen key
(2) Screw for upper brackets fixing M6 X 6
(2) Screw for upper brackets fixing
(2) Brackets holder
(2) Green gaskets
(2) Sliding caps
(2) Washers
(2) Taps
(1) Instruction & Operation Manuel
INSTALLATION: (see design 2 )
1. Take out the heated towel rail and its components
from the package.
2. Let the plumber predispose two horizontal F ½ “
connections out coming from the wall with 470mm
distance between hole centres.
3. Screw the heating towel rail to the above
mentioned tap correctly tightening the proper nuts
(provided with gasket) with a 29mm key in order to
avoid any surface damages on them.
4. Rotate and approach the brackets to the wall.
5. Place them to the wall and mark the dowels
position.
6. Make 2 holes with a Ø 8 drill in correspondence
of the wall brackets.
7. Take the heated towel rail off from the tap to
make the dowels be easier inserted in the wall.
8. Mount the heated towel rail again, following step
n°2.
9. Insert the sliding caps in the wall brackets to slide
adherent to the wall and fix them to the wall, locking
the provided screw with the allen key.
10. When the item is installed, it is suggested to
vent it more times until air has completely gone out
from the pipes, using the breathing valves on the
top of the heated towel rail. (see design 3)
11. If not all bars reach the expected temperature,
you would have better repeat the operation after a
few minutes.
1)
2)
3)
REV.01 Verifica AQU Approvazione UTE