Margules SF 220 User manual

MARGULE S
SF 220 STEREO TUBE PREAMPLIFIER
OUT IN STEREO TUBE PREAMPLIFIER
LEFT RIGHT LEFT RIGHT
1 CD SF 220
2 LINE 1 Do Not Open !
Lethal Voltage Inside
DIRECT
INPUT
LINE 2
AC OUTLET
DIRECT
OUTPUT
LINE 3
RS232
Designed and made by Margules
ON / OFF
LINE 3
DIRECT PROCESS
VOLUME
SF 220 Black 30th
MARGULES
SELECT
CD
LINE 1
LINE 2
Designed and Made by Margules
For
service refer
to qualified
personnel
Morelia 38-4 Col. Roma
México, DF.
C.P.
06700
Tel.: (55)
5514.7448
www.margules.com
MARGULES AC
127/220 VOLTS

ÍNDICE:
INSTRUCCIONES DE SEGURIDAD
2 - 3
INTRODUCCIÓN
4
ESPECIFICACIONES TÉCNICAS
4
PANEL FRONTAL (CONTROLES)
5
PANEL TRASERO (CONECTIVIDAD)
6 - 7
OPERACIÓN
7 - 8
SOLUCIÓN DE PROBLEMAS
8
NOTAS DE INSTALACIÓN
9
INDEX:
SAFETY INSTRUCTIONS
10 - 11
INTRODUCTION
12
TECHNICAL SPECIFICATIONS
12
FRONT PANEL (CONTROLS)
13
REAR PANEL (CONECTIVITY)
14 - 15
OPERATION
15 - 16
TROUBLESHOOTING
16
INSTALLATION NOTES
17
.

ESPAÑOL - 2
INSTRUCCIONES DE SEGURIDAD IMPORTANTES
PRECAUCIÓN: Para reducir el riesgo de descarga
eléctrica, no retire la cubierta. No hay partes repara-
bles por el usuario adentro; Se recomienda que solo
personal calificado repare este componente.
1. MANUAL DEL PROPIETARIO: antes de encender el
equipo, lea todas las instrucciones de seguridad y
funcionamiento y sígalas como se indica. Conserve
las instrucciones de seguridad y funcionamiento para
futuras consultas.
2. ACCESORIOS: Utilice sólo los accesorios recomen-
dados por el fabricante de la unidad, ya que otros
pueden causar peligros.
3. ACCESORIOS: No coloque la unidad sobre un
carrito, soporte, trípode, soporte o mesa inestable. La
unidad puede caer y causar lesiones a una persona o
dañar la unidad. Monte la unidad de acuerdo con las
instrucciones del fabricante con el accesorio de
montaje sugerido.
4. AGUA Y HUMEDAD: No use la unidad cerca del agua
(por ejemplo, cerca de una piscina, bañera, lavabo,
fregadero de cocina o lavadero) o en un ambiente
húmedo (como un sótano o afuera bajo la lluvia) .
5. MONTAJE EN PARED O TECHO: Monte la unidad en
una pared o techo sólo de la manera recomendada por
el fabricante.
6. ENTRADA DE OBJETOS Y LÍQUIDOS: No introduzca
objetos de ningún tipo en la unidad a través de las
aberturas, ya que podrían tocar puntos de voltaje
peligrosos y cortocircuitar piezas, lo que podría
provocar un incendio o una descarga eléctrica. Evite
derramar líquidos de cualquier tipo sobre la unidad. Si
agua o cualquier objeto metálico (como un clip, una
moneda o una grapa) cae accidentalmente dentro de la
unidad, desconéctela de la fuente de alimentación de
CA inmediatamente y comuníquese con Margules
Audio para obtener más instrucciones.
7. CALOR: Coloque la unidad lejos de fuentes de calor
como radiadores, rejillas de calefacción, estufas u
otras unidades (incluidos amplificadores) que produz-
can calor.
8. VENTILACIÓN: Las ranuras y aberturas en el gabi-
nete crean ventilación para proteger el componente
del sobrecalentamiento. Deje al menos 6 pulgadas (16
cm) de espacio libre por encima de la unidad y una
abertura detrás de la unidad para el flujo de aire. No
coloque la unidad sobre una cama, sofá, alfombra,
librero empotrado o estante sin la ventilación adecua-
da.
9. CONEXIÓN A TIERRA O POLARIZACIÓN: Como
característica de seguridad, la unidad puede estar
equipada con un enchufe de línea de corriente alterna
polarizada en el que una clavija es más ancha que la
otra. Este enchufe encajará en la toma de corriente de
una sola manera. Si no puede insertar el enchufe
completamente en el tomacorriente, intente invertir el
enchufe. Si el enchufe aún no encaja, comuníquese
con un electricista autorizado para actualizar su toma
de corriente obsoleta. No anule el propósito de seguri-
dad del enchufe polarizado.
10. FUENTES DE ALIMENTACIÓN: Utilice la unidad
únicamente con la fuente de alimentación indicada en
la etiqueta de marcado. Si no está seguro del tipo de
energía suministrada a su hogar, consulte con el
distribuidor de su unidad o con la compañía eléctrica
local.
11. PROTECCIÓN DEL CABLE DE ALIMENTACIÓN:
Disponga los cables de alimentación de modo que no
sufran el tránsito peatonal ni los aprieten los elemen-
tos colocados sobre ellos o contra ellos. Preste
mucha atención a los cables por donde el enchufe
ingresa al tomacorriente de CA y por donde sale de la
unidad.
12. RAYOS: Para mayor protección durante una
tormenta eléctrica o cuando el componente está
inactivo durante largos períodos de tiempo, desen-
chufe la unidad del tomacorriente de la pared y
desconecte la antena o el sistema de cable. Esto
ayudará a proteger la unidad de rayos y daños por
sobretensiones en la línea eléctrica.
13. LÍNEAS ELÉCTRICAS: No coloque un sistema de
antena exterior cerca de líneas eléctricas aéreas u
otros circuitos eléctricos o de luz. Cuando instale un
sistema de antena exterior, tenga mucho cuidado de
no tocar las líneas eléctricas o los circuitos; el contac-
to con ellos podría ser fatal.
14. SOBRECARGA: No sobrecargue los tomacorrien-
tes de la pared, los cables de extensión o los
receptáculos de conveniencia integrales, ya que esto
aumenta el riesgo de incendio o descarga eléctrica.
15. PIEZAS DE REPUESTO: Cuando se requieran
piezas de repuesto, asegúrese de que el técnico de
servicio haya utilizado las piezas de repuesto especifi-
cadas por el fabricante o aquellas que tengan las
mismas características que las piezas originales. Las
sustituciones no autorizadas pueden provocar incen-
dios, descargas eléctricas u otros peligros.
16. VERIFICACIÓN DE SEGURIDAD: Al finalizar cual-
quier servicio o reparación de la unidad, pídale al
técnico de servicio que realice verificaciones de
seguridad para asegurarse de que la unidad esté en
condiciones de funcionamiento adecuadas.
17. NOTA DE SEGURIDAD IMPORTANTE: Antes de
conectar un producto nuevo, como el U280-SC, a su
sistema de audio o de cine en casa, apague todos los
demás equipos (preferiblemente desenchufándolos de
la fuente de alimentación de CA). Muchos componen-
tes de audio cuentan con circuitos de encendido
automático que pueden activarse durante una insta-

ESPAÑOL - 3
lación, lo que podría causar daños a los componentes
electrónicos y / o altavoces. Este tipo de daño no está
cubierto por las garantías del producto, y Margules
Audio específicamente se exime de responsabilidad
por dicho daño.
•Cable de alimentación: el cable de
alimentación extraíble provisto con su reproductor fue
diseñado específicamente para su uso con este
producto, pero se pueden usar otros cables de CA.
Consulte a su distribuidor para obtener asesoramiento
sobre cables de alimentación de CA y cables de alta
calidad en su sistema.
•Fusible de CA: el fusible está ubicado
dentro del chasis y el usuario no puede
repararlo. Si la unidad no se enciende,
comuníquese con un representante de
servicio autorizado.
•Cableado: Los cables que corren dentro de las
paredes deben tener las marcas apropiadas para
indicar el cumplimiento y la lista de UL, CSA u otras
normas requeridas por UL, CSA, NEC o su código de
construcción local. Las preguntas sobre los cables
dentro de las paredes deben dirigirse a un instalador
personalizado calificado, un electricista autorizado o
un contratista de baja tensión.
18. GRABACIÓN DE DERECHOS DE AUTOR: La
grabación de material protegido por derechos de autor
para otro uso que no sea personal es ilegal sin el
permiso del propietario de los derechos de autor.
19. NOTA PARA EL INSTALADOR DEL SISTEMA CATV:
Este recordatorio se proporciona para llamar la
atención del instalador del sistema CATV sobre el
artículo 820-40 de NEC, ANSI / NFPA 70, que propor-
ciona pautas para una conexión a tierra adecuada y,
en particular, especifica que la tierra del cable debe
estar conectado al sistema de puesta a tierra del
edificio tan cerca del punto de entrada de cables como
sea posible.
20. INFORMACIÓN DE LA FCC PARA EL USUARIO:
•PRECAUCIÓN: Cualquier cambio o
modificaciones no aprobadas expresa-
mente de Margules Audio podría anular
el autoridad para operar el equipo.
•Estos límites están diseñados para proporcionar una
protección razonable contra interferencias perjudicia-
les en una instalación residencial. Este equipo genera
y puede irradiar energía de radiofrecuencia y, si no se
instala y utiliza de acuerdo con las instrucciones,
puede causar interferencias perjudiciales en las
comunicaciones por radio. Sin embargo, no hay
garantía de que no se produzcan interferencias en una
instalación en particular. Si este equipo causa interfer-
encia dañina en la recepción de radio o televisión, lo
cual se puede determinar encendiendo y apagando el
equipo, se recomienda al usuario que intente corregir
la interferencia mediante una o más de las siguientes
medidas:
•Reorientar o reubicar la antena receptora.
•Aumente la separación entre el equipo y el
receptor.
Conecte el equipo a una toma de corriente en un
circuito diferente de donde está conectado el receptor.
21. INSTALACIÓN DE ANTENA EXTERIOR / CONEXIÓN
SEGURA DE ANTENA Y CABLE:
•Si se conecta una antena exterior o un sistema de
cable al equipo, asegúrese de que la antena o el
sistema de cable estén conectados a tierra para
brindar protección contra cargas estáticas acumula-
das y sobretensiones. El artículo 810 del Código
Eléctrico Nacional, ANSI / NFPA 70 (en Canadá, Parte 1
del Código Eléctrico Canadiense) proporciona infor-
mación sobre la conexión a tierra adecuada del mástil
y la estructura de soporte, la conexión a tierra del
cable de entrada a una unidad de descarga de antena,
tamaño de conductores de puesta a tierra, ubicación
de la unidad de descarga de la antena, conexión a los
electrodos de puesta a tierra y requisitos para el
electrodo de puesta a tierra.
•El sistema de antena exterior debe ubicarse lejos de
líneas eléctricas, luz eléctrica o circuitos de energía y
donde nunca entrará en contacto con estas fuentes de
energía si llegara a caer. Al instalar una antena exteri-
or, se debe tener mucho cuidado para evitar tocar
líneas eléctricas, circuitos u otras fuentes de energía,
ya que esto podría ser fatal. Debido a los peligros
involucrados, la instalación de la antena debe dejarse
en manos de un profesional.

ESPAÑOL - 4
INTRODUCCIÓN:
El Preamplificador SF-220 posee un circuito que integra la etapa de salida con la de entrada para obtener una respuesta en
frecuencia y velocidad de transientes inusualmente altas, esto resuelve la señal con un gran detalle instrumental lleno de
riqueza tonal y logra una impedancia de salida capaz de manejar fácilmente cualquier amplificador de estado sólido o de
bulbos sin interacciones audibles ni pérdida en la calidad del audio.
Nuestro SF-220 cuenta con un bello control remoto labrado en madera. El uso de componentes premium complementa el
diseño avanzado del SF220. Todas las operaciones en este preamplificador se realizan con relevadores electromagnéticos
con puntas de oro, además cuenta con un potenciómetro motorizado para mantener la integridad de la señal analógica.
Entre sus componentes Premium destaca la placa PCB de oro que garantiza una máxima conductividad así como
elementos grado audiófilo que ayudan a dar el sonido característico.
La fuente de alimentación en este equipo es del tipo SHUNT. Al no tener un circuito de lazo de control no induce armónicos,
por lo que ayuda a mantener la integridad de la señal de audio. La tecnología de derivación proporciona una mejora
dramática en la amortiguación Q, el factor crítico en la regulación de voltaje para esas etapas. Una buena regulación
reduce la pérdida de integridad de la señal que ocurre cuando la propia señal cambia el punto de funcionamiento. La
amortiguación es fundamental para el rendimiento general, incluida una respuesta transitoria más suave y una amplia
puesta en escena.
Nuestra nueva fuente de alimentación SHUNT es virtualmente indestructible debido a la tecnología de regulación
especialmente diseñada que protege el equipo de fallas importantes en los bulbos. La amortiguación activa del filamento
minimiza el efecto microfónico producido por los bulbos.
ANA® (Alineación Neuro-Acústica).
El desarrollo de la tecnología ANA® (Neuro-Acoustic Alignment) es una innovación de Margules que está basada en la
forma en que el cerebro humano percibe el sonido, al priorizar la estructura armónica sobre el tono fundamental. Esta
tecnología está definida en base a cómo los humanos percibimos y procesamos el sonido.
Este avance tecnológico tiene su origen en la teoría del sonido cautivador (sonido atractivo). Nuestro cerebro decodifica la
información de las ondas sonoras a través de nuestros oídos. Cuando los sonidos están cerca, nos mantienen atentos
debido a la relación entre la percepción de estos, la distancia en la que los percibimos y su inteligibilidad. Los sonidos
distantes, incluso cuando son inteligibles, no atraen nuestra atención y son fácilmente ignorados.
Creamos nuestra tecnología ANA® para lograr un sonido más realista con una respuesta de frecuencias adecuada, baja
distorsión y una reproducción armónica de alta precisión, optimizando al máximo la relación entre la fuente y el escucha
para poder disfrutar de la música de formas que nunca habían sido experimentadas.
ESPECIFICACIONES TÉCNICAS:
Respuesta de frecuencias: 5-400 khz
Distorsión Armónica Total: <0.014% máx
Máximo nivel de salida: 30 v
Relación señal/ruido: >80dB
Ganancia: 6 dB
Tiempo de subida: 6 micro sec
Tiempo de bajada: 6 micro sec
Consumo de poder (máx.): 55 w
Peso: 14 kg
Dimensiones: (alto, ancho, largo): 13.6 cm x 44 cm x 3 cm

ESPAÑOL - 5
PANEL FRONTAL: CONTROLES
Botón de
Encendido /
Apagado
Perilla de
control de
Volumen
Selector de
fuente de
entrada
Monitor de
fuente de
entrada
Receptor IR
del control
Remoto
CONTROLES:
Botón de Encendido / Apagado: Botón pulsable para encender y apagar el SF 220. Este botón está disponible también en el
control remoto.
Botón de Selector de fuente de entrada: Botón pulsable para seleccionar la fuente de entrada entre las 4 entradas de línea y la
de fono, pulsar una vez para avanzar entre las entradas. Este botón está disponible
también en el control remoto.
Monitor del Selector de fuente de entrada: Despliega por medio de un led azul la fuente de entrada seleccionada.
Receptor Infrarojo del control remoto: Este receptor óptico recibe la señal del control remoto, no obstruir, ya que si es
bloqueado, el equipo no recibirá la señal del control remoto.
Perilla de Control de Volumen: Con esta perilla, girándola a la derecha aumentará el nivel de salida de audio, girar a la
izquierda para disminuir el nivel de salida. La operación de la perilla de volumen está disponible
en el control remoto.
SF 220 BLACK 30th
EDITION
VOLUME
DIRECT PROCESS

ESPAÑOL - 6
PANEL TRASERO: CONECTIVIDAD:
CONECTIVIDAD:
1: Salida de pre-amplificador (PRE OUT 1 Y 2): Dos juegos de salidas no balanceadas RCA procesadas por la etapa de
pre-amplificación.
La salida OUT 2 puede ser utilizada para conectar un subwoofer,
un segundo amplificador o una segunda zona.
NOTA: Debido a que el preamplificador es a bulbos o válvulas, evitar
conectar equipos con carga de baja impedancia, Menores a 100 KΩ.
2: Entradas de línea (CD LINE 1-3): Entradas no balanceadas RCA para dispositivos nivel línea como CD, Tuner, Tape,
Tornamesas Pre-amplificadas o Phonostage externo.
3: Salida de señal (DIRECT OUTPUT): Esta salida está controlada por el selector de la etapa de pre-amplificación, no
por el control de volumen. Esta salida se puede utilizar para conectar equipo de
grabación ó para mandar la señal de audio a otra zona, ó para conectar equipo
con procesador envolvente e integrar un sistema de audio de alto desempeño
con uno de audio/video.
4: Entrada de señal (DIRECT INPUT): Esta entrada no está controlada por el control de volumen. Esta entrada se puede
utilizar para recibir la señal de audio desde otra zona, ó desde un equipo con
procesador envolvente e integrar un sistema de audio de alto desempeño con
uno de audio/video.
5: Puerto RS232: Puerto RS232 para integración con sistemas de autoamtización ó para conectar módulo de webserver
(Vendido por separado) para administración y control del equipo. Los códigos de integración son los
siguientes: Selector: !1ENT01 !1ENT02 !1ENT03 !1ENT04
Direct input: !1ENT05
Mute: !1ENT06
Aumentar o Disminuir el Volumen:
UP !1VOL99
Down ! 1VOL55
Apagado ! 1PWR0
Encendido !1PWR1
Cambio !1POW2
LEFT
RIGHT
LEFT
RIGHT
STEREO TUBE PREAMPLIFIER
SF 220
Lethal Voltage Inside
RS 232

ESPAÑOL - 7
PANEL TRASERO: CONECTIVIDAD (CONT):
6: Entrada y salida de corriente
eléctrica (127VAC 15 AMP MAX): Entrada de corriente eléctrica para alimentar el equipo. La salida es para conectar
un purificador de línea QR1 o QR2 de Magenta o bien un sistema que se quiera
interrumpir ligado al encendido del amplificador. Esta salida eléctrica es contolada
por medio del encendido del equipo y tiene capacidad máxima de 15AMP / 1800 W.
OPERACIÓN:
Cuando su SF-220 es conectado por primera vez, es necesario inicializar el sistema, esto se hace encendiendo el equipo
con el selector de entrada.
Verifique que el volumen se encuentra en el nivel mínimo para evitar un golpe súbito de sonido que pueda dañar sus
bocinas.
Mientras el SF-220 se encuentre conectado al la red de suministro eléctrico los filamentos de los bulbos estarán siempre
funcionando, así que el encendido será inmediato. La expectativa de vida de los bulbos no disminuye por este hecho. Más
bien aumenta, ya que la nube electrónica del cátodo ya esta formada al aplicar el alto voltaje (cuando se enciende).
Encienda el equipo por medio del interruptor de encendido en el control remoto o en el frente del equipo, en caso que la
alimentación eléctrica sea interrumpida, permita que los filamentos de los bulbos se calienten por unos segundos.
Seleccione la fuente de entrada presionando el interruptor selector del panel frontal o en la unidad de mando remoto, esto
encenderá la luz azul en el panel frontal indicando la fuente seleccionada.
La luz azul en los bulbos indica que la unidad está activa, por lo tanto, el SF-220 se encuentra en estado operacional.
Comentarios Generales:
La unidad está siempre tibia, de manera que debe de colocarse en un área ventilada, con al menos una pulgada de aire en
la parte superior y a los lados del equipo, para permitir el flujo de aire y evitar sobrecalentamiento.
Coloque siempre su unidad en una plataforma firme para evitar vibraciones externas, que pudieran imprimir un carácter
tonal no deseado.
Usted puede alterar las características tonales al colocar la unidad en diferentes tipos de soportes como pies de goma,
spikes etc.
LEFT
RIGHT
LEFT
RIGHT
STEREO TUBE PREAMPLIFIER
SF 220
Lethal Voltage Inside
RS 232
CONECTIVIDAD:

ESPAÑOL - 8
OPERACIÓN (CONT):
Para minimizar ruidos indeseados o interferencias en el sistema:
1.- Evite el largo excesivo en los cables de interconexión.
2.- Evite tener los cables cerca de la línea de corriente alterna.
3.- Evite circuitos de retroalimentación de tierra entre los componentes.
4.-Los cables de interconexión deben tener buen blindaje.
Asentamiento (Burn-in):
Se requieren unas 150 horas de reproducción musical. El tener la unidad prendida sin música no funciona para lograr un
asentamiento apropiado.
Expectativa de Vida de los bulbos (válvulas):
Para un desempeño óptimo recomendamos cambiar ambos bulbos cada tres años, aunque pueden durar un período más
largo.
Tipo de bulbos o válvulas compatibles:
La unidad tiene bulbos 12AU7 o la equivalencia ECC83, no utilizar ningún otro tipo de bulbo.
IMPORTANTE: Nunca saque los bulbos del circuito mientras el equipo está conectado al tomacorriente.
La unidad tiene una toma de corriente alterna para equipos asociados interrumpida con una capacidad de 15 amperes, así que
podrá controlar el encendido y apagado del equipo conectado al SF 220.
Es normal que el indicador de entrada esté iluminado mientras la unidad está conectada al suministro de corriente.
En caso de una pérdida súbita de energía que provoque que dos o más indicadores de selección estén encendidos, simple-
mente desconecte la unidad de la toma de corriente y vuelva a hacer el procedimiento de inicialización (pág. 7).
El cable de poder de la unidad puede ser cambiado por otro de mayor calidad de manera que las características tonales
puedan mejorar.
SOLUCIÓN DE PROBLEMAS:
El equipo no enciende:
Verificar que la alimentación eléctrica sea la correcta y que el cable de corriente esté conectado a una toma eléctrica activa.
No hay sonido:
La luz del selector está encendida pero no hay sonido: Asegúrese de que la unidad está prendida verificando la luz iluminando
los bulbos. Verifique que la señal de entrada está conectada en la entrada correcta.
Revisar el puente entre la salida OUT 1 se encuentre conectada al amplificador, y que éste se encuentre encendido y listo para
operar.
Si más de un indicador está encendido:
Un transitorio en la corriente eléctrica provocó un error en la lógica del control remoto.
Reinicie la unidad desconectándola de la corriente y conéctela de nuevo.

ESPAÑOL - 9
NOTAS DE INSTALACIÓN:

ENGLISH - 10
IMPORTANT SAFETY INSTRUCTIONS
CAUTION: To reduce the risk of electric shock, do not
remove the cover. There are no user-serviceable parts
inside; it is recommended that only qualified person-
nel service this component.
1. OWNER’S MANUAL: Before powering up the
equipment, read all safety and operating instructions
and follow them as instructed. Retain the safety and
operating instructions for future reference.
2. ATTACHMENTS: Use only those attachments
recommended by the unit manufacturer, as others may
cause hazards.
3. ACCESSORIES: Do not place the unit on an
unstable cart, stand, tripod, bracket, or table. The unit
may fall, causing injury to a person or damage to the
unit. Mount the unit according to the manufacturer’s
instructions with the suggested mounting accessory.
4. WATER AND MOISTURE: Do not use the unit
near water (for example, near a swimming pool, bath
tub, wash bowl, kitchen sink, or laundry tub) or in a
damp environment (like a basement or outside in the
rain).
5. WALL OR CEILING MOUNTING: Mount the unit
to a wall or ceiling only in the manner recommended
by the manufacturer.
6. OBJECT AND LIQUID ENTRY: Do not push
objects of any kind into the unit through openings as
they could touch dangerous voltage points and
short-out parts, possibly resulting in a fire or electric
shock. Avoid spilling liquid of any kind on the unit. If
water or any metal object (such as a paper clip, coin,
or staple) accidentally falls inside the unit, disconnect
it from the AC power source immediately and contact
Margules Audio for further instructions.
7. HEAT: Position the unit away from heat sourc-
es such as radiators, heat registers, stoves, or other
units (including amplifiers) that produce heat.
8. VENTILATION: Slots and openings in the
cabinet create ventilation to protect the component
from overheating. Allow at least 6 inches (16cm) of
clearance above the unit and an opening behind the
unit for airflow. Do not place the unit on a bed, sofa,
rug, built-in bookcase, or rack without adequate
ventilation.
9. GROUNDING OR POLARIZATION: As a safety
feature, the unit may be equipped with a polarized
alternating current line plug in which one blade is
wider than the other. This plug will fit into the power
outlet only one way. If you cannot insert the plug fully
into the outlet, try reversing the plug. If the plug still
will not fit, contact a licensed electrician to update
your obsolete outlet. Do not defeat the safety purpose
of the polarized plug.
10. POWER SOURCES: Operate the unit only from
the power source indicated on the marking label. If
you are unsure of the type of power supplied to your
home, consult your unit dealer or local power compa-
ny.
11. POWER CORD PROTECTION: Arrange power
supply cords so that they do not suffer from foot
traffic or pinching by items placed on or against them.
Pay close attention to cords where plug enter the AC
outlet and where they exit from the unit.
12. LIGHTNING: For added protection during a
lightning storm or when the component is idle for long
periods of time, unplug the unit from the wall outlet
and disconnect the antenna or cable system. This will
help protect the unit from lightning and power line
surge damage.
13. POWER LINES: Do not locate an outside
antenna system in the vicinity of overhead power lines
or other electric light or power circuits. When install-
ing an outside antenna system, take extreme care to
avoid touching the power lines or circuits; contact
with them could be fatal.
14. OVERLOADING: Do not overload wall outlets,
extension cords, or integral convenience receptacles
as this increases the risk of fire or electric shock
15. REPLACEMENT PARTS: When replacement
parts are required, be sure the service technician has
used replacement parts specified by the manufacturer
or those having the same characteristics as the
original parts. Unauthorized substitutions may result
in fire, electric shock or other hazards.
16. SAFETY CHECK: Upon completion of any
service or repairs to the unit, ask the service techni-
cian to perform safety checks to ensure the unit is in
proper operating condition.
17. IMPORTANT SAFETY NOTE: Before connecting
a new product such as the U280-SC to your audio or
home theater system, turn off all other equipment
(preferably unplugging them from the AC power
source). Many audio components feature automatic
turn-on circuits that may activate during an installa-
tion, potentially causing damage to electronic compo-
nents and/or speakers. This type of damage is not
covered by product warranties, and Margules Audio
specifically disclaims responsibility for any such
damage.
•Power Cord: The removable power cord
provided with your player was specifically designed
for use with this product, but other AC cords may be
used. Consult your dealer for advice on AC power
cords and high quality wire in your system.
•AC Fuse: The fuse is located inside
the chassis and is not user serviceable. If
the unit does not power up, contact an
authorized service representative.

ENGLISH - 11
•Wiring: Cables running inside walls should
have the appropriate markings to indicate compliance
and listing by the UL, CSA or other standards required
by the UL, CSA, NEC or your local building code.
Questions about cables inside of walls should be
referred to a qualified custom installer, a licensed
electrician, or low-voltage contractor.
18. RECORDING COPYRIGHT: Recording of
copyrighted material for other than personal use is
illegal without permission of the copyright holder.
19. NOTE TO CATV SYSTEM INSTALLER: This
reminder is provided to call the CATV system install-
er's attention to article 820-40 of the NEC, ANSI/NFPA
70, which provides guidelines for proper grounding
and, in particular, specifies that the cable ground shall
be connected to the grounding system of the building
as close to the point of cable entry as practical.
20. FCC INFORMATION FOR USER:
•CAUTION: A n y c h a n g e s o r
modifications not expressly approved
by Margules Audio could void the user's
authority to operate the equipment.
•These limits are designed to provide reason-
able protection against harmful interference in a
residential installation. This equipment generates and
can radiate radio frequency energy, and if not installed
and used in accordance with the instructions it may
cause harmful interference to radio communications.
However, there is no guarantee that interference will
not occur in a particular installation. If this equipment
does cause harmful interference to radio or television
reception, which can be determined by turning the
equipment off and on, the user is encouraged to try to
correct the interference by one or more of the follow-
ing measures:
•Reorient or relocate the receiving antenna.
•Increase the separation between the equip-
ment and receiver.
Connect the equipment into an outlet on a circuit
different from where the receiver is connected.
21. OUTDOOR ANTENNA INSTALLATION/SAFE
ANTENNA AND CABLE CONNECTION:
•If an outside antenna or cable system is
connected to the equipment, be sure the antenna or
cable system is grounded in order to provide protec-
tion against built-up static charges and voltage
surges. Article 810 of the National Electrical Code,
ANSI/NFPA 70 (in Canada, Part 1 of the Canadian
Electrical Code) provides information regarding proper
grounding of the mast and supporting structure,
grounding of the lead-in wire to an antenna discharge
unit, size of grounding conductors, location of anten-
na discharge unit, connection to grounding electrodes
and requirements for the grounding electrode.
•Outside antenna system should be located well
away from power lines, electric light or power circuits
and where it will never come into contact with these
power sources if it should happen to fall. When install-
ing an outside antenna, extreme care should be taken
to avoid touching power lines, circuits or other power
sources as this could be fatal. Because of the hazards
involved, antenna installation should be left to a
professional.

ENGLISH - 12
INTRODUCTION:
The SF-220 Preamplifier has a circuit that latches the output stage with the input stage to obtain an unusually
high-frequency response and transient velocity. This technology resolves the signal with great instrumental detail full of tonal
richness and achieves a low output impedance. Capable of efficiently driving any solid-state or tube amplifier without audible
interactions or loss of audio quality.
Our SF-220 features a beautiful wood-carved remote control. The use of premium components complements the advanced
design of the SF220. Gold-tipped electromagnetic relays control all operations on this preamplifier, plus it features a
motorized potentiometer to maintain the integrity of the analog signal. Among its Premium components, the gold PCB plate
stands out, which guarantees maximum conductivity and audiophile-grade elements that help give the characteristic sound.
The power supply in this equipment is of the SHUNT type. As it does not have a feedback loop circuit, it does not induce
harmonics, which is why it helps maintain the audio signal's integrity. Bypass technology provides a dramatic improvement
in Q damping, the critical factor in voltage regulation for those stages. Good regulation reduces the loss of signal integrity
that occurs when the signal itself changes the operating point. Damping is critical to overall performance, including
smoother transient response and extensive staging.
Our new SHUNT power supply is virtually indestructible due to specially designed dimming technology protecting
equipment from major tube failure. The active damping of the filament minimizes the microphonic effect produced by the
bulbs.
ANA® (Neuro-Acoustic Alignment).
NEURO-ACOUSTIC ALIGNMENT (ANA)
The ANA® technology (Neuro-Acoustic Alignment) is one of Margules’ technological innovations developed from a fundamental
principle: the human brain perceives sound by prioritizing the harmonic structure above fundamental tone; that is, it focuses on
how humans perceive sound and not on how we measure it.
This technological advance originates from the engaging sound theory and is based on the way in which our brain decodes the
information from the sound waves through the ears: when sounds are closer, they keep us focused due to the relation between
perception and sound, the distance at which we perceive them and their intelligibility, whereas distant sounds, even when
intelligible, do not catch our attention and are easily ignored.
Our ANA® technology is designed to achieve a realistic sound, with a wide frequency response, low distortion and precise
harmonic reproduction, optimizing to the utmost the relationship between the source and the receiver, so that you can enjoy your
music in a way you have never experienced before.
TECHNICAL SPECIFICATIONS:
Frequency Response: 5-400 khz
TDH: <0.014% máx
Max Output Level: 30 v
Signal/Noise Ratio: >80dB
Gain: 6 dB
Raise Time: 6 micro sec
Fall Time: 6 micro sec
Power Consumption (máx.): 55 w
Weight: 14 kg
Dimensions (height, width, depth): 13.6 cm x 44 cm x 3 cm

ENGLISH - 13
FRONT PANEL: CONTROLS
ON / OFF
Power Switch
Input Selector Input Source
Monitor
Volume
Control Knob
Remote
Control IR
Receiver
CONTROLS:
ON / OFF Power Switch: Push the button to turn the SF 220 on and off. This button is also available on the remote control.
Input Selector Switch: Push button to select the input source between the 4 line in inputs and the direct input,
push once to advance between the inputs. The selector on the preamplifier is
sequential. This button is also available on the remote control, along with direct access
to a desired input.
If the unit is off, the SF220 will be turned on if any selector button is triggered.
Input Source Monitor: It displays the selected input source by means of an orange led.
Remote Control IR Receiver: The remote control is infrared, requires a visual line between the remote handheld unit and the
SF220 preamplifier. Do not obstruct, because if it isblocked, the equipment will not receive the
signal from the remote control.
The remote handheld has several extra functions not available on the front panel.
Volume Control Knob: With this knob, turning it to the right will increase the audio output level. Turn it to the left to decrease the
output level. Volume knob operation is available on the remote control. The remote-controlled
potentiometer is powered by a motor, this devise is totally analog, and mechanical.
SF 220 30th EDITION
VOLUME
DIRECT PROCESS

ENGLISH - 14
LEFT
RIGHT
LEFT
RIGHT
STEREO TUBE PREAMPLIFIER
SF 220
Lethal Voltage Inside
RS 232
REAR PANEL: CONECTIVITY:
CONECTIVITY
1: Pre-Amplifier Output (OUT 1 Y 2): The pre-amplification stage processes and controls two sets of unbalanced RCA
outputs.
The OUT 2 output can be used to connect a subwoofer, a second amplifier
or a second zone.
NOTE: Since the preamplifier is operated by tubes or valves, avoid
connecting equipment with a low impedance load, less than 100 KΩ.
2: Line Level Inputs (CD, 1-3): RCA unbalanced inputs for line-level devices such as media server, Bluetooth
receiver, Tuner, Tape, Pre-amplifiedTurntables, or an external Phono stage.
3: Line Level Signal Input (DIRECT INPUT): The volume control does not control this input. This input can receive the audio
signal from another area or equipment with a surround processor and
integrate a high-performance audio system with an audio/video one.
4: Line Level Signal Output (DIRECT OUTPUT): This output is controlled by the preamp stage input selector, and
bypasses the volume control. This output connectors can connect a
surround processor equipment and/or integrate a high-performance audio
system with an audio / video zone or component.
5: RS232 port: RS232 port for integration with automation systems or to connect web server module (Sold separately) for
equipment management and control. The integration codes are as follows:
Selector: !1ENT01 !1ENT02 !1ENT03 !1ENT04
Direct input: !1ENT05
Mute: !1ENT06
Volume Control:
UP !1VOL99
Down ! 1VOL55
Power OFF !1PWR0
Power ON !1PWR1
Toggle !1POW2

ENGLISH - 15
REAR PANEL: CONECTIVITY (CONT):
CONECTIVITY:
6: Electric Power Input / Outputs
(127VAC 15 AMP MAX): The input port feeds an electric current to power the equipment. The output is to
connect a Magenta QR-1 or QR-2 power conditioners or other equipment that needs to
be turned on simultaneously as the SF 220. This electrical output is controlled by
turning on the equipment and has a maximum capacity of 15AMP / 1800 W. Can be
use to plug the amplifier, but not recommended, the sound quality might be affected.
Avoid connecting noisy devices (switching power supplies) into it, might change the
tonal characteristics.
OPERATION:
When your SF 220 is connected for the first time, it is necessary to initialize the system, this is done by pressing the input
selector button.
Check that the volume is at the minimum level to avoid a sudden bump of sound that could damage your speakers.
As long as the SF 220 is connected to the electrical supply network, the vacuum tube´s filaments will always be working, so
the ignition will be immediate. The life expectancy of the valves or vacuum tubes does not decrease due to this fact, instead
it increases since the electronic cloud of the cathode is already formed when the high voltage is applied (whenit is turned
on).
Turn on the equipment using the power switch on the remote control or the front of the equipment. If the power supply is
interrupted, allow the bulbs' filaments to heat up for a few seconds.
Select the input source by pressing the selector switch on the front panel or the remote control unit. This will turn on the blue
light on the front panel indicating the selected source.
The blue light below the vacuum tubes indicates that the unit is active. Now the high voltage the preamplifier is operational.
General Comments:
The unit is always warm, so it should be placed in a ventilated area, with at least one inch of air on the top and sides of the
equipment, to allow airflow and avoid overheating.
Always place your unit on a firm platform to avoid external vibrations, or that can imprint an unwanted tonal character.You
can alter the tonal characteristics by placing the unit on different types of stands such as rubber feet, spikes, etc.
LEFT
RIGHT
LEFT
RIGHT
STEREO TUBE PREAMPLIFIER
SF 220
Lethal Voltage Inside
RS 232

ENGLISH - 16
The SF220 is a very accurate preamplifier and its tonal characteristics can be altered by the cabling and tweaking devices,
we strongly recommend to be very careful using them.
The power cable supplied is just to let you use it, we recommend a high quality one and as well interconnect cables.

ENGLISH - 17
OPERATION (CONT):
To minimize unwanted noise or interference in the system:
1.- Avoid excessive length in the interconnection cables.
2.- Avoid having the cables near the alternating current line.
3.- Avoid ground feedback loops between components.
4.- Interconnect cables must be shielded and in good condition.
Burn-In Process:
About 150 hours of music playback are required. Having the unit on without music does not work for proper burn-in.
Vacuum Tube durability:
We recommend changing both vacuum tubes every three years for optimal performance, although they may last a more
extended period.
Type of compatible tubes or valves:
The unit has 12AU7 tubes or the ECC83 equivalency, do not use any other type of tube.
IMPORTANT: Never remove the tubes from the circuit while the equipment is connected to the power outlet.
The unit has an AC outlet for associated equipment interrupted with a capacity of 15 amps, so you will be able to control the on
and off of the equipment connected to the SF 220.
It is usual for the input indicator to be lit while the unit is connected to the power supply.
If a sudden power loss causing two or more selection indicators to light, unplug the unit from the power outlet and redo the
initialization procedure (p. 15).
The unit's power cord can be exchanged for higher quality to improve the tonal characteristics.
TROUBLESHOOTING:
The equipment does not turn on:
Check that the power supply is correct and that the power cord is connected to a live electrical outlet.
There is no sound:
The selector light is on, but there is no sound: Ensure the unit is turned on by checking the light in the upper left corner. Check
that the input signal is connected to the correct input.
Check the cable between the OUT 1 output and the power amplifier, make sure that the amplifier is tured on and ready to
operate.
If more than one indicator is lit:
A transient in the electrical current caused an error in the remote control logic.
Restart the unit by unplugging it from power and plugging it in again.

ENGLISH - 18
INSTALL NOTES:
Table of contents
Languages:
Other Margules Amplifier manuals
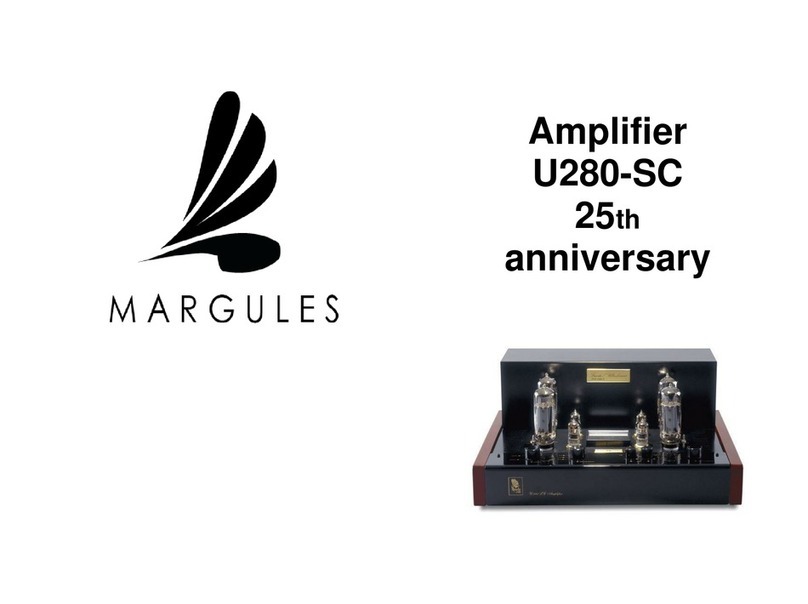
Margules
Margules U280SC User manual

Margules
Margules ACRH-3 User manual

Margules
Margules U280sc 25th User manual

Margules
Margules SF220-20th User manual

Margules
Margules U-280 SC 30TH ANNIVERSARY User manual

Margules
Margules U280SC User manual

Margules
Margules ACRH-4 User manual

Margules
Margules FZ47DB User manual
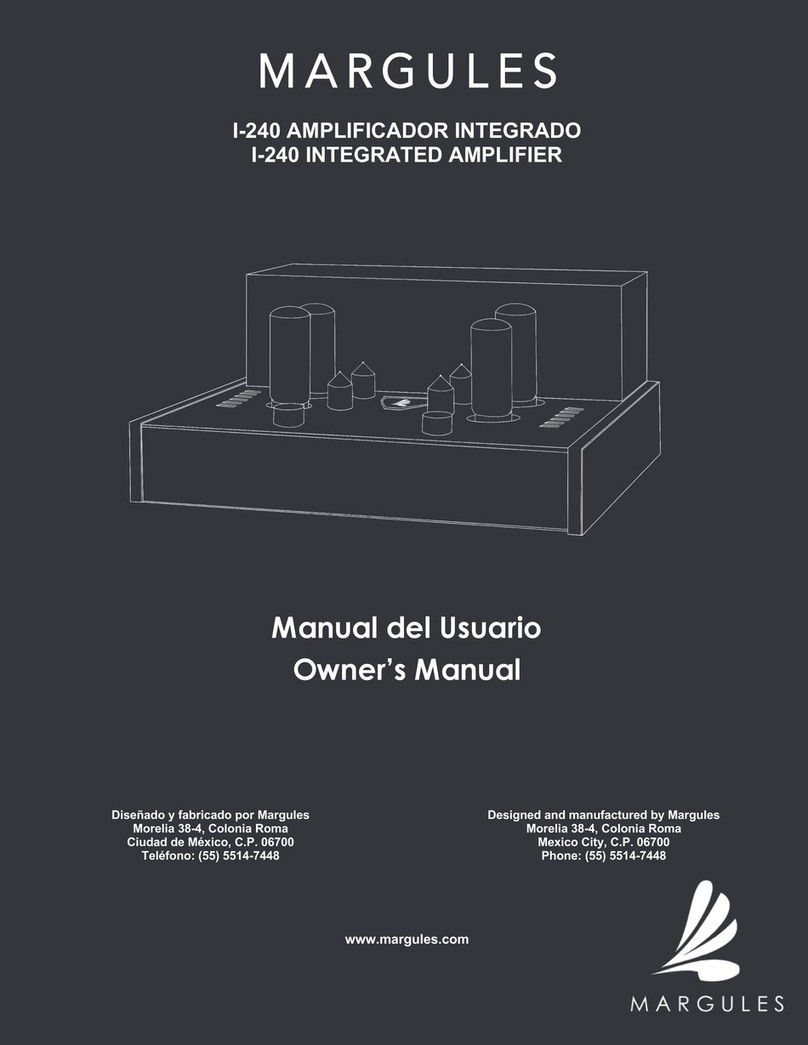
Margules
Margules I-240 User manual
Popular Amplifier manuals by other brands
NAD
NAD CI 8-120 DSP owner's manual
Audio Note
Audio Note M8 Line Signature Owner's Information
Audio Note
Audio Note P3 Tonmeister Silver Signature Owner's Information

Behringer
Behringer Ultratone K3000FX Specifications

YORKVILLE
YORKVILLE DynaBass 800H Service manual

RS
RS V2359j amp4ribbon operating manual
