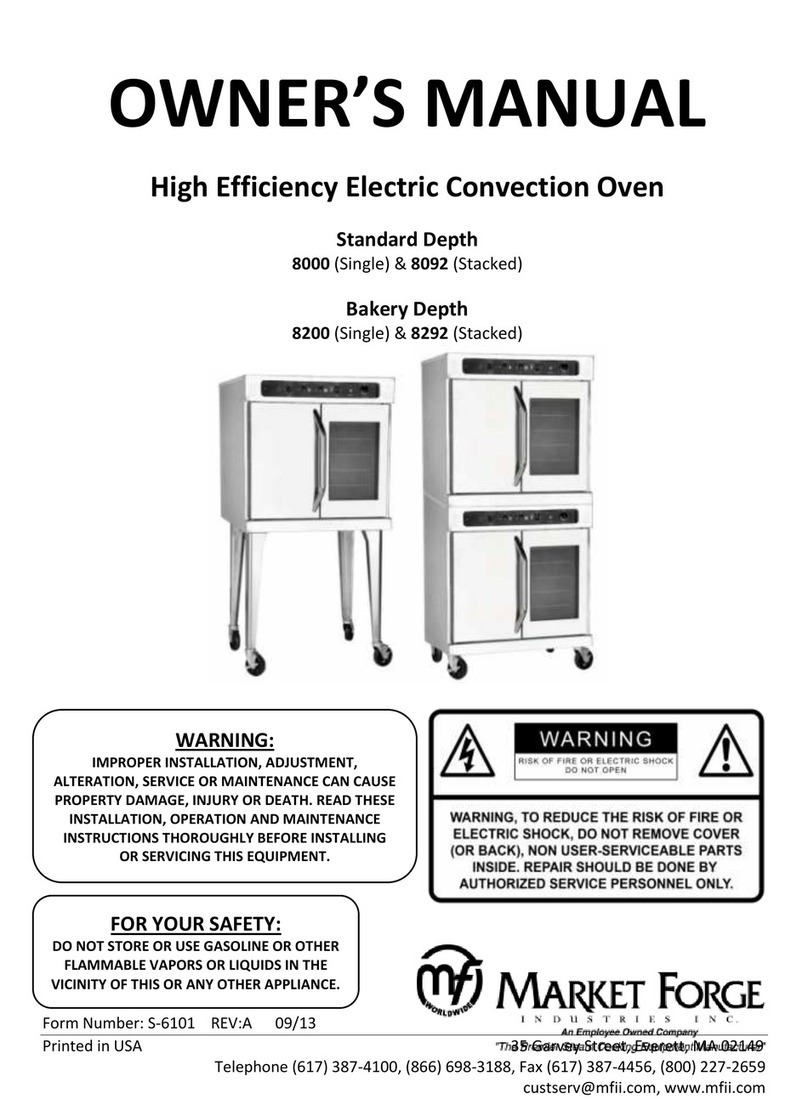
Market Forge Industries Standard Depth 8100 User manual

0
OWNER’S MANUAL
High Efficiency Gas Convection Oven
Standard Depth
8100 (Single) & 8192 (Stacked)
Bakery Depth
8300 (Single) & 8392 (Stacked)
WARNING:
IMPROPER INSTALLATION, ADJUSTMENT,
ALTERATION, SERVICE OR MAINTENANCE CAN
CAUSE PROPERTY DAMAGE, INJURY OR DEATH.
READ THESE INSTALLATION, OPERATION AND
MAINTENANCE INSTRUCTIONS THOROUGHLY
BEFORE INSTALLING OR SERVICING THIS
EQUIPMENT.
FOR YOUR SAFETY:
DO NOT STORE OR USE GASOLINE OR OTHER
FLAMMABLE VAPORS OR LIQUIDS IN THE VICINITY
OF THIS OR ANY OTHER APPLIANCE.
Form Number: S-6100 REV:A 09/13
Printed in USA 35 Garvey Street, Everett, MA 02149
Telephone (617) 387-4100, (866) 698-3188, Fax (617) 387-4456, (800) 227-2659

1
TABLE OF CONTENTS
INTRODUCTION .............................................................................................................................. 2
Important Information:............................................................................................................... 2
Shipping Damage Claim Procedure:............................................................................................ 2
Visible loss or damage: ........................................................................................................... 2
File claim for damages immediately: ...................................................................................... 2
Concealed loss or damage: ..................................................................................................... 2
Service: ........................................................................................................................................ 2
Air Supply and Ventilation:.......................................................................................................... 2
INSTALLATION ................................................................................................................................ 4
READ BEFORE INSTALLING .......................................................................................................... 4
Clearance: ............................................................................................................................... 4
Leveling: .................................................................................................................................. 4
Rating Plate: ............................................................................................................................ 4
Electrical Connection: ............................................................................................................. 4
Gas Connection:...................................................................................................................... 4
Single Oven Service Connections:........................................................................................... 5
Stacked Oven Service Connections:........................................................................................ 6
Manual Shut-Off Valve:........................................................................................................... 6
Pressure Regulator:................................................................................................................. 6
Connections: ........................................................................................................................... 7
Flexible Coupling, Connectors and Casters:............................................................................ 7
Lighting:................................................................................................................................... 7
Check for Gas Leaks:.................................................................................................................... 8
Final Preparation:........................................................................................................................ 8
Wiring Diagram: .......................................................................................................................... 9
ASSEMBLY..................................................................................................................................... 10
Caster Installation on Legs:................................................................................................... 10
Instructions for oven Leg (Stand) Assembly:............................................................................. 10
Figure 1, Stand Assembly...................................................................................................... 10
Instructions for Optional Bottom Shelf and Rack Guide Assembly: ......................................... 11
Figure 2, Optional Bottom Shelf and Rack Guide Assembly ................................................. 11
Stacking Assembly..................................................................................................................... 12
Figure 3, Stacked Models 8192 and 8392 Shown................................................................. 12
Assembling Stacked Oven:.................................................................................................... 12
Caster Installation on Stacked Ovens: .................................................................................. 12
OPERATION................................................................................................................................... 13
Control Panel............................................................................................................................. 13
MAINTENANCE ............................................................................................................................. 14
Daily Cleaning:....................................................................................................................... 14
Periodic Cleaning: ................................................................................................................. 14
Cleaning Stainless Steel: ....................................................................................................... 14
ILLUSTRATED PARTS..................................................................................................................... 15
Gas Convection Oven Exploded View ................................................................................... 15
Gas Convection Oven Parts List ............................................................................................ 16
2
INTRODUCTION
Instructions to be followed in the event the user smells gas shall be posted in a prominent location in
the kitchen area. This information shall be obtained by consulting the local gas supplier. Retain this
manual for future reference.
Important Information:
Safe and satisfactory operation of your equipment depends on proper installation. Installation must
conform with local codes, or in the absence of local codes, the National Fuel Gas Code, (ANSI Z-223.1
Latest Edition). In Canada installation should conform to installation codes for gas burning appliances
and equipment standard (CAN1-B149.1 Natural Gas) or (CAN1-B149.2 Propane Gas).
Electrical wiring from the Electric Meter, main control box or service outlet to appliance must be
electrically grounded in accordance with local codes or, in the absence of local codes, the National
Electric Code (ANSI/NFPA 70 Current). In Canada wiring should conform with Canadian Electrical Code
(CSA-C22.1).
Shipping Damage Claim Procedure:
The equipment is crafted and inspected carefully by skilled personnel before leaving the factory. The
transportation company assumes full responsibility for safe delivery upon acceptance of this equipment.
If shipment arrives damaged:
Visible loss or damage:
Note the damage or loss on freight bill or express delivery and signed by the person making the delivery.
File claim for damages immediately:
Regardless of the extent of damages.
Concealed loss or damage:
If damage is noticed after unpacking, notify the transportation company immediately and file a
"Concealed Damage" claim with them. This should be done within fifteen (15) days from the date
delivered. Retain container for inspection.
Service:
Installation of the equipment should be performed by qualified, certified, licensed and/or authorized
personnel who are familiar with and experienced in state/local installation codes.
Operation of the equipment should be performed by qualified and authorized personnel who have read
this manual and are familiar with the functions of the equipment.
Service of the equipment should be performed by qualified personnel who are knowledgeable with
Market Forge cooking equipment.
Air Supply and Ventilation:
The area in front of, around and above the appliance must be kept clear to avoid any obstruction of the
flow of combustion and ventilation air. Adequate clearance must be maintained at all times in front and
at the sides of the appliances for servicing and proper operation.

3
Means must be provided for any commercial, heavy-duty cooking appliance to exhaust combustion
waste products to the outside of the building. Usual practice is to place the unit under an exhaust hood.
Filters and drip troughs should be part of any industrial hood. Consult local codes before constructing
and installing a hood.
Strong exhaust fans in this hood or in the overall air conditioning system can produce a slight vacuum in
the room and/or cause air drafts, either of which can interfere with pilot or burner performance and can
also be hard to diagnose. Air movement should be checked during installation; if pilot or burner outage
problems persist, make-up air openings or baffles may have to be provided in the room.

4
INSTALLATION
READ BEFORE INSTALLING
Clearance:
When installing ovens against combustible surfaces (rear or side walls) 6” (152mm) clearance is
required. When installing ovens against non-combustible surfaces (rear or side walls) 0” clearance is
required.
Leveling:
A carpenter’s spirit level should be placed on the oven’s center baking rack and the unit leveled both
front-to-back and side-to-side. If it is not level, cakes, casseroles, and any other liquid or semi-liquid
batter will not bake evenly, burner combustion may be erratic, and the unit will not function efficiently.
If the floor is relatively smooth and level, the unit may be further leveled with adjustment in the foot of
the leg. Units with casters must be leveled with shims. A unit will probably not return to the same
position after being moved, requiring re-leveling after each and every move.
Rating Plate:
The rating plate is located in front of the oven below the oven section. Information on this plate includes
the model, and serial number, BTU / hour input of the burners, operating gas pressure in inches WC, and
whether the appliance is orificed for Natural or Propane gas. Pilot lighting instructions are also located in
the same area.
UNIT MUST BE CONNECTED ONLY TO THE TYPE OF GAS IDENTIFIED ON THE RATING PLATE!
Electrical Connection:
Oven requires a 120 volt supply to operate the ignition system and blower. The supply cord provided
along with the appliance is equipped with a three prong (grounding) plug for protection against shock
hazard. The electrical service in the building must be equipped with a properly grounded three prong
receptacle, in accordance with local codes, or in the absence of local codes, with the national electrical
code, ANSI/NFPA 70-1987, in Canada, conform with Canadian electrical codes, CSA-C22.1.
Do not cut or remove the grounding prong from this plug. Wiring diagram is located on the backside of
the appliance.
Disconnect power supply before cleaning or servicing.
NOTE: This appliance is not capable of being operated in the event of power failure. No attempt should
be made to operate this appliance during power failure.
Gas Connection:
Single Deck oven requires one gas connection. Stacked oven requires two gas connections. The gas
supply (service) line must be the same size or greater than the inlet line of appliance. Oven uses a 3/4”
NPT inlet. Sealant on all pipe joints must be resistive to LP gas.

5
Single Oven Service Connections:
Models 8100 and 8300.
Gas Fired
G
Gas Connection –3/4”
(20mm) NPT on the right
hand rear of the appliance.
Gas Pressure:
-Natural Gas 5” W.C.
-Propane 10” W.C.

6
Stacked Oven Service Connections:
Models 8192 and 8392.
Manual Shut-Off Valve:
This installer-supplied valve must be installed in the gas service line ahead of the appliance and
regulator in the gas stream and in a position accessible in the event of an emergency.
Pressure Regulator:
All commercial cooking equipment must have a pressure regulator on the incoming service line for safe
and efficient operation, since service pressure may fluctuate with local demand. The pressure regulator
comes with the oven. Failure to install the pressure regulator will void the equipment warranty!
Gas Fired
G
Gas Connection –3/4”
(20mm) NPT on the right
hand rear of the appliance.
Gas Pressure:
-Natural Gas 5” W.C.
-Propane 10” W.C.

7
The regulators supplied with MARKET FORGE INDUSTRIES, INC. Ovens, have 3/4” inlet /outlet openings
and are adjusted at the factory for 5” WC (Natural gas) or 10” WC (Propane gas) depending on
customer’s ordering instructions.
Prior to connecting the regulator, check the incoming line pressure, as these regulators can only
withstand a maximum pressure of ½ PSI (14”WC). If the line pressure is beyond this limit, a step-down
regulator will be required. The arrow shown on the bottom of the regulator body shows gas flow
direction; it should point downstream to the appliance. The red air vent cap on the top regulator is part
of the regulator and should not be removed.
Any adjustments to regulators must be made only by qualified service personnel with the proper
equipment.
Connections:
Please check installer-supplied intake pipes visually and /or blow them out with compressed air to clear
any dirt particles, threading chips, or other foreign matter before installing a service line. When gas
pressure is applied these particles can clog orifices. All connections must be sealed with a joint
compound suitable for LP gas, and all connections must be tested with a soapy water solution before
lighting any pilots!
Flexible Coupling, Connectors and Casters:
If the unit is to be installed with flexible couplings and /or quick-disconnect fittings, the installer must
use a AGA design-certified commercial flexible connector of at least 3/4” NPT (with suitable strain relief).
The flexible connector must comply with the standard for Connectors for Movable Gas Appliances, ANSI
Z21.69 and addendum Z21.69a (or latest edition) and a quick-disconnect device that complies with the
standard for quick-disconnect devices for use with Gas Fuel should comply with ANSI Z21.41 and
addendum Z21.41a (or latest edition). If disconnection of the restraint is necessary, make sure to
reconnect restraint after the appliance has been returned to its originally installed position. Domestic
gas or water connectors are not suitable!*Restraining device may be attached to the back frame/panel
of unit.
If the unit is to be installed with casters, a flexible connector must be used and the same ANSI standards
apply. Locking front casters are provided to limit the movement of the appliance without depending on
the connector or associated piping. A suitable strain relief must be installed with the flexible connector.
All connections must be sealed with a joint compound suitable for LP gas and all connections must be
tested with a soapy water solution before lighting pilots.
Lighting:
CAUTION: When lighting pilots and checking for leaks, do not Stand with your face close to the
combustion chamber.
All MARKET FORGE INDUSTRIES, INC. appliances are adjusted and tested before leaving the factory,
effectively matching them to sea level conditions. Adjustments and calibrations to assure proper
operation may be necessary on installation to meet local conditions; low gas characteristics, to correct
possible problems caused by rough handling or vibration during shipment, and are to be performed only
by qualified service personnel. These adjustments are the responsibility of the customer and/or dealer
and are not covered by our warranty. Check all gas connections for leaks with a soapy water solution
before lighting any pilots.

8
DO NOT USE AN OPEN FLAME TO CHECK FOR LEAKS!
Putting an open flame beside a new gas connection is extremely dangerous. A. Turn the thermostat dial
to the “OFF” position. Place the power switch to the “OFF” position. B. Wait five minutes. C. Place
power switch to the “ON” position. Turn the oven thermostat to the desired temperature. D. For a
complete shutdown, place the thermostat and power switch in the “OFF” position.
Check for Gas Leaks:
1. Remove the kick plate and the component cover at the rear of the oven
2. Check pilot tubing and burner tubing for leaks at the connectors with a soapy water solution.
3. Light the pilot as described above.
4. Turn the thermostat to any setting and the burner should light.
5. Check the burner orifice elbow connection downstream of the valve with a soapy water
solution.
6. Check the burner visually for blue flame. There should be no yellow tips or soot. If yellow tipping
occurs, call an authorized service person to adjust the burner air shutter.
Final Preparation:
On initial installation, turn the oven to 250 degrees and operate for about 1 hour, then reset the
thermostat to its maximum and operate for another hour. This will drive off solvents remaining in the
unit. At the end of this second hour, turn the thermostat OFF, open the door and set the switch to ‘cool’.
Oven should then be thoroughly washed using hot, soapy water before being used.

9
Wiring Diagram:

10
ASSEMBLY
DO NOT MOUNT oven on a curb base. Use legs/casters provided. Adequate air space at the bottom and
rear of the unit must be provided for proper venting of blower motor. DO NOT USE door to lift or move
oven!!! All ovens must be installed on leg assembly or casters shipped with the unit. The leg/stand
assembly parts or casters are shipped separately.
Caster Installation on Legs:
If casters are provided, match holes on the caster with holes on the oven bottom base and fasten with
bolts provided. NOTE: Front casters are locking type.
Instructions for oven Leg (Stand) Assembly:
Assemble the leg assembly as follows: (For 8100 & 8300 Models Only)
1. Remove legs from package.
2. Line leg plate holes with holes at the bottom of the base.
3. Secure with (4) 3/8-16 bolts.
Figure 1, Stand Assembly

11
Instructions for Optional Bottom Shelf and Rack Guide Assembly:
Assemble as follows: (For 8100 & 8300 Models with Standard Leg Assembly already Installed)
1. Line up bottom shelf hole with holes on the legs and secure with #10 x 1/2 SMS as shown on
detail "B"
2. Fold up the inner tab about 90○on each leg using pliers. Fold as shown on detail "A"
3. Insert (Bottom Rack Assembly) on upper side and line up holes on (Bottom Shelf) See detail "A"
and "B"
Figure 2, Optional Bottom Shelf and Rack Guide Assembly

12
Stacking Assembly
Figure 3, Stacked Models 8192 and 8392 Shown
Assembling Stacked Oven:
1. Match holes on the legs with oven bottom base and screw with bolts provided.
2. Set top oven on top of bottom oven.
3. Bolt down at rear and front as shown in (Figure 3). Remove top kick plate to access
screwing the front bolts.
4. Assemble bottom flue extension (not shown).
Caster Installation on Stacked Ovens:
If casters are provided, match holes on the caster with holes on the oven bottom base and fasten with
bolts provided. NOTE: Front casters are locking type.

13
OPERATION
Control Panel
ITEM
PART NO.
DESCRIPTION
FUNCTION
QTY.
1
93-5035
Lexan Decal
Easy to clean surface.
1
2
93-5037
Thermostat
Control Knob
Regulates oven
temperature controls
heating element
operation.
1
3
93-5039
Fan Switch
Two position fan switch.
Controls fan speed either
high or low.
1
4
93-5038
Light Switch
Momentary switch.
1
5
93-5040
Power Switch
Three position switch –
on, off, cool down.
1
6
93-5041
Timer
60-minute timer.
1
7
93-5036
Burner
Switch
Indicates when
thermostat is calling for
heat and the heat or
burners are on.
1
1. Check that power is available to the oven
2. Arrange shelf positions according to the item to be cooked.
3. Close doors. Move fan switch to HIGH or LOW. Fan should come on.
4. Set thermostat dial to desired cooking temperature. Heat indicator
light should come on
5. Allow oven to preheat for about 5-10 minutes. Preheating is
complete.
6. Load oven. The load should be adjacent to the oven, so the doors
will be open as short a time as possible.
7. Close doors. Set timer for desired cooking time.
8. Buzzer will sound at end of preset interval. Oven is ready to unload.
9. If oven temperature is to be lowered, set the thermostat to the desired temperature to cool
interior. Press the cool down switch. The fan will continue to run with no heat.
10. This will help cool down the cooking compartment more rapidly.
11. For daily shutdown, place oven thermostat and power switch in OFF position. For extended
shut- down, leave doors ajar as well.
12. To view product while cooking press the momentary light switch. (see item 4).
2
6
1
4
3
5
7

14
MAINTENANCE
Any piece of equipment works better and lasts longer when maintained properly. Cooking equipment is
no exception. Your MARKET FORGE INDUSTRIES, INC. oven must be kept clean during the working day
and thoroughly cleaned at the end of the day.
CAUTION: Never use Ammonia in an Oven that is warmer than room temperature and always have
direct ventilation.
Daily Cleaning:
1. Remove the baking racks. Wash in hot soapy water, and replace after the rest of the oven is
cleaned.
2. Scrape off any food particles with a nylon griddle scraper. Be very careful about scratching the
porcelain finish on the oven liner panels.
3. Wash all the above with hot soapy water, then reassemble.
4. Baked on spills may be loosened and stubborn stains removed with ordinary household
ammonia and scrubbing with a nylon pad in a cold oven only.
5. Do not allow spray type oven cleaners to come into contact with the temperature probe in the
oven.
6. After cleaning the oven, rinse well with ¼ cup of vinegar to one quart of clear water solution to
neutralize any caustic residue of the cleaning compound. Wipe dry.
7. To increase the life of the motor, follow these instructions:
a) Never run oven with motor off.
b) After you finish cooking and the oven is not to be used for more then 1/2 hour. Place the
switch to the “COOL” position and open the door. When oven temperature is equal to
room temperature turn unit off.
Periodic Cleaning:
Check the ventilation system periodically to see that nothing has fallen down into the exhaust vents.
Lubricate the pivot pins of the oven door hinge. Use a multi-purpose lubricating oil sparingly so as to not
drip oil needlessly.
Your appliance should be checked for safe and efficient operation at least once a year by qualified
service personnel.
Cleaning Stainless Steel:
All stainless steel body parts should be wiped regularly with hot soapy water during the day and with a
liquid cleaner designed for this material at the end of each day.
DO NOT USE steel wool, abrasive cloths, cleaners or powders to clean stainless surfaces! If it is
necessary to scrape stainless steel to remove encrusted materials, soak in hot water to loosen the
material; then use a wood or nylon scraper.
DO NOT USE a metal knife, spatula, or any other metal tool to scrape stainless steel. Scratches are
almost impossible to remove.

15
ILLUSTRATED PARTS
Gas Convection Oven Exploded View

16
Gas Convection Oven Parts List
ITEM
NO.
PART
NO.
DESCRIPTION
1
93-5008
Motor
2
93-5009
Motor Bracket
3
93-5010
Blower
4
93-5011
Snorkel Tube Weld Assembly
5
93-5012
Motor Mount Weld Assembly
6
93-5013
Blower Spacer Tube
7
93-5041
Blower Baffle Cover
8
93-5015
Shoulder Bolt (1/4-20 x 4”)
9
93-5016
Light Bulb Cover R/H
9
93-5017
Light Bulb Cover L/H
10
93-5018
Light Bulb (Complete Set)
11
93-5019
Power Cord 6 Feet
12
93-5020
Terminal Block
13
93-5021
Spark Module
14
93-5022
Flame Switch
15
93-5023
Straight Fitting (3/8 CC x 3/8 NPT)
16
93-5024
Solenoid Valve
17
93-5025
Brass Fitting (1/4 CC x 1/8 NPT x 90o)
18
93-5026
Gas Pressure Regulator (Natural Gas)
18
93-5027
Gas Pressure Regulator (Propane Gas)
19
93-5028
Side Panel –Right Access (8300 & 8392)
19
93-5029
Side Panel –Right Rear (8300 & 8392)
19
93-5030
Side Panel –Right Side (8100 & 8192)
20
93-5031
Side Panel –Left Side (8300 & 8392)
20
93-5032
Side Panel –Left Side (8100 & 8192)
21
93-5033
Door Switch
22
93-5034
Thermostat
23
93-5035
Control Panel Decal
24
93-5036
Burner Indicator Light
25
93-5037
Thermostat Control Knob
26
93-5038
Switch, Momentary Oven Lights
27
93-5039
Switch, Oven Fan, High/Lew
28
93-5040
Switch, Power –3 Positions
29
93-5041
Timer –Knob & Manual Timer, 60-Minute
30
93-5042
Kick Plate
31
93-5043
Bushing Holder (Door Lock-In Bracket)
32
93-5044
Channel Sprocket Support
33
93-5045
Chain Assembly (Complete Set)
34
93-5046
Bushing (1/2 I.D. x 5/8 O.D.)

17
ITEM
NO.
PART
NO.
DESCRIPTION
35
93-5047
Door Assembly –Left Side
36
93-5048
Door Assembly –Right Side
37
93-5048
Door Gasket (Top & Bottom)
38
93-5050
Door Gasket (Sides)
39
93-5051
Orifice Elbow (3/8 CC x 3/8-27)
40
93-5052
Orifice Hood #33 (Brass) Natural 40,000BTU (8300 & 8392)
40
93-5054
Orifice Hood #36 (Brass) Natural 35,000BTU (8100 & 8192)
40
93-5053
Orifice Hood #49 (Brass) Propane 40,000BTU (8300 & 8392)
40
93-5055
Orifice Hood #50 (Brass) Propane 35,000BTU (8100 & 8192)
41
93-5056
Oven Pilot –Natural Gas
41
93-5057
Oven Pilot –Propane Gas
42
93-5058
Oven Front Baffle
43
93-5060
“U” Burner – 35,000 BTU (8100 & 8192)
43
93-5059
“U” Burner –40,000 BTU (8300 & 8392)
44
93-5061
Oven Rack (8300 & 8392)
44
93-5062
Oven Rack (8100 & 8192)
45
93-5063
Oven Rack Guide –Right Side (8300 & 8392)
45
93-5064
Oven Rack Guide –Left Side (8300 & 8392)
45
93-5065
Oven Rack Guides (8100 & 8192)
46
93-5066
Oven Top Liner (8300 & 8392)
46
93-5067
Oven Top Liner (8100 & 8192)
47
93-5068
Leg –Single Oven (Complete Set of 4)
48
93-5069
Bottom Shelf (8300)
48
93-5070
Bottom Shelf (8100)
49
93-5071
Adjustable Bullet Feet (One Piece Only)
50
93-5072
Caster 5”w/out brake plate mounting(8392&8192-Stacked)
50
93-5073
Caster w/brake stem mounting (8392 & 8192-Stacked)
51
93-5074
Caster 5” w/out brake plate mounting (8300 & 8100-Single)
51
93-5075
Caster w/brake stem mounting for (8300 & 8100 -Single)
52
93-5076
6” Leg (Stacked Ovens Only)
53
93-5077
Leg Plate –for 6” Leg Only
54
93-5078
Rack Guide, Upper Bracket
55
93-5079
RAM-4 Spark Module
-
93-5443
Module Kit (#5856)
-
93-5438
ST/ST Bottom Shelf (Bakery Depth Oven)
-
93-5439
Bottom Storage Rack
This manual suits for next models
7
Table of contents
Other Market Forge Industries Oven manuals

Market Forge Industries
Market Forge Industries Premier PS-3E User manual

Market Forge Industries
Market Forge Industries 2624 User manual

Market Forge Industries
Market Forge Industries MSA-SB-2600 User manual

Market Forge Industries
Market Forge Industries Standard Depth 8000 User manual

Market Forge Industries
Market Forge Industries 4200 User manual

Market Forge Industries
Market Forge Industries 2600PHE User manual

Market Forge Industries
Market Forge Industries 8000 Owner's manual

Market Forge Industries
Market Forge Industries 2500 HE Guide