If the user moves too quickly or moves away
from the seat, the sensor may not be able to find
the user position for a short period of time.
Some electro-conductive materials came
in touch with the seat (e.g. water drops or
wet toilet paper). The sensor might have
recognised a user using the product.
Troubleshooting
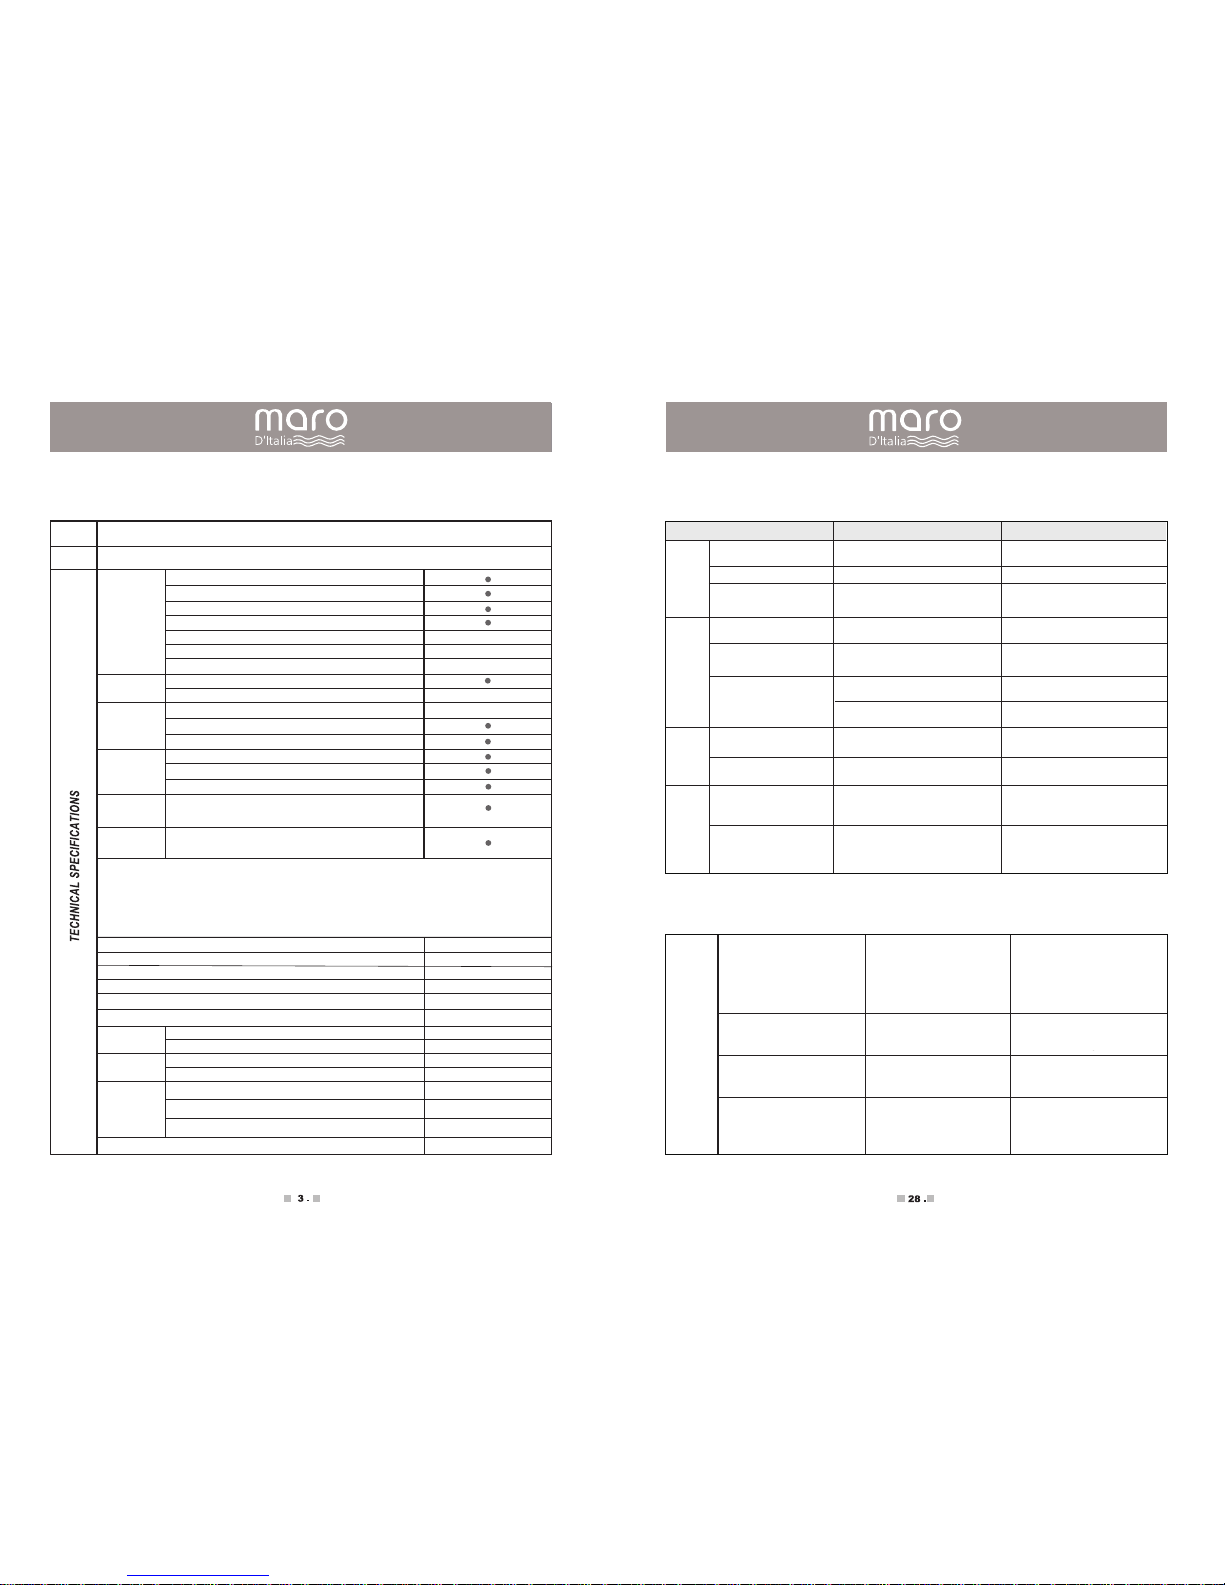
250W-300W
385x510x136mm
>4m/s
40~55°C
50W-60W
29~41°C
1250W-1500W
30~40°C
IPX4
4~35°C
0.07~0.75MPa
3~40°C
1300W-1550W
AC 220V-240V, 50Hz
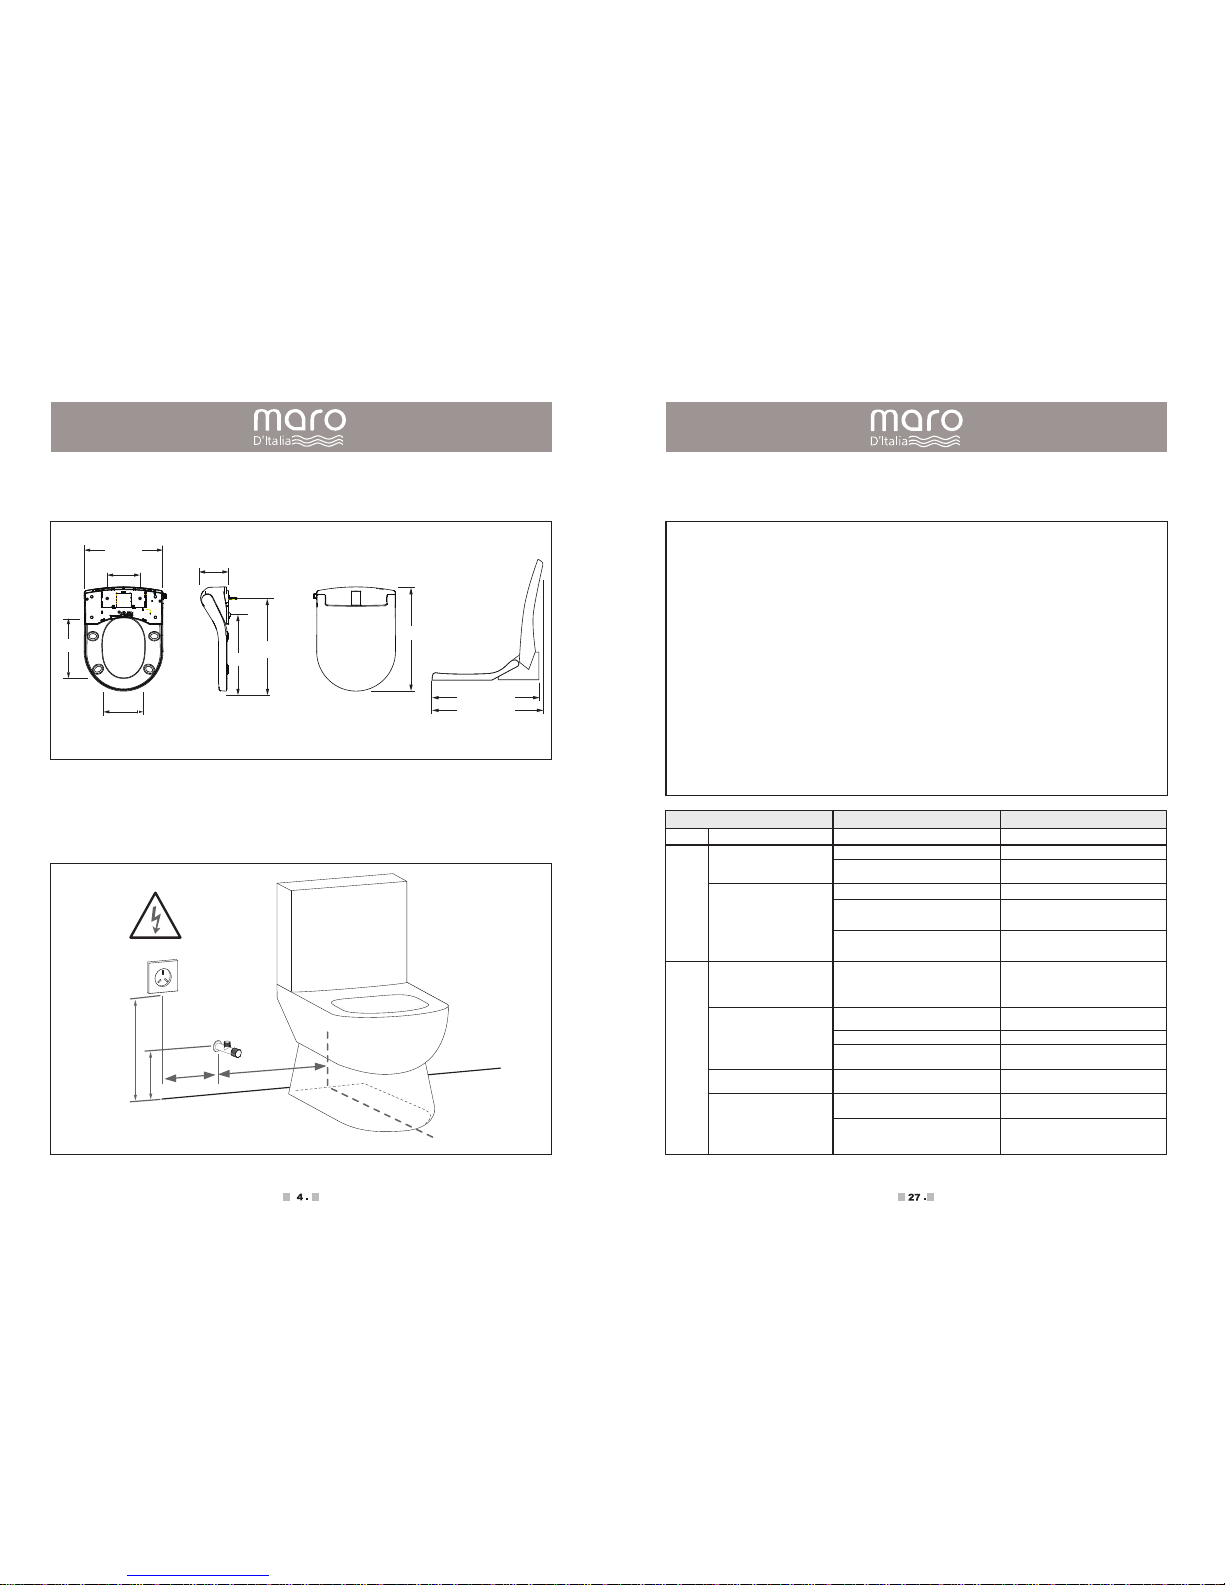
PRODUCT DIMENSIONS
MAXIMUM SPEED OF AIR
AIR TEMPERATURE
HEATER POWER
SURFACE TEMPERATURE
HEATER POWER
WATER TEMPERATURE
WATERPROOF RATING
WATER SUPPLY TEMPERATURE
WATER SUPPLY PRESSURE
BEST ROOM TEMPERATURE
RATED POWER
RATED VOLTAGE
SEAT
HYGIENE
HEATED WATER
HEATED SEAT
DRYER
ENERGY
SAVING
WASH
5 Settings
5 Settings
3 Settings
5 Settings
3 Settings
AIR
DI600
ELECTRONIC TOILET SEAT
MODEL
NAME
Technical Specifications
WASHING
BIDET
OSCILLATING
PULSATING
WATER PRESSURE CONTROL
WATER TEMPERATURE CONTROL
NOZZLE POSITION ADJUSTMENT
AIR DRYER
AIR TEMPERATURE CONTROL
SEAT HEATING TEMPERATURE CONTROL
SOFT CLOSING SEAT AND COVER
ANTIBACTERIAL NOZZLE CAP
ANTIBACTERIAL SEAT
NOZZLE MANUAL CLEAN MODE
ENERGY-SAVINGS
NIGHT LIGHT
SEAT SENSOR
DRYER POWER
OTHER
Seat temperature is not warm
enough during usage.
Is seat temperature set on low or is it
turned off?
Reset the seat temperature on a
higher setting.
Problem
Seat
heating
Solution
Cause
Is the seat temperature set too high? Reset the seat temperature on a lower setting.
Seat temperature is too high.
The night light is set on “off” status. Press the “Night Light” button to turn on
the light.
The night light is off.
The night light is set on “on” status. Press the “Night Light” button to turn off
the light.
The night light is on.
Air temperature is not warm
enough.
Is drying temperature set on low or is it
turned off?
The nozzle will be automatically retracted
2 minutes after the nozzle self cleaning
mode begins.
Reset the seat temperature on a
higher setting.
Are you seated on the seat?
Did you select any washing function?
Sit on the seat sensor again and
press the drying button.
Turn off the washing functions and
press the drying button.
Drying
function
Night
light
function
This is normal phenomenon.
The nozzle is automatically
retracted.
The nozzle does not extend
after the “Nozzle Clean” button
is pressed.
Remove the conductive media from the seat.
Manual
nozzle
cleaning
mode
Continuous beeping sound of the
buzzer which lasts for 3 minutes, with
the red indicator light flashing twice
every second.
Red indication light flashes once
every second.
Turn off the corner valve, connect to
power and switch on the product again.
1. Set the water temperature on “off”,
connect to power and switch on the
product again.
2. Please stop using the product and
call our service centre.
The water temperature is too high;
the water is continually emitted
from the nozzle holder.
Has the corner valve been turned off?
Red indication light flashes once
every second.
Please stop using the product and call
our service centre.
Function failure.
Green indicator lightis flashing.Please stop using the product and call
our service centre.
Current leakage has exceeded the
limit.
Indicator
for light
and alarm
functions
Sit on the seat so the sensor will be activated
again, and press the drying button.
Drying stops suddenly.
Drying function does not work.
Is the product set to ECO mode? The seat
temperature will increase automatically after
you use the seat in the ECO mode.
This is normal phenomenon. This mode
will save energy.
Drying function does not work.
Significant indication and warning