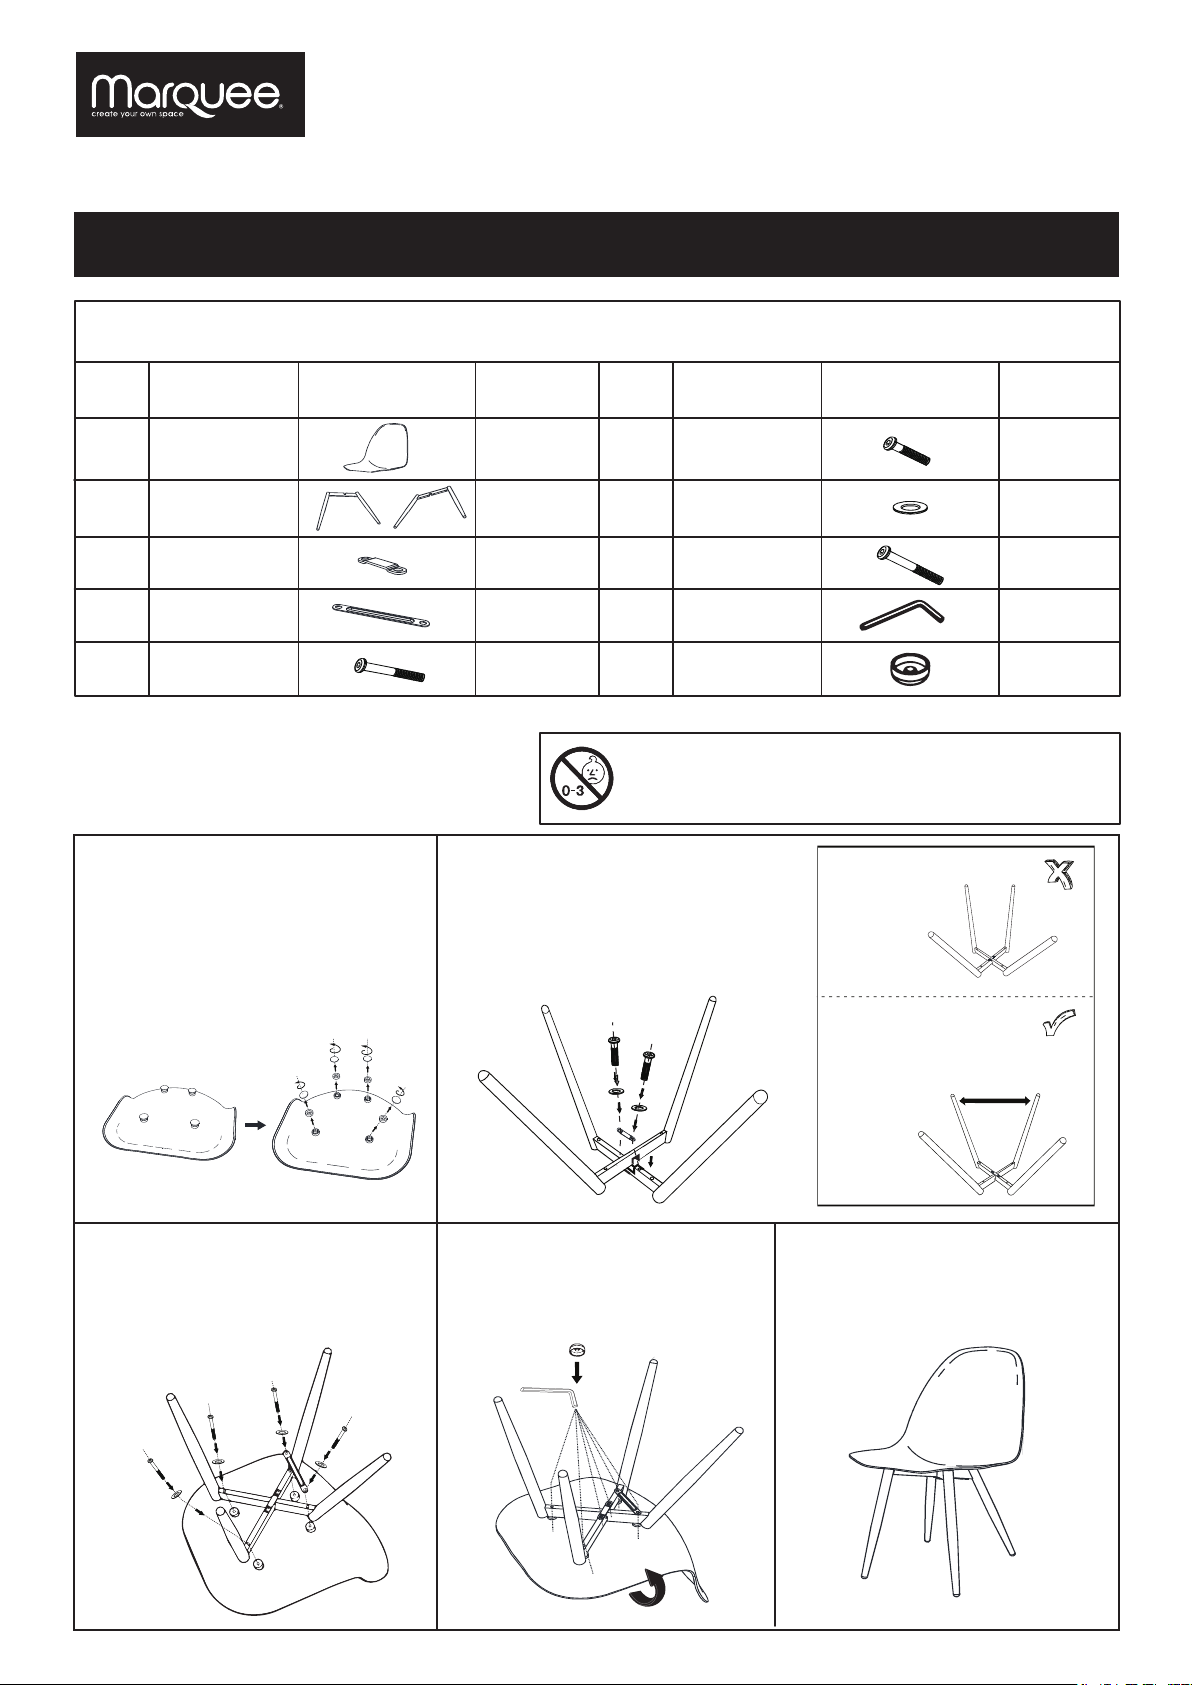
ASSEMBLY INSTRUCTIONS
SEAFORD 7PCE
STEEL DINING SETTING
Item No. 0108619
2
Parts List
Part No.
1
1
Description Quantity
Pictures Part No. Description Quantity
Pictures
1
Please ensure you have all the components above before you begin assembly.
Note:
1. Please kindly check the spare parts are included
before assembly.
2. Please do not tighten the screws before assembly
is completed.
1
2
WARNING:
Not for children under 3 yrs.
CAUTION! Functional sharp points and edges. Use with care.
To be used under the direct supervision of an adult.
Seat
Leg
Short connection
bar
Long connection
bar
A
B
C
D
2
EMedium bolt
2
M6*45
F
G
H
I
Short bolt
Washer
Long bolt
Allen Key
6
M6*15
M6*48
Step 1
#
A
#
A
#H
#G
#E
#G #H
#G
#E
#G
#A
#B
#D
Step 2
Step 3 Step 4 Step 5
#
I
Unscrew the plastic plugs from the
base of the seat (Part A). Secure the short connection bar (part C),
to the chair legs (Part B), with washer
(Part G) and short bolt (part F). Ensure the
legs are facing the correct way
(refer to images on the right).
Wrong assembly
Correct assembly
Please ensure the front
legs are outward-inclined
before assembling legs on
the seat.
Nut cap
J
6
J#
After all components are in position,
tighten securely using Allen Key
(Part I) and cover with nut cap
(part J).
#F
#G
#C
#F
#G
#B
Secure the long connection bar (part D)
to the rear of the seat, using washer
(part G) and long bolt (part H). Then
insert the medium bolt (part E) into the
chair with washer (part G).
Your chair is now ready for use.


