manuals.online logo
Brands
  1. Home
  2. •
  3. Brands
  4. •
  5. Mart
  6. •
  7. Switch
  8. •
  9. Mart TS-21 User manual

Mart TS-21 User manual

TWILIGHT SWITCH
type TS-21
I. PURPOSE
The TS-21 TWILIGHT SWITCH is designed to automatically switch the receiver on at dusk and switch it
off at dawn. Installation on a vertical surface, outdoors, in direct sunlight. Protection degree IP54.
II. PROPERTIES OF THE TS-21 TWILIGHT SWITCH
>> High switching power 16A (4000 W) 250VAC,
>> high inrush current (resistance to 100 A surge current)
>> precise logarithmic adjustment:
1 ... 10 lx - energy-saving compartment,
10 ... 100 lx - standard range,
100 ... 1000 lx - advertising switching range,
>> traffic lights (LED) informing about the operating status:
LED-1 - indication of 230V supply voltage on terminals 1,2,
LED-2 - signaling the presence of voltage on terminals 3,4,
LED-3 - signaling (without delay) of exceeding the set (set) lighting threshold,
>> quick assembly:
two screws for fixing to the wall,
cover mounted with "click" type latches.
The TS-21 TWILIGHT SWITCH uses a specialized OMRON G2RL-1-E-HR relay, designed to switch
various lighting lamps. The special design enables effective switching of lamps with an inrush current of up to
100 A per pulse.
The receivers switched on by THE TS-21 TWILIGHT SWITCH can be:
>> outdoor lighting of buildings,
>> street lighting,
>> lighting of exhibitions, shop windows, various types of advertisements etc.
>> drivers in closing and opening systems for roller shutters and window blinds,
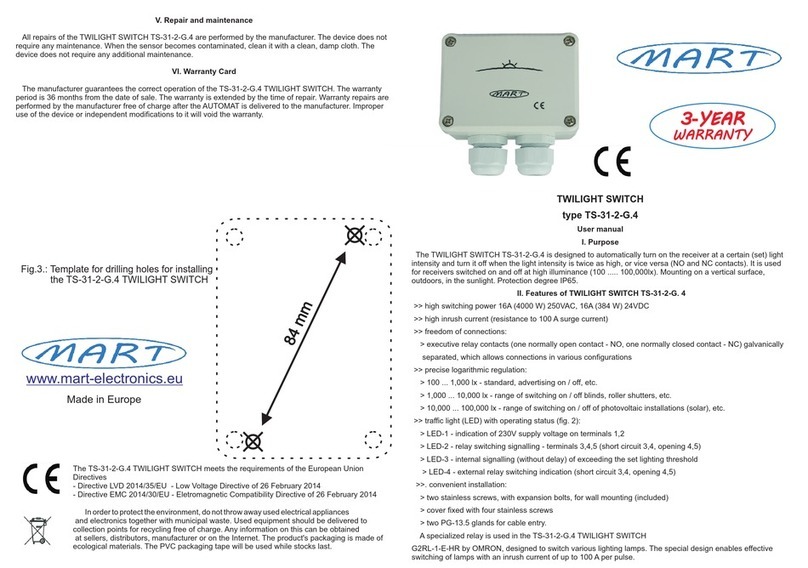
Fig. 3 .:Template for drilling holes
for installing the TS‑21TWILIGHT SWITCH.
115 mm
V. Repair and maintenance
All repairs of the TWILIGHT SWITCH TS-21 are performed by the manufacturer. The device does not require
any maintenance. When the sensor becomes contaminated, clean it with a clean, damp cloth. The device does
not require any additional maintenance.
VI. Warranty Card
The manufacturer guarantees the correct operation of the TS-21 TWILIGHT SWITCH. The warranty period is
36 months from the date of sale. The warranty is extended by the time of repair. Warranty repairs are
performed by the manufacturer free of charge after the AUTOMAT is delivered to the manufacturer. Improper
use of the device or independent modifications to it will void the warranty.
Made in Europe
www.mart-electronics.eu
In order to protect the environment, do not throw away used electrical appliances
and electronics together with municipal waste. Used equipment should be delivered to
collection points for recycling free of charge. Any information on this can be obtained
at sellers, distributors, manufacturer or on the Internet. The product's packaging is made of
ecological materials. The PVC packaging tape will be used while stocks last.
The TS-21 twilight switch meets the requirements of the European Union Directives
- Directive LVD 2014/35/UE - Low Voltage Directive of 26 February 2014
- Directive EMC 2014/30/UE - Eletromagnetic Compatibility Directive of 26 February 2014
3-YEAR
WARRANTY
There are three LED diodes (LED-1, LED-2, LED-3) inside the TS-21 TWILIGHT SWITCH. There are two
LEDs under the terminal strip. LED-1 indicates the presence of the supply voltage on the LN (1,2) terminals, LED-2
indicates the presence of voltage on the terminals 3,4.
LED-3 informs (without delay) about exceeding the activation threshold. After approx. 30 sec. the relay will be
activated - 230VAC voltage will be activated on terminals3,4 and LED-2 will light up.
III. ASSEMBLY
The TS-21 TWILIGHT SWITCH device may only be connected by a person authorized to operate electrical
installations. Remember to choose the right protection.
The housing is adapted for easy and quick fixing to the surface with two screws (stainless screws with expansion
plugs are included in the set). The housing cover is removed in no time with a flat screwdriver Fig. 1.
After removing the TS-21 TWILIGHT SWITCH cover, four mounting clamps 1, 2, 3, 4 are available, as well as a
description of electric wires connection and a knob for setting the activation threshold - Fig. 2 To facilitate the
assembly, the manual includes a template that facilitates drilling mounting holes - Fig. 3.
After installing the TS-21 TWILIGHT SWITCH on a vertical wall, do the following:
- with the power supply off, connect the wires in accordance with the instructions,
- turn on the supply voltage - LED-1 will light up at terminals 1, 2,
- to check the correct operation, use a screwdriver to set the threshold, and when the current lighting level is
exceeded, LED-3 will light up (without delay), and after 30 seconds the relay will turn on, turning on the receiver,
which will be signaled by LED-2 at terminals 3, 4.
- using the scale, using the potentiometer knob, using a screwdriver, set the desired value of the switching on
threshold,
- after checking, close the lid carefully,
- check the operation of the TS-21 TWILIGHT SWITCH in real conditions and possibly correct the setting.
In order to limit the impact of temporary large changes in lighting, e.g. car lamps, lightning flash, etc. on the
operation of the TWILIGHT SWITCH, a delay of 30 seconds has been applied.
To check the operation of the TS-21 TWILIGHT SWITCH during the day, after its correct installation in accordance
with the instructions, cover the sensor, wait about 30 seconds until the AUTOMAT turns on the lighting. When
setting low values ??(below 100 lux), remember that on a sunny day, covering the sensor with your bare hand may not
be sufficient. Then the SENSOR should be covered more effectively.
The most advantageous, from the point of view of energy efficiency, is to install the AUTOMAT on the eastern or
south-eastern side, due to the early switch-off of the receiver at dawn, which reduces electricity costs and
contributes to environmental protection.
CAUTION: Avoid mounting the TS-21 TWILIGHT SWITCH directly in the stream of lamp illumination, because
lighting with the TS-21 TWILIGHT SWITCH lamp may interfere with operation - the lamp will periodically turn on
and off from evening until morning.
Fig. 1 .: How to open the "click" cover
LED-1 LED-3
LED-2
Fig. 2 .: Description of cable connections to the TS-21 TWILIGHT SWITCH visible
after removing the cover.
IV. Technical data
Logarithmic control range
Rated power consumption
Hysteresis
Switch-on and switch-off delay
Mechanical durability
Protection level
Working temperature
Dimensions
Weight
Connecting cable
Wall plugs (drill Ö6mm)
Spacing mounting holes
Working position
Meethod of assembly
1...10...100...1000 lx
1 W
E = 2E
30s (± 20%)
100 000 operations
IP 54
-25...+50 °C
92 x 92 x 44 mm
100g
2
max 4 x 2,5 mm
6mm x 30 mm
115 mm
vertical
surface mounted with two screws
Rated supply voltage LN
Rated frequency
Maximum load current (power):
> resistive load
> incandescent lamps
> halogen lamps
> fluorescent lamps
> energy-saving lamps and LED
Instantaneous inrush current
Executive contacts
100 A
1 x NO
230V AC, + 10%, - 15%
50Hz
8A ( 2 000 W )
8A ( 2 000 W )
8A ( 2 000 W )
10A ( 2 500 W )
16A, AC1 ( 4 000 W )
OFF ON
t
E
ON OFF
lx
10 100
11000

Other Mart Switch manuals

Mart TS-31-2-G.4 User manual

Mart

Mart TS-31-2-G.4 User manual

Mart TS-42-4 ECO User manual

Mart

Mart TS-42-4 ECO User manual

Mart TS-42-3 ECO User manual

Mart

Mart TS-42-3 ECO User manual

Popular Switch manuals by other brands

Eaton SVC-T3 manual

Eaton

Eaton SVC-T3 manual

IDT PCI Express 89HPES32NT24xG2 user manual

IDT

IDT PCI Express 89HPES32NT24xG2 user manual

Asante NetStacker Hub installation guide

Asante

Asante NetStacker Hub installation guide

Siemens RUGGEDCOM RSG2200 installation manual

Siemens

Siemens RUGGEDCOM RSG2200 installation manual

Transition Networks mil-sm8dpa user guide

Transition Networks

Transition Networks mil-sm8dpa user guide

Parker 118368-01 installation guide

Parker

Parker 118368-01 installation guide

Intelix ASW-WP quick start guide

Intelix

Intelix ASW-WP quick start guide

Danfoss BCP1H installation guide

Danfoss

Danfoss BCP1H installation guide

Gefen VGA-145 user manual

Gefen

Gefen VGA-145 user manual

Dahua DH-LR2218-16ET-240 quick start guide

Dahua

Dahua DH-LR2218-16ET-240 quick start guide

Ricmotech AP-Xtreme Assembly guide

Ricmotech

Ricmotech AP-Xtreme Assembly guide

CHELIC PSV-15 Series manual

CHELIC

CHELIC PSV-15 Series manual

Velleman VASH3 user manual

Velleman

Velleman VASH3 user manual

BABBITT LS7000 owner's manual

BABBITT

BABBITT LS7000 owner's manual

NETGEAR ProSafe FS105v2 installation guide

NETGEAR

NETGEAR ProSafe FS105v2 installation guide

BEA Door Switch And Toggle Switch user guide

BEA

BEA Door Switch And Toggle Switch user guide

Rockwell Automation Allen-Bradley Stratix 5800 installation instructions

Rockwell Automation

Rockwell Automation Allen-Bradley Stratix 5800 installation instructions

Conrad 986131 operating instructions

Conrad

Conrad 986131 operating instructions

manuals.online logo
manuals.online logoBrands
  • About & Mission
  • Contact us
  • Privacy Policy
  • Terms and Conditions

Copyright 2025 Manuals.Online. All Rights Reserved.