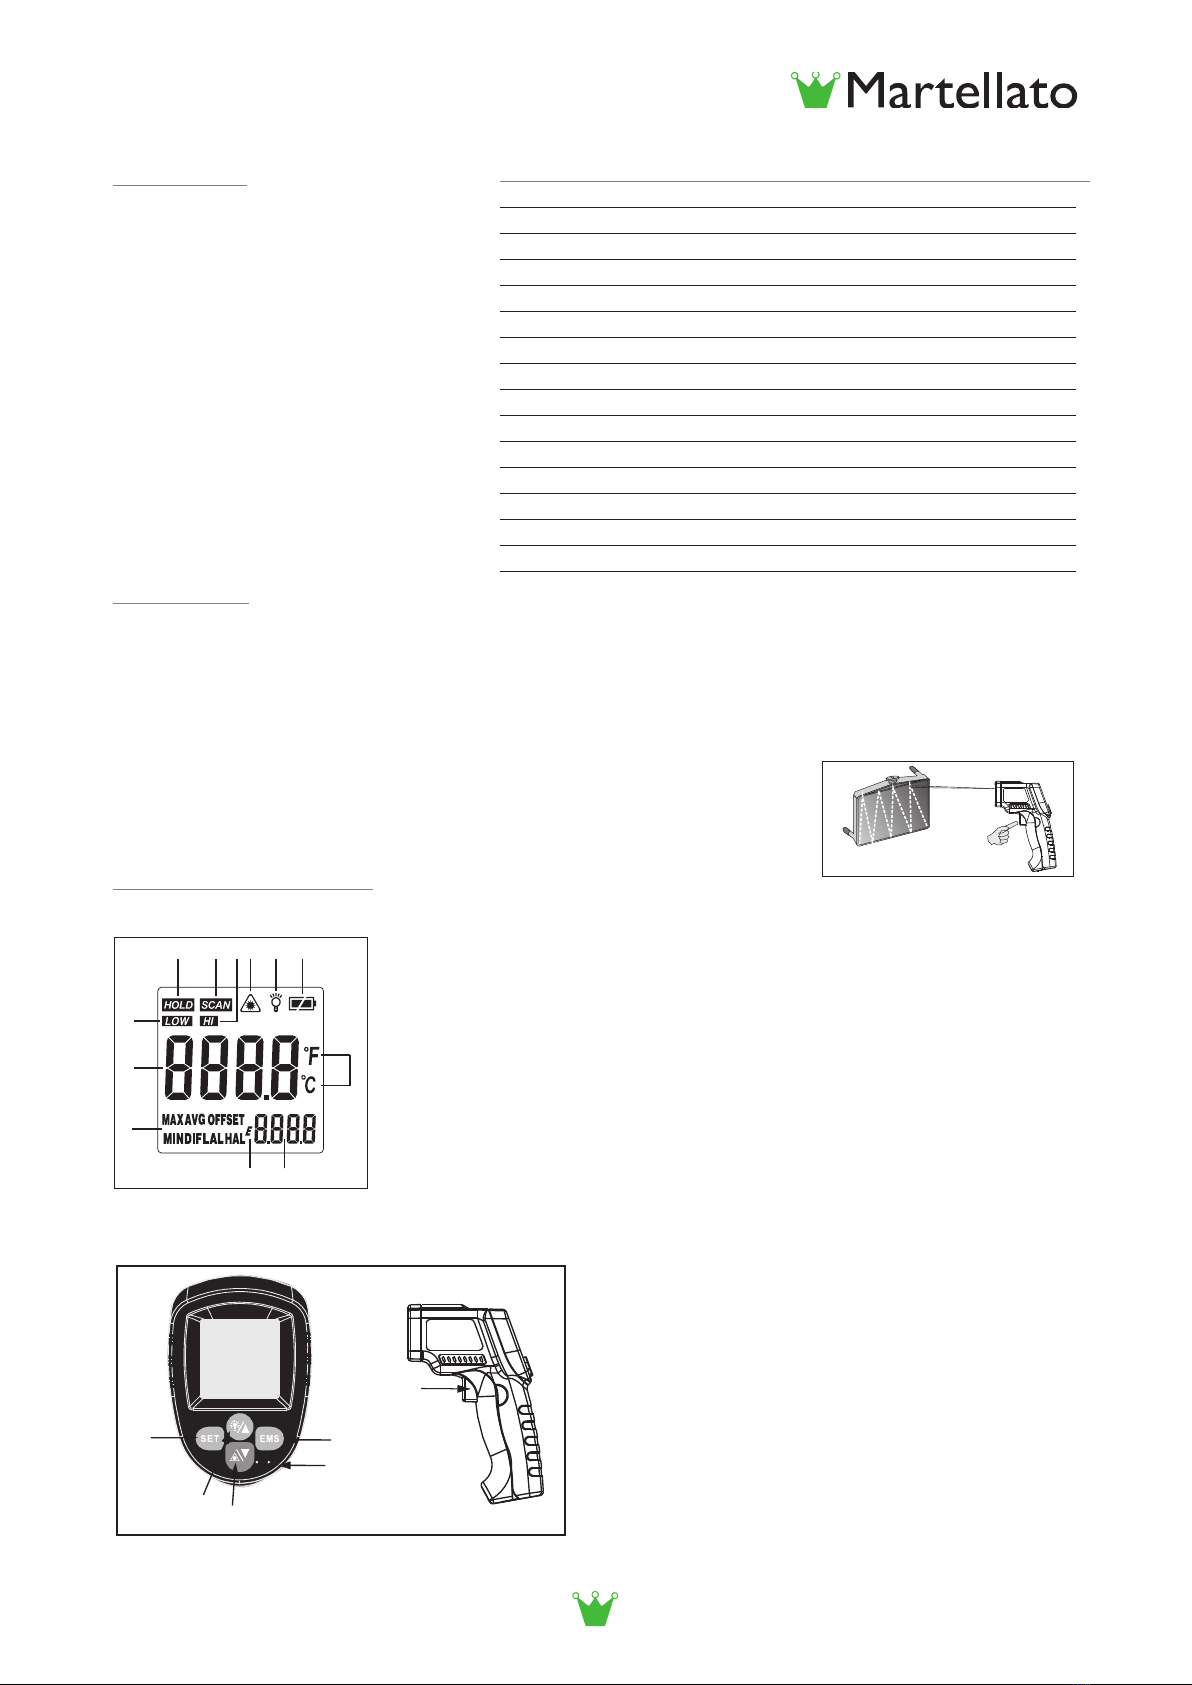
manuals.online logo
Brands
  1. Home
  2. •
  3. Brands
  4. •
  5. Martellato
  6. •
  7. Thermometer
  8. •
  9. Martellato 50T002 User manual

Martellato 50T002 User manual

50T002 ENG
INFRARED THERMOMETER
A. INTRODUCTION
This infrared thermometer is used for measuring the
temperature of the object’s surface, which is applicable
for various hot, hazardous or hard-toreach objects
without contact safely and quickly.
This unit consist of Opcs, Temperature Sensor Signal
amplier, Processing circuit and LCD Display. The
Opcs collected the infrared energy emied by object
and focus onto the Sensor. Then the sensor translates
the energy into an electricity signal. This signal will be
turned out to be digital shown on the LCD aer the
signal amplier and processing circuit.
B. WARNING & CAUTIONS
1.Warning:
To avoid the potenal situaon may cause harm or damage to people, please pay aenon to the following
items:
1) Do not point laser directly at eye or indirectly o reecve surfaces.
2) The unit cannot measure through transparent surfaces such as glass or plasc. It will measure the surface
temperature of these materials instead.
3) Steam, dust, smoke, or other parcles can prevent accurate measurement by obstrucng by the units opcs.
2. Cauons:
Infrared thermometer should be protected for the following:
1 ) EMF (electro-magnec elds) from arc welders, inducon heaters.
2) Thermal shock (cause by large or abrupt ambient temperature changes allow 30 minutes for unit to stabilize
before use).
3) Do not leave the unit on or near objects of high temperature.
C. DISTANCE TO SPOT SIZE
1. When take measurement, pay aenon to the Distance
to Spot Size. As the Distance (D) from the target surface
increases, the spot size (S) of the area measured by the unit
becomes larger.
The Distance to Spot size of the unit is 12:1.
This unit is equipped with a laser, which is used for aiming.
2. Field of view:
Make sure the target is larger than the unit’s spot size.
The smaller the target the closer measure distance. When
accuracy is crical, make sure the target is at least twice as
large as the spot size.
38mm@
300mm
75mm@
900mm
132mm@
1500mm
1.5"@
12"
3.0"@
36"
5.3"@
60"
D:S=12:1
50T002 ENG
D. EMISSIVITY
Emissivity: Most organic materials and
painted or oxidized surfaces have an
emissivity of 0.95(preset in the unit).
Inaccurate readings will result from
measuring shiny or polished metal
surfaces. To compensate for this, adjust
the units emissivity reading or cover the
surface to be measured with masking
tape or at black paint. Measure the
tape or painted surface when the tape
or painted reach the same temperature
as the material underneath.
E. OPERATION
1. Operang the unit:
1 ) Open the baery door and insert the baery.
2) Pull the trigger to turn on the unit;
3) Aim at the target surface and pull the trigger, then temperature will be shown on the LCD.
This unit is equipped with a laser, which is only used for aiming.
2. Locang a Hot Spot:
To nd a hot spot, aim the thermometer outside of interest, then scan
across with an up and down moon unl you locate the hot spot.
F. LCD DISPLAY & BUTTONS
1. LCD display:
A: measuring reading
B: measuring unit
C: low temperature alarm icon
D: data hold icon
E: scanning icon
F: high temperature alarm icon
G: laser on icon
H: back light on icon
I: baery power icon
J: mode
K:emissivity indicator
L:funconal value
2. Diagram descripon: (gure 2)
(1 ) Trigger: press it to display temperature value with
SCAN appears at meanme. Release the trigger and
enter into HOLD mode to save the data automacally,
and the unit turns o automacally if there is no
further operaon.
(2) Laser posioning: press the trigger and then press
the 2 key to turn on/o the laser posioning funcon
with an icon displaying on LCD.
(3) Temperature unit shi: press 2 key to shi the
temperature unit between the Celsius and the
Fahrenheit.
MATERIAL EMISSIVITY MATERIAL EMISSIVITY
Aluminum 0.30 Iron 0.70
Asbestos 0.95 Lead 0.50
Asphalt 0.95 Limestone 0.98
Basalt 0.70 Oil 0.94
Brass 0.50 Paint 0.93
Brick 0.90 Paper 0.95
Carbon 0.85 Plasc 0.95
Ceramic 0.95 Rubber 0.95
Concrete 0.95 Sand 0.90
Copper 0.95 Skin 0.98
Dirt 0.94 Snow 0.90
Frozen food 0.90 Steel 0.80
Hot food 0.93 Texles 0.94
Glass (plate) 0.85 Water 0.93
Ice 0.98 Wood 0.94
Figure 1
A
C
B
G H IE FD
J
K L
1
C / F
2
4
56
3
Figure 2
50T002 ENG
(4) Backlight: press the trigger rst and then press the 4 key to turn on/o the backlight with an icon displaying
on LCD.
(5) Press the SET key and MAX-AVG-MIN-DIF-LAL-HAL-OFFSET-E will be display on the LCD in sequence
repeatedly, press SET key again to select the desired funcon. This device has memory funcon; the measuring
mode will be displayed next me aer turning on.
a. MAX: measuring maximum temperature
b. MIN: measuring minimum temperature
c. DIF: gure out the dierence between the MAX and MIN
d. AVG: measuring average temperature
e. HAL: high temperature alarm-when selected HAL, press 4 keys and 2 keys to set high
temperature alarm trigger and conrmed by pressing 6 key. When reading over trigger, LCD
display HI icon with BiBi audio sounds. Alarm works in other funcon modes as well.
f. LAL: low temperature alarm-when selected LAL, press 4 keys and 2 keys to set low
temperature alarm trigger and conrmed by pressing 6 key. When reading over trigger, LCD
display LOW icon with BiBi audio sounds.Alarm works in other funcon modes as well.
g. OFFSET: Zero oset adjustment
(6) E:Press EMS key and then press 4 keys and 2 keys to set up the emissivity, and then press the EMS key to
conrm the selected.
(7) Clesius / Fahrenheit switch: Please open baery and push the slide switch for conversion.
G. MAINTENANCE
1. Lens Cleaning:
Blow o loose parcles using clean compressed air. Gently brush remaining debris away with a moist coon
swab. The swab may be moistened with water.
2. Case cleaning: Clean the case with a damp spo-nge/cloth and mild soap.
Note:
1 ) Do not use solvent to clean plasc lens.
2) Do not submerge the unit in water.
Special Statement:
this company reserves
the right of changing the
product design and contents
of instrucon if changed the
separate noce isn’t given.
Temperature range -50~420°C (-58~788°F)
Accuracy
1.5°C(±2.7°F)
0~420°C(32~788 F) :±
or± 1.5%
-50~0°C(-58~32°F):±3°C (±5°F )
Resoluon 0.1°C or 0.1°F
Repeatability 1% of reading or 1°C
Response me 500 mSec, 95% response
Spectral response 8-14 um
Emissivity 0.10~1.00 Adjustable (0.95 Preset)
Operang
Temperature
0~40°C (32~104°F)
Operang Humidity 10~95%RH non-condensing, up to 30°C(86°F)
Storage Temperature -20~60°C (-4~140°F)
Power 3V (1.5V AAA baery X2)
Typical baery life (Alkaline) Non laser-mode: 22 hrs;
Laser Models: 12 hrs

Other Martellato Thermometer manuals

Martellato 50T004 User guide

Martellato

Martellato 50T004 User guide

Martellato 50T003 User guide

Martellato

Martellato 50T003 User guide

Popular Thermometer manuals by other brands

WIKA TR21 operating instructions

WIKA

WIKA TR21 operating instructions

Sanitas SFT 01/1 quick start guide

Sanitas

Sanitas SFT 01/1 quick start guide

SEFRAM 9822 instruction manual

SEFRAM

SEFRAM 9822 instruction manual

Emax EM 2239 manual

Emax

Emax EM 2239 manual

Omron ET720 instruction manual

Omron

Omron ET720 instruction manual

DeWalt DCT414 instruction manual

DeWalt

DeWalt DCT414 instruction manual

nantlife TE4.0 user manual

nantlife

nantlife TE4.0 user manual

Tenmars TM-183 user manual

Tenmars

Tenmars TM-183 user manual

Lotus DT-8806H user manual

Lotus

Lotus DT-8806H user manual

Microlife NC150 BT manual

Microlife

Microlife NC150 BT manual

ACU-RITE 1523 instruction manual

ACU-RITE

ACU-RITE 1523 instruction manual

Levenhuk Wezzer PLUS LP30 user manual

Levenhuk

Levenhuk Wezzer PLUS LP30 user manual

Omron EcoTemp instruction manual

Omron

Omron EcoTemp instruction manual

Microlife IR 1DE1 instruction manual

Microlife

Microlife IR 1DE1 instruction manual

TFA 35.1087 instruction manual

TFA

TFA 35.1087 instruction manual

BIOS DT300 instruction manual

BIOS

BIOS DT300 instruction manual

YOKOGAWA TX10-01 instruction manual

YOKOGAWA

YOKOGAWA TX10-01 instruction manual

Microlife MT 16A1 manual

Microlife

Microlife MT 16A1 manual

manuals.online logo
manuals.online logoBrands
  • About & Mission
  • Contact us
  • Privacy Policy
  • Terms and Conditions

Copyright 2025 Manuals.Online. All Rights Reserved.