manuals.online logo
Brands
  1. Home
  2. •
  3. Brands
  4. •
  5. Maruzen
  6. •
  7. Fryer
  8. •
  9. Maruzen MEF-13E User manual

Maruzen MEF-13E User manual

This manual suits for next models

3

Popular Fryer manuals by other brands

GILES EOF-BIB/FFLT/24/24 manual

GILES

GILES EOF-BIB/FFLT/24/24 manual

GE 168997 manual

GE

GE 168997 manual

Falcon G350/11 Installation and servicing instructions

Falcon

Falcon G350/11 Installation and servicing instructions

GoWISE USA GW22612 instruction manual

GoWISE USA

GoWISE USA GW22612 instruction manual

Wolf IF15/S Specification sheet

Wolf

Wolf IF15/S Specification sheet

Electrolux Thermetic 9CHG583284 Operating and safety instructions

Electrolux

Electrolux Thermetic 9CHG583284 Operating and safety instructions

DeLonghi D677UX Instructions for use

DeLonghi

DeLonghi D677UX Instructions for use

SEVERIN DEEP FRYER - Dimensions

SEVERIN

SEVERIN DEEP FRYER - Dimensions

Toastmaster TMFG18-NAT Installation and operation instructions

Toastmaster

Toastmaster TMFG18-NAT Installation and operation instructions

Domo DO465FR Instruction booklet

Domo

Domo DO465FR Instruction booklet

Russell Hobbs RDF300 Instructions and warranty

Russell Hobbs

Russell Hobbs RDF300 Instructions and warranty

Henny Penny PFG-691 Technical manual

Henny Penny

Henny Penny PFG-691 Technical manual

Farberware FBW FT 43721 B manual

Farberware

Farberware FBW FT 43721 B manual

GERMANICA GEAF5L3LD instruction manual

GERMANICA

GERMANICA GEAF5L3LD instruction manual

Wells F-85 Features and specifications

Wells

Wells F-85 Features and specifications

Philips HD9211 user manual

Philips

Philips HD9211 user manual

Lakeland 31796 Instruction booklet

Lakeland

Lakeland 31796 Instruction booklet

Dash Tasti-Crisp DFAF755 user manual

Dash

Dash Tasti-Crisp DFAF755 user manual

manuals.online logo
manuals.online logoBrands
  • About & Mission
  • Contact us
  • Privacy Policy
  • Terms and Conditions

Copyright 2025 Manuals.Online. All Rights Reserved.

Fryer(Electric)
【Stand regular type 1tank-type】
●MEF-13E ●MEF-18E
●MEF-23E ●MEF-27E
USER’S MANUAL
(Product・Installation)
General commercial kitchen Appliances & Equipment
Maruzen Co.,Ltd.
Contents
1Before Use
1-1 Name and function of each parts・・・・・・・・1
1-2 Accessories・・・・・・・・・・・・・・・・・・3
2How to Use
2-1 Preparation before use・・・・・・・・・・・・・4
2-2 Basic usage・・・・・・・・・・・・・・・・・・72-3 How to use Menu Mode Operation・・・・・・・102-4 Other usage・・・・・・・・・・・・・・・・・11
2-5 Precautions for use・・・・・・・・・・・・・・13
2-6 Draining of oil・・・・・・・・・・・・・・・・13
Before use
1-1
Name and function of each parts
Name of each parts
Name and function of operation panel
<Fixed type・Tabletop type(MEF-13TE)・In the case of tabletop auto lift type>
1 2 3
4 5 6
7 8 9
0
マニュアル eco 延長 ラード
加熱スタート
電源
現在
温度
設定
温度
℃
タイマー
分 秒メニュー設定
スタート/ストップ
適
温
メニュー
℃
排油コック
(40A)
1 2 3
4 5 6
7 8 9
0
マニュアル eco 延長 ラード
加熱スタート
電源
現在
温度
設定
温度
℃
タイマー
分 秒メニュー設定
スタート/ストップ
適
温
メニュー
℃
排油コック
(40A)
70 415 85
30
600
800 110
345
280
60 520 2020 410 20
450
40 370 40
ハイリミ ッ ト 感 熱 棒
油槽
ヒータ
温度セン サ ー
ハンドル 
アジャスト
操作パネル
排油口 
フタ収納
フタ  
電源コード
ハイリミ ッ ト リ セ ッ ト ス イ ッ チ
800 110
345
280
60 520 2020 410 20
450
40 370 40
ハイリミ ッ ト 感 熱 棒
油槽
ヒータ
温度セン サ ー
ハンドル 
アジャスト
操作パネル
排油口 
フタ収納
フタ  
ハイリミ ッ ト リ セ ッ ト ス イ ッ チ
70 415 85
30
600
電源コード
跳ね上げ取手
ヒータボックス
ストッパーバー
跳ね上げ取手
ヒータボックス
ストッパーバー
MEF-18E
High limit reset switch
High limit thermos sensitive rod
Temperature sensor
Heater
Oil tank
⑬
①
⑱
③
⑰
④
⑱
①
②
⑲
⑥
⑤
⑨
⑧
⑦
Lift-up handle
Heater box
Stopper bar
Power code
Cover
Cover storage space
⑪
⑩
Oil drain port
⑫
Operation panel
Oil drain
cock handle
⑮
⑭
⑯
Adjustment
①Power switch・・・・・・・・・・Power is “ON” or “OFF” whenever you press the power switch.
②Power lamp (Yellow) ・・・・・・・・・Lit when the power is “ON”.
③Hearting start switch・・・・・・・・・・・・Used to start or stop heating while the power switch is “ON”
④Heating lamp (Red) ・・・・・・・・ Lit when heating is「ON」.The heating lamp starts blinking over set temperature.
⑤Lard switch・・・・・・・・・・・・・・・・・・・・Used this switch when you cook with lard.
⑥Lard lamp (Yellow) ・・・・・・・・・・・・Lit when the lard mode is「ON」.
⑦ECO switch・・・・・・・・・・・・・・・・・・・・Whenever you press the switch, the ECO mode is "ON" "OFF".
⑧ECO lamp (Yellow) ・・・・・・・・・・・Lit when the ECO mode is「ON」.
⑨Extension switch・・・Pressed this switch will do additional cooking for 10 seconds. Also, you can extend
cooking time of 10 seconds by pressing it during cooking.
⑩Manual switch ・・・・・・・・・・・・・・・・Used when you cook at any set except menu cooking.
⑪Manual lamp(Yellow) ・・・・・・・・・・Lit when the manual mode is「ON」.
⑫Start / Stop switch・・・・・・・・・・Menu cooking starts or stops if you press the switch while heating is「ON」
⑬Menu setting switch・・・・・・・・・・・・Set the designed menu number.
⑭Appropriate temperature lamp(Green) ・・・・Lit when oil temperature has reach the set temperature.
⑮Ten key switches・・・・・・・・・・・・・・Used when you input the cooking menu, temperature and time.
⑯Menu display panel・・・・・・・・・・・・・Displayed menu number.
⑰Timer display panel・・・・・・・・・・・・・Displayed setting time or lapsed time during cooking (Down counting)
⑱Current temperature display panel・・・・・・・・・・・・・Displayed current temperature.
⑲Preset temperature display panel・・・・・・・・・・・Displayed preset temperature.
<Set range>
●Set temperature
・It can be set every second between 100℃to 220℃.(Initial value:180℃)
●Set timer
・It can be set every second between 0min 00sec to 99min 59sec(Initial value:0 min 0
0 sec)
・Time remaining of the set time is counted down every second.
●
If the high limit works, heater does not work even if you rise or drop
the temperature setting.
In this case, any parts might be damaged. Do NOT press the reset switch
by yourself. Contact our sales office or distributer.
CAUTION
使用前に
Before Use
1-2
Accessories
Name of
Accessory
Shape
Q’ty
How to use
User’s manual
1
●Accompanying all models.
●Keep carefully in a place to make it available for
reference at any time.
Warranty
1
●Accompanying all models.
●Keep it carefully not to lose.
Cover (Stationary)
●Accompanying all models.
(※However, Tabletop fast food type is excluded.)
Cover(Tabletop)
Partition net
●Accompanying all models.
(※However, Tabletop fast food type is
excluded.)
●Used by hooking on heater.
Oil can
●Accompanying Fixed type.
●Accompanying Tabletop type.(MEF-13TE)
●Used to drain oil.
Oil strainer net
●Accompanying Fixed type.
●Accompanying Tabletop type. (MEF-
13TE)
●Used to remove oil debris in wasted oil as put
ting Oil strainer net on Oil can.
Scoop net
●Accompanying Fixed type and Tabletop type.
(MEF-13TE)
(※However, Fixed fast food type is excluded.)
●Used to scoop up ingredients which are fried i
n Oil tank.
Sliding plate
●Accompanying fixed type and Tabletop type.
(MEF-13TE)
(※However, the Fixed fast food type is
excluded.)
●Used to put foods into Oil tank.
Oil cut plate
●Accompanying Fixed type and Tabletop type.
(MEF-13TE)
(※However the Fixed fast food type is
.excluded.)
●Used to fit in side of Oil tank. The fried food
is put on Oil cut plate to cut oil.
保
製造年月型式
保
お買い 上げ 日
お名前
ご住所
(TEL.
店名・住 所
お
客
様
販
売
店
〒 1 1 0- 0 0 0 3   東 京 都 台 東 区 根岸 2 - 1 9 - 1 8
こ の 製品 は 厳 密 な る 品 質 管理 及 び 検 査 を 経 て お 届 け
し た もの で す 。 本 書 は 、 お客 様 の 正 常 な 使 用 状 態 に
お い て万 一 故 障 し た 場 合 に、 本 書 記 載 内 容 で 無 料 修
理 を 行な う こ と を お 約 束 する も の で す 。
1 . お客 様 の 取 扱 説 明 書 など の 注 意 書 に よ る 正 常 な
2 . 本保 証 書 は 再 発 行 い たし ま せ ん の で 大 切 に 保 管
3 . 保証 に つ い て の 規 定 は裏 面 を ご 覧 く だ さ い 。
株式 会 社
M
R
A
U
Z
E
N
証 書
( ) )
証期間
ご 使 用 状 態で 、 保 証 期 間 中 に 故障 し た 場 合 に は
お 買 い 上 げの 販 売 店 ま た は 当 社支 店 、 営 業 所 に
    ご依 頼 く だ さ い 。                         
し て く だ さい 。
T E L 0 3- 5 6 0 3 - 7 7 11 ( 代 表 )
お買 い上 げ後 1年 間
The following items are available as option. Also you can make an additional purchase
of the same accessories. Please contact us about more details at our sales office or
distributer which you bought Fryers.
Oil cut net
●Accompanying the Fixed type and Tabletop typ
e. (MEF-13TE) (※However, the Fixed
fast food type is excluded.)
●Used by putting it on Oil cut plate.
Name of Accessory
Shape
Q’ty
How to use
Fry basket
(Fast foods type)
●Accompanying the Fixed fast food type.
●Accompanying Tabletop fast food type.
●Accompanying Tabletop auto lift type.
Fry basket
(Auto lift type)
Debris removing net
●Accompanying Tabletop type.
(However, MEF-13TE is excluded.)
●Accompanying Tabletop auto lift type.
●Used to scoop up oil debris in Oil tank.
Drain oil support
●Accompanying Tabletop type.
●Used to drain oil.
Drain oil flexible hose
●Accompanying Tabletop fast food type.
Drain oil hose
●Accompanying Tabletop auto lift type (ME
F-8TLE).
Attaching tool
●Accompanying Tabletop fast food type.
●Used when connecting drain oil flexible hos
e.
Option name
Shape
How to use
Sliding plate for
Tempura
●Used to form Tempura batter when you fry T
e-mpura.
Top oil cut plate
●Used to put in the upper parts of Heater box.
Used to cut oil according to put on fried food
s here.
Flat screen net
●Used to put on top of Top oil cut plate. Used
to cut oil.
How to use
2-1
Preparation before use
1)Preparation before use
<The Fixed regular type>
①Make sure that Heater is down in Oil tank.
②Confirm whether the using parts are installed.
※The Fixed regular type :Partition net, Oil can, Oil strainer net,
Sliding plate, Oil cut plate, Oil cut net.
油切板
油切網
油缶
油コシ網
スベリ板
仕切網
仕切網
ヒータ
【The Fixed regular type】
Sliding plate
Oil strainer net
Oil cut net
Oil cut plate
Partition net
仕切網取付け方
The way to set Partition net
Oil can
Partition net
Heater
●Do not place or use spray cans, or combustible, volatile or inflammable substance near the
appliance.
●Turn on ventilation facilities such as exhaust fan while in use.
・WARNING
●Do not place any material weak to heat near the appliance.
●Do not touch electrical components such as power plug or operate electric switches with wet
hands.
●In case of any part broken, do not continue to use and replace such part with a new one.
●Do not use when the appliance is dirty.
●Do not use any tools or accessories other than the designated ones.
●Do not dry-heat.
●Do not use for any purpose other than cooking.
CAUTION
③Confirm whether oil drain handle is at the stop position.
④Pour oil into Oil tank.
・Pour oil at the specified amount of oil.
※There is a mark of the oil amount inside of Oil tank. The center of the mark is the sp
ecified oil amount.
When oil is heated, the volume expands to the top of the mark.
・Heater cover mark is as following below.
Top mark: The upper limited of oil (Do not pour oil more than this.)
Middle mark: Appropriate amount of oil.
Bottom mark: The lower limited of oil.
(Be sure to add oil when it is less than this.)
⑤Ventilate with ventilation system.
⑥Turn on the main power (Hand switch).
適正な油量
下目印
中目印 上目印
ヒータ-カバー
止
開
1 2 3
4 5 6
7 8 9
0
マニュアル ec o 延長 ラ ード
加熱スタート
電源
現在
温度
設定
温度
℃
タイマー
分 秒
メニュー設定
スタート/ストップ
適
温
メニュー
℃
排油ハンドル
油缶
Appropriate oil amount
●Confirm whether there is no water left before putting oil in Oil tank.
It is very dangerous that you may have a risk of burn injury because the
oil may spit on you when remaining water is boiled while in use.
●Always use cold oil to pour into the oil tank.
Pouring hot oil into Oil tank is very dangerous because it may cause burn injury.
●Use lard heating(Melt function)in case of using a solid oil such as lard.
(refer to 2-4 other usage)
CAUTION
Drain handle
【The Fixed regular type】
Bottom mark
Middle mark
Heater cover
Oil can
Top mark
How to use
2-2
Basic usage
1)How to operate
<Fixed Standard Type>
<Fixed Fast Foods Type>
<Tabletop Type (MEF-13TE)>
◆【Menu mode】
※Please refer “2-3 How to use Menu Mode Operation” for menu registration method.
①Press the power switch.
・Power lamp (Yellow) lights.
・Setting information will be displayed as follows:
“Preset Time”on the timer display.
“Current Temperature”on the current temperature display.
“Preset Temperature”on the preset temperature display, and
“Menu Number”on the menu display.
②Press the ten key switches to select the registered menu
number.
・If the number is 1 digit, it will be confirmed after 3 seconds.
Or it will be confirmed with menu setting switch.
・If the number is 2 digits, it will be confirmed after inputting
the numbers
e.g.) The menu number is 10.
Press “1” then “0” on the ten key switches.
※Settings can be checked by pressing the menu setting switch.
●Do not place or use spray cans, or combustible, volatile or inflammable substances near the
machine.
●In case of abnormality, or earthquake or fire, stop the use and turn the main power (Hand
switch・Consent) off.
●Turn on ventilating facilities such as exhaust fan while in use.
●Do not leave the machine unattended while in use.
●Do not let children operate the machine.
●Turn the main power (Hand switch, plug) completely off after operation.
・WARNING
●Do not take out cooked food with bare hands.
●Take out cooked food immediately after cooking.●Set appropriate temperature and time.
●Do not touch any parts except operation parts while in use and just after use.
●Do not touch electrical components or operate electric switches with wet hands.
●Do not dry-firing ●Do not cool rapidly.
●Please use only for the purpose of fried and fry cooking.
●Do not operate / stop equipment by connecting or disconnecting the power plug.
●Do not use chlorine type detergent of solid or powder, and bleach.
●Do not use a metal scrubbing brush, cleanser and polishing power.
CAUTION
Power
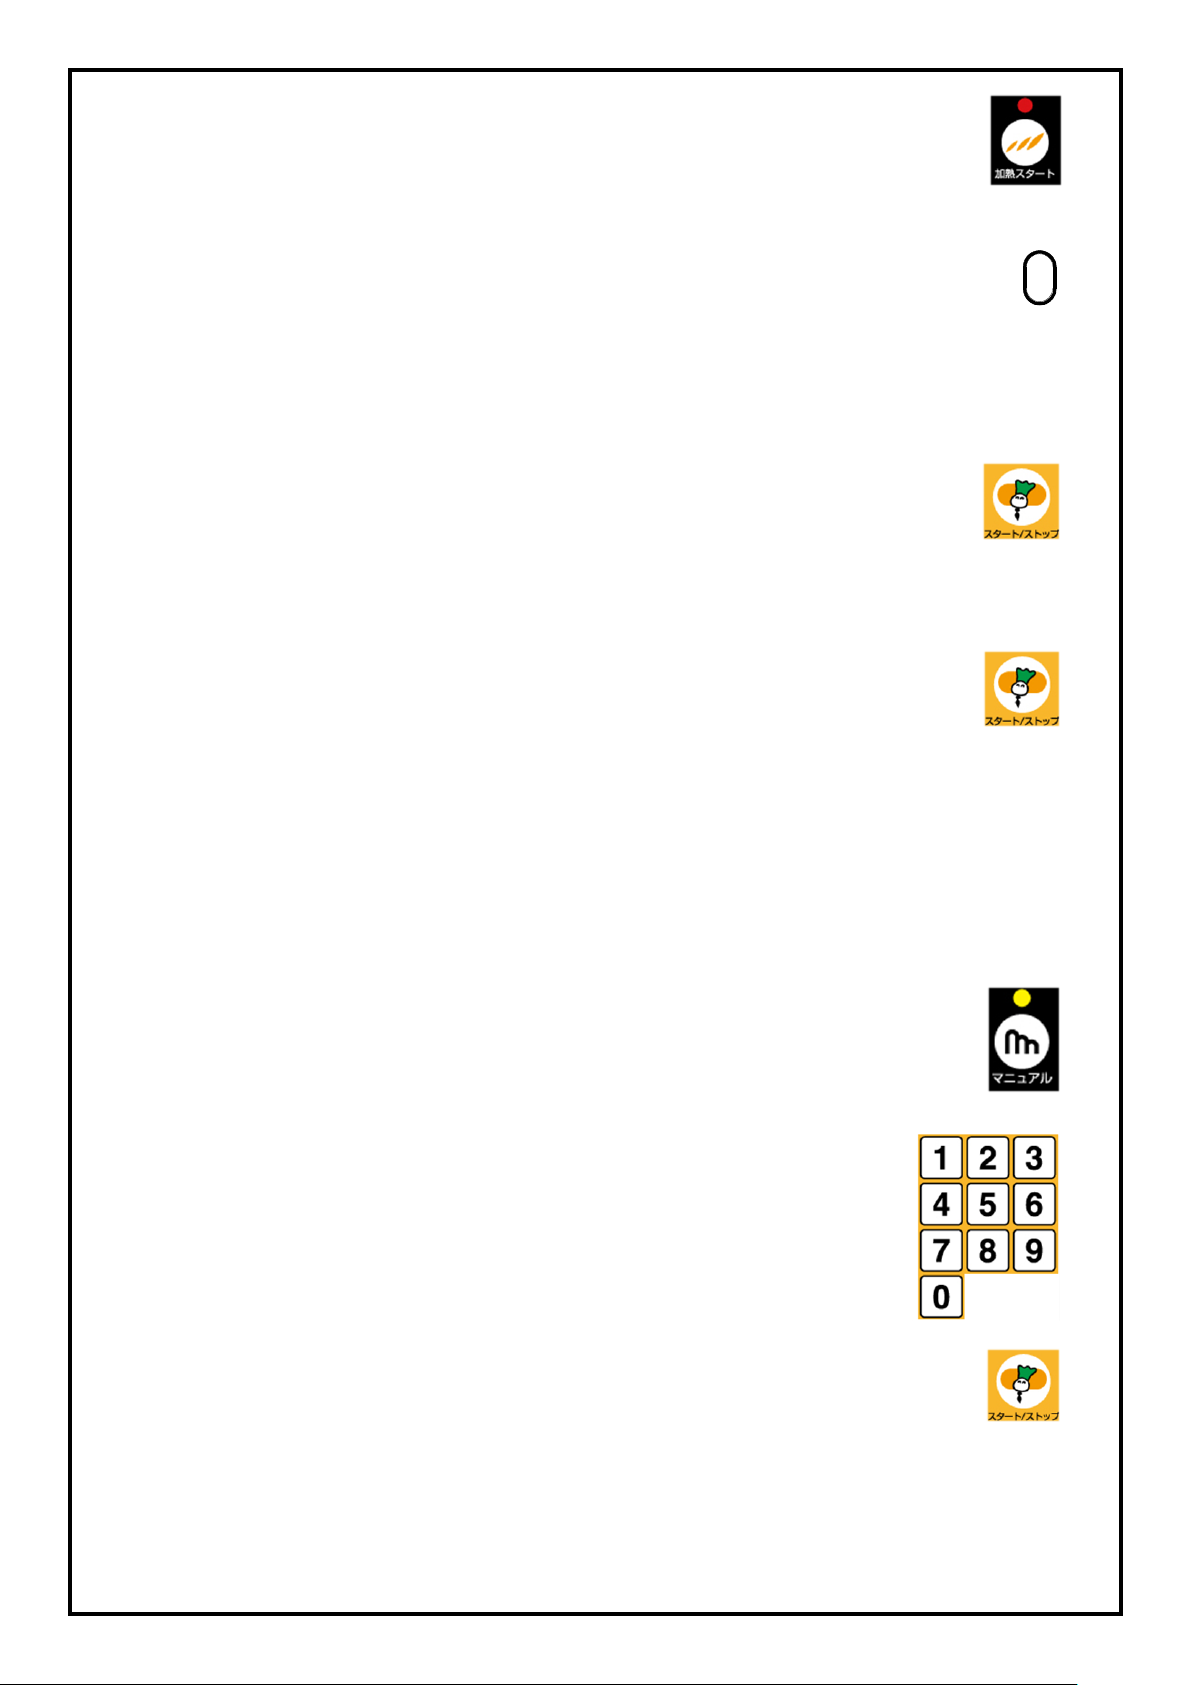
③Press the heating start switch.
・Heating lamp (Red) lights and heating starts.
※Once the temperature reached at appropriate temperature,
appropriate temperature lamp (Green) is turned on.
④Once the appropriate temperature lamp (Green) lights,
you can start cooking.
Put cooked food in to the oil tank.
・Appropriate temperature range is ±10℃ from the preset
temperature.
※Once the temperature exceeded the preset temperature, heating lamp
(Red) will blinks.
⑤Press the Start/Stop switch.
(The switch can be used as a kitchen timer.)
・The timer display starts down counting.
※If you want to abort cooking, press the Start/Stop switch again.
Down counting is terminated.
⑥Once it is the preset time the buzzer is sounded to notify the
completion.
Take cooked food from the oil tank with a scoop net etc.
・The buzzer is sounded 5 seconds before of the preset time.
・Once “End” is displayed on the timer display, press the Start/Stop switch to
finish cooking.
◆【Manual mode】
※Under the manual mode, you can cook even though the temperature has not
reached at appropriate temperature.
※The preset temperature is the one for the selected menu number.
①Press the manual switch.
・Manual lamp (Yellow) blinks
②Press the ten key switches to set desired cooking time.
・“Preset time” is displayed on the timer display.
・The timer setting can be done between
0 minute 00 second and 99 minutes 59 seconds.
e.g.) The preset time is 3 minutes 40 seconds.
Press “3”, “4”, then “0” on the ten key switches.
③Press the Start/Stop switch.
(The switch can be used as a kitchen timer.)
・Manual lamp (Yellow) lights.
・The timer display starts down counting.
※If you want to abort cooking, press the Start/Stop switch again.
Down counting is terminated.
適
温