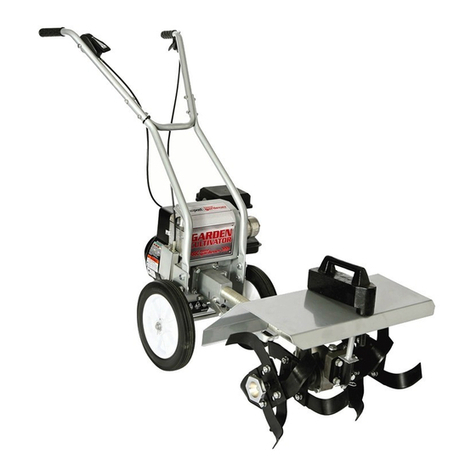
Masport Home Gardener MKII European User manual

www.masport.com
Home Gardener / Jardinero doméstico / Motoculteur
IMPORTANT / IMPORTANTE
OWNER’S MANUAL. GBR
Please read these instructions carefully before assembly.
Keep these and the engine instructions in a safe place for
future use.
MANUAL DEL PROPIETARIO. ESP
Lea estas instrucciones detenidamente antes del montaje.
Guarde estas instrucciones en un sitio seguro para uso en el
futuro.
MODE D’EMPLOI. FRA
Lire soigneusement ces instructions avant d’assembler le
motoculteur.
Garder ces instructions en lieu sûr à titre de référence
future.
Part No: 555064.C.0
Revised May 2016

2
Do not operate this machine before it has been
assembled correctly and you have read and under-
stood these instructions.
These instructions are intended as a general guide
and do not supersede national or local codes in any
way. Contact local Authorities for clarity of laws
relating to operation of this appliance.
Keep the instructions in a safe place for future use.
Contents
Symbols in this Owner’s Manual 2
Proper Use 3
Safety Precautions 3
Contents of Shipping Container 4
Assembly Instructions 4
Before you Start 5
General Maintenance 6
Using Your Home Gardener 6
Optional Extras 7
Troubleshooting 8
Specifications 8
Symbols in this Owner’s Manual
Threatened hazard or hazardous situation.
Not observing this instruction can lead to injuries or
cause damage to property.
Important information on proper handling.
Not observing this instruction can lead to faults in
the machine.
User information. This information helps you to
use all the functions correctly.
Symbols used on the Machine
Read and understand this Owner’s Manual
before operating the machine.
Keep bystanders clear. Danger of flying objects.
Keep hands and feet clear.
Max 15° slope when using machine.
Noise level.
Warning! Keep hands and feet clear of rotating
blades.
Operator Presence Control Lever (OPC).
Keep hands and feet clear of
rotating blade.
KEEP HANDS
AND FEET
CLEAR

FRANÇAIS ESPAÑOL ENGLISH
3
Proper Use
For safety reasons, the Home Gardener is not to be used by
children, young people, or any other persons who are not
acquainted with these directions for use.
Specific safety information Please read this safety
information and the directions for use carefully and be
sure to follow the instructions
to the letter.
Warning!
Even though this machine has been designed to be safe in
use, it is essential to follow the Safe Working instructions
carefully to avoid accidents to persons or property.
Safety Precautions
UNDERSTAND YOUR HOME GARDENER
Read and understand the owner’s manual and labels affixed
to the Home Gardener. Learn its application and limitations as
well as the specific potential hazards peculiar to it.
DRUGS, ALCOHOL AND MEDICATION
Do not operate the Home Gardener while under the influence
of drugs, alcohol, or any medication that could affect your ability
to use it properly.
1. Your Home Gardener is a piece of power equipment, not a toy,
and should be operated with extreme caution at all times.
2. Children should never be allowed to operate the Home
Gardener. Only persons acquainted with the rules of safe
operation set forth in this manual should be allowed to operate
the machine.
3. Read the complete manual to fully understand the
function of all the accessories and controls.
4. Keep other people, children and pets well away from
the area of operation as there is a risk of objects
being thrown out during operation.
5. Do not stand in front of the machine when starting
the engine or when the machine is running.
6. Wear hearing and eye protection.
7. Do not operate the machine barefoot or with open
sandals. Quality footwear is recommended.
8. Do not wear loose fitting clothing that could become
caught in the moving parts of the machine.
9. Do not start the engine without the machine stand locked in
the down position.
10. Do not place feet or hands on or near the working head or
attachments while the engine is running.
11. Do not attempt to adjust the working head or attachments
when the engine is running.
12. Do not leave the machine unattended when the engine is
running.
13. Check the fuel supply before starting the engine. Do
not fill the fuel tank with the machine indoors, while
the engine is running or while the engine is hot.
Replace the gasoline cap securely, and wipe off any
spilled gasoline before starting the engine.
Warning!
Gasoline is extremely flammable; spilled fuel can cause a fire or
explosion.
14. Do not run the machine indoors. Engine exhaust
gases are deadly poisonous.
15. Do not touch the engine muffler during or after
operation of the machine. It is extremely hot and
can cause severe burns.
16. Do not change the engine governor speed
setting. Over-revving of engine can damage the
machine and endanger the operator.
17. Before changing attachments or doing
maintenance on the machine, remove the spark
plug wire and ground it to the engine block for added safety.
18. Use caution when using the machine near buildings or fences
as damage or injury can result.
19. Do not attempt to remove debris from the attachments
without stopping the engine and removing the spark plug wire
for added safety. Make sure the working head has stopped
completely before attempting to clear the debris.
20. Keep all bolts and fasteners on the machine tight and check
them at regular intervals.
21. Do not store the machine inside a building with gasoline in the
tank where fumes can reach an open flame or spark. Allow the
engine to cool completely before storing inside any enclosure.
Important!
The engine is shipped WITHOUT GASOLINE or OIL. After
assembly, service engine with gasoline and oil as instructed
in the separate engine manual packed with your unit.
NOTE
Reference to right or left side of your Home Gardener is
viewed from the operating position.
FLAMMABL E
FUEL
80˚C+

4
Contents of the Shipping Container
Prior to assembly check to see that the following parts are
included with your Home Gardener.
1. Sub Frame Assembly and Engine
2. Upper and Lower Handle Assembly
3. Home Gardener Owner’s Manual (this publication) and an
Engine Owner’s Manual.
4. Tine Cover:– MkII European only.
Assembly Instructions
TOOLS REQUIRED FOR ASSEMBLY
Two 17 mm AF spanners, a screwdriver—Pozi drive,
adjustable wrench.
HANDLE ASSEMBLY
1. Attach the Handle Assembly to the Sub Frame using the
four bolts and nuts provided. Tighten using two 17mm AF
spanners.
A. Handle fasteners as shipped B. Handle when assembled.
THROTTLE CONTROL
Uncoil the throttle control from around the engine. Remove the M6
nut and bolt from the right hand side of the upper handle and fit the
Throttle Control to the handle and secure with the nut and bolt
OPERATOR PRESENCE CONTROL (OPC) LEVER
—European Models Only.
Uncoil the OPC control cable from around the engine. Remove the
M6 nut and bolt from the left hand side of the upper handle and fit
the OPC Lever to the handle and secure with the nut and bolt
Some models of Home Gardener are fitted with an OPC system
that shuts down the engine if the operator moves from behind the
handle. A small lever on the left handle must be held up towards
the handle before the engine can be started. Releasing this lever will
instantly switch off the ignition and bring the engine to a halt. This
ignition switching is performed by a micro-switch mounted in a box
just behind the chassis of the cultivator. A flexible cable connects
the switchbox to the handle lever.
DRIVE SHAFT. Delivered pre assembled.
1. The drive shaft (A) is designed to fit snugly over the square
pegs (B) and (C).
2. Care must be taken when installing the drive shaft as the
square drive peg on the working head cannot be seen with the
extension tube installed. Turn the shaft by hand until it fits over
the peg.
CA
A
B
D
C
J
E
Extension Tube
Clamp Housing
Clamp
GEARBOX and EXTENSION TUBE. Delivered pre assembled.
1. Insert the drive shaft into the clamp housing and onto the
square drive peg on the engine shaft.
2. Slide the working head and extension tube over the drive shaft
toward the clamp housing.
Important!
When the extension tube is nearly all the way into
the clamp housing the working head and extension
tube will need to be rotated slowly until the drive
shaft lines up with the square drive peg on the working
head.
3. Once the drive shaft is on both drive pegs, the extension tube
should be inserted into the clamp housing up to the step cut
groove on the extension tube.
4. Tighten the clamp lever on the clamp housing BY HAND ONLY.
The working head is intended to rotate slightly if the tines hit a
rock or other solid objects. (Two washers are fitted between the
shoulder of the clamp bolt and the housing.) The final angle of
the clamp handle can be adjusted by removal of one or both of
the washers.
5. Set the machine stand to the “down” position by moving the
spring loaded lever fully to the rear (toward the engine).
NARROW TINE SET ASSEMBLY– Optional Accessory.
HFE
IGJ
Key
Cutting Edge
Handwheel
Cutting Edge
T Bolt
Tine set
Drive-dog Tine set
A reduction T-Bolt is provided to decrease the cultivation
width to 30cm.
1. Undo the hand wheel from the working head and withdraw the
T-Bolt. Be careful not to lose either of the keys which could be
misplaced if the drive-dog tine sets are accidentally removed.
Important!
The tine sets are interchangeable but be careful to fit
them with the cutting edges positioned as
illustrated.
2. Mount one tine set on the right-hand mounting with the studs
(F) and (G) through the holes (H) and (I).
3. Insert the 19cm T-Bolt through the centre hole engaging the

FRANÇAIS ESPAÑOL ENGLISH
5
“T Section” and push it through and out the left-hand tine set
mounting.
4. Mount the second tine set and secure by screwing on the
hand-wheel.
Important!
Tighten the hand-wheel as firmly as you can by hand
(Do not use tools to force it).
EXTENSION TINE SET ASSEMBLY– Optional Accessory.
Extension tine sets will increase the cultivation width to
60cm.
Important!
The T ends of the spacer must be positioned in the recessed
section of the tine set.
1. Slide the T-Bolt through the centre hole ensuring the inner tine
set engages with the spacer.
2. Repeat this operation on the other side and secure by screwing
on the hand-wheel.
Important!
Ensure that the cutting edges of all tine sets are facing in the
correct direction.
THE STABILISER WEIGHT.
The addition of the stabiliser weight will assist in deeper cultivation
and the breaking up of hard compacted soils. To attach the weight,
insert the peg into the hole at the front of the gearbox. Place the
hairpin clip through the hole in the peg. On European models only—
the Stabiliser Weight may be removed/fitted to the machine by
pulling the securing clip from under the Tine Shield.
FITTING THE TINE SHIELD.
The Tine Shield is a standard fitting on the European Model and
available as an optional extra on other models. To fit the Tine Shield
place the spigot into the support on the Gearbox head and secure
with the pin provided.
Attach here.
Throttle control.
OPC Lever.
Warning!
Regulations require that the European Model be used with the Tine
Shield in place. Never operate the machine with the Tine Shield
removed.
Before You Start
Important!
The engine on this machine must not be operated
until it is filled to the correct level with oil. Check the oil in the
working head - refer to General Maintenance, point 2 on the
next page.
Support your Masport Home Gardener in a level position and
remove the plug marked ‘OIL FILL’. Use a funnel to fill the crank
case to the point of overflowing with SAE 10W-30 oil (600ml),
then replace and tighten the plug. When filling the crank case, it is
necessary to pour the oil slowly to avoid air locks.
Check the oil level each time you use your machine, and when
necessary refill to overflowing. Replacement oil is available from
your Masport Dealer. Fill the fuel tank with clean, fresh, preferably
premium grade gasoline.
The engine on your Home Gardener will benefit considerably
from being used under only moderate loads for the first five
hours use. Avoid using your machine with the engine at full
throttle during this period.
STARTING THE ENGINE
For a more detailed description refer to the Engine Owner’s Manual
provided.
Ensure that the tines are not resting on the ground. Check that the
support stand is down and locked in position.
EVERY TIME YOU USE YOUR HOME GARDENER CHECK:
The Extension Tube
Clamp is tight.
Tine sets are assembled
correctly with the cutting
edges facing forward.
The wheels turn freely, if not
remove the wheels and lubricate
the axles.
The handwheel
is secure.
Fill with
fuel.
Throttle control.
The engine oil is full to
overflowing.

6
General Maintenance
Lightly oil or grease the working parts.
The working head has been filled with a special gear oil, before
delivery. For replacement oil, order Part Number 503335 from your
Masport Dealer.
Important!
Failure to use this special purpose gear oil may cause
damage to the gear and void your warranty. When you are
washing your machine, take care not to wet the engine. This
could damage it.
AFTER THE FIRST FIVE HOURS WORK
Change the engine oil. Refer to the Engine Manual provided for
details.
AFTER EVERY 20-25 HOURS OF USE
1. Change the engine oil. Refer to the Engine Manual provided for
details.
2. Check the oil in the working head. If necessary fill with oil
(use Masport Part Number 503335). With the head in a level
position, unscrew the oil plugs ‘E’ and ‘J’ and pour oil slowly in
the top hole until the oil runs out of the lower hole. Replace and
tighten both plugs.
E
J
3. Clean and re-oil the air filter (every few hours under dusty
conditions). For a more detailed description refer to the Engine
Manual provided.
AFTER EVERY 100 HOURS OF USE – More often under dusty
conditions.
1. Service the air filter, refer to the Engine Manual.
2. Keep the fins of the engine block and cylinder head clean, refer
to the Engine Manual.
3. Check that all nuts and bolts are tight.
Using Your Home Gardener
Once you have established an area of land which you visualise as
your vegetable garden, you will want to clear it of weeds, grass,
etc, before you start tilling. To carry out this task you should use the
tilling tines, supplied as standard with your Home Gardener.
First place the Home Gardener on its supporting stand and make
sure the tines will revolve in a forward direction with the cutting
edges leading. Start the engine and advance the throttle setting to
‘Fast’. Retract the stand by pushing the lever forward. Allow the
tines to claw into the ground. This clawing action pulls the machine
forward while it chips out the weeds and stubble. Swing the handles
from side to side in an arc of approximately 50cm and move in a
direct line towards the end of your garden area. Always exert a little
upwards pressure on the handles except when you want to stop
the forward movement. Guide the machine, don’t push it. Let the
Home Gardener work for you.
If some of the weed growth is really stubborn, draw the machine
backwards down the row to dislodge any roots. When you finish the
first row, push down on the handles to clear the tines from the soil
and manoeuvre the machine on its wheels to begin digging the next
row. Repeat this process until the area is cleared. Rake the loose
weeds clear and you are ready to start cultivating.
THE FIRST DIG
This job is really a progression from the previous weeding operation.
As before, set the throttle to the ‘Fast’ position and move the
machine into position to dig the first row. This time, put a little more
upward pressure on the handles and allow the tines to slice into
the ground to a depth of approximately 15cm, as when weeding,
swing the handles from side to side. Continue until the whole area
has been cultivated. It may be wise to let the ground settle and dig
it over once again before planting.
BREAKING IN HARD GROUND
If the ground is very hard and compacted, use the following
“trenching” method of operation. The addition of the stabiliser
weight can also be of assistance. With the Home Gardener throttle
set to the ‘Fast’ position, swing the handles of the machine from
side to side applying upward pressure on the handles. Dig a trench
15cm deep and slightly wider than the width of the tines. Then allow
the machine to draw forward and let the wheels drop into the trench
you have just dug. This will anchor the wheels in the trench. Repeat
the procedure digging another trench. Then draw the machine
backwards and demolish the mound between the two trenches.
When this is completed allow the Home Gardener to propel itself
forward until the wheels anchor themselves against the wall of the
front trench, and repeat the process. Using this technique you will
be able to handle the hardest of ground with relative ease.
PLANTING
Remember, plan to make the maximum use of your Masport Home
Gardener for weeding and shallow cultivation. Leave enough room
between the rows for the Home Gardener to be able to carry out
inter-row work while the plants are growing, a minimum of 30cm
will be required to allow use of your Home Gardener with single tine
sets. Refer to ‘Optional Extras’.
WEEDING
Your Home Gardener may be set up to cope with all types of
weeding operations. If the area to be weeded is between widely
spaced rows the standard double tine sets may conveniently be
used. For more confined Inter-row weeding the two outside tine
sets may be removed and cultivation width reduced to 30cm. As
your plants and seeds begin to mature, so do the weeds. If not
attended to regularly, weeds will stifle and choke young plants.
To weed between rows, set the working head on the Home

FRANÇAIS ESPAÑOL ENGLISH
7
Gardener so that the curved tines are revolving in a forward
direction. Start the machine and set the throttle to half speed. Lift
slightly on the handles and work down between two rows swinging
the handle from side to side allowing the tines to chip out the
weeds. Use the machine in this manner between rows and between
individual plants. The long reach neck of the Home Gardener lets
you see where you’re going when you work close to the plants.
With practice, this exercise can be carried out at near normal
walking pace.
HOW TO AERATE THE SOIL
Aeration is necessary to allow even moisture distribution and
oxygen intake to take place in the soil. For this exercise you should
use the Cultivating Tool.
To fit: Slide the 11 inch (280mm) ‘T’ Bolt (B) through the Cultivating
Tool (E) and Spacer Drive (C) then through the Gear Head. Tighten
the Hand-nut to secure the assembly. Loosen the clamp that holds
the extension shaft and twist the Gear Head 90 degrees, tighten
clamp.
After the Cultivating Tool is fitted it should rotate in an anticlockwise
direction. Once you have started the machine, lift the handles to
let the Cultivating Tool break the soil surface, set the throttle to half
speed and work backwards down the row, using the swing arc
technique as previously described.
TRIMMING LAWN EDGES - Optional Extra
Fit the Edger Disc (D) to one side of the working head. To mount
the Disc, you will need the mounting extension (C) and the 28cm
T-Bolt (B) and the washer. Assemble as shown, making sure that
the shallow pegs fit into the holes on the weeder. Remember the
disc must revolve forward and the short side of each tooth should
be in a leading position. Tighten the Hand-nut onto the T-Bolt (B) to
secure the assembly.
B
DC
Position the Home Gardener on a path to give a firm and constant
bearing surface. Start the machine and set the throttle to quarter
speed. Gently feed the disc between the lawn edge and the
concrete. Keep the Home Gardener’s speed controlled to let the
teeth slice off overhanging grass. When you’ve finished the job,
brush the trimmed grass clear. If you like a bevelled edge set the
Trimmer at the required angle.
ROTARY BRUSH - Optional Extra
A useful scrubbing brush to assist in the revival of your drive, paths,
patios, etc. Used in conjunction with concrete cleaners and water.
To fit: Slide the 11 inch (280mm) ‘T’ Bolt (B) through the Brush
(F) and a Tine Spacer, then through the Gear Head. Tighten the
Hand-nut to secure the assembly. Loosen the clamp that holds the
extension shaft and twist the Gear Head 90 degrees, tighten clamp.
Optional Extras and Consumables
The following accessories can be purchased through your Masport
Dealer.
755068 Tine Reduction Kit. This reduces the cutting head down to
two tines, 30cm.
555069 Edger Kit. This is for trimming the edge of the lawn.
555790 Tine Shield.
503335 Gear Head oil.
550019 Accessory Kit which includes: Rotary Brush, Edge
Trimmer, Cultivating Tool and associated parts.
A. 1 x 7.5 inch (190mm) ‘T’ Bolt, used to convert your set of fitted
tines down to two.
B. 1 x 11 inch (280mm) ‘T’ Bolt, used to secure the Edger Disc,
Cultivating Tool or Brush.
D. 1 x Edger Disc
C. 1 x Spacer Drive
E. 1 x Cultivating/Aeration Tool
F. 1 x Brush

8
Troubleshooting
What to Check Possible Cause Remedy
Does the engine crank?
YES
NO Faulty recoil starter
Internal damage.
Return unit to dealer.
Good compression?
YES
NO Loose spark plug. Excess wear on
cylinder, piston, rings.
Tighten and re-test.
Return unit to dealer.
Does the tank have fresh fuel?
YES
NO Fuel/mixture incorrect, stale, contaminated.
Fuel of the proper grade?
Re-fill with fresh premium fuel.
Use gasoline as specified.
Is fuel visible and moving in the
return line when priming?
YES
NO Check for clogged fuel filter and/or vent. Clear as required. Re-start.
Check the spark plug If the plug is wet, excess fuel may be in the
cylinder.
Crank the engine with plug removed, re-
place the plug and restart.
The plug may be fouled or improperly
gapped.
Clean and regap the plug to 0.75mm.
Restart.
The plug may be damaged internally or of
the wrong heat range.
Replace the plug with the specified plug.
Restart.
TROUBLE CHECK LIST
Do not immediately assume you have mechanical trouble - first check the following possibilities:
1. Insufficient fuel in the tank. We recommend the use of unleaded fuels, for its clean burning and low alcohol content qualities.
2. Stale fuel.
3. Obstruction in the fuel cap vent.
4. Water or dirt in the fuel.
5. Incorrect carburettor adjustment.
6. Loose spark plug and/or lead.
7. Burned or carboned plug.
8. Incorrect gap in spark plug. The correct gap for a Champion RJ 19LM spark plug is 0.75mm (0.030”).
0.75 mm
Specifications
Model MKII MKII European
Unit Weight 37.5kg 41.5kg
Engine: All Models Refer to the Engine Owner’s Manual for details.
Trenching Width (four tines) 46cm 46cm

FRANÇAIS ESPAÑOL ENGLISH
9

10
No utilice este equipo antes de su montaje correcto
y si no ha leído y comprendido las instrucciones.
Estas instrucciones son una guía general y no
remplazan los códigos nacionales o municipales.
Contacte con las autoridades municipales si desea
aclaraciones sobre las leyes relativas al uso de este
equipo.
Guarde las instrucciones en un sitio seguro para uso en el
futuro.
Índice
Símbolos utilizados en este Manual del Propietario 10
Uso apropiado 11
Precauciones de seguridad 11
Contenido del contenedor de envío 12
Instrucciones de montaje 12
Antes de empezar 13
Mantenimiento general 14
Uso del Jardinero doméstico 14
Opciones extra 15
Resolución de problemas 16
Especificaciones 16
Símbolos utilizados en este Manual
del Propietario
Amenaza de peligro o situación peligrosa.
Respete esta instrucción para evitar lesiones o
daños a la propiedad.
Importante información sobre el manejo correcto.
Respete esta instrucción para evitar fallas del
equipo.
Información para el usuario. Esta información le
ayudará a usar todas las funciones correctamente.
Símbolos que se utilizan en la
máquina
Lea y comprenda este Manual del Propietario
antes de utilizar el equipo.
Mantenga a los espectadores alejados. Peligro
de objetos despedidos.
Mantenga las manos y los pies alejados.
Pendiente máxima de 15° cuando use este
equipo.
Nivel de ruido.
¡Atención! Mantenga las manos y los pies
alejados de las cuchillas rotativas en rotación.
Palanca de control de presencia del operador
(OPC).
Cuchilla en rotación — man
tenga las manos y los pies
alejados.
KEEP HANDS
AND FEET
CLEAR

FRANÇAIS ESPAÑOL ENGLISH
11
Uso apropiado
Por razones de seguridad el Jardinero doméstico no debe ser
utilizado por niños, jóvenes o por personas que no conozcan estas
instrucciones de uso.
Información especial sobre seguridad: Lea esta
información sobre seguridad y las instrucciones de
uso detenidamente para seguir las instrucciones
exactamente.
Advertencia
Aun si este equipo fue diseñado con miras a su uso seguro, es
esencial que siga detenidamente las instrucciones de uso seguro a
fin de evitar accidentes personales o daño a la propiedad.
Precauciones de seguridad
COMPRENDA SU JARDINERO DOMÉSTICO
Lea y comprenda el manual del propietario y las etiquetas del
Jardinero doméstico. Infórmese sobre su uso y sus limitaciones y
sobre los posibles peligros específicos del equipo.
LAS DROGAS, EL ALCOHOL Y LOS MEDICAMENTOS
No use el Jardinero doméstico si se encuentra afectado por drogas,
alcohol o medicamentos que podrían afectar su capacidad de
usarlo en forma apropiada.
1. Su Jardinero doméstico es un equipo mecánico, no un juguete,
y deberá ser sumamente cauteloso en todo momento al usarlo.
2. No permita jamás que los niños utilicen el Jardinero doméstico.
No permita que las personas utilicen el equipo a menos de
que hayan leído y comprendido las reglas de uso seguro
contenidas en este manual.
3. Lea todo el manual para comprender cabalmente la
función de todos los accesorios y controles.
4. Mantenga a otras personas, a los niños y animales
domésticos bien alejados del área de funcionamiento
pues existe el riesgo de que el equipo despida
objetos durante su funcionamiento.
5. No se pare frente al equipo cuando lo arranque o
cuando éste esté funcionando.
6. Use protección para los oídos y los ojos.
7. No utilice el equipo descalzo o con sandalias
abiertas. Recomendamos el uso de calzado de buena calidad.
8. No use ropa suelta que podría engancharse en las piezas
móviles del equipo.
9. No arranque el motor sin haber trabado el pie del equipo en la
posición “abajo”.
10. No ubique los pies o las manos sobre el cabezal o los
accesorios o cerca de ellos mientras el motor esté en
funcionamiento.
11. No intente ajustar el cabezal de trabajo o los accesorios
mientras el motor esté en funcionamiento.
12. No deje el equipo desatendido si el motor estuviera
en funcionamiento.
13. Examine el suministro de combustible antes
de arrancar el motor. No llene el tanque de
combustible si el equipo está en un recinto cerrado, mientras el
motor está en funcionamiento o si el motor está caliente. Antes
de arrancar el motor, vuelva a colocar y ajustar la tapa del
combustible y limpie toda gasolina que se haya derramado.
¡Atención!
La gasolina es sumamente inflamable; el combustible derramado
puede causar un incendio o explosión.
14. No utilice el equipo en un recinto cerrado. Los
gases del escape del motor son venenosos y
mortales.
15. No toque el silenciador del motor durante o
después del funcionamiento del equipo. Está
sumamente caliente y puede causar quemaduras
graves.
16. No cambie la selección de velocidad del regulador
del motor. El exceso de aceleración del motor
puede dañar el equipo y poner en peligro al
operador.
17. Antes de cambiar accesorios o de hacer mantenimiento en el
equipo, desconecte el cable de la bujía y conéctelo a tierra al
bloque del motor para mayor seguridad.
18. Sea cauteloso al usar el equipo cerca de edificios o cercas
para evitar daños o lesiones.
19. No intente retirar rastrojos de los accesorios sin apagar el
motor y desconectar el cable de la bujía para mayor seguridad.
Compruebe que el cabezal se haya detenido completamente
antes de intentar retirar los rastrojos.
20. Mantenga todos los bulones y sujetadores del equipo bien
apretados, y compruébelos periódicamente.
21. No guarde el equipo en un edificio si tiene gasolina en el
tanque si los vapores pueden llegar a una llama encendida o
chispa. Espere a que el motor se enfríe completamente antes
de guardarlo en un recinto cerrado.
¡Importante!
El motor se vende SIN GASOLINA o ACEITE. Después del
montaje, haga el servicio del motor con gasolina y aceite
según las instrucciones del manual separado del motor que
se incluye con el equipo.
NOTA
Toda descripción del costado derecho o izquierdo del Jardinero
doméstico se refiere a lo que se ve desde la posición del operador.
FLAMMABL E
FUEL
80˚C+

12
Contenido del contenedor de envío
Antes del montaje compruebe que todas las piezas siguientes de
su Jardinero doméstico estén incluidas.
1. Conjunto del sub-marco y motor
2. Conjunto de la manija superior e inferior
3. Manual del Propietario del Jardinero doméstico (esta
publicación) y Manual del Propietario del motor.
4. Tapa de las cuchillas rotativas: Modelo MkII europeo
únicamente.
Instrucciones de montaje
HERRAMIENTAS NECESARIAS PARA EL MONTAJE
Dos llaves AF de 17 mm, un destornillador-Pozi drive, llave
ajustable.
MONTAJE DE LA MANIJA
1. Sujete el conjunto de la manija al sub-marco usando los cuatro
bulones y tuercas suministrados. Ajústelos con las dos llaves
AF de 17mm.
A. Handle fasteners as shipped B. Handle when assembled.
A. Sujetadores de manija incluidos B. Manija armada.
CONTROL DEL ACELERADOR.
Desenrosque el control del acelerador de alrededor del motor. Quite
la tuerca y el bulón M6 del lado derecho de la manija superior y
coloque el Control del acelerador en la manija, sujetándolo con la
tuerca y el bulón.
PALANCA DE CONTROL DE PRESENCIA DEL OPERADOR (OPC).
—Modelos europeos únicamente.
Desenrosque el cable del control OPC de alrededor del motor. Quite
la tuerca y el bulón M6 del lado izquierdo de la manija superior,
coloque la palanca OPC en la manija y sujétela con la tuerca y el
bulón.
Algunos modelos del Jardinero doméstico vienen con un sistema
CPO que apaga el motor si el operador deja su puesto de atrás
de la manija. Para que el motor arranque es preciso mantener la
pequeña palanca de la manija izquierda apretada contra la manija.
Al soltar dicha palanca el arranque se apagará instantáneamente
y se detendrá el motor. Este interruptor del arranque es accionado
por un micro-interruptor montado en una caja justo detrás del
chasis de la cultivadora. Un cable flexible conecta la caja del
interruptor a la palanca de la manija.
EJE DE TRANSMISIÓN. Entregado ya armado.
1. El eje de transmisión (A) cabe exactamente sobre las espigas
cuadradas (B) y (C).
2. Cuidado cuando instale el eje de transmisión ya que la espiga
cuadrada de mando en el cabezal de trabajo no se puede ver
cuando el tubo de extensión está instalado. Gire el eje con la
mano hasta que encaje en la espiga.
CA
A
B
D
C
J
E
Tubo de extensión
Caja abrazadera
Abrazadera
CAJA DE CAMBIOS y TUBO DE EXTENSIÓN. Entregados ya
armados.
1. Inserte el eje de transmisión en la caja abrazadera y en la
espiga cuadrada de transmisión en el eje del motor.
2. Deslice el cabezal de trabajo y el tubo de extensión sobre el eje
de transmisión hacia la caja abrazadera.
¡Importante!
Cuando el tubo de extensión haya llegado casi al fondo
en la caja abrazadera, tendrá que rotar lentamente el
cabezal de trabajo y el tubo de extensión hasta que el eje
de transmisión esté alineado con la espiga cuadrada de
transmisión del cabezal de trabajo.
3. Una vez que el eje de transmisión esté sobre ambas espigas
de transmisión, inserte el tubo de extensión en la caja
abrazadera hasta la ranura escalonada del tubo de extensión.
4. Ajuste la palanca de la caja abrazadera A MANO
ÚNICAMENTE. El cabezal de trabajo debe poder rotar
levemente si las cuchillas rotativas golpean una piedra u otro
objeto sólido. (Hay dos arandelas entre el reborde del bulón
y la caja abrazadera.) Es posible ajustar el ángulo final de la
manija de la abrazadera retirando una o ambas arandelas.
5. Seleccione la posición “abajo” del pie del equipo moviendo la
palanca a resorte hacia atrás hasta el fondo (hacia el motor).
EQUIPO DE CUCHILLAS ROTATIVAS ANGOSTAS – Accesorio
optativo.
HFE
IGJ
Llave
Borde de corte
Rueda de ajuste
Borde de corte
Bulón T
Juego de
cuchillas
rotativas
Juego de cuchillas rotativas
de transmisión por
acoplamiento con garras
Se incluye un bulón T de reducción para disminuir el ancho de
cultivo a 30cm.
1. Suelte la rueda de ajuste del cabezal de trabajo y retire el bulón
T. Tenga cuidado de no perder ninguna de las llaves que se
podría perder si se quitaran accidentalmente los juegos de
cuchillas rotativas de transmisión por acoplamiento con garras.
¡Importante!
Los juegos de cuchillas rotativas son intercambiables,
pero tenga cuidado de montarlos con los bordes de corte
ubicados como se ilustra.
2. Monte un juego de cuchillas rotativas del lado derecho con los
tarugos (F) y (G) por los agujeros (H) e (I).

FRANÇAIS ESPAÑOL ENGLISH
13
3. Inserte el bulón T de 19cm por el agujero del centro,
enganchando la “Sección T” y empújelo hasta el fondo hasta
que salga por el conjunto del juego de cuchillas rotativas de la
izquierda..
4. Monte el segundo juego de cuchillas rotativas y sujételo
atornillando la rueda de ajuste.
¡Importante!
Ajuste la rueda cuanto pueda a mano (no use herramientas
para forzarlo).JUEGO DE CUCHILLAS ROTATIVAS DE
EXTENSIÓN – Accesorio optativo.
Los juegos de cuchillas rotativas de extensión aumentan el
ancho de cultivo a 60cm.
¡Importante!
Los extremos T del espaciador deben estar ubicados en la
sección del receso del juego de cuchillas rotativas.
1. Deslice el bulón T por el agujero del centro, asegurándose
de enganchar el juego de cuchillas rotativas internas con el
espaciador.
2. Repita este proceso del otro lado y asegúrelo atornillando en la
rueda de ajuste.
¡Importante!
Compruebe que los bordes de corte de todos los juegos de
cuchillas rotativas estén mirando hacia el lado correcto.
LA PESA DE ESTABILIZACIÓN.
Agregue la pesa de estabilización para facilitar el cultivo profundo y
para desmenuzar las tierras duras y compactadas. Para colocar la
pesa, inserte la espiga en el agujero al frente de la caja de cambios.
Coloque el pasador horquilla por el agujero de la espiga. En los
modelos europeos únicamente: la pesa de estabilización se puede
quitar/colocar en el equipo tirando del pasador sujetador debajo del
Protector de cuchillas rotativas.
COLOCACIÓN DEL PROTECTOR DE CUCHILLAS ROTATIVAS.
El Protector de cuchillas rotativas es un accesorio estándar del
modelo europeo; para otros modelos es un accesorio optativo.
Para colocar el Protector de cuchillas rotativas ubique la espiga
dentro del soporte en el cabezal de la Caja de cambios, y sujétela
con el pasador suministrado.
Coloque aquí.
Control del
acelerador.
Palanca OPC.
¡Atención!
El reglamento dispone que para usar el modelo europeo debe estar
colocado el Protector de cuchillas rotativas. Nunca use el equipo si
se ha quitado el Protector de cuchillas rotativas.
Antes del uso
¡Importante!
No utilice el motor de este equipo hasta haberle colocado
el nivel correcto de aceite. Inspeccione el aceite del cabezal
de trabajo – vea el punto 2 de Mantenimiento general en la
página siguiente.
Ubique el Jardinero doméstico Masport en una superficie nivelada
y retire la tapa “OIL FILL” (llenado de aceite). Use un embudo para
llenar el cárter hasta desbordar con aceite SAE 10W-30 (600 Ml),
luego vuelva a colocar la tapa y ajústela. Cuando esté llenando
el cárter tendrá que verter el aceite lentamente para evitar que se
formen burbujas de aire.
Examine el nivel de aceite cada vez que use el equipo y vuelva a
llenarlo hasta desbordar cuando sea necesario. Podrá obtener
aceite en el representante Masport de su zona. Llene el tanque
de combustible con gasolina limpia y fresca, preferiblemente de
primera calidad.
El motor de su Jardinero doméstico se beneficiará en
mucho si lo usa sólo con cargas moderadas durante las
primeras cinco horas de uso. Evite usar su equipo con el
motor en máxima aceleración durante este tiempo.
ARRANQUE DEL MOTOR
Encontrará una descripción más detallada en el Manual del
Propietario del motor incluido.
Compruebe que las cuchillas rotativas no estén apoyadas en el
suelo, y que el pie de apoyo esté bajado y trabado en su lugar
CADA VEZ QUE USE SU JARDINERO DOMÉSTICO
COMPRUEBE QUE:
La abrazadera del
tubo de extensión
esté ajustada.
Los juegos de cuchillas
rotativas estén montados
correctamente con los bordes
de corte hacia adelante.
Las ruedas puedan girar
libremente; si no fuera así,
quítelas y lubrique los ejes.
La tuerca de
ajuste esté
ajustada.
Haya combustible
en el tanque.
Throttle control.
Haya aceite en el motor
hasta desbordar.

14
Mantenimiento general
Aceite o engrase levemente las piezas de trabajo. El cabezal de
trabajo viene llenado de aceite especial para engranajes de fábrica.
Si necesita aceite para remplazarlo pida el N° de pieza 503335 al
representante de Masport de su zona.
¡Importante!
Si no usara este aceite de engranajes especial podría dañar
los cambios y anular su garantía. Cuando lave el equipo,
tenga cuidado de no mojar el motor. Esto podría dañarlo.
DESPUÉS DE LAS PRIMERAS CINCO HORAS DE TRABAJO
Cambie el aceite del motor. Vea los datos en el Manual del motor
suministrado.
DESPUÉS DE CADA 20-25 HORAS DE USO
1. Cambie el aceite del motor. Vea los datos en el Manual del
motor suministrado.
2. Examine el aceite del cabezal de trabajo. Si fuera necesario
llene con aceite (use el N° de pieza 503335 de Masport). Con
el cabezal nivelado, desatornille las tapas de aceite “E” y “J” y
vierta aceite lentamente en el agujero superior hasta que salga
aceite por el agujero inferior. Vuelva a colocar y ajustar ambas
tapas.
E
J
3. Limpie y vuelva a aceitar el filtro de aire (cada pocas horas
de trabajo en condiciones de mucho polvo). Encontrará
una descripción más detallada en el Manual del motor
suministrado.
DESPUÉS DE CADA 100 HORAS DE USO– Más seguido en
condiciones de mucho polvo.
1. Haga el servicio del filtro de aire; vea el Manual del motor.
2. Mantenga limpias las aletas del bloque del motor y cabezal del
cilindro; vea el Manual del motor.
3. Compruebe que todos los bulones y tuercas estén ajustados.
Uso del jardinero doméstico
Una vez que haya demarcado una sección de terreno que visualiza
como su futuro huerto, quite las malas hierbas y el pasto, etc. antes
de comenzar a trabajar la tierra. Para ello, use las cuchillas rotativas
de cultivo incluidas con su Jardinero doméstico. Primeramente
ubique el Jardinero doméstico sobre el pie de apoyo y compruebe
que las cuchillas rotativas puedan girar hacia adelante, con los
bordes de corte hacia adelante. Arranque el motor y deslice el
acelerador a la posición “Rápido” (Fast). Retraiga el pie empujando
la palanca hacia adelante. Deje que las cuchillas rotativas
“muerdan” la tierra. Esta acción arrastrará el equipo hacia adelante
y al mismo tiempo picará las malas hierbas y el rastrojo. Mueva las
manijas de lado a lado en un arco de unos 50cm y muévase en
línea recta hacia el fondo de la zona del huerto. Ejerza siempre un
poco de presión hacia arriba sobre las manijas, excepto cuando
quiera detener el movimiento hacia adelante. No empuje el equipo,
guíelo. Deje que el Jardinero doméstico haga el trabajo por usted.
Si algunas de las malas hierbas son realmente duras, lleve el equipo
hacia atrás por la misma hilera para soltar las raíces si las hubiera.
Cuando haya terminado la primera hilera, empuje las manijas hacia
abajo para alejar las cuchillas rotativas del suelo y maniobre el
equipo sobre las ruedas para empezar a cavar en la hilera siguiente.
Repita este proceso hasta haber recorrido toda la zona. Rastrille las
malas hierbas sueltas y estará listo para comenzar a cultivar.
A PRIMERA EXCAVACIÓN
En realidad esta tarea es la continuación natural de la operación
anterior de desherbado. Igual que antes, seleccione la posición
“Rápido” del acelerador y mueva el equipo hacia la posición donde
comenzará a excavar la primera hilera. Esta vez, ponga un poco
más de presión hacia arriba en las manijas y deje que las cuchillas
rotativas corten la tierra hasta una profundidad de unos 15cm; igual
que cuando quitaba las malas hierbas, mueva las manijas de lado a
lado. Continúe hasta haber cultivado toda el área. Tal vez convenga
dejar que la tierra se asiente, y volver a excavar antes de plantar.
CÓMO ROMPER LA TIERRA DURA
Si la tierra está muy dura y compactada, use el siguiente método de
“zanjas”. También podría ser útil agregar la pesa de estabilización.
Con el acelerador del Jardinero doméstico en “Rápido”, mueva las
manijas del equipo de lado a lado, aplicando presión hacia arriba
en las manijas. Excave una zanja de 15cm de profundidad y un
poco más ancha que el ancho de las cuchillas rotativas. Luego deje
que el equipo vaya hacia adelante y que las ruedas caigan dentro
de la zanja que acaba de excavar. Ello anclará las ruedas en la
zanja. Repita este procedimiento y excave otra zanja. Luego lleve
el equipo hacia atrás y demuela el montículo formado entre las dos
zanjas. Cuando haya terminado, deje que el Jardinero doméstico
se impulse hacia adelante hasta que las ruedas se anclen contra la
pared de la zanja delantera, y repita el proceso. Con esta técnica
podrá manejar las tierras más duras con relativa facilidad.
LA PLANTACIÓN
Recuerde, planifique para aprovechar al máximo su Jardinero
doméstico Masport para quitar las malas hierbas y cultivar la tierra
hasta una profundidad reducida. Deje suficiente espacio entre las
hileras para que el Jardinero doméstico pueda trabajar entre las
hileras mientras las plantas están creciendo; se necesitarán por lo
menos 30cm para poder usar el Jardinero doméstico con un juego
de cuchillas rotativas. Vea la sección “Opciones extra”.
DESHERBADO
Su Jardinero doméstico puede afrontar todo tipo de tarea de
desherbado. Si el área que desea limpiar se encuentra entre
hileras bien espaciadas podrá usar los juegos estándar de
cuchillas rotativas dobles. En el caso de superficies de desherbado
con menos espacio entre hileras, podrá quitar los dos juegos
de cuchillas rotativas externas y reducir el ancho de cultivo a

FRANÇAIS ESPAÑOL ENGLISH
15
30cm. A medida que vayan madurando sus plantas y semillas,
también madurarán las malas hierbas. Si no se ocupara de éstas
periódicamente, las malas hierbas ahogarán las plantas jóvenes.
Para desherbar entre hileras, ubique el cabezal de trabajo del
Jardinero doméstico de modo que las cuchillas rotativas curvas
giren hacia adelante. Arranque el motor y seleccione media
velocidad. Levante las manijas levemente y trabaje hacia abajo
entre las hileras, moviendo la manija de lado a lado, dándole tiempo
al equipo para destruir las malas hierbas. Use el equipo de este
modo entre las hileras y entre las plantas individuales. El cuello largo
del Jardinero doméstico permite al operador ver hacia dónde está
yendo cuando trabaja cerca de las plantas. Con la práctica, podrá
realizar este ejercicio casi a velocidad de caminata.
CÓMO AIREAR EL SUELO
Es necesario airear el suelo para que la humedad se distribuya en
forma pareja y que la tierra absorba oxígeno. Para ello se usa la
Herramienta de cultivo.
Para colocarla: Deslice el Bulón en T de 11 pulgadas (280 mm) (B)
a través de la Herramienta de cultivo (E) y del Impulsor espaciador
(C) y luego a través del Cabezal de engranajes. Apriete la tuerca
de ajuste manual para fijar el conjunto. Afloje la abrazadera que
sostiene el eje de extensión y gire el Cabezal de engranajes 90
grados, y ajuste la abrazadera.
Después de colocar la Herramienta de cultivo en el equipo, debería
rotar contra las agujas del reloj. Una vez que haya arrancado el
motor, levante las manijas para que la Herramienta de cultivo pueda
romper la superficie del suelo; seleccione media velocidad y trabaje
hacia atrás por la hilera, usando la técnica de movimiento en arco
descrita anteriormente.
RECORTE DE LOS BORDES DEL CÉSPED - Opción extra
Coloque el Disco de recorte de bordes (D) en un costado del
cabezal de trabajo. Para montar el Disco necesitará la extensión
de montaje (C), el Bulón en T de 28 cm (B) y la arandela. Monte el
disco como se ilustra; compruebe que las espigas cortas quepan
en los agujeros del desherbador. Recuerde que el disco debe girar
hacia adelante y que el costado corto de cada diente debe estar
hacia adelante. Apriete la tuerca de ajuste manual sobre el Bulón en
T (B) para fijar el conjunto.
B
DC
Ubique el Jardinero doméstico sobre un sendero para tener una
superficie firme que lo soporte bien. Arranque el motor y seleccione
un cuarto de velocidad. Lleve el disco suavemente entre el borde
del césped y el cemento. Mantenga el control de la velocidad
del Jardinero doméstico para que los dientes recorten el césped
que sobresale. Cuando haya terminado la tarea, barra el césped
recortado. Si prefiere un borde biselado, seleccione el ángulo
deseado en el Recortador.
CEPILLO ROTATIVO - Opción extra
Un cepillo útil para frotar que le ayudará a revivir su entrada, sus
senderos, patios, etc. Se utiliza con limpiadores para hormigón y
agua.
Para colocarlo: Deslice el Bulón en T de 11 pulgadas (280 mm) (B)
a través del Cepillo (F) y de un Espaciador de cuchillas rotativas,
y luego a través del Cabezal de engranajes. Apriete la tuerca
de ajuste manual para fijar el conjunto. Afloje la abrazadera que
sostiene el eje de extensión y gire el Cabezal de engranajes 90
grados, y ajuste la abrazadera.
Opciones extra y fungibles
Podrá adquirir los accesorios siguientes por intermedio del
representante de Masport de su zona.
755068 Kit de reducción de cuchillas rotativas. Reduce el cabezal
de corte a dos cuchillas rotativas, 30cm.
555069 Kit de recorte de bordes. Se usa para cortar el borde del
césped.
555790 Protector de cuchillas rotativas.
503335 Aceite para cabezal de engranajes.
550019 Kit de accesorios, que incluye: Cepillo rotativo, Recortador
de bordes, Herramienta de cultivo y las piezas
correspondientes.
A. 1 Bulón en T de 7,5 pulgadas (190 mm) para reducir su conjunto
de cuchillas rotativas instaladas a dos cuchillas.
B. 1 Bulón en T de 11 pulgadas (280 mm) para fijar el Disco de
recorte de bordes, la Herramienta de cultivo o el Cepillo.
D. 1 Disco de recorte de bordes
C. 1 Impulsor espaciador
E. 1 Herramienta de cultivo/aireación
F. 1 Cepillo

16
Resolución de problemas
Qué debe comprobar Posible causa Solución
¿Gira el motor?
SÍ
NO Problemas con el arranque de retroceso
Daño interno.
Devuelva el equipo al representante
¿Buena compresión?
SÍ
NO Bujía suelta. Desgaste excesivo de cilindro,
pistón, anillos.
Ajuste y vuelva a probar. Devuelva el equipo
al representante
¿Tiene combustible fresco el
tanque?
SÍ
NO Combustible/mezcla incorrecta, vieja,
contaminada. ¿Combustible del grado
apropiado?
Vuelva a llenar con combustible fresco de
primera. Use la gasolina especificada.
¿Se ve el combustible y se mueve
en la línea de retorno cuando se
ceba?
SÍ
NO Compruebe que el filtro y/o ventilación del
combustible no esté tapado.
Destape según sea necesario. Vuelva a
arrancar.
Examine la bujía Si la bujía estuviera mojada, puede que
haya exceso de combustible en el cilindro.
Arranque el motor con la bujía desconec-
tada; vuelva a colocar la bujía y vuelva a
arrancar.
Puede que la bujía esté sucia o que la luz
no sea la correcta.
Limpie y vuelva a ajustar la bujía en
0,75mm. Vuelva a arrancar.
Puede que la bujía esté dañada inter-
namente o que sea de la gama de calor
incorrecta.
Vuelva a colocar la bujía correspondiente.
Vuelva a arrancar.
LISTA DE VERIFICACIÓN DE PROBLEMAS
No suponga automáticamente que tiene problemas mecánicos: compruebe primero las posibilidades siguientes:
1. No hay suficiente gasolina en el tanque. Recomendamos el uso de gasolina sin plomo, porque quema más limpio y contiene menos
alcohol.
2. Combustible viejo.
3. Obstrucción en la ventilación de la tapa del combustible.
4. Agua o suciedad en el combustible.
5. Ajuste incorrecto del carburador.
6. Bujía y/o cable suelto.
7. Bujía quemada o carbonizada.
8. Luz incorrecta en la bujía. La luz correcta para las bujías Champion RJ 19LM es 0,75mm (0,030”)
0,75mm
Especificaciones
Modelo MKII MKII europeo
Peso de la unidad 37,5 Kg 41,5 Kg
Motor: Todos los modelos Vea los datos en el Manual del Propietario del motor.
Ancho de zanja: (cuatro cuchillas rotativas) 46cm 46cm

FRANÇAIS ESPAÑOL ENGLISH
17

18
Ne pas utiliser cet appareil avant de l’avoir
assemblé correctement ou d’avoir lu et compris ces
instructions.
Ces instructions sont données à titre d’information
et ne remplacent d’aucune façon la législation
nationale ou régionale en vigueur. Contacter
les collectivités locales en cas de doutes ou
de questions sur la législation se rapportant à
l’utilisation de cet appareil.
Garder ces instructions en lieu sûr à titre de référence future.
Sommaire
Symboles utilisés dans ce manuel 18
Utilisation correcte 19
Consignes de sécurité 19
Contenu de l’emballage 20
Instructions pour l’assemblage 20
Avant de commencer 21
Entretien général 22
Utilisation du motoculteur 22
Options en supplément et consommables 23
Dépannage 24
Spécifications 24
Symboles utilisés dans ce manuel
Danger potentiel ou situation dangereuse
Le non respect de cette instruction peut occasionner
des blessures corporelles ou des dégâts matériels.
Information importante sur l’utilisation correcte
Le non respect de cette instruction peut occasionner
des défaillances de la machine.
Information pour l’utilisateur. Cette information
vous aide à utiliser toutes les fonctions correctement.
Symboles utilisés sur la machine
Bien lire et comprendre le mode d’emploi avant
d’utiliser la machine.
Eloigner les spectateurs. Risque de projection
d’objets.
Eloigner les mains et les pieds de l’appareil.
Pente maximale de 15° pour l’utilisation de la
machine.
Niveau sonore.
Attention ! Eloigner les mains et les pieds des
lames rotatives.
Levier de contrôle de présence de l’opérateur
(CPO).
Eloigner les mains et les pieds
des lames rotatives.
KEEP HANDS
AND FEET
CLEAR

FRANÇAIS ESPAÑOL ENGLISH
19
Utilisation correcte
Pour des raisons de sécurité, le motoculteur ne doit pas être utilisé
par des enfants, des adolescents ou par toute personne n’ayant
pas pris connaissance du mode d’emploi.
Information spécifique de sécurité. Prière de lire
attentivement cette information de sécurité et le mode
d’emploi et veiller à suivre les instructions à la lettre.
Attention!
Bien que cette machine ait été conçue pour être utilisée sans
danger, il est important de suivre attentivement les instructions de
sécurité pour éviter de blesser des personnes ou de causer des
dégâts matériels.
Consignes de sécurité
BIEN CONNAITRE VOTRE MOTOCULTEUR
Lire et comprendre le mode d’emploi et les étiquettes apposées
sur le motoculteur. Familiarisez-vous avec ses applications et ses
limitations ainsi qu’avec les dangers spécifiques et potentiels qui lui
sont propres.
STUPÉFIANTS, ALCOOL ET MÉDICAMENTS
Ne pas utiliser le motoculteur sous l’emprise de stupéfiants,
d’alcool, ou de tout médicament susceptible d’affecter votre
capacité à l’utiliser correctement.
1. Votre motoculteur n’est pas un jouet mais un équipement
motorisé et doit être utilisé à tout moment avec la plus grande
prudence.
2. Ne pas laisser les enfants utiliser le motoculteur. Seules les
personnes familiarisées avec les règles d’utilisation sûre
exposées dans ce manuel sont autorisées à utiliser
la machine.
3. Lire l’intégralité du manuel pour bien comprendre les
fonctions de tous les accessoires et de toutes les
commandes.
4. Bien éloigner les personnes, les enfants et les
animaux de compagnie de la zone d’utilisation étant
donné que des objets peuvent être projetés en cours
d’utilisation.
5. Ne vous placez pas devant la machine lorsque vous
démarrez le moteur ou lorsque la machine est en
marche.
6. Portez un protège-oreilles et des lunettes de sécurité.
7. N’utilisez pas la machine pieds nus ou avec des sandales
ouvertes. Il est recommandé de porter des chaussures de
qualité.
8. Ne pas porter de vêtements lâches risquant de s’emmêler
dans les pièces en mouvement de la machine.
9. Ne pas démarrer le moteur sans avoir verrouillé le pied de
soutien de la machine en position basse.
10. Ne pas mettre les mains ou les pieds sur ou
à proximité de l’avant de la machine ou des
accessoires pendant que le moteur est en marche.
11. Ne pas essayer d’ajuster l’avant de la machine ou
les accessoires lorsque le moteur est en marche.
12. Ne pas laisser la machine sans surveillance lorsque le moteur
est en marche.
13. Vérifier l’alimentation en carburant avant de démarrer le moteur.
Ne pas remplir le réservoir de la machine à l’intérieur, pendant
que le moteur est en marche ou si le moteur est chaud. Bien
remettre le capuchon du réservoir et essuyer tout déversement
d’essence avant de démarrer le moteur.
Attention !
L’essence est extrêmement inflammable ; les déversements de
carburant peuvent causer un incendie ou une explosion.
14. Ne pas faire tourner la machine à l’intérieur. Les
gaz d’échappement sont toxiques et peuvent être
mortels.
15. Ne pas toucher le silencieux du moteur pendant
que vous utilisez la machine ou après. Il est
extrêmement chaud et peut occasionner de très
graves brûlures.
16. Ne pas changer les réglages du régulateur de
vitesse du moteur. Un emballement du moteur
peut endommager la machine et menacer la
sécurité de l’utilisateur.
17. Avant de changer d’accessoire ou d’entretenir la machine,
retirer le câble de la bougie et le mettre à terre au bloc moteur
pour plus de sécurité.
18. Soyez prudent lorsque vous utilisez la machine à proximité de
bâtiments ou de clôtures pour éviter tout dégât ou blessure.
19. Ne pas essayer de retirer de débris des accessoires sans
arrêter le moteur et retirer le câble de la bougie pour plus
de sécurité. Vérifier que l’avant de la machine s’est arrêté
complètement avant d’essayer de dégager les débris.
20. Vérifier que tous les boulons et toutes les attaches de la
machine sont bien serrés et les vérifier à intervalles réguliers.
21. Ne pas entreposer la machine dans un bâtiment avec de
l’essence dans le réservoir si des vapeurs peuvent entrer en
contact avec des flammes ou des étincelles. Laisser le moteur
refroidir complètement avant de l’entreposer dans tout espace
fermé.
Important!
Le moteur est expédié SANS ESSENCE ou huile. Après
assemblage, mettre de l’essence et de l’huile comme
indiqué dans le manuel pour le moteur fourni avec votre
machine.
NOTE:
Toute référence à la droite ou à la gauche de votre motoculteur est
faite à partir de l’arrière de la machine.
FLAMMABL E
FUEL
80˚C+

20
Contenu de l’emballage
Avant d’assembler le motoculteur, vérifier que les pièces suivantes
ont été inclues.
1. Ensemble faux châssis et moteur
2. Ensemble guidon supérieur et inférieur
3. Mode d’emploi du motoculteur (ce manuel) et mode d’emploi
du moteur.
4. Couvre-dents : MkII Europe uniquement.
Instructions pour l’assemblage
OUTILS REQUIS POUR L’ASSEMBLAGE
Deux clés AF de 17 mm, un tournevis Pozidrive, une clé ajustable.
ASSEMBLAGE DU GUIDON
1. Attacher l’ensemble guidon au faux châssis à l’aide des quatre
boulons et écrous fournis. Les serrer à l’aide des deux clés AF
de 17 mm.
COMMANDE DES GAZ
Dérouler la commande des gaz enroulée autour du moteur. Retirer
l’écrou et le boulon M6 de la droite du guidon supérieur, installer la
commande des gaz sur le guidon et l’attacher à l’aide de l’écrou et
du boulon
LEVIER DE CONTROLE DE PRESENCE DE L’OPERATEUR (CPO)
— Modèles européens uniquement.
Dérouler le câble de commande CPO enroulé autour du moteur.
Retirer l’écrou et le boulon M6 de la gauche du guidon supérieur,
installer le levier CPO sur le guidon et l’attacher à l’aide de l’écrou et
du boulon.
Certains modèles du « Home Gardener » sont équipés d’un arceau
de détection de la présence de l’utilisateur qui arrête le moteur si
l’utilisateur ne se trouve plus derrière le guidon. Il faut relever un
petit levier en direction de la poignée de gauche sur laquelle il est
situé pour pouvoir démarrer le moteur. Lorsque l’on relâche ce
levier, le contact est automatiquement coupé et le moteur s’arrête.
Cette coupure de contact est effectuée par un microrupteur situé
dans un boîtier juste derrière le châssis du motoculteur. Un câble
souple relie le boîtier au levier de la poignée.
ARBRE D’ENTRAÎNEMENT (livré pré assemblé)
1. L’arbre d’entraînement (A) a été conçu pour venir buter contre
les chevilles carrées (B) et (C).
2. Installer soigneusement l’arbre d’entraînement étant donné
qu’il n’est pas possible de voir la cheville d’entraînement carrée
sur l’avant de la machine lorsque le tube-rallonge est installé.
Faire tourner l’arbre d’entraînement manuellement jusqu’à ce
qu’il tienne bien sur la cheville.
CA
A
B
D
C
J
E
Tube-rallonge-
bride
Logement de la
bride
Bride
BOITE DE VITESSE et TUBE-RALLONGE (livré pré assemblé)
1. Insérer l’arbre d’entraînement dans le logement de la bride et
sur la cheville d’entraînement carrée de l’arbre d’entraînement
du moteur..
2. Faire glisser l’avant de la machine et le tube-rallonge sur l’arbre
d’entraînement vers le logement de la bride.
Important!
Lorsque le tube-rallonge est presque entièrement inséré
dans le logement de la bride, il faut faire tourner l’avant de la
machine et le tube-rallonge lentement jusqu’à ce que l’arbre
d’entraînement soit aligné avec la cheville d’entraînement
carrée de l’avant de la machine.
3. Lorsque l’arbre d’entraînement est installé sur les deux
chevilles d’entraînement, il faut insérer le tube-rallonge dans la
bride jusqu’à la rainure en gradins du tube-rallonge.
4. Serrer le levier de la bride du logement de la bride
MANUELLEMENT UNIQUEMENT. L’avant de la machine a
été conçu pour tourner légèrement si les dents heurtent une
pierre ou d’autres objets solides (Deux rondelles sont installées
entre l’épaulement du boulon de la bride et le logement). Il est
possible d’ajuster l’angle final de la bride du guidon en retirant
l’une ou les deux rondelles.
5. Mettre le pied de soutien de la machine en position basse en
déplaçant le levier à ressort entièrement vers l’arrière (vers le
moteur).
ASSEMBLAGE SET DE DENTS ETROIT – Accessoire en option
HFE
IGJ
Clé
Tranchant
Volant à main
Tranchant
Boulon pour
rainure en T
Set de
dents
Set de dents
du toc
Un boulon de réduction pour rainure en T a été fourni pour réduire
la largeur de labourage à 30 cm.
1. Défaire le volant à main de l’avant de la machine et retirer le
boulon pour rainure en T. Faites attention à ne pas perdre les
clés qui pourraient être égarées si le toc du set de dents est
retiré accidentellement.
Important!
Les sets de dents sont interchangeables mais il faut veiller
à les installer avec le tranchant positionné comme indiqué
dans l’illustration.
A. Attaches pour le guidon à l’expédition B. Guidon assemblé.
This manual suits for next models
1
Table of contents
Languages:
Other Masport Lawn And Garden Equipment manuals