MASSOTH ELEKTRONIK GMBH
BIEGEN? – SO GEHT'S
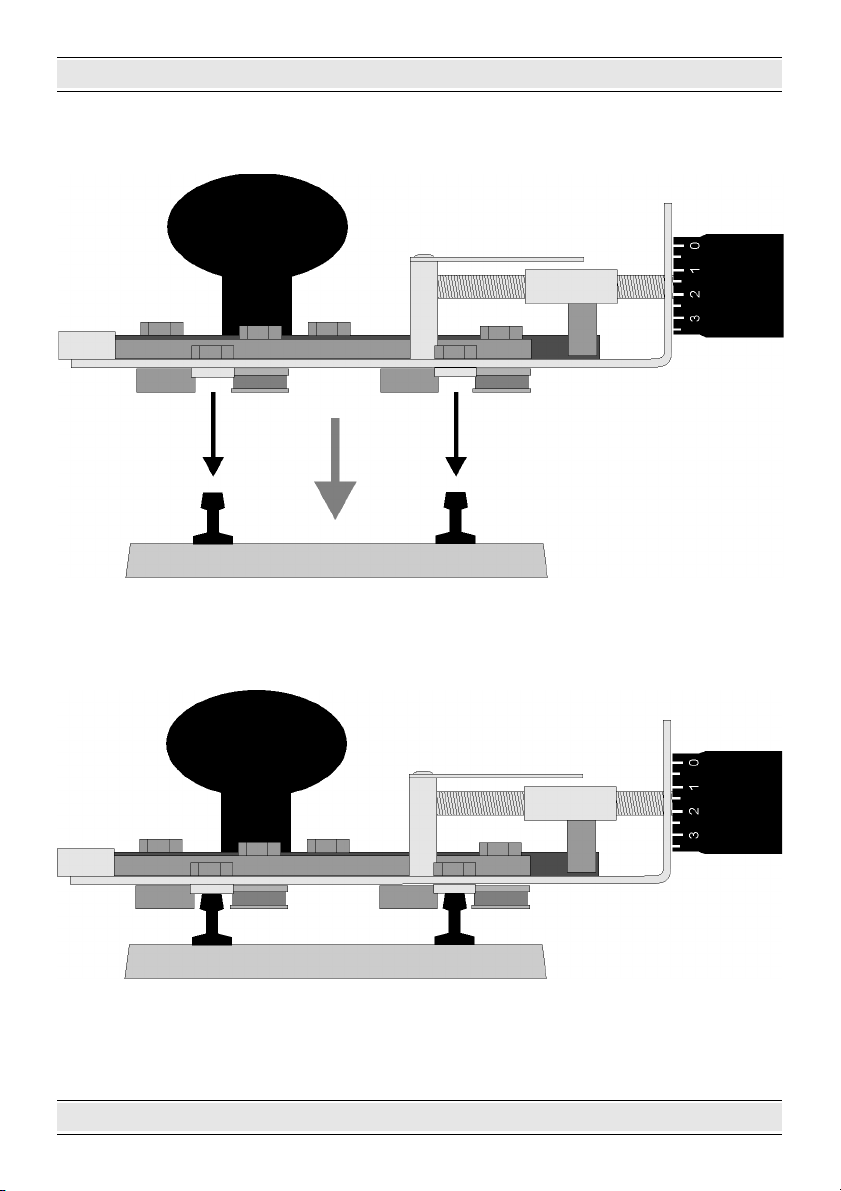
Zu Beginn wird der Rändelgriff so weit linksherumgedreht,
bis sich das Gleis leicht in das Biegegerät hineinschieben,
bzw. das Gleisbiegegerät auf das Gleis aufsetzten lässt.
Dann wird der Rändelgriff soweit nach rechts gedreht, bis
die Kugellager am Gleis ansetzen. Achten Sie darauf, dass
das Gleis noch leicht zu bewegen ist. Dieser Punkt ist etwa
bei Stellung 0,0 erreicht. Drehen Sie den Rändelgriff nun
weiter. Die Kugellager setzen an den beiden Schienenpro-
filen an und beginnen das Gleis zu verformen. Damit im
Gleis kein Knick entsteht, muss das Gleisbiegegerät nun
auf dem Gleis hin- und hergeschoben werden. Dadurch
wird das Flexgleis mit dem eingestellten Radius über die
gesamte Länge verformt.
Lässt sich das Gleisbiegegerät nach einigem hin- und her-
schieben wieder leicht bewegen, stellen Sie den Radius er-
neut enger und fahren Sie mit dem Gleisbiegegerät wieder
mehrmals über das Flexgleis. Wiederholen Sie diesen
Vorgang so lange, bis das Flexgleis den optimalen Radius
erhalten hat. Wir empfehlen, das Biegen in mehreren auf-
einander folgenden Arbeitsgängen durchzuführen. Dies ist
ohne großen Kraftaufwand möglich.
ZU WEIT GEBOGEN?
Sollte der gebogene Radius einmal zu stark gebogen sein,
so lässt sich durch Öffnen, Herumdrehen des Gerätes und
erneuter Einstellung das Gleis stufenlos zurückbiegen.
WEITERE NUTZUNGSHINWEISE
Beim Aufsetzen des Gleisbiegegerätes auf das Flexgleis,
achten Sie bitte darauf, dass die Schienenprofile auf den
Kunststoffschrauben und zwischen den Kugellagern liegen.
Eventuell muss die Position der Kugellager durch den
Rändelgriff korrigiert werden, um das Gleisbiegegerät auf
die Schienen zu setzen.
Liegen die Gleisenden in einer Kurve, so müssen die
geraden Enden üblicherweise mit einer Säge abgesägt
werden um einen parallel endenden Schienenstoß zu
erhalten. Sollten sich die 4 Polyamid-Schrauben im Laufe
der Zeit abnutzen, so sind sie leicht auszuwechseln.
Achten Sie bitte darauf, dass beim Festziehen der Muttern
der Schraubenschlitz immer quer zur Schieberichtung
steht.
WARTUNG + PFLEGE:
Sand, Schmutz und Wasser sollten vom Gerät ferngehalten
werden. Sollte das Gerät einmal verschmutzt sein, so
reinigen Sie es bitte gründlich, unter Umständen mit etwas
Reinigungsbenzin oder Reinungsalkohol. Ist die Mechanik
einmal etwas schwergängig, oder nach der Reinigung,
benetzen Sie bitte das Gewinde und die Schlittenmechanik
leicht mit etwas Öl.
BEND? - THIS IS HOW IT WORKS
To begin, set the large indicator knob completely to the left
until the flexible track slip easily into the Track Bender.
Then turn the indicator knob to the right until the tracks are
secure within the device but still allows the ball bearings to
roll gently underneath. This should be at position 0,0. If the
tracks did not slip into the device then the indicator knob
was turned far enough to the left. Before you begin the
bending process, be sure that the track profiles underneath
lie both flush with the polyamid screw heads and securely
between the ball bearings. Next, take hold of the black
mushroom knob and slide the device along the length of
track you wish to bend. If the end result is a curve that is
too wide, simply turn the indicator knob more to the right
and repeat the process by sliding the device back. It may
take several passes over the tracks back and forth with the
device until you get just the right size curve you want.
Note: the further the large indicator knob is turned to the
right, the smaller the resulting radius. The numbers on the
large indicator knob, as well as on the lever mechanism,
allow you to note an exact setting, so that a specific radius
can be repeated.
BENT TO FAR?
In the event of over-bending your tracks, release the Track
Bender from the tracks, turn the device around, secure the
device back onto the tracks, reset the indicator knob to the
previous setting, and roll the Track Bender across the area
of track you wish to correct. This will straighten out any
curve.
ADDITIONAL ADVICE
Before you begin the bending process, be sure that the
track profiles underneath lie both flush with the polyamid
screw heads and securely between the ball bearings.
Depending on the kind of layout you create, it may happen
that one or more ends of your Flextracks fall within a curve.
Should this occur, the track end profiles can be evened out
by carefully sawing off a portion of the track with a small
hand saw at the place where both track profiles are even
across. This will enable you to connect additional flexible
tracks to this curve. If over time the four (4) polyamid
screws wear out, they can easily be replaced. Please pay
close attention when tightening the nuts of the screws,
making sure the screws are properly placed straight into
their slots.
SERVICE
Sand, dirt, and water should be kept away from the device
at all times. If dirty, please clean the track bender. The
mechanics can be cleaned with standard cleansing alcohol.
Afterwards, please put some oil on the mechanics.
Bedienungsanleitung: Gleisbiegegerät Spur IIm Users Manual: Track Bender for G – Scale
Version: 2.0 Stand: 28.02.0 Seite 2 von 4