3 AA 1.5V BATTERIES
NEGATIVE END INSERTED FIRST
TROIS PILES AA DE 1,5 V
EXTRÉMITÉ NÉGATIVE INSÉRÉE D’ABORD
3 BATERÍAS AA DE 1,5 V
INSERTE PRIMERO EL EXTREMO NEGATIVO
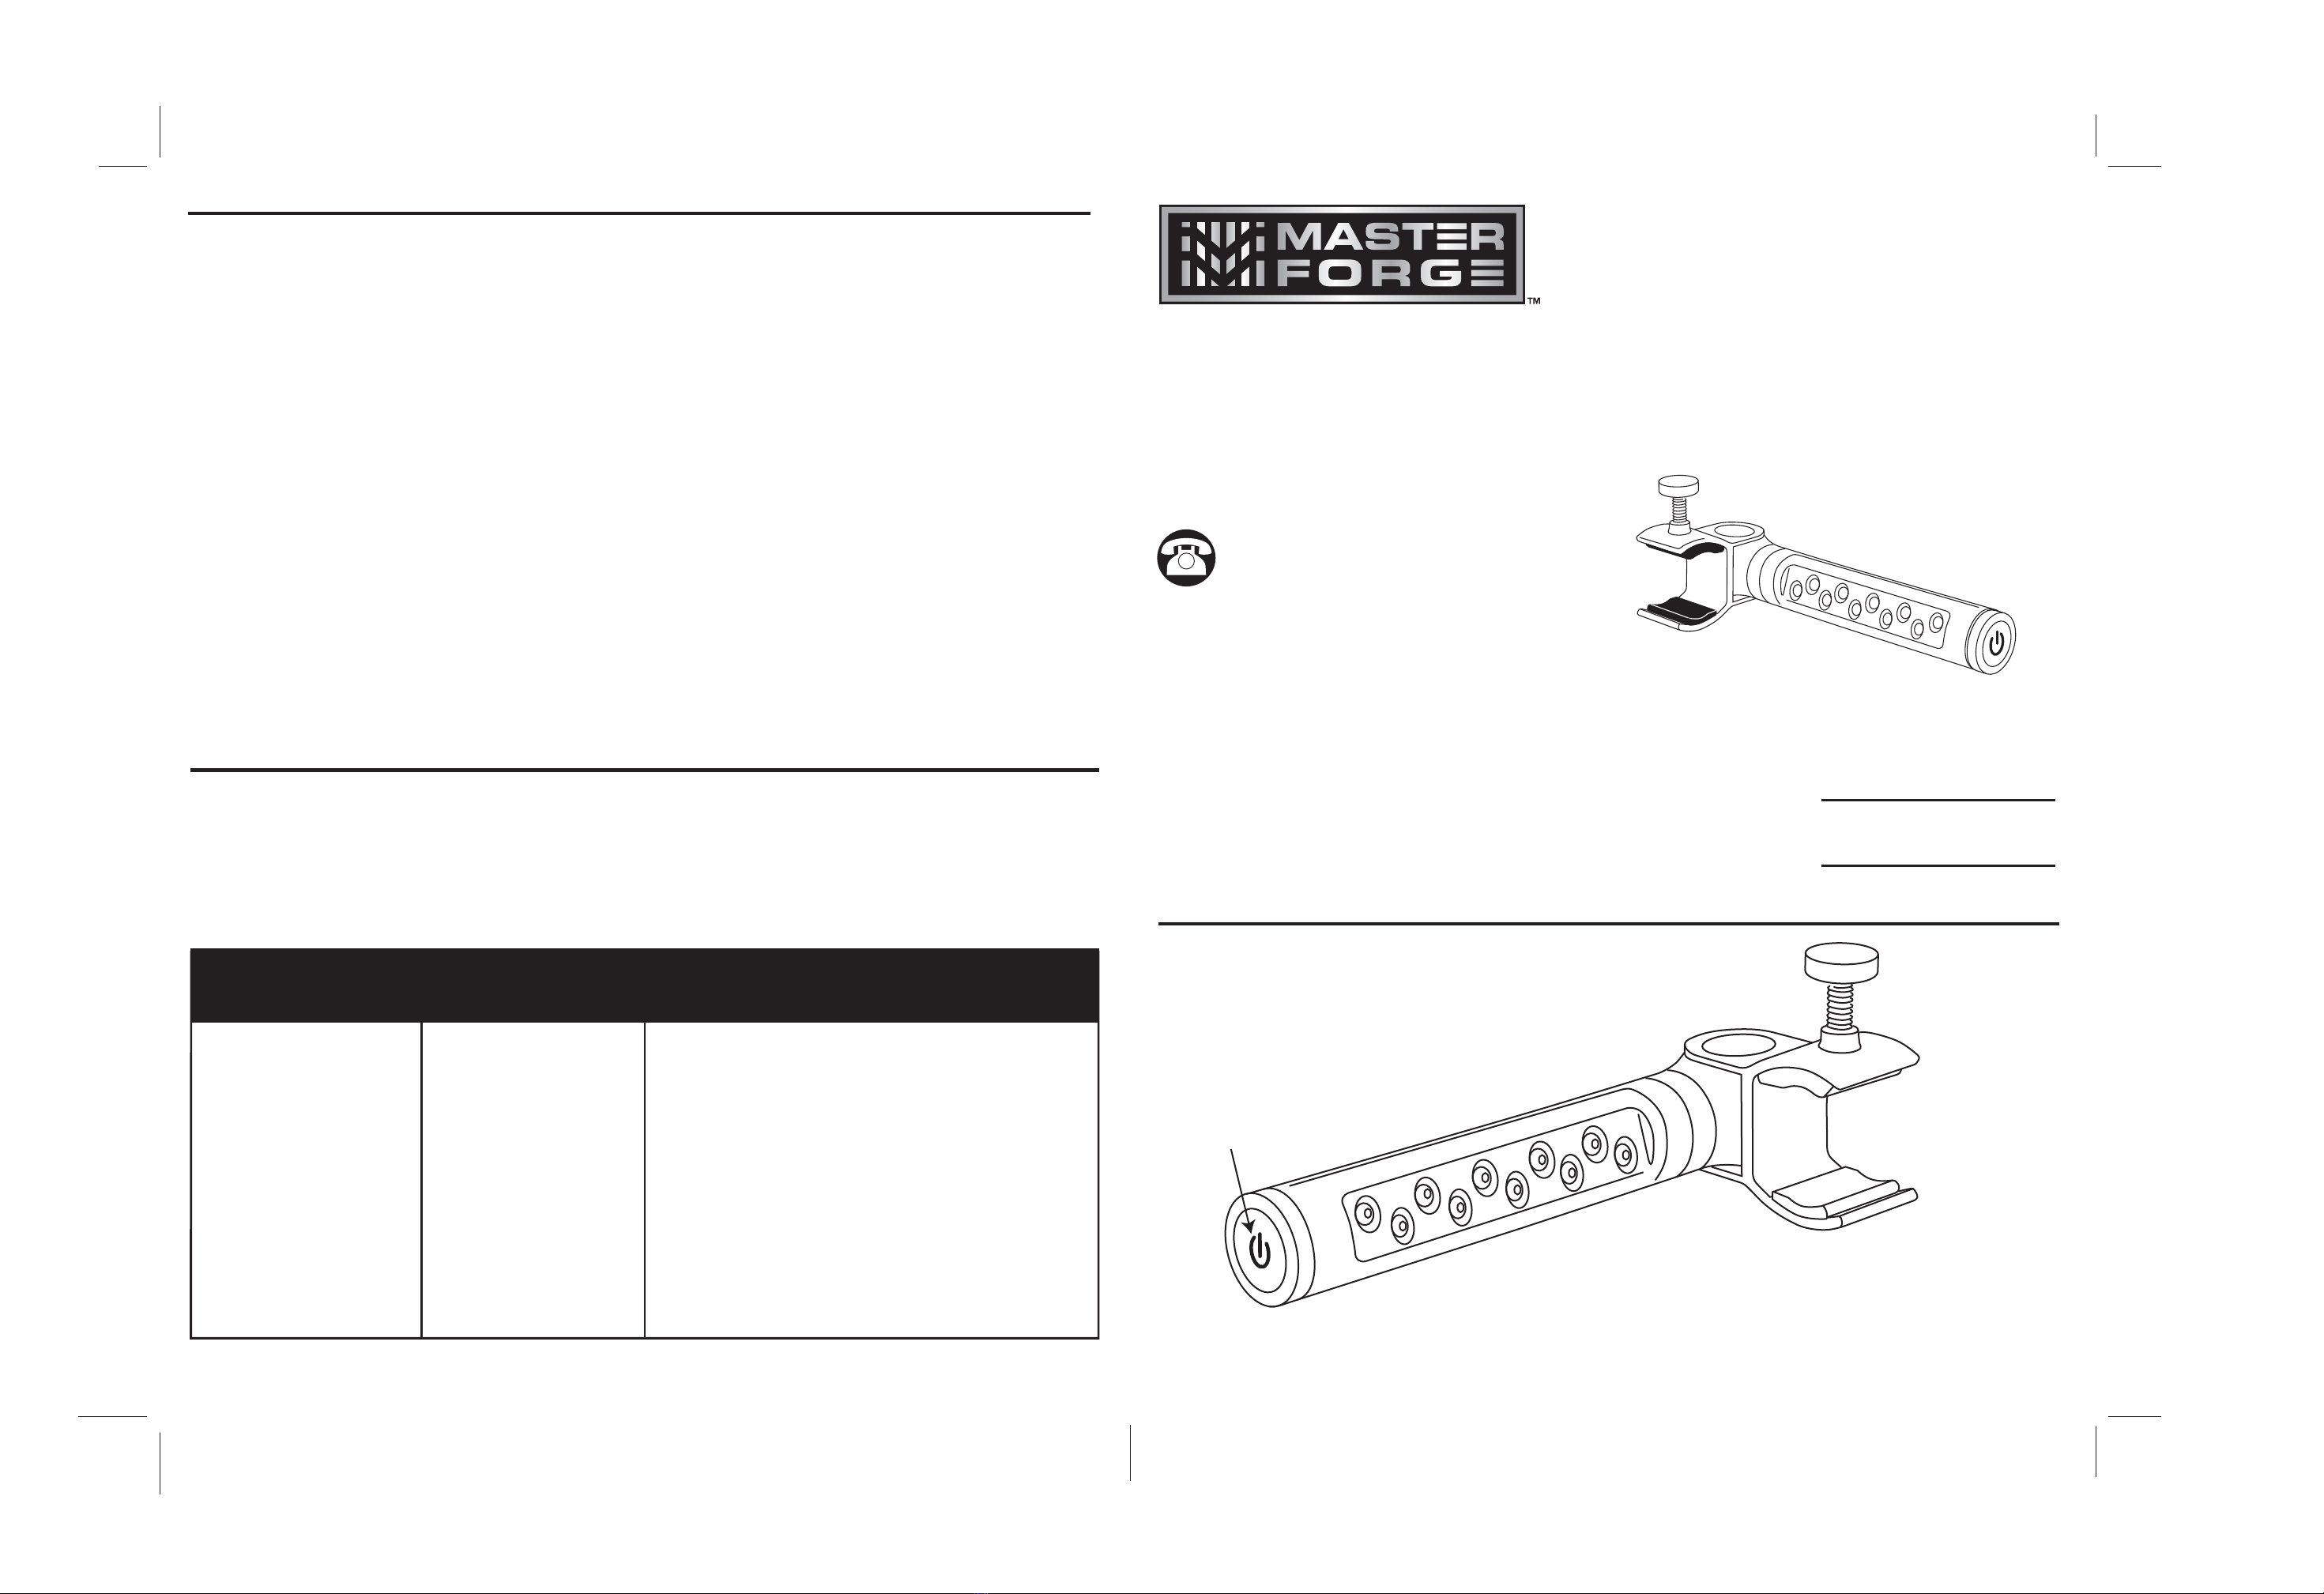
HANDLE MOUNT LED
GRILL LIGHT BODY
CORPS DU LUMINAIRE À DEL POUR
POIGNÉE DE BARBECUE
CUERPO DE LA LUZ PARA PARRILLA
CON LED QUE SE MONTA EN LA MANIJA
SCREW CAP BATTERY
COVER WITH ON/OFF
BUTTON
VISSEZ LE COUVERCLE DU
COMPARTIMENT À PILES
QUI COMPREND LE BOUTON
MARCHE/ARRÊT
ON/OFF BUTTON
BOUTON MARCHE/ARRÊT
BOTÓN DE ENCENDIDO/APAGADO
INSIDE PAGE 3
INSIDE PAGE 2
SAFETY INFORMATION/CONSIGNES DE SÉCURITÉ/INFORMACIÓN DE SEGURIDAD
Please read and understand this entire manual before attempting to assemble, operate or install the product. If you have any
questions regarding the product, please call customer service at 1-800-963-0211, If you have any questions regarding the
product, please call customer service 1-800-963-0211, 8 a.m.-6 p.m., EST, Monday-Thursday; 8 a.m.-5 p.m., EST, Friday.
Assurez-vous de lire et de comprendre l’intégralité du présent manuel avant de tenter d’assembler, d’utiliser ou d’installer le
produit. Si vous avez des questions concernant ce produit, veuillez communiquer avec notre service à la clientèle au
1 800 963-0211, entre 8 h et 18 h (HNE), du lundi au jeudi, ou entre 8 h et 17 h (HNE) le vendredi.
Lea y comprenda completamente este manual antes de intentar ensamblar, usar o instalar el producto. Si tiene preguntas
relacionadas con el producto, llame a Servicio al Cliente al 1-800-963-0211, de lunes a jueves de 8 a.m. a 6 p.m., y los viernes
de 8 a.m. a 5 p.m., hora estándar del Este.
WARNING/AVERTISSEMENT/ADVERTENCIA
CAUTION:/MISE EN GARDE:/PRECAUCIÓN:
Metal handle mount and mounting bolt may become hot during use. Use care when adjusting mounting position while grill is in use.
La poignée en métal et le boulon de montage pourraient devenir chauds durant l’utilisation. Soyez vigilant lorsque vous ajustez la
position de montage alors que le barbecue fonctionne.
El montaje de la manija metálica y el perno de montaje pueden calentarse durante el uso. Tenga cuidado al regular la posición
de montaje mientras la parrilla esté en uso.
HANDLE MOUNT LED GRILL LIGHT
LUMINAIRE À DEL POUR POIGNÉE DE BARBECUE
LUZ PARA PARRILLA CON LED QUE SE MONTA EN LA MANIJA
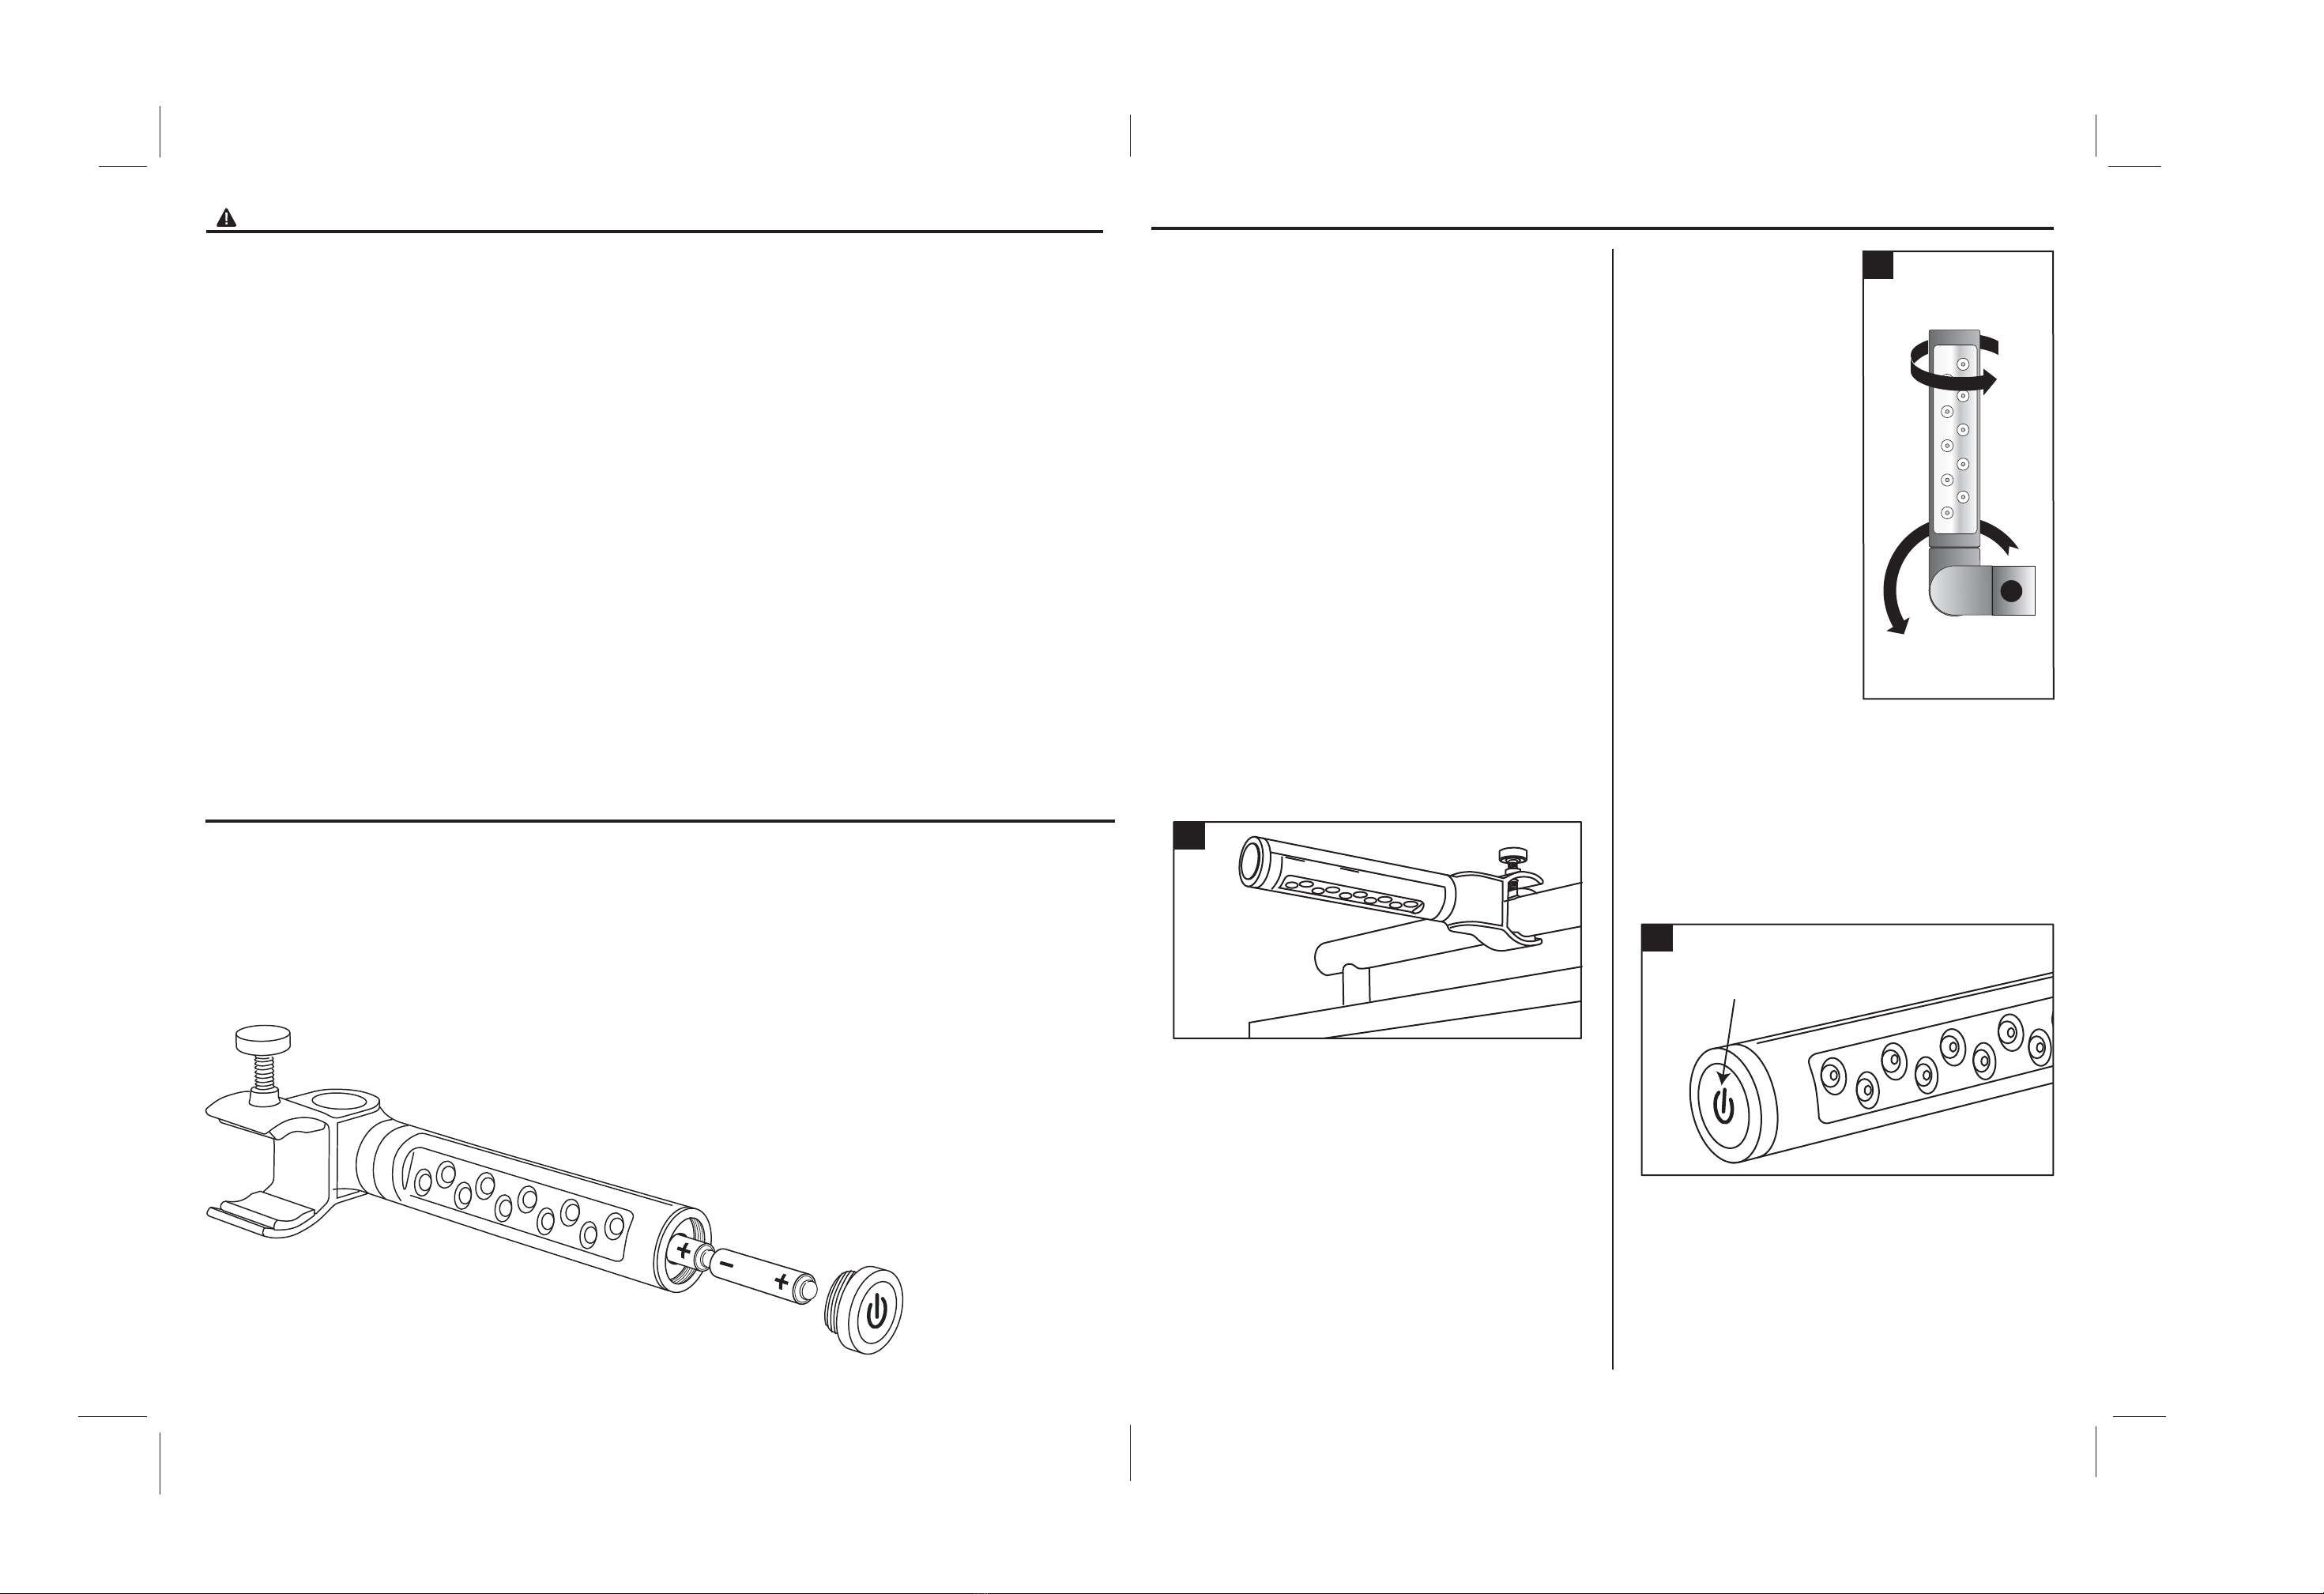
Remove battery cover/ON/OFF Button by unscrewing counterclockwise. Insert 3 AA 1.5V batteries
into the battery compartment
negative side down. Replace battery cover.
Retirez le couvercle du compartiment à piles/bouton marche/arrêt en tournant dans le sens contraire des aiguilles d’une montre
pour le dévisser. Insérez trois piles AA de 1,5 V dans le compartiment à piles, en orientant la polarité négative vers le bas.
Replacez le couvercle du compartiment à piles.
Para retirar la cubierta de las baterías/botón de encendido y apagado, desatornille en dirección
contraria a las manecillas del reloj. Inserte 3 baterías AA de 1,5 V en el compartimiento de baterías
con el lado negativo hacia abajo. Vuelva a colocar la cubierta de las baterías.
1. HANDLE MOUNT:
POIGNÉE:
MONTAJE DE LA MANIJA:
Locate desired mounting area on grill lid handle. Position
the mount so that the light fixture is on the bottom side of
the grill lid handle with the mounting bolt facing towards
you.Tighten mounting bolt until snug. Lift grill lid and turn
ON to ensure that the light illuminates the desired area.
Adjust position on grill lid handle as necessary.
Trouvez la position de montage souhaitée sur la poignée
du couvercle du barbecue. Choisissez la position de
manière à ce que le luminaire soit placé du côté inférieur
de la poignée du couvercle du barbecue et que le boulon
de montage soit orienté vers vous. Serrez le boulon de
montage jusqu’à ce qu’il soit fixé solidement. Soulevez le
couvercle du barbecue et allumez les ampoules pour
vous assurer que l’éclairage est orienté vers la position
souhaitée. Réglez la position sur la poignée du couvercle
du barbecue, au besoin.
Ubique el área de montaje deseada en la manija de la
tapa de la parrilla. Coloque el montaje de modo que la
lámpara quede en la parte inferior de la manija de la tapa
de la parrilla con el perno de montaje orientado hacia
usted. Apriete el perno de montaje hasta lograr un ajuste
ceñido. Levante la tapa de la parrilla y encienda para
asegurarse de que la luz ilumine el área deseada. Regule
la posición de la manija de la tapa de la parrilla según
sea necesario.
BATTERY INSTALLATION/INSTALLATION DES PILES/INSTALACIÓN DE LAS BATERÍAS
OPERATION/FONCTIONNEMENT/FUNCIONAMIENTO
1
3
3
DO NOT mix old and new batteries. DO NOT mix alkaline, standard (carbon-zinc) or rechargeable (nickel-cadmium) batteries.
DO NOT dispose of batteries in fire. Batteries may explode or leak. Please dispose of batteries properly.
Ne combinez PAS des piles usagées et des piles neuves. Ne combinez PAS des piles alcalines, des piles ordinaires (carbone-zinc)
et des piles rechargeables (nickel-cadmium). Ne jetez PAS de piles au feu. Elles pourraient exploser ou couler. Veuillez jeter les
piles de façon appropriée.
NO mezcle baterías antiguas con nuevas. NO mezcle baterías alcalinas, estándar (zinc-carbono) o recargables (níquel cadmio).
NO incinere las baterías, ya que podrían explotar o filtrarse. Deséchelas de manera adecuada.
3. ILLUMINATION:
ÉCLAIRAGE :
ILUMINACIÓN:
Press ON/OFF button to power ON and OFF.
Appuyez sur le bouton marche/arrêt pour allumer
et éteindre.
Presione el botón de encendido/apagado para
encender y apagar la lámpara.
PIVOTS OUT
PEUT PIVOTER
SE INCLINA
ROTATES AROUND
PEUT TOURNER
GIRA
2
2. LIGHT FIXTURE
ORIENTATION:
ORIENTATION DU
LUMINAIRE:
ORIENTACIÓN DE
LA LÁMPARA:
Light fixture can pivot
180 degrees on the handle
mount. Light fixture can
rotate 360 degrees on its
own axis.
Le luminaire peut pivoter
à 180 degrés sur la
poignée. Le luminaire peut
pivoter à 360 degrés sur
son propre axe.
La lámpara puede
inclinarse 180 grados en
el montaje de la manija.
La lámpara puede girar 360
grados en su propio eje.
CUBIERTA DE LAS BATERÍAS
CON TAPA ROSCA CON BOTÓN
DE ENCENDIDO/APAGADO