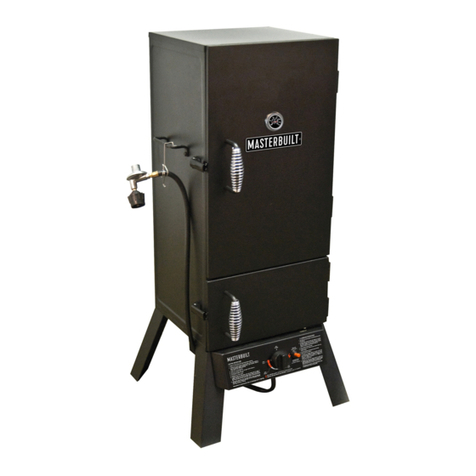
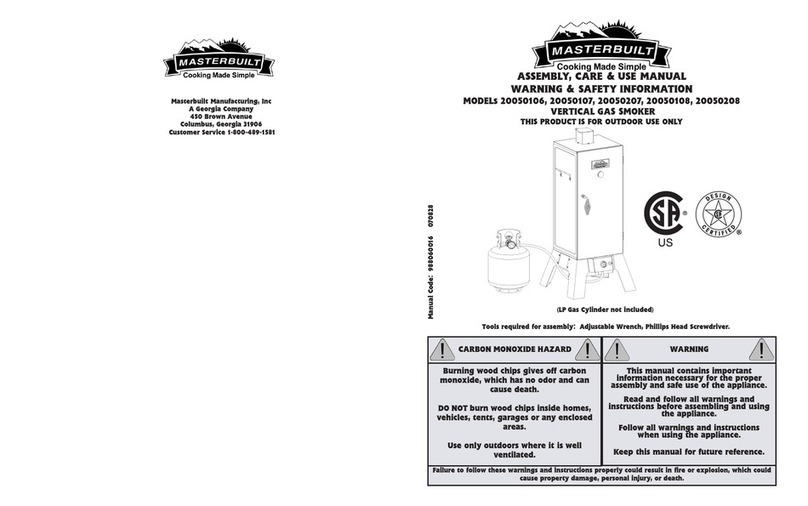
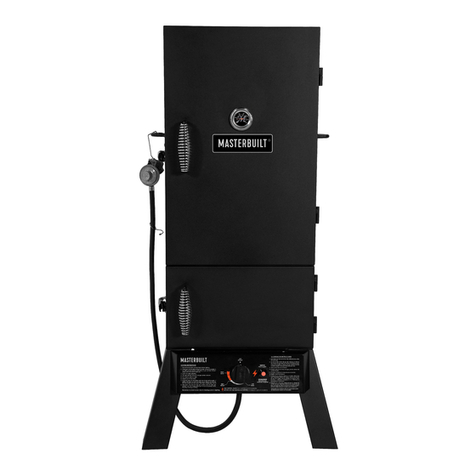
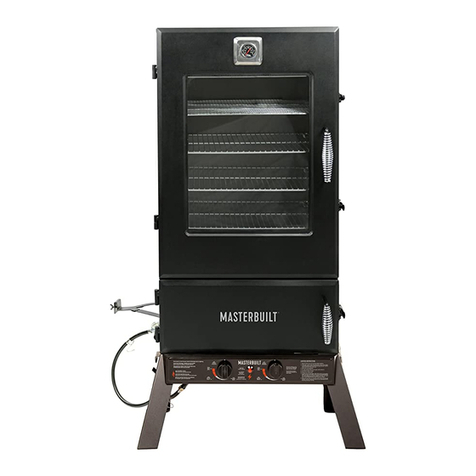
Masterbuilt 20050106 Guide

Cooking Made Simple
ASS,_LY, C_ _US__UAL
WARNING & SAFETY INFORMATION
MODEls 2OO50106j 2005OtO7_ 2OO50207]_ 20050108; 20050208
VERTICAl. GAS SMOKER
THIS PRODUCT IS FOR OUTDOOR USE ONLY
Ii/j \
US
(LIPGas Cylinder not included)
Tools required for assembly: Adjustable wrench_ Ph|lJ_s Head screwdriver.

!


SOAPY WATER TEST WARNINGS & P.ROCEDURFR
Warnings:
•Soapy Water Test MUST be performed each time gas cylinder is connected to burnerthose or
each time it is Used.
• Soapy Water Test MUST be performed outdoors in well ventilated area.
• When performing Soapy Water Test keep smoker away from open flames, sparks or lit
cigarettes.
•Smoker is designed to 'work with propane gas only. Only use gas cylinders marked propane with
this unit. This product will NOT operate with natural gas.
•Never use an open flame to test for gas leaks.
Preparation:
• Remove any cookware from smoker
•Make sure regulator and gas cyJinder valve to OFF position.
• Prepare soapy water solution: (1) part dish washing liquid (or more if desired), (3) parts water.
•Apply soapy water solution to gas cylinder valve, regulator and hose length up to burner.
Testing Gas Valve:
•Turn gas cylinder valve ON and watch for bubbles. DO NOT LE.AVE GAS ON MORE
THAN I2 SECONDS. If bubbles appear, stop, turn gas cylinder OFF and retighten fitting.
Repeat test.
Testing Regulator and Hose:
• AFTER gas cylinder valve has passed Soapy Water Test, turn gas cylinder valve ON,
open regulator control valve one full turn and check for bubbles at valve location, along
full length of hose and at burner connection. DO NOT LEAVE GAS ON MORE THAN I2
SECONDS. If bubbles appear, stop, turn regulator valve OFF, turn gas cylinder OFF and
retighten the connection that is leaking gas. If hose is source of leak, STOP, do not use
unit. Hose must be replaced.
• When test is complete, and there are no leaks, wait minimum of 5 minutes for gas fumes
to diminish before lighting cooker.
DURING ANY PORTION OF SOAPY WATER TEST IF BUBBLES CONTINUE TO
APPEAR, STOP, DO NOT USE UNIT, CONTACT LOCAL PROPANE DEALER OR
MASTERBUILT CUSTOMER SERVICE @ 1-800-489-158I.
Note: Use 20LB (gkgs) gas cylinder that has a protective collar with this unit.
Cylinder NOT included with this unit.
PLACEMENT OF APPLIANCE FOR SAFETY
Before using smoker check wind direction & place cylinder UPWIND, upright 12" (30.5cm) away from unit,
This is necessary so that cylinder supply system {s arranged for vapor withdrawaL
_WARt_ING: HOSEIS A TRIP HAZARD
II • i) MI'i
I:" (3_¢m) Apart

REGULATOR,BURNER AND GAS VALVE CONNECTION & OPERATIQ_
__•Inspect hose before each use, If there are signs of wear, cuts, or leaks, replace
O O unit, DO NOT USE.
•Inspect burner before each use, Check burner and burner venture tube for
insects and insect nests. A clogged tube can lead to a fire beneath appliance,
•Connect hose regulator to LP Gas Cylinder-
t_ _ 1. Make sure gas cylinder valve isclosed. Turn knob clockwise untUit stops.
_2. Make sum contro] knob on smoker is in the "OFF _posit[on.
A_ '_ _?_T 3. Remove protective cap from gas cylinder and coupling nut if applicable,
_-_-_ I 4. Center and insert regulator nipple into va ve outtet on gas cy nder as
| i _7.7s, shown in figure on the left, Turn regulator coupling nut clockwise until it
I i I,4_ stops. DO NOT OVER TIGHTEN.
_. _/ " Perform Soapy Water Test.
_--_._ • To use turn gas cylinder ON, turn regulator control valve ON, turn burner control
;_-- .,_ knob clockwise end push gn tot button to ght
_z.=_.,,_..,,,,,,,(z_=m)•If ignition does not occur, wait one minute and re-try. If ignition still does not occur
=
y_LLCr,_t
R_ME
wait five minutes and then match _ight.
After use turn burner control knob OFF, turn regulator control valve OFF, then turn
gas cylinder OFF.
Burner control knob adjusts burner flame. Turn control knob clockwise SLOWLY to
increase flame. Turn control knob counter-clockwise to decrease flame and shut
flame off.
Visually check burner flame. A CORRECT FLAME should be blue with a small
amount of yellow at the tip. An INCORRECT FLAME is excessively yellow and
irregular. If an incorrect flame occurs, turn burner control knob to "OFF position,
turn off regulator and propane tank. Allow unitto cool and then clean burner. Let
burner completely dry before re-lighting.
r_!ATCH LIGHT INSTRUCTIONS
1. Read all instructionsand warnings before light{rig.
2, Check gas controlvalve and gas _jlinder valveto be certain
in OFF position before connec_ng togas cylinder. Perform
soapy water test before each use.
3. Open door during light_ng.
4. Turn gas controlvalve on, turn gas cylinder valve on,
5. Ptace a litfireplace match cfose enough to burner to ignite
6. After each use, first turn gas control valve off, then gas
cylinder valve off. Always aIIow unit to cool completely
before touching, moving or stodng.

PARTS LIST
%
ITEM NO+ IQUANTLTY
1 1
2 1
31
43
..... 5........... +t ....
6 2
71
8 1
DESCRIPTION
Smoker Body
Smoker DOOT
$mokes_a_
Leg Frames
Leg Frame with hole
91
1; 2 Body Han dies
12 t Ftame D_k Bowl
rrmM No. _UAh'Tn_ DiSCretiON
13 1 water Bow]
t4 4Cooking Grat_
15 1 Water Bowl Holdey
_6 t Temperature 6auge
17 1valve (pre-mounced)
iSmall Leg Frame Connector Plat_ ....... 118 ...... 1 ReguIatortHose (we-mounted)
iLarge Leg Frame Connector plar.e t9 1 Stainless Stee]Bumer _re_mounted)
Con_:rolPanel ' 20 .............t....... He_ Shield (pre-mounCed to b_Jmer
box)
Burner Box 2t 1 Burner Corl_l K_eb ipi'e-mc_un_edi
22 t AU[o Ignitor (pre-mounted)
23 1 Hose Retention Hook (pre-mounted)

HARDWARE LIST
Crosshe_d PhillipsHex SpzingClip SpringHare KnurlNut
HEngeSCreW HeadBolt city- 1 q_" _ qty - 1
qty -34 qty- 4
,REP1.ACEME_ pAR_,,,,LIST
ITEM NO. DESCRIPTION
9_'_o16o BodyKit......
91"1060012' I)oor'wir.h Logo PFate ..............
990061}161 Leg Frame Kit ....
990060'162 Leg Frame with HoIe KJt
990060163 SmallLe__me connector_t ' '
990060164 "LargeLegFrameConnectorI<_'
990060156 Smokestack Kit ' '
990060158 Door Hand]e Kit "
990060157 Body Handle Kit
99oo_69 'c0n_ panelK_t .....................
990060170 Burner BOX Kit
"'990060232 Heat Shield Kit .........................................
990060"I65 TernperaW_ Gauge Kit ............
Hlo6o0o3 cooldngGrate ..........................................
911060004 Water BOW] Holder .........................
9110600O5 Water Bowl
911060006 Flame Dis}( BOW]
H1060001 t_egulatodHose ................................................
911060007 Sl3Jnle_s Steel Burner ..............
9i'_060014 Control K'o'b' '
970060328 ignitor Assembly Ki't....
990060291 Valve Kit ....................................
988060016 [p_"tlucZ:JonManual ......................
998060012 Hardware Bag
BO NOT RETURN TO RETAILER
STOP_ ForAssernblyAssistance,Missing orDamaged Parts
Call:MASTERBUILTCustomer Serviceat 1-800-489-1581 6

IMPORTANT:
Attach leg
with hi)le (5)
at this corner
Before assembly read
mStTUcdons carefully.
TOOLSneeded for assembly:
PhillipsHead screwdriver
Adjusrab]e Wrench
Assemble unit on a cleanr fiat
surface,
¢ere_uJl9position grlU us
shown,
Do not tighten screws all the
wag, Legj_mes may need €o
be adjusted during nssemblg.
STEP 1.
Attach leg frames (4,5) to botl:om of
smokerbody (t)usingscrews(A),
Make sure]egwidl hole(5)is
mounted asshowr_
Do not _screws yet
\/
L
Do nor tighten screws all the
wag. Leg_ames may need to
be adjusted during assemblg,
STEP 2.
Attach largeleg connectorp]aP_(7)
to backlegs asshown usil_ screws
(A).
Attach smallleg connector plate (6)
on sideasshownusing screws(A).
Repeaton otherside
Donot _s_ews yer_

®
STEP 3a.
Atr.achburnerbox (9)to control panel (8)
usingphillipshexhead bolt (B)as shown.
Make sure valve slidesinsideburner.
STEP 3b.
Firmlyattach lgnt_on wire to spark
module and back tide of ptezo ignitor
on control panel,
STEP 4a.
Position controlpanel!burnerbox
assembly(8,9)over center hole in
bottom ofsmoker body. A_.achone
sideof burnerbox to smoker body
us_g screws (A)as showrL Repeat on
other sid_
(Heatshleldnotshownforclarity3
STEP 4b.
Securecontrolpanelto front legs using
bolt(B),
_w tlght_ all_rews a_dbo_ dowrL

CareJuily position grill as
shown.
STEP 5.
Slidetop of smokestack(3)openas
shown. Anglesmokestackand push
upthrough ho]e on top of smoker
body.
Attach using screws _).
STEP 6,
Mount bodyhandle (11)to smoker
bodyusing screws(A).

STEP 7.
lnse_ pegsof smoker door(2)into
smok_rbody
simultaneously.
AU_Ch hosemten_on hook (23)to
smallhole In left I_ontleg. Cliphose
in_ hook.
SllF.P 8.
Insert doorhandle (t0) Intodoor,
Turn handleand pushso handle
goesinto doorup to attached spring.
Pushdoorhandle springplatefD)
over doorrod inside smokerand
alignside holeswith holes tn smoker
door,
Attach plate to doorwith screws(A).
Pushspringclip (0 through
remaininghole on doorhandle to
secure,
10

STEP 9.
insert tempem_re gauge (_o-')and
securewith nut {E)asshowrL
STEP t0.
Place _o_ng grates_1 water
bowl grate (15),water bowt (13)and
flame diskbowl "12)insidesmoker
as shown.
SMOKER iS READY FOR USE.
|1

SAFE STORAGE AND MAINTENANC, E
•Inspectallhardwarein assembledpartsfordght_essona regularbasisto insureunitisinsafe
workingcondition.
• ALWAYSallow unit to cool completeiy before handling.
• Clean unit, incIuding special surfaces such as cooking grates with mild cleaning agents. Wipe
outside of unit with damp rag. DO NOTuse oven cleaner.
• ALWAYScover and store cold unit in a protected area.
• Unit is made of steel and may rust over dine. Ifrusting occurs on outside surfaces, clean area
with sand paper or steel wool, then cover with heat resistant paint.
• NEVER USE PAINT ON INSIDE SURFACES OF UNIT.
WOOD SMOKING GUIDE FOR MEATS
WOOD FLAVOR
Hickory
Pungent,sr_o_,b_o_lil_ l_aw¢
Mesquite
Swset_d de!Sc_flsvar
Alder
Delicate,wood _k= ffsvor
Pecan
_o_d an_ hearty i_avot
Maple
Sw_e_,sublle#mr
Apple
swee_ _e_ea_ f_avor
Cherry
_:w_et, deJicate flavt_r
POULTRY FISH HAM BEEF PORK LAMB
€" ,/ V" 4" V
v" V" V
V" €" V_
v" €"
,," €,
- When outsidetemperature is coolerthan 65°F(1tO and/or a]titudeis above3_00 feet (1067m),
addidona! coeldngdrnemay be required, To |rtsurethat meat iscompletelycooked use a meat
thermometer to test internal temperature,
. Lifting grilllid during cooking process may extend cooking time due to heat loss.
12

Pot Roast 4 -5 ]bs 200_F 7 - 8 [be 3-4 qts 2 - 3 cups 3 - 4 hrs N0°F (60°0 Rare
(arm, top, (_.8-2.3kgs) (95"0 (31-3.6kgs) (2.8-3.8|) (0.56-0.831)
chuck, 160CF (71°Q Hedium
blade) 170=F (77_C)Well Done
SrJsket 3 _ 4ibs 200°F 7- 8lbs 4q_ ...... 3 cups 3- 4.5 hrs 170°F (7/=0 Well Done
('L4-t0kgs) {93°O (32-3.6kgs) (3,8|) (0,83])
Loin Roast, 3- 4 Ibs 200_F 8 ibs
bone in (t.4-1.Skgs) (93°0 8,6kgs)
s-7'ib_ 8lbs
(2,3-32P_,S) (3,6P..gS)
Loin Roast, 3 - 5'|be 200_F 10 ]be
bone]ess d.4-2,3kgs) (93°0 (4.6kgs)
Spare Ribs 4 - 6 ]be 200°F 8 - 10 Ibs
(t.8_221_s) (93"C) (3.6-4.6kgs)
7-10 ]bs t0 |be
(32,-4.6kgs) {4,6kgs)
4 q[s 2 cups 3.5 - 4.5hrs t?O°F(??°0Well Done
(3.81) (0÷561)
6 qts...... 3 cups 5-7hrs
(5,7J) (0,831)
4-5q_s 3 cups 3.5- 5,5hrs 170_F(77'0 Well Done
(3,s-4,7t) (0,83])
4qts 3 Cups 2.5- 3.5 hrs Weli donewhen meat:
(3.8]) (0.83]) pulls away from bone
S-6 qts 3 cups 3.5- 5hrs
H.7-5,71) (0,83J)
Chicken- 2 - 3Ibs ea 200°F S-7fbs 3-4 qts 2 cups 2.5 - 3.5 his 180°F (82%)
2 whole (0,9-1.4_:gs) {93'_0 _,3-32kgs) (2.8-3.81) (0.561) (Leg moves easily in
joint)
Turkey" ' 8 - 10 Ibs 200°F 8 ]bs 5 qts 3 cups 4-6hrs 185_F (85"C)
{3.6-4.6k_s) (93°C) (3.6_5)' H.T]) (0.830 (Leg moves easily in
ti - 13 Ibs 8 - t0 ibs 0 q_ 3 CLI]_S 6 - 7.5 hP; joint)
(S.0-5,9kgs) G.6-4.6kgs) (5,71) (0,83])
Salmon 6-;;ibs '200_F 10 Ibs S -6 q_s 3 cups 4-6.5 hrs Flesh whi_e, Rakes
(2.7-3.2kgs) (93"C) (4.6kgs) (4.7-5.71) (0.831) when forked
Fish Fillets Full Grate 200_F 5 ]bs 3 q_s ........t - 2 cups 1.5 - 2.5 hrs
(93°0 (2,3kgs) _2.8]) (018-0.561)
Shrimp, ........ FU!] Gra_e 200_F 5lbs 3 q[s 1- 2 cups 1 - 2 hrs ShnmP pink
Clams, Crab (93"0 (23kgs) (1.8]) (028"0.561)
Legs Shells open
!el:c. (93=0 (32-4.6kgs) 0,811 (0,56-0.83!)
Pheasan% 5 _7 ]bs 200=F 8 - 10 Ibs 4 - 5 q_'" 2-3cups
DUC]_ etc, (23-3.2kgs) (93°C) {3.6-4.6kgs) (3.8-4.71) (0.56-0.83])
joint
45hrs _eo-_s_o_(s2-ssoo
We]]Done
15

WARRANTY lllFORIV_TIOlt
Masterbui[t warrants itsproductsto befree from defectsin materialand workmanship under proper assembly,
normal useand recommended care for gOdaysfrom the date of original retail purchas_
Hasterbuilt warranty does not coverpaint finishas it may bum off during normalus_
Hasterbuiit warranty doesnot coverrustof the unit,
Masterbuiit requires reasonableproof of purchasefor warranty claimsand suggests that you keepyour receipt,
Upon the expiration of suchwarranty, a]!suchliabilityshaUterminate.
Within the statedwarranty period,Masmrbutlt,at its discretion, shall repairor replace defectivecomponentsfree of
chargewith owner being responsiblefor shipping. ShouldHasterbuilt require return of componentCs)inquestion for
inspechonHasterbuiit wilI be responsible for shippingcharges to returnrequested item.
Thiswarranty excludes property damage sustained due to misuse, abuse, accident_damage arisingout of
transportation,or damage incurred bycommercialuse of this product.
Thisexpressed warrunttj is [hesole warran_ given bg Mas_erbuilt and is in lieu of all o_er warranrJes,expreSsed
orimplied including implied warrant, merchanmbili_ orBmess for aparticularpurpose.
Neither Hasterbuilt nor the retail establishmentsellingthis produ_ hasauthority to make anywarranties otto
promiseremediesin addition to or inconsistentwith thosestated above.
Hasterbuiit'smaximum liability,in any event,sha]!not exceed the purchaseprice of the produce paid bythe original
c_nsumer_purchaser,s_me sta[asdo n_t au_w _e exdusion _r _m_tad_n _f inciden_a__r consequen_a_damage_
in sucha case,the above limitationsorexclusionsmay not be applicable.
¢a]ffomla residents only: No[ withstandingthis limitation of warranty, the fo]]owing specificres_chons apply; if
service,repair, or replacement of the product isnot commerda]iy pracdca],the retailer se]]ingthe product:or
Hasr_rbuiltwltl refund the purchasepricepaidfor the product,lessthe amount direr_y attributable to useby the
originalbuyer priorto the discoveryof the nonconformity.Owner m_ take the pmduc_to the reta]! establishment
se]ffngthis product in order to obtalnperformanceunderwarranty.
Thisexpressedwarranty givesyou specificlegal fights,and you may also have or.herdghtswhichva_ from state to
COMPLETE& RETURN TO
ATTN: WARRANTY REGISTRATION
blasterbuil¢ Manufa¢¢uringf Inc.
450 Brown Avenue, Columbus_GA 31906
Name:
Address: ........................
City:
Srate/Province:
Phone Number:
Model Number:
Purchase Date:
PostalCode:
:E-MailAddress:
Seria!Numbee..
Placeof Purchase:
t4

Masterbuilt/4anufaccuztng_ ]no
A Clee_lla Company
45O Brown Avenue
Co|umbu,5_Geo_lJa 3'1906
customer Service S..800..489.458t
Other manuals for 20050106
1
This manual suits for next models
4
Table of contents
Other Masterbuilt Smoke Alarm manuals