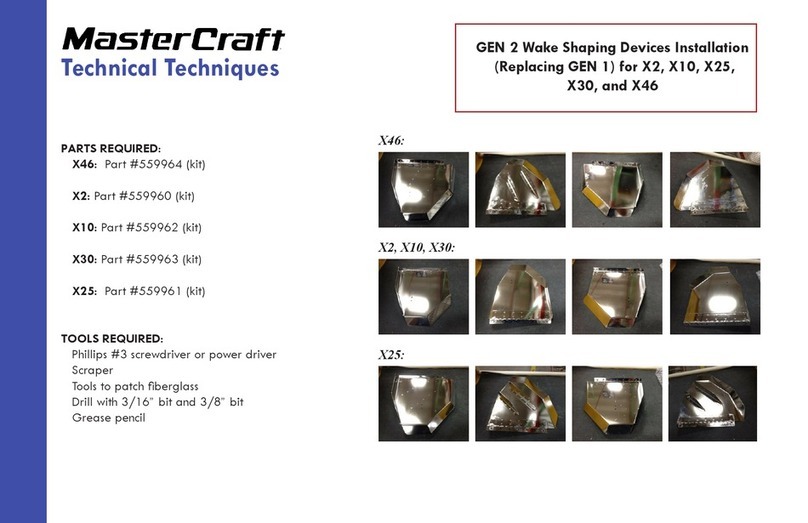
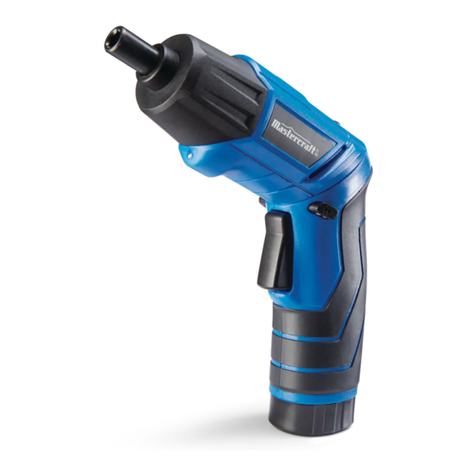
MasterCraft 054-2822-4 User manual

7.2 V LITHIUM-ION
CORDLESS SCREWDRIVER
054-2822-4
Owner’s Manual
PRODUCT SPECIFICATIONS
Rotation:
Clockwise or counter clockwise
Variable speed:
0–400 RPM (no load)
Variable torque:
17 positions (0–80 in/lbs)
Hex drive:
Quick release ¼” (6.35 mm)
Battery:
Integral 7.2 V, 1.1 Ah Lithium-ion
Battery charger:
3–5 hour
Charger input:
120 V AC, 60 Hz
Charger output:
9 V DC, 400 mA
Weight:
2 lb 2 oz (0.97 kg)
NEED ASSISTANCE?
Call us on our toll-free Customer Support Line:
1-800-689-9928
Imported by Mastercraft Canada Toronto, Canada M4S 2B8

2
Product specifications ………….…………………………………………………….
1
Table of contents ……………………………………………………………………...
2
General safety warnings ……………………………………………………………..
3–4
Eye, ear & lung protection ……………………………………………………………
3–4
Electrical safety ……………………………………………………………………….
4
Power tool safety ……………………………………………………………………...
5–7
General safety rules …………………………………………………………………..
5
Work area ………………………………………………………………….…………..
5
Electrical safety ……………………………………………………………………….
5
Personal safety ………………………………………………………………………..
5–6
Use and care of power tools .………………………………………………………..
6
Service …………………………………………………………………………………
6–7
Specific safety rules …………………………………………………………………..
7–8
Battery and charger safety …………………………………………………………..
8
Symbols ………………………………………………………………………………..
9
Know your cordless screwdriver ……………………………………………….......
10
Accessories and contents ……………………………………………………………
11–12
Available accessories ………………………………………………………………...
11
Contents ……………………………………………………………………………….
11–12
Assembly and operation ……………………………………………………………..
13–22
Charging the battery ………………………………………………………………….
13
Battery charge status …………………………………………………………………
14
Battery charging status ……………………………………………………………….
15
Installing screwdriver bits …………………………………………………………….
16
Forward/reverse switch ………………………………………………………………
17
Variable speed trigger switch ………………………………………………………..
17
Adjusting the torque collar …………………………………………………………...
18
Screwdriver worklight …………………………………………………………………
19
Preparing screw holes ………………………………………………………………..
20
Driving screws …………………………………………………………………………
21
Drilling ………………………………………………………………………………….
22
Maintenance …………………………………………………………………………..
23–24
Lithium-ion battery performance …………………………………………………….
23
Lithium-ion battery maintenance …………………………………………………….
23
Battery pack removal and preparation for disposal ……………………………….
24
Exploded view …………………………………………………………………………
25
Parts list ………………………………………………………………………………..
26–27
Warranty ……………………………………………………………………….………
28–29
TABLE OF CONTENTS

3
EYE, EAR & LUNG PROTECTION
This instruction manual includes the following:
General Safety Rules
Specific Safety Rules and Symbols
Functional Description
Assembly
Operation
Maintenance
Accessories
!
ALWAYS WEAR EYE PROTECTION THAT CONFORMS WITH CSA
REQUIREMENTS or ANSI SAFETY STANDARD Z87.1
FLYING DEBRIS can cause permanent eye damage. Prescription
eyeglasses ARE NOT a replacement for proper eye protection.
WARNING: Non-compliant eyewear can cause serious injury if
broken during the operation of a power tool.
SAVE THESE INSTRUCTIONS FOR REFERENCE
WARNING: Use hearing protection, particularly during extended
periods of operation of the tool, or if the operation is noisy.
!
GENERAL SAFETY WARNINGS
CAUTION: Before using this tool or any of its accessories, read this
manual and follow all Safety Rules and Operating Instructions.
!

4
ELECTRICAL SAFETY
WARNING: To avoid electrical hazards, fire hazards or damage to the
tool, use proper circuit protection.
This tool is wired at the factory for 120 V operation. It must be connected to
a 120 V, 15 A circuit that is protected by a time-delayed fuse or circuit
breaker. To avoid shock or fire, replace power cord immediately if it is worn,
cut or damaged in any way.
GENERAL SAFETY WARNINGS
WEAR A DUST MASK THAT IS DESIGNED TO BE USED WHEN
OPERATING A POWER TOOL IN A DUSTY ENVIRONMENT.
WARNING: Dust that is created by power sanding, sawing, grinding,
drilling, and other construction activities may contain chemicals that are
known to cause cancer, birth defects, or other genetic abnormalities. These
chemicals include:
Lead from lead-based paints
Crystalline silica from bricks, cement, and other masonry products
Arsenic and chromium from chemically treated lumber
The level of risk from exposure to these chemicals varies, according to how
often this type of work is performed. In order to reduce exposure to these
chemicals, work in a well-ventilated area, and use approved safety
equipment, such as a dust mask that is specifically designed to filter out
microscopic particles.
!

5
GENERAL SAFETY RULES
WARNING: Read and understand
all instructions. Failure to follow all
instructions listed below may result in
electric shock, fire and/or serious personal
injury.
WORK AREA
Keep your work area clean and well lit.
Cluttered benches and dark areas invite
accidents.
Do not operate power tools in potentially
explosive environments, such as in the
presence of flammable liquids, gas or dust.
Power tools create sparks that may ignite
dust or fumes.
Keep bystanders, children and visitors
away while operating the tool. Distractions
can cause the operator to lose control.
ELECTRICAL SAFETY
Double insulated tools are equipped with a
polarized plug (one blade is wider than the
other). This plug will only fit into a
polarized plug one way.
If the plug does not fit into the outlet
properly, reverse the plug. If it still does not
fit, contact a qualified electrician to install a
polarized outlet. Do not alter the plug in
any way. Double insulation eliminates the
need for the three-pronged grounded
power cord and grounded power supply
system.
Avoid contact between the operator's body
and grounded surfaces such as pipes,
radiators, ranges, and refrigerators. There
is an increased risk of electric shock if the
operator's body is grounded.
Do not expose power tools to rain or wet
conditions. Water entering the power tool
will increase the risk of electric shock.
Do not abuse the cord. Do not use the
power cord to carry the tool or to pull the
plug out of the outlet. Keep the power cord
away from heat, oil, sharp edges, and
moving parts. Replace a damaged power
cord immediately. A damaged power cord
increases the risk of electric shock.
When operating a power tool outdoors,
use an outdoor-rated extension cord type
“W-A” or “W”. These cords are rated for
outdoor use and they reduce the risk of
electric shock.
PERSONAL SAFETY
Stay alert, be aware of the surroundings,
and use common sense when operating a
power tool. Do not use a power tool while
tired or under the influence of drugs,
alcohol, or medication. A moment of
inattention while operating a power tool
may result in serious personal injury.
Dress properly. Do not wear loose clothing
or jewellery.
Contain long hair. Keep hair, clothing, and
gloves away from moving parts. Loose
clothing, jewellery, or long hair can get
caught in moving parts.

!
POWER TOOL SAFETY

6
PERSONAL SAFETY –cont’d
Avoid accidental start-ups. Verify that the
switch is in the OFF position before
plugging in the tool. Carrying a power tool
with a finger on the switch or plugging in a
tool that has the switch in the ON position
invites accidents.
Remove adjusting keys and wrenches
before turning the tool ON. A wrench or
key that is left attached to a rotating part of
the tool may result in personal injury.
Do not overreach. Keep proper footing and
balance at all times. Proper footing and
balance allows the operator to maintain
better control of the tool in unexpected
situations.
Use safety equipment. Always wear eye
protection.
Use a dust mask, non-skid safety shoes, a
hardhat, or hearing protection when
appropriate.
USE AND CARE OF POWER TOOLS
Use clamps or another practical means to
secure and support the workpiece to a
stable platform. Holding the work in a hand
or against the body is not stable, and may
lead to loss of control.
Do not force the tool. Use the correct tool
for the application. The correct tool will do
the job better and safer when used at the
rate that it was designed to work at.
Do not use a power tool if it cannot be
turned ON or OFF using the power switch.
A tool that cannot be controlled using the
switch is dangerous, and must be repaired.
Disconnect the plug from the outlet before
making any adjustments, changing
accessories, or storing the tool. Such
preventive safety measures reduce the risk
of accidental start-ups.
When power tools are not in use, store
them out of the reach of children or
untrained persons. Tools are dangerous in
the hands of untrained users.
Maintain tools with care. Keep cutting tools
sharp and clean. Properly maintained
cutting tools with sharp cutting edges are
less likely to bind, and are easier to
control.
Inspect the tool for misalignment or binding
of moving parts, broken parts, and any
other condition that may affect the
operation of the tool. If it is damaged, have
the tool serviced before using it. Many
accidents are caused by poorly maintained
tools.
Use only accessories that are
recommended by the manufacturer for this
model. Accessories that are suitable for
one tool may become hazardous when
used with another tool.
SERVICE
Tool servicing must be performed by
qualified personnel. Service or
maintenance performed by non-qualified
personnel could result in a risk of injury.
POWER TOOL SAFETY

7
SERVICE –cont’d
When servicing a tool, use only identical
replacement parts. Follow the instructions
in the Maintenance section of this Manual.
The use of unauthorized parts or failure to
follow the instructions in the Maintenance
section of this Manual may create a risk of
electric shock or injury.
WARNING: Know your cordless
screwdriver. Do not plug in the charger
until you have read and understand this
Owner’s Manual. Learn the tool’s
applications and limitations, as well as
the specific potential hazards related to
this tool. Following this rule will reduce the
risk of electric shock, fire, or serious injury.
Always wear eye protection. Any power
tool can throw foreign objects
into your eyes and cause
permanent eye damage.
ALWAYS wear safety goggles (not
glasses) that comply with ANSI safety
standard Z87.1. Everyday glasses have
only impact resistant lenses. They ARE
NOT safety glasses.
WARNING: Glasses or goggles
not in compliance with ANSI Z87.1
could cause serious injury when they
break.
Always check to make sure the area where
screws are being driven or where holes
are being drilled does not have any hidden
wiring. Contact with a “live” wire will make
exposed metal parts of the tool “live” and
could result in an electric shock to the
operator.
Do not drive screws or break into existing
walls or other blind areas where electrical
wiring may exist. If this situation is
unavoidable, remove all fuses or
disconnect all breakers feeding the work
area.
Secure the workpiece in a vice or with
clamps. Never hold it in your hand or
across your legs. The rotating action of the
screwdriver may cause the bit to come
loose from the screw and cause injury.
Never carry the cordless screwdriver with
your finger on the switch. The tool is
always in an “ON” condition when the
battery is charged.
Never hold the body of the cordless
screwdriver near the switch while changing
bits. Accidentally touching the switch may
start the tool and possibly cause an injury.
Always use the correct shape of
screwdriver bit that matches the head of
the screw.
Always use the largest size screwdriver bit
that will properly fit into the head of the
screw.
SPECIFIC SAFETY
RULES
!
!
!
POWER TOOL SAFETY

8
Do not use worn or damaged screwdriver
or drill bits. Worn or damaged screwdriver
bits will not drive the screw properly and
may jump out of the screw head, causing
possible injury and damage to the
workpiece. Worn drill bits will not drill
properly and may cause the tool to
overheat.
Always insert the magnetic bit holder fully
into the collet and make sure it is properly
locked into the collet. A loose bit holder
may jump out of the collet and cause
damage to the workpiece or possible
injury.
WARNING: The lithium-ion battery
is an integral part of the tool. If it no longer
charges properly or is damaged, the tool
and battery must not be discarded as
household trash, burnt or thrown into
water. The tool and battery must be
disposed of as hazardous waste in
accordance with all municipal
requirements.
Do not incinerate a discarded battery. It
can explode in a fire.
Do not use an extension cord. Plug the
charger cord directly into an electrical
outlet.
Charge the battery only with the charger
supplied with this cordless screwdriver.
Do not use the charger in wet or damp
conditions. It is intended for indoor use
only. Do not use the charger near sinks or
bathtubs. Do not immerse the charger in
water.
Do not allow the cord to hang over the
edge of a table or counter or touch hot
surfaces. The charger should be placed
away from sinks and hot surfaces.
Do not use the charger to charge any
batteries other than the cordless
screwdriver battery. Other batteries may
explode.
Do not operate the charger if the cord or
plug is damaged. Replace the damaged
cord and plug immediately.
Do not operate the charger if it has
received a sharp impact, been dropped or
otherwise damaged in any way. Have a
qualified technician examine the charger
and repair it if necessary. Do not
disassemble the charger.
For best results, charge the battery when
the temperature range of the battery and
the work area is 0–40° C (32–104° F).
Unplug the charger when not in use and
before cleaning or maintenance.
Do not abuse the cord. To reduce the risk
of damage to the electric cord or plug,
never carry the charger by the cord or
yank the cord to unplug the charger.
Always grasp the plug and pull to
disconnect. Always keep the cord away
from heat, oil and sharp edges.
SPECIFIC SAFETY RULES
BATTERY AND
CHARGER SAFETY
!

9
V
Volts
A
Amperes
Hz
Hertz
W
Watts
kW
Kilowatts
Microfarads
L
Litres
kg
Kilograms
H
Hours
N/cm2
Newtons per square
centimetre
Pa
Pascals
Min
Minutes
S
Seconds
Alternating current
Three-phase alternating
current
Three-phase alternating
current with neutral
Direct current
No load speed
Alternating or direct
current
Class II construction
Splash-proof
construction
Watertight construction
Protective grounding at
grounding terminal,
Class I tools
Revolutions or
reciprocations per
minute
Diameter
Off position
Arrow
Warning symbol
SYMBOLS
WARNING: Some of the following symbols may appear on the cordless
screwdriver. Study these symbols and learn their meaning. Proper
interpretation of these symbols will allow for more efficient and safer
operation of this tool.
!
3042597
LISTED
This symbol designates that this tool is
listed with Canadian requirements by
ETL Testing Laboratories, Inc.
Conforms to UL Std. 60745-1, 60745-2-2.
Certified to CAN/CSA Std. C22.2 No.
60745-1, 60745-2-2.
JD5018

10
KNOW YOUR CORDLESS SCREWDRIVER
Collet
Charging
stand
Charger plug
receptacle
Left/right
switch
LED
worklight
Battery &
charging
status LED’s
Battery status
LED switch
LED light
switch
Accessory bit
storage
Quick release
collar
Magnetic tray
Variable speed
trigger switch
Accessory bit
storage drawer

11
AVAILABLE ACCESSORIES
WARNING: Use only accessories
that are recommended for this cordless
screwdriver. Follow the instructions
that accompany the accessories. The
use of any other accessories may result
in injury to the operator or damage to
the cordless screwdriver.
Before using any accessory, carefully read
the instructions or the owner’s manual for
the accessory.
Screwdriver bits
Hex shank drill bits
WARNING: If any part is missing or
damaged, do not attempt to charge the
battery or operate the tool until the missing
or damaged part is replaced.
CONTENTS
Carefully unpack the cordless screwdriver.
Compare the contents against the
“CORDLESS SCREWDRIVER
COMPONENTS” chart at right.
NOTE: See illustration of the cordless
screwdriver and components on Page 12.
ACCESSORIES AND CONTENTS
!
!
CORDLESS SCREWDRIVER
COMPONENTS
KEY
DESCRIPTION
QTY
A
Cordless
screwdriver
1
B
Charging stand
1
C
Charger
1
D
Screwdriver bit
50 mm (2") #2
1
E
Screwdriver bit
50 mm (2") #2
1
F
Screwdriver bits
#1
#2
#3
1
1
1
G
Screwdriver bits
#1
#2
#3
1
1
1
H
Screwdriver bits
#1
#2
#3
1
1
1
I
Screwdriver bits
4 mm
5 mm
1
1
J
Screwdriver bits
T15
T20
T25
1
1
1
K
Magnetic bit holder
1
L
Drill bits
3/32", 1/8"
2
M
Drill bits
3/16", 5/32"
2
Owner’s manual
1

12
CONTENTS

13
CHARGING THE BATTERY
1. Place the cordless screwdriver and
the charging stand near a 120 V, 60
Hz electrical outlet.
2. Insert the small battery charger plug
(1) into the receptacle in the rear of
the charging stand (2) (Fig. 1).
3. Plug the battery charger (3) into a
120 V, 60 Hz wall receptacle.
4. Place the cordless screwdriver (4) into
the charging stand (5) (Fig. 2).
NOTES:
a) Make sure the charging plug (6) in the
charging base is fully inserted into the
matching receptacle in the bottom of the
screwdriver handle.
b) A new battery or one that is completely
exhausted should be charged for 5 hours
or until the charger shuts down and the red
indicator light goes OFF. After normal use,
a battery should be fully charged in about
3 hours.
c) If the battery does not charge properly,
check to make sure the electrical outlet is
“live” and that the temperature range in the
work area is between 0–40° C
(32–104° F).
LED BATTERY AND CHARGING
STATUS INDICATORS
The battery charge level and the battery
charging status are indicated by three
LED’s (1) located in the base of the tool
(Fig. 3). They are green, orange and red.
The functioning of these LED’s is detailed
in Fig. 4 through Fig. 11.
ASSEMBLY AND OPERATING
Fig. 1
Fig. 3
Fig. 2

14
BATTERY CHARGE STATUS
The battery status can be checked at any
time by pressing and releasing the battery
status button (2) located in the base of the
tool immediately above the LED status
indicators (1) (Fig. 4). The amount of
charge remaining in the battery will be
indicated by the LED’s.
NOTE: When the battery status button is
released, the battery status LED’s will
remain lit for approximately 10 seconds
and then they will automatically turn OFF.
When all three LED’s are ON, the battery
is between 2/3 and fully charged (Fig. 5).
When the green LED is OFF, and the
orange and red LED’s are ON, the battery
is between 1/3 and 2/3 charged (Fig. 6).
When the green and orange LED’s are
OFF and the red LED is ON, the battery is
less than 1/3 charged (Fig. 7).
NOTE: If the system detects a battery
defect, the red LED will flash at two
second intervals.
ASSEMBLY AND OPERATING
Fig. 6
Battery between
1/3 and 2/3
charged
Fig. 5
Battery between
2/3 and fully
charged
Fig. 7
Battery less than
1/3 charged
Fig. 4

15
BATTERY CHARGING STATUS
When the tool is in the charging stand with
the charger plugged into the power source,
the battery will be in the process of being
charged. Similar to the battery charge
status, the LED’s will indicate the status of
the charging process.
NOTE: The LED’s will automatically
indicate the battery charging status. Lights
will flash and then stay ON moving from
right to left as the charge increases.
When the green and orange LED’s are
OFF and the red LED is flashing, the
battery is being charged. The battery is 0
to 1/3 charged (Fig. 8).
When the green LED is OFF, the orange
LED is flashing and the red LED is ON, the
battery is still being charged. The battery is
1/3 to 2/3 charged (Fig. 9).
When the green LED is flashing and the
orange and red LED’s are ON, the battery
is 2/3 to nearly fully charged (Fig. 10).
When all three LED’s are ON, the charging
cycle is completed. The battery is fully
charged (Fig. 11).
NOTE: The red LED will flash at two
second intervals if one of the following
occurs:
The battery is defective
The charging cycle has stopped
prematurely.
ASSEMBLY AND OPERATING
Fig. 8
Battery 0 to 1/3
charged
Fig. 10
Battery 2/3 to nearly
fully charged
Fig. 9
Battery 1/3 to 2/3
charged
Fig. 11
Battery fully
charged

16
INSTALLING SCREWDRIVER BITS
WARNING: Never hold the cordless
screwdriver with your fingers near the
switch while changing screwdriver bits.
Accidentally touching the switch may start
the tool and possibly cause an injury.
1. Push the quick release collar (1) back
toward the rear of the tool (Fig. 12).
2. Insert the grooved end of the
magnetic bit holder (2) into the collet
(3) of the tool.
NOTE: Push the bit holder as far as it will
go into the collet.
3. Release the quick release collar.
4. Pull outward on the magnetic bit
holder to ensure it is properly locked
into the collet.
5. Select an appropriate screwdriver bit
that fits the head of the screw being
driven.
NOTES:
a) Never install a screwdriver bit directly
into the quick release collar. The magnetic
bit holder must always be used to properly
hold the screwdriver bit.
b) Use the largest size screwdriver bit that
will properly fit the screw head.
c) Make sure the screwdriver bit is in good
condition and is neither damaged nor
worn.
6. Insert the screwdriver bit (4) fully into
the large end of the magnetic bit
holder (5).
!
ASSEMBLY AND OPERATING
Fig. 12

17
INSTALLING SCREWDRIVER BITS –cont’d
NOTE: Make sure the screwdriver bit is
fully inserted into the magnetic bit holder
until it is held in place by the magnet.
FORWARD/REVERSE SWITCH
The forward/reverse switch (1) is
conveniently mounted above the trigger
switch (Fig. 13). To make the cordless
screwdriver rotate clockwise for drilling or
for driving screws, push the
forward/reverse switch to the left. To make
the cordless screwdriver rotate counter
clockwise for removing screws, push the
forward/reverse switch to the right.
NOTES:
a) Never change the position of the
forward/reverse switch while the collet is
turning.
b) The trigger switch will NOT function with
the forward/reverse switch in the middle
position.
VARIABLE-SPEED TRIGGER SWITCH
This cordless screwdriver is equipped with
a variable-speed ON/OFF trigger switch.
1. To start the screwdriver, gently
squeeze the trigger switch (2)
(Fig. 14).
NOTE: The cordless screwdriver will turn
at its slowest speed when the trigger
switch is squeezed lightly. The cordless
screwdriver will turn at its fastest speed
when the trigger switch is squeezed firmly.
2. To stop the cordless screwdriver,
release the trigger switch.
ASSEMBLY AND OPERATING
Fig. 13
Fig. 14

18
VARIABLE-SPEED TRIGGER SWITCH –cont’d
NOTE: Drilling at a slow speed for an
extended period of time may cause the
cordless screwdriver motor or the battery
to overheat. If the cordless screwdriver
gets hot, stop drilling and allow it to cool
for at least 15 minutes.
ADJUSTING THE TORQUE COLLAR
Your cordless screwdriver is equipped with
an adjustable torque clutch for driving
different types of screws into different
types of materials. It also has a setting for
“drilling”. The proper setting depends upon
the type of material and size of screw
being used and the function required.
Adjust the torque setting as follows:
1. Identify the torque settings located on
the torque adjustment ring (3)
(Fig. 15).
2. Rotate adjustment ring to align the
correct torque setting number with the
torque indicator arrow (4). The
following is a guide for torque settings:
1–4 For driving small screws
5–7 For driving medium sized screws
into soft materials
8–10 For driving screws into soft &
medium-density materials
11–13 For driving screws into
hardwood
14–16 For driving large screws
For drilling. This position is
marked with a drill bit icon on the
torque adjustment ring.
ASSEMBLY AND OPERATING
Fig. 15

19
SCREWDRIVER WORKLIGHT
The cordless screwdriver is equipped with
an LED worklight (1) (Fig. 16). To turn the
worklight ON, press the worklight switch
button (2) once. To turn the worklight OFF,
press the worklight switch again.
NOTE: The worklight will remain ON until it
is manually turned OFF.
ASSEMBLY AND OPERATING
For safety reasons, the operator
must read the sections of this
Owner’s Manual entitled “GENERAL
SAFETY WARNINGS”, “POWER
TOOL SAFETY”, “SPECIFIC SAFETY
RULES”, “BATTERY & CHARGER
SAFETY” and “SYMBOLS” before
using this cordless screwdriver.
Verify the following every time the
cordless screwdriver is used:
1. Safety glasses, safety goggles,
or face shield is being worn.
2. The bit holder is correctly
installed and locked into the
collet.
3. The bit is in good condition, and
is fully inserted into the bit
holder.
Failure to observe these safety rules
will significantly increase the risk of
injury.
WARNING
!
Fig. 16

20
PREPARING SCREW HOLES
It is important to prepare screw holes
before attempting to fasten two pieces of
wood together. Proper preparation will
make screws drive easier and prevent
misaligned components, stripped screw
heads, splitting and separating of wood
components.
1. Clamp components that are to be
screwed together in their desired
position (Fig. 17).
2. Drill a pilot hole (1) through the outer
piece (2) and into the inner piece (3).
Drill hole 2/3 the diameter of the
smooth portion of the screw shank.
NOTE: If the wood is soft, drill the hole 2/3
the length of the screw. If the wood is hard,
drill the hole the full length of the screw.
3. Remove the clamp from the two
pieces to be screwed together.
4. Enlarge the hole (1) in the outer piece
(2) so it is the same size as the
smooth portion of the screw shank
(Fig. 18).
5. If using a flat head screw, counter-sink
the hole (4) so the head of the screw
will be flush with the surface when
fully driven into place.
Fig. 17
Fig. 18
ASSEMBLY AND OPERATING
Table of contents
Other MasterCraft Power Screwdriver manuals

MasterCraft
MasterCraft TBD User manual

MasterCraft
MasterCraft 054-2502-6 User manual

MasterCraft
MasterCraft 054-2740-B User manual

MasterCraft
MasterCraft 054-3181-2 User manual

MasterCraft
MasterCraft GEN 2 User manual

MasterCraft
MasterCraft 054-2516-4 User manual

MasterCraft
MasterCraft 054-2500-0 User manual