PAGE 1 OF 2 | AU SUPPORT 1800 237 425 WWW.MATCHMASTER.COM.AU
55MM-SM18 INSTRUCTION MANUAL
Installation Site
Installer must carefully inspect the selected roof installation
location to ensure it is structurally sound and in good repair
before installation. Please also ensure the roof location
chosen is suitable for optimal signal and accepted by the
customer before installation.
Warning
The SM18 relies upon the strength of the purlin-rafter joint to
transfer the wind load to the building structure. Therefore,
the installer must inspect joints near the mast to ensure they
are suitable and structurally sound.
Safety Warning
Dangerous live electrical cables may be present behind
roof sheets/building cladding. Please make sure to use an
earth leakage protection safety device when drilling into
any surfaces.
Note: You can adjust the attened
ends of the stay bars to suit the
installation angle by simply bending
them with an appropriate tool like a
vice grip or adjustable wrench.
Installation Limitations
You can install the SM18 to a maximum height of 8.5m above
ground level. The roof must not exceed 30 degrees slope
and have cladding rib heights between 16 and 30mm.
Rafter and batten spacings must be between 900mm
minimum and 1200mm maximum.
The SM18 mount is suitable for use on standard corrugated
cladding proles like CUSTOM ORB®, and different proles
such as TRIMDEK®or SPANDEK®, a cyclonic metal batten
kit can be used for additional strength if required at the
anchor locations (sold separately) All anchor screws must
be through the ridge of the sheeting.
The SM18 is unsuitable for tiled roofs and light gauge metal
frame roofs.
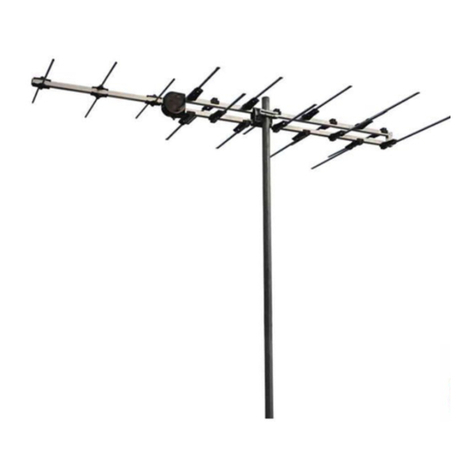
Mast and Stay Arms
The SM18 mast is 1.8m in height.
The design of the stay bars
allows them to run down the
roof from the main mast and
have a maximum allowable
length of 2200mm. The minimum
permissible overlap of the inner
and outer stay bar tubes is
150mm. See Figure 1.
Installation Guide
Step 1: After selecting a suitable
roof position and conrming
with your client, fasten the
supplied cleat bracket to the
foot of the mast using the
supplied M8 x 30mm carriage
bolt, washers and nut. Refer to
Figure 2.
Fix the two stay bars to the
mast (450-550mm down from
the mast top) using the collar
clamp assembly with two
supplied spacers and M8 x
50mm bolt, washers and nut.
Refer to Figure 3.
Figure 1
Figure 2
Figure 3
Figure 4 Figure 4a
Step 2: Place the mast foot cleat bracket onto the roof or
ridge capping. Place some roong silicone sealant
underneath the bottom face of the mast base where the
two screws fasten and then fasten to the roof using two
Type 17, 65mm wood screws with cyclone and rubber
washers supplied. Next, extend out and attach the attened
ends of the telescoping stay tubes to the roof ridges,
rst placing some roong silicone sealant underneath the
bottom face. Again, use the Type 17, 65mm wood screws
and cyclone and rubber washers supplied.
See Figures 4 and 4a.
Step 3: The mount is nearly
complete and should look as
shown in Figure 1. Using a
spirit level (magnetic levels
make the job easier), adjust
the mast by pushing it into
place until it is plumb, now
secure in place the two stay
bars by using the supplied
10g x 16mm TEK®screws and
drilling into the pilot holes of
the stay bar overlap.
See Figure 5
Mast
Spacers
Inner Stay
Inner Stay
Outer Stay
Cleat Bracket
Cleat Bracket
M8 Bolt
M8 Bolt
M8 Nut
M8 Nut Cyclone & Rubber
Washer with
Silicone Sealant
Underneath
Cyclone & Rubber
Washer with
Silicone Sealant
Underneath
M8 Washers
M8 Washers
Adjustable
Outer Stays
M8 Bolt
M8 Washers
& Nut
Outer Stays
Warning: If xing to metal batten roofs (0.42-1.5mm
thick), use either duo cleats (55MM-DUOCLEAT) or the
cyclonic metal batten kit (sold separately) and fasten
replacing all Type 17, 65mm wood screws with Buildex®
M6.5-12 x 55 Roof Zips®screw fasteners.
*Also sold separately 55MM-BK01 Universal Batten Kit for
Metal Roofs
Figure 5
Outer
Stay
Inner
Stay
10g x 16mm
Tek Screw
(Pilot Hole)
T17 x 65mm
T17 x 65mm


