manuals.online logo
Brands
  1. Home
  2. •
  3. Brands
  4. •
  5. Matrix
  6. •
  7. Treadmill
  8. •
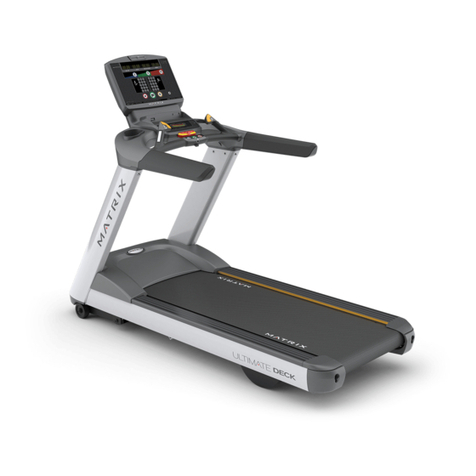
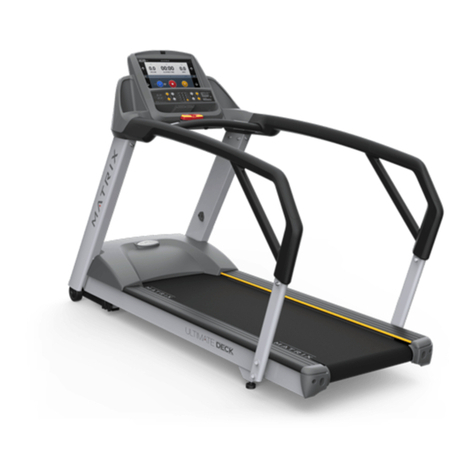
  9. Matrix T-DPT User manual

Matrix T-DPT User manual

Other manuals for T-DPT

1

Other Matrix Treadmill manuals

Matrix T5X GROUP TRAINING User manual

Matrix

Matrix T5X GROUP TRAINING User manual

Matrix T7xe User manual

Matrix

Matrix T7xe User manual

Matrix S-DRIVE P User manual

Matrix

Matrix S-DRIVE P User manual

Matrix T5X GROUP TRAINING User manual

Matrix

Matrix T5X GROUP TRAINING User manual

Matrix T1XE-04 User manual

Matrix

Matrix T1XE-04 User manual

Matrix T5X-02 User manual

Matrix

Matrix T5X-02 User manual

Matrix TF30 Parts list manual

Matrix

Matrix TF30 Parts list manual

Matrix T3X-05 User manual

Matrix

Matrix T3X-05 User manual

Matrix T3x Administrator guide

Matrix

Matrix T3x Administrator guide

Matrix C5X-05 User manual

Matrix

Matrix C5X-05 User manual

Matrix ENDURANCE STEPPER User manual

Matrix

Matrix ENDURANCE STEPPER User manual

Matrix T1xe-02(AC) User manual

Matrix

Matrix T1xe-02(AC) User manual

Matrix MX-T5x User manual

Matrix

Matrix MX-T5x User manual

Matrix T7X-02 User manual

Matrix

Matrix T7X-02 User manual

Matrix TOUCH XL User manual

Matrix

Matrix TOUCH XL User manual

Matrix T-DPT User manual

Matrix

Matrix T-DPT User manual

Matrix T3xm User manual

Matrix

Matrix T3xm User manual

Matrix T1x Maintenance manual

Matrix

Matrix T1x Maintenance manual

Matrix T3x User manual

Matrix

Matrix T3x User manual

Matrix TF30 User manual

Matrix

Matrix TF30 User manual

Matrix H7XI-01 User manual

Matrix

Matrix H7XI-01 User manual

Matrix T50x-02 User manual

Matrix

Matrix T50x-02 User manual

Matrix T7xe-04 User manual

Matrix

Matrix T7xe-04 User manual

Matrix T5 User manual

Matrix

Matrix T5 User manual

Popular Treadmill manuals by other brands

Motus M990T Service manual

Motus

Motus M990T Service manual

NordicTrack APEX4100i NTTL18906 user manual

NordicTrack

NordicTrack APEX4100i NTTL18906 user manual

CAPITAL SPORTS Pacemaker Touch manual

CAPITAL SPORTS

CAPITAL SPORTS Pacemaker Touch manual

Insportline Hill Pro user manual

Insportline

Insportline Hill Pro user manual

Expondo Gymrex GR-MG31 user manual

Expondo

Expondo Gymrex GR-MG31 user manual

HEALTH ONE Walk Ro user manual

HEALTH ONE

HEALTH ONE Walk Ro user manual

NordicTrack T7.5 S user manual

NordicTrack

NordicTrack T7.5 S user manual

Gold's Gym ADVANTAGE GGTL12920 user manual

Gold's Gym

Gold's Gym ADVANTAGE GGTL12920 user manual

Merax MS282992 manual

Merax

Merax MS282992 manual

FitLogic freewill d225 owner's manual

FitLogic

FitLogic freewill d225 owner's manual

HOP-SPORT ESTIMA HS-3200LB instruction manual

HOP-SPORT

HOP-SPORT ESTIMA HS-3200LB instruction manual

Stamia InMotion II owner's manual

Stamia

Stamia InMotion II owner's manual

Smooth Fitness EVO 3i user manual

Smooth Fitness

Smooth Fitness EVO 3i user manual

NordicTrack NETL81810.0 user manual

NordicTrack

NordicTrack NETL81810.0 user manual

Schwinn 830/Journey 8.0 Assembly manual / owner's manual

Schwinn

Schwinn 830/Journey 8.0 Assembly manual / owner's manual

Keys Fitness HealthTrainer HT-740T owner's manual

Keys Fitness

Keys Fitness HealthTrainer HT-740T owner's manual

Spirit XT8 Service manual

Spirit

Spirit XT8 Service manual

NordicTrack T 14.0 Treadmill Manuel de l'utilisateur

NordicTrack

NordicTrack T 14.0 Treadmill Manuel de l'utilisateur

manuals.online logo
manuals.online logoBrands
  • About & Mission
  • Contact us
  • Privacy Policy
  • Terms and Conditions

Copyright 2025 Manuals.Online. All Rights Reserved.

T-DPT
3
IMPORTANT PRECAUTIONS
SAVE THESE INSTRUCTIONS
 When using a treadmill, basic precautions should always be followed, including the following: Read all instructions before using this treadmill. It is
the responsibility of the owner to ensure that all users of this treadmill are adequately informed of all warnings and precautions.
 This product is intended for commercial use. To ensure your safety and protect the equipment, read all instructions before operating.
 Incorrect or excessive exercise may cause injury. If you experience any kind of pain,
including but not limited to chest pains, nausea, dizziness, or shortness of breath, stop
exercising immediately and consult your physician before continuing.
 When exercising, always maintain a comfortable pace.
 Do not wear clothes that might catch on any part of the treadmill.
 Always wear athletic shoes while using this equipment.
 Emergency dismount can be done by grabbing the front or side handlebars and
jumping with both feet on the side rails.
 Do not jump on the treadmill.
 At no time should more than one person be on treadmill while in operation.
 7KLVWUHDGPLOOVKRXOGQRWEHXVHGE\SHUVRQVZHLJKLQJPRUHWKDQVSHFLȴHGLQWKH
OWNERS MANUAL SPECIFICATIONS SECTION. Failure to comply will void the warranty.
 To clean, wipe surfaces down with soap and slightly damp cloth only; never use
solvents. (See MAINTENANCE)
 'RQRWRSHUDWHXQGHUEODQNHWRUSLOORZ([FHVVLYHKHDWLQJFDQRFFXUDQGFDXVHȴUHRU
injury to persons.
 At NO time should pets or children under the age of 14 be closer to the treadmill than
10 feet.
 At NO time should children under the age of 14 use the treadmill.
 Keep children under the age of 14 away from this equipment. Teenagers must be supervised at all
times while using this equipment.
 This equipment is not intended for use by persons with reduced physical, sensory or mental
capabilities, or lack of experience and knowledge, unless they have been given supervision or
instruction concerning use of the equipment by a person responsible for their safety.
 Use the treadmill only for its intended use as described in the treadmill guide and owners manual.
 Do not use other attachments that are not recommended by the manufacturer. Attachments may
cause injury.
 Never operate the treadmill if it is not working properly, if it has been dropped or damaged, or
immersed in water. Call Customer Tech Support for examination and repair.
 Do not use treadmill in any location that is not temperature controlled, such as but not limited to
garages, porches, pool rooms, bathrooms, car ports or outdoors. Failure to comply may void the
warranty.
 Over exercising may result in serious injury or death.
 If you feel faint, stop exercising immediately.
CAUTION!
CONSULT A PHYSICIAN BEFORE USING THIS EQUIPMENT. READ OWNERS MANUAL BEFORE USE.
 It is essential that your treadmill is used only indoors, in a climate controlled room. If your treadmill has been exposed to colder temperatures or
KLJKPRLVWXUHFOLPDWHVLWLVVWURQJO\UHFRPPHQGHGWKDWWKHWUHDGPLOOLVZDUPHGXSWRURRPWHPSHUDWXUHEHIRUHȴUVWWLPHXVH
WARNING!
TO REDUCE THE RISK OF INJURY TO PERSONS:
ENGLISH
4
SERIAL NUMBER LOCATION
ASSEMBLY
UNPACKING
8QSDFNWKHHTXLSPHQWZKHUH\RXZLOOEHXVLQJLW3ODFHWKHFDUWRQRQDOHYHOȵDWVXUIDFH,WLV
UHFRPPHQGHGWKDW\RXSODFHDSURWHFWLYHFRYHULQJRQ\RXUȵRRU1HYHURSHQER[ZKHQLWLVRQLWVVLGH
IMPORTANT NOTES
During each assembly step, ensure that ALL nuts and bolts are in place and partially threaded.
Several parts have been pre-lubricated to aid in assembly and usage. Please do not wipe
WKLVRII,I\RXKDYHGLɚFXOW\DOLJKWDSSOLFDWLRQRIOLWKLXPJUHDVHLVUHFRPPHQGHG
SERIAL NUMBER
MODEL NAME: S-DRIVE PERFORMANCE TRAINER
* Use the information above when calling for service.
TOOLS REQUIRED:
F8mm T-Wrench
F5mm Allen Wrench
F6mm Allen Wrench
F8mm Wrench x2
F10mm Wrench x2
FPhillips Screwdriver
PARTS INCLUDED:
F1 Base Frame
F2 Front Handlebar Supports
F2 Rear Handlebar Supports
F1 Sled Bar
F1 Handlebar Set
F1 Harness
F1 Hardware Kit
WARNING!
There are several areas during the assembly process that special attention must be
paid. It is very important to follow the assembly instructions correctly and to make
VXUHDOOSDUWVDUHȴUPO\WLJKWHQHG,IWKHDVVHPEO\LQVWUXFWLRQVDUHQRWIROORZHG
correctly, the equipment could have parts that are not tightened and will seem
loose and may cause irritating noises. To prevent damage to the equipment, the
assembly instructions must be reviewed and corrective actions should be taken.
NEED HELP?
If you have questions or if there are any missing parts, contact Customer
Tech Support. Contact information is located on the information card.
ENGLISH
5
1
B
A
Black Hardware Bags (x2)
Description Qty
A
B
Bolt
Flat Washer
4
4
Note:
Do not fully tighten hardware
until the end of step 5.
Step 2 Torque Value:
78.4 Nm / 57.8 ft-lb
2
Note: There are no screws holding on the motor cover.
ENGLISH
6
3 4
C
D
Red Hardware Bags (x2)
Description Qty
C Bolt 4
Note:
Do not fully tighten hardware
until the end of step 5.
Step 3 Torque Value:
78.4 Nm / 57.8 ft-lb
White Hardware Bag
Description Qty
D Bolt 4
Note:
Do not fully tighten hardware
until the end of step 5.
Step 4 Torque Value:
39.2 Nm / 28.9 ft-lb
ENGLISH
7
G
F
E
2
1
H
Yellow Hardware Bag
Description Qty
H Screw 2
5 6
Green Hardware Bag
Description Qty
E
F
G
Bolt
Flat Washer
Bolt
4
4
2
Note:
Step 5 Torque Value:
39.2 Nm / 28.9 ft-lb
A. Carefully pull the CABLE (1) through the
RIGHT HANDLEBAR SUPPORT using the twist
tie located inside the RIGHT HANDLEBAR
SUPPORT and attach to the CONNECTOR
CABLE (2) on the MAIN FRAME.
B. Repeat on other side.
C. Completely tighten hardware from
steps 25 according to the Torque
Values specified in each step.
ENGLISH
8
7
12
5
7 8 ASSEMBLY
COMPLETE!
Note: Check that all harness connections are secure before use
ENGLISH
9
BEFORE YOU BEGIN
TREADMILL LOCATION
Place the treadmill on a level and stable surface away from direct sunlight. The intense UV light can cause discoloration on the
plastics. Locate your treadmill in an area with cool temperatures and low humidity. Please leave a clear zone behind the treadmill
that is at least the width of the treadmill and at least 79 (2000 mm) long. This zone must be clear of any obstruction and provide
the user a clear exit path from the machine. For ease of access, there should be an accessible space on both sides of the treadmill
of at least 24 (600 mm) to allow a user access to the treadmill from either side. Do not place the treadmill in any area that will
block any vent or air openings. The treadmill should not be located in a garage, covered patio, near water or outdoors.
WARNING!
Our treadmills are heavy. To avoid injury and damage, use care and additional help if necessary when moving.
TENSIONING AND CENTERING THE RUNNING BELT
After placing the treadmill in the position it will be used, the belt must be checked for
SURSHUWHQVLRQDQGFHQWHULQJ7KHEHOWPLJKWQHHGWREHDGMXVWHGDIWHUWKHȴUVWWZR
hours of use. Temperature, humidity, and use cause the belt to stretch at different rates.
If the belt starts to slip when a user is on it, be sure to follow the directions below.
1. Locate the two hex head bolts on the rear of the treadmill. The bolts are located at each
end of the frame at the back of the treadmill. These bolts adjust the rear belt roller.
Do not adjust until the treadmill is on. This will prevent over tightening of one side.
2. The belt should have equal distance on either side between the frame. If the belt
is touching one side, do not start the treadmill. Turn the bolts counter clockwise
approximately one full turn on each side. Manually center the belt by pushing the belt
from side to side until it is parallel with the side rails. Tighten the bolts the same amount as
when the user loosened them, approximately one full turn. Inspect the belt for damage.
3. While walking on the treadmill at 3 mph (~4.8 kph), observe the belt position. If it is moving
to the right, tighten the right bolt by turning it clockwise ¼ turn, and loosen the left bolt
¼ turn. If it is moving to the left, tighten the left bolt by turning it clockwise ¼ turn and
loosen the right ¼ turn. Repeat Step 3 until the belt remains centered for several minutes.
4. Check the tension of the belt. The belt should be very snug. When a person
walks or runs on the belt, it should not hesitate or slip. If this occurs, tighten
the belt by turning both bolts clockwise ¼ turn. Repeat if necessary.
127(8VHWKHIURQWFRYHUWRFRQȴUPWKHEHOWLVSURSHUO\FHQWHUHGDVVKRZQ,WLV
necessary to adjust the belt until the edge of the belt is parallel to the cover.
CAUTION!
Do not run faster than 3 mph (~4.8 kph) while centering. Keep
fingers, hair and clothing away from belt at all times.
BELT IS TOO FAR TO THE RIGHT SIDE BELT IS TOO FAR TO THE LEFT SIDE
TIGHTENS RIGHT SIDE OF ROLLER
TIGHTENS LEFT SIDE OF ROLLER
0.6 M
(2 FT)
0.6 M
(2 FT)
0.6 M
(2 FT)
2 M(79)
0.3 M(1 FT)
ENGLISH
10
WALK / SPRINT
PROPER USAGE
SLED MODE
PROPER USAGE PROPER USAGE
The treadmill can be used in two modes; sled or walk/sprint. To use the
treadmill in sled mode, remove the harness so the user has access to the
upper and lower sled handlebars. To use the treadmill in walk / sprint
mode, connect the harness and adjust by using the instructions below.
Emergency dismount can be done by grabbing the front or side
handlebars and jumping with both feet on the side rails.
ADJUSTING THE HARNESS
After stepping onto the treadmill, slowly walk into the harness to check for
proper height. The harness should sit comfortably at about waist height.
If the harness needs to be adjusted, release the front connection
point and reconnect the harness at the correct height.
ADJUSTING THE BRAKES
The treadmill is equipped with two brakes, a sled brake and a speed brake. The
left hand side lever controls the sled brake and the right hand lever controls the
speed brake. The sled brake has 8 resistance settings and the speed brake has 11.
The brakes are designed to be used together or independently of each other.
The sled brake is designed to simulate the resistance created when pushing a
sled. When using this brake, resistance will be immediately applied to the belt.
The speed brake is designed to simulate the resistance created
when running with a parachute. When using this brake,
resistance will increase as the user increases speed.
SLED MODE WALK / SPRINT MODE
HARNESS
SPEED BRAKE
(RIGHT SIDE)
SLED BRAKE
(LEFT SIDE)
LEVELING THE EQUIPMENT
It is extremely important that the levelers are correctly adjusted
for proper operation. An unbalanced treadmill may cause belt
misalignment or other issues. Use of a level is recommended.
Once you have placed the treadmill where you intend to use it, raise or lower
one or both of the adjustable levelers located on the bottom-front of the frame.
ENGLISH