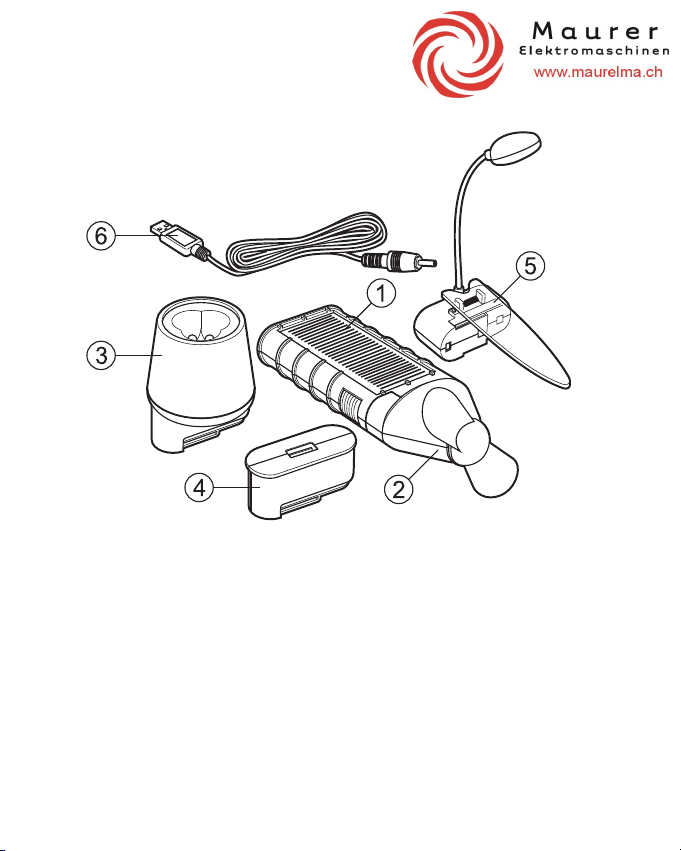
Laden der Solarbatterie (Hauptgerät)
Die eingebaute Lithiumbatterie kann von der Sonne aufgeladen werden. Der AC Adapter ist im
Lieferumfang enthalten. Ein USB Kabel ist nicht beigefügt.
HINWEIS: VERSUCHEN SIE NICHT, DIE SOLARBATTERIE AUSEINANDERZUNEHMEN
UND/ ODER DIE LITHIUMBATTERIE ZU ERSETZEN.
Laden der Solarbatterie (Hauptgerät) mit Sonnenlicht
Suchen Sie eine geeignete Stelle, an der die Solarzellen das meiste direkte Sonnelicht erhalten.
Die grüne LED neben der Steckdose zeigt an, dass die Solarbatterie geladen wird.
Die Batterie benötigt 10 – 15 Stunden um vollständig mit Sonnenlicht geladen zu werden.
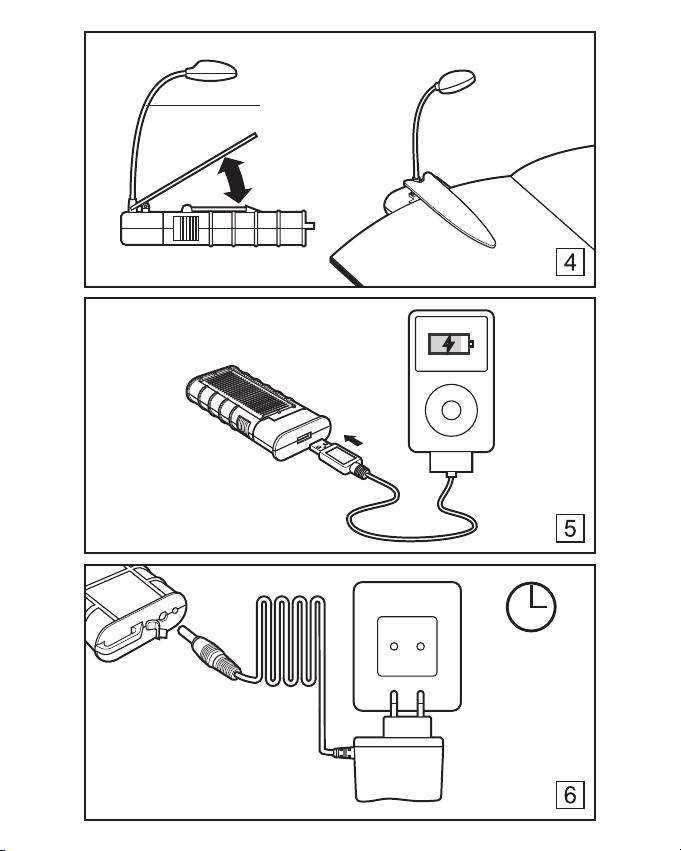
Laden der Solarbatterie (Hauptgerät) mit dem Adapter
Öffnen Sie die Abdeckung unten am Gerät und verbinden den in dieser Packung beigefügten
Adapter mit der Batterie. (Siehe Abb. 6) Die rote LED Leuchte zeigt an, dass die Solarbatterie
aufgeladen wird. Die grüne Leuchte leuchtet auf, sobald die Batterie voll geladen ist.
Die Batterie benötigt 8 – 10 Stunden um vollständig mit mit dem Adapter geladen zu werden.
HINWEIS: BENUTZEN SIE ZUM LADEN DER BATTERIE NUR DEN IN DIESER PACKUNG
BEIGEFÜGTEN ADAPTER ODER DIE GARANTIE WIRD FÜR UNGÜLTIG ERKLÄRT.
Laden der Solarbatterie (Hauptgerät) über ein USB Kabel
Öffnen Sie die Abdeckung und schliessen Sie die Batterie mit einem geeigneten USB Kabel
(nicht im Lieferumfang enthalten) an Ihren Computer an. Die rote LED Leuchte zeigt an, dass
die Solarbatterie aufgeladen wird. Die grüne Leuchte leuchtet auf, sobald die Batterie voll
geladen ist.
Die Batterie benötigt 8 – 10 Stunden um vollständig über ein USB Kabel geladen zu werden.
Instandhaltung und Reinigung
Reinigen Sie die Oberfläche des Gerätes nur mit einem leicht angefeuchteten Tuch oder einer
trockenen Bürste. Benutzen Sie keine korrosiven Reinigungsmittel oder chemischen Lösungen,
da dies die Oberfläche des Gehäuses beschädigen und den Betrieb beeinträchtigen kann.
Halten Sie die Batterie frei von Schmutz, Ablagerungen und Schnee, da die Batterie ansonsten
-8-