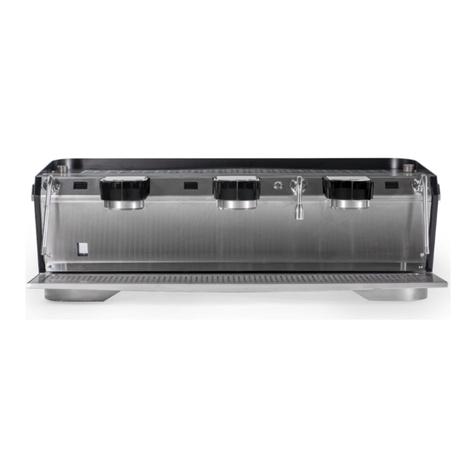
Mavam UnderCounter User manual

2021
Table of Contents
Safety Warnings 4
Safety Messages 4
Warning Labels 5
Operational Setting Limits 5
Overview 6
Machine Description 6
Description of terms 7
What is new in this version 8
Machine Components 9
Main Components 9
Group Components 9
Controls 10
Boiler Unit Controls 10
User Interface 10
Actuators 10
General 11
Startup 12
Functions 13
Pre-Infusion 13
Brew 13
Steam 13
Hot Water 13
Group Head Cleaning 14
Manual and Automatic Modes 15
Manual Mode 15
Automatic Mode 15
Pre-infusion options 15
Brew options 15
UI Display 16
Display Modes 17
Brew Display 17
Data Table 17
Table of data shown in different phases and modes. 17
Screen Examples 18
2023 Mavam User Manual V4.53 UC/F Page 2 of 28

2021
Pre-infusion and Brew Screens 19
USER INTERFACE MENU INSTRUCTIONS 20
Menu Overview 20
Entering the Menu 21
Entering the Menu by pushing both Pre-Infusion and Brew 21
Menu Item 1, Selecting Auto Clean Cycle 21
Menu item 1. Auto Clean Cycle. 21
Menu Item 2, Selecting Temperature Units 23
Menu Item 3, Offset 23
Menu item 3, Offset 24
Menu Item 4, Manual / Automatic 24
Menu Items 5,6,7,8 25
Menu Item 5, Setting Automatic 1 Pre-Infusion Time: 25
Menu Item 6, Setting Automatic Brew Time:1 26
Menu Item 7, 8, Setting Automatic Pre-Infusion and Brew Time:2 26
NOTE:
This manual is for the daily use of the machine. For detailed data, technical diagrams,
installation, and troubleshooting please see the applicable document.
2023 Mavam User Manual V4.53 UC/F Page 3 of 28

2021
Safety Warnings
Safety Messages
IMPORTANT Information for the Mavam Undercounter Espresso Machine
➔DISCONNECT FROM ALL POWER SOURCES BEFORE SERVICING
➔Read the entire manual BEFORE operating this machine
➔Steam and condensation from the steam wand discharge is HOT and may cause burns
➔The steam wand tips become HOT during use, do not touch them - Use Caution!
➔Always have the steam wand tip covered or inserted in the product to be steamed
before turning steam on.
➔Never remove the steam wand from the product that is being heated when the steam
is on.
➔Never remove the portafilter from the machine during the brewing process
➔Keep water and moisture away from any electrical device or live power
➔Steam tank water can be heated to 260°F (126°C), use caution around this
➔The brew groups are heated to 200°F and deliver water as hot as 210°F (99°C) - Use
Caution!
➔Brew Group housings can be hot to the touch - Use Caution!
Brew Group
2023 Mavam User Manual V4.53 UC/F Page 4 of 28

2021
Warning Labels
Operational Setting Limits
The machine will limit settings and operation to these ranges. They are not user adjustable.
Steam Pressure 0.0 to 1.3 Bar
Brew, Water Hose, and Group Temperature 85 to 110 C (185 to 230 F)
Steam Hose Temperature 100 to 178 C (212 to 350 F)
Pre-Infusion Time 0 to 360 seconds (6 minutes)
Brew Time 0 to 120 seconds (2 minutes)
Steam Time 0 to 120 seconds (2 minutes)
Water Time 0 to 30 seconds (½ minute)
Internal Boiler Unit Temperature 80 C (175 F)
2023 Mavam User Manual V4.53 UC/F Page 5 of 28

2021
Overview
Machine Description
The Mavam Under Counter Espresso Machine is a commercial espresso machine featuring a
unique user interface that sits flush with the counter. Depending on model there may be one,
two, or three group heads, one or two steam wands, one hot water jet, and one or two pitcher
rinsers built into the drain tray. The steam boiler unit is connected to the user interface via
heated transfer hoses. This allows the steam boiler unit to be installed up to 1 meter (3 feet)
away from the user interface.
This arrangement allows the Barista to interact with the customer while working the machine.
The user interface may also be finished in many styles: plated, powder coated, or stainless steel
with various textures.
Another unique feature is the fully heated water path. Brew water is heated from entry into the
Boiler Unit to the Group Head. This provides the user with a stable, steady, and constant supply
of hot water to the coffee.
Water Path
2023 Mavam User Manual V4.53 UC/F Page 6 of 28

2021
Description of terms
The following terms are used throughout this manual and other Mavam publications. While not
a full list these are the most used and common terms.
Blind Basket: A cup that is installed in the portafilter without holes. This is used for cleaning the
Group Head. Also called a “Backflush Basket”.
Drain Tray: Removable metal screen below the Group Heads. Water drains through this screen
to the User Interface drain.
Flow (Flowmeter): The volume of water used in brewing is measured using a “flowmeter”.
Water flowing through the flowmeter turns a paddle wheel. Each revolution of this wheel is
counted at one “Pulse”. The volume of water per Pulse will vary depending on the machine,
use, and water pressure.
Flow Rate: The volume of water (Pulses) over time.
Group Display: OLED display mounted in the User Interface base. This displays group
temperature, mode of operation, and brew times for pre-infusion and brew cycles, and menu
functions.
Group Head: Metal receptacle attached to the underside of the top of the Group Tower that
holds the portafilter.
Group Tower: Stand connected to the User Interface counter panel that holds the brew head.
The tower routes the hot water for brewing, power for the group heater, and brew head
temperature sensors.
Hot Water Jet: Metal tube shaped like an upside down “U”. Hot water is piped from the steam
boiler and exits at the Hot Water Diffuser tip.
Operation Controls: Illuminated actuators button(s) that control a function of the machine.
Each actuator may have more than one function depending on the mode selected.
Portafilter: Mates with the Group Head and holds the basket containing ground coffee. A
handle is attached to the portafilter so the barista may insert and remove the portafilter. There
are many styles and configurations of portafilters.
Pulse: One revolution of the flow meter paddle wheel. Used to measure volume.
Pump: AC motor with pump and pressure regulator attached. These are external to the unit.
Rinser Jet: Fitting mounted in the Drip Tray connected to the rinser activation plate. When the
rinser activation plate is pressed down cold water is sprayed from the fitting.
Steam Boiler Unit: Metal enclosure containing the steam boiler, brew tanks, water distribution
manifold, pump interface, BCU (Boiler Control Unit electronics), 24V power supply.
Steam Wands: Metal tubes shaped like an upside down “U”. Steam is piped from the steam
boiler and exits at the Steam Wand tip.
User Interface: This is the entire unit that sits on the countertop. It contains the Group tower,
group head, steam wands, hot water jet, rinser jet, drain tray, operation controls and group
display.
2023 Mavam User Manual V4.53 UC/F Page 7 of 28

2021
What is new in this version
BEST and Volumetric Brew control
A new term is introduced in this version, “BEST”. This is one of the three options in the
Automatic Mode Pre-infusion menu. The other two are OFF, and TIME. BEST is our unique
method of determining when a puck has been saturated with just the right amount of water
during Pre-infusion then starting full pressure brew automatically. Using BEST removes one of
the most time consuming and demanding tasks the barista has. The machine does the work
and monitors the shot for you. Instead of having to watch the portafilter for saturation and
starting Brew manually the barista can focus on other tasks. Along with Brew volumetric
control this allows you to make an almost perfect shot every time*.
Volumetric Brew control is another feature added to this version. In Automatic mode
Brew is controlled by the number of Pulses set in the menu. This precisely measures the
volume of water used during Brew.
The number of Pulses can be determined when dialing in a new batch of coffee. Use
Manual Mode to pull shots until the desired shot is pulled. After dialing in the shot the barista
can set the volumetric measurement (Pulses) in the menu. The last dialed in shot is
remembered and can be entered directly.
Using the combination of BEST for Pre-infusion and Volumetric (Pulses) for Brew ensures
a consistent and repeatable shot every single time.
* We acknowledge that to make a perfect shot requires the full attention of a dedicated and
skilled barista! We aim to get close to that when full attention can not be given.
2023 Mavam User Manual V4.53 UC/F Page 8 of 28

2021
Machine Components
There are two categories of components, Main, and Group. Main components are the
core parts of the Mavam Espresso machine regardless of the number of groups. Group
components are the parts required for one group.
Main Components
1. Boiler Unit: This contains the steam / hot water boiler, Pump power connections, Water
distribution manifold, BCU, and 24V Power supply.
a. Steam boiler: Generates steam and is the hot water source for the hot water jet.
b. Pump power connections: Power output for the pump.
c. Water distribution manifold: Holds the check valves, pressure relief valves, steam boiler
fill output, two water outputs per group.
d. BCU: Controls the steam boiler heat and fill, group temperature, and monitors internal
temperature.
2. User Interface: The countertop piece of the machine holding the brew towers, steam
wands, hot water jet, and user controls / display.
a. Steam wands: Outlet for steam from the steam boiler.
b. Water Jet: Outlet for the hot water tap from the steam boiler.
c. User Controls: Steam and Hot water buttons.
Group Components
1. Boiler Unit: There is one of each of these components for each group.
a. Pump: Provides adjustable water pressure during brew.
b. Brew tank: Holds and heats water for the group before the heated transfer hose.
c. Heated transfer hose: Transports hot water between the Boiler Unit and User Interface.
2. User Interface:
a. Group Tower: The focal point of the machine. Holds the Group Head, and the controls
for the flow of water to the Group Head.
b. Grouphead: Holds the portafilter. The heater transfer hose is connected to the Group
Head via a solenoid that controls water flow to the portafilter. The Group Head is also
heated.
c. User Controls: Pre-infusion, Brew, Steam and Hot Water buttons.
d. User Display: Shows brew time information, mode, group temperature, and menu
settings.
2023 Mavam User Manual V4.53 UC/F Page 9 of 28

2021
Operation
Controls
Boiler Unit Controls
Controls on the boiler unit will usually not be needed during daily use of the machine.
Power Switch: Power for the entire machine is controlled by the switch on the left side of the
Boiler Unit. Caution: while this removes power from the unit power is still supplied to the
boiler unit from the main panel. Before working on or opening up the unit ensure power is
removed from the main panel before beginning.
Boiler Unit Controller: This is the main controller for temperature of all elements, steam
pressure, steam hoses, fill, and internal sensing. Note: For operation of the BCU refer to the
manual titled “BOILER UNIT CONTROLLER USE AND SETUP”.
User Interface
There are two main components of the User Interface used for operation, actuators, and UI
display. Display is discussed in detail in the section “UI DISPLAY”.
Actuators
Actuator Placement on User Interface
UI Actuators control all the functions of the UI. They consist of an actuator, (the part you
push), and an illuminated ring that indicates mode of operation.
2023 Mavam User Manual V4.53 UC/F Page 10 of 28

2021
General
All controls on the User Interface are momentary actuators with an illuminated ring
surrounding the actuator. The actuator controls all functions of the UI, (Pre-Infusion, Brew,
Steam, and Water), the illuminated ring around the actuator indicates the state of the
operation.
There are two types of actuators used on the UI, Mechanical and Piezo. Operation is slightly
different for these two types of actuators. Any difference in operation between the
mechanical and piezo actuators will be noted in the instructions. Mechanical actuators will
depress when the center is pushed while Piezo actuators will not. Piezo actuators require a
slight force to register a push different than the Mechanical actuators. Practice is encouraged
prior to daily use with the Piezo actuators.
The illuminated ring has four different indications:
Steady ON: This indicates the function is idle (off).
Steady DIM: Used during the Pre-Infusion and Brew operation. Indicates that half of the
operation is not running. For example, if PI is DIM and Brew is Slow Blink, Brew is
on and PI is off
Slow Blink: This indicates the function is running (on).
Fast Blink: Only used in Menu mode when setting up group options.
All actuators operate in the same manner. If the function is off, (Steady ON), pressing the
actuator will turn the function on (Fast Blink). If on, pressing the actuator will turn the function
off. There is a short delay, (¼ second), required between pushes. Pushing the actuator faster
than this will not register a new push.
Each actuator has two uses, regular operation, and menu (setting options for that group). Uses
of the actuator are detailed in the “Functions” section.
2023 Mavam User Manual V4.53 UC/F Page 11 of 28

2021
Startup
On power up the UI will display the version number and configuration in the upper data
window. The data will be shown for two seconds. Please note this information for reference
later on. The numbers are the firmware version number. The two letters are the configuration.
There are two configuration options: [C/U] and [F].
[C] is for MACH 2 above counter units, [U] is Undercounter units.
[F] is for flow meter equipped units.
This manual is for [C/U] [F] configuration
2023 Mavam User Manual V4.53 UC/F Page 12 of 28

2021
Functions
Pre-Infusion and Brew are two phases of the coffee extraction cycle. Pre-Infusion introduces
hot water to the coffee puck at a low pressure to saturate the coffee and let it bloom. Once the
coffee has had a chance to bloom the Brew cycle is started. Hot water under pressure is forced
through the coffee to produce espresso. Mavam gives the barista complete control over the
time, pressure, and temperature the coffee is extracted at. How to change these settings is
beyond the scope of this document, please refer to the appropriate instructions on how to
change these settings.
Pre-Infusion
Regular: Turns on and off the Pre-Infusion phase of the brew cycle. Maximum time allowed is
360 seconds (6 minutes). Pre-Infusion will shut off after this time.
Menu: Selects one of two options or increments a setting (counts up).
NOTE: Holding down Mechanical actuator will increment in 10s after counting three. Quickly
pressing and releasing Piezo actuators will increment in 10s after a few pressed.
Brew
Regular: Turns on and off the Brew phase of the brew cycle. Maximum time allowed is 120
seconds (2 minutes). Brew will shut off after this time.
Menu: Selects one of two options or decrements a setting (counts down).
NOTE: Holding down Mechanical actuator will decrement in 10s after counting three. Quickly
pressing and releasing Piezo actuators will decrement in 10s after a few pressed.
Steam
Regular: Turns on and off the Steam Wand. Maximum time allowed is 120 seconds (2 minutes).
Steam will shut off after this time.
Menu: Used as Enter key.
Hot Water
Regular: Turns on and off the Hot Water Jet. Maximum time allowed is 3 seconds. Hot Water
will shut off after this time.
Menu: Used as alternate Enter key in three group machines.
2023 Mavam User Manual V4.53 UC/F Page 13 of 28

2021
Group Head Cleaning
This is a special function usually performed at the end of the day. The clean cycle will run ten
cycles of five seconds Brew phase and five seconds off. The UI display will show “AUTO CYCLE”
in the top data window with the total cycles on the right of the bottom data window and cycles
completed in the left of the bottom data window. After each cycle the top data window will
display “CYCLES TOTAL” and a total of completed cycles. The following steps describe how to
access this function
1. Enter Menu Mode by pressing and releasing BOTH Pre-Infusion and Brew actuators at
the same time. “PSH FOR MENU” should show in the top data display. Press and release
BOTH Pre-Infusion and Brew actuators again, (this has to be done within two seconds of
the first part). If done within two seconds “CLEAN? NO” will show in the top data
window.
2. When “CLEAN? NO” is shown use the Brew actuator to change to “CLEAN? YES”. Press
the Steam or Water actuator to start the clean cycle. If you do not want to perform the
clean function leave at “NO” and press the Steam or Water actuator to move to the next
menu function. Pressing the Pre-infusion actuator will change “YES” to “NO”.
3. When running pressing either Pre-Infusion or Brew actuator at any time will cancel the
clean cycle.
4. When completed, or stopped, the UI will return to Idle mode.
Clean Cycle running Clean Cycle running, Display between cycles
2023 Mavam User Manual V4.53 UC/F Page 14 of 28

2021
Manual and Automatic Modes
There are two modes used for the brew cycle, Manual, and Automatic. Current mode is shown
in the upper left corner of the display in the upper data window. “MANUAL” = Manual, “AUTO”
= Automatic. The mode is set in the MENU function.
Manual Mode
This mode gives the barista complete control over the brew cycle. Once a portafilter is inserted
and ready for use the user may initiate the brew cycle by starting Pre-Infusion or go directly to
Brew. In the brew cycle pressing the actuator for the phase that is running, (Slow Blink), will
stop the brew cycle, pressing the other actuator, (Steady Dim), will change to that phase.
For example: User starts the Pre-Infusion phase and after the desired time has elapsed starts
the Brew phase. Pressing the Brew actuator will finish the cycle, pressing the Pre-Infusion
actuator will change the brew cycle to the low pressure Pre-Infusion phase.
Note: When Brew phase is started the elapsed time will continue to count up in the Brew phase
window of the display.
Automatic Mode
Automatic settings are shown in the lower data window when idle, A1 and A2. Settings are
shown on three lines:
AUTO 1: 10/300 [Auto 1, 10 second Pre-infusion, 300 Pulse Brew]
AUTO 2: BEST/350 [Auto 2, BEST Pre-infusion, 350 Pulse Brew]
Pre-infusion options
OFF: No Pre-infusion goes directly to Brew.
BEST: Machine determines the optimal puck saturation and starts Brew.
TIME: Sets seconds for Pre-infusion to run. Can go up to 6 minutes to accommodate
pour over shots.
Brew options
0 (Zero): No Brew. Used mostly when Pre-infusion is for pour overs.
PULSES: Runs Brew using the amount of Pulses entered.
Pressing the Pre-Infusion actuator will start AUTO 1, pressing the Brew actuator will start AUTO
2. When started the cycle will run for the pre-set time and stop. The program will be shown in
the upper data window when running, “AUTO:1”, or “AUTO:2” The cycle may be stopped
anytime by pressing the current phase actuator. For example, if in the Pre-Infusion phase,
pressing the Pre-Infusion actuator will cancel the cycle.
2023 Mavam User Manual V4.53 UC/F Page 15 of 28

2021
UI Display
Display in MANUAL “Post Display”
There is one display per group. The display is located in the front of the UI, (closest to the
barista), and centered on the group.
Placement of Display on User Interface
2023 Mavam User Manual V4.53 UC/F Page 16 of 28

2021
Display Modes
There are many different phases of displays, Brew Display, Menu Display, Post, Idle, and
Idle Screensaver. Idle is displayed after a Brew cycle, Menu exit, and finishing Auto Clean.
Screensaver is displayed after sixty seconds of Idle screen.
Brew Display
Information on the screen is dependent on what phase of operation is active and mode of
operation. (X) refers to illustration on the next page. The different phases are:
Idle: Group not in use, Steam and / or Water may be in use. (1), (2), (3)
Pre-Infusion: Pre-Infusion phase of the brew cycle in use. (4)
Brew: Brew phase of brew cycle in use (5)
Post Brew: Pre-Infusion and Brew phase finished. (6)
Menu: Changing group options. See “Using the Menu Functions”
Modes of operation are Manual, and Automatic.
Data Table
Table of data shown in different phases and modes.
Phase
Mode
Steam,
Water ON
Group
Temperature
Pre-Infusion
Time
Brew
Time
Auto
Settings
Idle
M, A
M,A
M, A
X
X
A
Pre-Infusion
M, A
X
M,A
M,A
M,A
X
Brew
M,A
X
M,A
M,A
M,A
X
Post Brew
M,A
M,A
M,A
M,A
M,A
X
Menu
S
S
S
S
S
S
M = Shown in Manual Mode, A = Shown in Automatic Mode, X = Not Displayed, S = Special use
2023 Mavam User Manual V4.53 UC/F Page 17 of 28

2021
Screen Examples
(1) Idle Screen (2) Idle ScreenSaver
(3) Idle, Steam and Water ON (4) Pre-Infusion phase
Idle screen shows the settings for AUTO only if in AUTO.
Screen above indicates that AUTO 1 is Pre-Infusion fifteen seconds, Brew 300 Pulses. AUTO 2
is Pre-Infusion BEST, Brew 350 Pulses.
Menu functions and screens are covered in “USER INTERFACE MENU INSTRUCTIONS”
2023 Mavam User Manual V4.53 UC/F Page 18 of 28

2021
Pre-infusion and Brew Screens
There is a lot of information presented during a shot. See the examples below to help explain
what is shown on the screen during a shot.
Pre-infusion screen, Automatic, BEST setting:
1. Heading showing Auto 1 , Best.
2. Time Pre-infusion has run in seconds.
3. Volume of water into puck in Pulses.
4. Rate of flow (Volume/Time).
5. Time of Brew, zero since Brew is not started.
Pre-infusion screen, Automatic, TIME setting:
1. Heading showing Auto 1, Time.
2. Time Pre-infusion has run in seconds
3. Volume of water into puck in Pulses.
4. Rate of flow (Volume/Time).
5. Time of Brew, zero since Brew is not started.
Brew screen, Automatic:
1. Heading showing Auto 2
2. Time of Pre-infusion, White on Black means
completed
3. Volume used during Pre-infusion
4. Volume used so far in Brew
5. Time so far in Brew
The shot information will remain on screen for 30 seconds before going to Idle.
2023 Mavam User Manual V4.53 UC/F Page 19 of 28

2021
USER INTERFACE MENU INSTRUCTIONS
Menu Overview
Menu functions allow the user to set or change the operating parameters of the User Interface.
Features available in the menu are listed in order with the Parameter in italics and options
available in parenthesis (). Default option shown in brackets [].
1. CLEAN? [NO], (YES) Selects auto clean cycle if yes.
2. [CELSIUS], (FAHRENHEIT) Selects temperature units.
3. OFFSET [0.0] Sets a hardware offset for the temperature display. NOTE: only set this if
you are sure you know the calibrated temperature of the group. This is set at the factory
and normally does not need to be changed.
4. [MANUAL], (AUTOMATIC) Changes mode between Manual and Automatic.
4.1. If set to MANUAL the remaining steps will be skipped.
5. AUTO PI NO:1 [OFF, BEST, (0 to 360)] Sets the Pre-Infusion mode for Automatic one.
6. AUTO BR NO:1 [0], (0 to 1000) Sets the Brew pulses for Automatic one.
7. AUTO PI NO:2 [OFF, BEST, (0 to 360)] Sets the Pre-Infusion time for Automatic two.
8. AUTO BR NO:2 [0], (0 to 1000) Sets the Brew pulses for Automatic two.
9. EXITING MENU End of menu, returns to Idle.
If there is no activity for thirty (30) seconds the menu function will exit and return to Idle.
The Steam AND / OR Water Actuator is used as an Enter button. On three group machines the
Water actuator is used for the center User Interface Enter button. For ease of display the Steam
Actuator is shown in all illustrations.
2023 Mavam User Manual V4.53 UC/F Page 20 of 28
Table of contents
Other Mavam Coffee Maker manuals