MaxPro PROFESSIONAL MPSG550/800V User manual

PROFESSIONAL
MPSG550/800V
Pulvérisateur de peinture 8-14
FR
Pulverizador de pintura 15-21
ES
Распылитель электрический 22-29
RU
Paint sprayer
GB 1-7
DECLARATION OF CONFORMITY
MPSG550/800V
EN 60745-1:2009/A11:2010, EN 50580:2012/A1:2013
2014/30/EU, 2006/42/EC, 2014/35/EU
Chief Ex ve Officer:
KREBS GmbH D-72124 PLIEZHAUSEN
01-08-2017
We declare under our sole responsibility that this product is in conformity with the following standards
CE DECLARATION OF CONFORMITY
GB
Nous déclarons sous notre propre responsabilité que ce produit est en conformité avec les normes ou
documents normalisés suivants:
FR DÉCLARATION DE CONFORMITE CE
Declaramos bajo nuestra sola responsabilidad que este producto está en conformidad con las normas o
documentos normalizados siguientes:
ES DECLARACIÓN DE CONFORMIDAD CE
Мы с полной ответственностыо заявляем, что это изделие соответствует следующим стандартам
или станда ртизованным документам:
RU ДЕКЛАРАЦИЯ О СООТВЕТСТВИИ СТАНДАРТАМ CE
www.maxpro-tools.com
2021-04

123
When spray upwards
When spray downwards
4 5
6
Adjustion Screw
Length control knob
7
VERTICAL
Correct:
Keep stroke smooth and at even speed.
HORIZONTAL
8
Do not flex wrist while spraying.
Incorrect:
9
10
a)As shown in the figure, rotate to remove the needle
(A)
(B)
b) As shown in the figure, rotate to set up the needle

1GB
TECHNICAL DATA.................................................................................................................................
APPLICATION........................................................................................................................................
WARNING............................................................................................................................................
GENERAL SAFETY.................................................................................................................................
SAFETY INSTRUCTION..........................................................................................................................
SYMBOLS.............................................................................................................................................
OPERATING INSTRUCTION...................................................................................................................
CLEANING AND MAINTENANCE...........................................................................................................
ENVIRONMENT....................................................................................................................................
TROUBLE SHOOTING............................................................................................................................
Contents
TECHNICAL DATA
Model
ode
Voltage
Rated power input
Max.paint delivery
Max.viscosity
Nozzle
Container capacity
Cable
Cable length
Weight according to EPTA-Procedure 01/2003
Noise/Vibra nforma
LpA sound pressure level
LWA sound power level
Uncertainty
Vibra value
Uncertainty
The vibra emission level given in this informa sheet has been measured in accordance with a
standardised test given in EN 60745 and may be used to compare one tool with another. It may be used for
a preliminary assessment of exposure.
The declared vibra emission level represents the main applica s of the tool. However if the tool is
used for different applica with different accessories or poorly maintained, the vibra emission may
differ. This may significantly increase the exposure level over the total working period.
An es a of the level of exposure to vibra should also take into account the when the tool is
switched offor when it is running but not actually doing the job. This may significantly reduce the exposure
1
2
2
2
3
4
4
5
6
7
MPSG550/800V
111-1402
220-240V~50Hz
550W
700ml/min
70DIN-s
2.5mm
800ml
PVC
2M
1.2 KG
85.1dB(A)
96.1dB(A)
3 dB(A)
0.766 m/s²
1.5 m/s²

2 3GB GB
level over the total working period.
Idenfy addional safety measures to protect the operator from the effects of vibraon such as: maintain
the tool and the accessories, keep the hands warm, organisaon of work paerns.
APPLICATION
are devoted to connuously improving and perfecng the exisng products. Therefore,
the technical performance and design concept of products may vary without any prior noce; our apology
for any possible incurrence of inconvenience therefrom. Read and follow the operang instrucons and
safety informaon before using for the first me. Save this manual.
WARNING
Remove the plug from the socket before carrying out any adjustment, servicing or maintenance. Read all
safety warnings and all instrucons. Failure to follow the warnings and instrucons may result in electric
shock, fire and/or serious injury. Make sure the voltage corresponds to the type label on the unit. Packing
materials are no toys! Children must not play with plasc bags! Danger of suffocaon! The power tool noise
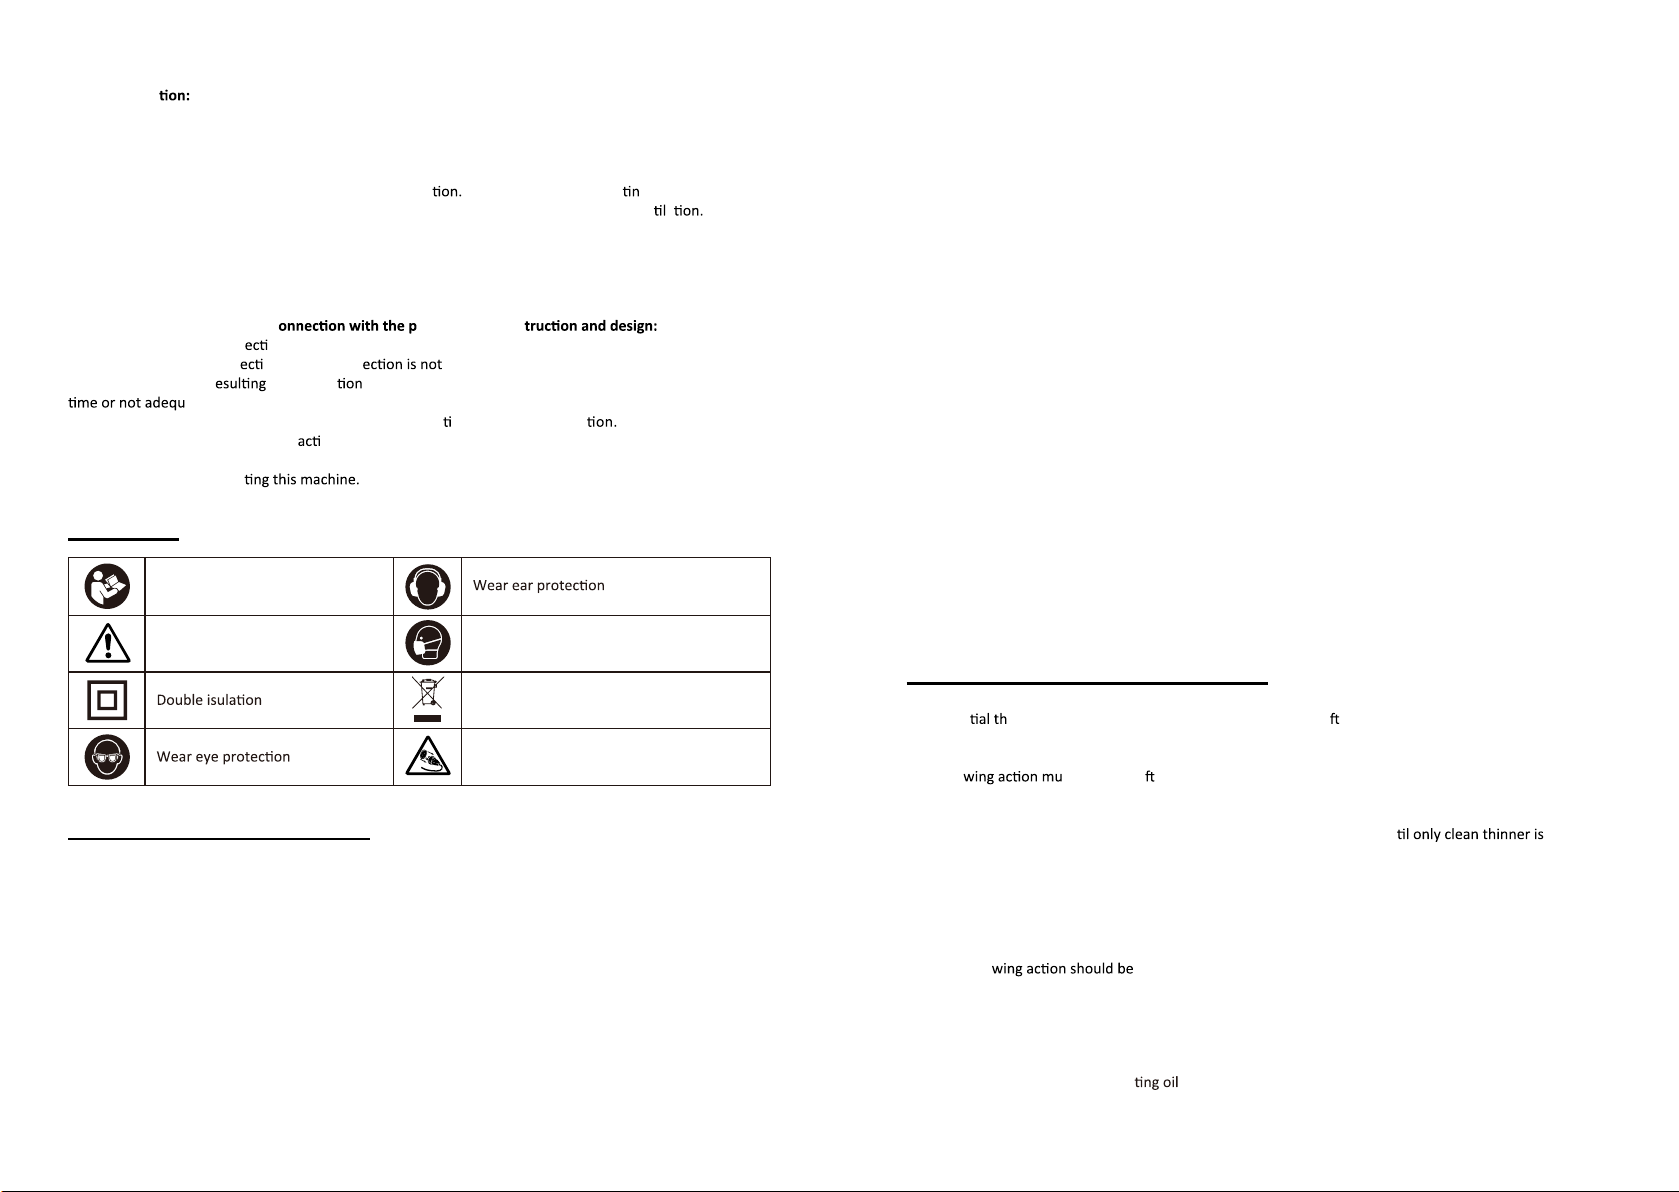
output may exceed 85dB(A) at the workplace. In this instance, wear ear protecon.
GENERAL SAFETY
Read all safety warnings and all instrucons. Failure to follow the warnings and instrucons may result in
electric shock, fire and/or serious injury.
Save all warnings and instrucons for future reference.
The term “power tool” in the warnings refers to your mains-operated (corded) power tool or baery-
operated (cordless) power tool.
1) Work area safety
a) Keep work area clean and well lit. Cluered or dark areas invite accidents.
b) Do not operate power tools in explosive atmospheres, such as in the presence of flammable liquids,
gases or dust. Power tools create sparks which may ignite the dust or fumes.
c) Keep children and bystanders away while operang a power tool. Distracons can cause you to lose
control.
2) Electrical safety
a) Power tool plugs must match the outlet.Never modify the plug in any way.Do not use any adapter
plugs with earthed (grounded) power tools.Unmodified plugs and matching outlets will reduce risk of
electric shock.
b) Avoid body contact withearthed or grounded surfaces, such as pipes, radiators, ranges and
refrigerators. There is an increased risk of electric shock if your body is earthed or grounded.
c) Do not expose power tools torain or wet condions. Water entering a power tool will increase the risk
of electric shock.
d) Do not abuse the cord. Never use the cord for carrying, pulling or unplugging the power tool. Keep
cord away from heat, oil, sharp edges and moving parts. Damaged or entangled cords increase the risk of
electric shock.
e) When operang a power tool outdoors, use an extension cord suitable for outdoor use. Use of a cord
suitable for outdoor use reduces the risk of electric shock.
f) If operang a power tool in a damp locaon is unavoidable, use a residual current device (RCD)
protected supply. Use of an RCD reduces the risk of electric shock.
3) Personal safety
a) Stay alert, watch what you are doing and use common sense when operang a power tool. Do not use
a power tool while you are red or under the influence of drugs, alcohol or medicaon.A moment of
inaenon while operang power tools may result in serious personal injury.
b) Use personal protecve equipment. Always wear eye protecon. Protecve equipment such as dust
mask, non-skid safety shoes, hard hat, or hearing protecon used for appropriate condions will reduce
personal injuries.
c) Prevent unintenonal starng. Ensure the switch is in the off-posion before connecng topower
source and/or baery pack, picking up or carrying the tool. Carrying power tools with your finger on the
switch or energising power tools that have the switch on invites accidents.
d) Remove any adjusng key or wrench before turning the power tool on. A wrench or a key leaached
to a rotang part of the power tool may result in personal injury.
e) Do not overreach.Keep proper foong and balance at all mes.This enables beer control of the
power tool in unexpected situaons.
f) Dress properly.Do not wear loose clothing or jewellery.Keep your hair, clothing and gloves away from
moving parts.
Loose clothes, jewellery or long hair can be caught in moving parts.
g) If devices are provided for the connecon of dust extracon and collecon facilies, ensure these are
connected and properly used. Use of dust collecon can reduce dust-related hazards.
4) Power tool use and care
a) Do not force the power tool. Use the correct power tool for your applicaon. The correct power tool
will do the job beer and safer at the rate for which it was designed.
b) Do not use the power tool if the switch does not turn it on and off. Any power tool that cannot be
controlled with the switch is dangerous and must be repaired.
c) Disconnect the plug from the power source and/or the baery packfrom the power tool before
making any adjustments, changing accessories, or storing power tools. Such prevenve safety measures
reduce the risk of starng the power tool accidentally.
d) Store idle power tools out of the reach of children and do not allow persons unfamiliar with the power
tool or these instrucons tooperate the power tool. Power tools are dangerous in the hands of untrained
users.
e) Maintain power tools. Check for misalignment or binding of moving parts, breakage of parts and any
other condion that may affect the power tool’s operaon. If damaged, have the power tool repaired
before use. Many accidents are caused by poorly maintained power tools.
f) Keep cung tools sharp and clean. Properly maintained cung tools with sharp cung edges are less
likely to bind and are easier to control.
g) Use the power tool, accessories and tool bits etc. in accordance with these instrucons, taking into
account the working condions and the work to be performed.
Use of the power tool for operaons different from those intended could result in a hazardous situaon.
5) Service
a) Have your power tool serviced by a qualified repair person using only idencal replacement parts. This
will ensure that the safety of the power tool is maintained.
b) Cauon! The use of any accessories or addional tools other than those recommended in this manual
may lead to an increased risk of injury. Only use original replacement parts.
SAFETY INSTRUCTION
•You may only spray coang materials such as paints, varnishes, glazes, etc. with a flashpoint of 55°C (32°C
in UK) and higher without addional warning. (German classificaon of coang material is hazard classes A
II and A III, see material n.)
• The device may not be used in workplaces covered by the explosion-protecon regulaons.
•There must be no sources of ignion such as, for example, open fres, smoke of lit cigarees, cigars and
tobacco pipes, sparks, glowing wires, hot surfaces, etc. in the vicinity during spraying.
• Do not spray any substances whose hazard potenal is not known.
• Before working on the spray gun remove the power plug from the socket.
• Do not use the spray guns to spray flammable substances.
• The spray guns are not to be cleaned with flammable solvents which have a flashpoint under 55°C.
•Cauon against dangers that can arise from the sprayed substance and observe the text and informaon
on the containers or the specificaons given by the substance manufacturer.
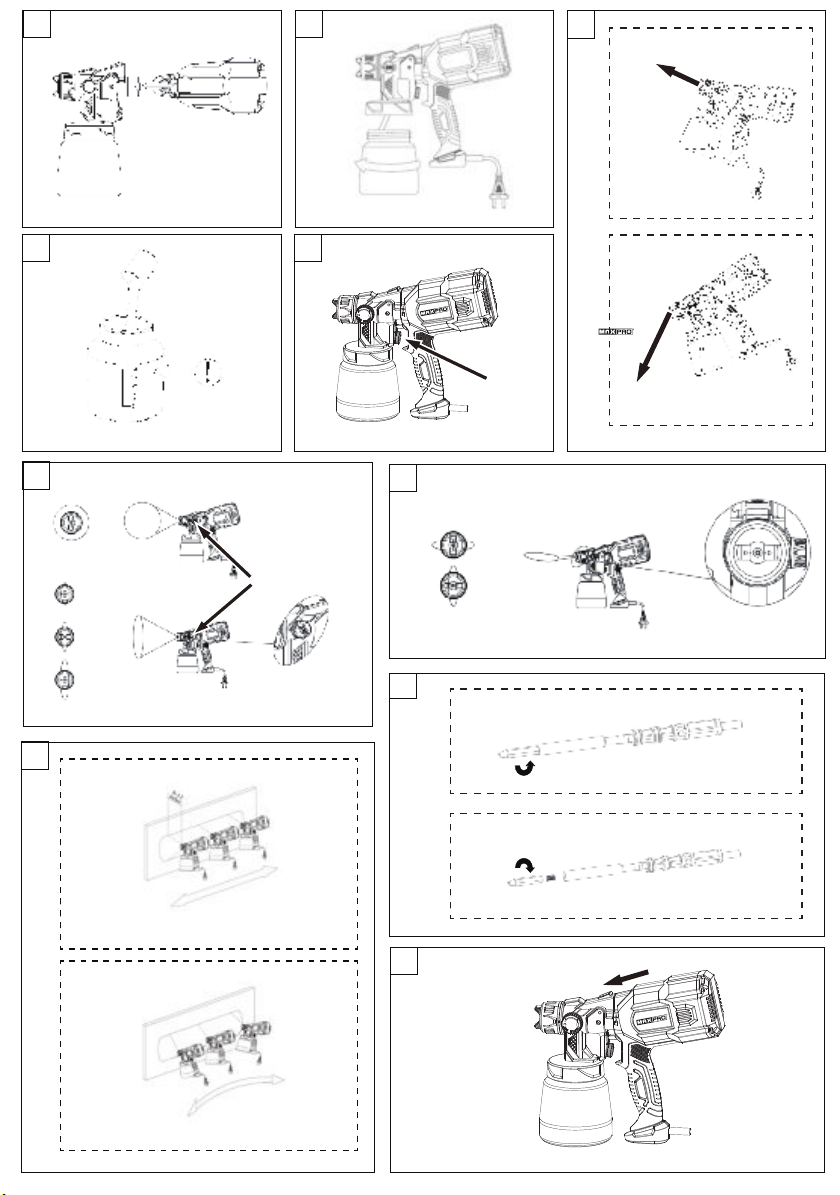
The paint sprayer is mainly intended for decoraon coang, painng, plant watering, etc., it is can not
be intended for the painng and coang of flammable, explosive and corrosive liquids, please read the
instrucon manual carefully before use.

CLEANING AND MAINTENANCE
4 5GB GB
• High pressure at the nozzle.
RecommendaWear a breathing mask and safety glasses when spraying.
CAUTION - DANGER OF INJURY!
Never point the spray gun at yourself, at other people or at animals.
•When working with the tool indoors as well as outdoors ensure that no solvent vapors are sucked in by
the spray gun.
•When working outdoors, be aware of the wind direc Wind can carry the coa g substance across
greater distances - thus causing damage. When working indoors, provide for adequate ven a
• Do not let children handle(4) the device.
• Never open the device yourself in order to carry out repairs in the electrical system!
• Do not lay the spray gun.
Residual risks
Even when the power tool is used as prescribed it is not possible to eliminate all residual risk factors. The
following hazards may arise in c ower tool’s cons
1. Damage to lungs if an effve dust mask is not worn.
2. Damage to hearing if effve hearing prot worn.
3. Damages to health r from vibra emission if the power tool is being used over longer period of
ately managed and properly maintained.
WARNING! This power tool produces an electromagne c field during opera This field may under
some circumstances interfere with ve or passive medical implants. To reduce the risk of serious or fatal
injury, we recommend persons with medical implants to consult their physician and the medical implant
manufacturer before opera
SYMBOLS
OPERATING INSTRUCTION
1.Connect gun body with motor(Fig.1)
2.Unscrew the paint container from the spray gun.(Fig.2)
3.Adjust the sucon tube.(Fig.3)
4.Pour material into container, make sure not to exceed 800ml(Fig.4)
5.Adjust the needle adjusng screw to meet your requirement.(Fig.5)
(1).Hold the gun with your hand to align the slot on the gun with the slot on the motor and insert it (as shown
in the figure).
(2). Hold the motor handle with your hand, rotate the right hand clockwise 90°.
(3).When the gun and host are parallel, it is locked.
(1).If spray in an upward direcon,the angled end of the sucon tube should be poinng toward the rear of
the gun.
(2).If spray in a downward direcon, the angled end of the sucon tube should be poinng towards the front
of the gun.
(1).Adjust the screw to le to decrease paint volume, lower paint thickness.
(2).Adjust the screw to right to increase paint volume, increase paint thickness.
6.Spray length adjustment: Turn this knob to adjust the round shape from vercal to horizontal.
Adjust the required length according to the spraying environment, reduce waste and save material.(Fig.6)
(1).The counterclockwise rotaon shortens the length, and when it rotates to the stop posion, it is sprayed
with the largest circle.
(2).Adjust the screw to right to increase paint volume, increase paint thickness.
7.Adjusng spray paerns.(Fig.7)
(1).The gun spray paerns can be changed from a horizontal oval fan paern to a round.
(2).detailed paern to a vercal fan paern by adjusng the nozzle.
8.Open the power switch, pull trigger, the paint will spray from the nozzle.(Fig.8)
(1).EVEN COAT THROUGHOUT.
Correct:Keep stroke smooth and at even spee.
Incorrect:Do not flex wrist while spraying.
9.VI Replace nozzle and Needle:(Fig.9)
(1).When disassembling the nozzle, please pull the trigger first, then press and remove the nozzle.
(2).As shown in the figure, rotate to remove the needle
(3).As shown in the figure, rotate to set up the needle.
10..Remove the motor(Fig.10)
(1).Hold the gun with your hand and press the latch in the direcon of the arrow.
(2).At the same me hold the motor handle with your hand and rotate it counterclockwise 90°.
(3).Pull out to remove the motor from the gun.
Always remember to disconnect from the mains supply before cleaning the spray gun or paint container. (5)
It is essen at the spray gun is cleaned and oiled thoroughly a er every use. Failure to clean and
oil it will almost certainly result in blockages and it may not operate when you next come to use it! The
guarantee does not cover cleaning a sprayer that has not been properly cleaned by the user.
The follo st be taken a er every use:
1. Empty any remaining material from the container.
2. Clean the container thoroughly with the thinner that was used.
3. Pour some thinner into the container and spray through the spray gun un coming
out of the nozzle.
4. Thoroughly clean the paint pick up pipe and filter with thinner.
5. Clean the basket and nozzle and remove any other debris or paint that remains.
6. Turn the spray gun upside down and apply a few drops of light oil to the two apertures
7. switch on the unit for a while, this will lubricate the piston and cylinder.
If your spray gun should require extra internal cleaning, it may be necessary to disassemble it.
If so the follo taken:
Read the manual
Warning Wear dusk mask
Do not dispose of old appliances in the
household garbage
Disconnect from power supply while
maintance
7. Clean the cylinder (K) and all parts thoroughly with solvent.
8. Apply a few drops of light lubrica to the piston, spring and cylinder.
9. Reassemble the spray gun.
3. Remove the plug from the mains socket.
4. Remove paint container (5), pick up pipe and filter.
5. Take off the pump assembly.
6. Release the nozzle (H), valve (I), piston (M) and spring (L).

6 GB 7GB
ENVIRONMENT
Do not dispose of electric tools, accessories and packaging together with household waste material -
in observance of European Direcve 2002/96/EC on waste of electric and electronic equipment and its
implementaon in accordance with naonal law, electric tools that have reached the end of their life must
be collected separately and returned to an environmentally compable recycling facility.
TROUBLE SHOOTING
Fault Symptom Possible Cause Troubleshoong
Motor noise not normal Spray gun not clean, or not
lubricated, resulngin piston being
stuck in cylinder
Disassemble spray gun and clean
with thinner
Motor hums but does not spray
or irregular spraying Worn swirl head Replace swirl head
Pick up pipe not in the right
posion
Re-adjust pick up pipe
Blocked pick up pipe Clean with thinner
Blocked nozzle Clean nozzle
Blocked filter Clean with thinner
Control knob needs adjustment Adjust
Atomizaon is not good
Over painng Spray gun not clean, or not
lubricated resulng in piston being
stuck in cylinder
Disassemble spray gun and clean
with thinner.
Too much paint Adjust the volume clockwise to
reduce spraying. Two thin
coats are beer then one
Viscosity too low Check viscosity
Operang sound not right Poor output adjustment Re-adjust
Not enough paint in the container
resulng in air being sucked in
Refill with paint
Not dilung properly or not
passing pick up pipe completely
Check pick up pipe and viscosity
level
“Orange Skin” excessive fogging Incorrect solvent is used Use correct solvent
Spray gun too far from the surface Hold spray gun closer to the object
Paint too thick Thin the paint
Lile or no material flow Nozzle clogged.
Sucon tube clogged.
Material volume seng
turned too low(-).
Sucon tube loose.
No pressure build up in container.
Air filter clogged.
Clean.
Clean.
Increase volume seng (+).
Insert.
Tighten container.
Change.
Material leaking Nozzle loose.
Nozzle worn.
Nozzle seal worn.
Material build-up on air
cap and nozzle.
Tighten.
Replace.
Replace.
Clean.
Viscosity of material too high.
Material volume too large.
Material volume seng too
high (+).
Nozzle clogged.
Air filter clogged.
Too lile pressure build-up in
container.
Thin.
Decrease volume seng (-).
Clean.
Change.
Tighten container.

8 FR
DONNÉES TECHNIQUES.......................................................................................................................
APPLICATION........................................................................................................................................
MISE EN GARDE....................................................................................................................................
SÉCURITÉ GÉNÉRALE............................................................................................................................
CONSIGNE DE SÉCURITÉ.......................................................................................................................
SYMBOLES............................................................................................................................................
MODE D’EMPLOI..................................................................................................................................
NETTOYAGE ET MAINTENANCE............................................................................................................
ENVIRONNEMENT................................................................................................................................
DÉPANNAGE EXCLURE..........................................................................................................................
Contenu
DONNÉES TECHNIQUES
Modèle
Voltage
Puissance d’entrée nominale
Max. dis nture
Max. viscosité
Bec
Capacité du réservoir
câble
Longueur du câble
Poids suivant EPTA-Procedure 01/2003
Niveau sonore et vibra
LpA niveau de pression acous
LWA niveau de ppuissance acous
Valeur d'émission des vibra
Le niveau d’oscilla s ’ a été mesuré conformément à la norme EN
60745 et peut être pour une comparaison d’ électroporta fs. Il est également approprié pour
une es a réliminaire de la charge vibratoire.
Le niveau d’oscilla on correspond aux u sa ons principales de l’o électroporta f. Si l’ou électrique
est cependant sé pour d’autres applica s, avec d’autres s de travail ou avec un entre non
approprié, le niveau d’oscilla être différent. Ceci peut augmenter considérablement la
charge vibratoire pendant toute la durée de travail.
Pour une es a précise de la charge vibratoire, il est recommandé de prendre aussi en considéra
8
9
9
9
11
11
12
13
13
14
MPSG550/800V
111-1402
220-240V~50Hz
550W
700ml/min
70DIN-s
2.5mm
800ml
PVC
2M
1.2 KG
85.1dB(A)
96.1dB(A)
3 dB(A)
0.766 m/s²
1.5 m/s²

9 FR
les périodes pendant lesquelles l’appareil est éteint ou en f nt, mais pas vraiment Ceci
peut réduire considérablement la charge vibratoire pendant toute la durée de travail.
Déterminez des mesures de prot supplémentaires pour protéger l’ ateur des effets de vibra
telles que par exemple : entre de l’ électrique et des de travail, maintenir les mains chaudes,
organisa ra ravail.
APPLICATION
est décidé à l’améliora con et au perf nt de ses produits existants.
Par conséquent, la performance technique et le design des produits peuvent varier sans préavis; nous vous
présentons nos excuses pour toute possible gêne occasionnée due à cela. Lisez et suivez les ins de
mise-en-route ainsi que les conseils de sécurité avant la premièr aConserver ce manuel.
MISE EN GARDE
Avant d’effectuer aucun réglage, l’entre ou la maintenance : débrancher la machine en re rant la prise
électrique. Lisez tous les av nts de sécurité et les ins Ne pas suivre ces av nts et
ces ins pourraient entraîner un choc électrique, un incendie et/ ou des blessures graves. Assurez-
vous que la tension correspond aux données inscrites sur la machine. Les matériaux d’emballage ne sont
pas de jouets! Les enfants ne doivent pas jouer avec des sacs en plas ffoca
Le niveau de pression acous peut dépasser 85dB(A) dans le lieu de travail. Dans ce cas-là, porter des
prot ves.
SÉCURITÉ GÉNÉRALE
ATTENTION! Lisez tous les av nts de sécurité et toutes les ins . Ne pas suivre les
vaver ments et instruc peut entraîner un choc électrique, un incendie et/ou de graves blessures
sur les personnes. Conservez tous les av nts et toutes les ins pour pouvoir s’y reporter
ultérieurement. La no d’”ou électroporta f” dans les aver nts se rapporte à des ou s
électriques raccordés au secteur (avec câble de raccordement) et à des o s électriques à ba erie (sans
câble de raccordement).
1) SECURITE DE LA ZONE DE TRAVAIL
a) Maintenez l’endroit de travail propre et bien éclairé. Un lieu de travail en désordre ou mal éclairé
augmente le risque d’accidents.
b) N’ sez pas l’appareil dans un environnement présentant des risques d’explosion et où se trouvent
des liquides, des gaz ou poussières inflammables. Les ou électroporta fs génèrent des é celles
risquant d’enflammer les poussières ou les vapeurs.
c) Tenez les enfants et autres personnes éloignés durant l’ a de l’ électroporta f. En cas
d’ina en vous risquez de perdre le contrôle sur l’appareil.
2) SECURITE RELATIVE AU SYSTEME ELECTRIQUE
a) La fiche de secteur de l’ électroporta doit être appropriée à la prise de courant. Ne modifiez en
aucun cas la fiche. N’ ez pas de fiches d’adaptateur avec des appareils avec mise à la terre. Les fiches
non modifiées et les prises de courant appropriées réduisent le risque de choc électrique.
b) Evitez le contact physique avec des surfaces mises à la terre telles que tuyaux, radiateurs, fours et
réfrigérateurs. Il y a un risque élevé de choc électrique au cas où votre corps serait relié à la terre.
c) N’exposez pas l’ électroporta f à la pluie ou à l’humidité. La pénétra d’eau dans un ou l
électroporta nte le risque d’un choc électrique.
d) N’ ez pas le câble à d’autres fins que celles prévues, n’ ez pas le câble pour porter l’appareil
ou pour l’accrocher ou encore pour le débrancherde la prise de courant. Maintenez le câble éloigné des
sources de chaleur, des grasses, des bords tranchants ou des de l’appareil en rota Un
câble endommagé ou torsadé augmente le risque d’un choc électrique.
Pistolet électrique est principalement u pour la décora revêtements, peintures, arrosage des
plantes, etc., ne peut pas être pour liquides inflammables, corrosifs et opéra de pulvérisa n
facile, se il vous plaît lire a en vement les ins avan za
10FR
e) Au cas où vous seriez l’ roporta ’extérieur sez une rallonge autorisée homologuée
pour les applica extérieures. L’ a d’une rallonge électrique homologuée pour les applica
extérieures réduit le risque d’un choc électrique.
f) Si l’usage d’un dans un emplacement humide est inévitable, sez un disjoncteur de fuite à la
terre. L’ a ’un disjoncteur de fuite à la terre réduit le risque de choc électrique.
3) SECURITE DES PERSONNES
a) Restez vigilant, surveillez ce que vous faites. Faites preuve de bon sens en sant l’ l
électroporta f. N’ ez pas l’appareil lorsque vous êtes fa ou après avoir consommé de l’alcool,
des drogues ou avoir pris des médicaments. Un moment d’ina en on lors de l’ sa on de l’appareil peut
entraîner de graves blessures sur les personnes.
b) Portez des équipements de prote . Portez toujours des lune es de protec . Le fait de porter
des équipements de prot personnels tels que masque an res, chaussures de sécurité
an rapantes, casque de prot ou prot acous suivant le travail à effectuer, réduit le risqué
de blessures.
c) Evitez tout démarrage intempes f. S’assurez que l’interrupteur est en posi arrêt avant de brancher
l’ au secteur et/ou au bloc de ba eries, de le ramasser ou de le porter. Porter les o s en ayant
le doigt sur l’interrupteur ou brancher des ou don’t l’interrupteur est en posi marche est source
d’accidents.
d) Enlevez tout de réglage ou toute clé avant de me re l’appareil en f nt. Une clé ou un
rouvan rota causer des blessures.
e) Ne sures ez pas vos capacités. Veillez à garder toujours une stable et équilibrée. Ceci vous
permet de mieux contrôler l’appareil dans des situa a endues.
f) Portez des vêtements appropriés. Ne portez pas de vêtements amples ni de bijoux. Maintenez cheveux,
vêtements et gants éloignés des s de l’appareil en rota . Des vêtements amples, des bijoux ou
des cheveux longs peuvent être happés par des pièces en mouvement.
g) Si des fs servant à aspirer ou à recueillir les poussières doivent être vérifiez que ceux-
ci soient effvement raccordés et qu’ils sont correctement . L’ sa des collecteurs de
poussière réduit les dangers dus aux poussières.
4) UTILISATION ET EMPLOI SOIGNEUX DE L’OUTIL ELECTROPORTATIF
a) Ne surchargez pas l’appareil. ez l’ électroporta approprié au travail à effectuer. Avec l’
électroporta f approprié, vous travaillerez mieux et avec plus de sécurité à la vitesse pour laquelle il est
prévu.
b) N’ ez pas un électroporta don’t l’interrupteur est défectueux. Un électroporta qui ne
peut plus être mis en ou hors f nt est dangereux et doit être réparé.
c) Débranchez la fiche de la source d’alimenta en courant et/ou le bloc de ba eries de l’ avant
tout réglage, changement d’accessoires ou avant de ranger l’ Ce e mesure de préc empêche
une mise en f nt par mégarde.
d) Gardez les électroporta fs non hors de portée des enfants. Ne perme ez pas l’ a
de l’appareil à des personnes qui ne se sont pas familiarisées avec celui-ci ou qui n’ont pas lu ces
instruc .Les ou ls électroporta fs sont dangereux lorsqu’ils sont u par des personnes non
e) Prenez soin des électroporta fs. Vérifiez que les par es en mouvement f ent
correctement et qu’elles ne soient pas coincées, et contrôle nt cassées ou endommagées
de telle sorte que le bon f nt de l’appareil s’en trouve entravé. Faites réparer les s
endommagées avant d’ l’appareil. De nombreux accidents sont dus à des électroporta fs mal
entretenus.
f) Maintenez les de coupe aiguisés et propres. Des soigneusement entretenus avec des bords
tranchants bien aiguisés se coincent moins souvent et peuvent être guidés plus facilement.
g) U sez les ou s électroporta fs, les accessoires, les ou s à monter etc. conformément à ces
ins Tenez compte également des c de travail et du travail à effectuer. L’ a des
roporta fs à d’autres fins que celles prévues peut entraîner des situa gereuses.
5) SERVICE
a) Ne faites réparer votr roporta rsonnel qualifié et seulement avec des pieces de
rechange d’origine. Ceci permet d’assurer la sécurité de l’appareil.
b) C !L’ sa on d'accessoires ou des s supplémentaires autres que celles recommandées

11 FR
dans ce manuel peut conduire à un risque accru de blessures. uniquement des pièces de rechange
d’origine.
CONSIGNE DE SÉCURITÉ
• Vous ne pouvez pulvériser des produits de revêtement tels que peintures, vernis, émaux, etc., avec
un point d'éclair de 55 ° C (32 ° C au Royaume-Uni) et supérieur sans av nt supplémentaire.
(Classifica atériau de revêtement est classes de danger A II et A III, voir l'étain matériel.)
• L'appareil ne peut pas êtr ravail où sont couverts par les règles de prot
l’explosion.
• Il ne doit pas avoir aucune source d'inflammacomme, par exemple, le doubleur de fréquence ouvert,
la fumée de cigare es, de cigares et de pipes à tabac, des é candescents, des surfaces
chaudes, etc., dans l’endroit proche de la pulvérisa
• Ne pulvériser pas dessubstancesqui ont le poten ’on ne sait pas.
• Avant de travailler sur le pistolet, re rer la fiche d'alimenta
• N’stolets à pulvériser des substances inflammables.
• Les pistolets de pulvérisa vent pas être ne oyés avec des solvants inflammables qui a le point
de rupture moins de 55 ° C
• Aen contre les dangers qui peuvent résulter dumatériel pulvériseet observer le texte et des
informa conteneurs ou les spécifica fournis par le fabricant de la substance.
• Pression hauteà la buse.
Recommanda Porter un masque respiratoire et des lune es de sécurité lors de la pulvérisa
ATTENTION - Risque de blessure!
Ne pas viser le piloter à peinture à toi-même ou les autres personnes, les autres animaux.
• Quand vous travaillez av ntérieur ou à l'extérieur, assurez qu'aucun des vapeurs de solvants
sont aspirés par le pistolet.
• Quand vous travaillez à l'extérieur, il doit être conscient de la dir vent. Le vent peut transporter
la substance de revêtement sur de plus grandes distances – qui va causer des dommages. Quand vous
travaillez à l'intérieur, prévoir une ven a ate.
• Ne laissez pas les enfan f.
• N’ouvrir jamais l'appareil par vous-même afin d'effectuer des répara système électrique!
• Ne poser pas le pistolet.
Les risques résiduels
s p st impossible d'éliminer tous les
facteurs de risque résiduel. Les risques suivants peuvent survenir dans le cadre de la cons et de la
concep
1. Il aura des dommages aux poumons si un masque an re efficace n’est pas usé.
2. Il aurades dommages à l'ouïe si une prot efficace de l'audience n’est pas usé.
3. Il aura des dommages pour la santé résultant de l'émission de vibra té
nt une période trop longue ouil n’est pas bien géré ou bien entretenu.
ATTENTION! Ce génère un champ électromagné nt le f nt. Dans
certaines circonstances, ce champ peut perturber le f nt d'implants médic fs ou passifs.
Pour réduire le risque de blessures graves ou mortelles, les hommes portant des implants médicaux doivent
consulter leur médecin et le fabricant de l'implant médical avan e e machine.
SYMBOLES
dans les ordures ménagères!
12FR

13 FR 14FR
DÉPANNAGE EXCLURE
NETTOYAGE ET MAINTENANCE
Rappelez-vous toujours de débrancher la sourced'aliment nt de ne oyer le pistolet ou le conteneur
de peinture. (5)
Il est essen stolet est ne oyé et huiléà fond apr a e oyer et
huilier le pistoletpourront certainement entraîner des blocages, et il peut pas f rs de votre
pr a garan couvre pas le ne oyage d'un pistoletqui n'a pas été correctement
ne oy ateur.
vante doit être prise apr a
1. Videz tout les matériaux restant dans le récipient.
2. Ne oyez le récipient à fond avec le diluant qui a ét
3. Versez un peu de diluant dans le récipient et pulvériser à travers le pistolet jusqu'on ne peut que voir le
diluant propr
4. Ne oyez soigneusement la peinture,le tuyau d'alimenta et le filtrez avec du diluant.
5. Ne oyez le panier et la buse et re rez tout autre débris ou de la peinture qui restent.
6. Tournez le pistolet à l'envers et appliquez quelques gou es d'huile légère sur les deux ouvertures.
7. Démarrez l'appareil pour un certain temps, cela va lubrifier le piston et le cylindre.
Si votre pistolet a besoind’un ne oyage interne supplémentaire, il devrait démonter le pistolet.
Si c’était comme ça les mesures suivantes doivent être prises:
3. Re rez le bouchon de la prise de courant.
4. Re rez le bac à peinture (5), le tuyau d'alimenta et le filtrez.
5. Re rez la pompe.
6. Relâchez la buse (H), la vanne (I), le piston (M) et le ressort (L).
7. Ne oyez le cylindre (K) et toutes les pièces soigneusement avec du solvant.
8. Appliquez quelques gou es d'huile de lubrifica gère pour le piston, le ressort et le cylindre.
9. Remontez le pistolet.
ENVIRONNEMENT
Ne jete et l’emballage dans les ordures ménagères
- conformément à la dir ve européenne 2002/96/EG rela ve aux déchets d’équipements électriques ou
électroniques, et à sa tr a a vent être
collectés séparément et faire l’objet d’un recyclage respectueux de l’environnement
et insérer le pistolet dans l’ensemble de compresseur d’Air en place, tourner les deux boutons des deux
2. Vous devriez inspecter le filtre à air dans l’ensemble de compresseur d’Air pour voir si elle est
excessivement sale. S’il est sale, suivez les étapes ci-dessous pour le remplacer.Débrancher le pistolet
sales et les remplacer par des neuves.Fixer le couvercle sur la turbine.
Peinture excès Pistolet pas propre, ou non lubrifié
résultant en piston étant coincé
dans le cylindre
Démonter le pistolet et le ne oyer
avec du diluant
Trop de peinture Ajuster le dans le sens horaire
pour réduire la pulvérisa
couches fines valent mieux qu'une
Viscosité trop faible Vérifier la viscosité
Son de f nt anormal Ajustemen re Rajuster
Pas assez de peinture dans le
récipient résultant dans l'air étant
aspiré
Remplir avec de la peinture
Ne diluer pas très bien ou ne
passer pas le tuyau d’alimenta
complètement
Vérifier le tuyau d’alimenta et le
niveau de viscosité
"Peau d'orange" buée excessive
pas présent
Fuit de Matériel
Buse obstruée
Réglage volume matériau s’est
trop bas (-)
Augmenter le réglage du volume (+)
Tube lâche de succion Insérez
dans le récipient
Serrez le conteneur
Filtre à air colmaté Changement
Buse lâche Serrer
Buse usée Remplacer
Joint debuse usée Remplacer
le chapeau d’air et de la buse
Solvant incorrect es vant correct
Pistolet est trop loin de la surface Faire le pistolet rapprocher l'objet
Peinture trop épaisse Diluer la peinture
Le bruit du moteur est anormal
La viscosité du matériau trop élevé Mince
Matériau volume trop grand Diminuer le réglage de volume (-)
Matériau réglage du volume trop
élevé (+)
Diminuer le réglage de volume (-)
Buse obstruée
Filtre à air colmaté Changement
Trop peu montée en pression dans
le récipient
Serrez le conteneur
Pistolet pas propre, ou non lubrifié,
résultant en piston étant coincé
dans le cylindre
Démonter pistolet et le ne oyer
avec du diluant
Le moteur ronfle, mais il n’y
a pas de pulvérisa
pulvérisa régulière
Tête de turbulence est cassée Remplacer la Tête de turbulence
Le tuyau d'alimenta st hors de Rajuster le tuyau d’alimenta
Le tuyau d'alimenta st bloqué Ne oyer avec dudiluant
La buse est bloquée Ne oyer la buse
Le filtre est bloqué Ne oyer avec du diluant
Bouton de commande doit être
réglé
Ajuster
Descrip Causes possibles Méthode de dépannage

APPLICAZIONE
15 ES
DATOS TÉCNICOS .................................................................................................................................
APLICACIÓN..........................................................................................................................................
ADVERTENCIA.......................................................................................................................................
SEGURIDAD EN GENERAL ......................................................................................................................
INSTRUCCIONES DE SEGURIDAD
...........................................................................................................
SÍMBOLOS ............................................................................................................................................
INSTRUCCIONES DE FUNCIONAMIENTO.................................................................................................
LIMPIEZA Y MANTENIMIENTO ...............................................................................................................
AMBIENTE ............................................................................................................................................
SOLUCIÓN DE PROBLEMEAS..................................................................................................................
Contenidos
DATI TECNICI
Modelo
Códig
Tensión nominal
Potencia absorbida
Máximo caudal de pintura
Viscosidad máxima
Boquilla
Capacidad de envase
Cable
Longitud del cable
Peso según EPTA-Procedure 01/2003
Información sobre ruidos y vibraciones
Nivel de presión acús ca LpA
Nivel de potencia acús ca LWA
re
Valor de vibraciones generadas
re
El nivel de vibraciones indicado en estas instrucciones ha sido determinado según el procedimiento de
medición fijado en la norma EN 60745 y puede servir como base de comparación con otras herramientas
eléctricas. También es adecuado para es rovisionalmente la solicitación experimentada por
las vibraciones.
El nivel de vibraciones indicado ha sido determinado para las aplicaciones principales de la herramienta
eléctrica. Por ello, el nivel de vibraciones puede ser diferente si la herramienta eléctrica se za para otras
aplicaciones, c ferentes, o si el mantenimiento de la misma fuese deficiente. Ello
puede suponer un aumento drás co de la solicitación por vibraciones durant total de trabajo.
15
16
16
16
18
18
19
20
20
21
MPSG550/800V
111-1402
220-240V~50Hz
550W
700ml/min
70DIN-s
2.5mm
800ml
PVC
2M
1.2 KG
85.1dB(A)
96.1dB(A)
3 dB(A)
0.766 m/s²
1.5 m/s²
16ES
Para determinar con exac tud la solicitación experimentada por las vibraciones, es necesario considerar
trato esté desconectado, o bien, esté
en funcionamiento, pero sin ser u zado realmente. Ello puede suponer una disminución drás ca de la
solicitación por vibraciones durant total de trabajo.
Fije unas medidas de seguridad adicionales para proteger al usuario de los efectos por vibraciones, como
por ejemplo: Mantenimiento de la herramienta eléctrica y de los s, conservar calientes las manos,
organización de las secuencias de trabajo.
se dedica a la mejora y perfeccionamiento de los productos existentes con amente.
Por lo tanto, el concepto de rendimiento y diseño técnico de los productos pueden variarse sin el previo
aviso. Disculpa por cualquier posible incoveniente.
Por favor lea y siga las instrucciones de funcionamiento y las informaciones de seguridad antes de zarlo
por la primera vez. Y Mantenga el manual bien.
AVVISO
Por favor quite el enchufe de la tomacorriente antes de realizar cualquiera configuración, reparación o
mantenimiento.
Por favor lea todas las advertencias e instrucciones relacionadas a la seguridad. La falla de seguir las
advertencias e instrucciones puede resultarse en los choques eléctricos, los incendios y/o las lesiones
graves.
Asegúrese de que el voltaje se corresponde a la e et ¡Los materiales del embalaje
no son juguetes! ¡Los niños no deben jugar con las bolsas plás cas! ¡Peligro de la sofocación!
La salida del ruido de la herramienta de potencia puede exceder a 85dB(A) en el lugar de trabajo. En este
caso, por favor ponga con la protección de los oídos.
SICUREZZA GENERALE
ATENCIÓN! Lea íntegramente estas advertencies de peligro e instrucciones. En caso de no atenerse
a las advertencias de peligro e instrucciones siguientes, ello puede ocasionar una descarga eléctrica,
un incendio y/o lesión grave. Guardar todas las advertencias de peligro e instrucciones para futuras
consultas. El término “herramienta eléctrica” empleado en las siguientes advertencias de peligro se refiere
a herramientas eléctricas de conexión a la red (con cable de red) y a herramientas eléctricas accionadas por
acumulador (o sea, sin cable de red).
1) SEGURIDAD DEL PUESTO DE TRABAJO
a) Mantenga limpia y bien iluminada su área de trabajo. El desorden o una iluminación deficiente en las
áreas de trabajo pueden provocar accidentes.
b) No e la herramienta eléctrica en un entorno con peligro de explosión, en el que se
encuentrencombus gases o material en polvo. Las herramientas eléctricas producen chispas
que pueden llegar a inflamar los materiales en polvo o vapores.
c) Mantenga alejados a los niños y otras personas de su área de trabajo al emplear la
herramientaeléctrica. Una distracción le puede hacer perder el control sobre la herramienta.
2) EGURIDAD ELÉCTRICA
a) El enchufe de la herramienta debe corresponder a la toma de corriente zada. No es admissible
modificar el enchufe en forma alguna. No emplear adaptadores en herramientas dotadas con una toma
de ra. Los enchufes sin modificar adecuados a las r vas tomas de corriente reducen el riesgo de
una descarga eléctrica.
b) Evite que su cuerpo toque partes conectadas a ra como tuberías, radiadores, cocinas y
refrigeradores. El riesgo a quedar expuesto a una descarga eléctrica es mayor si su cuerpo contacto
Pistola eléctrica se u za principalmente para reves mientos de decoración, pinturas, regar las plantas,
et zar para líquidos corrosivos, inflamables y operaciones de fumigación fáciles, por favor
lea las instrucciones cuidadosamente antes de usar.

17 ES
con t ra.
c) No exponga las herramientas eléctricas a la lluvia o a condiciones de humedad. Existe el peligro de
recibir una descarga eléctrica si penetran líquidos en la herramienta.
d) No el cable de red para transportar o colgar la herramienta, ni re de él para sacar el enchufe
de la toma de corriente. Mantenga el cable de red alejado del calor, aceite, esquinas cortantes opiezas
móviles. Los cables de red dañados oenredados pueden provocar una descarga eléctrica.
e) Al trabajar con la herramienta eléctrica en laintemperie e solamente cables de prolongación
homologados para su uso en exteriores. zación de un cable de prolongación adecuado parasu uso en
exteriores reduce el riesgo de una descargaeléctrica.
f) Si el funcionamiento de una herramienta eléctricaen un lugar húmedo fuese inevitable, e
uncortacircuito de fuga a ra. El uso de un cortacircuito de fuga a ra reduce el riesgo de descarga
eléctrica.
3) SEGURIDAD DE PERSONAS
a) Esté atento y emplee la herramienta con prudencia. No la herramienta eléctrica si
estuviesecansado, ni bajo los efectos de alcohol, drogas omedicamentos. El no estar atento durante el uso
de unaherramienta eléctrica puede provocarle serias lesiones.
b) un equipo de protección personal y en todo caso unas gafas de protección. El riesgo a lesionarse
se reduce considerablemente si, dependiendo del y la aplicación de la herramienta eléctrica empleada,
za un equipo de protección adecuado como una mascarilla an vo, zapatos de seguridad con suela
an zante, casco, o protector vos.
c) Evite una puesta en marcha fortuita. Asegurarse de que la herramienta eléctrica esté desconectada
antes de conectarla a la toma de corriente y/o al montar el acumulador, al recogerla, y al transportarla. Si
transporta la herramienta eléctrica sujetándola por el interruptor de conexión/desconexión, o si introduce
el enchufe en la toma de corriente con la herramienta eléctrica conectada, ello puede dar lugar a un
accidente.
d) Re re las herramientas de ajuste o llaves fijas antes de conectar la herramienta eléctrica. Una
herramienta o llave colocada en una pieza rota va puede producer lesiones graves al accionar la
herramienta eléctrica.
e) Sea precavido. Trabaje sobre una base firme y mantenga el equilibrio en todo momento. Ello le
rá controlar mejor la herramienta eléctrica en caso de presentarse una situación inesperada.
f) Lleve puesta una ves nta de trabajo adecuada. No ves nta amplia ni joyas. Mantenga su
pelo, ves nta y guantes alejados de las piezas móviles. La ves nta suelta, las joyas y el pelo largo se
pueden enganchar con las piezas en movimiento.
g) Siempre que sea zar equipos de aspiración o captación de polvo, asegúrese que éstos estén
montados y que sean zados correctamente. El empleo de estos equipos reduce los riesgos derivados
del polvo.
4) CUIDADO Y UTILIZACIÓN DE HERRAMIENTAS ELÉCTRICAS
a) No sobrecargue la herramienta. Use la herramienta prevista para el trabajo a realizar. Con la
herramienta adecuada podrá trabajar mejor y con mayor seguridad dentro del margen de potencia
indicado.
b) No herramientas con un interruptor defectuoso. Las herramientas que no se puedan conectar o
desconectar son peligrosas y deben repararse.
c) Saque el enchufe de la red y/o desmonte el acumulador antes de realizar un ajuste en la herramienta
eléctrica, cambiar de accesorio o al guardar la herramienta eléctrica. Esta medida preven va reduce el
riesgo de conectar accidentalmente la herramienta.
d) Guarde las herramientas fuera del alcance de los niños y de las personas que no estén familiarizadas
con su uso. Las herramient zadas por personas inexpertas son peligrosas.
e) Cuide sus herramientas con esmero. Controle si funcionan correctamente, sin atascarse, las
partesmóviles de la herramienta, y si existen partes rotas o deterioradas que pudieran afectar al
funcionamiento de la herramienta. Si la herramienta eléctrica estuviese defectuosa haga repararla antes
de volv zarla. Muchos de los accidentes se deben a herramientas con un mantenimiento deficiente.
f) Mantenga los limpios y afilados. Los mantenidos correctamente se dejan guiar y controlar
mejor.
g) U herramientas eléctricas, accesorios, s,etc. de acuerdo con estas instrucciones,
teniendoen cuenta las condiciones de trabajo y la tarea arealizar. El uso de herramientas eléctricas para
18ES
trabajosdiferentes de aquellos para los que han sido concebidaspuede resultar peligroso.
5) SERVICIO
a) Únicamente haga reparar su herramienta eléctricapor un profesional, empleando exclusivamentepiezas
de repuesto originales. Solamente así seman ramienta eléctrica.
b) ¡Atención! U únicamente piezas de repuesto originales indicado en este manual, de lo contrario
puede conducir un mayor riesgo de lesiones.
INSTRUZIONI DI SICUREZZA
•Con la herramienta eléctrica sólo puede pulverizar materiales tales como pinturas, barnices y esmaltes,
etc., con un punto de inflamación de 55 °C (32 °C en el Reino Unido) y más alto sin aviso adicional. (Según
la clasificación alemana sobre el material de reves nto,el clases de peligro es A II y A III, vease el estaño
de material).
•El dispos vo no debe ser zado en lugares de trabajo cubiertos donde presentan normas de protección
contra explosiones.
•No debe haber fuentes de ignición, por ejemplo, chimeneas, el humo de los cigarrillos encendidos,
cigarros y pipas, chispas, alambres incandescentes, superficies calientes, etc. en la zona donde hay trabajo
de pulverización con la herramienta eléctrica.
• No pulverice ninguna sustancia cuyo potencial de riesgo que se desconoce.
• Antes de realizar cualquier trabajo en la pistola de pulverización desconecte el enchufe de la toma.
stola pulverizadora para pulverizar sustancias inflamables.
•Las pistolas pulverizadoras no deben ser limpiados con solventes inflamables que tengan un punto de
inflamación menor de 55 °C.
•Mucha precaución contra peligros que pueden surgir por la sustancia pulverizada, debe observar el texto
y la información sobre los contenedores o especificaciones dadas por el fabricante sobre la sustancia.
• Alta presión en la boquilla.
Recomendación: Use una mascarilla y gafas de seguridad para el trabajod de pulverización.
¡ATENCIÓN! PELIGRO DE LESIONES
Nunca apunte la pistola pulverizadora hacia usted mismo ni hacia otras personas o en los animales.
•Cuando se trabaja con la herramienta eléctrica en interiores tanto como en exteriores, hay que asegurar
que no haya vapores en los disolventes ni aspiradas por la pistola de pulverización.
•Cuando se trabaja al aire libre, debe estar al tanto de la dirección del viento. El viento puede llevar la
sustancia a grandes distancias causando daños. Cuando se trabaja en un lugar cerrado, debe haber una
ven
• No permit
• ¡Nunca debe abrirse el equipo por usted mismo, con el fin dereparaciones en el sistema eléctrico!
• No debe colocar la pistola de pulverización.
Riesgos residuales
Incluso cuando se za la herramienta eléctrica según lo prescrito, no es posible eliminar todos los
factores de riesgo residuales. Los siguientes riesgos pueden surgir en relación con la construcción y
diseño de las herramientas eléctricas:
1. Daño a los pulmones si una mascarilla de polvo no es eficaz y desgastado.
2. Daño a la audición si la prot va no es eficaz y desgastado.
3. Los daños a la salud resultantes por la emisión de vibraciones si la herramienta eléctrica es u zada
durante un larg ges nte.
¡ADVERTENCIA! Esta herramienta eléctrica genera un campo electromagné co durante el funcionamiento.
Este campo puede, en determinadas circunstancias, interferir con implantes médic vos o pasivos. Para
reducir el riesgo de lesiones graves o mortales, las personas que u zan implantes médicos deben consultar
a sus médicos y fabricante del implante médico ant zar esta herramienta.
SIMBOLI

INSTRUCCIONES DE OPERACIÓN
Leer el manual Ponerse protección de los oídos
Advertencia Ponerse máscara de polvos
Aislamiento doble No debe disponer los aparatos viejos en la
Ponerse gafas de seguridad Si prega di scollegare l'alimentazione
prima della manutenzione
19 ES 20ES
PULIZIA E MANUTENZIONE
Recuerde siempre desconectar el enchufe de la red eléctrica antes de limpiar el envase de pintura de la
pistola de pulverización. (5)
Es esencial realizar una limpieza y lubricación a fondo de la pistola de pulverización después de cada uso.
Una limpieza y lubricación inadecuada de la herramienta sin seguir los pasos e instrucciones del manual
resultará el bloqueo y daño de la misma, y la garan rá.
Después de cada uso de la herramienta eléctrica hay que tomar los siguientes pasos:
1. Vaciar cualquier material de pintura restante del recipiente.
2. Limpiar el recipiente a fondo con el diluyente adecuado.
3. V co de aerosol en el recipiente y a través de la pistola hasta que el líquido sale limpio de la
boquilla.
4. Limpiar a fondo la pipa de pintura y filtrarla con diluyente.
5. Limpie la canasta y la boquilla y re re cualquier otro residuo o pintura que queda.
6. Girar la pistola de pulverización hacia abajo y gotear unas gotas de aceite lubricante a las dos aberturas
7. Mantenga apretado el interrupt o, esto lubricará el pistón y el cilindro.
Si su pistola requiere una limpieza interna adicional, habrá que desmontarla
Para desmontarla debe tomar las siguientes medidas:
3. Re re el enchufe de la toma de corriente.
4. Re re el recipiente de pintura (5) y recoger la tubería y el filtro.
5. Saque el conjunto de la bomba.
6. Soltar la boquilla (H), la válvula (I), el pistón (M) y el resorte (L).
7. Limpie el cilindro (K) y todas las piezas internas con disolvente.
8. Aplique unas gotas de aceite lubricante sobre el pistón, el resorte y el cilindro.
9. Vuelva a montar la pistola de pulverización.
AMBIENTE
No deseche las herramientas eléctricas, los accesorios y embalajes junto con los residues domés cos
- de conformidad con la Dir va Europea 2002/96/CE sobre residuos de aparatos eléctricos y electrónicos
y su aplicación de acuerdo con la legislación nacional, las herramientas eléctricas cuy aya llegado
a su fin se deberán recoger por separado y trasladar a una planta de reciclaje que cumpla con las exigencias
ecológicas.
1. Gire ambas perillas a los lados del Montaje del Compresor de Aire hacia la posición de "Desbloqueo",
e inserte la pistola de spray en el Montaje del Compresor de Aire en su lugar. Gire ambas perillas en ambos
lados hacia de posición de "Bloqueo" para asegurar ambas piezas en su lugar.
2.Inspecciones el filtro de aire en el Montaje del Compresor de Aire para verificar si se encuentra
excesivamente sucio. Si encuentra suciedad, siga los siguientes pasos para realizar el reemplazo.
Desenchufe la pistola spray. Remueva la cubierta del filtro con alguna herramienta (como un
destornillador plano)
Remueva los filtros sucios y reemplácelos por otros nuevos.
Asegura de vuelta la cubierta sobre la turbina.

21 ES
TECNICHE DI RIPARAZIONE
Problemas y fallos Posibles causas Solución de problemas
El ruido del motor no es normal La pistola está sucia o mal
lubricada, lo cual puede provocar
un atascamiento del cilindro
Desarmarla y limpiarla con
disolvente
El motor zumba pero no pulveriza
o pulveriza de manera irregular
Cabeza de remolino gastada Reemplace la cabeza
Atomizzazione non buona Viscosità del materiale troppo alta
Volume del materiale troppo grande Diminuire le impostazioni del volume (-)
Impostazioni del volume del
materiale troppo alte (+)
Diminuire le impostazioni del
volume(-)
Pulita
Filtro dell’aria intasato Cambiare
Pressione troppo bassa accumulata
nel contenitore
Stringere il contenitore
Tubería de conexión en posición
correcta
Reajustar la tubería
Tubería de conexión bloqueada Limpiarla con diluyente
Boquilla bloqueada Limpiar la boquilla
Filtro bloqueado Limpiarlo con diluyente
Mando de control se necesita
ajuste
Ajustarlo
Pulveriza demasiada pintura Pistola no limpio, o no lubricado
resulta en pistón estar atrapado en
el cilindro
Desarmar la pistola y limpia con
disolvente
La can ntura es excesa Ajuste el volumen de flujo para
reducir la pulverización. Dos capas
delgadas es mejor que una
La viscosidad es demasiado baja Comprobar la viscosidad
El sonido de funcionamiento no
es normal
El ajuste de salida es pobre Reajuste la salida
Insuficiente pintura en el envase y
resulta el escaso aire aspirado
Vuelva a llenarlo con pintura
No se ha dilatado correctamente
o no pasa por la tubería
completamente
Chequear la hora de recogida y nivel
de viscosidad
Empañamiento excesivo de “la
piel de naranja”
zado un solvente incorrecto vente adecuado
Poco flusso di materiale o
inesistente
Pulire
Tubo di suzione intasato Pulire
Impostazioni del volume del
materiale troppo basse (-)
Aumentare le impostazioni del
volume (+)
Tubo di suzione allentato Inserire
Nessuna pressione nel contenitore Stringere il contenitore
Filtro dell’aria intasato Cambiare
Materiale che perde Stringere
Materiale accumulato sul tappo Pulire
Pistola está demasiado lejo de la
superficie
Mantenga la pistola más cerca del
objeto
Pintura demasiada gruesa Afina la pintura

22 RU
Содержание
ОБЩИЕ УКАЗАНИЯ...............................................................................................................................22
СЕРТИФИКАЦИЯ....................................................................................................................................22
ТЕХНИЧЕСКИЕ ХАРАКТЕРИСТИКИ......................................................................................................23
НАЗНАЧЕНИЕ...................................................................................................................................23
КОМПЛЕКТ ПОСТАВКИ.........................................................................................................................23
КОНСТРУКТИВНЫЕ ОСОБЕННОСТИ....................................................................................................23
МЕРЫ БЕЗОПАСНОСТИ.........................................................................................................................23
ПОДГОТОВКА КРАБОТЕ........................................................................................................................25
РЕКОМЕНДАЦИИ ПО РАБОТЕ..............................................................................................................25
ОБСЛУЖИВАНИЕ..................................................................................................................................28
ХРАНЕНИЕ..............................................................................................................................................29
ТРАНСПОРТИРОВАНИЕ.........................................................................................................................29
ЗАЩИТА ОКРУЖАЮЩЕЙ СРЕДЫ ИУТИЛИЗАЦИЯ..............................................................................29
ОБЩИЕ УКАЗАНИЯ
При покупке изделия врозничной торговой сети требуйте проверки его работоспособности иком-
плектности, а также штампа торгующей организации и даты продажи в гарантийном талоне.
Чтобы избежать недоразумений внимательно ознакомьтесь сданной Инструкцией. Обращаем Ваше
внимание на исключительно бытовое назначение данного изделия, т.е. оно не должно использоваться
для профессиональных работ или в коммерческих целях.
На изделии размещены специальные пиктограммы, обращающие Ваше внимание на наиболее важ-
ные моменты.
Внимательно прочитайте данную
Инструкцию.
По окончании работы, перед переры-
вами или обслуживанием обязательно
отключайте машину от электросети.
Изделие изготовлено по второму (II)
классу защиты от поражения элек-
трическим током.
Будьте внимательны при всех ви-
дах работы.
Примите меры по экологически
чистой утилизации пришедшей в
негодность упаковки, изделия или
аксессуаров.
Всегда используйте надлежащие за-
щитные средства.
СЕРТИФИКАЦИЯ
Изделие соответствует требованиям технических регламентов Таможенного Союза: «Обезопасно-
сти низковольтного оборудования (ТР ТС 004/2011),«Электромагнитная совместимость технических
средств» (ТР ТС 020/2011), «О безопасности машин и оборудования» (ТР ТС 010/2011).
23RU
ТЕХНИЧЕСКИЕ ХАРАКТЕРИСТИКИ
Модель MPSG500/800V
Артикул 111-1402
Напряжение питания 220-240 В, 50 Гц
Максимальная потребляемая мощность 550 Вт
Максимальный потребляемый ток 1,8 А
Производительность 0,7 л/мин
Вязкость краски 70 din/c
Диаметр форсунки 2,5 мм
Емкость бака для краски 0,8 л
Уровень звукового давления по EN 60745 (85,1±3) дБ(А)
Уровень акустической мощности по EN 60745 (96,1±3) дБ(А)
Уровень вибрации по EN 50144 (0,766±1,5) м/сек2
Длина кабеля электропитания 2,0 м
Вес по EPTA-Procedure 01/2003 1,2 кг
НАЗНАЧЕНИЕ
Ручной краскораспылитель сэлектрическим нагнетателем турбинного типа артикул 85265 (вдальнейшем
– краскораспылитель) предназначен для нанесения невоспламеняющихся лакокрасочных, защитных, дезин-
фицирующих идругих жидких материалов на различные поверхности вбытовых условиях свысокой произ-
водительностью инизкими энергозатратами.
Краскораспылитель имеет
1 Разборную конструкцию, что уменьшает габариты его упаковки иоблегчает, тем самым, хранение и
транспортировку изделия.
2 Коллекторный двигателя мощностью 400 Вт, на валу которого закреплен компрессор турбинного типа.
3 Клавишный выключатель, совмещенный срегулятором количества подаваемого лакокрасочного или
другого материала.
4 Ограничитель максимально подаваемого лакокрасочного или другого материала.
5Трехпозиционный регулятор формы факела, позволяющий изменять форму факела взависимости от
конкретных задач.
6Бак емкостью 0,8 л для лакокрасочного или другого материала.
7Двойную электрическую изоляцию активных частей электропривода (класс защиты от поражения элек-
трическим током – II),что позволяет работать без применения индивидуальных средств защиты от пораже-
ния электрическим током ине требует заземления нагнетателя.
КОМПЛЕКТ ПОСТАВКИ*
Инструкция по эксплуатации.
Краскораспылитель в разобранном виде (4 позиции).
Вискозиметр **.
Коробка упаковочная**.
*Производитель имеет право на конструктивные изменения с целью улучшения качества и дизайна, а
также на изменение комплектации изделия.
**Принадлежности являются расходным материалом и на них гарантийные обязательства не распро-
страняются.
КОНСТРУКТИВНЫЕ ОСОБЕННОСТИ
Данный краскораспылитель состоит из распылителя 6(см.рис. на развороте титульного листа) инагнетате-
ля 1,объединенные в разъемную конструкцию.
Распылитель осуществляет распыление ввоздухе лакокрасочногоматериала, поступающего из бака 5,и
формирование полученной взвеси ввиде факела определенной формы для равномерного переноса мате-

24 RU
5 Вседействия, связанные сподготовкой кработе, работой иобслуживанием, следует проводитьв
защитных перчатках.
Регулировка формы факела
1 Регулировка формы факела описана в разделе КОНСТРУКТИВНЫЕ ОСОБЕННОСТИ.
Внимание! Перед регулировкой убедитесь, что вилка электрического кабеля изделия отключена от элек-
трической розетки.
Подготовка и заправка лакокрасочного материала
1 Внимание! Убедитесь, что вилка электрического кабеля отключена от электрической розетки.
2 Краскораспылитель предназначен для нанесения невоспламеняющихся лакокрасочных, защитных,
дезинфицирующихидр.жидких материалов на различные подготовленные поверхности вбытовых усло-
виях, если это допускается изготовителем этих материалов.
3 Лакокрасочный материал перед применением должен быть тщательноперемешан иотфильтрован
(см.рис.2).
4 Дляполучения наилучшего результата лакокрасочный материалдолжен иметь определенную вяз-
кость, котораяможет бытьоценена спомощью вискозиметра(см.рис.1).Дляопределения вязкости на-
лейте материал ввискозиметр до краев изасеките время, за которое краска полностью из него вытечет. В
таблице 1 содержатся временные рекомендации для разных лакокрасочных материалов.
5 Если истечение краски из вискозиметра занимает больше времени, чем указано втаблице 1, то сле-
дует добавить рекомендованный производителем растворитель итщательно перемешать материал. Вновь
выполняйте требования предыдущего иданного пунктов до тех пор, пока не будетдостигнута рекомендо-
ванная норма вязкости.
6 Выкрутите бак длякраски 5(см.рис. на развороте титульного листа) изалейте внего необходимое
количество подготовленного материала, но не более 0,7 л. Надежно вкрутите бак вдержатель бака.
Включение/Выключение и регулировка факела
Включение
1 Внимание! Убедитесь, что краскораспылитель выключен, нажав до упора иотпустив на клавишу вы-
ключателя/регулятора 3(см.рис. на развороте титульного листа ирис.3).Вмомент включения ивыключе-
ния должен раздаваться характерный щелчок. Подключите вилку кабеля кэлектрической сети.
2 Включите нагнетатель, нажав до щелчка на клавишу выключателя 3.Враспылитель начнет посту-
пать воздух.
3 Враспылителе имеется запорная игла, которая висходном положении перекрывает отверстие фор-
сунки, но по мере увеличения усилия нажатия на клавишу (это приводит кее перемещению), запорная
игла начнет все больше ибольше открывать отверстие форсунки 6ипоявится факел. Таким образом, с
увеличением усилия нажатия на клавишу выключателя/регулятора плотность взвеси лакокрасочного ма-
териала в факеле увеличивается.
4 Враспылителе имеется ограничитель факела 2.Им можно регулировать максимальную плотность
взвеси краски в факеле при утопленной до упора клавише 3. Это удобно при продолжительной работе.
Выключение
Дляпрекращения формирования факела просто отпустите клавишу выключателя/регулятора 3.Должен
раздаться щелчок и краскораспылитель выключится. Отключите вилку кабеля от электрической сети.
Первое включение
1 Распакуйте изделиеипроизведите осмотр комплекта поставки на предмет отсутствия внешних меха-
нических повреждений. Внимание! Изделие поставляется вразобранном виде: нагнетатель 1(см. рис. на
развороте титульного листа), распылитель 6, бак для краски 5 и подающая трубка ссапуном.
2 Внимание! Если притранспортировке температура окружающей среды быланиже +10ОС, перед
дальнейшими операциями необходимовыдержать изделие впомещении стемпературой от +10 до +35ОС
иотносительной влажностью не выше 75% не менее четырех часов. Вслучае образования конденсата на
деталяхкраскораспылителя его эксплуатация или дальнейшаяподготовка кработе запрещена вплоть до
полного высыхания конденсата.
3 Соберите краскораспылитель, предварительно прочитав раздел КОНСТРУКТИВНЫЕ ОСОБЕННОСТИ.
4 Проверьте возможность регулировки формы факела (см. подраздел Регулировка формы факела).
Таблица 1
Акриловые и латексные краски 20 - 25 с
Водоэмульсионные краски 20 - 25 с
Грунтовки 24 - 28 с
Лаки 20 - 25 с
Масляные краски, эмали 18 - 22 с
Алюминиевые краски(серебрянки)22 - 25 с
Антисептики и морилки Не разбавлять
25RU
5 Отвинтите бак для краски 5. Налейте в бак приблизительно 0,5 л воды и ввинтите его в держатель бака.
6 Включите краскораспылитель (см. подраздел Включение/Выключение иРегулировка факела) и
дайте ему поработать около минуты.Проверьте возможность регулировкифакела на тестовом материале
(например, куске плотного картона) прирасстоянии между форсункой иповерхностью этого материала по-
рядка 30 см.
7 Выключите распылитель. Вывинтите бак для краски и вылейте из него воду. Установите бак на место.
8 Включите распылитель смаксимальным факелом для удаления из него остатков воды.
9Выключите краскораспылитель иотключите его от электрической сети.
10 Если проверки прошлиуспешно – можете приступать кработе, предварительно прочитав следующие
разделы и выполнив обслуживание распылителя (см.раздел ОБСЛУЖИВАНИЕ) для его высушивания.
11 Если возникли проблемы, то обратитесь кподразделу Возможные неисправности следующего раз-
дела РЕКОМЕНДАЦИИ ПО РАБОТЕ.
12 Если ипосле этого устранить проблему не удалось - обратитесь за консультацией вторгующую орга-
низацию илиСервисный центр.
РЕКОМЕНДАЦИИ ПО РАБОТЕ
Общие рекомендации
1 Внимательно ознакомьтесь с предыдущими разделами и выполняйте изложенные в них требования.
2 Перед началом работы проверьте функционирование краскораспылителя.
2.1 Произведите осмотр изделияна предмет отсутствия внешних механических повреждений и, при необ-
ходимости, соберите его.
2.2 Внимание! Убедитесь, что краскораспылитель выключен, нажав до упораиотпустивклавишу выключа-
теля/регулятора.
2.3 Установите необходимую форму факела.
2.4 Подготовьте и заправьте лакокрасочный материал.
2.5 Подключите вилку кабеля изделия кэлектрической сети и включите изделие.
2.6 Произведите окончательнуюнастройку распылителя под конкретный лакокрасочный материал на тестовой
поверхности. Если возникли проблемы, то обратитесь кследующему подразделу Возможные неисправности.
3 Помните!
3.1 Изделие рассчитано на эксплуатацию при температуре окружающей среды от +5 до +35ОС.
3.2 Продолжительность непрерывной работы краскораспылителя не должна превышать 20 минут спосле-
дующим перерывом не менее двадцати минут.
3.3 Суммарная продолжительность работы изделия составляет 60 часов вгод, после чего требуется прове-
сти его профилактический послегарантийный осмотр в Сервисном центре.
3.4 Запрещено применение вкраскораспылителе воспламеняющихся лакокрасочных, защитных, дезинфи-
цирующих и др. жидких материалов.
3.5 Запрещено применение лакокрасочных идр.материалов, вязкость которыхпревышает 60 din/c.Внеси-
стемная единица измерения din/c подразумевает, что вязкость измеряется спомощью секундомера испеци-
альновходящего вкомплектпоставки вискозиметрапо методике, изложенной вподразделе Подготовка и
заправка лакокрасочного материала предыдущего раздела.
3.6 Лакокрасочный материалфакела, не попавший на обрабатываемую поверхность, может разноситься на
значительные расстояния, особенно под действием ветра.Это надо учитывать и, при необходимости, приме-
нять специальные укрывные (защитные) пленки.
3.7 Результат окрашивания сильно зависит от качества подготовки окрашиваемой поверхности.
3.8 При нанесении лакокрасочного материаларекомендуется держать краскораспылитель так, как показа-
но на рис.5, равномерно перемещая его по одной из траекторий, представленной на рис.4.
3.9 Если распыляемые материалынакапливаются на форсунке 6или вотверстиях регулятораформыфаке-
ла, протрите обе детали тряпкой, смоченной соответствующим растворителем.
3.10 Чтобы избежать образования наплывов иподтеков никогда не включайте ине выключайте краскора-
спылитель, направленный на окрашиваемую поверхность.
3.11 Наносите слой единовременно. Если необходимонанесение двух слоев, выдержите время, установлен-
ное производителем материала, для высыхания первого слоя.
3.12 При окраске небольших поверхностей используйте режим снизкой подачейматериала. Это позволит
избежать перерасхода краски и появления наплывов.
4 Сразу по окончании работ произведите промывку краскораспылителя (см. раздел ОБСЛУЖИВАНИЕ).
Внимание! Наличие высохшего лакокрасочного материалана внешних или внутренних деталяхкраскора-
спылителя является признаком нарушения правил эксплуатации иоснованием дляснятия данного изделияс
гарантийного обслуживания.
Возможные неисправности
Нет факела после включения распылителя
1 Возможные причины испособы устранения, если неисправность возникла вначалеработы, или по-
сле обслуживания.

26 RU
рила на окрашиваемую поверхность. Применяемый визделии HVLP распылитель позволяет использовать
нагнетатель, обеспечивающий воздушный поток сневысоким избыточным давлением. Это обстоятельство
накладывает некоторое ограничение на вязкость лакокрасочного материала, но позволяет существенно (до
90%) сократить потери вфакеле, формируемом распылителем, иснизить отскок материала от обрабатывае-
мой поверхности.
Нагнетатель создает воздушный поток спроизводительностью идавлением, необходимым для работы
распылителя. Он состоит из высокооборотного коллекторного двигателя мощностью 400 Вт, на валу которого
закреплен компрессор турбинного типа, икнопочного выключателя сактиватором, который управляет вы-
ключателем спомощью клавиши 3. Эти узлы (кроме клавиши) расположены вкорпусе, оснащенном ручкой
4ивоздушным фильтром «filters» (см.рис.8). Фильтр находится под заднейкрышкой корпуса, имеющей воз-
духозаборные прорези. Кроме того, непосредственно на корпусе нагнетателя можножестко зафиксировать
распылитель с помощью двух замков (см.рис.6).
Состав распылителя.
1 Форсунка 6(см.рис. на развороте титульного листа) сотверстием 2,5 мм обеспечивает формирование
взвеси.
2 Регулятор формы факела «Air cap» (см.рис.7) сгайкой «Nut» позволяет формировать круглое «Round
pa er», плоское горизонтальное «Horizontal pa er», либоплоское вертикальное «Ver cal pa er» пятно факе-
ла на окрашиваемой поверхности.
3 Клавиша выключателя 3(см.рис. на развороте титульного листа) одновременно является регулятором
факела иуправляет иглой, перекрывающей отверстие форсунки, что обеспечивает включение/ выключение
факела и регулирование его размеров в процессе работы. Ограничителем 2можно ограничить величину хода
клавиши и, тем самым, подобрать нужный дляконкретной работы размер факела.
4 Бак 1емкостью 0,8 лдля лакокрасочного илидругого материала иподающая трубка ссапуном, по кото-
ройматериализ бака поступает кфорсунке. Сапун обеспечивает выравнивание давлениявнутри распылителя и
вбаке, но одновременно препятствует проникновению материала к форсунке, минуя подающую трубку.
МЕРЫ БЕЗОПАСНОСТИ
Безопасная работа изделия возможна только после внимательного изученияпотребителем настоящей
Инструкции перед проведением работ ипри условии соблюдения им изложенных вней требований. Не-
соблюдение этих требований может стать причиной не только отказов или инцидентов, но икритических
отказов или аварий. Вследующих подразделах приведен перечень критических отказовивозможных
ошибочных действий потребителя, которые приводят кинциденту или аварии. Там же описаны действия
потребителя вэтихслучаях.
Запрещается эксплуатация изделия
1 Во взрывоопасных помещениях или помещениях с химически активной средой.
2 В условиях воздействия капель и брызг, а также при атмосферных осадках.
3 При несоответствии характеристик электрической сети, имеющейся вместе подключения, следую-
щим значениям: напряжение 220В ±10% переменного тока с частотой 50 Гц.
4 При неисправной электропроводке или электрической розетке, атак же если их токовые параме-
тры ниже требуемых со стороны изделия (см. раздел ТЕХНИЧЕСКИЕ ХАРАКТЕРИСТИКИ)
5 При использовании в краскораспылителе воспламеняющихся лакокрасочных и др. материалов.
6 При обнаружении перед работой или возникновении во время работы хотя бы одной из следую-
щих неисправностей.
6.1 Повреждение электрического кабеля или штепсельной вилки.
6.2 Кольцевое искрение щеток на коллекторе, что указывает на неисправность двигателя.
6.3 Появление дыма или запаха, характерного для горящей изоляции.
6.4 Неисправность или нечеткая работа выключателя.
6.5 Появление нехарактерных звуков (стука) или вибрации.
6.6 Поломки или трещины в краскораспылителе, баке для краски и деталях корпуса нагнетателя.
Запрещается при эксплуатации изделия
1Заземлять изделие.
2 Оставлять без надзора краскораспылитель, подключенный к электросети.
3 Передавать изделие лицам, не имеющим права пользоваться им.
4 Работать с приставных лестниц.
5 Натягивать и перекручивать электрический кабель, подвергать его нагрузкам.
6 Превышать предельно допустимую продолжительность работы (см. раздел РЕКОМЕНДАЦИИ ПО
РАБОТЕ).
7 Передавать краскораспылитель для эксплуатации лицам моложе 18 лет, либо лицам, не имеющим
навыков работы сданным изделием, которые не прошли инструктаж по правилам безопасности ине
прочитали данную Инструкцию.
27RU
Специальные правила безопасности при эксплуатации изделия
1 Внимательно ознакомьтесь споставляемой изготовителем документацией на лакокрасочные материа-
лы иобязательно выполняйте изложенные внейтребованияпо технике безопасности испособам примене-
ния. Не используйте материалы, если не знаете их состав исвойства.
2 Не позволяйте посторонним людям иживотным приближаться кместу работы. Никогда не направляйте
краскораспылитель на себя, других людей или животных - это может привести к травме или отравлению.
3 При работе впомещениях обеспечьте хорошую естественную или принудительную вентиляцию. Высо-
кое содержание пылиили взвеси лакокрасочного покрытия ввоздухе помещения может явиться причиной
взрываипожара. Имейте средства пожаротушения идержите их под рукой в процессе работы.
4 Во время работы на открытом воздухе обязательно определяйте направление ветра. Ветер может пере-
носить лакокрасочный материал факела на большие расстояния.
5 Носите подходящую одежду ииспользуйте защитные средства (защитные очки, пылезащитная маска,
перчатки, наушники, головной убор ит. д.). Помните!Лакокрасочный материал факела опасен для дыхатель-
ных путей иглаз. Кроме того, он может бытьопасен дляоткрытыхучастков кожи.
Общие правила безопасности при эксплуатации изделия
1 Учитывайте влияние окружающей среды.
1.1 Не подвергайте изделие воздействию атмосферных осадков.
1.2 Непользуйтесь изделием поблизости от легковоспламеняющихся жидкостей игазов.
1.3 Не пользуйтесь изделием для обработки сырых материалов.
1.4 Позаботьтесь охорошем освещении.
2 Правильно обращайтесь сэлектрическим кабелем изделия.
2.1 Не носите изделие, держась за кабель.
2.2 Дляотключения изделияот сети беритесь за штепсельную вилку, ане за кабель.
2.3 Кабель должен бытьзащищен от случайного повреждения (острыми гранями, движущимся инструмен-
том ит.д.).
2.4 Не допускайте непосредственного соприкосновения кабеля сгорячими имасляными поверхностями.
2.5 Если произошёл инцидент икабель поврежден впроцессе работы, то, не касаясь его, выньте вилку из
розетки изамените электрический кабель в Сервисном центре.
3 Пользуйтесь, вслучае необходимости, электрическими сетевымиудлинителями промышленного произ-
водства, рассчитаннымина ток, потребляемыйВашим изделием (см. раздел ТЕХНИЧЕСКИЕ ХАРАКТЕРИСТИКИ).
4 Избегайте непреднамеренного включения.
4.1 Перед подключением электрического кабеля крозетке, проверьте правильность инадежность соедине-
ний всех узлов изделия иубедитесь, что выключатель находится в выключенном положении.
4.2 Отключайте изделие выключателем при внезапной остановке (вследствие исчезновения напряжения в
сети ит.п.).
5 Содержите в порядке рабочее место. Прежде чем включить изделие, проверьте, не забыли лиВы убрать
из зоны работы ключи, отвертки и другой вспомогательный инструмент.
6 Всегда будьте внимательны.
6.1 При всех видах работы располагайте нагнетатель так, чтобы не закрывать воздухозаборные прорези.
6.2 Руки должны бытьсухиеине испачканные краской.
6.3 Избегайте физического контакта сзаземленнымиобъектами (металлическими трубами, батареями ит.д.).
6.4 Не отвлекайтесь во время работы, выполняйте ее вдумчиво.
6.5 Старайтесь работать вустойчивом положении, постоянно сохраняя равновесие, причем факел иобраба-
тываемая поверхность должны находиться в поле Вашего зрения.
6.6 Не допускайте механических повреждений, ударов, падения изделия на твердые поверхности ит.п.
6.7 Оберегайте изделие от воздействия интенсивных источников тепла или химически активных веществ, а
также от попадания жидкостей и посторонних твердых предметов внутрьнагнетателя.
7 По окончании работ и во время перерыва выключайте изделие.
8 Не рекомендуется работать сизделием, если Вы сильно утомлены, находитесь всостоянииалкогольно-
го опьянения или принимаете сильнодействующиемедикаменты.
9 Каждый раз, сразу по окончании работы, осуществляйте обслуживание краскораспылителя.

28 RU
ОБСЛУЖИВАНИЕ
Внимание!
1.1 Обслуживаниекраскораспылителя должно производиться вхорошо вентилируемом помещении, вдали
от источников тепла иоткрытого огня.
1.2 Проводите обслуживаниесразу по окончании работ и взащитных перчатках.
1.3 Наличие высохшего лакокрасочного материала на внешнихили внутренних деталях краскораспылителя
является признаком нарушенияправил эксплуатации иоснованием для снятия данного изделия сгарантий-
ного обслуживания.
1.4 Очистку всех узлов идеталей изделия допускается производить тряпкой (ветошью) смоченной только в
промывочнойжидкости (растворителе), рекомендованной изготовителем того лакокрасочного материала, с
которым проводилась работа.
1.5 Запрещенозамачивание узлов идеталей распылителя в промывочной жидкости (растворителе).
29RU
1.6 Запрещеноиспользование абразивных чистящих средств, металлическихщеток идругих материалов и
приспособлений, которые могут нарушить геометрию поверхностей деталей иузловизделия или их растворить.
1.7 Запрещеноиспользование легковоспламеняющихся промывочных жидкостей ирастворителей.
1.8 Через каждые60 часов эксплуатации, но не реже одного раза вгод, осуществляйте профилактический
послегарантийный осмотр изделия вуполномоченных на это Сервисных центрах.
2 Перед началом работ убедитесь, что вилка электрического кабеля вынута из розетки.
3 Вывинтите бак 5(см.рис. на развороте титульного листа) для краски. Вылейте остатки лакокрасочногомате-
риала. Ввинтите бак на место иустановите распылитель на ровную горизонтальную поверхность (стол, верстак).
4 Нажмите до упора иудерживайте клавишу выключателя/регулятора приблизительно 10 секунд для сте-
кания остатков лакокрасочного материала из распылителя ивсасывающей трубки. Проделайте эту операцию
еще 2 раза.
5 Вывинтите бак для краски иснимите всасывающую трубку. Ветошью, смоченной промывочнойжидко-
стью (растворителем), очистите внутреннюю ивнешнюю поверхности бака итрубку.
6 Установите на место всасывающую трубку. Налейте вбак промывочную жидкость (растворитель) иввин-
тите его вдержатель бака.
7 Внимание!Убедитесь, что краскораспылитель выключен, нажав до упора иотпустив клавишу выключа-
теля/регулятора. Подключите вилку кабеля кэлектрической сети.
8 Направьте форсунку 6вприемную емкость для отработанной промывочной жидкости. Включите кра-
скораспылитель смаксимальным факелом ипроизводите его промывку до тех пор, пока жидкость вфакеле
не станет прозрачной.
9 Выключите краскораспылитель иотключите его от розетки электропитания.
10 Вывинтите бак для краски. Вылейте остатки промывочной жидкости (растворителя) иветошью вытрите
бак насухо.
11 Выньте из держателя бака всасывающую трубку ссапуном. Разберите сапун. Отвинтите гайку«Nut»
(см. рис.7) ивыньте регулятор формы факела «Air cap». Очистите снятые детали, атакже форсунку икорпус
распылителя от остатков лакокрасочного материала влажной тряпкой, смоченной впромывочной жидкости.
Обратите внимание на чистоту каналов для краски ивоздуха. Вытрите все детали насухо. При необходимости
воспользуйтесь сжатым воздухом.
12 Соберите распылитель.
13 При необходимости очистите корпус нагнетателя влажной тряпкой, смоченной впромывочной
жидкости.
14 Снимите заднюю крышку корпуса, отжав две защелки с помощью плоской отвертки так, как
показано на рис.8. Выньте фильтр «filters». Промойте его в теплой воде с мылом, если фильтр имеет
заметные загрязнения. Высушите фильтр, не располагая его около обогревательных приборов. При
необходимости замените фильтр новым. Установите сначала фильтр а затем и заднюю крышку на
свои места. Внимание! Запрещена эксплуатация краскораспылителя без фильтра.
ХРАНЕНИЕ
Хранить изделие следует после проведенного в полном объеме обслуживания в помещении с от-
носительной влажностью не выше 75% при температуре не ниже +5 оС.
ТРАНСПОРТИРОВАНИЕ
Транспортировка предварительно прошедшего обслуживание и размещенного в штатную упаковку
изделия производится в закрытых транспортных средствах в соответствии с правилами перевозки
грузов, действующих на транспорте данного вида.
ЗАЩИТА ОКРУЖАЮЩЕЙ СРЕДЫ И УТИЛИЗАЦИЯ
Когда изделие, дополнительные принадлежности и упаковка придут в негодность, примите меры
по экологически чистой их утилизации в соответствии с законодательством РФ.
Не сжигать!
This manual suits for next models
1
Table of contents
Languages:
Other MaxPro PROFESSIONAL Paint Sprayer manuals