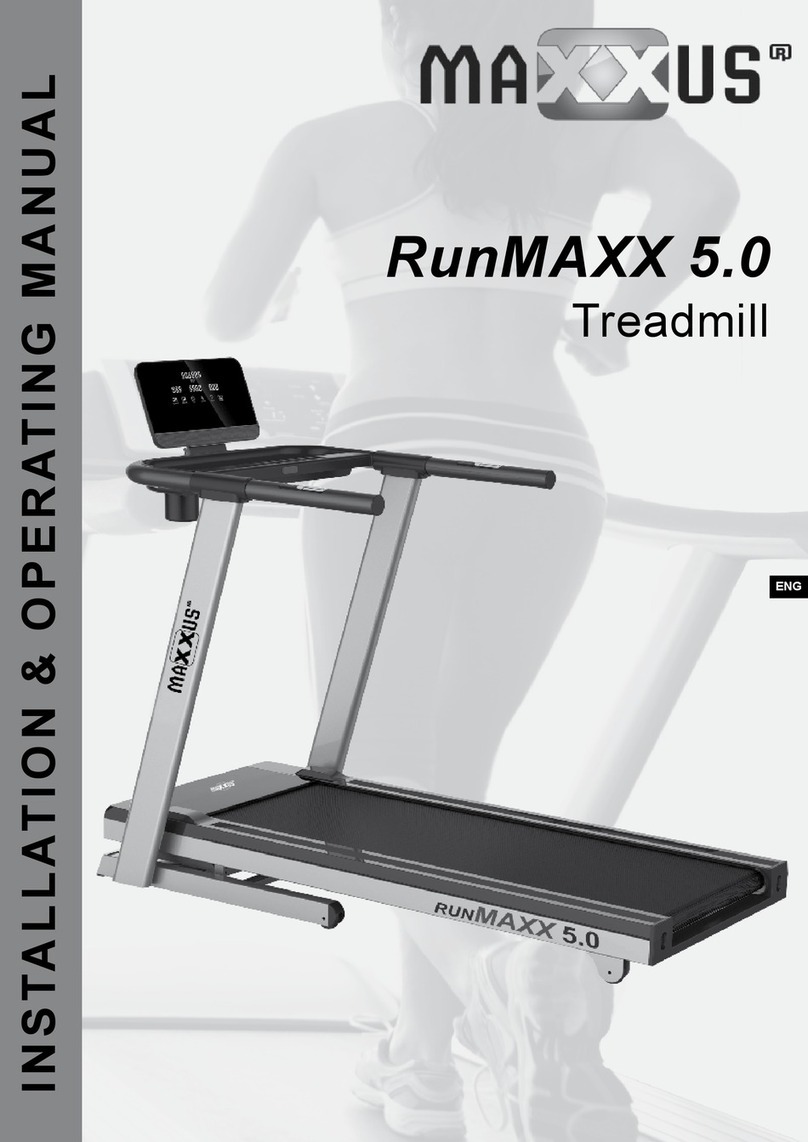
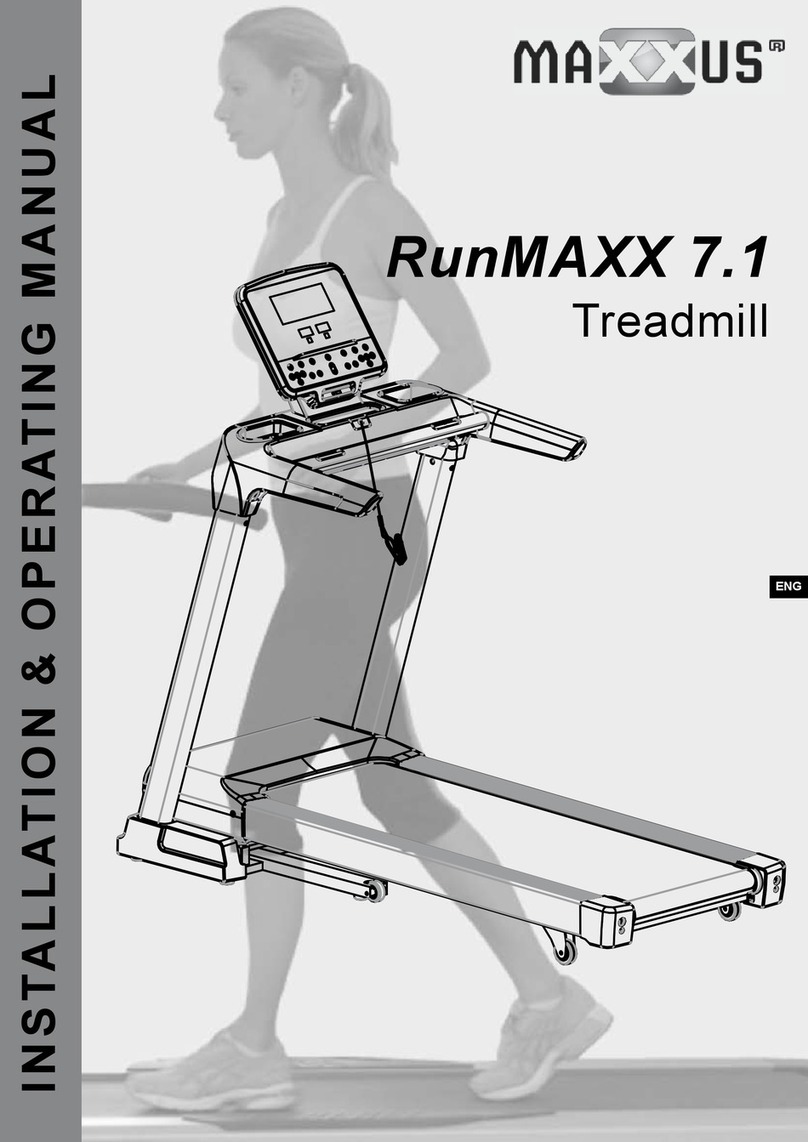
Maxxus RunMaxx 6.3 Installation instructions

RUNMAXX 6.3
ENG
Treadmill
INSTALLATION & OPERATING MANUAL

2
Index
Index 2
Safety instructions 3
Overall View of the Device 4
Scope of Delivery 4
Assembly 5 - 8
Folding Mechanism 9 - 10
Transport 10
Mains Cable 11
Disabling Function 11
Safety Key 12
What to do in an emergency 12
Care, Cleaning & Maintenance 13
Lubricating the Treadmill Belt 14-15
Adjusting the Treadmill Belt 15
Re-Tensioning the Treadmill Belt 15
Cockpit 16 - 26
Heart Rate Monitoring 27
Warning about Pulse & Heart Rate Monitors 28
Pulse Rate Monitoring using Hand Sensors 28
Heart Rate Monitoring using a Chest Belt 28
Training Recommendations 29 – 30
Technical Details 31
Disposal 31
Recommended Accessories 31
Exploded Drawing 32 – 33
Parts List 34 – 35
Warranty 36
Terms and Conditions of the Warranty - private use 37
Registration 38
Repairs Contract / Notication of a Damage Claim 39
© 2017 MAXXUS Group GmbH & Co. KG
All rights reserved / All rights reserved
This publication may not be reproduced, stored in a retrieval system, or transmitted in whole or in part, in any form or by any means, electronic, mechanical, photocopying,
recording, or otherwise without the prior written permission of Maxxus Group GmbH & Co. KG.
Errors, colour and technical modication subject to change, reproduction as well as electronic duplication only with written permission of MAXXUS Group GmbH & Co. KG.

3
ENG
Before you start exercising, be sure to read the entire user guide, especially the safety information, the maintenance & cleaning infor-
mation and the training information. Take care too that everyone who uses this training device is also familiar with this information and
observes it.
Be sure to carefully follow the maintenance and safety instructions in this manual.
This training device may only be used for its specic purpose. Improper use may present a risk of accidents, damage to health or dam-
age to the exercise device. No liability whatsoever is accepted by the distributor for injury or damage caused by improper use.
Power connection
− A mains voltage of 220-230V is required for the operation of the device.
− The exerciser may only be connected to a professionally installed, earthed, 16 A, fused single socket with the mains cable sup-
plied.
− The training device is switched on and o only using the ON / OFF switch.
− Always disconnect the power plug from the power outlet when moving the exerciser.
−Before carrying out any cleaning, maintenance or other work, always disconnect the mains plug from the socket.
−When connecting the mains plug, do not use socket strips or cable reels.
− If an extension cable is required, then it must comply with DIN standards, VDE regulations and guidelines, technical rules issued
by other European Union member states or other states which are party to the Agreement on the European Economic Area.
− Always lay the power cord in such a way that it can neither be damaged nor is a tripping hazard.
− In operating or standby mode, electrical devices such as mobile phones, PCs, Televisions (LCD, plasma, tube, etc.), game con-
soles etc. will emit electro-magnetic radiation. For this reason, all these types of devices should be kept away from your training
device as they could lead to malfunction, disturbances or false outputs being shown in heart rate measurements.
Training environment
− Choose a location that oers the greatest possible rm space on all sides of the exerciser. The safety area behind the training
device should be at least 200 cm long and 100 cm wide. Allow at least 100 cm to each side of the training device and 100 cm in
front of the training device.
− Ensure good ventilation and that optimal oxygen is available during exercise.Avoid draughts.
− Your exercise equipment is not suitable for outdoor use, so storage and training is only possible in temperate, clean dry rooms.
− Do not operate or store your training device in wet areas, such as swimming pools, saunas, etc.
− Make sure that your exercise equipment is always mounted on a level clean surface is. Unevenness in the ground must be re-
moved or compensated.
− To protect delicate oors, such as wood, lamina, tiles, etc. and from damage such as scratches, it is recommended to put a oor
protection (carpet piece, mat, etc.) permanently under the device. Make sure that the pad is secured against slipping.
− Do not place the exerciser on pale or white carpets, as the feet of the appliance may cause marks.
− Make sure that your exercise equipment, including the power cord, does not come into contact with hot objects and there is a
sucient safety distance from any heat source, such as radiators, stoves, open replaces, etc.
Personal safety instructions for training
−The safety key must be correctly inserted before each training session.
−While the exerciser is not in use, remove the safety key and mains cable to prevent improper or unsupervised use by third parties,
such as children.
− You should make a health check with your doctor before your rst workout.
− If you feel any physical discomfort or experience breathing problems, stop training immediately.- Always start your workouts with
a light load and increase it during the course of your workout evenly and gently. Reduce the load towards the end of your training
session.
−Be sure to wear suitable sportswear and sports shoes during exercise. Note that loose clothing can get caught in the running belt
or rollers during exercise.
− Your exercise equipment can only be used by one person at a time.
−Check whether your device is in perfect condition before every training session. Never use your exerciser if it has any faults or
defects.
− Independent repair work can only be done after agreement and approval from our service department has been received. Only
original spare parts may be used.
− Your exercise equipment must be cleaned after each use. In particular, remove all residues caused by body perspiration or other
liquids.
− Always make sure that liquids (drinks, body sweats, etc.) never enter the vibrating plate or penetrate the cockpit, as this leads to
corrosion and damage to the mechanical and electronic components.
− Your exercise equipment is not suitable for use by children.
− During training, third parties - especially children and animals - must have a sucient safety zone.
− Before any training, check whether there are objects under your training device and remove them. Never exercise with your exer-
ciser when there are objects underneath.
− Always make sure that your exerciser is not misused by children as a toy or climbing equipment.
−Make sure that you and third parties never bring body parts close to moving mechanisms.
The construction of this training device is based on the latest technical and safety standards.
This training device should only be used by adults!
Wrong and / or unplanned training can lead to extreme health problems!
Safety Instructions
A
E32
E13
B08 B09
C05 C06
E22
C14 C15
B01
D07
B15
E39
B C
4
Part Description Quantity
A Main Frame 1
B Cockpit 1
CTablet PC Holder 1
B01 Drink Holder 1
B08 Wrench/Phillips screwdriver 1
B09 Allen Key, 5mm 1
B15 Spanner, 19mm 1
C05 Handrail, left 1
Part Description Quantity
C06 Handrail, right 1
D07 Safety Key 1
C14 Frame Cover, left 1
C15 Frame Cover, right 1
E13 Hex Socket Head Screw 10
E22 Allen Head Screw M5 x 12 6
E32 Locking Washer M8 10
E39 Washer Ø5xØ13xT1.0 4
Overall View of the Device
Scope of Delivery
Tablet PC holder
Side frame
Motor housing
Cockpit
Handrail
Drink holder
Hand pulse sensors
Running deck
Tread

A
P
E13 E32
A
E32
E13
A06
A07
E32
E13
E13
E32
P
5
ENG
Carefully unpack all components. Two people are required, because some parts of your exercise machine are
bulky and heavy. Check that you have all of the fastening material (screws, nuts, etc.) and the components be-
fore starting the assembly steps. Take great care with the installation as damage or defects caused by assembly
errors are not covered by the warranty or guarantee under any circumstances. Please, read the manual before
carrying out the installation, follow the sequence of the installation steps exactly and follow the instructions of
the individual assembly steps. The installation of the exercise equipment must be carried out by responsible
adults. Perform the installation of your exercise equipment in a location that is level, clean and free from ob-
struction during assembly. Carry out the assembly with two people. Only start training after complete installation
of your training device has been carried out.
Preparation of the assembly
Unpack the main frame (A) and place it in your chosen assembly area. This should be level and clean.
ATTENTION: Do not remove the transport safety strap (P) until you have read the assembly instructions. Pre-
mature removal of the conveyor belt (P) can cause the tread to open upwards suddenly.
Step 1 - Mounting the side frames:
Fold up the left side frame (A06).
Secure it laterally to the main frame with two Allen screws M8x15 (E13) and two locking washers M8 (E32) and
from above with a hexagon socket screw M8x15 (E13) and a pulley M8 (E32).
Then do the same with the right side frame (A07).
Assembly

D03
D04
B
A06 A07
E13
E32
E13
E32
E32 E13
E32
B
C
B
B12
B13
P
6
Step 2 - Mounting the cockpit frame:
Connect the cable (D04) protruding from the top of the right side frame to the cable (D03) protruding from the
right of the cockpit frame (B). Then place the cockpit frame (B) in the side frames from the top (A06 / A07).
ATTENTION: Make sure that you do not squeeze or damage the cables.
Then secure them both sides with one hexagon socket screw M8x15 (E13) and one locking washer M8 (E32)
each on the right and left side frames (A06 / A07).
Step 3: Mounting the Tablet PC Holder
Insert the thread of the tablet PC holder (C) into the cockpit (B). Then tighten the lower part of the shaft (B12) by
hand. align the tablet PC holder (C) then tighten the screw (B13) with the wrench (B15).
Assembly

C14
C15
A
P
E22 C05
E39
E22 C06
E39
B
B01
E22
A07
7
ENG
Step 4 - Assembly of the handrails
Insert the left handrail (C05) on the left side of the cockpit frame (B) and secure it from below using two M5x12
pan head screws (E22) and two Ø5xØ13T1.0 washers (E39). Now do the same with the right handrail (C06).
Step 5 - Mounting the side covers
Insert the left side cover (C14) into the main frame (A) and press rmly. Repeat with the right side cover (C15).
Step 6 - Mounting the cup holder
Attach the Cup Holder (B01) to the right side frame (A07) with two M5x12 pan head screws (E22).
Assembly

D07
B
P
E13 E
E13
E
8
Step 7 - Inserting the Safety Key
Insert the safety key in the cockpit (B). Cut and remove the transport strap (P).
Step 8 - Remove the second transport lock
Loosen and remove the hexagon socket screw M8x15 (E13) with the steel cable (E) on the main frame (Located
as shown).
Now fold up the treadmill. Then loosen and remove the Allen bolt M8x15 (E13) with the steel cable (E) attached
to the inside of the main frame.
Note: Keep the steel cable (E) and the two screws (E13). You can use them if you want to disassemble the
treadmill for transportation or to save some space.
Step 9 - Check the lubrication of the running belt
The running belt has been lubricated at the factory but there is a possibility that due to delivery, storage time
and weather conditions (warm season) the lubrication is partly to completely dried out. For this reason, check
whether the running belt is suciently lubricated and lubricate if necessary. Please read the chapter “Lubrication
of the running belt” in this manual.
Illustration shows similar treadmill
Assembly
Illustration 1
Illustration 1
Lubrication region

9
ENG
This treadmill is equipped with a folding mechanism to save
space. To fold up the treadmill and fold down again, proceed as
follows:
Fold up the tread
Step 1:
Slope = 0%
Make sure the treadmill slope is level “0”, turn the treadmill o us-
ing the main switch and remove the power plug from the socket.
DANGER:
Never fold up the running surface of the treadmill when the tread-
mill slope is not at level “0” or the treadmill is still turned on.
Step 2:
To lift the tread, grasp the back end of the tread with both hands
and then lift it up.
Lift carefully, standing with your feet rmly on the oor.
Step 3:
Press the tread upwards until the lock system clicks into place.
Check that the tread is securely locked in the folded up position
by lightly shaking it.
Hydraulic Cylinders
The folding mechanism relies on a hydraulic cylinder. This is lled with oil under high pressure. Should a cylin-
der be damaged, the safe folding of the tread is no longer guaranteed. If damaged, the hydraulic cylinder must
be replaced before raising the tread again.
Folding Mechanism
Hydraulic Cylinder

10
Fold down the tread
Step 1:
Hold the back of the tread rmly with both hands. Press the safety lever of
the lock system down with your foot to release the lock. Pull the tread gently
down.
Step 2:
The tread is equipped with a soft-fold system. This causes the tread to auto-
matically slow down until it has complete contact with the ground. You should
watch the tread and never leave it to fold down unattended.
DANGER:
Folding up and down of the tread should never be done by children.
When folding down, always make sure that no objects, children or pets are
under the tread.
Folding Mechanism
Transport
When folded, the treadmill can be moved without much eort.
To move the treadmill please proceed as follows:
Step 1:
Fold the tread upwards as described in the chapter “Folding Mechanism”. Grasp the tread on the top right and
left with your hands and pull the tread towards yourself until the weight of the treadmill is resting on the transport
rollers.
Make sure you stand upright.
Step 2:
Now the treadmill can be moved without much eort.
When moving the treadmill always make sure that no objects, children or pets are in the way.
Always make sure to walk carefully while moving.
Step 3:
To stand the folded treadmill up safely, lift the tread up gently until the front base frame is completely on the
ground.
DANGER:
The transport of the treadmill should only be performed by adults.
Step 1 Step 2 Step 3

11
ENG
Illustration may vary due to the model
Residual current circuit breaker (depending on model)
To protect the treadmill from damage caused by overvoltage of the mains there is a fault current circuit breaker
next to the main switch on the front of the motor cover. This switch jumps out at an overvoltage and breaks the
circuit, the treadmill is completely switched o. If this happens, turn o the treadmill with the main power switch
and disconnect the power cord from the socket. Push the raised residual-current-operated circuit breaker back
in again. Plug the power cord into the power outlet and turn the treadmill back on using the main power switch.
Backup (depending on model)
To protect the treadmill from damage caused by overvoltage of the mains there is a fuse next to the main switch
on the front of the engine cover. This breaks the circuit in the event of an overvoltage, the treadmill is completely
switched o. If this happens, turn o the treadmill with the main power switch and unplug the power cord from
the wall outlet. Check the fuse and replace if necessary. Then connect the power cord to the Socket and switch
the treadmill back on using the main switch.
To protect the treadmill from being used by unauthorized third parties, always remove the safety key and discon-
nect always the power cord when not in use. Store these separately from the treadmill in a safe place inaccessi-
ble to children
Mains cable
Connect the plus of the mains cable to the corresponding coupling on the treadmill. Then
connect the power cord to a power outlet.
The device may only be connected to an earthed socket installed by professional
installers. Do not use multiple sockets to connect the treadmill. If an extension cable
is required, then it must comply with DIN standards, VDE regulations and guidelines,
technical rules issued by other European Union member states or other states which are
party to the Agreement on the European Economic Area.
Main Switch
The main switch is located next to the power connector on the front of the treadmill. This
switch turns the treadmill on or o.
Switch position “I” = treadmill switched on
Switch position “0” = treadmill switched o
Mains Cable
Disabling Function
Main Switch
Residual-current device /
Fuse
Coupling for
Mains Cable

.
12
Safety Key
The operation of the treadmill is only possible when the safety key is correctly in the contact point in the cockpit.
If the safety key is removed from the contact point the treadmill stops automatically. Before every training, make
sure that the safety key is rmly attached to your clothing by the string and clip. If you want to stop the treadmill
quickly, do not adjust the speed or another emergency may occur, pull the safety key from the contact point us-
ing the cord. In the event of a fall, the safety key releases from the cockpit due to the connection to your clothes.
Make sure that the clip is always rmly attached to your clothes during training. Adjust the length of the rope so
that it hangs easily during exercise.
Operation of the treadmill is not possible without the proper use of the safety key. If the safety key is pulled from
the contact point during exercise, the treadmill stops automatically. I
Function test of Safety Key and EMERGENCY button
Check the proper functioning of the safety key before each use of the treadmill. To do this, start the treadmill
without entering it. Pull the safety key out of his Contact position. The treadmill should stop immediately.
WARNING:
Under no circumstances should you use the treadmill if the safety key or EMERGENCY button is not working
properly.
Safety distance
Select the location for the treadmill so that there is a free safety area with a length of at least 200 cm and a
width of at least 100 cm behind the treadmill in training mode.
You will also need a free safety area at least equal to the length of the treadmill and a minimum width of 100 cm
on the right and left side of the treadmill during training sessions.
What to do in an emergency
If you notice during exercise that you are no longer able to manage the speed, you feel pain or any another
emergency situation arises, immediately pull the safety key or press the emergency stop button. Hold onto the
handrails with both hands and place both feet on the foot rails treads. If you trip during your workout, you should
immediately grasp the handrails with both hands. Support yourself with hands and arms on the handrails and
bring your feet right and left on the side treads. You should practice this situation rgularly, so that in an emergen-
cy situation the corresponding reaction will be easy for you.
Be sure to wear the safety key during each use of the treadmill. Also make sure that third parties who use the
treadmill are informed about the safety instructions and always wear the safety key during training!
Safety Key
What to do in an emergency

13
ENG
WARNING
Before you perform any care, cleaning, maintenance, repair or similar work on your training device, turn o your
exerciser and remove the power cord. Check before starting the planned work that your exerciser is completely
disconnected and switched o. Only when all work is fully completed and the device is completely re-assem-
bled, may the training device to be reconnected to the mains and turned on.
Before rst use or after a long break from training
Check that the treadmill is safe. There must be no objects on or under the device. Make sure that there is a
continuous lm of lubricant (silicone) on the running deck. If this is not the case, then use the enclosed silicone
and apply a lubricant lm.
Maintenance & Cleaning Intervals:
After each workout, clean the treadmill with a damp cloth to remove possible perspiration and / or other liquid
residues. Under no circumstances use solvents for this purpose. Dry the cleaned areas thoroughly.
Checking the lubrication of the running belt: once a week
If your regular checks show that there is no longer sucient lubrication, immediately lubricate and adjust the
check interval accordingly. If the treadmill has a folding mechanism and has been standing upright for a long
time, check whether there is still enough lubricant present.
Check the belt run: once a week
The alignment of the running belt must be checked regularly. Should you notice that the belt is running to one
side, this must be corrected immediately. Please read the corresponding section the guide.
Cleaning the motor compartment: once a month
To clean the motor compartment, remove the motor cover bolts and cover.
ATTENTION: This work may only be performed when the exerciser is switched o and the power plug is re-
moved. Vacuum the visible dust with the small nozzle of a vacuum cleaner. Never use detergent or compressed
air under any circumstances.
Checking the mounting materials: once a month
Check the bolts and nuts at least once a month. Tighten it, if necessary.
Why is maintenance of my treadmill so important?
In order for you to enjoy your treadmill for a long time, it is important to do some basic maintenance regularly
and conscientiously. The intervals of this work depend very much on the degree of utilization of the device and
therefore, the specied intervals can be quite short.
What can happen if there is a lack of maintenance?
There is friction between the running belt and the running deck when in use. Any kind of friction means wear and
thus reduces the life of your training device. By lubricating between the board and mat with silicone the friction
is reduced, thus increasing the life of both parts. If the treadmill runs dry the running board gets hot, the surface
of the running board and the running belt may be destroyed. Friction can also lead to a static charge which can
discharge on body contact with the frame. This is not only unpleasant, but can also destroy the electronics of
the treadmill.
Why do I have to clean the motor compartment?
Due to movement of the running belt and ventilation of the motor, the treadmill attracts dust from the environ-
ment. This deposits both under and in the device. At some point, the interior of the device would be so dusty that
it causes a short to electronic components. To avoid this, regular cleaning necessary.
Damage caused by neglect or lack of maintenance and care are excluded from the
Warranty and Guarantee.
Costs for the repair of a non-maintained training device can therefore quickly amount to several hundred euros.
A high price that can be avoided by regular care and maintenance
Care, Cleaning & Maintenance

14
The most important maintenance measure for a treadmill is regular and timely lubrication, maintenance and care of
the running belt. Damage or defects to the running belt resulting from lack of or failure to care for or lubricate the
running belt, are not covered by the warranty or guarantee under any circumstances.
The treadmill belt must always be lubricated when a signicant increase in friction of the running belt is noted. This can de-
tected by a jerking movement of the belt while training, or an error message E05 in the cockpit display. Inadequate lubrica-
tion or care and the associated signicant increase in the friction inevitably leads to increased wear and causes damage to
the running belt, running deck, engine and circuit board.
The frequency of use of the treadmill is largely dictates how often you have to perform maintenance. Because this varies
from user to user we recommend creating a service booklet. You should set a xed day of the week to check the lubrication
of the running belt during the rst 6 months of use. To do this, lift the front third of the running belt and feel with your hand to
the middle of the running belt whether there is still lubricant present. If so, enter the date and “ok” in the service booklet. If
little or no lubricant is available, lubricate the belt and enter this with the date. After some time, you can see the lubrication
interval required.
Even if you do not want to run a service book, be sure to check the lubrication of the running belt once per
week!
Reminders
In addition, this treadmill is with a reminder feature tted.
Every 300 kilometers appears in the TFT display this message:
Check the lubrication of the treadmill and lubricate the belt according to the following instructions on demand. To reset the
reminder function press and hold the STOP button for approx. 5 seconds.
If the treadmill is not used or the treadmill is folded up for a long period of time, check the treadmill before using it again and
lubricate if necessary.
To lubricate the belt optimally take the MAXXUS care oil bottle, remove the regular screw cap (Fig 1) and then insert
the screw cap with tube (Fig 2). Before you lubricate the belt, make sure that the treadmill is o and the running belt has
stopped. Lift the running belt (Fig 3).
Figure 1 Figure 2 Figure 3
Figure 4
Lubricating the Treadmill Belt
Lubrication area
Middle of the running belt
Rear wheel
Running deck Running belt
Motor Compartment

15
ENG
Use only the silicone supplied with your treadmill
or MAXXUS® Care Oil (available at www.maxxus.de) to lubricate the running belt.
Do not use other silicone or lubricants!
In particular, we advise against the use of silicone sprays.
After nishing the lubrication, let the treadmill run at a speed of 4 km / h for about 3 to 5 minutes
without load to distribute the silicone oil thoroughly.
Do not fold up the tread for at least 3 days after lubrication.
The treadmill must always be switched o and the power cord disconnected from the power outlet
before carrying out maintenance, cleaning, repair or other work!
The running belt should always run in the middle and in a straight line in order to achieve the longest possible
service life. Before each workout, therefore, check whether the running belt runs straight and in the middle, or
whether its alignment has changed. Possible reasons for changed alignment of the running belt are:
− The oor on which the treadmill stands is uneven or has a slope.
− Individual running styles (eg one-sided weight distribution, foot inclination, etc.)
The running belt is adjusted as follows, as follows:
1. Start the treadmill and let it run at a constant speed of 12 km / h.
2.1 If the belt is running to the left, turn the left adjustment screw on the rear end of the treadmill
1 /8 turn clockwise and right adjusting screw 1 /8 turn counterclockwise. Wait a moment, as the change is
not immediately visible.
The alignment of the belt changes after a 1 /8 turn of the adjusting screw. Change the screw position
only one step at a time.
2.2 If the belt is running to the right, turn the right adjusting screw 1 /8 turn clockwise and the left adjusting
screw 1 /8 turn counterclockwise.
3. If the belt is centred again, the adjustment is correct. If not, repeat the steps described under 2.1 and 2.2
until the belt runs in the middle.
If the belt can not be adjusted, please contact the Maxxus service department.
If the alignment of the running belt has shifted so far that it rubs on one of the two
side treads malfunctions and defects to the treadmill occur. Damage caused by a
failure or inadequate adjustment of the running belt are not covered by the warran-
ty under any circumstances.
Lubricating the Treadmill Belt
Adjusting the Treadmill Belt
Re-Tensioning the Treadmill Belt
If the running belt slips on the rollers during operation (manifested
by a jerking motion during running), the belt has to be re-tensioned.
Re-tightening using the same adjustment screws, which used to adjust
the running belt.
1. Start the treadmill and leave it with a constant Speed of 4 km / h.
2. Turn both screws, one after the other 1 /8 turn clockwise.
3. Now try to decelerate the mat by being on walking on the tread-
mill as if you were going down a steep slope. If the front roller
still spins, repeat the tightening process again. The running belt
should only spin with heavy braking.

6 8 10
SPEED
6 8 10
INCLINE
16
TFT Colour Screen
Display of the current slope
Display of energy consumption in calories
* Note on calorie measurement
The calculation of the energy consumption is done by means of a general formula. It is not possible to determine an individual
energy consumption exactly because this requires a lot of personal data. Therefore, the displayed power consumption is approxi-
mate and not one exact value.
Duration of Training
Training Distance in km
Speed in km / h
−when using the hand sensors: pulse display
−hen using a transmitter chest strap *: heart rate display
* optionally available
INCLINE keys (slope)
During programming: keys for specifying values
During exercise: buttons to adjust the slope from level 0-15 in 1-step increments”
Direct dial keys for slope
The cockpit of your treadmill has 3 direct access buttons for incline
These shortcut keys allow you to quickly and easily select specic xed slopes. These can not be
changed by the user”
SPEED buttons
During programming: keys for specifying values
During exercise: keys to adjust the speed of 0.8-20.0km / h in 1km /h increments”
Speed dial buttons
The cockpit of your treadmill has 3 speed-dial buttons. These shortcut keys allow you to quickly and
easily select specic xed speeds. These can not be changed by the user.
Cockpit
Tablet PC support
Incline/Calories Time Distance Speed/Pulse

MODE
START
STOP
PROG
u
MP3
Wu
W
u
17
ENG
Button to select training presets and to select the manual training programs and the competition
programs.
Button to start the selected program or the Quick Start function
Pause function
Pressing the STOP button once while exercising will stop the treadmill. The cockpit switches to
pause mode and the display shows “PAU”. By pressing the START button again the training will be
continued from the point where it was interrupted.
Stop function
If the cockpit is in pause mode, the training is terminated by pressing the STOP button again and a
summary of the training data appears in the display.
RESET function
If the cockpit is in STOP mode, pressing the STOP button again will reset ockpit data to zero.
Button to select pre-programmed exercises P1 to 24, the free memory locations U1 to U3, heart rate
controlled programs HRC 1 and HRC2 and BMI determination.
RCA connector for connecting an external music source (MP3 player, Smartphone, etc.). The con-
nection cable is supplied.
Starts or stops the connected music or video. A USB stick with with video or audio les can be start-
ed or stopped using this button.
To choose between the individual videos or music les - briey press the button
To reduce the volume - keep the button pressed
To choose between the individual videos or music les - briey press the button
To increase the volume - keep the button pressed
Button for selecting audio or video playback.
If pressed during video playback, the video will be played in full screen
USB port for USB stick up to USB 2.0.
The connection is located on the top of the cockpit housing.
Cockpit

18
Cockpit
More functions
Hand pulse sensors
Serve for short-term pulse measurement. To do this, cover the hand sensors with both hands. After a short time,
the current pulse is shown in the display. Please also read the chapter “Pulse measurement using hand sensors
as well as Warnings for pulse and heart rate measurement in this manual.
Heart rate measurement
The cockpit of this treadmill is already factory tted with a receiver for wireless heart rate measurement. For this
purpose, an optional chest strap with a transmitter is needed. This chest strap must be on the 5 KHz frequency
and uncoded. MAXXUS® recommends the use of a POLAR® T34 transmitter chest strap. The use of Bluetooth
chest straps is not possible. Please also read the chapters “Heart Rate Monitoring using a Chest Belt” and
“Warning about Pulse & Heart Rate Monitors” in this manual.
Line-in connection & speakers
The cockpit of the treadmill is equipped with a line-in connection and speakers. The line-in cable supplied,
can be used to connect an external music source (eg smartphone, MP3 player, etc.) to play the audio source
through the speakers. The volume is controlled via the externally connected device. Volume control via the
cockpit is not possible.
USB port
Connection option for a USB stick. Audio or video les can be played.
Switch the treadmill on
Connect the mains plug of the power cable to an earthed, 16 A single fused professionally installed mains
socket. Now switch the treadmill on with the on / o button (located on the back of the motor compartment). The
treadmill is ready for use if the following appears in the TFT display
Switch the treadmill o
To switch o the treadmill, press the on / o button again. Then remove the power plug from the socket.
WARNING:
Before you switch o the treadmill always make sure that the slope is set to level zero.
Quick start
Turn on the treadmill and press the START button.
The treadmill starts automatically after a countdown and the exercise time starts to run.
Use the SPEED buttons to adjust the speed, and the INCLINE buttons to adjust the slope during the workout.
To stop the workout, press the STOP button.

19
ENG
Manual training
In this type of training, the user sets a goal before training. The chosen value shows when the count-
down starts to run backwards at the beginning of training.
Step 1: Program selection.
Turn on the treadmill and press the MODE button once.
Step 2: Selection and specication of the training goal
Step 2.1: Specication of the training time
The value “15:00” ashes in the display eld for “TIME”.
If you want to specify the time as your training goal, then enter the desired training time from 05:00
to 99:00 minutes by pressing the buttons for SPEED or INCLINE. Proceed to step 3.
If you want to select another training target, press the MODE button as soon as the value “15:00”
appears in the “TIME” window.
Step 2.2: Specication of the training distance
The value “1.00” ashes in the display eld for “DISTANCE”.
If you want to specify the distance as your training goal, then enter the desired distance from 0.5 to
99.5km by pressing the buttons for SPEED or INCLINE. Proceed to step 3.
If you want to select another training target, press the MODE button as soon as the value “1.00”
appears in the DISTANCE window.
Step 2.3: Specifying the calorie consumption
The value “50” ashes in the display eld for “CALORIE”.
If you want to set the calorie consumption as your training goal, then enter the desired calorie con-
sumption from 10 to 999 calories by pressing the buttons for SPEED or INCLINE.
Proceed to step 3.
Step 3: Training start
After entering the desired workout goals, press the START button. The display will show a count-
down. After completion of the countdown the treadmill starts automatically.
Use the SPEED buttons to adjust the SPEED, and the INCLINE buttons to adjust the slope during
the workout. The training automatically ends with the achievement of the given training goal.
Cockpit
Race Simulation
With these programs, you can dene a workout time for a particular distance that you like to reach. Based on your intended
training time, a computer opponent runs with the appropriate training speed. In the display the opponent is indicated as “C”
and the user as “U” in percent towards the specied target.
Step 1: Program selection.
Switch on the treadmill and press the MODE button until the following graphic appears in the TFT display:
You now have the choice between the following predened distances:
− 3.00km
− 5.00km
− 10.00km
− 15.00km
− 21.10km
− 42.19km
These are selected by pressing the MODE button again.
Step 2: Timing
Now press the SPEED or INCLINE buttons to select the time in which you want to reach the destination. This is also
the time the computer opponent will reach the goal.
Step 3: Competition start
After entering the desired exercise time, press the START button. The display will show a countdown. After completion of
the countdown the treadmill starts automatically.
Use the SPEED buttons to adjust the speed, and the INCLINE buttons to adjust the slope during the workout.
The training ends automatically with the achievement of the given competition distance.

■ km/h %
16
16
14 14
12 12
10:00 10 10 �f
8 8
6 6
4 4
2 2
10:00
■ km/h %
16
16
14 14
12 12
10:00 10 10 �f
8 8
6 6
4 4
2 2
10:00
20
Training proles P01 - P24
With this type of training, the user has 24 preset, permanently installed training proles. Each prole consists of
10 segments. The total training time set by the user determines on the duration of the segments (training time:=
10 x time per segment).
Step 1: Program selection.
Turn on the treadmill and select the desired program by pressing the PROG button.
Step 2: Specication of the training time
The value “10:00” ashes in the display eld for “TIME”.
Enter the desired workout time from 05:00 to 139: 00 minutes by pressing the buttons
for SPEED or INCLINE.
Step 3: Training start
After entering the exercise time, press the START button. The display shows a countdown. After completion of
the countdown the treadmill starts automatically.
The training ends automatically with the achievement of the given training time.
Note:
During exercise, you can change the default speed and incline for the current segment. At the beginning of the
next segment, however, these automatically change to the pre-programmed values for the currently selected
training prole.
Changing the speed and incline values for the entire prole is not possible.
Cockpit
This manual suits for next models
1
Table of contents
Other Maxxus Treadmill manuals

Maxxus
Maxxus M8 User manual

Maxxus
Maxxus RunMaxx 7.4 T Installation instructions

Maxxus
Maxxus RunMAXX 90 PRO Installation instructions

Maxxus
Maxxus RunMAXX 9.1 Installation instructions

Maxxus
Maxxus Multipress 8.1 User manual

Maxxus
Maxxus M8 User manual

Maxxus
Maxxus 7.3 Installation instructions

Maxxus
Maxxus RunMaxx 7.4 User manual

Maxxus
Maxxus RunMAXX 3.0 Installation instructions

Maxxus
Maxxus 6.4 Installation instructions