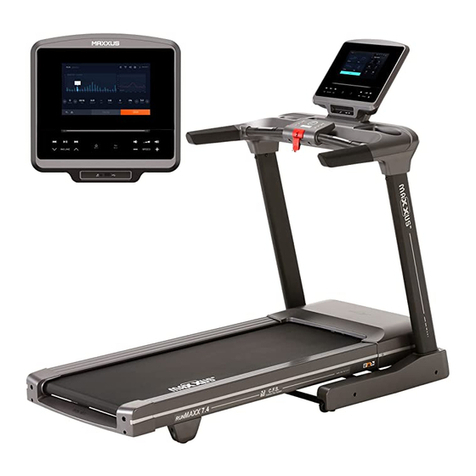
Maxxus RunMAXX 3.0 Installation instructions

ENG
RunMAXX 3.0
Treadmill
INSTALLATION & O PERATING MANU A L

2
Index
Index 2
Safety Instructions 3
Overview of the Device 4
Assembly Material 4
Scope of Delivery 4
Assembly 5 – 6
Mains Cable 6
Disabling Function 7
Folding Mechanism 8 – 9
Transport 9
Safety Key 10
Safety Distance 10
What to do in an Emergency 10
Maintenance & Care 11 – 13
Cockpit 12 – 20
Pulse & Heart Rate 21 – 22
Training Recommendations 23 – 24
Technical Details 25
Disposal 25
Recommended Accessories 25
Exploded Drawing 26
Parts List 27
Warranty 28
Notes 29 – 30
Service Contract 31
© 2019 MAXXUS Group GmbH & Co. KG
All rights reserved / All rights reserved
This publication may not be reproduced, stored in a retrieval system, or transmitted in whole or in part, in any form or by any means, electronic,
mechanical, photocopying, recording, or otherwise without the prior written permission of Maxxus Group GmbH & Co. KG.
Errors, colour and technical modication subject to change, reproduction as well as electronic duplication only with written permission oMAXX-
US Group GmbH & Co. KG.

3
ENG
Safety Instructions
Before you start exercising, be sure to read the entire operating manual, especially the Safety Information, the Maintenance and Clean-
ing Information and the Training Information. Also make sure that anyone else who uses this training device is familiar with this informa-
tion and observes it.
Always follow the maintenance and safety instructions in this manual very carefully.
This training device may only be used or its specic intended use. Any misuse can cause risk opossible accident, damage to health
or damage to the device for which the Distributor will not assume any liability.
Electrical Connection
−A mains voltage of 220-230V is required to operate this training device.
−The training device is only to be connected to the mains with the mains cable supplied using a 16A individually fused and earthed
socket installed by a qualied electrician.
−The training device is only to be switched on and ousing the ON/OFF switch.
−Always remove the electric plug from the socket before moving the training device.
−Remove the electric plug from the socket before commencing any cleaning, maintenance or other works.
−Do not connect the mains plug to a socket on a socket strip or on a cable drum.
−If using a cable extension please ensure that this complies with DIN standards, VDE regulations and guidelines, technical rules
issued by other European Union states.
−Always place the mains cable so it cannot be damaged or cause a tripping hazard.
−In operating or standby mode, electrical devices such as mobile phones, PCs, Televisions (LCD, plasma, tube, etc.), game con-
soles etc. will emit electro-magnetic radiation. For this reason, all these types of devices should be kept away from your training
device as they could lead to malfunction, disturbances or false outputs being shown in heart rate measurements.
−For safety reasons, always remove the electrical plug from the socket when the device is not in use.
Training Environment
−Select a suitable space for your training device to provide an optimum amount of free space and highest level of safety. You
should leave a free space measuring a minimum of 200 cm long and at least the width of the treadmill behind the device. A free
space measuring a minimum of 50cm long and at least the width of the treadmill should be left in front of the device.
−Make sure that the area is well ventilated and that an optimum amount of oxygen is available during training. Avoid draughts.
−Your training device is not suitable for outside use and so storage and training can only take place in a temperate, clean dry room.
−The temperature range to operate or store this device is between a minimum of 10° and maximum of 30°
−Do not operate or store your training device in wet areas such as in swimming pools, saunas etc.
−Make sure that your training device is kept on at, hard, clean ground both in operation and at rest. Any uneven suraces must be
removed or made good.
−It is recommended that a oor covering (carpet, mat, etc.) should be placed under the device to protect damageable oors such as
wood, laminates, oor tiles etc. Please ensure that this underlay cannot slip or slide.
−Do not put this training device on pale or white coloured carpets or rugs as the feet of the device may leave marks.
−Make sure that your training device and mains cable are kept out of contact with hot surfaces and are kept at a safe distance from
any sources oheat e.g. central heating, hot stoves, urnaces, ovens or open res.
Personal Safety Instructions for Training
−The safety key must be inserted correctly before each training session can begin.
−Remove the safety key and mains cable from the training device when not in use to avoid inappropriate or uncontrolled use by any
other third party, e.g. children.
−You should have a health check carried out by your doctor before you start any training
−Stop training immediately iyou eel physically unwell or are experiencing any breathing difculties.
−Always start your training session at a low workload increasing it slowly but steadily throughout. Reduce the workload again to-
wards the end of your training session.
−Suitable sports shoes and clothes should always be worn during training sessions. Make sure that loose clothes do not get caught
up in the treadmill belt or rollers.
−Your training device is only to be used by one person at a time.
−Check each time before a training session to see if your device is in perfect condition. Never use your training device if it is faulty
or defective.
−You are only permitted to carry out repairs to the device yourself after having contacted our Service Department and on receipt of
explicit permission to do so. Only original spare parts may be used at any time.
−Your training device must be cleaned after each use. Remove all dirt including body sweat or any other liquids.
−Always make sure that liquids (drinks, body sweat, etc.) do not get onto the vibrating plate or into the cockpit as this can cause
damage to the mechanical and electronic components.
−Your training device is not suitable for use by children.
−Third parties, especially children and animals, must be kept at an appropriate safety distance during training.
−Check if there are any items underneath the training device before each training session and remove them without fail. Never use
the training device when items are underneath it.
−Do not allow children to use your training device as a toy or climbing frame at any time.
−Ensure that no body parts of your own or of third parties ever come in contact with any of the moving mechanisms.
Warning for pulse and heart rate measurement
Pulse and heart rate monitoring systems may be inaccurate. Excessive training can lead to serious injury or lead to death. Iyou eel
unwell and / or aint, you must stop training immediately. Make sure that all persons using this exercise device are amiliar with and
understand this information and abide by it without fail.
The construction of this training device is based on state-of-the-art technology and highest modern technical safety standards. This
training device is to be used by adults only! Extreme misuse and/or unplanned training can cause damage to your health!
BEDIENUNGS- & MONTAGEANLEITUNG
RUNMAXX 3.0
Laufband
4
Hexagon Socket Screw
M8x35
2 Pieces
Hexagon Socket Screw
M8x12
2 Pieces
Locking Pin
1 Piece
Allen Key
1 x 5mm
1 x 6mm
Overall View of the Device
Assembly Materials
Hand Rail
Shelf
Cockpit
Motor Housing
Base Frame
Safety Key Assembly & Operating
Manual
Care Oil
Hand Pulse Sensors &
Hand Rail Control
Side Frame
Treadmill Deck
Running Deck
You are welcome to supplement or replace the tools included with your own tools. Make sure that
you use suitable tools which are an appropriate t.
Scope of Delivery

5
ENG
Carefully unpack all delivered parts. Have someone there to help you as some of the training device parts are
bulky and heavy.
Check that all the parts and xing materials (screws, nuts, etc.) have been delivered.
Assemble the parts carefully as any damages or defects occurring due to mistakes made at the time of assem-
bly are not covered by the warranty or guarantee. Therefore, read through the assembly instructions carefully
before you start assembling, follow each assembly step exactly as described and keep to the correct sequence
of assembly as instructed. Assembly of the training device must be carried out thoroughly by adults only.
Assemble the training device in a location which is level, clean and clear of obstructions. 2 people are required
to carry out the assembly. Training can only start when the training device has been fully assembled.
Step 1: Preparing for Assembly
Remove all treadmill parts rom the packaging. Place the base rame on a clean at surace.
Step 2 Assembling the Side Frames & Cockpit Frame
Lift the two side frames and secure them to each side of the base frame from the outside with a hexagon socket
screw M8x35. Then rmly tighten the pre-assembled hexagon socket screws located just below the screws
previously tted.
Lit the cockpit rame upwards and x it rom the inside to each side othe side rame using an M8x12 hexagon
socket screw. Then tighten the preassembled hexagon socket screws located just below the other two screws
you have just tted.
CAUTION: Make sure that the cable in the right side-rame does not get damaged or jammed whilst you are
assembling the cockpit frame.
Assembly

6
Step 3: Assembly of the Cockpit Frame
Raise the cockpit upwards and insert the locking pin into the let opening on the joint between the cockpit and
the cockpit rame. Now tighten the hexagon socket screws to be ound on the let and right sides othis joint.
Important Note before First use of the Treadmill
Lubricate the running belt beore using the treadmill or the rst time. Please read the Section “Lubrication othe
Belt” in this manual.
Assembly
Tighten this hexagon
socket screw
Tighten this hexagon
socket screw

7
ENG
Mains Cable
Connect the power cable to an electrical socket.
The device may only be plugged-in to grounded socket which has been installed by a
professional electrician. Do not use multiple sockets to connect the treadmill. If you need
to use an extension cable, it must comply with the VDE or equivalent guidelines.
Main Switch
The main switch is located next to the power connection on the front of the treadmill. This
switch is used to turn the treadmill on or o.
Switch position “I” = treadmill switched on
Switch position “0” = treadmill switched o
Fault-Current Switch (depending on the model)
There is a fault-current button-switch next to the main switch on the front of the motor
cover to prevent the treadmill from being damaged by electrical surges in the network.
This button-switch is triggered oby ia surge in the electrical supply occurs and acts as
a circuit breaker. In this case the treadmill will be completely switched o. Ithis occurs,
switch othe treadmill at the main switch, and pull the mains cable out othe socket
with the plug. Press the button on the fault-current switch back in. Re-connect the mains
cable with the plug and switch the treadmill back on at the main switch.
Fuse (depending on model)
To protect the treadmill from damage caused by overvoltage of the mains there is a fuse
next to the main switch on the front of the engine cover. This breaks the circuit in the
event oan overvoltage, the treadmill is completely switched o. Ithis happens, turn
othe treadmill with the main power switch and unplug the power cable rom the wall
socket. Check the fuse and replace if necessary. Then re-connect the power cable to the
socket and switch the treadmill back on using the main switch.
To protect the treadmill from being used by unauthorised third parties, always remove the
safety key and keep it stored away in a separate place and out of the reach of unauthor-
ised persons, such as children.
Mains Connection
May vary depending on the model
Main Switch
Fuse
Disabling Function

Klick
8
Hydraulic Cylinder
The olding mechanism relies on a hydraulic cylinder. This is lled with oil
and is under high pressure. If the cylinder is damaged, the safe folding of the
treadmill deck is no longer guaranteed. It must therefore be replaced without
fail before the treadmill deck is raised again.
This treadmill is equipped with a folding mechanism. To save space, fold the
treadmill deck up and down as follows:
Folding up the Treadmill Deck
Step 1:
Make sure that the deck incline level is at “0”, switch the treadmill oat the
main switch and remove the mains plug from the socket.
CAUTION:
Never old up the treadmill deck without the incline in “0” position or without
switching it o.
Step 2:
Hold onto the rear end of the treadmill deck and lift it upwards.
Make sure that you are standing with your eet rmly on the ground.
Step 3:
Push up the deck until you hear it click into the catch.
Check that it is locked safely in the upright position by gently shaking the
deck.
Folding Mechanism
Hydraulic Cylinder
Figure similar to the treadmill
Table of contents
Other Maxxus Treadmill manuals

Maxxus
Maxxus RunMAXX 90 PRO Installation instructions

Maxxus
Maxxus RunMAXX 9.1 Installation instructions

Maxxus
Maxxus M8 User manual

Maxxus
Maxxus RunMAXX 7.1 Installation instructions

Maxxus
Maxxus RunMaxx 7.4 User manual

Maxxus
Maxxus RunMaxx 7.4 T Installation instructions

Maxxus
Maxxus Multipress 8.1 User manual

Maxxus
Maxxus M8 User manual

Maxxus
Maxxus RunMaxx 6.3 Installation instructions

Maxxus
Maxxus 6.4 Installation instructions