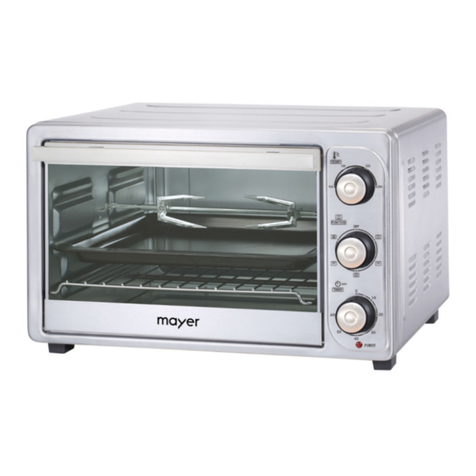
Mayer MMO328 User manual

32L Electric Oven
Model: MMO328
INSTRUCTION MANUAL
Please read this instructions thoroughly before using.
Keep it for future reference.
One year warranty.
Not applicable on misuse, wear & tear.
For Household Use Only

1
32L Electric Oven
Model: MMO328
INSTRUCTION MANUAL
Please read this instructions thoroughly before using.
Keep it for future reference.
One year warranty.
Not applicable on misuse, wear & tear.
For Household Use Only

Description of the oven
1.Heating Element 6. Wire Rack 11. Thermostat pilot light
2.DoorHandle 7.Rotisserie 12.ThermostatKnob
3 .Glass Door 8. Bracket (if fitted) 13. Crumb Tray
4TrayHandle 9.Timerknob
5. Bake tray 10 . Function Selector Knob
Electrical connection
WARNING--THIS APPLIANCE MUST BE EARTHED (IMPORTANT)
IMPORTANT: the wires in this mains lead are colored in accordance with the
following code:
GreenandYellow -Earth
Blue -Neutral
Blown -Live
As the colours of the wires in the mains lead of this appliance may not correspond with
ug, proceed follows:
ted to the terminal in the plug
〒” or coloured green or green
erminal which is marked with
he terminal which is marked
the first time.
uring transport
e oven without
he Appliance
or oven
of the oven. Do not unplug by
the manufacturer, its service
the appliance is operating.
arbecue, when barbecue is
1

2
Description of the oven
1.Heating Element 6. Wire Rack 11. Thermostat pilot light
2.DoorHandle 7.Rotisserie 12.ThermostatKnob
3 .Glass Door 8. Bracket (if fitted) 13. Crumb Tray
4TrayHandle 9.Timerknob
5. Bake tray 10 . Function Selector Knob
Electrical connection
WARNING--THIS APPLIANCE MUST BE EARTHED (IMPORTANT)
IMPORTANT: the wires in this mains lead are colored in accordance with the
following code:
GreenandYellow -Earth
Blue -Neutral
Blown -Live
As the colours of the wires in the mains lead of this appliance may not correspond with
the coloured markings identifying the terminals in your plug, proceed follows:
The wire which is coloured green & yellow must be connected to the terminal in the plug
which is marked with the letter “E” or the earth symbol “〒” or coloured green or green
& yellow.
The wire which is coloured blue must be connected to the terminal which is marked with
the letter “N” or coloured black.
The wire which is coloured brown must be connected to the terminal which is marked
with the letter “L” or coloured red.
Specification:
Operating voltage………………………….220-240V,50/60Hz
Max power load………….………………..1600W
Cavity volume…………………………… 32 Litre
Important Precautions:
Please read these instruction carefully before using for the first time.
1. Take time to read all instructions carefully.
2. Before using the oven, make sure it has not been damaged during transport
3. As with all cooking electrical appliance do not leave the oven without
supervision if you are using it near children.
4. Check that the mains voltage matches that indicated on the Appliance
5. So as to avoid electric shock, do not immerse cord, plug or oven
unit in water or other liquids.
6. Do not place the appliance near a source of heat.
7. Do not allow the cord to trail or touch the hot surfaces of the oven. Do not unplug by
pulling on the cord.
8.If the supply cord is damaged, it must be replaced by the manufacturer, its service
agent in order to avoid a hazard.
9.The temperature of accessible surfaces may be high when the appliance is operating.
And the door or outer surface may get hot.
10.Do not emit water to the quadrate container under barbecue, when barbecue is
provided in the appliance.
2

11..Make sure that the electrical installation is sufficient to supply an appliance of this
power.
12.Never place any paper, cardboard or plastic in the oven and do not place anything on
top of it (utensils, objects….).
12.Should any parts of the appliance catch fire, never try to put the fire out with water.
Smother the flames with a damp cloth.
13.Never place any paper, cardboard or plastic in the oven and do not place anything on
top of it (utensils, objects….).
14. Do not operate your appliance under a wall cupboard, shelves or close to flammable
materials such as blinds, curtains, etc.
15. When operating the oven, keep at least four inches of space on all sides of the oven to
allow for adequate air circulation.
16.Do not use the appliance if:
- it or the cord is damaged.
-the appliance has been dropped or shows visible sign of damage or faulty working.
17.Extreme caution must be used when moving the appliance containing hot oil or other
hot liquids.
18.Do not cover the bottom or any other part of the oven with metal foil. This may cause
overheating of oven.
19.Use extreme caution when removing tray or disposing of hot oil or other hot liquids.
20.Do not store any materials other than manufacturer’s recommended
Accessories in this oven when not in use.
21.This appliance has a tempered, safety glass door, but the glass is stronger than
ordinary glass and more resistant to breakage. Tempered glass can break, but the
pieces will not have sharp edges. Avoid scratching door surfaces or nicking edge. If
the door has a scratch or nick, do not use the oven.
22.For your own safety, never dismantle the appliance yourself; take it to an approved
repair center.
23.Do not use outdoors. Do not use the appliance for other than intend use.
24.When using this unit the distance at least 4 inches between wall and rear cover or side
cover.
25.Do not apply excessive force with heavy objects or by pulling the handle downwards.
Never place heavy containers or hot pans just taken out of the oven on the open door.
26.Never move the oven when it is operation.
27.The oven is eguipped with a manual reset thermofuse, to make the oven more safe
and reliable.
SAVE THESE INSTRUCTIONS
Before Using For the First Time:
1. Carefully unpack the oven making sure to remove all packing materials.
2. Wipe the oven and accessories with a damp cloth, and dry.
3. Remove all the accessories from the oven (rack, tray…).
4. Fully unwind the removable cord and plug into the oven pushing the plug in as far as
it will go.
5. Switch on.
6. Close the door
7. Set the thermostat to 250 degrees.
8.
CAUTION: Some smoke may appear. This is normal and will soon disappear as you
use your oven.
Using The Oven:
zGeneral Advice
- Before using the oven, you must open the timer for the first time, then choose (select) the (needed)
function.
- When baking or grilling, it is advisable to always pre-heat the oven to the desired
temperature, to get the best possible cooking results.
- Cooking times depend on the product quantity, the food temperature and on
individual taste. The times shown in the table are only indicative an thus susceptible to
variations and do not take into account the time needed to pre-heat the oven.
-
When cooking freeze-dried foods, check the times suggested in the products’
packaging.
zKeeping food warm
- Set the function selector knob to position
- Set the temperature to “60” degrees.
- Insert the wire rack , and place the food on top of it.
- If the food needs to be kept warm for longer than 20-30 minutes, it should be covered
with tinfoil, to prevent it from becoming too dry.
Do not leave the food in the oven for a long time as it may become too dry.
zBaking
- This function is ideal for flans, fruit puddings, quiche, pies.
- Insert the wire rack to the bottom position.
- Turn the function selector knob to position
3
Allow to operate for 15 minutes.

3
11..Make sure that the electrical installation is sufficient to supply an appliance of this
power.
12.Never place any paper, cardboard or plastic in the oven and do not place anything on
top of it (utensils, objects….).
12.Should any parts of the appliance catch fire, never try to put the fire out with water.
Smother the flames with a damp cloth.
13.Never place any paper, cardboard or plastic in the oven and do not place anything on
top of it (utensils, objects….).
14. Do not operate your appliance under a wall cupboard, shelves or close to flammable
materials such as blinds, curtains, etc.
15. When operating the oven, keep at least four inches of space on all sides of the oven to
allow for adequate air circulation.
16.Do not use the appliance if:
- it or the cord is damaged.
-the appliance has been dropped or shows visible sign of damage or faulty working.
17.Extreme caution must be used when moving the appliance containing hot oil or other
hot liquids.
18.Do not cover the bottom or any other part of the oven with metal foil. This may cause
overheating of oven.
19.Use extreme caution when removing tray or disposing of hot oil or other hot liquids.
20.Do not store any materials other than manufacturer’s recommended
Accessories in this oven when not in use.
21.This appliance has a tempered, safety glass door, but the glass is stronger than
ordinary glass and more resistant to breakage. Tempered glass can break, but the
pieces will not have sharp edges. Avoid scratching door surfaces or nicking edge. If
the door has a scratch or nick, do not use the oven.
22.For your own safety, never dismantle the appliance yourself; take it to an approved
repair center.
23.Do not use outdoors. Do not use the appliance for other than intend use.
24.When using this unit the distance at least 4 inches between wall and rear cover or side
cover.
25.Do not apply excessive force with heavy objects or by pulling the handle downwards.
Never place heavy containers or hot pans just taken out of the oven on the open door.
26.Never move the oven when it is operation.
27.The oven is eguipped with a manual reset thermofuse, to make the oven more safe
and reliable.
SAVE THESE INSTRUCTIONS
Before Using For the First Time:
1. Carefully unpack the oven making sure to remove all packing materials.
2. Wipe the oven and accessories with a damp cloth, and dry.
3. Remove all the accessories from the oven (rack, tray…).
4. Fully unwind the removable cord and plug into the oven pushing the plug in as far as
it will go.
5. Switch on.
6. Close the door
7. Set the thermostat to 250 degrees.
8. Allow to operate for 15 minutes.
CAUTION: Some smoke may appear. This is normal and will soon disappear as you
use your oven.
Using The Oven:
zGeneral Advice
- Before using the oven, you must open the timer for the first time, then choose (select) the (needed)
function.
- When baking or grilling, it is advisable to always pre-heat the oven to the desired
temperature, to get the best possible cooking results.
- Cooking times depend on the product quantity, the food temperature and on
individual taste. The times shown in the table are only indicative an thus susceptible to
variations and do not take into account the time needed to pre-heat the oven.
-
When cooking freeze-dried foods, check the times suggested in the products’
packaging.
zKeeping food warm
- Set the function selector knob to position
- Set the temperature to “60” degrees.
- Insert the wire rack , and place the food on top of it.
- If the food needs to be kept warm for longer than 20-30 minutes, it should be covered
with tinfoil, to prevent it from becoming too dry.
Do not leave the food in the oven for a long time as it may become too dry.
zBaking
- This function is ideal for flans, fruit puddings, quiche, pies.
- Insert the wire rack to the bottom position.
- Turn the function selector knob to position
4

- Set the thermostat at required temperature.
- Set the timer knob to the required cooking time.
- Wait for the oven to reach the set temperature (the pilot lights goes off), then put the
food in.
- If cooking is completed before the end of the set manually turn the timer knob to
position “0”.
zTraditional oven cooking
- This function is ideal for cooking great pizzas, lasagne, first courses au gratin, small
fowl, all types of fish, stuffed vegetables au gratin and some types of cakes.
- Insert the wire rack in the oven.
- Turn the function selector knob to position
- Set the thermostat at required temperature.
- Set the timer knob to the required cooking time
- Wait for the oven to reach the set temperature (the pilot lights goes off), then put the
food in.
-If cooking is completed before the end of the set manually turn the timer knob to
position “0”.
zGrilling
-This function is ideal for grilling hamburgers, chops, frankfurters, sausages, etc. In
addition, this function may be used for browning foods: coquilles saint-jacques, etc.
-Insert the wire rack to the top position and the dripping tray on to the bottom heating
element. We suggest pouring two glasses of water into the dripping tray so as to avoid
smoke and bad resulting from burning fat, and for easy in cleaning.
-Set the function selector knob to position . .
-Set the thermostat at required temperature.
-Set the timer knob to the required cooking time.
-Preheat the oven for about 5 minutes, with the door slightly ajar,
-Place the food on the wire rack, and close the door, leaving it ajar, and remember to turn
the food half way through cooking.
-If cooking is completed before the end of the set manually turn the timer knob to
position “o”.
zConvection oven cooking (if fitted)
- This function is ideal for cooking great savoury pies, all types of meat-based main
dishes(apart from small fowl), roast potatoes and cakes in general. It is also suitable
for simultaneous cooking on two different levels.
- Insert the wire rack to the oven.
- Turn the function selector knob to position
- Set the thermostat at required temperatures.
- Set the timer knob to the desired time setting.
- Wait for the oven to reach the set temperature (the pilot light goes off), then put the
food in.
- - If cooking is completed before the end of the set manually turn the timer knob to
position “0”.
Care and Cleaning:
- Allow appliance to cool completely before cleaning. Unplug cord from the outlet.
- The turnspit mount, dripping tray, wire back, barbecue tray and other accessories
contact with food directly can be washed as other kitchen ware, either by hand or in
the dishwasher. Before use please make sure everything is dry.
- To clean the outside surface always use a moist sponge. Avoid using abrasive products
that could damage the finishing. Ensure water or soap does not penetrate the inside of
the oven through the vents positioned on to of the oven.
- Never immerse the appliance in water.
-To clean the inside aluminum walls never use aluminum-corrosive products (spray
detergents) and never scrape the walls with sharp or pointed objects.
5

4
- Set the thermostat at required temperature.
- Set the timer knob to the required cooking time.
- Wait for the oven to reach the set temperature (the pilot lights goes off), then put the
food in.
- If cooking is completed before the end of the set manually turn the timer knob to
position “0”.
zTraditional oven cooking
- This function is ideal for cooking great pizzas, lasagne, first courses au gratin, small
fowl, all types of fish, stuffed vegetables au gratin and some types of cakes.
- Insert the wire rack in the oven.
- Turn the function selector knob to position
- Set the thermostat at required temperature.
- Set the timer knob to the required cooking time
- Wait for the oven to reach the set temperature (the pilot lights goes off), then put the
food in.
-If cooking is completed before the end of the set manually turn the timer knob to
position “0”.
zGrilling
-This function is ideal for grilling hamburgers, chops, frankfurters, sausages, etc. In
addition, this function may be used for browning foods: coquilles saint-jacques, etc.
-Insert the wire rack to the top position and the dripping tray on to the bottom heating
element. We suggest pouring two glasses of water into the dripping tray so as to avoid
smoke and bad resulting from burning fat, and for easy in cleaning.
-Set the function selector knob to position . .
-Set the thermostat at required temperature.
-Set the timer knob to the required cooking time.
-Preheat the oven for about 5 minutes, with the door slightly ajar,
-Place the food on the wire rack, and close the door, leaving it ajar, and remember to turn
the food half way through cooking.
-If cooking is completed before the end of the set manually turn the timer knob to
position “o”.
zConvection oven cooking (if fitted)
- This function is ideal for cooking great savoury pies, all types of meat-based main
dishes(apart from small fowl), roast potatoes and cakes in general. It is also suitable
for simultaneous cooking on two different levels.
- Insert the wire rack to the oven.
- Turn the function selector knob to position
- Set the thermostat at required temperatures.
- Set the timer knob to the desired time setting.
- Wait for the oven to reach the set temperature (the pilot light goes off), then put the
food in.
- - If cooking is completed before the end of the set manually turn the timer knob to
position “0”.
Care and Cleaning:
- Allow appliance to cool completely before cleaning. Unplug cord from the outlet.
- The turnspit mount, dripping tray, wire back, barbecue tray and other accessories
contact with food directly can be washed as other kitchen ware, either by hand or in
the dishwasher. Before use please make sure everything is dry.
- To clean the outside surface always use a moist sponge. Avoid using abrasive products
that could damage the finishing. Ensure water or soap does not penetrate the inside of
the oven through the vents positioned on to of the oven.
- Never immerse the appliance in water.
-To clean the inside aluminum walls never use aluminum-corrosive products (spray
detergents) and never scrape the walls with sharp or pointed objects.
6

Correct Disposal of this product
This marking indicates that this product should
not be disposed with other household wastes
throughout the nation. To prevent possible harm
to the environment or human health from
uncontrolled waste disposal, recycle it
responsible to promote the sustainable reuse of
material resources. To return your used device,
please use the return and collection systems or
contact the retailer where the product was
purchased. They can take this product for
environmental safe recycling.
………………………………………………………………
Warranty & customer service:
e-Warranty Registration at https://mayercare.biz/eWarranty
Customer Service Hotline: 6542-8383
[Mon-Fri: 9:00am to 6:00pm]
Sat: 9:00am to 12noon
Closed: Sunday & Public Holiday
Keep your sales receipt for future reference.
You must provide proof of purchase for in-warranty service.
71 Ubi Crescent, #06-02, Excalibur Centre,
Singapore 408571
www.mayer.sg
………………………………………………………………
7

5
Correct Disposal of this product
This marking indicates that this product should
not be disposed with other household wastes
throughout the nation. To prevent possible harm
to the environment or human health from
uncontrolled waste disposal, recycle it
responsible to promote the sustainable reuse of
material resources. To return your used device,
please use the return and collection systems or
contact the retailer where the product was
purchased. They can take this product for
environmental safe recycling.
………………………………………………………………
Warranty & customer service:
e-Warranty Registration at https://mayercare.biz/eWarranty
Customer Service Hotline: 6542-8383
[Mon-Fri: 9:00am to 6:00pm]
Sat: 9:00am to 12noon
Closed: Sunday & Public Holiday
Keep your sales receipt for future reference.
You must provide proof of purchase for in-warranty service.
71 Ubi Crescent, #06-02, Excalibur Centre,
Singapore 408571
www.mayer.sg
………………………………………………………………


Table of contents
Other Mayer Oven manuals