manuals.online logo
Brands
  1. Home
  2. •
  3. Brands
  4. •
  5. Maytag
  6. •
  7. Range
  8. •
  9. Maytag X3448XTALT User manual

Maytag X3448XTALT User manual

i_!i_!i7{.i.17it!ii ___ :iii:ii!i7iliiit!i_i;i17i_ii_it!i_!i:iili_iii.i7it!iii.!i;_!i7.;.!.i7.;.ii:iii.i;iill7i_ii7i_iiii!ii_!i7.;.!.i7.;.!.i7.;.i.1:ii_il7ii.i_it!i
il ) ii ii17illillillillil ii7il ileal7ilii ii
iii!7_ t _i!ii!77!71i!_ii!71i!77!_7!_7!7_,_:i!-__i_,_!7,ii" _i,__D!71i!:
,, ,, ..,, .,*.• . ,, .., ..•• ..,, .., ..,• ••, .., ..,• ,•-., . ,, .•,, .., ..•• •,•., . , ..•, .., .., .,,• .• ....,.- .•, .., •.,• . ....
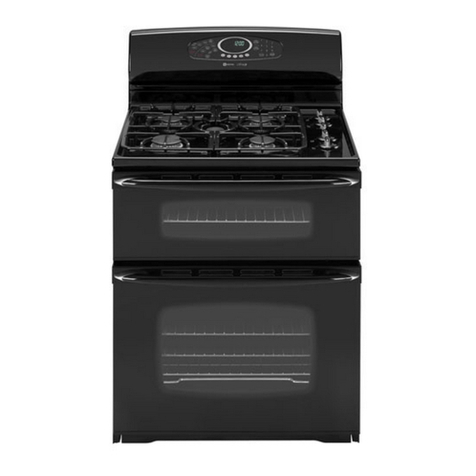
Gas Range with Rotary Clock & Timer
TABLE OF CONTENTS
IMPORTANTSAFETY INSTRUCTIONS ......... 1-3 Use ofaluminumfoil........................... 10
Oven racks.................................. 11
CLOCK AND TIMER ............................ 4 Commonbakingproblems .................... 12
Automaticovencookingfeature................. 4 Broiling and chart ............................ 13
SURFACECOOKING ......................... 5-8 SELF-CLEAN OVEN,if equipped ............. 14-15
Ignitionsystem ............................... 5
Conventionalsurface burners, if equipped ........ 5 CARE ANDCLEANINGCHART .............. 16-17
Sealed surface burners, if equipped ............. 6
Lightingsurface burners ....................... 6 MAINTENANCE............................ 18-20
Selectingflame size ........................... 7 Coektop light, if equipped ..................... 18
About the surfaceflame ........................ 7 Oven light ................................... 18
Adjustingthe flame ..•7 Coektop .................................... 18
Cookware .................................... 8 Burner grates ................................ 19
Canning ..................................... 8 Doorlock lever, if equipped .................... 19
Ovendoor .................................. 19
USING YOUR OVEN ......................... 9-13 Ovenbottom ............................ _... 20
Ovenlight.................................... 9Storagedrawer,ifequipped................... 20
Oven vent.................................... 9 Levelinglegs ................................ 20
Ignitionsystem............................... 9 Howto removerangeforcleaningand servicing . 20
Ovenburner .................................. 9
Oven characteristics ........................... 9 SERVICE .................................. 21-22
Oven controls ............................... 10 Before you callfor service ..................... 21
Oven indicator light ........................... 10 Proportional valve adjustment ................. 22
Howto set ovenfor baking .................... 10 Electricalconnection ......................... 22
Preheating .................................. 10 Howto obtain service ......................... 22
INSTALLER Pleaseleave this The model and serial numbers are found on the rating plate
manualwiththisappliance• locatedonthesides ofthe lowerrangefrontframe•
Be sure applianceis properly Model Number:
.installedby theinstaller.SerialNumber:
CONSUMER Tosaveyoutime,DateofPurchase:
energy and money,read and keep Please keepyoursalesreceiptand/oryourcancelledcheckas
this manualforfuturereference, proofof purchaseshould warrantyservicebeneeded. Store
thesedocumentswiththisbooklet.
8113P106-60
(02-96-01)
/7_ - D<._-"
ABOUT YOUR NEW GASRAN(IE
Congratulationsonyour choice ofthisgas range.Asyou use appliancewithout revisingthis manual.As anexample, the
your new range, we know you will appreciate the many knob on your appliance may not look like the illustration in
features that provide excellent performance,ease of this manual.
cleaning, convenienceand dependability. Should you have any questions about usingyour new gas
New features have dramatically changed today's cooking appliance, pleasewrite to us at this address:
appliances and the way we cook.It is therefore very
important to understand howyour new gas range operates Customer Assistance
BEFOREyou use itfor the first time. c/o Maytag Customer Service
P.O.Box2370
Inthis Owner's Guide,you will find a wealth of information Cleveland, TN 37320-2370
regarding all aspects of your appliance. By following the
instructions carefully, you will be able to fully enjoy and Be sure to include the model and serialnumbers of your
properly maintain your new range, appliance.Foryour convenience, we have provided space
on the front cover to record this information. Please retain
Inour continuingeffort to improvethe qualityof our cooking theproofof purchase(salesreceipt)documents forwarranty
products, it may be necessary to make changes to the service.
50%P|SI-CIUU [IBm
100%DEtNKBNEWSPAPBIS,HAGAZINES&CATALOGS
IMP(IRTANTSAFETYINSTRUCTIONS
Read all instructions before using this appliance.
Thefollowing instructions are based on safety Have yourappliance installed and properly grounded by a
considerations and must be strictlyfollowed to eliminate the qualified installer according to the installation instructions.
potentialrisksoffire, electricshock, or personalinjury. Havetheinstallershowyou thelocation of the gas shut off
valve andhow to shut it off in an emergency.
Alwaysdisconnect powerto appliance beforeservicing.
WARNING: If theinformation in this
manual is not followed exactly, a fire or Toensureproperoperation andavoidpossible injuryor
explosion may result causing property damage to unitdo notattemptto adjust,repair,service,or
replaceany part ofyour applianceunlessit is specifically
damage, personal injury or death, recommended in this book. All other servicingshouldbe
referredtoa qualifiedinstalleror servicer.
-Do not store or use gasoline or other
flammable vapors and liquids in the
vicinity of this or any other appliance. Besureallpackingmaterialsare removedfromtheappliance
beforeoperatingit:
- WHAT TO DO IF YOU SMELL GAS: Keepareaaroundapplianceclearandfree fromcombustible
materials, gasoline, and other flammable vapors and
•Do nottry to light any appliance, materials.
•Do not touch any electrical switch; do If appliance isinstallednear a window,properprecautions
not use any phone in your building, should be taken to prevent curtains from blowing over
burners.
•Immediately call your gas supplier Do notleave any items onthe cooktop.The hotairfromthe
from a neighbor's phone. Follow the ventmay igniteflammableitemsandmayincreasepressure
gas supplier's Instructions. in closedContainerswhichmay causethemto burst.
•If you cannot reach your gassupplier, Many aerosol-type spray cans areEXPLOSIVE when
exposedto heat andmay behighlyflammable.Avoidtheir
call the fire department, useor storagenearan appliance.
Many plasticsarevulnerableto heat.Keep plasticsaway
-Installation and service must be frompartsoftheappliancethatmaybecomewarmorhot. Do
performed bya qualified installer,service notleave plasticitems on the cooktopas they maymeltor
agency or the gassupplier, softeniflefttooclosetotheventor a lightedsurfaceburner.
Toeliminatethe hazardofreachingoverhotsurfaceburners,
cabinetstorageshouldnotbe provideddirectlyaboveaunit.
Ifsuchstorageisprovided,itshouldbelimitedtoitemswhich
areusedinfrequentlyand whichare safelystoredinanarea
A_LL subjectedto heatfrom an appliance. Temperaturesmay be
WARN I NG unsafe for some items, suchas volatileliquids,cleaners or
aerosolsprays,
I• RANGESCANTIP AND
CAUSE INJURIESTO PERSONS. Turnoff appliance and ventilating hood to avoid spreading
the flame. Extinguishflame thenturn on hoodto remove
_)•INSTALLANTI-TIP DEVICES smoke and odor.
PACKEDWITHRANGE. Use drychemicalorfoam-type extinguisherorbakingsoda
tosmotherfireorflame. Neverusewater ona greasefire.
•FOLLOW ALL INSTALLATIONIffire isinthe ovenor broilerpan,smotherbyclosingoven
INSTRUCTIONS.door.
If fire is in a panonthesurfaceburner,coverpan. Never
attempttopickup or moveaflamingpan.
IMP(IRTANTSAFETYINSTRUCTIONS
WARNING:To reduce the risk of tipping of the appliance
from abnormalusageor byexcessiveloadingoftheoven
Do not leavechildren alone or unsupervisednear thedoor,the appliancemustbesecuredbya properlyinstalled
appliancewhenitisinuseorisstillhot.Childrenshouldnever anti-tipdevice.Ifthe rangeismovedfromthe wall, besure
be allowedto sitor stand on any part ofthe appliance, the anti-tip device is engaged when the rangeis replaced.
Look underneath range to verify that one of the rear leveling
Children must be taught that the appliance and utensils in legs is properly engaged in the bracket slot. The anti-tip
it can be hot.Let hot utensils cool devicesecuresthe rear levelinglegtothefloor when properly
in a safe place, out of reach of engaged. Also, be sure the range is properly re-installed.
small children. Children should be
taught that an appliance is not a Do nottouch a hotoven light bulb with a damp cloth as the
toy.Childrenshouldnot beallowed bulb could break. Shouldthe bulb break, disconnect power
to play with controlsor other parts to the appliance before removing bulb to avoid electrical
of the unit. shock.
CAUTION: Do not store items of
interest to children in cabinets
above an appliance or on the Always placea pan on a surfaceburner beforeturning it on.
backguard of a range. Children Besure youknowwhich knob controlswhich surface burner.
climbing onthe appliance oronthe Make surethe correct burner isturned onandthat the burner
appliance door to reach items has ignited. When cooking is completed, turn burner off
could be seriously injured, before removing panto prevent exposure to burnerflame.
Always adjustsurface burnerflame sothat itdoes notextend
beyond the bottom edge of the pan.An excessive flame is
hazardous, wastes energy and may damage the appliance,
To prevent potential hazardto the userand damage tothe pan or cabinets above the appliance.
appliance, do not use
appliance as a space \ Never leave a surface cooking operation unattended
heater to heat or warm a especially when using a i_- , _
room. Also, do not use highheatsetting or when
the cooktop or oven as a deep fat frying. Boilovers
storage area for food or cause smoking and
cooking utensils, greasy spillovers may
ignite.Clean up greasy
Do not obstruct the flow spills as soon as
of combustion and /possible.Do not usehigh
ventilationairby blocking
the oven vent or air intakes. Restriction of air flow to the heat for extended
burnerpreventsproperperformanceand increases carbon cooking operations.
monoxide emissionto unsafe levels. Never heat an unopened containeron thesurface burner or
Avoid touching oven vent area while oven is on and for in theoven.Pressure build-up maycause container to burst
several minutes after oven is turned off. Some parts of the resulting in serious personal injury or damage to the
vent and surrounding area become hot enough to cause appliance.
burns.After ovenisturned off,do nottouch the oven vent or Use dry, sturdy pot holders. Damp pot holders may cause
surrounding areas untilthey have hadsufficient time to cool. burns from steam. Dish towels or other substitutes should
never be used as pot holders because they can trail across
CAUTION: Do not _ ._c._,_ J hotsurface burners and ignite or get caught on appliance
useanapplianceasa ,_ __ _ parts.
step stoolto cabinets
above.Misuse of Always let quantities of hot fat used for deepfat frying cool
appliance doors or beforeattempting to move or handle.
drawers, such as
stepping, leaning or _ Do not let cooking grease or other flammable materials
sitting on the door or accumulate in or nearthe appliance, hoodorventfan. Clean
drawer, may result in hood frequently to prevent grease from accumulating on
possible tipping of hoodorfilter.Whenflamingfoodsunderthehoodturnthefan
the appliance, breakage of door,and serious injuries, offas the fan may spread the flame.
IMP()RTANTSAFETYIN;TRU(;TIONS
Use cautionwhen wearinggarments madeof flammable Thisappliance has been testedforsafe performance using
material to avoid clothing _ _;]conventional cookware. Do not useany devices or
fires.Loosefittingor long _ accessoriesthat arenot specificallyrecommendedin this
hanging-sleeved apparel manual.Donotuseeyelidcoversforthe surfaceunits,stove
should not beworn whiletopgrills,or add-on oven convectionsystems.Theuse of
cooking.Clothingmayignitedevicesoraccessoriesthatarenotexpresslyrecommended
or catch utensilhandles, inthis manual can create serious safety hazards, result in
performance problems, and reducethe life of the
Always place oven racksinthe desired positionswhile oven components of the appliance.
is cool.Slideoven rack out to add orremove food, usingdry
sturdy pot holders,Always avoid reaching intothe oven to
add or removefood. Ifa rack must be movedwhilehot,use
a dry pot holder. Always turn the oven off at the end of Turn offallcontrolsand waitfor appliance partstocoolbefore
cooking, touching or cleaningthem. Do not touchthe burner grates or
surrounding areas untilthey have had sufficienttime tocool.
Use care when opening the oven door. Let hot air or steam
escape before removing or replacingfood. Cleanappliance withcaution.Usecaretoavoid steam burns
ifawetspongeorclothis usedtowipespills ona hotsurface.
PREPAREDFOOD WARNING:Followfood manufacturer's Somecleaners canproducenoxiousfumes ifappiiedtoa hot
instructions.Ifaplasticfrozenfood container and/oritscover surface.
distorts, warps, or is otherwise damaged during cooking,
immediately discard the food and its container. The food
could be contaminated. Clean only partslisted in this booklet.Do not clean door
gasket. The door gasket is essential for a good seal. Care
should betaken not to rub,damage, ormovethe gasket. Do
Use pans with flat bottoms and handles that areeasily notuseovencleanersofanykindinoraroundanyparfofthe
grasped andstay cool.Avoid using unstable,warped, easily self-clean oven.
tipped or loose handled pans. Pansthat are heavy to move
whenfilled withfood may also behazardous.Beforeself-cleaning the oven, remove broiler pan, oven
racks, and other utensils,and wipe offexcessive spillovers
Besure utensil is large enoughto properly containfood and to prevent excessive smoke orflare ups. CAUTION: Do not
avoidboilovers. Pansize isparticularly importantin deepfat leave food or cooking utensils, etc. in the oven during the
frying.Besure panwill accommodatethe volumeoffoodthat self-clean cycle.
isto be added as well as the bubbleaction of fat. Itisnormalfor thecooktopoftherangeto becomehotduring
Tominimize burns, ignition offlammable materials and a self-clean cycle.Therefore,touching or liftingthecooktop
spillage dueto unintentionalcontactwith the utensil, do not during a clean cycle should be avoided.
extend handles over
adjacent surface _ .__
burners.Always turn /_
pan handlestowardthe
side or back of the
appliance,notout into The CaliforniaSafeDrinkingWater andToxicEnforcement
the room wherethey- Act of 1986 (Proposition65) requires the Governor of
Californiatopublishalistof substancesknownto theState
are easilyhit or
reached by small of Californiato cause cancer or reproductiveharm,and
children, requires businessesto warncustomers of potential
exposurestosuch substances.
Neverlet apanboildryasthiscoulddamagethe utensiland Usersof this appliance are hereby warned that the burning
the appliance, ofgas can result inlow-level exposureto some of the listed
Follow the manufacturer's directions when using oven substances, includingbenzene,formaldehydeandsoot, due
cookingbags. primarilyto theincompletecombustionofnaturalgasorliquid
petroleum(LP)fuels. Properlyadjustedburnerswill minimize
Only certain types of glass, glass/ceramic, ceramic, or incomplete combustion. Exposureto these substances can
glazed utensils are Suitable for cooktop or oven usage also beminimized by properly ventingtheburners tothe
without breaking due to the sudden change in temperature,outdoors.
SAVETHESEINSTRUCTIONS
4 CLOCKAND TIMER C()NTROL
12
% I •START STOP
O_F 60
• " ..."" 1 "%%• 1212
%t_t t I I/##1 _t_ttll#lll
..10_"%2_o..,, -,_2
- .-+ _
•=o"dr. ,,,,-4o o% ,,S4,, ,,
Ill,fills flfl|_t
30
#•
6
Push in and turn the MINUTE TIMER knob to set the clock The Automatic Oven Cooking feature is used to turn the
to the correct time of day.Be sure that the MINUTE TIMER oven on and off at a preset time of day. This feature can be
hand is on OFF after setting the clock, used to:
• Turn the oven on immediately (immediate start).
• Delay the start of cooking (delaystart).
Turn the MINUTETIMER knob in either direction until the IMPORTANT
timer hand is set to the desired time.When the buzzer • Highly perishablefoods such as dairy products,
sounds, manually turnthe timer hand to OFF. pork, poultry,seafood, or stuffing are not
NOTE: Do not push in theknob when setting the timer, recommended for Delay Start cooking.
•Ifcooking more than one food, selectfoods that
cook for thesamelength of time and at the same
oven temperature.
The feature canbe used with either oven cooking or the
self-cleaning oven feature. See page 15 forinstructionson
delaying thestart ofa clean cycle.
Theclock must befunctioning and set at thecorrect time of
day for the Automatic Oven Cooking featureto operate
properly.
To Operate:
1. Place thefood inthe oven.
2. To delay the start of cooking: Push in and turn the
START knobtothetimeof dayyou wish cookingto begin.
(NOTE: Ifyou wish to begincooking immediately, do NOT
set theSTART knob.)
3. Push in and turn the STOP knob to thetime of day you
wish the oven to turn off.
4. Turn the Thermostat knob to the desired temperature
setting. Turn theSelector knob to TIME BAKE.
The ovenwill automatically turn on and off at the preset
times. At the end ofcooking,turntheSelector knobtoOFF to
turn theoven off.
SURFACE COOKING
IMPORTANT:When theapplianceis first installed,the
surface burnersand pilots,ifequipped,maybedifficultto
light dueto airin thegas line. This mayalso occurif the
app!iance has been disconnected from themain gas The two surface burner assembliesare secured in place
supplyorifithasnotbeenusedforseveraJdaysorweeks, dudng transportation with spring clips. Oncetherangeis
installed, these clips may be removed to allow quick and
Toremovetheairinthegasline,hold alighted matchnext easy removalof the burner assemblies.
tothe burner headandturnthe knobon.Whenthe burner
tights,turn theknoboff.For pilotignitionmodels,proceed _ __
as directed below to light the pilot. For pilotless ignition m _kt_,_",-x_
models,eitheradjust theknobtothe desiredflame size or
turn the burner off.
Your rangeis equipped with pilotlessignition. Besure all
surfacecontrolsaresetintheOFF positionpriorto supplying
gas to theappliance.
Pilotless Ignition To remove: Allow burnersto cool.Liftup thecooktop. Grasp
Pilotless ignition uses a spark from the ignitor to light the burnerassemb/ythenliftup andtoward backofthe cooktop
burner. There are two ignitors for conventional surface until the air shutter ends on the burner assembly release
burners. Each sealed burnerhas its own ignitor. Once the from the valves.
burner lights, turn the knob to the desired setting. The
clickingsound will not stop until the knob is turned fromtheTo replace: Insertthe air shutter ends onthe burner
LITE position, assembly over the valvesand lower into place. Replace
cooktop. Turn on each burner to be sure burner assembly
has been correctly replaced. I
Under no circumstances is the surface burner assembly
to be taken apart for cleaning.
Ignitor
NOTE: The surface burner will not light if the ignitor is
damaged,broken,soiledorwet.Also,the burnerwill notlight
ifthe small portbeneaththe ignitor is blocked. See page 17
for cleaning instructions.
Inthe event ofa powerfailure,the surface burner can be
manually lighted, Be sure all controlsarein theOFF
position.Hold a lighted matchto the desired surface burner
head then push in ad turn the knob to the LITE position.
Whenthe burnerlights,adjust theflame tothe desired flame
size.
6 SI IRFACE COOKING
Thesealed surfaceburnersare securedto the cooktopand CAUTION: To preventdamage tothe cooktop or pan,
areNOT designedto beremovedbytheconsumer, neveroperatesurface burnerwithouta pan in place,
neverallowapantoboildryandneveroperateasurface
Since theburnersaresealed intothecooktop,boilovers burneronHIGH forextendedperiodsoftime.
won'tseepunderneathtotheburnerboxarea.Thus,there
arenohiddenspillsintheburner boxarea to clean. To light surface burner:
1. Place a pan onthe burnergrate.
Super High Speed Burners 2. Push in and turn knob tothe LITE position.
Some models feature two special SUPER HIGH SPEED
sealed burners. Use the SUPER HIGH SPEED burners to
quicklybring waterto a boilandfor large -potcooking.See ,,f_ _-_LZT_-_
information on rating plate to determine if your appliance
features these burners. Q
Thetwo High Speed burners are located at the right-front
and left-rear burners.
3. Afterthe burner lights,turn the knobto the desired flame
HIGHSPEED size.Theignitorswillcontinuetosparkuntiltheknobis
BURNER turned from the LITE position.
ICAUTION: If theflame should go out during a cooking
operation, turn the burner off. If gas has accumulated
and a stronggasodor isdetected,wait 5minutes for the
gas odor to disappear before relighting burner.
To light surface burner during a power failure:
1, Be sureall controlsareintheOFF position,
2,Holda lightedmatchtothe desiredsurface burner head.
3. Push inandturn knobtothe LITEposition.Theburnerwill
then light.
4.Adjust the flame to the desiredflame size.
CAUTION: When lighting the surface burner, be sure all I
ofthecontrols areinthe OFFpositJon,Strikethematch
firstand hold it in position beforeturning the knobto the
LITEposition.
SURFACE COOKING
Use a HIGH flamesetting toquicklybringliquidsto aboil or A properlyadjustedburnerwithcleanportswilllightwithina
tobeginacookingoperation.Then reducetoa lowersetting fewseconds.
tocontinuecooking. Neverleave food unattended when
using a HIGH flame setting. On naturalgas, theflamewillbebluewithadeeper blue
core;thereshouldbenotraceof yellowinthe flame.
A yellowflame indicatesanimpropermixtureofair/gas.This
wastesfuel, so have aservicemanadjustthe mixtureif a
yellowflameoccurs,
_-_-_ On LPgas,someyellowtippingJsacceptable,Thisisnormal
andadjustmentisnotnecessary.
An intermediateflame size is usedto continuea cooking
operation,Foodwillnot cook any faster when a higher Youmayheara"popping"soundonsometypesofgaswhen
flame setting is usedthan needed to maintain a gentle
boil. Remember, water boils at thesametemperature thesurfaceburneristurnedoff.Thisisa normaloperating
soundoftheburner.
whetherboilinggentlyorvigorously.
UseLO tosimmeror keepfoodsat servingtemperatures.
Adjust the flame sizesoit
does not extend beyond
the edge ofthecooking
.utensil.This is for
personal safety andto
I preventpossibledamage
to the appliance, pan,or
Some cooking may take place on the LO setting if the cabinets above the
cooking utensil is covered. If food does boil on the LO appliance.Thisalso im-
setting, itis possibleto reducethe heat by rotatingthe knob proves cooking efficiency.
towardthe OFF position.
_ If aknob is turned very quicklyfrom the HI to theLOI
setting,the flame may go out,particularly if the burner isI
cold. Ifthis occurs,turn the knobto the OFF position.Wait
severs seconds, then ghtthe burner aga n.
Besureto adjustthe knobsothereisanadequatesupplyof
gas to maintain a stable flame on the burner.Check to be
sure burner is litand the flame isstable.
a knob is turned very quickly from the HI to the LOI
If
setting, theflame may go out, particularly ifthe burner isI
cold. Ifthis occurs,turn the knobto theOFF position.Wait
severa seconds, then light the burner aga n.
SURFACE COOKING
Cookwarewhich extendsmorethan two inches beyondthe The panmaterialdetermineshowevenlyand quicklyheatis
grate, rests on two grates, or touchesthecooktopmay conductedfromtheheat sourcetothefood. Somewidely
causea buildupofheatwhichmayresultindamageto the usedpanmaterialsare:
the burnergrate,burneror cooktop. Aluminum - excellent heat conductor.Somefoodswill
Cookware,suchasawokwithasupportring,whichrestrictscauseitto darkenor pit.Oftenusedas a bottomcoatingto
aircirculationaroundtheburnerwillcauseheatto buildup improvetheheatingofotherpan materials.
and may result in damageto the burnergrate,burneror
cooktop. Copper-excellent heat conductor.Discolors easily,
requiresconstantpolishing.Often usedasa bottomcoating
Foedscookfasterwhenthecookwareis coveredbecauseto improvetheheatingofotherpanmaterials.
moreheatisretained.LowertheflamesizewhencookwareStainless Steel - slow conductorofheat. Developshot
iscovered.spots and produces uneven cooking results. Durable,
The cookingperformanceisgreatlyaffectedbythetypeof attractive,easy toclean and stainresistant.Will distribute
cookwareused.Propercookwarewillreducecookingtimes, heat betterif other metals (aluminum or copper) are
uselessenergyandproducemoreevencookingresults.For combinedorsandwichedtogetherasa bottomcoating.
bestresultsusea heavygaugemetalpanwitha smoothflat Cast Iron - slow heat conductor.Cooks evenly once
bottom,straightsidesanda tightfittinglid.temperatureis reached.Heavy.Needsseasoningto make
cleaningeasierandto preventstickingand rusting.
Cookwarewithuneven,warped,orgroovedbottomsdonot
makegoodcontactwiththeheatingsurface,willreduceheat Glass - slow heat conductor.Easyto clean.Sometypes
conductivityand resultinslower,lessevenheating,may onlybeusedintheoven.
Todeterminethe flatnessofthebottomofa pan,placethePorcelain Enamel -glass-likesubstancefusedto metal.
edgeofa ruleracrossthebottomofthe utensil.Holditupto Heatingcharacteristicsdependon basematerial.Easyto
the light.Littleor no lightshould,bevisibleundertheruler, clean.
Acceptablewater-bath orpressure cannersshouldnotbe
oversized and should not rest on two burner grates. They
should also haveflat bottoms.
Whencanning, usethe HIsettingjust untilthewater comes
to a boil or pressure isreached in a pressure canner,then
reduce to a setting that maintainsthe pressureor a boil.
Prolonged use of the HI setting or the use of incorrec_
canning utensils will produce excessive heat. Excessive
heat can cause permanent damage to the appliance.
OVEN USE 9
The oven lightswitchis located on the controlpanel and isThesizeandappearance ofa properlyadjustedovenburner
marked OVEN LIGHT.Toturn the oven light on, push inthe flame should be as shown:
bottom half of the switch.
The oven vent is located at the base of the backguard or _ --
backsplash. Whenthe oven is in use, this area may feel _ -! Coneincenterissmaller
warmor hottothe touch.Topreventbakingproblems,do not
block thevent opening inany way.
•IP Coneapprox.1/2-inch
I-l
Your appliance features pilotless ignition. A glo bar will
light the oven burner.With this type of ignition system',the Theoventemperature ismaintainedbycyclingthe burner on
oven will not operate during a powerfailure or if the oven is and off.After the oven temperature has beenset, there will
disconnectedfromthe wall outlet. No attempt should be beabouta 45 seconddelaybeforetheburnerignites.This
made to operate oven during a powerfailure, isnormaland nogasescapesduringthisdelay.
Be sureoven controlis set in the OFF positionpriorto Duringthe cleancycle,and someextendedovencooking
supplyinggas tothe appliance, operations,you may hear a "popping"sound when the
burnercyclesoff.This is a normaloperatingsoundofthe
burner.
Everyovenhasitsowncharacteristics.Youmayfindthatthe
cooking times and temperatures you were accustomed to
withyour previous oven may needto bealtered slightlywith
your new oven. It is normal to notice some differences
between this oven and your previous oven.
Be sure the oven control is set inthe OFF positionpriorto 1.When cool,positiontheracks in the oven.
supplyinggastothe appliance. 2. TurntheThermostatknobtothedesiredtemperature.
3. TurntheSelectorknobto BAKE.
minimum of 2 inches between the utensil andthe oven
walls.
5. Check food for donenese at the minimum time in the
recipe. Cook longer if necessary.
6. Removefoodfrom the ovenandturnthe Thermostat knob
THERMOSTAT SELECTOR toOFF.
NOTE:The knobsonyourrange maynotlooklikethe knobs
in the above illustration.However, they will operate as
described below. Preheating is necessary for baking. Allow about 10 to 15
minutes for the oven to preheat.It is not necessary to
TheTHERMOSTATknobis usedtoselectand maintain the preheat for roasting.
oventemperature.Always turnthis knobjust TOthe desired
temperature. Do not turn to a higher temperatureand then Selecting a temperature higher than desired wiil NOT
back.preheat the oven any faster,and may have a negative
The SELECTOR knob determines the type of oven effect on baking results.
operation.Turnthis knobtothe desired setting.Each setting
is identified by an indent (stop)and a "click"sound.
Toturn the oven on, boththeThermostat and Selector Do not cover an entire rack with foil or place foil directly
knobs must be set. The oven will not operate if the under cookware. Tocatch spillovers, place a pieceoffoil, a
Selectorknobisleft inthe OFF position.Toturn the oven little largerthan the pan,on the rackbelowthe pan. Do not
off,turn the Thermostatknob to the OFF position, place foil on the oven bottom.
The OVEN indicator light, located on the backguard,turns
onwheneverthe oven isturned on. Whenthe oven reaches
thepresettemperature,the indicatorlightwillturn offand on
as the oven elements cycle off and on.
OVEN U.C;E 11
Thetwooven racksare designed withasafetylbck-stopFor optimum bakingresults ofcakes,cookiesor biscuits,
positionto keep theracksfrom accidently cominguseonerack.Positiontheracksothefoodisinthecenterof
comptetelyoutoftheovenwhen pullingtherackouttoaddor the oven. Useeitherrackposition3 or 2.
removefood.Ifcookingonmorethanonerack,staggerthefoodtoensure
properairflow.
CAUTION: Do notattemptto Changetherackpositions If cookingontwo racks,userack positions4 and 2forcakes
whentheovenishot. and rackpositions4 and1whenusingcookiesheets. Never
placetwo cookiesheetsononerack.
Toremove: Besuretherackiscool.Pulltherackstraightout Ifroastinga largeturkey,placetheturkeyon rack 1or the
untilitstopsatthelock-atopposition.Tiltthefrontendofthe roastingpositionandthe sidedishesonrack5.
rackupand continueDullingtherackoutoftheoven.
Toreplace: PlacetherackontheracksupportsandtilttheUsedfor roastingtaller cutsofmeat orturkey.Placeboth
frontendoftherackupslightly.Slideitbackuntilitclearstheovenracks,oneabovetheother,ontheraised sidesofthe
lock-stopposition.Lowerthefrontandslidetherackstraight ovenbottom.
in.Pulltherackouttothe lock-stoppositionto besureitis
positionedcorrectlyandthenreturnitto itsnormalposition. NOTE: For more informationabout food safety, call
USDA'sMeat & Poultry Hotlineat1-800-535-4555. For
It isimportantthat aircancirculatefreelywithin theoven and cooking information write to the National Live Stock and
around the food. To help ensure this, place food on the Meat Board, 444 North Michigan Avenue,Chicago,
center ofthe ovenrack. Allowtwo inches betweentheedgeillinois606t"_.
ofthe utensil(s) and the oven walls.
RACK 5Usedfortoastingbread,or fortwo-rackbaking.
(highestposition)
RACK 4 Usedfor mostbroilingandtwo-rack baking.5
RACK 3 Usedfor mostbakedgoodsona cookiesheetor
jelly rollpan,orfrozen conveniencefoods.
RACK2 Used for roasting small cuts of meat,large
. casseroles, baking loaves of bread, cakes (in
either tube, bundt,or layer pans) or two-rack
baking. ROASTING
RACK 1 Used for roasting large cuts of meat and large POSITION .,-3_"---(_,77_1
poultry, pies, souffles, or angel food cake, or for
two-rack baking.
OVEN USE
PROBLEM CAUSE PROBLEM CAUSE
Cakesare uneven. Panstoo closeortouching Cakes don'tbrown on top. Incorrectrack position.
each other or oven walls. Temperatureset too low.
Batter uneven in pans. Overmixing.
Temperature set too low or Too much liquid.
bakingtime too short.Pan size too large or too little
Oven not level, batter in pan.
Undermixing. Oven door opened too often.
Too much liquid.
Cake high in middle. Temperatureset too high. Excessive shrinkage. Too little leavening.
Bakingtime too long. Overmixing.
Overmixing, Pan too large.
Too muchflour. Temperature set too high.
Panstouching each other or Bakingtime too long.
oven walls. Panstoo close to each other
Incorrect rack position,or oven walls.
cake falls. Too much shortening or sugar.
Too much or too little liquid. Uneven texture. Toomuch liquid.
Temperatureset too low.Undermixing.
Old or too little baking powder. Temperatureset too low.
Pantoo small. Baking time too short.
Ovendoor opened frequently.
Added incorrect type of oil to
cake mix. Cakeshave tunnels. Not enough shortening.
Added additional ingredients Toomuch baking powder.
to cake mix or recipe. Overmixing or attoo high a
speed.
Cakes, cookies, biscuits Incorrect rack position. Temperaturesettoohigh.
don't brown evenly Oven door not closed properly.
Doorgasket not sealing
properly. Cakescrack on top. Batter overmixed.
Incorrect use ofaluminum foil. Temperatureset too high.
Oven not preheated. Toomuch leavening.
Pansdarkened, dented or Incorrect rack position.
warped.
Cake not done in middle. Temperatureset too high.
Foroptimum results,bake on onerack. If baking cakeson Pantoo small.
two racks,place panstoward back of oven on upper rack Baking time too short.
and toward front of ovenonlower rack.
Cakes, cookies, biscuits too Oven not preheated. I Ifadditional ingredientswere added to mix or recipe,expect l
brown on bottom. Pans touchingeach other or_cookingtimeto increase.I
oven walls.
Incorrect rack position. Pie crust edges too brown. Temperatureset too high,
Incorrect use ofaluminum foil.Pans touching each other or
Placed 2 cookie sheets on oneoven walls.
rack.Edges of crust too thin; shield
Used glass, dark, stained, with foil.
warped or dullfinish metal
pans. (Use a shiny cookie Pies don't brown on bottom. Used shiny metal pans.
sheet.) Temperatureset too low.
Incorrect rackposition.
Follow cookware manufacturer's instructionsfor oven
temperature.Glasswareanddarkcookwaresuchas Ecko's Pies have soaked crust. Temperaturetoolowat start
Baker's Secretrequireloweringthe oven temperatureby ofbaking.
25° F. Fillingtoojuicy.
Usedshinymetalpans.
OVEI USE 13
Broiling is a method ofcooking tender meats by direct heat. TOSet Oven To Broil:
The cooking timeisdetermined bythedistancebetween the
meat and theoven burner, thedesired degree of aloneness 1. Place theoven rack in therecommended rack position.
and thethickness of the meat. 2. Turn the Thermostat knob to BROIL.
Itispossibletobroillonger cookingfoodssuch as chicken
Broiling Tips at a lower temperatureto prevent overbrowning. Turn the
Broiling requires theuseofthe broiler pan and insert. Theknob to 450°F, rather than BROIL, for low temperature
broilerinsert mustbeinplacetoallow fatand liquid todrain to broiling.
the pan below to prevent spatters, smokeand flare-ups.
Improper usemay cause greasefires. 3. Turn theSelector knob to BROIL.
For easiercleanup, linethe broiler pan with foil and spray 4. Followthe suggested times in thechart below. Turn meat
theinsert with a non-stick vegetablespray. Do notcover theonceabout halfway through cooking.
broiler insert with aluminum foil as this prevents fat from
draining into pan below.5. Check for doneness bycutting a slitnear the center ofthe
meat.
Trim excess fat and slash remaining fat to help keep meat
from curlingand to reducesmoking and spattering. Season 6.Afterbroiling,turntheThermostat knobto OFF toturnthe
meat after cooking, oven off and removethebroilerpan from theoven.
Place oven rack in thecorrect rack position when oven is
cool.For darker browning, placemeat closer to the oven
burner. Placemeat further down ifyou wishmeat to bewell
doneorif excessivesmoking or flaring occurs.
SeeCare and CleaningChart on page16for instructionson
cleaning the broiler pan and insert.
BACON #4 Well Done6 to 10
BEEF STEAKS
1-inchthick #4Medium 15 to20
#4Well Done 20 to 25
CHICKEN 450OF
Pieces #3 or #4 WellDone 30 to45
FISH
Fillets , #4 I Raky , 8 to 12
Steaks, 1-inch thick #4 ' Flak_/t2 to 15
GROUND BEEF PATTIES
3/4-inchthick #4 WellDone 15 to20
HAMSLICE, precooked
1/2-inchthick#4 Warm 8 to 12
PORK CHOPS
1-inch thick #4 WellDone 20 to25
* The top rackpositionis position#5.
** Broilingtimesareapproximateand mayvarydependingon themeat.
14 SELF-( ;LEAN OVEN, ifequipped
The self-clean oven uses temperatures above normal
cookingtemperaturestoautomatically cleanthe entireoven
interior. Whenthe doorislocked andthe oven issetfor aclean cycle,
the ovenwill automatically begin toheat to cleaning
1
CAUTION:It is normal for parts of the range to becomeItemperatures.
hotduring a clean cycle. Therefore, during a clean cycle,/
avoid touching the cooktop, oven vent area, oven door/Asthe oven reachescleaningtemperatures,an internal lock
and window, jmechanism will engage.At this point,the oven doorcan not
be unlocked and opened. To prevent damage to the door
and lock lever,donot force the dooropen whenthe internal
Itis betterto clean the oven regularlyratherthanto wait until lock hasengaged.
there isa heavy build-up of soil in the oven. The first few times the oven is cleaned, some smoke and
Turn offthe ovenlight beforea clean cycle.Iftheoven lightis odor may be detected. This is normal and will lessen or
lefton, the light bulbwill burn out duringthe clean cycle, disappear with use.If the oven is heavily soiled, or if the
broiler pan was accidently left in theoven, smoke and odor
mayoccur.
Remove broiler pan, all pans and the oven racks from the Asthe oven heats andcools, youmay hearsounds of metal
oven. The racks will discolor and may not slide easily parts expandingand contracting.Thisis normal and will not
after a clean cycle,damageyour appliance.
Cleanovenframe,doorframeandaroundtheovenventwith
a non-abrasivecleaning agent suchas Bon Ami or
detergent and water. Theseareas arenot exposed to Aboutonehouraftertheendofthecleancycle,the internal
cleaningtemperaturesandshouldbecleanedtopreventsoil lockwill disengage.At thispoint,thedoorcan beunlocked
frombakingonduringthecleancycle,and opened.Movethe doorlocklevertotheleft orunlocked
Wipeupexcessgrease orspilloversfromtheovenbottomtopositionandopen the door.Theovenmay stillbe hot.
preventexcessivesmokingand flare-upsduringtheclean Somesoilmayleavea lightgray,powderyashwhichcanbe
cycle, removedwitha dampcloth.If soilremains,it indicatesthat
Wipeupsugaryspilloversand acidspilloverssuchaslemon the clean cycle was not long enough. The soil will be
juice, tomato sauceor milk-based sauces. Porcelain removedduringthenextcleancycle.
enamelisacidresistant,notacidproof.TheporcelainfinishIf theoven rackswereleft intheoven anddo not slide
maydiscolorifacidspillsare notwiped upimmediately, smoothlyafteracleancycle,wiperacksandembossedrack
Donot use ovencleaners ontheself-cleanovenfinishor supportswithasmallamountofvegetableoiltorestoreease
aroundany partoftheovenastheywilldamagethefinishor ofmovement.
parts.Fine,hair-like linesmayappearintheoveninteriororoven
Topreventdamage,do notcleanor rubthegasketaround door.This isa normalconditionresultingfromheatingand
theovendoor.Thegasketisdesignedtoseal inheatduring coolingofthe porcelainfinish.Theselinesdonot affectthe
theclean cycle, performanceoftheoven.
,,SELF-CLEAN OVEN, ifequipped 15
To set oven for a self-clean cycle: To delay the start of a clean cycle:
1. Removethe ovenracksandclosethe door. 1. Removethe ovenracksandclosethedoor.
1.Movethe door locklevertotherightuntilitrestsin the2. TurntheThermostatknobto CLEAN.
lockedposition. 3. TurntheSelectorknobto CLEAN.
I I_ -_=_ 4. To set cleaning time: PushinandturntheSTOP knob
ahead2to3 hoursfora 2toa 3hourcleancycle.Besure
theSTARTknobis inthe OUT position.
5. To delay the start of clean:
•Pushinand turntheSTOP knobtothetimeofday
2. TurntheThermostatknobtoCLEAN. youwishthe cleancycletoend.
3.TurntheSelectorknobtoCLEAN. •Pushinand turntheSTARTknobto3 hoursprior
4. Toset cleaning time: Pushinand turntheSTOP knob totheend ofthe cleancycle.
ahead2 to3 hoursfora 2toa3 hourcleancycle.BesureExample For Delay Start
theSTARTknobisintheOUT position. At7 o'clockintheevening,youwishtodelaythestartofthe
START STOP 3 hourcleancycleuntil8 o'clock(delayedbyonehour)and
endthe cleancycleat 11o'clock.
,\_lll/t"\\\\_ III/ 12
_ _ _ • O F60 /
,rio.
_: ._ !/. _...,"_ '%.. s
6<- 6 ,o: %o3 ,,..-"........%,,o............%,
Example of clean cycle startingat 12:00and stopping ato'O.,_,_
3:00. ,.2...,.-,,'-- ._ ....,_.... ,,,,
30
iI•
About one hour after the clean cycle ends, ihe LOCK 6
indicatorwillturn off andthe ovendoorcan beunlockedand
opened. To operate:
The ovendoorand doorlockleverwill be damagedifthe1. Closeand locktheovendoor.
ovendoorisforcedtoopenwhentheLOCKindicatorisstill 2. TurntheThermost_andSelectorknobsto CLEAN.
displayed. 3.Pushinandturnthe START knobto 8 o'clock.
4. PushintheturntheSTOP knobto 11o'clock.
TO cancel clean cycle: At 8 o'clock,theovenwillautomaticallyturnonandcleanfor
1. TurnthesToP knobuntiltheknobpopsout.3 hours.At 11o'clock,theovenwillautomaticallyturnoff.
2. TurntheThermostatknobtoOFF,ifthisknobhasanOFF About1houraftertheendofthecleancycle,thedoorcanbe
position, unlockedandopened.
3. Turnthe Selectorknobto OFF< ifthisknobhas anOFF
position.
4. IftheIocklevercanbeeasilymovedtotheleft,unlockthe
ovendoor.Ifthelockleverdoesnoteasilymovetothe
left,allowtheovento coolupto 1 hourthen unlockthe
door.
The doorand leverwillbedamagedifthe leverisforced
tothe leftbeforethe internallockisdisengaged.
16 CAREAND CLEANING CHART
Because ofthe many newcleaning productsintroduced in Mild Liquid Spray Cleaners - Fantastik, Formula 409.
the marketplaceeach year, it is not possibleto list all
productsthat can besafely usedto clean this appliance. Non-Abrasive Cleaners - BonAmi,pasteofbakingsoda
Listed below are just a few examples ofrecommended and water.
products. Mildly Abrasive Powder or Liquid Cleansers - Ajax,
REMEMBER, ALWAYS READ THE MANUFACTURER'S Barkeepers Friend,Cameo,Comet,Soft Scrub.
INSTRUCTIONSto besure the cleaner canbe safelyused Non-Abrasive or Scratchless Plasticor NylonScouring
on this appliance.Also,read and carefully follow the Pads or Sponges - ChoreBoy Plastic Cleaning Puff,
manufacturer'sdirectionswhenusinganycleaningproduct.ScrungeScrubSponges, or Seotch-BriteNo Scratch,
Cookwareor KitchenSponge.
To determineifa cleaning productis safe, test a small
inconspicuousarea usinga verylightpressuretosee iftheAbrasive Scouring Pads - S.O,S., BrilloSteelWoolSoap,
surfacemayscratchordiscolor.Thisisparticularlyimportant Scotch-BriteWoolSoap Pads.
for porcelainenamel, highlypolished,shiny, painted, or (Brandnamesfor the abovec/eaningproductsare registered
plasticsurfaces, trademarksoftherespectivemanufacturers.)
The followingbrandsmayhelpyouto makean appropriateBe sure applianceis off and all parts arecool before
selection: handlingorcleaningtoavoiddamageandpossibleburns.
Ifapart is removed,besureitiscorrectlyreplaced.
Glass Cleaners - BonAmi, Cinch,GlassPlus,Windex. To prevent staining or discoloration, clean range
DishwashingLiquid Detergents -Dawn,Dove,Ivory,Joy. after each use.
Baked Enamel •Soapand waterUseadrytowelorclothtowipeupspills,especiallyacid(railk,lemonjuice,fruit,mustard,
or Porcelain Enamel •Pasteof bakingsodaandwater tomatosauce)orsugaryspills.Surfacemaydiscolorordullifsoilis notimmediatelyre-
•Cooktop •Mildliquidcleaner moved.This isespeciallyimportantforwhitesurfaces.
• Ovendoor *Glasscleaner
•Storagedrawer Whensurfaceiscool,washwithwarmsoapywater,rinseanddry.Forstubbornsoil,use
•Side panels mildlyabrasive cleaningagentssuch asbakingsoda pasteoreonAmi.Ifdesired,athin
• Beckguard coatofmildappliancewaxcan beusedto protectthe sidepanels.Aglass cleanercanbe
usedto add "shine"to the surface.
NOTE=Donotuseabrasive, causticor harshcleaning agentssuch assteelwoolpadsor
oven cleaners. These products will scratch or permanentlydamage the surface.
NOTE=Never wipea warm or hot surface with adamp cloth as this may damage the
surfaceand may cause a steam burn.
Burner box • Soap and water Burnerbox, forcooktopswith ¢onventionalburners, islocated under lift-up cooktop.
•Pasteof bakingsodaandwater Cleanfrequentlytoremovespil[overs.Ifsoilisnotremovedandisallowedtoaccumu-
•Non-abrasiveplasticpad orsponge[ate,itmaydamagethe finish.Tocleanremovegratesandsurfaceburnersand clean
•Liquidcleaner withsoapand water,rinseand dry.
•Glasscleaner
CARE AND CLEANING CHART 17
Control knobs • Soap andwater Toremoveknobsforcleaning,gentlypullforward.Washinmilddetergentandwater.Do
not soak knobs in water.Do not use abrasive cleaning agents. They will scratch finish
andremove markings. Rinsedn/and replace.TurnON each burner to see if knobs
have been replaced correctly.
Grates • Detergent andwater Grates aremade ofporcelain-coated steel. Theycan be cleanedat the sinkwithdeter-
.Nen-abrasive plastic pad gent andwater or inthe dishwasher.To clean bakedon soil,place adamp soapy paper
towel over thegrate end let stand for 30 minutes.Use a non-abrasive plastic padto
scour stubborn soil,
NOTE: Neveroperate burner without agrate inplace. Toprotect the porcelainfinish on
thegrate fromexcessive heat,neveroperatesurfaceburner without acookingutensil on
the grate. It is normalfor gratesto lose their shine over a period of time.
Oven cavity See pages 14and 15for instructions.
• Self-clean porcelain Protect the oven bottomby (1) using large enough cookware to prevent boilovers; (2)
placeapieceofaluminumfoil, thatisslightlylargerthanthe cookware,onthe lower rack.
NEVER placefoil directly on the oven bottom.
Protect oven bottom against acid spills (milk,cheese,tomato, Lemonjuice, etc.) or
sugaryspills (pie filling) as they may pit or discoler the porcelain.
Plastic finishes • Soap and water When surfaceiscool,clean with soap and water; rinse, and dry.Use a window cleaner
• Doorhandles • Paste of baking soda and water and asoftcloth.
• Backguard trim °Non-abrasiveplastic pad or sponge
• Overlays NOTE: Never useoven cleaners,abrasiveor caustic liquid or powderedcleaning
• Knobs agents on plastic finishes.These cleaning agents will scratch or marrfinish.
• Endcaps NOTE; Topreventstaining or discoloration, wipeupfat, grease or acid(tomato, lemon,
vinegar,milk,fruit juice, marinade) immediatelywith edry papertowel or cloth.
Surface _urners I"_and water I All burners: For ease of cleaning, clean burnerseach timethe cooklopis usedwith
• Conventional • Pasteofbaldngsoda andwaterwarmsoapywater_Ifaboileveroccurs, removepanto anot_burner;cool burnerand
• Sealed • Pastic scouringspongeorpad clean,Toremovestubbornsoil,useadryclothandmildlyabrasivecleanser.Usecareto
•M dy abrasvecleanserprevantcleanerfromcoggingpods.BurnermuStbe drybeforeuse.NOTE.Yeowtip-
pingor distortionoftheflamemay occuruntiltheburneriscompletelydry.
- - Cleanbumerportswtthastra_ht pinorsmallmetalpaperclip.Donotentargeordistort
ports.Donotusea woodentoothpickas itmay breakoffand clog port,If _are
c oggedorso ed theburnermaynotlightproperlyorthe flamemaynot beeven.
Conventienal burners; Dryburnersinthe ovensetat 170_F.
Sealed burners: Sealedburne_cannot be removedbytheconsumer.Whencteardng
burner,usecaretop_eventdamagetothe igniter.SurfacebumerwillnetUg_properlyif
ignitorIsdamaged,broken,soiled,erwet.Whencleaningtheports,besuretocleanthe
18 MAINTENAN(;E
replacingthecooktoplightbulbor fluorescenttube, I
Before
DISCONNECTPOWER TO RANGE.Be sure the bulb isI
cool. Do nottoucha hot bulb with adamp clothas the bulbIThe cooktop featuring conventionalsurface burners lifts up
[ may break. Ifor easy cleaning of the burner box area.
The sealed burner cooktop is designed with two contour
wells to catch and contain spills. Becauseof this design
Toturn oncooktop light:Pressandholdrockerswitchuntil itisnot necessary to lift up the cooktop to clean under-
the light turns on. The oven light switch is located on theneath.Topreventdamageto thegastubingortop,donot
backguard,attempt to ft or remove the cooktop.
To replacecooktop light: Besurebulbiscool. Grasp the
top trim of the backguardwith your thumbs under the front
edge and pulloutward while lifting to release trim from Toraise the"lift-up"cooktop:Whencool, graspthe front
catches at each end. edge of the cooktop and gently liftup until the two support
rods at the front of the cooktop snapinto place.
Remove fluorescent tube and replacewithan 18 watt
fluorescent tube. Snap top trim backintoplace andTolower the top: Holdthe front edgeof the cooktop and
reconnectpower to range.Resetthe clock,carefully push back on each support rod to release the
notched support. Then gently lowerthe topintoplace. The
support rods will slide into the cooktop frame.
Toturn onoven light:Pushtherocker switchlocatedonthe
backguard or onthe controlpanel.
Toreplace ovenlight:Be sure bulb is cool. Use a dry
pothotder, to prevent possible harm to hands, and very
carefullyunscrewbulbcover, ifequipped,and bulb. (Note:
Non-self-cleaning models do not have a bulb cover.)
Replacewitha 40 watt appliance bulb. Replace bulb cover
and reconnect power to range. Resetthe clock.

This manual suits for next models

1

Other Maytag Range manuals

Maytag MGR5710 User manual

Maytag

Maytag MGR5710 User manual

Maytag MGR5510 User manual

Maytag

Maytag MGR5510 User manual

Maytag MES5775BAB - 30" Slide-In Electric Range User manual

Maytag

Maytag MES5775BAB - 30" Slide-In Electric Range User manual

Maytag MGR4410ADH User manual

Maytag

Maytag MGR4410ADH User manual

Maytag ELECTRIC RANGE User manual

Maytag

Maytag ELECTRIC RANGE User manual

Maytag MER6755AAS26 User manual

Maytag

Maytag MER6755AAS26 User manual

Maytag PGR5710BDQ User manual

Maytag

Maytag PGR5710BDQ User manual

Maytag MGS5775BDW - Slide in Gas Range User guide

Maytag

Maytag MGS5775BDW - Slide in Gas Range User guide

Maytag MGR8800HK User manual

Maytag

Maytag MGR8800HK User manual

Maytag MER5870 User manual

Maytag

Maytag MER5870 User manual

Maytag MGS5752BDB User manual

Maytag

Maytag MGS5752BDB User manual

Maytag MGT8720DS User manual

Maytag

Maytag MGT8720DS User manual

Maytag MGR4450 User manual

Maytag

Maytag MGR4450 User manual

Maytag 8113P560-60 User manual

Maytag

Maytag 8113P560-60 User manual

Maytag MGS5875BDQ - Gas 4.5 cu. Ft. Slide-In Range Manual

Maytag

Maytag MGS5875BDQ - Gas 4.5 cu. Ft. Slide-In Range Manual

Maytag 8113P296-60 User manual

Maytag

Maytag 8113P296-60 User manual

Maytag MER8800FB User manual

Maytag

Maytag MER8800FB User manual

Maytag MGR5875QDB1 User manual

Maytag

Maytag MGR5875QDB1 User manual

Maytag ACCELLIS MER67 User manual

Maytag

Maytag ACCELLIS MER67 User manual

Maytag ELECTRIC RANGE User manual

Maytag

Maytag ELECTRIC RANGE User manual

Maytag PERFORMA PER4510 User manual

Maytag

Maytag PERFORMA PER4510 User manual

Maytag YMER8772WW1 User manual

Maytag

Maytag YMER8772WW1 User manual

Maytag MER5775RAW - Electric Range User manual

Maytag

Maytag MER5775RAW - Electric Range User manual

Maytag MGR7661WW User manual

Maytag

Maytag MGR7661WW User manual

Popular Range manuals by other brands

Frigidaire CFEF3018LMB use & care

Frigidaire

Frigidaire CFEF3018LMB use & care

Bosch HEZBS301 installation manual

Bosch

Bosch HEZBS301 installation manual

Jenn-Air JDS8850BD Service manual

Jenn-Air

Jenn-Air JDS8850BD Service manual

LG LRG4115 Series owner's manual

LG

LG LRG4115 Series owner's manual

Frigidaire Gas Range use & care

Frigidaire

Frigidaire Gas Range use & care

Whirlpool RF301OXTW01 installation instructions

Whirlpool

Whirlpool RF301OXTW01 installation instructions

GE Profile PGS908 owner's manual

GE

GE Profile PGS908 owner's manual

Kenmore 79046629505 installation instructions

Kenmore

Kenmore 79046629505 installation instructions

Bosch L0609466 installation instructions

Bosch

Bosch L0609466 installation instructions

Kenmore 790.9414 Series Use & care guide

Kenmore

Kenmore 790.9414 Series Use & care guide

Whirlpool RF310PXD Use and care guide

Whirlpool

Whirlpool RF310PXD Use and care guide

Whirlpool WFG320M0BS3 Use & care guide

Whirlpool

Whirlpool WFG320M0BS3 Use & care guide

Inoksan PERFECT 7KG201 Series instruction manual

Inoksan

Inoksan PERFECT 7KG201 Series instruction manual

Ariston CP90510MFIXAUS operating instructions

Ariston

Ariston CP90510MFIXAUS operating instructions

Verona VPFSGG365 Series installation instructions

Verona

Verona VPFSGG365 Series installation instructions

LG LRG3097ST installation instructions

LG

LG LRG3097ST installation instructions

Frigidaire FEF316B Factory parts catalog

Frigidaire

Frigidaire FEF316B Factory parts catalog

Garland Enodis 36ER32 Specifications

Garland

Garland Enodis 36ER32 Specifications

manuals.online logo
manuals.online logoBrands
  • About & Mission
  • Contact us
  • Privacy Policy
  • Terms and Conditions

Copyright 2025 Manuals.Online. All Rights Reserved.