16.17.
Using the navigation
By default, the Navigation System calculates routes using the road
network of the maps provided with the product.
You can select the destination and start navigating to it right away
(normal navigation) if you need a route for immediate navigation.
You can also plan a route independently of your current GPS
position even without GPS reception. To achieve this, you need
to set a new starting point in the Multipoint Route menu. It also
suspends guidance so that the route is not recalculated when a new
position is received. See Page 22.
You can plan routes with multiple destinations by selecting a rst
and a second destination and adding it to your route. You can add
as many destinations to your route as you like. See Page 25.
You can also use the Navigation System for o-road navigation.
See page 29.
e following sections describe how to select a destination, view
and modify the route or use navigation-related features with the
help of the touch screen.
Selecting a destination
You can choose your destination by selecting one of the following
options:
• Using Freeform Search to search among dierent destination
types at once, see page 16.
• Entering a full address or a part of an address, for example a
street name without a street number, see page 17.
• Selecting a Place as your destination, see page 18.
• Selecting a Saved Location as your destination, see page 21.
• Selecting a location from the History of previously used
destinations, see page 21.
• Entering the coordinate of the destination, see page 22.
• Selecting a location on the map, see page 22.
• Planning a multipoint route, see page 22.
Using Freeform Search
ere are several ways to select your destination. You can initiate
a separate search for addresses, Places, Saved Locations, or recent
destinations, but the fastest way to search for any of these is to use
Freeform Search.
Perform the following steps to use Freeform Search:
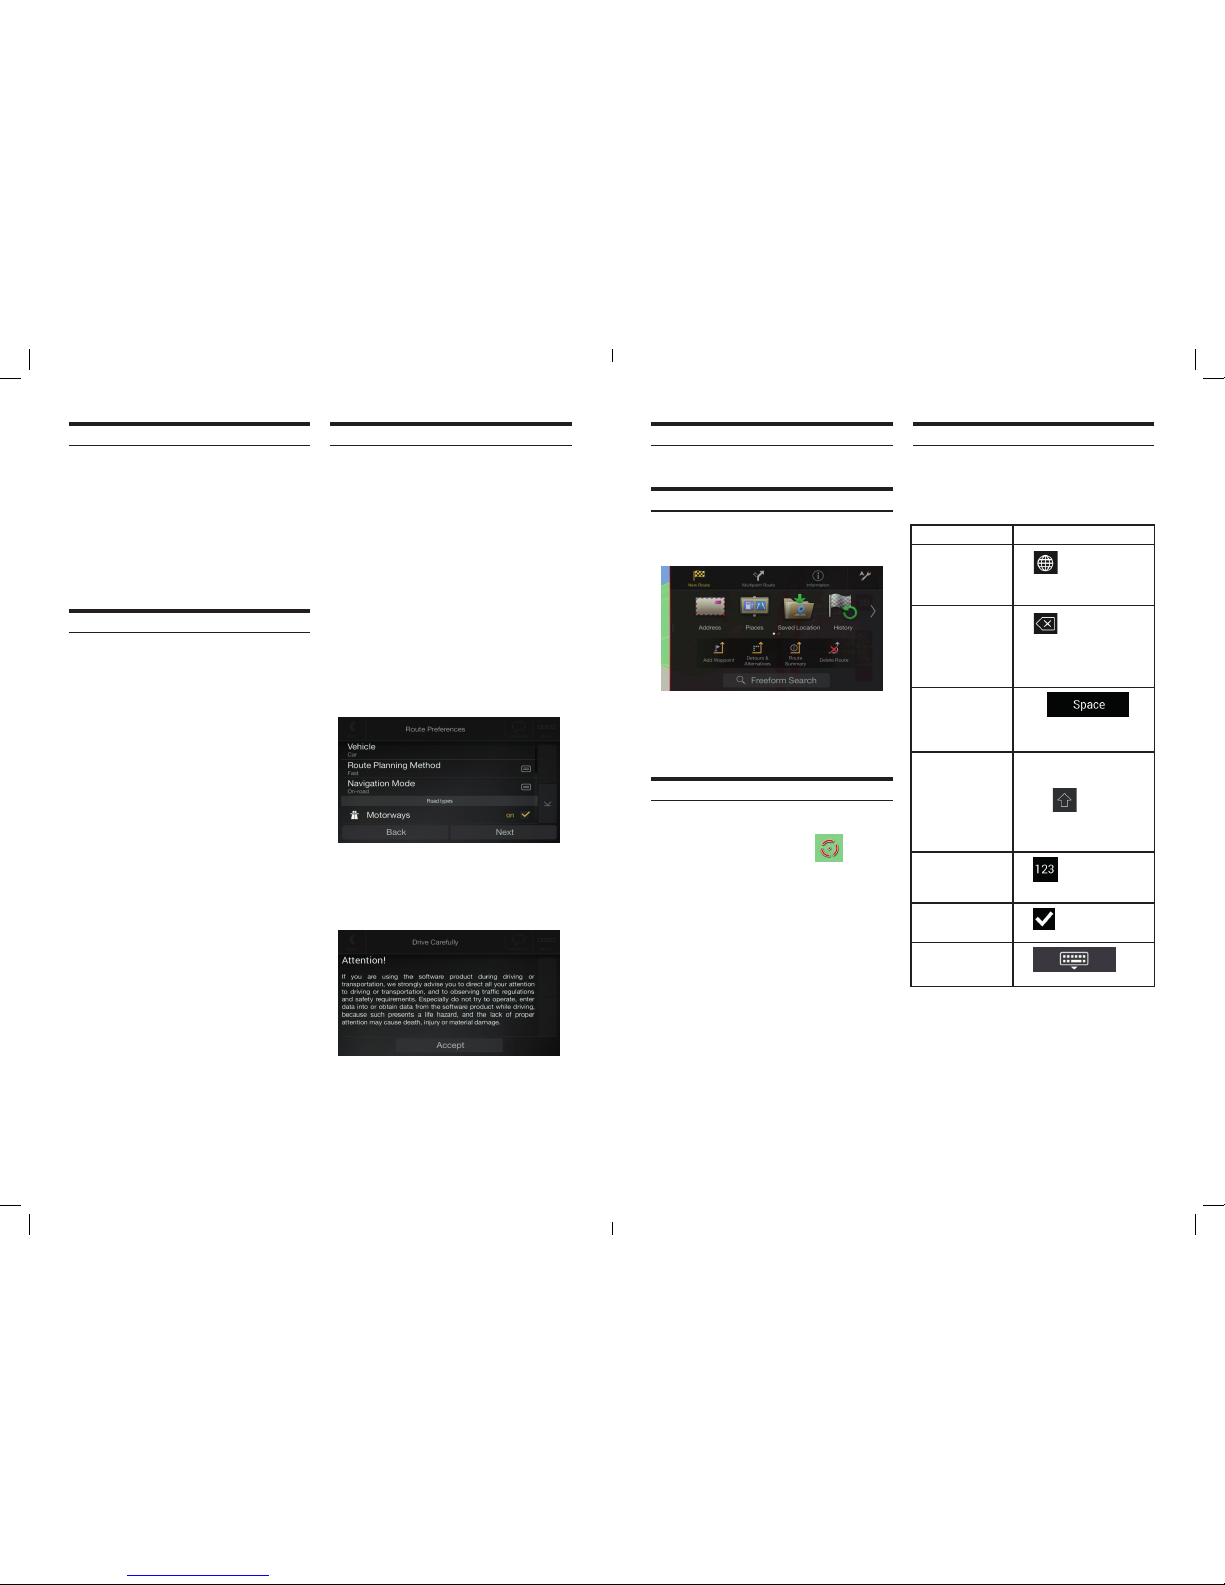
1. Press the navigation hard key button to access the Navigation
menu.
2. Tap ‘Search in All’. You can see the input eld at the top of the
screen. Right next to it you can see the search area, the town
around which the search is carried out. e default search area is
the area where you are located. For a local search, skip the next
step.
3. Optional, to search in a dierent area, tap the input eld with the
search area, and start entering the name of the new search area on
the keyboard.
You only need to enter a few letters to get a result. e most likely
result appears below the input eld as you enter new letters.
a. If the new search area is in a dierent country or state, start
entering the country/state and the town.
b. Tap the ‘Keyboard Down’ button to see
the whole list of the matching results.
4. With the proper search area displayed, start entering the name,
address, or category of the destination you are looking for.
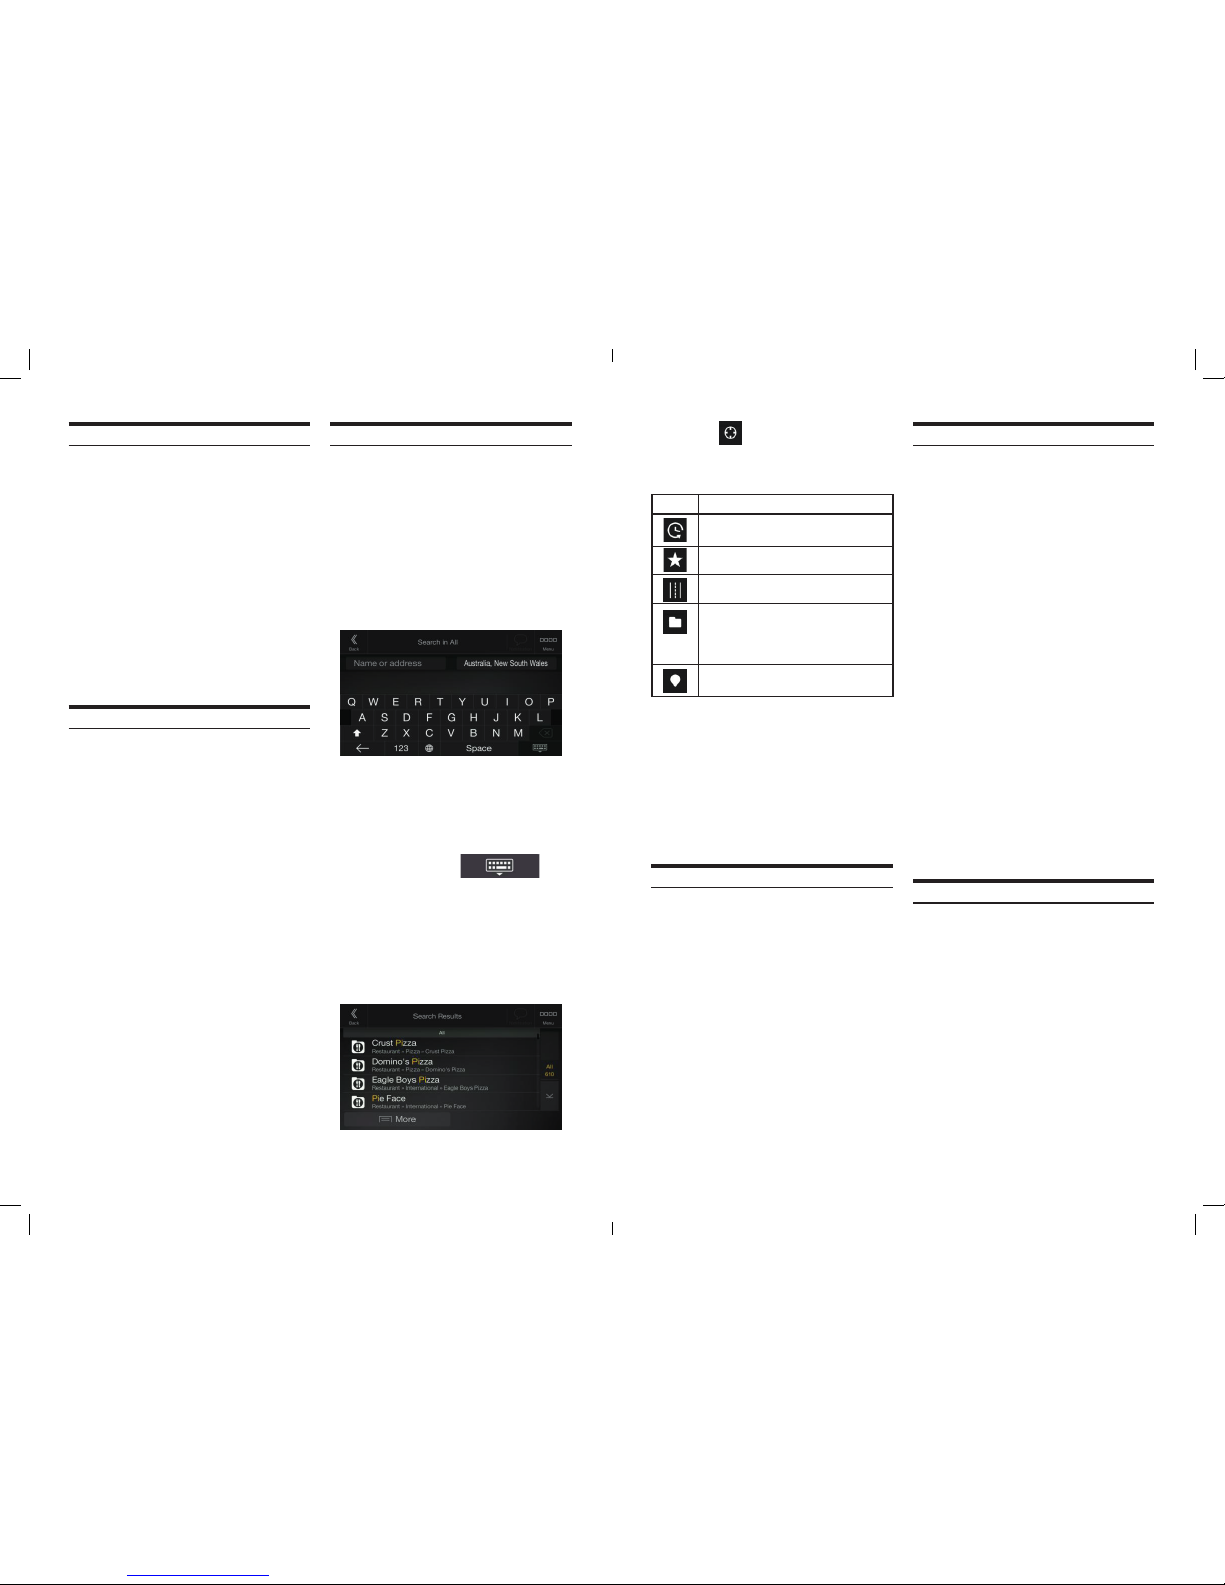
5. Tap the ‘Keyboard Down’ button to switch to the result screen.
You can see all the results in the list, regardless of their type.
Addresses, Places, Place categories, Saved Locations, and recent
destinations are mixed in one list. You can immediately select the
result you want to use as your destination or narrow the list of
results for only one type (for example, Places).
6. If necessary, tap on the right side of the list and then tap
the related button in the following table to narrow the list of search
results by type (the number on the related icon shows the number
of the matching results):
Button Function
Tap to see the list of recent destinations with a
matching name or address.
Tap to see the list of your saved locations with a
matching name.
Tap to see the list of matching addresses.
Tap to see the list of matching Place category
names. Scroll the list and select one of the
categories. You get the list of Places in that
category ordered by their distance from your
current position.
Tap to see the list of matching Places ordered by
their distance from your current location.
TIP! To search for an intersection in the Freeform search, enter the
names of the streets connected by the ‘&’ sign. You do not need to
use spaces before and aer the separator character. For example
you can nd the intersection of Collins Street and Douglas Avenue
by entering strings, like “Collins St & Douglas Ave”, “Collins &
Douglas”, “Col&Doug”, etc. e more precise the input string is,
the fewer false results are expected. If you enter “Collins St&”, you
get all the intersections of Collins Street and you can select the
appropriate one from the result list.
7. e route is calculated and the map appears showing the entire
route, where you can check route information and route
alternatives. Tap the ‘More’ button to modify the route parameters,
or tap the ‘Start Navigation’ button to start your journey.
Selecting an address
If you know at least a part of the address, this is the quickest way
to select your destination. Using the same screen, you can nd an
address by entering the following information:
• e exact address, including the street number, see page 17.
• e centre of a town, see page 17.
• e midpoint of a street, see page 18.
• An intersection, see page 18.
• Any of the above, starting the search with the postal code, see
page 18.
Entering an address
To enter an address as the destination, perform the following steps:
1. Press the navigation hard key button to access the Navigation
menu.
2. Tap ‘Address’.
3. Select the country by performing the following steps:
a. By default, the Navigation System proposes the country where
you are or in case there is no valid GPS position, the country of the
last known position. If needed, tap ‘Country/State’.
b. Start entering the rst few letters of the country. e names that
match the string appear in a list.
c. To open the list, tap the ‘Keyboard Down’ button, and select the
country.
4. Select a new town or postcode by performing the following
steps:
a. Tap ‘Town/Suburb or Postcode’ and start entering the rst few
letters of the town or the rst few numbers of the postcode. e
names that match the string appear in a list.
b. To open the list, tap the ‘Keyboard Down’ button, and select the
town or postcode.
5. Enter the street name and the street number or crossing street by
performing the following steps:
a. Start entering the street name on the keyboard. e names that
match the string appear in a list.
b. Tap the ‘Keyboard Down’ button to open the list of results. Select
the street from the list.
c. Enter the street number or crossing street on the keyboard. (To
enter letters, tap the ‘QWE’ button.)
d. Tap the selected address to nish the address search.
3. e route is calculated and the map appears showing the entire
route, where you can check route information and route
alternatives. Tap the ‘More’ button to modify the route parameters,
or tap the ‘Start Navigation’ button to start your journey.
Selecting a town centre
e town centre is not the geometric centre of the town but an
arbitrary point the map creators have chosen. In towns and
villages, it is usually the most important intersection and in larger
towns, it is one of the important intersections.
1. Press the navigation hard key button to access the Navigation
menu.
2. Go to ‘Address’ and modify the country as described earlier
above if necessary.
3. Select a new town or postcode by performing the following
steps:
a. Tap ‘Town/Suburb or Postcode’ and start entering the rst few
letters of the town or the rst few numbers of the postcode. e
names that match the string appear in a list.
b. To open the list, tap ‘Keyboard Down’ button, and select the
town or postcode.