4
unique high end audio
mbl 101 E MKII
1. Speaker setup
1.1 How to test your listening room
A simple ”clapping test” will give you important information on the acoustic conditions in your room.
Walk up and down in the area where you want to set up the speakers and clap your hands loudly. Pay
attention to the echoes reflected. If they are either extremely loud or extremely long (flutter eect), the
room´s reverberation is high and it is recommended to work with dampers.
To damp the room use sound absorbing elements like carpets and curtains. Diusers like small-leaved
plants or bookshelves between the corners of the room and the speakers help to improve the acoustic
pattern.
1.2 General setup tips
For best performance the speakers should be set up in front of a solid area of the room (e.g. a solid
wall).
If possible, set up the speakers on the longer wall.
The total high of shelves or hi-fi racks (incl. electronics) located between the speakers (also at the wall)
should not be higher than the midrange driver of the speaker, 80 cm (31”) total height.
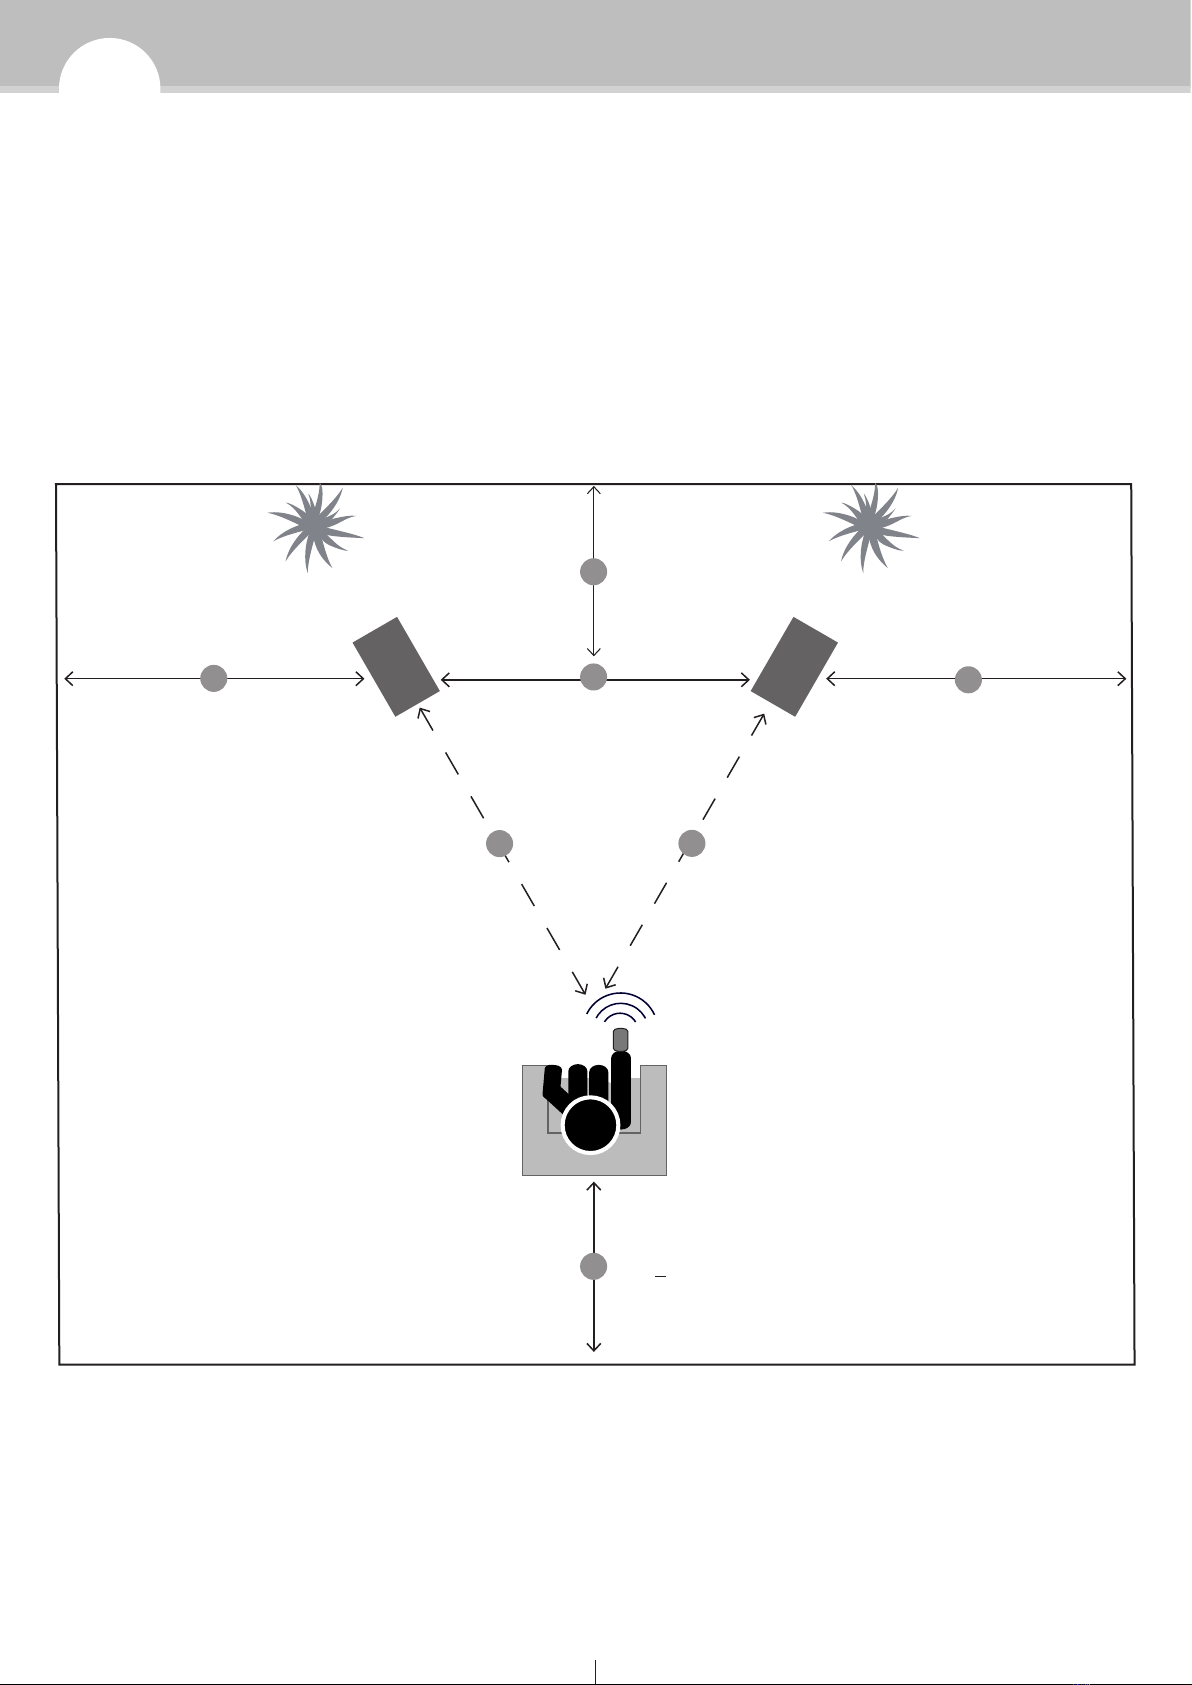
1.3 Speaker positioning
Transfer your room dimensions (longer and shorter side of the room) on a handmade drawing (note
the example given on page 6).
Set the position of the speakers into the drawing. To find out the optimal position proceed as follows:
Stereo base (a)
At first define the stereo base, that is the distance between the speakers (a). The stereo base should
not be under 2 meters (80“) or longer than 3.5 meters (140“).
Back wall (b) and side wall (d) distance
The distance between the back wall and the speakers (b) and the distance between the side wall and
the speakers (d) should both be at least 0,8 meters (32’’).
However these two distances should not be the same. A ratio of 1:1,3 is recommended, the speakers
always being closer to the longest wall.