McGREGOR GT2551 User guide

McGregor 320W Grass Trimmer
ORIGINAL
INSTRUCTION
MANUAL
7525911 (Model: GT2551)
These instructions contain important information that will help
you get the best from your mower, ensuring it is assembled
correctly and safely. If you need help or have damaged or
missing parts, call the Customer Helpline on 0345 605 2063
Important - Please read these
instructions fully before starting assembly
0345 605 2063
AFTER SALES SUPPORT

Contents
2
Customer Helpline 0345 605 2063
Safety Information.................................................................................................................................... 3
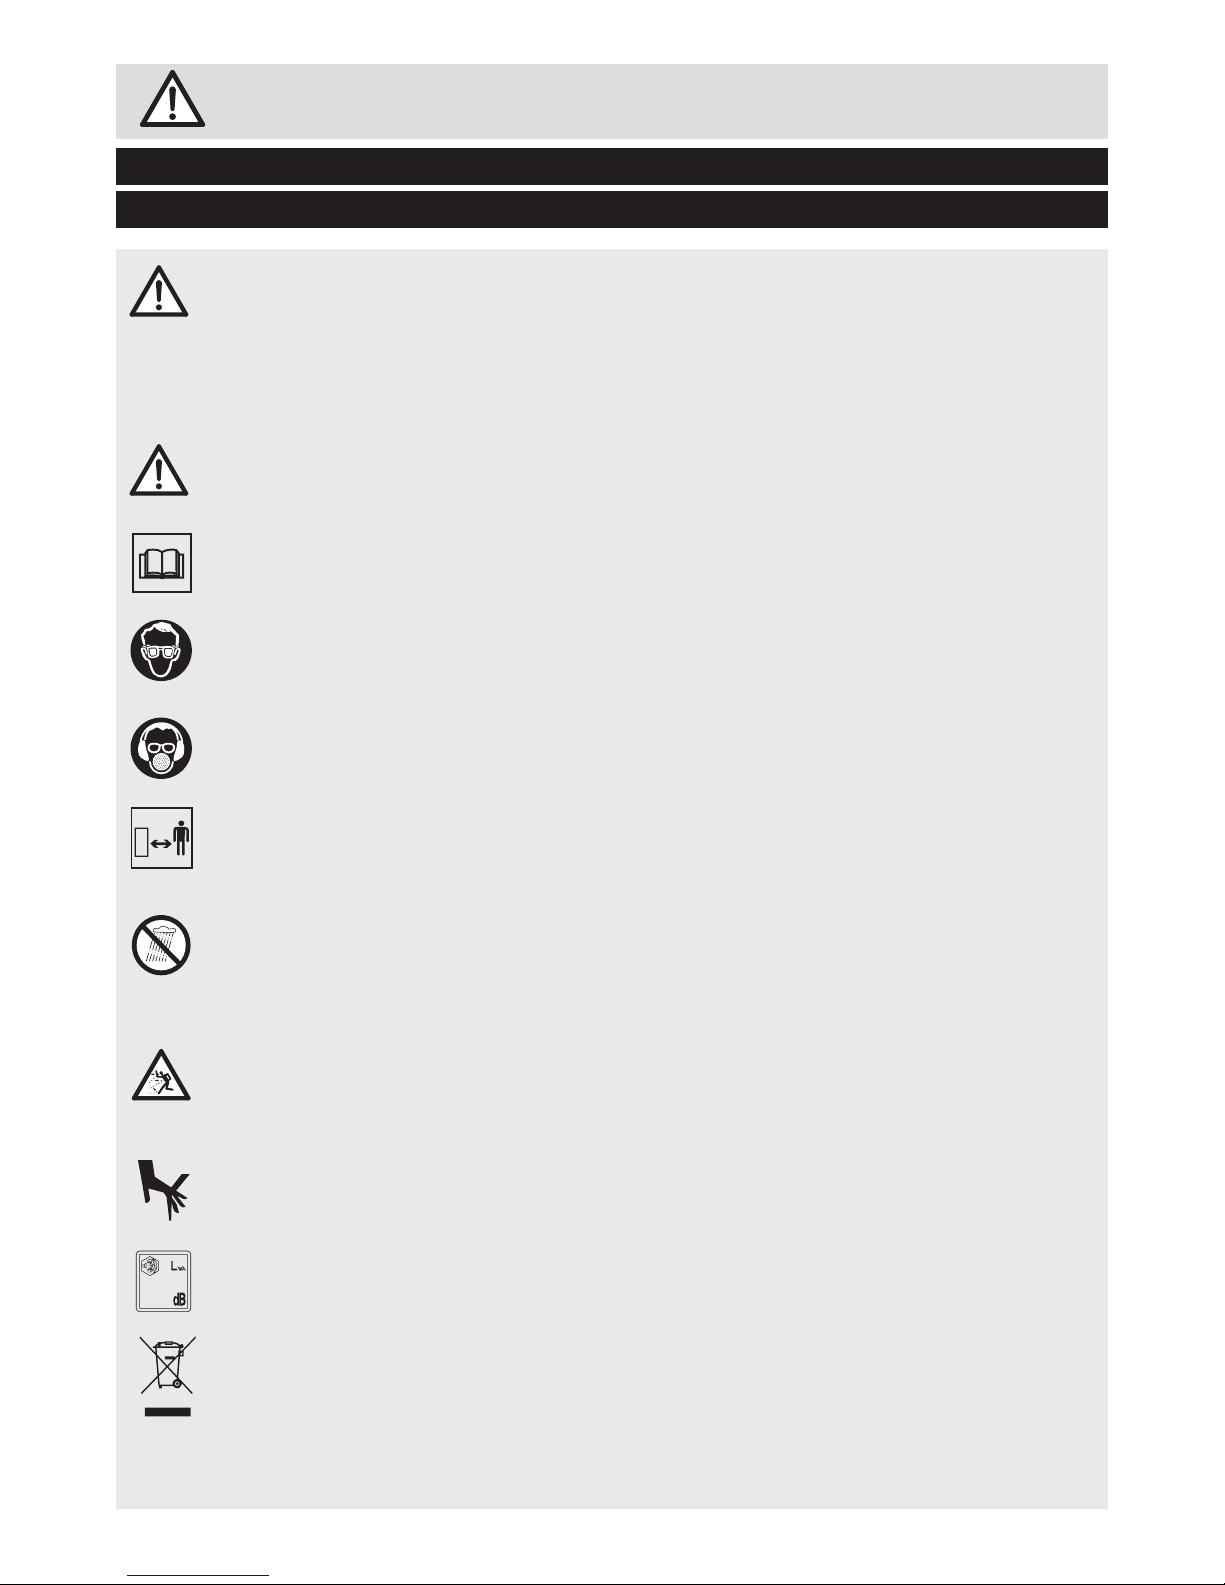
Description Of Symbols ......................................................................................................................... 3
Operational Safety.................................................................................................................................. 7
Maintenance And Storage Safety ........................................................................................................... 8
Intendend Use........................................................................................................................................ 9
In the Box ............................................................................................................................................... 10
Parts ................................................................................................................................................... 10
Assemble .................................................................................................................................................11
Unpacking ........................................................................................................................................... 11
Assembling the housing and handle ................................................................................................... 11
Fitting the Guard ................................................................................................................................. 11
Prepare ................................................................................................................................................... 12
Edge ................................................................................................................................................... 12
Connection to the power supply ......................................................................................................... 12
Operate ................................................................................................................................................... 13
Switching on/off ................................................................................................................................... 13
Trimming ............................................................................................................................................. 13
Warning ............................................................................................................................................... 14
Tips ..................................................................................................................................................... 14
Maintenance............................................................................................................................................ 15
Replacing the spool ............................................................................................................................ 15
Winding the line .................................................................................................................................. 15
Storage ............................................................................................................................................... 16
Transportation ..................................................................................................................................... 16
After use ............................................................................................................................................. 16
Recycling and disposal ....................................................................................................................... 16
Technical Data ........................................................................................................................................ 17
Technical Date Table ........................................................................................................................... 17
Part list ................................................................................................................................................ 17
Troubleshooting ..................................................................................................................................... 18
General Troubleshooting .................................................................................................................... 18
Getting Help ............................................................................................................................................ 19
Customer Helpline .............................................................................................................................. 19
Guarantee ........................................................................................................................................... 19

Important - Please read these instructions fully before starting assembly
3
Customer Helpline 0345 605 2063
The following warning symbols appear throughout this
assembly manual and indicate the appropriate safety
measures you should take when assembly and operating
the grass trimmer.
Take extra care, beware of hazards.
Read instruction manual.
Warning - Wear eye protection.
Wear hearing protection. Wear breathing protection.
Use at a distance of at least 5m from other people.
Do not use the machine in the rain or leave it outdoors
when it is raining.
Pay attention that bystanders are not injured by objects
thrown out from the machine.
Sharp cutting device.
Noise level specication Lwa in dB.
Do not dispose of electrical equipment in domestic waste.
Description Of Symbols
Safety Information
96

Important - Please read these instructions fully before starting assembly
4
Customer Helpline 0345 605 2063
Important!
All operators must read these instructions before use.
Warning! Read all safety warnings and all instructions.
Failure to follow all warnings, and instructions may result
in electric shock, re or serious injury. Save all warnings
and instructions for future reference.
Description Of Symbols (continued)
Safety Information
Work Area
• Keep work areas clean and well lit. Cluttered and dark
areas invite accidents.
• Do not operate power tools in explosive atmospheres,
such as in the presence of ammable liquids, gases,or
dust. Power tools create sparks which may ignite the
dust or fumes.
• Keep children and bystanders away while operating a
power tool. Distractions can cause you to lose control.
• Stay alert, watch what you are doing and use common
sense when operating a power tool. Do not use a
power tool while you are tired or under the inuence of
drugs, alcohol, or medication. A moment of inattention
while operating power tools may result in serious
personal injury.
• Use safety equipment. Always wear eye protection.
Safety equipment such as a dust mask, non-skid
safety shoes, hard hat, or hearing protection used for
appropriate conditions will reduce personal injuries.
• Avoid accidental starting. Ensure the switch is in the off-
position before plugging in. Carrying power tools with
your nger on the switch or plugging in power tools that

Important - Please read these instructions fully before starting assembly
5
Customer Helpline 0345 605 2063
Description Of Symbols (continued)
have the switch on invites accidents.
• Ensure you always have proper footing and balance.
This will provide better control of the power tool in
unexpected situations.
• Do not overreach. Keep proper footing and balance at
all times. This enables better control of the power tool
in unexpected situations.
• Dress properly. Do not wear loose clothing or jewellery
Keep your hair, clothing and gloves away from moving
parts. Loose clothes, jewellery or long hair can be
caught in moving parts.
• If devices are provided for the connection of collection
facilities ensure that these are connected and properly
used.
• Do not use the power tool for applications that are
beyond it’s capacity. Use the correct power tool for your
application. The correct power tool will do the job better
and more safely at the rate for which it was designed.
• Do not use the power tool if the switch does not turn it
ON and OFF. Any power tool that cannot be controlled
with the switch is dangerous and must be repaired.
• Disconnect the plug from the power source before
making any adjustments, changing accessories, or
storing power tools. Such preventive safety measures
reduce the risk of starting the power tool accidentally.
• Store the tool out of the reach of children. Do not
allow people unfamiliar with the power tool or these
instructions to operate the power tool. Power tools are
dangerous in the hands of untrained users.
Safety Information

Important - Please read these instructions fully before starting assembly
6
Customer Helpline 0345 605 2063
• Always maintain the power tool in good working order.
Check for misalignment or binding of moving parts,
breakage of parts, or other conditions that would affect
it’s operation. If damaged, have the power tool repaired
before use. Many accidents are caused by poorly
maintained power tools.
• Keep cutting tools sharp and clean. Properly
maintained cutting attachments with sharp cutting
edges are less likely to bind and are easier to control.
• Only use the tool, accessories, and attachments as
described in these instructions. Using the tool for
operations it is not intended for could cause damage to
the tool and hazardous situations. Always consider the
working conditions and the work to be performed.
• Have the power tool serviced by a qualied repair
personnel using only manufacturer’s recommended
replacement parts. This will ensure that the safety of
the power tool is maintained.
• Always wear adequate protective clothing when
operating the tool to avoid injuries to face, eyes, hands,
feet, head or hearing. Use safety glasses or a face
shield, high boots or sturdy shoes, long trousers, work
gloves, a hard hat and hearing protection.
• When starting up and when the tool is in operation,
keep the cutting section away from all parts of the
body, especially the hands and feet.
Description Of Symbols (continued)
Safety Information

Important - Please read these instructions fully before starting assembly
7
Customer Helpline 0345 605 2063
• Do not expose the appliance to rain. Do not use the
appliance in damp or wet conditions.
• Only use the appliance in daylight or good articial light.
• Wear stout shoes or boots to protect your feet. Do not
operate the appliance wearing open-toed sandal or
when barefoot.
• Wear long trousers to protect your legs.
• Be sure that the appliance is switched off before
connecting it to the mains supply.
• Stay alert at all times. Watch carefully what you are
doing. Use common sense.
• Do not operate the appliance when you are tired.
• If the appliance begins to vibrate abnormally, switch it
off and remove the plug from the socket. Allow rotating
parts to stop and inspect the appliance for damage and
loose part.
• Never pull the cord to disconnect the plug from the
socket. Keep the cord away from heat, oil and sharp
edges.
• If the main cable becomes damaged during use. Switch
the appliance off and disconnect the plug from the
mains immediately. Do not touch the main cable before
disconnect from the mains.
• Do not allow children or any person unfamiliar with
these instructions to operate the appliance.
• Do not allow children, bystanders or animal to come
near the work area or to touch the appliance or mains
cable.
Operational Safety
Safety Information

Important - Please read these instructions fully before starting assembly
8
Customer Helpline 0345 605 2063
Operational Safety (continued)
Safety Information
• Remember that the operator maybe held responsible
for the accidents or hazards occurring to other people
or their property.
• Switch off, remove the plug from the socket and
ensure that moving parts have stopped rotating before
leaving the appliance unattended and before changing,
cleaning or inspecting any parts of the appliance.
• When not in use, the appliance should be stored in a
dry place. Children should not have access to stored
appliances.
• Before use, check the appliance for damaged or
defective parts. Check for misalignment and seizure
of moving part, broken parts, damage to guards and
switches or any other conditions that may affect its
operation.
• Do not use the appliance if any part is damaged or
defective. Do not use the appliance if the switch does
not turn it on and off.
• Never use the appliance when any guard or housing
element is damaged or not in place.
• Ensure that the appliance will operate properly and
perform its intended function.
• Have any damaged or defective parts repaired or
replaced an authorized repair agent.
• Before use, check the mains cable for signs of
damage, ageing or wear.
Maintenance And Storage Safety

Important - Please read these instructions fully before starting assembly
9
Customer Helpline 0345 605 2063
Maintenance And Storage Safety (continued)
Safety Information
• Do not use the appliance if the mains cable is damaged
or defective.
• If the mains cable is damaged or defective it must
immediately be repaired by an authorised repair agent
to avoid any further hazard.
• Never attempt to remove or replace any parts other
than those specied in this manual.
• This grass trimmer is designed for domestic use only:
to trim grass, lawn edges and light foliage.
• This machine is not designed for heavy duty or
commercial use.
• Any use of the machine that deviates from its
intended use and is not included in these instructions
is considered unauthorized use and relieves the
manufacturer from his or her legal liability.
Intendend Use

10
Customer Helpline 0345 605 2063
In the Box
Parts
1
2
3
4
8
7
6
5
1 Cable strain-relief
2Shaft
3Safety Guard
4Cutting line
5 Motor Housing
6Auxiliary handle
7ON/OFF switch
8 Main handle
This 10m extend
cable is shared with
mower/trimmer

11
Customer Helpline 0345 605 2063
Assemble
Unpacking
Assembling the housing and handle
Fitting the Guard
• Unpack all parts and lay them on a at, stable surface.
• Remove all packing materials and shipping devices if applicable.
• Make sure the delivery contents are complete and free of any damage. If you nd that
parts are missing or show damage do not use the product but contact the aftersales
helpline within 28 days of purchase. Using an incomplete or damaged product
represents a hazard to people and property.
• Ensure that you have all the accessories and tools needed for assembly and
operation. This also includes suitable personal protective equipment.
• Assemble the housing into the handle and fully engaged.
• Place the guard onto the tool as shown, secure the guard with screws.
Warning! Never use the tool unless the guard is properly tted.

12
Customer Helpline 0345 605 2063
Prepare
Edge
Connection to the power supply
• Push the shaft forward, turn the handle to 180°,when trimming near edges and walls.
Warning! Always ensure the handle is locked in a secure. Only adjust to
indicated angle!
Never adjust to an intermediate position.
• Hook the mains cable through the cable strain-release.
• Connect the plug to the main socket.
EDGE
EDGE

13
Customer Helpline 0345 605 2063
Switching on/off
Trimming
• To Switch on, Press the on/off switch the lawn trimmer(1).
• To Switch off, release the switch(2).
• Ensure the knife protector label is removed before use. Ensure you wear gloves when
removing this label.
• Adjust the trimmer head angle to a proper position for trimming operation.
• Hold the grass trimmer rmly, keeping your balance with feet slightly apart. Alter the
height of the product if needed to ensure an upright posture.
• Hold the trimmer head just above the ground at an angle of approximately 30°.
• Move the product slowly from side to side in a swinging motion.
• Ensure the cutting device remains clean and free from off-cuts that may cause it
to jam. Check regularly. Release the on/off switch and disconnect the plug before
checking.
• Trim longer grass in stages; do not cut long grass in one cut. For the best results, cut
longer grass in steps.
• Place the trimmer along the edge of the lawn.
• Turn product on and push the trimmer forward slowly.
Operate
1 2
30o

14
Customer Helpline 0345 605 2063
Warning!
Tips
• For best results, do not cut wet grass because it tends to stick to the cutting head and
guard, prevents proper discharge of grass trimmings, and could cause you to slip and fall.
• Do not allow the spool cover to drag on the ground or other surfaces.
• Pay special attention when performing the work close to trees and bushes. The
cutting head could damage sensitive bark, and damage fence posts.
• Fold the plant protector out to avoid bringing the cutting device into contact with hard
objects such as walls and curbstones.
NOTE: The trimming line will wear faster and require more feeding if the cutting or
edging is done along sidewalks or other abrasive surfaces or heavier weeds are being
cut.
• Always t the guard before using the product
• When cutting longer /high grass, please make sure that you cut this down in 2 to 3
stages.
• DO NOT cut long grass in one cut, as this will damage your grass trimmer, and make
your warranty invalid.
Operate

15
Customer Helpline 0345 605 2063
Maintenance
This product does not contain any parts that can be repaired by the consumer.
Contact an authorised service centre or a similarly qualied person to have it
checked and repaired.
Replacing the spool
Winding the line
NOTE: Before replace the spool, make sure the mains plug is disconnected from the unit.
• Press together both locking device tabs on the spool cover and remove the cover.
• Remove the old spool from the spool cover.
• Clean out any dirt or grass residue.
• Put the new spool in the spool housing, thread the line into the hole.
NOTE: Should you wish to wind the line yourself, the instructions are provided below:
Self-winding, however, is NOT recommended because if the line is not wound properly it
can cause the trimmer’s feed system to malfunction. For this reason, users are strongly
urged to purchase the pre-wound spool.
• Hold the loose ends of the line together with one hand, insert one end of the line into
the groove on the spool.
• Wind the line following the directional arrows on the spool housing and hook the two
ends into the side grooves.

16
Customer Helpline 0345 605 2063
Maintenance
Storage
Transportation
After use
Recycling and disposal
• Store the product and its accessories in a dry, frost-free place.
• Always store the product in a place that is inaccessible to children. The ideal storage
temperature is between 10°C and 30°C.
• Switch the product off and disconnect the plug before transporting it anywhere.
• Protect the product against scratching and secure it to avoid damage from impact.
• Switch the product off, take off the plug and let it cool down.
• Check, clean and store the product as described below.
• The product comes in a package that protects it against damage during shipping.
Keep the packaging until you are sure that all parts have been delivered and the
product is functioning properly. Recycle the packaging afterwards.
• Old products are potentially recyclable and do not, therefore, belong in your
household rubbish. You are requested to assist us and our contribution to saving
resources and protecting the environment by handing in this product at an equipped
collection centre (if there is one available).

17
Customer Helpline 0345 605 2063
Technical Date
Technical Date Table
Part List
PART NUMBER ACCESSORIES
121001110 Spool
Model GT2551
Rated Voltage 220-240V~50Hz
Rated Power 320W
Motor speed 12000/min
Cutting width 25cm
Cutting line dia. 1.5mm
LpA sound pressure level 83.2 dB(A), K=3 dB(A)
LWA sound power level 96 dB(A)
Vibration at the handlebars ahv 4.3m/s2 K=2.2m/s2
Net weight 1.6kgs
Insulation class II

18
Customer Helpline 0345 605 2063
Suspected malfunctions are often due to causes that the user can x themselves. Therefore, check
the product using this section. In most cases the problem can be solved quickly.
WARNING!
Only perform the steps described within these instructions! All further inspection, maintenance and
repair work must be performed by an authorised service centre or a similarly qualied specialist if
you cannot solve the problem yourself!
Troubleshooting
General Troubleshooting
Gloves and appropriate protective clothing must be worn when performing these instructions. When
inspecting the line always take off the plug .
Problem Possible Cause Solution
Product does not start Not connected to power
supply
Connect to power supply
Power cord or plug is
defective
Check by a specialist
electrician
Other electrical defect to the
product
Check by a specialist
electrician
Product does not reach full
power
Extension cord not suitable
for operation with this product
Use a proper extension cord
Power source (e.g.generator)
has too low voltage
Connect to another power
source
Air vents are blocked Clean the air vents
Unsatisfactory cutting
performance
Cutting device worn or empty Replace cutting device

19
Customer Helpline 0345 605 2063
Dear Customer,
In the unlikely event that your device develops a fault, please contact our Customer service department
on the telephone number shown below.
1. These guarantee terms cover additional guarantee rights and do not affect your statutory warranty
rights. Claims must be accompanied by Proof of Purchase. This must be in the form of a Sales
receipt or Bank statement and must show that the product has been purchased within 2 years prior
to the claim, from the retailer that it was originally sold to.
2. Our guarantee covers problems caused by material or manufacturing defects, and will result
in the repair of these defects or replacement of the device with a like for like or similar article.
Please note that our devices have not been designed for use in commercial, trade or industrial
applications. Consequently, the guarantee is invalidated if the equipment is used in commercial,
trade or industrial applications or for other equivalent activities.
3. The following are also excluded from our guarantee:
A. Faults due to accidents, customer misuse or unauthorized repairs
B. Failure due to lack of routine maintenance.
C. Failure as a result of not using the equipment in accordance with the manual and safety
instructions.
4. The guarantee is valid for a period of 2 years starting from the purchase date of the device.
Guarantee claims should be submitted before the end of the guarantee period within two weeks
of the defect being noticed. No guarantee claims will be accepted after the end of the guarantee
period. The original guarantee period remains applicable to the device even if repairs are carried
out or parts are replaced. In such cases, the work performed or parts tted will not result in an
extension of the guarantee period, and no new guarantee will become active for the work performed
or parts tted.This also applies when an on-site Service is used.
5. Please keep your sales receipt in a safe place.
Customer Helpline
Guarantee
Getting Help
Our dedicated UK based customer helpline is open to assist you with assembly, parts queries and
technical support. We are open during ofce hours.
Our experts are here to get you back enjoying your garden in no time.
Calling our service does not affect your statutory rights.
After sales helpline number: 0345 605 2063
Table of contents
Other McGREGOR Trimmer manuals
Popular Trimmer manuals by other brands

Grizzly
Grizzly ERT 600 R Translation of the original instructions for use

Craftsman
Craftsman WEEDWACKER 358.796190 Operator's manual

Einhell Royal
Einhell Royal HEC 550/1 Directions for use

Echo
Echo GT_225 - 11-09 Operator's manual

Fieldmann
Fieldmann FZN 4001-A user manual

Lux Tools
Lux Tools A-HS-20/52 Set Original instructions