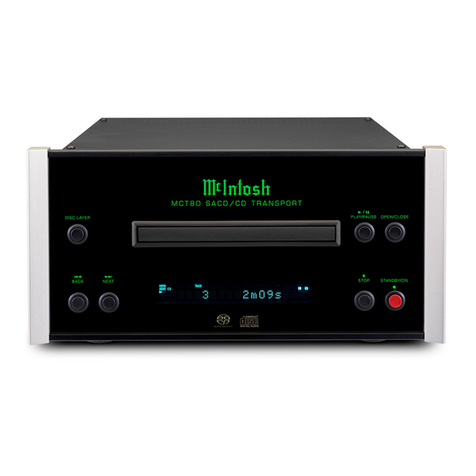
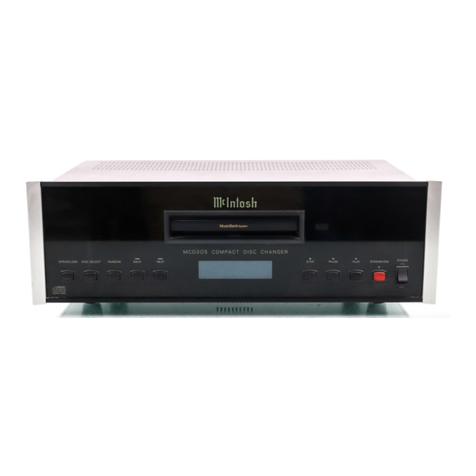
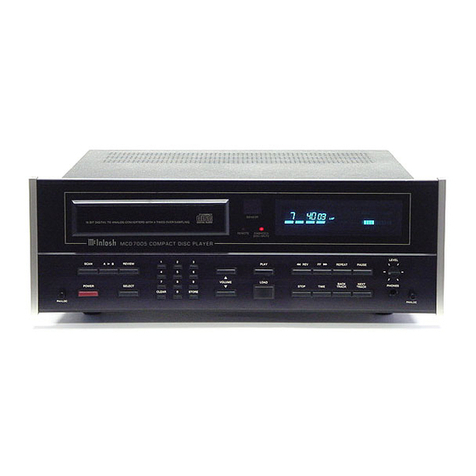
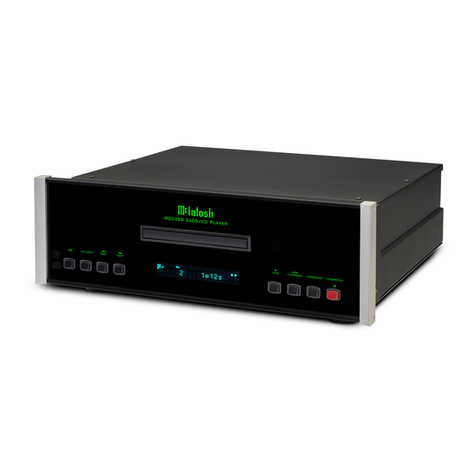
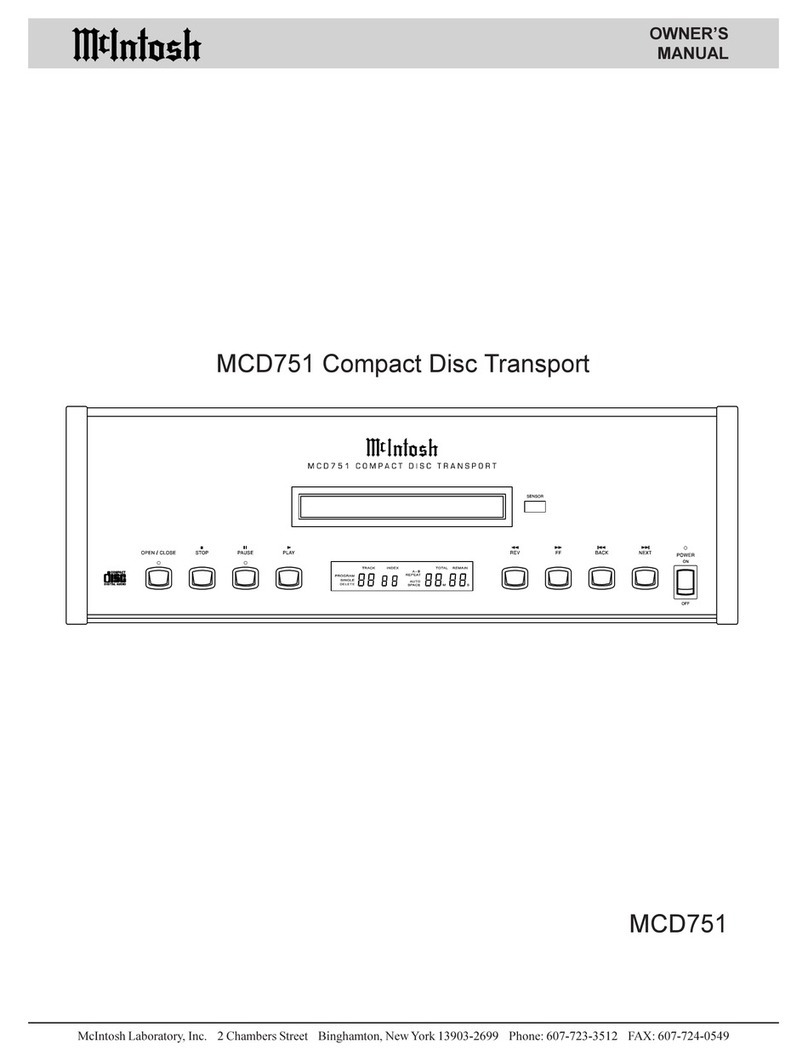
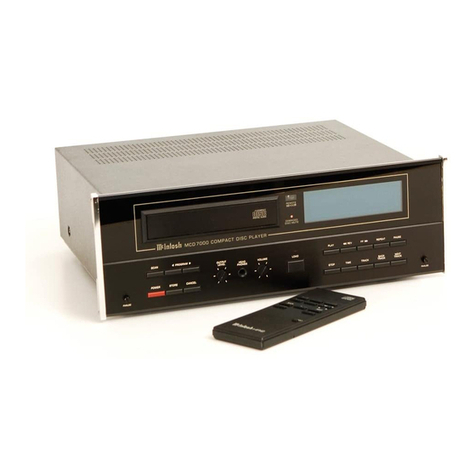
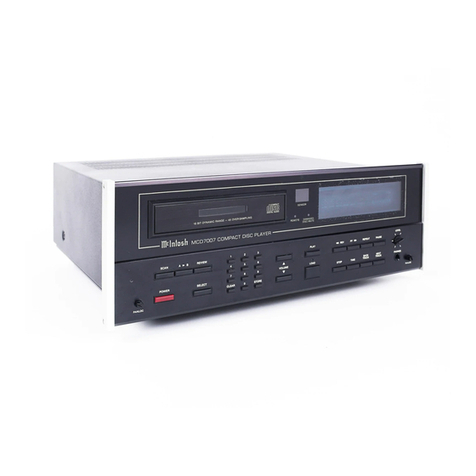
McIntosh MCD 7009 User manual

MCD7009
COMPACT
DISC
PLAYER

IMPORTANT
SAFETY
INSTRUCTIONS
THESE
INSTRUCTIONS
ARETOPROTECT
YOUANDTHE
MclNTOSH
INSTRUMENT.
BESURETO
FAMILIARIZE
YOURSELF
WITHTHEM
Copyright1994© by
MclntoshLaboratoryInc.
1.Readallinstructions- Readthesafetyandoperatinginstructionsbeforeoperatingtheinstrument.
2. RetainInstructions- Retainthesafetyandoperatinginstructionsforfuturereference.
3.Heedwarnings- Adheretowarningsandoperatinginstructions.
4.FollowInstructions- Followalloperatinganduseinstructions.
WARNING:
TO
REDUCERISK
OF
FIRE
OR
ELECTRICALSHOCK,
DONOT
EXPOSETHIS
IN-
STRUMENTTORAINORMOISTURE.
5.PowerSources- Connectthepowersupplyonlytothetypedescribedintheoperatinginstructions
orasmarkedontheunit.
6.Power-CordProtection- Routepower-supplycordssothattheyarenotlikelytobewalkedonor
pinchedbyitemsplaceduponoragainstthem,payingparticularattentiontocordsatplugs,
conveniencereceptacles,andthepointwheretheyexitfromtheinstrument.
7.Ventilation- Locatetheinstrumentforproperventilation.Forexample,theinstrumentshouldnot
beplacedona bed,sofa,rug,orsimilarsurfacethatmayblockventilationopenings;or,placed
ina built-ininstallation,suchasa bookcaseorcabinet,thatmayimpedetheflowofairthrough
theventilationopenings.
8.Heat- Locatetheinstrumentawayfromheatsourcessuchasradiators,heatregisters,stoves,or
otherappliance(includingamplifiers)thatproduceheat.
9.WallorCabinetMounting- Mounttheinstrumentina wallorcabinetonlyasdescribedintheowner's
manual.
10.WaterandMoisture- Donotusetheinstrumentnearwater- forexample,neara bathtub,washbowl,
kitchensink,laundrytub,ina wetbasement,orneara swimmingpool,etc.
11.Cleaning- Cleantheinstrumentbydustingwitha drycloth.Cleanthepanelwitha clothmoistened
witha windowcleaner.
12.ObjectandLiquidEntry- Donotpermitobjectstofallandliquidstospillintotheinstrumentthrough
enclosureopenings.
13.NonusePeriods• UnplugthepowercordfromtheACpoweroutletwhenleftunusedfora longperiod
oftime.
14.DamageRequiringService- Servicemustbeperformedbyqualifiedservicepersonnelwhen:
A.Thepowersupplycordortheplughasbeendamaged;or
B.Objectshavefallen,orliquidhasbeenspilledintotheinstrument;or
C.Theinstrumenthasbeenexposedtorain;or
D.Theinstrumentdoesnotappeartooperatenormallyorexhibitsa markedchangeinperformance;
or
E.Theinstrumenthasbeendropped,ortheenclosuredamaged.
15.Servicing- Donotattempttoservicebeyondthatdescribed intheoperatinginstructions.Allother
serviceshouldbereferredtoqualifiedservicepersonnel.
16.GroundingorPolarization- Donotdefeattheinherentdesignfeaturesofthepolarizedplug.Non-
polarizedlinecordadaptorswilldefeatthesafetyprovidedbythepolarizedACplug.
17.
CAUTION:
TO
PREVENTELECTRICALSHOCK
DONOTUSE
THIS(POLARIZED)PLUG
WITHANEXTENSIONCORD,RECEPTACLEOROTHEROUTLETUNLESSTHEBLADESCAN
BEFULLYINSERTEDTOPREVENTBLADEEXPOSURE.
ATTENTION:
POURPREVENIR
LES
CHOCSELECTRIQUES
PAS
UTILISERCETTE
FICHEPOLARISEEAVECUNPROLONGATEUR,UNEPRISEDECOURANTOUUNEAUTRE
SORTIEDECOURANT,SAUFSILESLAMESPEUVENTETREINSEREESA FONDSANSEN
LAISSERAUCUNE PARTIEA DECOUVERT.
Thelightningflashwitharrowhead,withinanequilateraltriangle,isintendedtoalertthe
usertothepresenceofuninsulated"dangerousvoltage"withintheproduct'senclosure
thatmaybeofsufficientmagnitudetoconstitutea riskofelectricshocktopersons.
CAUTION:
TO
PREVENT
THE
RISK
OF
ELECTRIC
SHOCK,
DONOT
REMOVECOVER(ORBACK).NOUSER-SERVICABLEPARTSINSIDE.
REFERSERVICINGTOQUALIFIEDPERSONNEL.
Theexclamationpointwithinanequilateraltriangleisintendedtoalerttheusertothe
presenceofimportantoperatingandmaintenance(servicing) instructionsintheliterature
accompanyingtheappliance.
WARNING:THISUNITISCAPABLEOFPRODUCINGHIGHSOUND
PRESSURELEVELS.CONTINUEDEXPOSURETOHIGHSOUND
PRESSURELEVELSCANCAUSEPERMANENTHEARINGIMPAIRMENT
ORLOSS.USERCAUTIONISADVISEDANDEARPROTECTIONIS
RECOMMENDEDWHENPLAYINGATHIGHVOLUMES.
2
YourdecisiontoownthispieceofMclntoshStereoEquipmentranksyouattheverytop
amongdiscriminatingmusiclisteners.Younowhave"TheBest".TheMclntoshdedication
to"Quality",isassurancethatyouwillreceivethousandsofhoursofmusicalenjoymentfrom
thisunit.
Pleasetakea shorttimetoreadtheinformationinthismanual.Wewantyoutobeasfamiliar
aspossiblewithallthefeaturesandfunctionsofyournewpieceofMclntosh.Thiswillen-
surethatyoureceivealltheperformancebenefitsthisinstrumentcanofferyou,andthat
itwillbecomea highlyvaluedpartofyourhomemusicsystem.
THANK
YOU
Theserialnumber,purchasedate,andMclntoshLaboratoryServiceContractnumberare
importanttoyouforpossibleinsuranceclaimorfutureservice.Recordthisinformationhere.
SerialNumberPurchaseDate
ServiceContractNumber
Uponapplication,MclntoshLaboratoryprovidesa ServiceContracttotheoriginalpurchaser.
YourMclntoshAuthorizedServiceAgencycanexpediterepairswhenyouprovidethemwith
theServiceContract.
SERVICECONTRACT4
READBEFOREOPERATING5,6
HOWTOINSTALLBATTERIESINTHEREMOTECONTROLLER6
HOWTOINSTALLTHEMCD70096
THEREARPANELANDHOWTOCONNECT7,8
HOWTOOPERATETHEMCD7009WITHREMOTECONTROLLERSFROM
OTHERMclNTOSHREMOTECONTROLLEDPRODUCTS9,10,11
THEFRONTPANELANDREMOTECONTROLLER12
HOWTOOPERATE13-21
IFYOUNEEDHELP22
SPECIFICATIONS 23
FOLD-OUTDRAWINGOFMCD7009BACKPANEL24
CUSTOMINSTALLATIONDRAWING25
TABLEOF
CONTENTS
3

TAKEADVANTAGEOF3 YEARSOFCONTRACTSERVICE.. .
FILLINTHEAPPLICATIONNOW.
YourMCD7009CompactDiscPlayerwillgiveyoumanyyearsofsatisfactoryperformance.
Ifyouhaveany questions,pleasecontact,
MclntoshLaboratoryInc.
2ChambersStreet
Binghamton,NewYork13903-2699
Phone:607-723-3512
MclNTOSH
THREEYEAR
SERVICE
CONTRACT
AnapplicationforA THREEYEARSERVICECONTRACTisincludedwiththismanual.
Thetermsofthecontractare:
1.If
m
ori
sh
2.An
ser
vice
3.Alw
moc
ed
4.The
misr
IIprovideallparts,
instrumenttothe
esnotcoverany
ry.
mentsatnormal
contract,theser-
eserviceagency.
he instrument is
twill be cancell-
icecontract.
protectyoufrom
betransferredtoa secondowner.
5.UnitsinoperationoutsidetheUnitedStatesandCanadaarenotcoveredbytheMclntosh
FactoryServiceContract,irrespectiveoftheplaceofpurchase.Norareunitsacquired
outsidetheUSAandCanada,thepurchasersofwhichshouldconsultwiththeirdealer
toascertainwhat,ifany,servicecontractorwarrantymaybeavailablelocally.

Choosetheinstallationlocationofyourunitcarefully.Avoidplacingitindirectsunlightor
closetoa sourceofheat.Alsoavoidlocationssubjecttovibrationsandexcessivedust,heat,
coldormoisture.Keepawayfromsuchsourcesthathum,suchastransformersormotors.
Donotopenthecabinetasthismightresultindamagetothecircuitryorelectricalshock.
Ifa foreignobjectshouldgetintotheMCD7009,contactyourauthorizedMclntoshdealer.
Besurenottohandlediscswithdirtyfingers.Neverinserta discwhichhasa crackon
thesurface.
Whenremovingthepowerplugfromthewalloutlet,alwayspulldirectlyontheplug,never
yankthecord.
Tokeepthelaser-pickupclean,donottouchit,anddonotforgettoclosethedisctray.
Donotattempttocleantheunitwithchemicalsolventsasthismightdamagethefinish.
Usea clean,drycloth.
Keepthismanualina safeplaceforfuturereference.
BEWARE OF CONDENSATION
When the player (or a compact disc) is moved from a cold to a warm place or used after
asudden temperature change, there is the danger of condensation. Water vapor in the air
could condense on the mechanism or the laser pickup. If droplets of water form on these
parts, correct playback will be impossible because the laser cannot read the information from
the disc correctly. To prevent this, if you are going to use the player in a condition where
condensation could occur, you should leave the player for 1 or 2 hours after plugging it into
an AC outlet depending on the amount of condensation. If this is done, the player willstabilize
at the temperature of its surroundings.
HANDLINGTHEDISCS
Alwaysplacethecompactdiscinthedisctraywiththelabelfacingupward.(Compact
discscanbeplayedonlyononeside.)
Toremovea discfromitsstoragecase,pressdownonthecenterofthecaseandliftthe
discout,holdingitcarefullybytheedges.
READ
BEFORE
OPERATING
Howtoremovethedisc.Howtoholdthedisc.
Fingermarksanddustshouldbecarefullywipedoffthedisc'srecordedsurfacewitha soft
cloth.
Wiperadially
5

READ
BEFORE
OPERATING
TRANSPORTFIXING(LOCKING)SCREW
AtransportFIXINGorlockingscrewisprovidedtoprotecttheMCD7009Laserpickup
mechanismfromshocksandmovementduringtransitorshipping.Accessthefixingscrewfrom
thebottompaneloftheplayer.
RELEASETHEFIXINGSCREWBEFOREOPERATING
1.Carefullyplacetheplayer,upsidedown,ona firmsurfacewiththebottompanelfacingup.
2.Inserta 3/16inchflatbladescrewdriverintothefixingscrewslotandturnthescrewtothe
FREEposition,(approximately45°rotationfromLOCK).
TOTRANSPORTORSHIPTHEPLAYER
1. Openthediscdrawertomakesurenodiscisloaded.
2.Carefullyplacetheplayer,upsidedown,ona firmsurfacewiththebottompanelfacingup.
3.Inserta 3/16inchflatbladescrewdriverintothefixingscrewslotandturnthescrewtothe
LOCKposition.
HOWTO
INSTALL
BATTERIES
INTHE
REMOTE
CONTROLLER
Slideopenthebatterycompartment.InserttwotypeAAAbatteriesintothecompartment,
makingsuretoobservethebatterypolaritiesindicatedinthebatterycompartment.
Whenthebatteriesarenearingexhaustion,theeffectiverangeoftheremotecontroller
decreases,andMAYeven failtooperate.Inthiscase,replacebothbatterieswithfreshones.
NOTE:
1.Donotmixoldandnewbatteries.UseONLYbatteriesthatarenew.
2.Makesurebothbatteriesareofthesametypeandidentical.
3.Topreventdamagecausedbypossiblebatteryleakage,removethebatteriesfrom
theremotecontrollerifitisnotgoingtobeusedforanextendedperiodoftime.
4.Neverdismantlebatteriesofdisposeofthemina fire,astheymayexplode.Dispose
ofoldbatteriesinanapprovedmethodforpropersafety.
HOWTO
INSTALLTHE
MCD7009
TheMCD7009canbeplaceduprightona tableorshelf,standingonitsown plasticfeet.
ItcanalsobeinstalledinanoptionalMclntoshL72cabinet.
TheMCD7009canalsobecustominstalledina pieceoffurnitureorcabinetofyourchoice.
Therequiredpanelcutoutandunitdimensionsareshownona pagefurtherbackinthismanual.
AlwaysprovideadequateventilationforyourMCD7009,eventhoughitdevelopesverylittle
heat.Cooloperationinsuresthelongestpossibleoperatinglifeforanyelectronicinstrument.
DonotinstallyourMCD7009directlyabovea heatgeneratingcomponentsuchasa high
poweredamplifier.Ina systemstack,thepoweramplifiershouldalwaysbeatthetop.Ifall
thecomponentsareinstalledina singlecabinet,aquietrunningventilationfancanbea definite
assetinmaintainingallthesystemcomponentsatthecoolestpossibletemperatures.
Acustomcabinetinstallationshouldallowthefollowingrecommendedminimumspacingdimen-
sionsforcooloperation.Allowatleast1-1/2inches(3.8cm)abovetheunitsoairflowisnot
obstructed.Allow17inches(43.2cm)depthbehindthemountingpanel,whichincludesclearance
forconnectors.Allow1-1/8inches(2.9cm)infrontofthemountingpanelforknobclearance.
6

ontheMCD7009,bysendingcontrolsignalstotheplayerthroughtheControlCentersensor
ineitherthemainora remotearea.
5.DATAIN
Connecta DATAcablefromtheMCD7009DATAIN(5)jacktoa CDDATAPortona Mcln-
toshControlCenterorRemoteControlSystem.ThisallowstheMclntoshControlCenterRemote
Controllertooperatea widerangeoffunctionsontheMCD7009player,fromeitherthemain
orremotearea
RefertothedrawingsofthevariousMclntoshhandheldRemoteControllersinthemanual
sectionHOWTOUSETHEMCD7009WITHOTHERMclNTOSHREMOTECONTROLPRO-
DUCTS.ThesedrawingsshowwhichpushbuttonsoneachspecificControllerareactivefor
controllingtheMGD7009.Thedrawingsalsoindicateseveralpushbuttonsthatperformplayer
functionsthataredifferentfromthemarkingsontheRemoteControllers.
AKeypadcanalsobeusedtocontroltheMCD7009ina remotearea.Refertothekeypad
drawingwhichindicateswhichpushbuttonsareactivewiththeMCD7009.
TheMCD7009RemoteControllercan alsobeusedina remoteareaofanyMclntoshremote
controlsystemtooperatetheplayerbysendingcontrolsignalstoa wallmountedIRsensor.
AlltheMCD7009RemoteControllerpushbuttonsareactiveinthisconfiguration.
AData cable uses single conductor shielded wire with 1/8" mini phone plugs. Connections
are to the sleeve (-) and tip (+) of the plug.
(Do not connecta DIN CONTROL cable to the MCD7009 when the DATA In is being used.)
6.ACPOWER
ConnecttheMCD7009ACPowerCordtoa 120volt,50Hz/60Hzoutlet.
7.LINEOUT,L ANDR
ConnectshieldedcablesfromtheL (Left)andR (Right)LINEOUTjackstotheCDinputsof
aControlCenterorPreamplifier.SimilarhighlevelaudioinputssuchasAuxiliaryorTapecanbe
used,butyouwillthennotbeabletocontroltheplayerwiththeControlCenterRemoteController.
THEREARPANEL
ANDHOWTO
CONNECT
7
andNEXTTrack
CenterRemoteControllerwillthenoperatePLAY,STOP,BACKTrack
Thelastpageofthismanualfoldsouttoshowa drawingoftherearpanelofthe
MCD7009.Thelettersonthedrawingrefertotheinformationthatfollows.
1.DIGITALOUT:OFF/ON
TurnstheOPTICALandCOAXIAL,DIGITALOUTconnectorsONorOFF.
2.OPTICALDIGITALOUT
1.SettheDIGITALOUTswitch(1)totheONposition.
2.RemovetheprotectivecapfromtheMCD7009OPTICALDIGITALOUTconnector.
3.ConnectanOpticalcablefromtheMCD7009OPTICALDIGITALOUTtotheOpticalin-
putofanexternalDAConverter.
4.ConnecttheanalogoutputsoftheDAConvertertotheCDinputsoftheControlCenter
orpreamplifier.
3.COAXIALDIGITALOUT
1.SettheDIGITALOUTswitch(1)totheONposition.
2.Connecta coaxialcable(RG6orRG59U)fromtheMCD7009COAXIALDIGITALOUT
tothecoaxialinputoftheexternalDAConverter.
3.ConnecttheanalogoutputsoftheDACtotheCDinputsoftheControlCenteror
preamplifier.
4.CONTROL
(Thisconnectorisusedwitha MclntoshControlCenterorRemoteControlSystemthatdoes
nothavea CDDATAPORT.)
Connecta 7 pinDINcablefromtheMCD7009DINCONTROLsockettoa matchingDIN
CDCONTROLsocketona MclntoshControlCenterorRemoteControlSystem.TheControl

THEREARPANEL
ANDHOWTO
CONNECT
8.LEFTandRIGHTBALANCEDOUTPUTS
ConnectcablewithXLRtypeBalancedConnectorsfromtheMCD7009LEFTandRIGHTBAL-
ANCEDOUTPUTjackstothebalancedCDorAUXinputjacksofa PreamplifierorControlCenter.
Usingbalancedconnectorsandcablescanreducenoiseandinterferencebyasmuchas
40dB.Thisextranoisereductioncanbea significantimprovement,especiallyifthecablesare
quitelong.IfcablelengthsbetweentheMCD7009andthepreamplifierinputsareshort,(one
meterorless),youwillprobablyfindhighqualityunbalancedcablestobeequallysatisfactory.
YoucanuseboththeBalancedandUnbalancedOutputssimultaneouslyifyoudesire.
BalancedJackPinConfiguration:
Pin1 SystemGround
Pin2 + Output
Pin3 - Output
HOWTOCONNECTFORNORMALAUDIOPLAYBACK
ConnectcableswithRCAconnectorsfromtheLINEOUTL (Left)andR (Right)outputstothe
CDinputsofa ControlCenterorpreamplifier.
HOWTOCONNECTTHEMCD7009DIGITAL
COAXIALOUTPUTTOANEXTERNALDACONVERTER
1.SettheDIGITALOUTSwitch(1)totheONposition.
2.Connecta coaxialcable(RG6orRG59U)fromtheMCD7009COAXIALDIGITALOUTtothe
coaxialinputoftheexternalDAConverter.
3.ConnecttheanalogoutputsoftheDACtotheCDinputsoftheControlCenterorpreamplifier.
HOWTOCONNECTTHEMCD7009OPTICALOUTPUTTOANEXTERNALDACONVERTER
1.SettheDIGITALOUTSwitch(1)totheONposition.
2.RemovetheprotectivecapfromtheMCD7009OPTICALDIGITALOUTconnector.
3.ConnectanOpticalcablefromtheMCD7009OPTICALDIGITALOUTtotheOpticalinput
ofanexternalDAConverter.
4.ConnecttheanalogoutputsoftheDAConvertertotheCDinputsoftheControlCenteror
preamplifier.
HOWTOCONNECTTOOPERATETHEMCD7009
WITHTHEREMOTECONTROLLERFROMA MclNTOSH
REMOTECONTROLSYSTEMORCONTROLCENTERTHATHASNOCDDATAPORT
Connecta ControlCablewithDINconnectors,fromtheMCD7009CONTROL(4)receptacle
tothematchingCDCONTROLconnectorona MclntoshControlCenterorRemoteControl
System.TheControlCenterRemoteControllerwillthenoperatetheMCD7009bysendingIR
signalstotheControlCentersensorandthenontotheCDplayer.Thisconnectionallowsthe
followingfourplayeroperations:PLAY.STOP.NEXTtrackandBACKtrack.A controlcableis
includedwiththeMCD7009.
HOWTOCONNECTTOOPERATETHEMCD7009WITHTHEREMOTECONTROLLERFROM
AMclNTOSHREMOTECONTROLSYSTEMORCONTROLCENTERTHATINCLUDESA CD
DATAPORT.
ConnectaDATAcablefromtheMCD7009DATAIN(5)receptacletotheCDDATAPORTof
aMclntoshControlCenterorRemoteControlSystem.
(Do not connect a DIN Control cable when the DATA IN Is used.)
8

TheDATAINconnectionallowsa MclntoshControlCenterRemotetransmittertooperatea
widerangeoffunctionsontheMCD7009playerfromthemainareaora remotearea.
RefertothedrawingsofthevariousMclntoshhandheldremotecontrollersshowingwhich
pushbuttonsareactiveforcontrollingtheMCD7009.Thedrawingsalsoindicateseveralpush-
buttonsthatperformplayerfunctionsthataredifferentfromthemarkingsontheremote
controller.
AkeypadcanalsobeusedtocontroltheMCD7009ina remotearea.Refertothekeypad
drawingwhichindicateswhichpushbuttonsareactivewiththeMCD7009.
TheMCD7009RemoteControllercanalsobeusedinaremoteareaofanyMclntoshremote
controlsystemtooperatetheplayerbysendingcontrolsignalstoa wallmountedIRsensor.All
theMCD7009RemoteControllerpushbuttonsareactiveinthisconfiguration.
The cable connected from the DATA port uses single conductor shield wire with 1/8" mini
phone plugs. Connections are to the sleeve (-) and tip (+) ofthe plug.
THEREARPANEL
ANDHOWTO
CONNECT
MostoftheoperatingfunctionsoftheMCD7009canbecontrolledwiththefollowingMclntosh
RemoteControllersandkeypad.ThepushbuttonsactivewiththeMCD7009areshadedonthe
drawings.Pleasenotethepushbuttonsthathavespecificfunctionswhenusedwiththe
MCD7009thataredifferentfromthenormalfunctionsofthepushbuttons.
CR10REMOTECONTROL
HOWTO
OPERATE
THE
MCD7009
WITHREMOTE
CONTROLLERS
FROMOTHER
MclNTOSH
REMOTE
CONTROLLED
PRODUCTS
9

MX118/C712REMOTECONTROL
HOWTO
OPERATE
THE
MCD7009
WITHREMOTE
CONTROLLERS
FROMOTHER
MclNTOSH
REMOTE
CONTROLLED
PRODUCTS
C39/MX130REMOTECONTROL
10

C38/C712REMOTECONTROL
HOWTOOPERATE
THE
MCD7009
WITHREMOTE
CONTROLLERS
FROMOTHER
MclNTOSH
REMOTE
CONTROLLED
PRODUCTS
WK-2KEYPAD
11

FRONTPANEL
ANDREMOTE
CONTROLLER
1.OPEN/CLOSE
2.REPEAT
3.STOP
4.PAUSE
5.PLAY
6.DISPLAYWINDOW
A.PROGRAMIndicator
B.TRACKIndicator
C.INDEXIndicator
D.REPEAT/ A-BIndicators
E.TOTAL/ REMAINTimeIndicators
RSINGLEIndicator
G.DELETEIndicator
H.AUTOSPACEIndicator
I.TimeCounter
(Search)
REMOTECONTROLLER
1.NUMERICPUSHBUTTONS,(0-9,+10)
2.DELETE
3.PGM(Program)
4.REPEAT
5.SINGLE
NEXT(TrackSkip)
12
16.FADER
17.PLAY
BACK/
15.
8.PAUSE
9.STOP
10.CLEAR
11.REVIEW
12.AUTOSPACE
13.A-B
14.TIME
7.INDEX
6.
REV(Reverse)/ FF(FastForward)Search
9.POWER
7.
8.
REV(Reverse)/
BACK/ NEXT(TrackSkip)
FF(FastForward)Search

BASICOPERATION
1.PressthePOWERpushbutton
Thefrontpaneltealpushbuttonnomenclaturewillturnon.
2.PresstheOPEN/CLOSEpushbutton.
TheRedLEDabovethepushbuttonstartstoflashandthedisctraywillslideout.Thefrontpanel
displaywillindicate"OPEN"Placea discwithintheguides,onthetraywiththelabelfacingup.
Thereisa recessedareaonthedisctraytoaccommodate3 inch(7.6cm)discs.
3.PresstheOPEN/CLOSEpushbuttonagain.
Thedisctraywillcloseandthefrontpaneldisplaywillindicate"CLOS".TheRedLEDabovethe
pushbuttonwillturnon,toindicatea discisloaded.ThisLEDwillstayonaslongasa discisin
thetrayorplaying.
Theaboveinformationisdisplayed.
Severalsecondslater,theMCD7009entersthestandbymode.
4.PRESSTHEPLAYBUTTON
Discplaybackstartsfromthefirsttrack.
CAUTION
Do not force the tray by hand during opening and closing operations.
Do not leave the disc tray open when the MCD7009 is not in use to prevent dirt and dust
from entering the mechanism.
EVENIFTHEDISCTRAYISOPEN
DIRECTACCESSPLAY:
Bypressingthenumericbuttonscorrespondingtotherequiredtrack,thetraywillclose
andplaystartsfromthespecifiedtrackdirectly,withoutyourhavingtopresstheplaybutton.
Example1
Toplaythe5thtrack:
Press
WHENTHEPLAYBUTTONISPRESSED
Thedisctraywillcloseandplaybackstartsfromthefirsttrack.
WHENTHEPAUSEBUTTONISPRESSED
ThetraywillcloseandtheMCD7009willenterthepausemodeatthebeginningofthe
firsttrack.TheRedLEDabovethePAUSEpushbuttonwillturnontoindicatethepausemode
isineffect.
TOSTOPPLAYBACK
Pressthestopbutton.TheMCD7009entersthestopmode.
13
HOWTO
OPERATE
Example2
Toplaythe21sttrack:
Press
twice,then

HOWTO
OPERATE
TOUNLOADTHEDISC
Presstheopen/closebuttononthefrontpanel;playbackstopsandthedisctraywillslideout,
andallfunctionsareresettotheirinitialsettings.
TOTEMPORARILYSUSPENDPLAYBACK(PAUSEMODE)
Pressthepausebutton.PlaybackstopsatthecurrentpositionandtheRedLEDabovethe
PAUSEpushbuttonturnson.Toresumeplaybackfromthesameposition,presstheplaybutton
orpausebuttonagain.
SINGLEPLAYBACK
1.Pressthesinglebutton.TheSINGLEindicatorwilllightinthedisplay.
2.Pressthenumericbuttonscorrespondingtotherequiredtrack.
3.A singletrackwillbeplayedback,afterwhichtheMCD7009willenterthestopmode.To
releasethesinglemode,pressthesinglebuttonagain.
PROGRAMPLAYBACK
Theprogramplaybackfunctionallowsyoutoprogramupto20tracksforplaybackinany
desiredorder.
PROGRAMMINGREQUIREDTRACKS
Example:
4.Presstheplaybutton.
Programmedplaybackstartsfromthefirstprogrammedtrack,the2ndtrackonthedisc.
Whenthistrackisfinished,theMCD7009skipstothe15thtrackwhichhasbeenstoredas
thesecondtrackintheprogram,etc.
Theprogrammedcontentswillbeheldinmemoryevenafterprogrammedplaybackhas
beencompletedorwhenprogrammedplaybackisstoppedbypressingthestop(•)button.
Whenthestopbuttonispressedinthestopmode,thecontentsoftheprogramarerelased.
Toreleasetheprogrammode,presstheprogrambuttonagain.
Duringprogramplayback,theTOTALREMAINtimedisplayshowsthetotalremainingtime
oftheprogrammedtracks,fromthecurrentposition.
14
tocancelit.
3.Pressthenumericbuttonsinthefollowingorder:
Ifthe
buttonispressedbymistake,presstheclearbuttonontheremotecontrol unit
1.Pressthestopbutton.
2.Presstheprogrambutton.
ThePROGRAMindicatorlightsinthedisplay.
Toprogramtracksintheorderinthestopmode.

Iftrackswithnumbershigherthan20areprogrammed,eithertheREMAINtimeorTOTAL
REMAINtimemaynotappearinthedisplay.
Intheplaybackmode,presstheprogrambutton.Thecurrenttrackwillbeprogrammed
asfirsttrack.
REVIEWINGTHEPROGRAMMEDCONTENTS
Theprogrammedcontentscanbereviewedeasilyusingthereviewbutton.Pressthereview
button;thedisplaywillshowthedetailsofthefirstprogrammedtrack.Toreviewthedetails
of thesecondtrack,pressthereviewbuttonagain.Eachtimethereviewbuttonis pressed,
thedisplayshowsthedetailsofthenextprogrammedtrack.
HOWTO
OPERATE
Whenreviewingtheprogammedcontents,thetotalprogramplaybacktimeisdisplayed
regardlessofthetimemodeindication.
Ifthetotalplaybacktimeexceeds100minutes,the10'sdigitoftheminutesdisplaywill
showoneofthefollowingcodes:
Theaboveexample,therefore,shows102minutes30seconds.
Ifthetotalprogramtimeexceeds150minutes,therewillbenocode.Whenplaybackstarts,
theminutesdisplaywillshowa numberwhichisthetotalprogramplaybacktimeminus160.
CHANGINGTHEPROGRAM
Afterprogrammingiscomplete,unnecessarytrackscanbedeletedfromtheoriginalpro-
gramornewtrackscanbeaddedaftera trackoriginallyprogrammed,inthefollowingway.
DELETION
EXAMPLE:
Withtheoriginalprogramsetasfollows;
Todeletethe"15"fromtheaboveprogram:
1.WiththePROGRAMindicatorlit,pressthe
reviewbuttonrepeatedly.
TheTRACKindicatorwillshow"15".
ProgramNo.
Presstwice.
TrackNo.tobedeleted
15

2.Presstheclearbutton.
TheTRACKindicatornowshowsthenexttracknumber
"10",toshowthat"15"hasbeendeleted.
Todeleteotherunnecessarytracks,repeatsteps1 and
2above.
ADDITION
1.WhenthePROGRAMindicatorislit,pressthereviewbuttontoindicatethetracknumber
inthedisplay.
2.Toaddnewtrackstoa program,inputthetracknumberusingthenumericbuttons(this
canevenbedoneafterstartingprogrammedplayback);thetrackisaddedaftertheindicated
trackwhichwaspreviouslyprogrammed.
TOPROGRAMA "PAUSE"ATA DESIREDPOINTIN
THEPROGRAM(PAUSEPROGRAM)
A"Pause"canalsobeprogrammedintheprogrammemorytostopprogrammedplayback
inthemiddle.Thisfunctionisconvenientwhenyouhavetoturna cassetteoverwhenrecord-
inga CDontobothsidesofthecassette.
Example
Toprograma "Pause"between3rdand4thtunes:2
1.Programthetracks"2","15"and"10"inorder.
2.Pressthepausebutton.
"PA"willappearinthetracknumberdisplaywith
theprogramnumber"4".Thisshowsthatthe"PA"
code(designatinga "Pause")isprogrammedasthe
fourthprogram.
3.Programthefollowingtrack"8".
Inthiscase,thetimedisplayshowsthetotalplaybacktimeofthetracksafterthe"PA"code.
Whenplayedback,programmedplaybackwillbesuspended(stoppedtemporarily)after
track"10"isfinished.Torestartprogramplayback,presstheplaybutton.
Duringprogramplayback,whenthe"PA"codeisprogrammed,theTOTALREMAINindicator
showsthetotalremainingtimeuptothepointatwhichthe"PA"codeisprogrammed.In
thiscase,whenprogramplaybackisrestarted,theTOTALREMAINindicatorwillshowthe
totalremainingtimetotheendoftheprogram.
Morethantwo"PA"codescanbeprogrammedinoneprogram,however,itisimpossible
toprograma "PA"codeimmediatelyaftera previouslyprogrammed"PA"code.
DELETEPROGRAMMING
Thisistheoppositetonormalprogramming,andisusedtoprogramtrackswhicharenot
tobeplayed.Useitwhentherearetracksonthediscyoudon'twanttolistento.
16
8.
PAUSE
10
15
HOWTO
OPERATE

Tracknumber
Orderinthememory
Totalplaybacklimewithout
Tracknumber'5'
1.Pressthedeletebutton.
Thedisplayshowsthetotalnumberoftracks
andtotalplaybacktimeofthedisc.
2.Pressthenumericbuttonscorrespondingto
thetracknumberswhichyoudon'twanttolisten
tointhesamewayasinnormalprogramming.
Tospecifymoretracksthatarenottobeplayed,
presstheirnumericbuttons.Thenumbersof
tracksthathavebeendeletedcanbecheckedor
correctedbythesameprocedureasinnormal
programming.
Iftheprogramincludestracknumber"21"or
later,thetotalplaybacktimeisnotindicated.
3.Iftheplaybuttonispressed,playbackofthetracksexceptforthetrack(s)thathavebeen
"deleted"willstart.
Deleteprogrammingcanalsobeengagedduringthenormalplaybackmode.
Whenthedeletebuttonispressedduringplayback,thetrackcurrentlyplayingisnotdeleted.
REPEATFUNCTION
Therepeatfunctionallowsrepeatplaybackofanysingletrack,theentiredisc,orofany
desiredportiononthediscdesignatedbytwo(startandend)points.
TOREPEATONETRACK(Singlerepeatmode)
1.Pressthesinglebuttonandrepeatbutton.
TheSINGLEandREPEATindicatorslight.
2.Pressthenumericbuttonscorresponding
totherequiredtrack.
Theselectedtrackisplayed,thenwhentheend
ofthetrackisreached,theplayerwillreturnto
thebeginningofthetrackandplaybackstartsagain.Inthisway,theselectedtrackwillbe
playedbackrepeatedly.
Singlerepeatplaycanalsobeengagedduringplayback.
TOREPEATANENTIREDISC(Allrepeatmode)
1.Presstherepeatbutton.
TheREPEATindicatorlights.
2.Presstheplaybutton.
Playbackstartsand,whentheendofthedisc
isreached,theplayerwillreturntothebeginningofthefirsttrack,andthenplaybackcon-
tinuesrepeatedly.
Allrepeatplaycanalsobeengagedafterplaybackhasstartednormally,bypressingthe
repeatbutton.
HOWTO
OPERATE
17

1.Pressthenumericbuttonsortheplaybutton
2.Designatethepointatwhichplaybackshould
start(pointA)bypressingtheA-Bbutton.
TheREPEATindicatorlightsandtheA-Bindicator
blinkstoshowthatpointA hasbeenentered.
3.Whentheportionatwhichrepeatplaybackshouldendisreached,presstheA-B
buttonagaintodesignatepointB.
TheA-Bindicatorischangedtolightsteadily
toshowthattheA-Brepeatfunctionhasbeen
activated.
TheMCD7009automaticallyreturnstopointA
andrestartsplayback.
fromthebeginningofthattrack.
18
TOSKIPTOTHENEXTTRACK
Whenthe
nexttrack.
Eachtimethebuttonispressed,thepickupskipsforwardbyonetrackandplaystarts
button ispressedduringplay,thepickupwillskiptothebeginningofthe
buttonsduringplaybackorinthepausemode.ThisoperationisindicatedclearlyintheTRACK
display.
BACK/NEXT
and
Thebeginningofany trackcanbeeasilylocatedusingthe
MUSICSEARCHUSINGBUTTONS(BACK/NEXT)
MUSICSEARCHOPERATION
Anyoftherepeatfunctionscanbereleasedbypressingtherepeatbuttonagain,sothat
theREPEATindicatorgoesoff.Ifthisisdoneduringplayback,theMCD7009willcontinue
normalplayback.
Torepeatalltheprogrammedtracks,pressthe
repeatbutton.
WhenthesinglebuttonispressedONduring
programmedrepeatplayback,thetrackcurrent-
lyplayingwillbeplayedbackrepeatedly.Inthat
case,theoriginalprogramwillbeerased.
PROGRAMMEDREPEATPLAYBACK
Repeatfunctioncanbeactivated evenintheprogrammedplaybackmode.
Duringprogrammedplaybackorinthe"deleteprogram"playmode,theblockrepeatfunc-
tionispossibleonlywithinonetrack.
WhentheA-Bbuttonispressedagainduringblockrepeatplay,blockrepeatplaybackwill
bereleased.
buttonin-
AfterdesignatingpointA,whenquicksearchingpointB,usethe
steadofplayingbacknormally.
WhenplayreachespointB,theMCD7009returnstopointA andstartsplaybackagain,
repeatedly.
HOWTO
OPERATE
TOREPEATA DESIGNATEDSECTION(A-B
repeatmode)

Thisoperationispossibleevenintheprogram
playbackmode.Howeveronlyprogrammedtracks
willbedetected.
HOWTO
OPERATE
ispressedinthemiddleofa track,theMCD7009willskipbacktothebeginningofthecur-
renttrack.Tomakeitskipbacktotheprevioustrack,thebuttonmustbepressedtwice.
Inthisway,theMCD7009canbereturnedtothebeginningofthefirsttrackonthedisc.
Thisoperationispossibleevenintheprogram
playbackmode.However,onlyprogrammed
trackswillbedetected.
MUSICSEARCHUSINGREVANDFFBUTTONS(SEARCH)
Duringplaybackorinthepausemode,holddownthe
tionquicklyintheforwarddirection,andholddownthe
reversedirection.
buttontomovetheplayingposi-
buttontomovequicklyinthe
19
TOSKIPBACKTOTHEPREVIOUSTRACKPRESSTHE
BUTTON.
TheMCD7009willskipbackonetrackeachtimethebuttonispressed.Ifthisbutton

1.Selecttherequiredtrackwithinwhichthe
desiredIndexcodeisencoded,usingthe
numericbuttons.
buttonuntilthedesiredIndexnumberappearsinthe
toincreasetheINDEXnumber,and
decreasetheINDEXnumber.
DIRECTINDEXSEARCH
Afterselectinga requiredtracknumberusingthe
inthestopmode,selecttherequiredindexnumber
startsfromtheselectedindexpoint.
TIMECOUNTERDISPLAY
Thetimecountershowsvarioustimereadouts,
asfollows.First,whenthedisctrayisclosedwith
thediscloaded,thetotaldiscplaybacktime©
willbedisplayedforseveralseconds.
20
button.Playback
button withtheMCD7009
or
usingthe
or
HOWTO
OPERATE
Duringthemanualsearchoperation,soundwillbeaudiblebuttheoutputlevelwillbe
lowered.Thisletsyousearchforanyrequiredportionwhilecheckingthesound.
Whenthedesiredpositionisreached,releasethebuttontoreenterthepreviousmode.
Duringthenormalplaymode(orintheprogrammedplaybackmode),whentheMCD7009
reachestheendofthedisc(orprogram)afterthebuttonhasbeenpressed,theMCD7009
entersthepausemodewhereaswhentheMCD7009reachesthebeginningofthedisc(or
program)afterthe
Inthesinglerepeatmode,holdingthe
withinthecurrenttrack.
button hasbeenpressed,theMCD7009enterstheplaybackmode.
buttonwillmovetheplayingposition
or
or
buttonwillmovetothenextor
Intheprogramplaybackmode,holdingthe
previousprogrammedtrack,respectively.
INDEXSEARCH
IndexSearchispossibleusingtheindex
toanydesiredpointsonthediscswhere
and
buttons.Thisallowsdirectaccess
INDEXcodeshavebeenencoded.
TheMCD7009skipstotheselectedINDEXpointandplaybackstartsfromthepointatwhich
thedesignatedIndexcodeisencoded.
IftheIndexnumberdesignatedexceedsthehighestIndexnumberintheselectedtrack,
playbackwillbeginfromtheportionwiththehighestIndexnumberinthetrack.
WhiletheMCD7009searchesthedesisgnatedIndexpoint,thetimecounterdisplaysno
timeinformation.Duringthisinterval,nocontrolbuttonsexceptforthestopandtheopen/close
buttonscanbeengaged.
DIRECTTRACKSEARCH
stopmode.Pressingtheplay
selectedtrackandplayit.orpause
Selecta requiredtracknumberusingthe
or
buttonallowstheMCD7009tosearchthe
buttonwiththeMCD7009inthe
or
2.Presstheindex
INDEXdisplay.
to
Press
press
Other McIntosh CD Player manuals

McIntosh
McIntosh MCD12000 User manual

McIntosh
McIntosh MCD301 User manual

McIntosh
McIntosh MCT80 User manual

McIntosh
McIntosh MCD201 User manual

McIntosh
McIntosh MCD201 User manual

McIntosh
McIntosh MCD751 User manual

McIntosh
McIntosh MCT500 User manual

McIntosh
McIntosh MCD301 User manual

McIntosh
McIntosh MCD85 User manual

McIntosh
McIntosh MCD550 User manual

McIntosh
McIntosh MCD350 User manual

McIntosh
McIntosh MCD 7007 User manual

McIntosh
McIntosh MCD205 User manual

McIntosh
McIntosh MCD 7005 User manual

McIntosh
McIntosh MCD301 User manual

McIntosh
McIntosh MCD205 User manual

McIntosh
McIntosh MCD500 User manual

McIntosh
McIntosh C100 User manual

McIntosh
McIntosh MCD1100 User manual

McIntosh
McIntosh MCD600 User manual