Mechatronix COOLSTACK MAX User manual

COOLSTACK®
Installation Manual
Version 2022Mar_TW

EMAIL horti@mechatronix-europe.com
CoolStack® Installation Manual | Version 2022Mar_TW
Page 1
EMAIL horti@mechatronix-asia.com
www.horti-growlight.com
MANUAL FOR INSTALLER
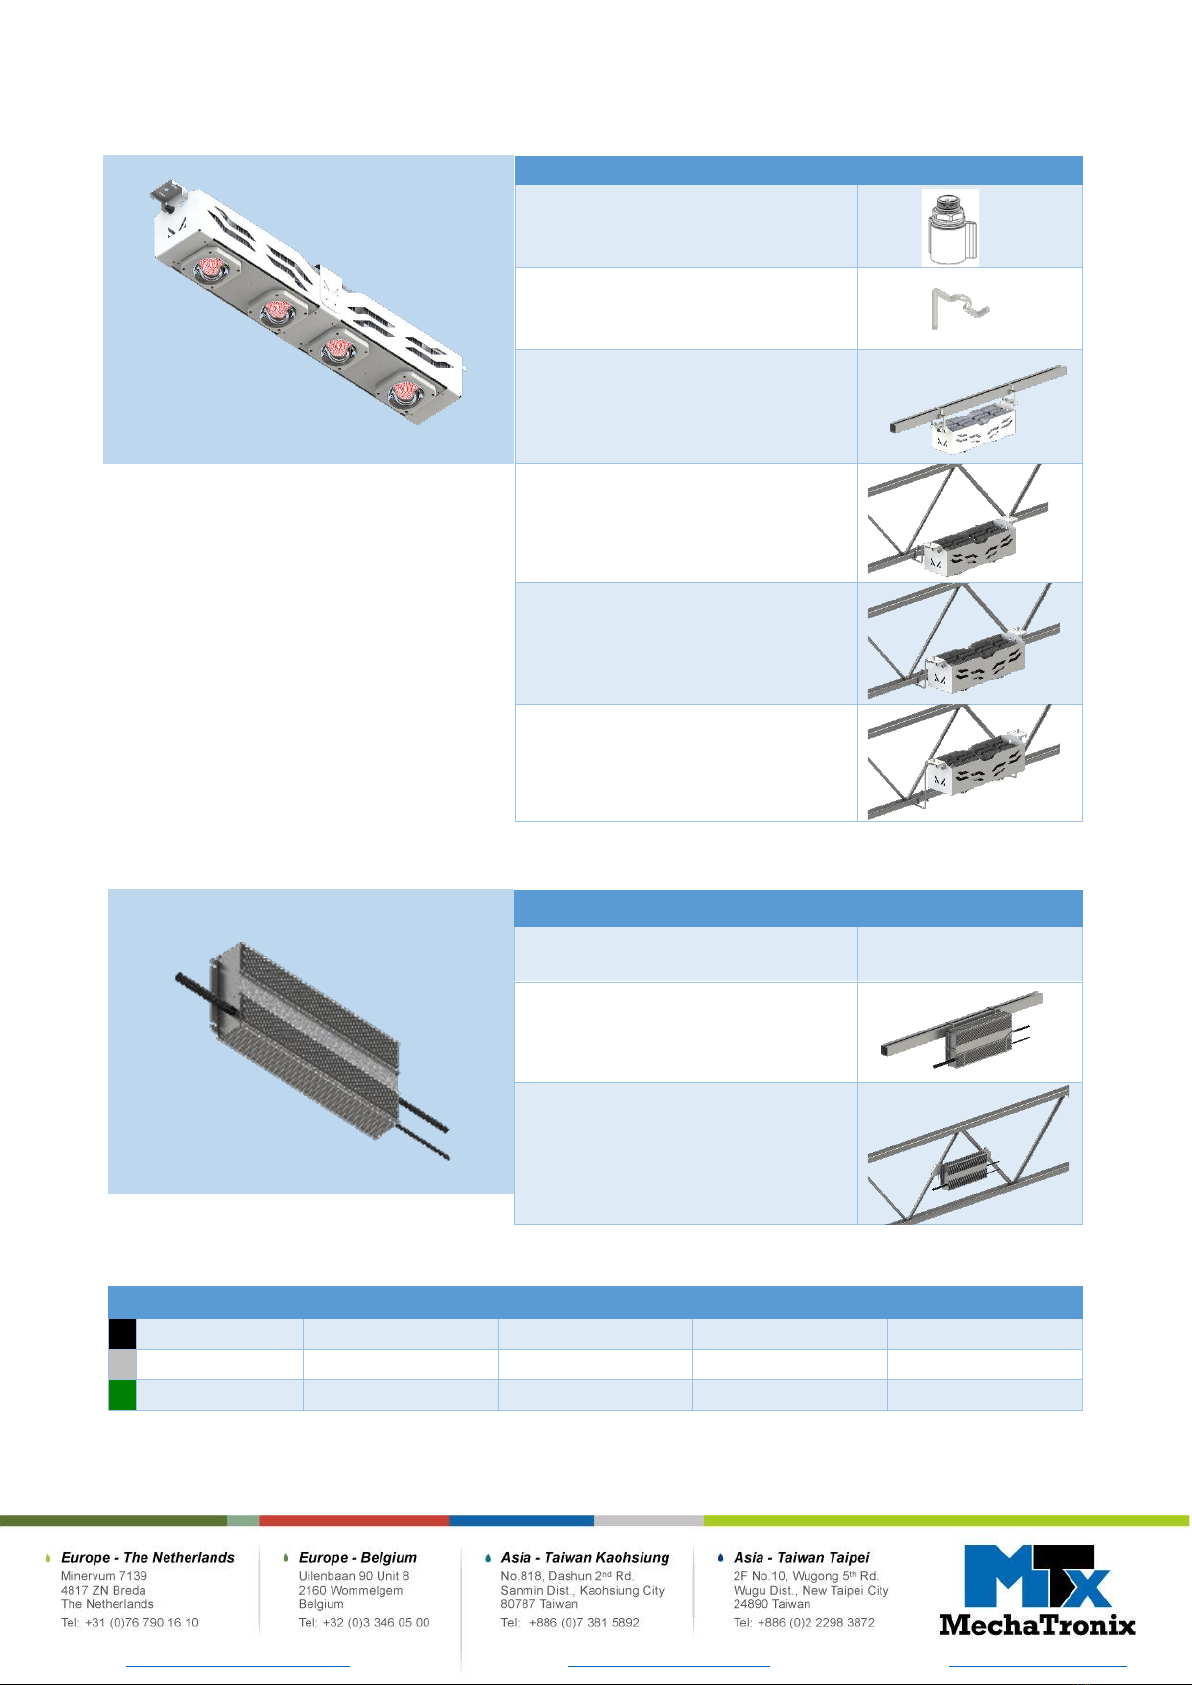
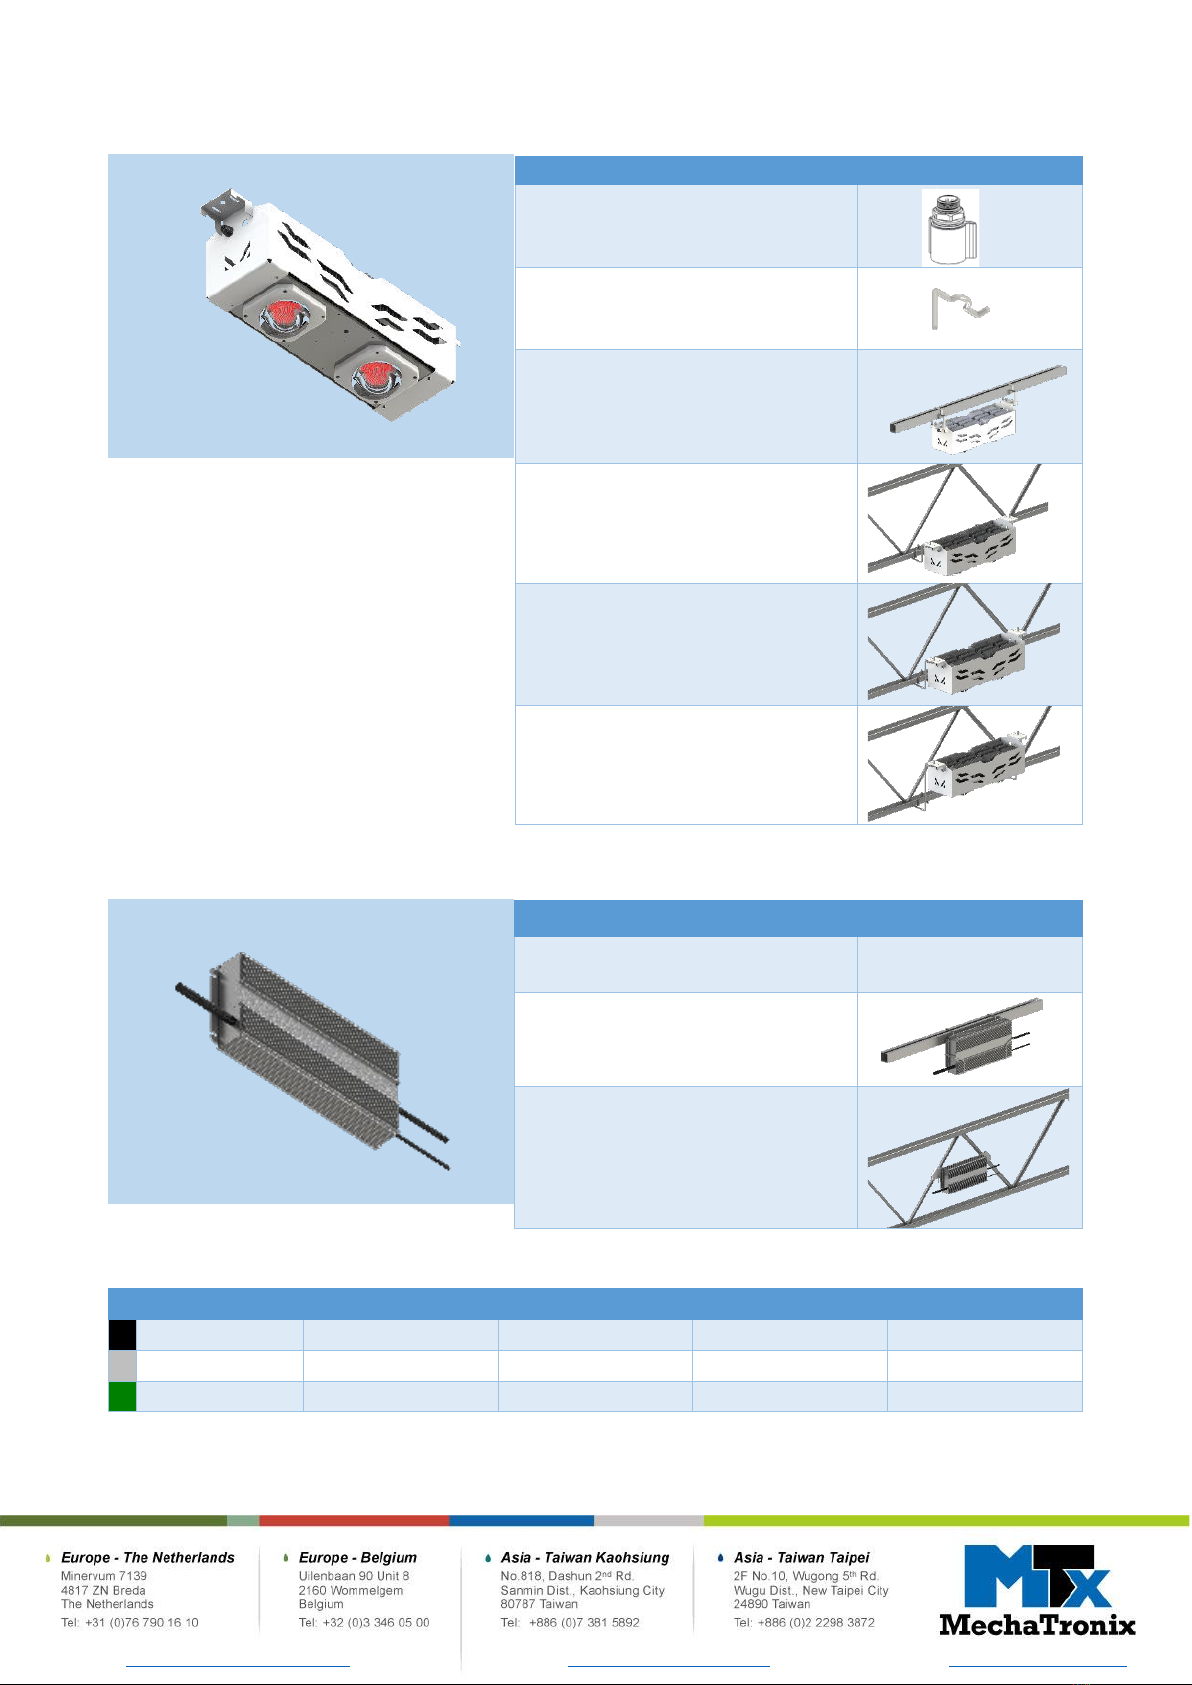
This manual contains all the information required for COOLSTACK®MAX, COOLSTACK® BOOST
and COMPACT. Please read through this information carefully before you start installing the
system.
This manual is intended for the installer for COOLSTACK®MAX, COOLSTACK® BOOST and
COMPACT product. Keep this manual safe for operation reference.
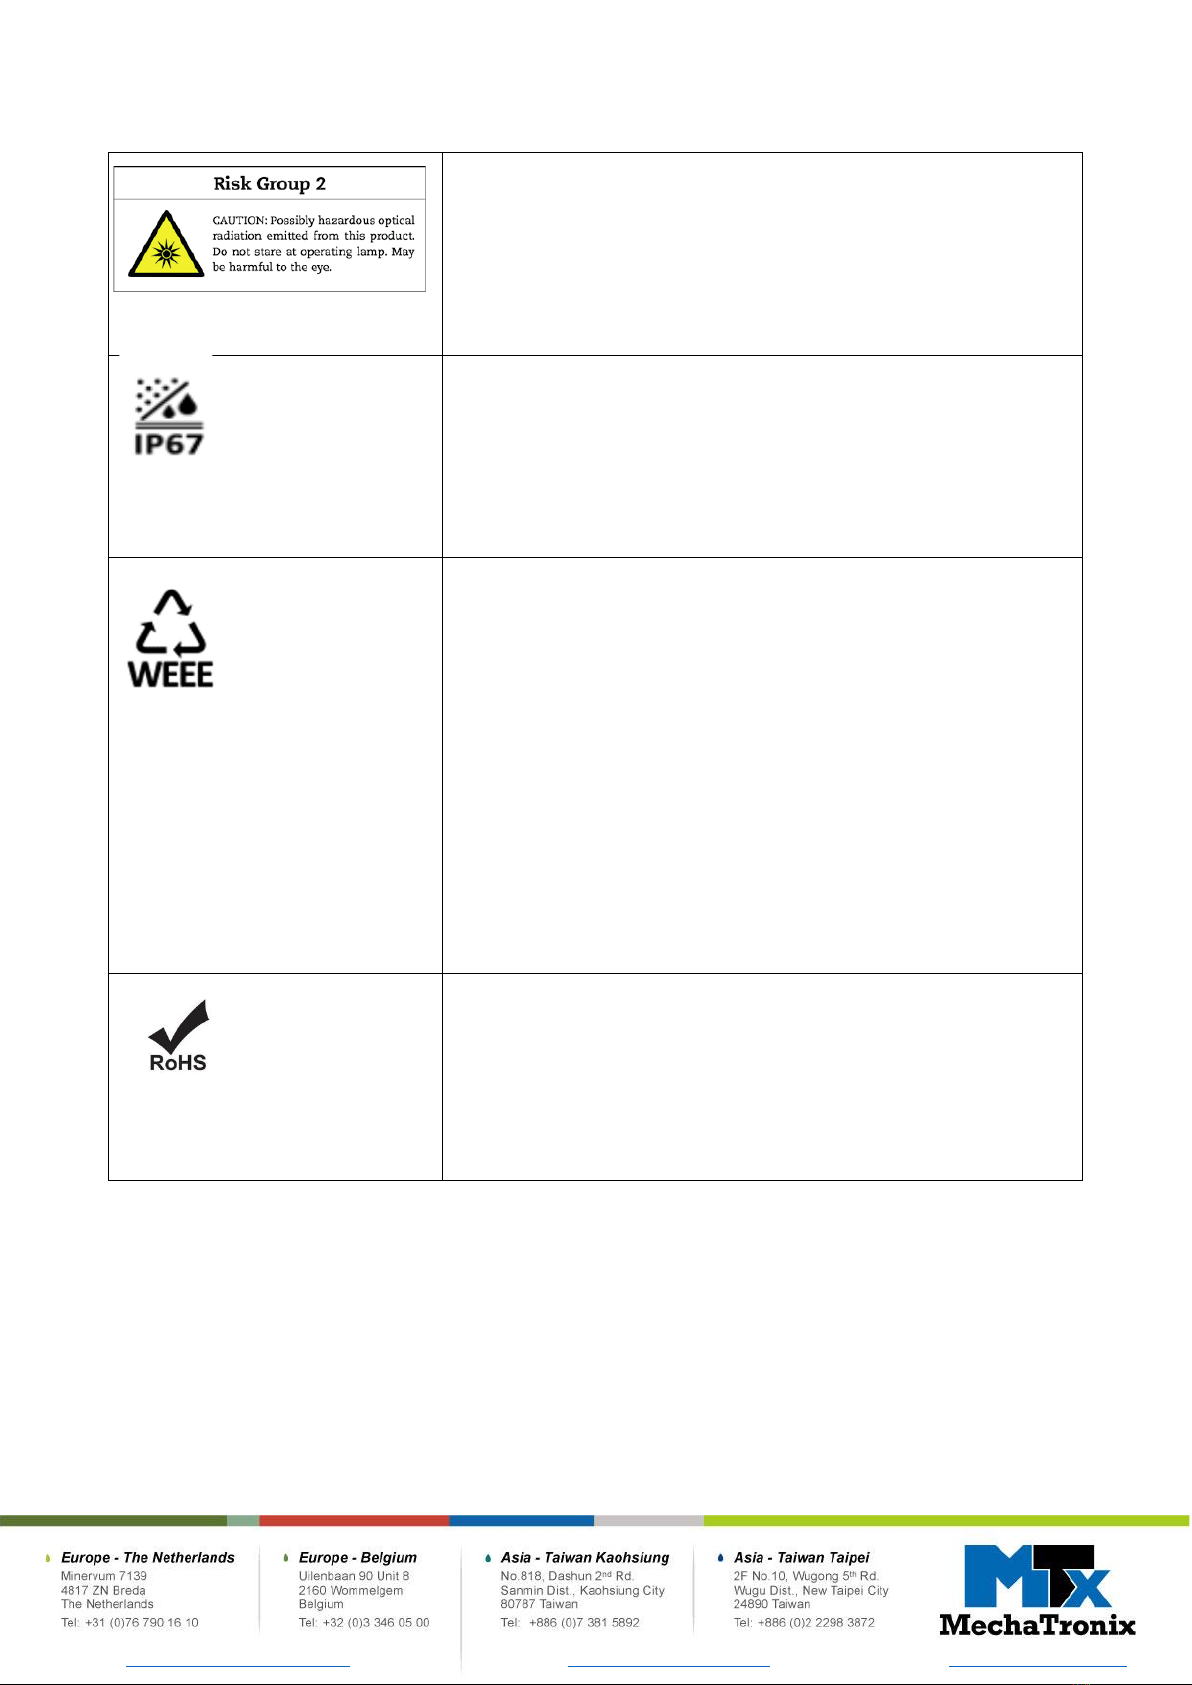
COOLSTACK®MAX, COOLSTACK® BOOST and COMPACT is compliant to the following standards:
CE
-Waste from Electrical and Electronic Equipment (WEEE)
-Restriction of Hazardous Substances (RoHS) Directive 2011/65/EU
-Low Voltage Directive (LVD) 2014/35/EU
(EN60598-1/ EN60598-2-1/ EN62778)
-Electromagnetic Compatibility Directive (EMC) 2014/30/EU
(EN 55015:2019/ EN 61547:2009/ EN IEC 61000-3-2:2019/ EN 61000-3-3:2013+A1:2019)
UL
-CUL/UL 8800
Design Lights Consortium™ (DLC)
-Ver 5.0
General
-Ingress Protection Code (IP67)

EMAIL horti@mechatronix-europe.com
CoolStack® Installation Manual | Version 2022Mar_TW
Page 2
EMAIL horti@mechatronix-asia.com
www.horti-growlight.com
Contents
Introduction =Page 3=
-Product description
-Order contents
-Symbols used on the product.
Specifications =Page 8=
-Product Dimensions
-Technical Specifications
Installation =Page 9=
-Preparation: COOLSTACK® Lamps Direction
-COOLSTACK® MAX/ COOLSTACK® BOOST Installation Procedures --On C-profile
-COOLSTACK® MAX/ COOLSTACK® BOOST Installation Procedures --On Trellis
-COOLSTACK® COMPACT Installation Procedures --On C-profile
-COOLSTACK® COMPACT Installation Procedures --On Trellis
-Precautions
Maintenance, Environmental and Disposal =Page 19=
-Maintenance
-Use of cleaning agents, crop protection products and other chemicals
-Cleaning the COOLSTACK® products

EMAIL horti@mechatronix-europe.com
CoolStack® Installation Manual | Version 2022Mar_TW
Page 3
EMAIL horti@mechatronix-asia.com
www.horti-growlight.com
Introduction
Product Description
The market leading COOLSTACK® grow lights offer you precisely what you need!
The choice between multiple power and light levels up to a PPF of 4230μmol/s guarantee you an
optimal balance between the number of lamps you need to install, a minimal investment cost and a
perfect light distribution.
Our research team has developed a multitude of light spectra from full spectra for grow rooms to
dedicated narrow band spectra for vegetable production, young plants, germination and each specific
process in plant growth what needs to be optimized.
With over two hundred hectares of installed lamps in greenhouses and grow rooms, the COOLSTACK®
became the reference for LED top lights in Europe and gained the trust of many leading growers around the
world.

EMAIL horti@mechatronix-europe.com
CoolStack® Installation Manual | Version 2022Mar_TW
Page 4
EMAIL horti@mechatronix-asia.com
www.horti-growlight.com
Order Contents: COOLSTACK® MAX
Driver: ESM-1K2S525Mx
Power Input Connector (Wieland; Other type of connectors or connections can be done on specific request.)
Color of coding
Application
Marking of Poles
Female Art. #
Male Art. #
Black
250V with PE
L, N, PE
96.031.4053.1
96.032.4053.1
Light Grey
250V with PE
L, N, PE
96.031.4053.0
96.032.4053.0
Leaves green
250/400V with PE
1, 2, PE
96.031.4055.7
96.032.4055.7
Options
Image
COOLCONTROLS® PRO MESH
Secure pin
COOLSTACK® C-PROFILE HOOK:
Standard
COOLSTACK® TRELLIS HOOK:
Low
COOLSTACK® TRELLIS HOOK:
High
COOLSTACK® TRELLIS HOOK:
Extra High
Driver options
Image
COOLSTACK® C-PROFILE
MOUNTING: Screws-Side mount
COOLSTACK® C-PROFILE HOOK
COOLSTACK® TRELLIS HOOK

EMAIL horti@mechatronix-europe.com
CoolStack® Installation Manual | Version 2022Mar_TW
Page 5
EMAIL horti@mechatronix-asia.com
www.horti-growlight.com
Order Contents: COOLSTACK® BOOST
Driver: ESM-1K2S740Mx
Power Input Connector (Wieland; Other type of connectors or connections can be done on specific request.)
Color of coding
Application
Marking of Poles
Female Art. #
Male Art. #
Black
250V with PE
L, N, PE
96.031.4053.1
96.032.4053.1
Light Grey
250V with PE
L, N, PE
96.031.4053.0
96.032.4053.0
Leaves green
250/400V with PE
1, 2, PE
96.031.4055.7
96.032.4055.7
Options
Image
COOLCONTROLS® PRO MESH
SECURE PIN
COOLSTACK® C-PROFILE HOOK:
Standard
COOLSTACK® TRELLIS HOOK:
Low
COOLSTACK® TRELLIS HOOK:
High
COOLSTACK® TRELLIS HOOK:
Extra High
Driver options
Image
COOLSTACK® C-PROFILE
MOUNTING: Screws-Side mount
COOLSTACK® C-PROFILE HOOK
COOLSTACK® TRELLIS HOOK

EMAIL horti@mechatronix-europe.com
CoolStack® Installation Manual | Version 2022Mar_TW
Page 6
EMAIL horti@mechatronix-asia.com
www.horti-growlight.com
Order Contents: COOLSTACK® COMPACT
Driver: ESM-680S560Mx
Power Input Connector (Wieland; Other type of connectors or connections can be done on specific request.)
Color of coding
Application
Marking of Poles
Female Art. #
Male Art. #
Black
250V with PE
L, N, PE
96.031.4053.1
96.032.4053.1
Light Grey
250V with PE
L, N, PE
96.031.4053.0
96.032.4053.0
Leaves Green
250/400V with PE
1, 2, PE
96.031.4055.7
96.032.4055.7
Options
Image
COOLCONTROLS® PRO MESH
SECURE PIN
COOLSTACK® C-PROFILE HOOK:
Standard
COOLSTACK® TRELLIS HOOK:
Low
COOLSTACK® TRELLIS HOOK:
High
COOLSTACK® TRELLIS HOOK:
Extra High
Driver options
Image
COOLSTACK® C-PROFILE
MOUNTING: Screws-Side mount
COOLSTACK® C-PROFILE HOOK
COOLSTACK® TRELLIS HOOK

EMAIL horti@mechatronix-europe.com
CoolStack® Installation Manual | Version 2022Mar_TW
Page 7
EMAIL horti@mechatronix-asia.com
www.horti-growlight.com
Symbols on the product
Photobiological hazard
Group 2 (moderate risk) —Lamp does not pose a hazard due to the
aversion response or thermal discomfort.
Dust Tight: No ingress of dust
eImmersion, up to 1 meter (3 ft 3 in) depth: Ingress of water in harmful
quantity shall not be possible when the enclosure is immersed in water for
30min. (up to 1 meter (3 ft 3 in) of submersion).
The symbol on the material, the accessories or packaging
indicates that this lamp may not be treated as domestic waste.
Dispose of the equipment through a recycling center that
handles electronics and electrical appliances within the EU and in
other European countries which use separate collection systems
for used electronics and electrical appliances. By disposing of the
equipment in the proper way, you will be helping to prevent
potential risks to the environment and public health, which might
otherwise be caused by improper handling of the discarded
equipment. Recycling of materials contributes to the conservation
of natural resources. Therefore, do not discard your old electrical
and electronic equipment via the domestic waste.
All components are RoHS compliant products.

EMAIL horti@mechatronix-europe.com
CoolStack® Installation Manual | Version 2022Mar_TW
Page 8
EMAIL horti@mechatronix-asia.com
www.horti-growlight.com
Specifications
Product Dimensions
COOLSTACK® MAX & COOLSTACK® BOOST COOLSTACK® COMPACT
Technical Specifications
Item
COOLSTACK®MAX
COOLSTACK®BOOST
COOLSTACK®COMPACT
Optical
Lens coating
AR
AR
AR
Electrical
Power consumption
(recipe/current dependent)
950~1250W
900~1030W
520~710W
Supply voltage
277~480Vac
277~480Vac
277~480Vac
Supply frequency
47~63Hz
47~63Hz
47~63Hz
Power factor
0.96~0.99
0.96~0.99
0.96~0.99
Inrush current
≤20A
≤20A
≤20A
Inrush time
<2.7ms
<2.7ms
<2.7ms
Earth Leakage Current
<0.7mA @UL8750
480Vac/60Hz
<0.7mA @UL8750
480Vac/60Hz
<0.75mA @UL8750
480Vac/60Hz
Environment
Storage Condition
-30 ~ 70 °C
-30 ~ 70 °C
-30 ~ 70 °C
Operating Ambient
Condition
-20°C to 35°C / 95%
RH
-20°C to 35°C / 95%
RH
-20°C to 35°C / 95% RH
Cooling
Passive
Passive
Passive
Ingress Protection
IP67
IP67
IP67
Physical
Lamp Dimension
1120x170x209.5
1120x170x209.5
635x170x209.5
Net Weight
(Driver included)
15.6kg
15.6kg
8.9kg

EMAIL horti@mechatronix-europe.com
CoolStack® Installation Manual | Version 2022Mar_TW
Page 9
EMAIL horti@mechatronix-asia.com
www.horti-growlight.com
Lamp above pathway
Lamp near wall
Lighting area
Lighting area
Installation Preparation:
COOLSTACK® Lamp Direction
The market leading COOLSTACK® Lamps are
effectiveness driven design. Two shapes of light are
provided to give the best coverage over the crops. The
COOLVIEW® HC Lens spread light evenly over crops,
while COOLVIEW® HCP provides side focused light for
lamps located above pathway or near wall side.
COOLVIEW® HC Lens
For lamps installation above crops.
COOLVIEW® HCP Lens
For lamps installation above pathway or near the wall side location.
Lens type description on product box
label:
COOLVIEW® HCP Lens Lighting Scenario
Pathway
Wall
Pointing to pathway / wall
Pointing to crop
DC Input
Connector

EMAIL horti@mechatronix-europe.com
CoolStack® Installation Manual | Version 2022Mar_TW
Page 10
EMAIL horti@mechatronix-asia.com
www.horti-growlight.com
Installation:
COOLSTACK® MAX / BOOST on C-profile
C-Profile Mounting Step
Step. 1 -Hooks
Slide the C-profile hooks from top to bottom over
the C-profile.The distance between two hook is
110mm. Maximal C-profile width for standard
hook is 50mm. Maximal C-profile height for
standard hooks = 75mm, If your C-profile excess
these sizes width 50mm or height 75mm please
contact us for customized hooks.
Step. 2 Lamp on hooks
Hang the lamp onto the hooks and fine-tune its
position.
Step. 3A Driver mounting (Standard)
Install Install the driver beside the lamp with self
tapping screws. Properly position it before fixing it
on the c-profile bar.
Step. 3B Driver mounting (Hooks, optional)
Slide driver into wire hook while bending it to
align one hole (on dirver), guide the other end of
wire hook into the other driver hole.
Place the driver and hook onto C-profile.
Check the driver connection status and make sure
the driver is not connected to the outer electric
supply source before going to the next steps
Step. 4 Driver to lamp connection
Mount the driver output cable (910mm) to the
lamp input.
Tighten the connector by turning the lock
clockwise.
Driver
Lamp
-
8
Hook
pin
thru
this
hole

EMAIL horti@mechatronix-europe.com
CoolStack® Installation Manual | Version 2022Mar_TW
Page 11
EMAIL horti@mechatronix-asia.com
www.horti-growlight.com
Step. 5 Add CoolControls Mesh antenna
(Optional)
Push theCoolControls Mesh antenna on the
controls output connector from the driver.
Tighten by turning the lock from the cable
connector clockwise.
DO NOT twist the cable during locking as internal
wiring might break.
Step.6 Connect to AC mains
Connect the driver AC input connector (cable
length: 630mm) to the mains supply. When the
lamp is foreseen from the CoolControls Mesh
antenna, the lamp will blink.

EMAIL horti@mechatronix-europe.com
CoolStack® Installation Manual | Version 2022Mar_TW
Page 12
EMAIL horti@mechatronix-asia.com
www.horti-growlight.com
Installation: COOLSTACK® MAX / BOOST
on V-shape Trellis
V-shape Trellis Mounting Step
Step. 1 Hooks
Install the standard trellis hooks on the trellis, the
distance between two hooks is 105cm.
Hold the hook parallel with the trellis and rotate
90 degrees to clamp.
The ends of the hook have to point inwards
towards each other.
For greenhouses with solar screens, point the
hooks towards the direction of the screen so the
lamp will hang partially under the screen –this
avoids shadow on the crops.
There are 3 standard heights of hooks, which will
determine how high the position of the lamp
towards the trellis will be.
COOLSTACK® TRELLIS HOOK (LOW->HIGH->EXTRA HIGHT)
Step. 2 Lamp on hooks
Hang the lamp on the hooks by sliding in the end
of the hook into the lamp fixation cutout on the
sides.
The design of the hooks and the lamp is made self
calibrating so automatically the lamp will hang
horizontal perfectly.
Step. 3 Driver on trellis
Place the driver flat against the reverse V-trellis
bars and slide down.
Make sure the driver mounting plates are securely
clamped over the bars.
The standard driver mounting plates support as
well round as square V-bars with a size up to
75mm.
If your V-bars excess these sizes, please contact us
for customized hooks.

EMAIL horti@mechatronix-europe.com
CoolStack® Installation Manual | Version 2022Mar_TW
Page 13
EMAIL horti@mechatronix-asia.com
www.horti-growlight.com
Step. 3.1 Driver fall prevention (Optional)
Insert the fall prevention pin (optional) into the
gap on the front of the driver mounting plate.
To insert hold the pin horizontal.
Than release and rotate pin tail downwards.
Step. 4 Add CoolControls Mesh antenna
(Optional)
Push theCoolControls Mesh antenna on the
controls output connector from the driver.
Tighten by turning the lock from the cable
connector clockwise.
DO NOT twist the cable during locking as internal
wiring might break.
Step.5
Mount the driver output cable (910mm) to the
lamp input.
Tighten the connector by turning the lock
clockwise.
Step.6
Connect the driver AC input connector (cable
length: 630mm) to the mains supply. When the
lamp is foreseen from the CoolControls Mesh
antenna, the lamp will blink.

EMAIL horti@mechatronix-europe.com
CoolStack® Installation Manual | Version 2022Mar_TW
Page 14
EMAIL horti@mechatronix-asia.com
www.horti-growlight.com
Installation:
COOLSTACK® COMPACT on C-profile
C-Profile Mounting Step
Step. 1 -Hooks
Slide the C-profile hooks from top to bottom over
the C-profile.The distance between two hook is
110mm. Maximal C-profile width for standard
hook is 50mm. Maximal C-profile height for
standard hooks = 75mm, If your C-profile excess
these sizes width 50mm or height 75mm please
contact us for customized hooks.
Step. 2 Lamp on hooks
Hang the lamp onto the hooks and fine-tune its
position.
Step. 3A Driver mounting (Standard)
Install Install the driver beside the lamp with self
tapping screws. Properly position it before fixing it
on the c-profile bar.
Step. 3B Driver mounting (Hooks, optional)
Slide driver into wire hook while bending it to
align one hole (on dirver), guide the other end of
wire hook into the other driver hole.
Place the driver and hook onto C-profile.
Check the driver connection status and make sure
the driver is not connected to the outer electric
supply source before going to the next steps
Step. 4 Driver to lamp connection
Mount the driver output cable (910mm) to the
lamp input.
Tighten the connector by turning the lock
clockwise.
Driver
Lamp
-
8
Hook
pin
thru
this
hole

EMAIL horti@mechatronix-europe.com
CoolStack® Installation Manual | Version 2022Mar_TW
Page 15
EMAIL horti@mechatronix-asia.com
www.horti-growlight.com
Step. 5 Add CoolControls Mesh antenna
(Optional)
Push theCoolControls Mesh antenna on the
controls output connector from the driver.
Tighten by turning the lock from the cable
connector clockwise.
DO NOT twist the cable during locking as internal
wiring might break.
Step.6 Connect to AC mains
Connect the driver AC input connector (cable
length: 630mm) to the mains supply. When the
lamp is foreseen from the CoolControls Mesh
antenna, the lamp will blink.

EMAIL horti@mechatronix-europe.com
CoolStack® Installation Manual | Version 2022Mar_TW
Page 16
EMAIL horti@mechatronix-asia.com
www.horti-growlight.com
Installation: COOLSTACK® COMPACT
on V-shape Trellis
V-shape Trellis Mounting Step
Step. 1 Hooks
Install the standard trellis hooks on the trellis, the
distance between two hooks is 105cm.
Hold the hook parallel with the trellis and rotate
90 degrees to clamp.
The ends of the hook have to point inwards
towards each other.
For greenhouses with solar screens, point the
hooks towards the direction of the screen so the
lamp will hang partially under the screen –this
avoids shadow on the crops.
There are 3 standard heights of hooks, which will
determine how high the position of the lamp
towards the trellis will be.
COOLSTACK® TRELLIS HOOK (LOW->HIGH->EXTRA HIGHT)
Step. 2 Lamp on hooks
Hang the lamp on the hooks by sliding in the end
of the hook into the lamp fixation cutout on the
sides.
The design of the hooks and the lamp is made self
calibrating so automatically the lamp will hang
horizontal perfectly.
Step. 3 Driver on trellis
Place the driver flat against the reverse V-trellis
bars and slide down.
Make sure the driver mounting plates are securely
clamped over the bars.
The standard driver mounting plates support as
well round as square V-bars with a size up to
75mm.
If your V-bars excess these sizes, please contact us
for customized hooks.
8
8

EMAIL horti@mechatronix-europe.com
CoolStack® Installation Manual | Version 2022Mar_TW
Page 17
EMAIL horti@mechatronix-asia.com
www.horti-growlight.com
Step. 3.1 Driver fall prevention (Optional)
Insert the fall prevention pin (optional) into the
gap on the front of the driver mounting plate.
To insert hold the pin horizontal.
Than release and rotate pin tail downwards.
Step. 4 Add CoolControls Mesh antenna
(Optional)
Push theCoolControls Mesh antenna on the
controls output connector from the driver.
Tighten by turning the lock from the cable
connector clockwise.
DO NOT twist the cable during locking as internal
wiring might break.
Step.5
Mount the driver output cable (910mm) to the
lamp input.
Tighten the connector by turning the lock
clockwise.
Step.6
Connect the driver AC input connector (cable
length: 630mm) to the mains supply. When the
lamp is foreseen from the CoolControls Mesh
antenna, the lamp will blink.

EMAIL horti@mechatronix-europe.com
CoolStack® Installation Manual | Version 2022Mar_TW
Page 18
EMAIL horti@mechatronix-asia.com
www.horti-growlight.com
Precautions
1. Follow proper grounding methods: The electrical system must be grounded. If you
are not sure if your power system is grounded, DO NOT install the LED fixture.
Contact a licensed electrician for information on proper grounding methods.
FAILURE TO FOLLOW THIS WARNING MAY LEAD TO DEATH, SEVERE INJURY, OR
PROPERTY DAMAGE.
2. The electrical power must be clean and have stable voltage and current and
undistorted waveforms. It is highly recommended to install suitable surge
protective devices in the electrical panels to prevent damage by surge events.
Failure to ensure power quality requirements will void warranty.
3. If it is necessary to maintain or dismount the lamp, please cut off the outer electric
supply source prior to removal in order to prevent electrical injuries.
4. The maximum ambient temperature of the installed environment is 35°C. This will
ensure safe operation of the lighting equipment. Mechanical ventilation or cooling
system may be needed to keep the growing space temperature under 35°C when
the lamp is in operation.
5. This lamp is equipped with cords. Please read the following requirements:
1) Do not conceal or extend it through a wall, floor, ceiling, or other parts of the
building structure;
2) Do not allocate it above any suspended or dropped ceiling;
3) Do not permanently affix it to the building structure;
4) Lamps are routed so that they are not subject to strain and are protected from
physical damage;
5) Lamps are visible over their entire length;
6) Lamps are used within the ampacity determined for the maximum temperature
of the installed environment specified in the instructions.
6. This lamp is suitable for damp locations.
7. The photobiological safety markings are based on testing of the light output
characteristic of a single horticultural lamp. Increased exposure risk to facility
personnel may be present depending upon the number of horticultural lamps and
their placement and/or positioning within the plant growth facility.
8. It is the responsibility of the plant growth facility to address these risks at the
facility level and to ensure that people entering the plant growth areas while the
lights are on, are aware of these risks and that appropriate safeguards are in place.

EMAIL horti@mechatronix-europe.com
CoolStack® Installation Manual | Version 2022Mar_TW
Page 19
EMAIL horti@mechatronix-asia.com
www.horti-growlight.com
Maintenance, Environmental and Disposal
Maintenance
▪Maintain electrical input voltage and current in stable range, without distorted waveforms. It is
highly recommended to install suitable surge protective devices in the electrical panels to prevent
damage by surge events. Failure to ensure power quality requirements will void warranty.
▪Regularly check the lamp for build-up of dust and dirt, clean the lamps if necessary.
▪Switch off the main power before conducting installation or maintenance work.
▪Do not disassemble the COOLSTACK® products, doing so will void warranty.
▪In case lamp stored as backups, please follow the storage specification, keep COOLSTACK® in clean
environment.
Use of cleaning agents, crop protection products and other chemicals
Mechatronix COOLSTACK® products are weatherproof engineered for high PPF daily usage. Anti-Reflection
and anti-dust coating layer is applied onto your lens. Damages to the lens may affect the overall
performance of the crop production.
Please ensure the following instructions are applied when cleaning the COOLSTACK® products.
Cleaning the COOLSTACK® products
▪Turn off power before cleaning the product.
▪Wait 30min prior to clean the lamp.
▪Spray clean water gently onto the lamps
▪DO NOT use acid, alkaline or other strong detergent which may cause Anti-Reflection coating layer
defect.
▪DO NOT use rough or coarse-grained materials, scouring pads, bleach, or non-approved solvent.
Important
Influencing factors of light output
As ambient temperature increases, both the photon flux and the photon maintenance will
decrease.
Anti-Reflection (AR) coating layer is highly delicated optical treatment for advanced lens
performance, any damage to the layer may caused lamp performance reduction.
Please read the Maintenance, Environmental and Disposal chapter for further lamp cleaning
instructions.
This manual suits for next models
2
Table of contents
Popular Lighting Equipment manuals by other brands

Monster
Monster SMART ILLUMINESSENCE DIGIT Design guide

Federal Signal Corporation
Federal Signal Corporation Cuda TriOptic 351016F Series instruction sheet

Ledj
Ledj LEDJ377 user manual

Z-CAM
Z-CAM ZOLAR Vega 30C user manual

Lightolier
Lightolier Calculite C4MRP specification

Lightolier
Lightolier Skyway SKS2GPK217 Installation

VelLight
VelLight LEDA204WW user manual

Maxspect
Maxspect Recurve R6-120 owner's manual

TOOLCRAFT
TOOLCRAFT PL012 operating instructions

Pinegreen Lighting
Pinegreen Lighting CL-LTPA-18RGBCEXT user manual

Generac Power Systems
Generac Power Systems TOWER LIGHT V20 owner's manual

Aervoe
Aervoe 1166 operating instructions