Med-Pat XL-IP User manual

VOIP Phone
Model: XL-IP
User Manual
(QR code)
Smartphone Scan to download PDF version
Version1.2

XL-IP UserManual
1
1
Introduction
.........................................................................................................................3
1.1
HardwareOverview
..........................................................................................................3
1.2
SoftwareOverview
...........................................................................................................6
1.3
Combination operation
..................................................................................................... 6
2
SetuptheIPPhonesystem by using Web Browser
................................................................7
2.1
Login
.............................................................................................................................. 7
2.2
System Information
.......................................................................................................... 7
3
Accounts
............................................................................................................................ 8
3.1
General Settings
............................................................................................................8
3.2
Codecs Settings
............................................................................................................ 9
3.2.1
G729AB Packaging Time
......................................................................................... 9
3.2.2
Audio encoder selection
............................................................................................ 9
3.2.3
DTMF Type
............................................................................................................10
3.3
Call Settings
................................................................................................................ 10
3.3.1
Call Forward
...........................................................................................................11
3.3.2
Busy Forward
......................................................................................................... 11
3.3.3
No Answer Forward
................................................................................................11
3.3.4
Ring Type
.............................................................................................................. 11
3.3.5
Auto Answer
...........................................................................................................12
3.3.6
Dial Plan
................................................................................................................. 12
3.3.7
Replace Rule
.......................................................................................................... 13
3.3.8
Dial Now
................................................................................................................. 13
3.3.8.1
Use Pound Key(#) As Send Key
............................................................................13
3.3.8.2
Use Asterisk Key(*) For IP Dialing
.........................................................................13
4
Phone
.............................................................................................................................. 14
4.1
Volume Settings
............................................................................................................14
4.1.1
Call volume............................................................................................................................. 14
4.1.2
Ringtone volume..................................................................................................................... 14
4.1.3
Dial Tone................................................................................................................................ 15
4.2
Feature Settings
............................................................................................................15
4.2.1
Call Waiting.............................................................................................................15
4.2.2
Dial Timeout Time&Call Waiting Tone...................................................................... 16
4.2.3
Tone Standard
....................................................................................................... 16
4.2.4
Emergency Call Number
........................................................................................ 16
4.3
Ringtones
....................................................................................................................17
4.3.1
Upload Ringtone File
.............................................................................................. 17
5
Network
............................................................................................................................17
5.1
LAN
.............................................................................................................................17
5.1.1
Network Settings
................................................................................................... 17
5.1.2
802.1X Settings
......................................................................................................19
5.2
Qos & VLAN
................................................................................................................ 19
5.2.1
LLDP Settings
........................................................................................................ 20
5.2.2
LAN Port VLAN Settings
.........................................................................................20
5.2.3
PC Port VLAN Settings
...........................................................................................20
5.2.4
(QoS) Settings
........................................................................................................21
5.3
NAT Travel
.................................................................................................................. 21

XL-IP User Manual
2
5.3.1
STUN Settings
....................................................................................................... 21
5.4
Open VPN Settings
......................................................................................................22
6
Maintenance
..................................................................................................................... 22
6.1
WEB
............................................................................................................................22
6.2
Auto Provisioning
..........................................................................................................23
6.3
Syslog
..........................................................................................................................24
6.4
Pcap
............................................................................................................................ 24
6.5
Config
.......................................................................................................................... 25
6.5.1
Update
...................................................................................................................25
6.5.2
Backup
...................................................................................................................25
6.5.3
Clear
......................................................................................................................25
6.6
Firmware
..................................................................................................................... 25
6.6.1
Update firmware
.................................................................................................... 26
6.7
Reboot
.........................................................................................................................26
7
Directory
........................................................................................................................... 26
7.1
Local Phonebook..........................................................................................................26
7.1.1
Adding Contacts
...................................................................................................26
7.1.2
Editing Contacts
................................................................................................... 26
7.1.3
Search Contacts
.................................................................................................. 26
7.1.4
Saving Contacts
.................................................................................................... 27
7.1.5
Deleting Contacts
.................................................................................................. 27
7.1.6
Move to blacklist
....................................................................................................28
7.2
Blacklist........................................................................................................................28
7.2.1
Adding Blacklist
.................................................................................................... 28
7.2.2
Editing Blacklist
..................................................................................................... 29
7.2.3
Search Blacklist
.................................................................................................... 29
7.2.4
Saving Blacklist
......................................................................................................29
7.2.5
Deleting Blacklist
....................................................................................................30
7.2.6
Removing Blacklist
.................................................................................................30
7.3
Group...........................................................................................................................31
7.3.1
Adding Group
....................................................................................................... 31
7.3.2
Editing Group
........................................................................................................31
7.3.3
Deleting Group
..................................................................................................... 31
7.4
Import and Export Phone book...................................................................................... 32
7.4.1
Remote Phone book
............................................................................................. 32
8
LDAP
............................................................................................................................... 33

XL-IP User Manual
3
1 Introduction
Before using the SIP Phone, some configurations are required to make the IP Phone
work properly. The manual will illustrate how to configure the ip phone via web page.
1.1
HardwareOverview
One RJ-45 Networking interfaces for WAN port which supports10/100Mps
Fast Ethernet. The default setting of WAN port is a DHCP client.
One LED that combine functions of ringer and message-waiting and one in-use
LED.
The power is only supplied by switch hubs with POE (Power over
Ethernet). There is no any jack for external power adaptor.

XL-IP UserManual
4

XL-IP UserManual
5

XL-IP
XL-IP
XL-IP UserManual
6
1.2
SoftwareOverview
Network Protocol
Codec
Z
SIP2 (RFC3261)
Z
G71 aLaw
Z
IP/TCP/UDP/RTP/SNTP
Z
G71 uLaw
Z
DHCP Client/PP PoE Client/PPTP Client
Z
G722
Z
HTTP Server
Z
G723
Z
DNS Client
Z
G729
Z
LLDP
Z
iLBC
Voice Quality
Tone
Z
Comfortable noise generator
Z
Ring Tone
Z
Voice Activity Detector
Z
350Hz/440Hz Dial Tone
Z
Voice QoS
Z
400Hz Dial Tone
Z
SIP QoS
Z
Busy Tone
Z
Jitter Buffer
Z
Phone Function
Cal l Function
Z
Volume Adjustment
Z
Call Hold
Z
8 types of ringing melody
Z
Call Mute
Z
Do Not Disturb
Z
Call Waiting
Z
Schedule Alarm
Z
Call Forward
Z
Z
IP As
s
s ignment
DTMF
Z
Static IP
Z
RFC2833
Z
DHCP
Z
In band
Z
PPPoE
Z
SIP Info
NAT Traversal
Firmware Upgrade
Z
STUN
Z
TFTP
Z
FTP
Z
HTTP
Z
Local Computer
SIP Server
Configuration
Z
Up to two SIP account
Z
Web Browser
Z
Outbound Proxy
Z
1.3
Combination operation
Instructions
Describe
47*#
Gets the IP address assigned from the DHCP server
48*#
Get the native software version
49*#
Reset the factory device and clear the setting parameters
50*#
Get whether the VLAN Tag is on or off
51*#
Get the network connection
52*#
Gets the last 8-bit MAC address of the device
778899*#
Enter the engineering test mode
XL-IP
XL-IP
XL-IP UserManual
7
2 SetuptheIP Phone system by using Web Browser
Before configure the IP Phone, Firstly user should press the keys “47*#” keys of
IP phone in order to obtain the IP address which is assigned from a DHCP server.
2.1
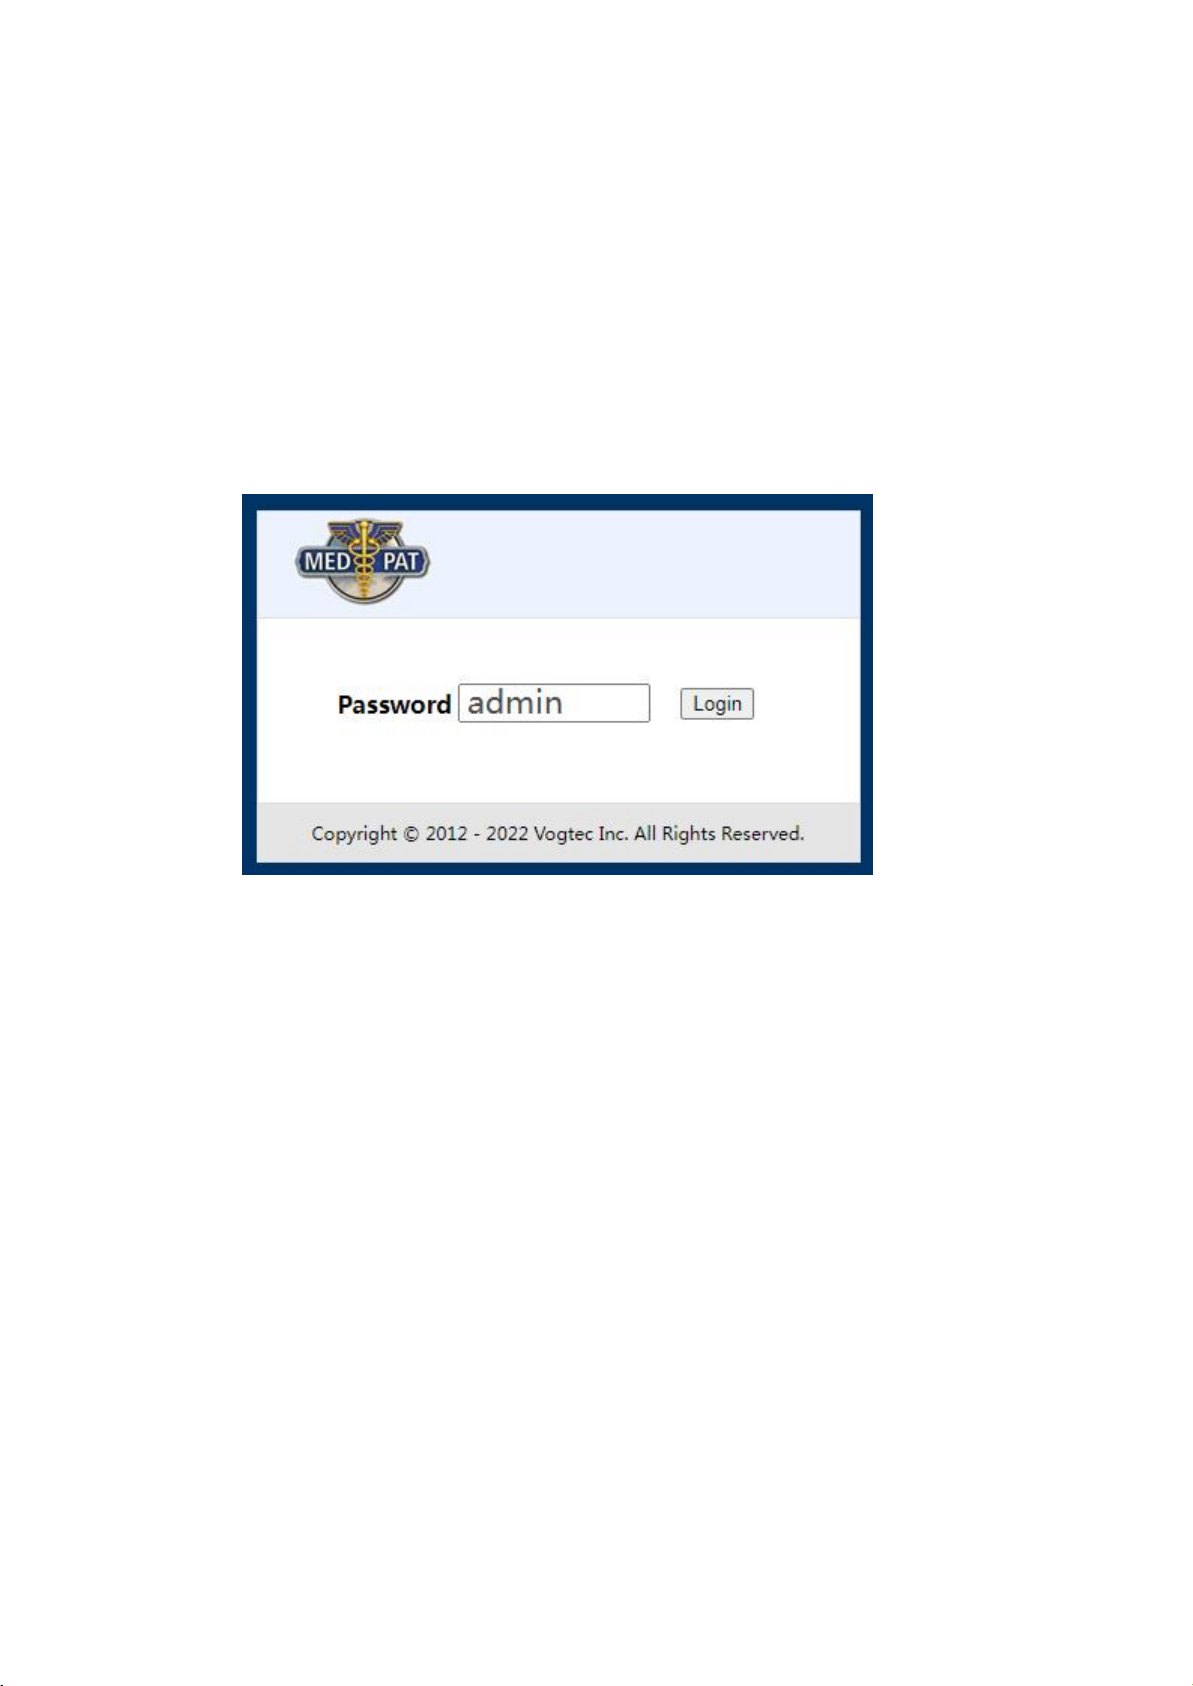
Login
Please input the default username and password into the blank fields. The user
name is hidden by default, the default password is admin.Then click the Login button to
login the SIP Phone.
2.2
System Information
After login the web page,user can see the system information such as model name
and firmware version.
In addition, there is a function list in the left hand side. User can use mouse to
click the function to setup and configure the IP phone.

XL-IP
XL-IP
XL-IP UserManual
8
3 Accounts
The account setting page is displayed, and you can set the basic, audio coding, call,
and advanced Settings of the account.
3.1
General Settings
Show registration status of this realm. Please click the “ Apply ” button after
finishing.
menu:
Accounts>SIP 1>General Settings

XL-IP
XL-IP
XL-IP UserManual
9
3.2
Codecs Settings
To change RFC2833event ID. When SIP phone communicate with other SIP device,
if the codec ID that other SIP device deployed is non-standard, problem will occur. User can
adjust the codec ID of SIP phone from default to a matching one. Please click the “Apply”
button after finishing.
menu:
Accounts>SIP 1>
Codecs
Settings
3.2.1
G729AB Packaging Time
Set the number of seconds for codec G729AB RTP Packet Time.
3.2.2
Audio encoder selection
PCMU
To enable Choose PCMU encoder.
PCMA
To enable Choose
PCMA
encoder.
G.722
To enable Choose G.722 encoder.
G.729
To enable Choose G.729 encoder.
G.726
To enable Choose G.726 encoder.
G.723

XL-IP
XL-IP
XL-IP UserManual
10
To enable Choose G.723 encoder.
iLBC
To enable Choose iLBC encoder.
AMR_WB
To enable Choose AMR_WB encoder.
GSM
To enable Choose GSM encoder.
opus
To enable Choose opus encoder.
3.2.3
DTMF Type
Currently, there are four common standards: DTMF, RFC2833, Audio and SIP
Info, and Audio+SIP Info. The user should consult the service provider as to which setting
is correct and appropriate. Click the "Apply" button when you are done.
3.3
Call Settings
Phone Settings contains Call Forward, Ring Type, Auto Answer and Dial Plan.
menu:
Accounts>SIP 1>Call settings

XL-IP
XL-IP
XL-IP UserManual
11
3.3.1
Call Forward
Always Forward All incoming call will be forward to the number that is filled.
Please input the name in the name field and the phone number or IP address in the
URL field.
3.3.2
Busy Forward
When a user is engaged in a call, an incoming call is forwarded to a network number
selected by the user.
3.3.3
No Answer Forward
User can have incoming calls answered by another phone whenever the IP
phone is unanswered after several seconds of ring. How long the call will be forwarded is
determined by the No Answer Fwd Time Out. The transfer time is shorter than the call time.
The value ranges from 5 to 30 seconds.
If the user wants to disable the previous forward Settings, please select "Uncheck" in
the checkbox. After setting, please click the "Apply" button.
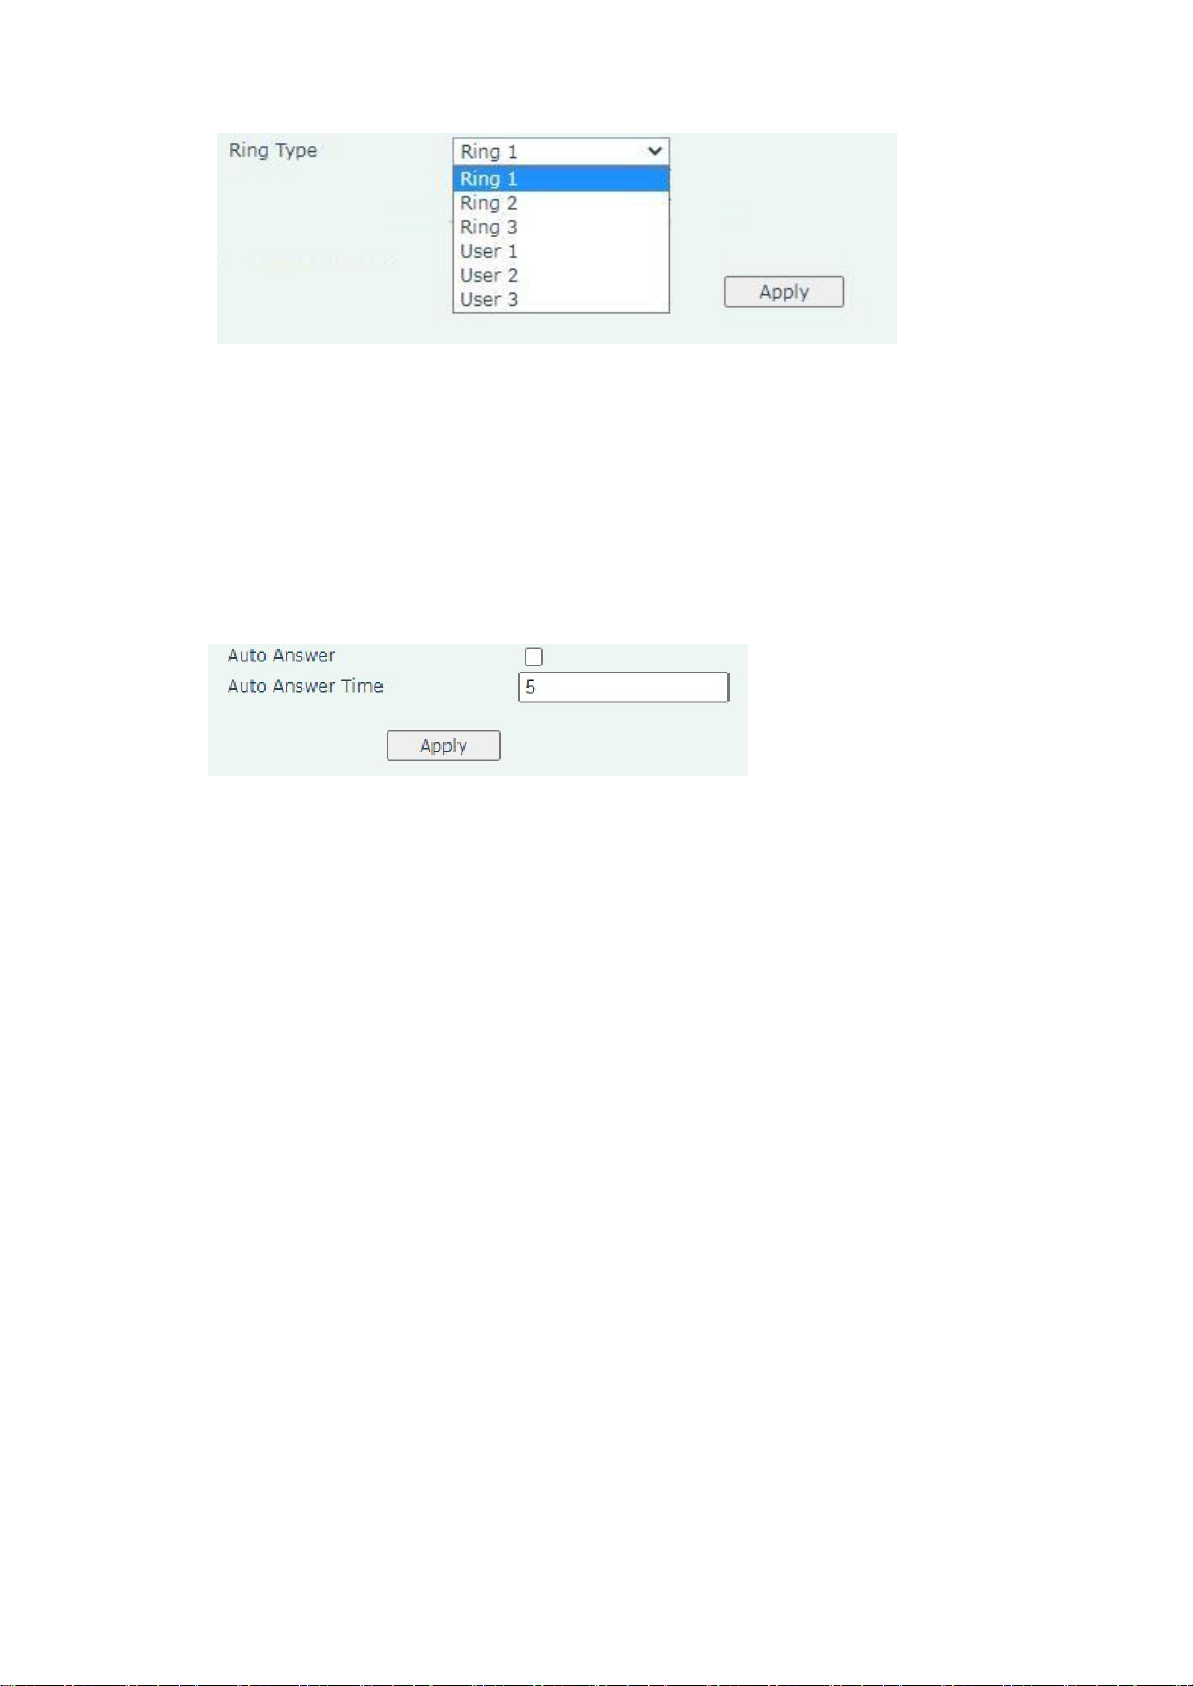
3.3.4
Ring Type
User can select one of melodies from Ringer Type for ringing tone of incoming call.
Please click the “Apply” button after finishing.
At present, there are three ringtones (Ring) that can be used, and three standby ones
(User).
XL-IP
XL-IP
XL-IP UserManual
12
3.3.5
Auto Answer
When the automatic answer period ends, the system automatically answers the
number of the calling party and communicates with the calling party.Automatically answer a call
by handsfree.
Enable the auto answer option and auto answer time in your phone call
Settings.Please click the “Apply” Button after finishing.
3.3.6
Dial Plan
Dial Plan:
'X' matches any number between 0-9, including *
'x' matches any digit from 0-9
'Z' matches any digit from 1-9
'N' matches any digit from 2-9
'.' wildcard, matches one or more characters
'!' wildcard is referred to as a barring rule
'?' wildcard matching function matches 0 or 1 x, X
'|' separates a dialing prefix from the number(for example:*74(xx|xxxx) would match
when some dialed '*74xx' or '*74xxxx')
'[]' matches any digit or letter in the brackets (for example65[8-9] match 658 and 659
'<>' An element-to-literal transformation allows us to substitute the digit sequence
matching elements with the given literals,If we want to add to the start of a dialed
number, for example to add 02 to the start of an 8-digit number, we would
write:<02>xxxx xxxx or <:02>xxxx xxxx
'^' An exclusion set matches any single alphanumeric character that is not within the
set,Example:To match any arbitrarily long sequence of digits that does not start with *
we would write our matching rule as follows:[^*]xx.
';' separates each one rules,for example:{1xxx;<1>[2-9]xxx;*74(xx|xxx)}
In addition, Dial Plan may have some incomplete functions, which will be added later.

XL-IP
XL-IP
XL-IP UserManual
13
3.3.7
Replace Rule
The Dial Plan function provides basic dial number replacement or drop rule.
Maximum 4 rules user can apply at a same time. The rules will only be effective when
matching digits are located at the beginning of dialed numbers.
menu:
Account>SIP 1>Call settings>Dial Plan
Example for operation of “replace number by”:
Digitsfor matching
Operation
Digitsfor operation
852
replace number by
1234
When user presses85291234567 on the keypad, the IP Phone will send out
123491234567 Example for operation of “drop number”:
When user presses005091234567 on the keypad, the IP Phone will send out 91234567.
3.3.8
Dial Now
If user wants to dial some digits at once without waiting for timeout, please input the
digits into the field of “Dial Now”.
User can set more than one rule in the field by adding “+”, e.g.
*xx+#xx+11x+xxxxxxxx. If the number dialed matches the rule “*xx”, e.g. “*11”,“*1123”.
“*11”will be automatically dial out at once no matter there are more digits followed by “*11”.
3.3.8.1
Use Pound Key(#) As Send Key
User can enable the pound key (#) as an end signal. It instructs the IP Phone dial out
the numbers at once by pressing pound key. For example, 91234567#.
3.3.8.2
Use Asterisk Key(*) For IP Dialing
User can enable the asterisk key(*) as a dot-decimal notation of IP address.After user
enabled it, user can direct input IP address by keypad.
Digitsfor matching
Operation
Digitsfor operation
0050
Drop number

XL-IP
XL-IP
XL-IP UserManual
14
4 Phone
On this page, you can set the date and time, personalization, function, and
language.
4.1
Volume Settings
Screen Settings include call volume and ringtone volume.
menu:
Phone>Preference>Screen Settings
4.1.1
Call volume
You can adjust the voice volume, handheld voice volume, during a call. The value ranges
from 1 to 15 seconds. Please click the “Apply” Button after finishing.
4.1.2
Ringtone volume
You can adjust the ring tone volume during an incoming call.
The value ranges from 1 to 15 seconds . Click the "Apply" button when you are
done.

XL-IP
XL-IP
XL-IP UserManual
15
4.1.3
Dial Tone
At present, our company combines dial tone and ring tone. If one is modified, the
other will be modified.The value ranges from 1 to 15 seconds .Please click the “Apply” button
after finishing.
4.2
Feature Settings
Feature Settings include Dial Timeout Time&Call Waiting Tone ,Call Waiting ,Tone
Standard and Emergency Call Number.
menu:
Phone>Feature>Feature Settings
4.2.1
Call Waiting
User can enable or disable the call waiting function.Once checked, click the "Apply"
button.
XL-IP
XL-IP
XL-IP UserManual
16
4.2.2
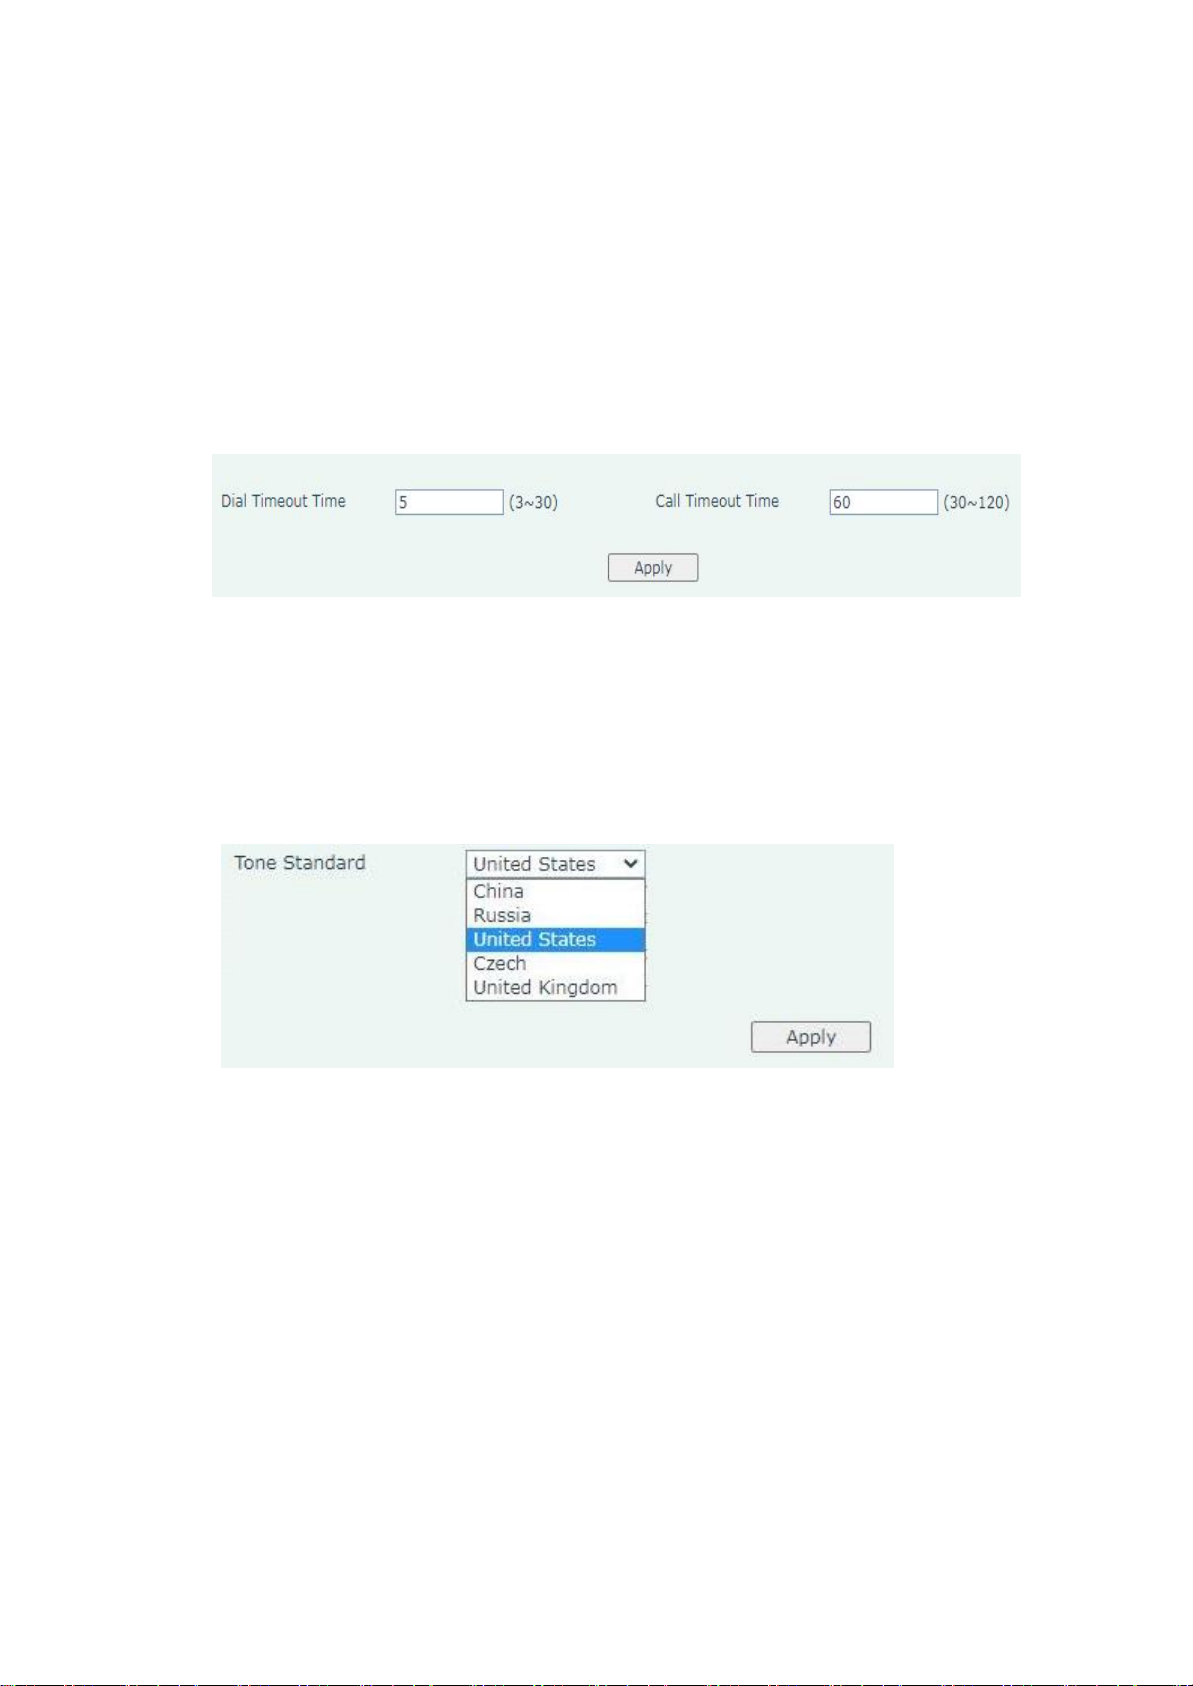
Dial Timeout Time&Call Waiting Tone
Timeout period: duration for calling another phone. Click the "Apply" button when
you are done.
Call Waiting Tone:The phone has an incoming call duration.Please click the “Apply”
button after finishing.
4.2.3
Tone Standard
If you need to adjust to the familiar voice. Users can access the,Select a combo
box from the drop-down list. After setting, please click the "Apply" button.
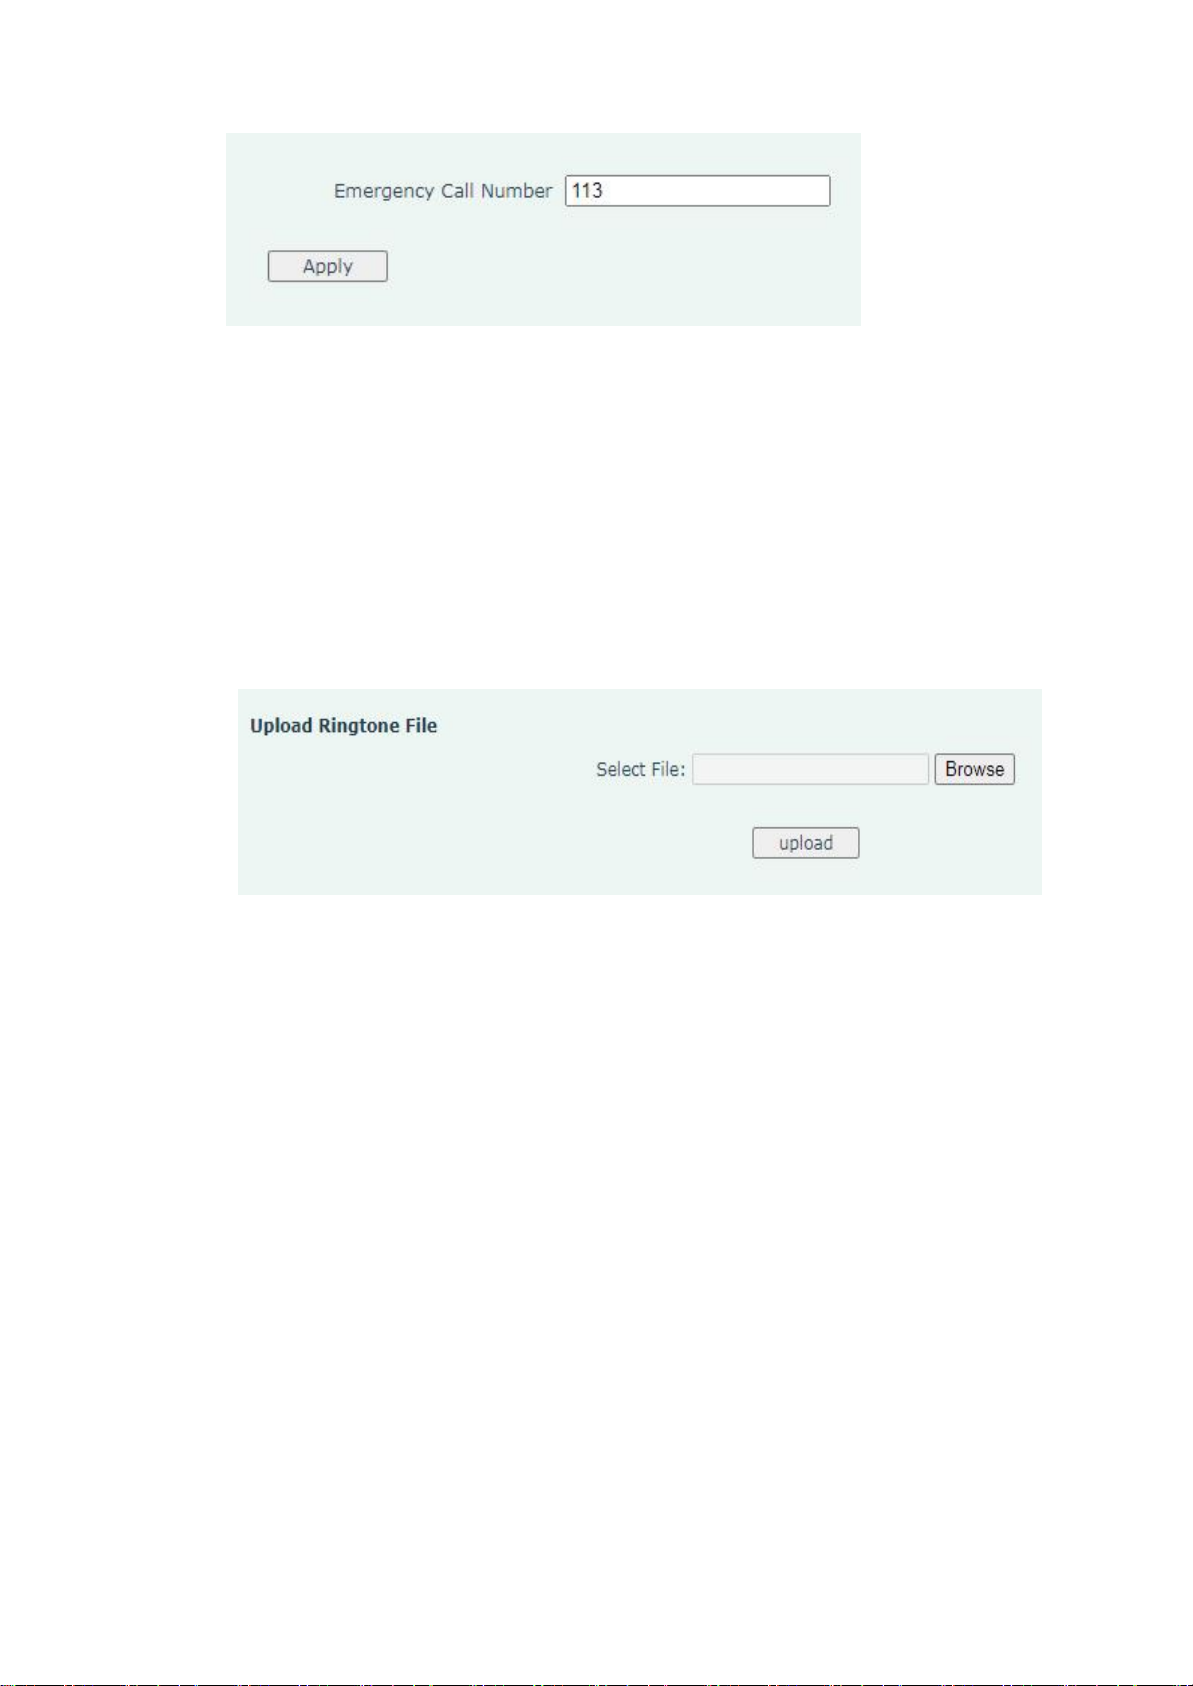
4.2.4
Emergency Call Number
In case of emergency, you can directly call the toll-free help number. Generally, the
number is short and easy to remember, and it is easy to connect. Different countries have
different emergency numbers. Commonly used emergency numbers such as 119, 110, 120
and so on.After setting, please click the "Apply" button.
XL-IP
XL-IP
XL-IP UserManual
17
4.3
Ringtones
The ringtone Settings page is displayed.
4.3.1
Upload Ringtone File
On the ringtone setting page, click the "Select File" button, select the ringtone file
to be uploaded, and click "OK". Click Upload on the ringtone Settings page to upload the
ringtone.
menu:
Phone>Ringtones>Upload Ringtone File
5 Network
In Network page, user can configure all the network settings and check the network
status of IP phone.
5.1
LAN
The LAN network configuration page is displayed.
5.1.1
Network Settings
You can set a fixed IP address or obtain an IP address through DHCP client or PP
PoE. Select an IP Mode that is appropriate for your current network environment.

XL-IP
XL-IP
XL-IP UserManual
18
DHCP(动态):
When DHCP is set, IP Phone acts as a DHCP client and obtains all TCP/IP
parameters from DHCP server.
The sub net of LAN port and the device that connects to LAN port must be the
same and must be different to WAN port. There is a feature of DHCP server in LAN port,
user can enable it for automatically assigning IP address to the device that connected to LAN
port.
menu:
Network>LAN>Network Settings>DHCP
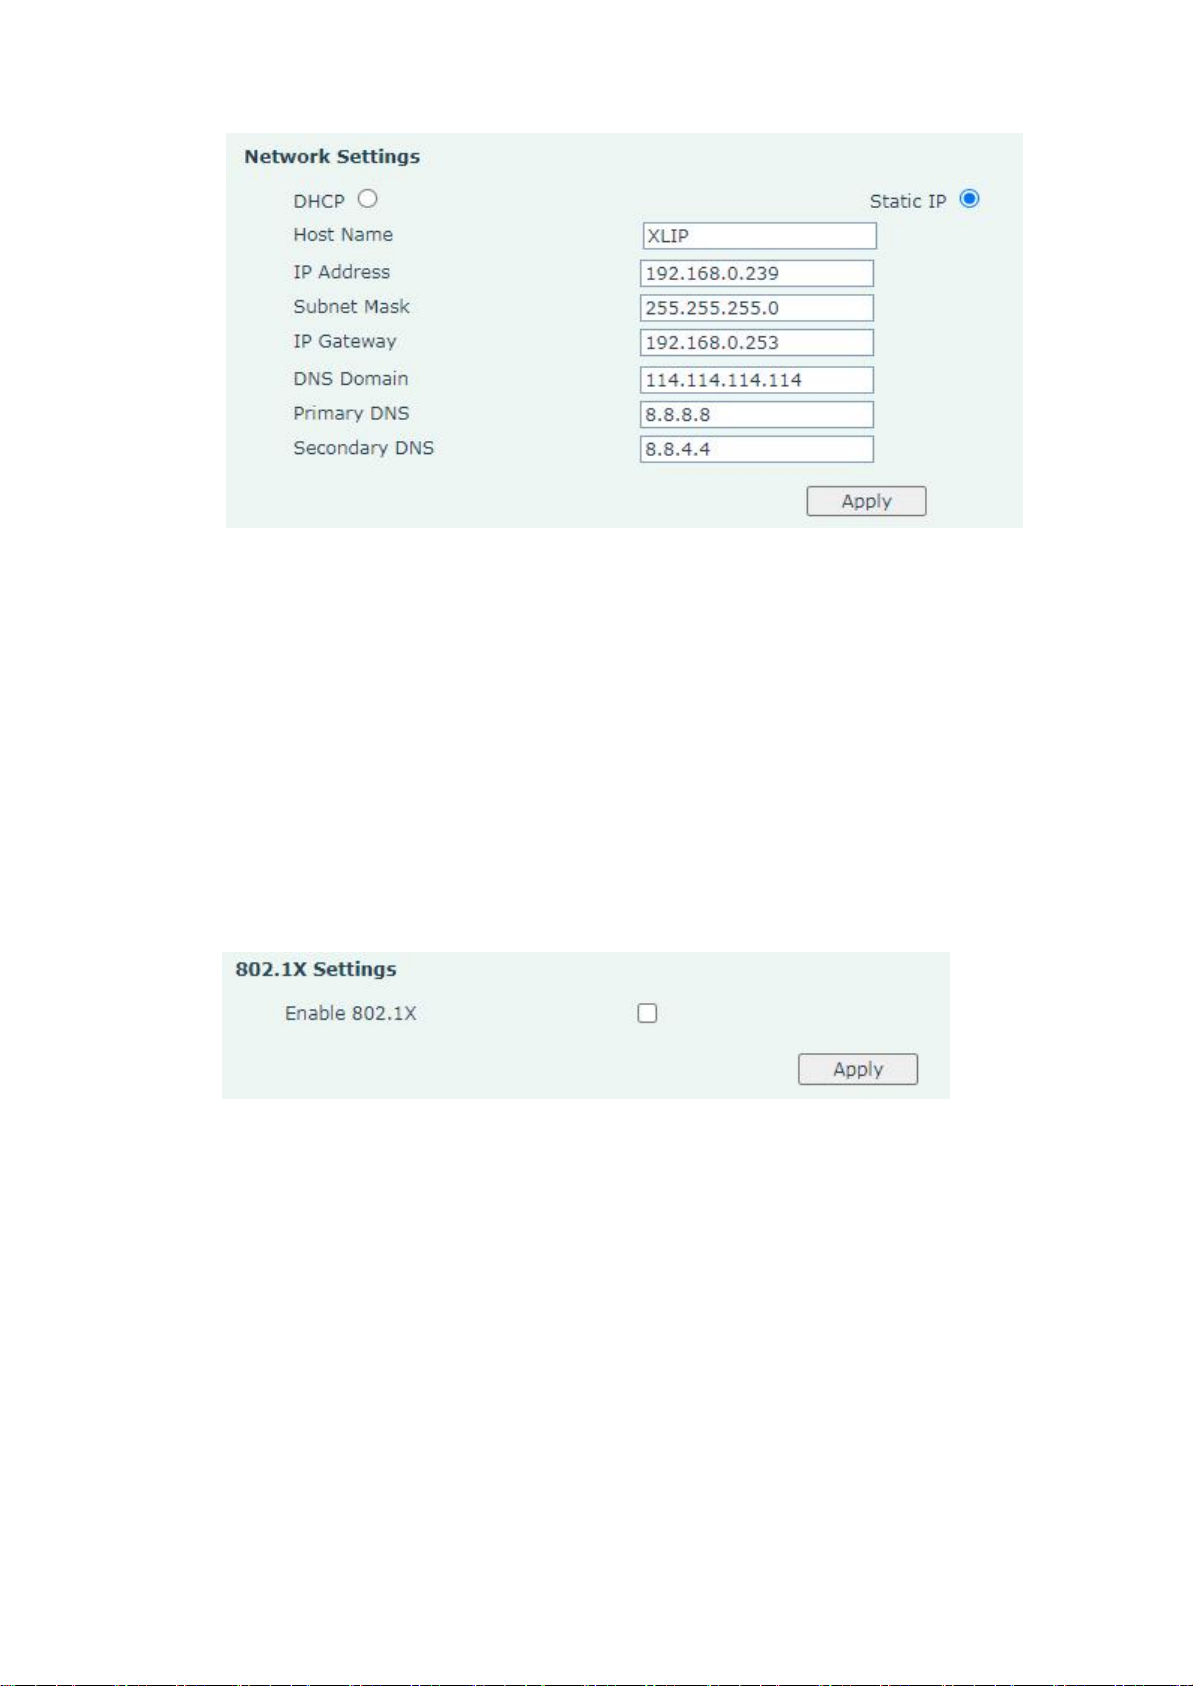
Static IP(静态):
User should input the IP address,the net mask and default gateway which are
suitable to current network into the fields.
It shows the current status of connection, and the current information such as IP
address, Net mask, Gateway, MAC address, IP address of Primary DNS and Secondary
DNS. Please click the “Apply” button after finishing.
XL-IP
XL-IP
XL-IP UserManual
19
menu:
Network>LAN>Network Settings>Static IP
5.1.2
802.1X Settings
Enable or disable a user or device to access a LAN or WLAN through an Access
port and change the user name and password. Click the "Apply" button when you are done.
menu:
Network>LAN>802.1X Settings
5.2
Qos & VLAN
Voice Quality of Service allows user set the priority of voice packet pass through the
router or firewall which connects to Internet. The higher value is set, the higher priority it gets.
Table of contents
Other Med-Pat IP Phone manuals


