Meech 977HL User manual

Model 977HL
Operating
Manual
Current Monitoring
Pulsed DC Controller for
Hazardous Location Ionisers


Products shown in this document may be covered by one or more patents, patents applied for
and/or registered designs and/or trade marks. For further information please refer to our Head
Oce or visit www.meech.com.
© Meech Static Eliminators Ltd., 26.10.17
Contents
Introduction 3
Inspection 4
Content 4
Features 5
Controls 6
Connections 7
Installation 8
Operation 10
Setting the Start Voltage and Ion Output Set Point 10
To set the Start Voltage and Ion Output Set Point 10
Setting the Rate 11
Setting the Balance 12
Setting the Alarm Point 13
Locking and Unlocking the Controls 13
Changing the System Set Up 14
Input/Output Connections 15
Output Signals 16
Feedback 17
Feedback Setup 18
Feedback Alarm 19
Specication 19
Maintenance 20
Repairs and Warranty 20
977HL Case and Mounting Detail 21
Health and Safety 22
CE Approval 22


3
Introduction
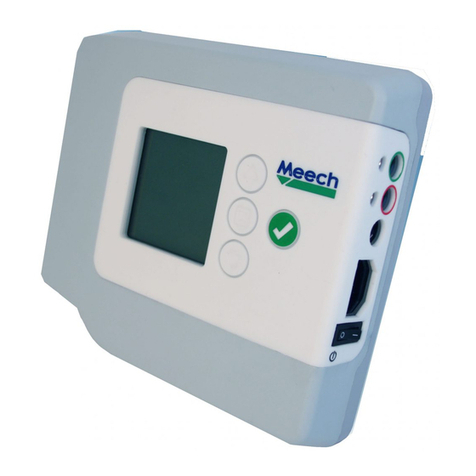
The Model 977HL Pulsed DC controller is designed to power Meech 976EX Pulsed
DC Ionising Bars in EX Areas
The unit is mains powered with an in-built switch mode power supply to allow its use
on all mains voltages and frequencies. Display is via a LCD panel with adjustment
made by 4 push buttons.
The Pulsed DC output has a maximum voltage of +/- 9.6 kV and a frequency range of
1 to 20 Hz. Output balance is adjustable from 80% / 20% positive /
negative to 20% / 80% positive / negative.

4
In-built current monitoring measures ion output and displays the performance of the
unit as a percentage on the LCD display.
Audible, visual and remote alarms alert operators to the need to clean the
ionisers. Analogue outputs enable logging of system performance.
A software lock allows the front panel controls to be locked to prevent
unauthorised adjustment of the ionising system.
An input for a Meech 988 Feedback sensor bar facilitates closed-loop
feedback control of the system, together with outputs for data logging etc.
The Model 977HL Pulsed DC controller was carefully packed at our factory in
a container designed to protect it from accidental damage. Nevertheless, we
recommend careful examination of the carton and contents for any damage. If damage
is evident, do not destroy the carton or packing material and immediately notify the
carrier of a possible damage claim. Shipping claims must be made by the consignee
to the delivering carrier. In addition, please also notify Meech International of any
damage claims that may be made against the delivery carrier.
Inspection:
Contents:
The following are included with the 977HL:
1. Instruction manual
2. IEC cable

5
3. Remote ON/OFF jack plug
Option:
1. Interface cable - mini DIN
Features:
Display
In normal operation* the LCD display will look similar to the following:

6
The information displayed is:
1. Power: Peak momentary output voltage in kV.
2. Rate: Frequency of the output in Hz. The output frequency is
operator set according to the type of installation and the
ionising equipment connected to the 977HL.
3. Balance: Balance of the Positive and Negative outputs in Percent.
The balance can be biased to positive or negative to give the
most accurate neutralisation.
4. Ion Output: Graphical display of system performance with percentage
value.
*Without Feedback sensor bar connected. See Feedback section on page 18 for further information.
Controls
Four buttons control the 977HL:
Up: Moves the cursor up and increases numerical values
Menu: Enters and exits the main system menu
Down: Moves the cursor down and decreases numerical values
Tick: Accepts and stores the displayed value.
Samples of Meech user interface icons

7
Connections
1. Mains On/O Switch
2. Mains Inlet Socket. IEC-C13
3. Output Signals. 8 Way Mini DIN
4. Remote On/O. 3.5mm Jack Socket
5. Feedback Sensor Bar inlet. 2.5mm Jack Socket
6. Positive and Negative HT Outputs.
1 2 4 5
3
6

8
Installation
Installation and connection should be completed by a qualied electrical
engineer
This equipment must be grounded /earthed via the mains cable. Failure to do so can
result in damage to the unit.
1. Locate the 977HL in a dry, well ventilated area outside the EX zone. Allow sucient
space for the cables on the right hand side of the unit.
2. Mount the unit using the 5mm keyhole mounts on the rear face.
3. Connect ionising equipment using grey HT connections.

9
4. Connect IEC mains cable. Input voltages from 100 to 240V, 50 or 60Hz are
acceptable.

10
Operation
Getting Started
On rst use, the 977HL needs to be congured to suit the type of installation and the
type of ionising equipment connected to it. This includes basic settings of the Output
Power, Rate and Balance as well as alarm functionality and the lock option.
Setting the Start Voltage and Ion Output Set Point
During installation and commissioning two parameters must be set correctly to allow
optimum performance.
1. Start Voltage. When used with a 976EX bars the voltage should be set to 9.6kV
2. Ion Output Set Point: This is the target Ion Output as measured when the system is
clean. The 977HL self adjusts to try to maintain the output at this level.
This value should only be set when the ionisers have been cleaned, otherwise the
performance of the system will be reduced.
To set the Start Voltage and Ion Output Set Point
1. Press
Samples of Meech user interface icons
to enter menu
2. Press
Samples of Meech user interface icons
to enter option 1 “Power”
3. Use
Samples of Meech user interface icons
and
Samples of Meech user interface icons
to set voltage to required voltage.
4. Press
Samples of Meech user interface icons
to accept value. The unit will display “Set Ion Output”

11
Selecting “Yes” and pressing
Samples of Meech user interface icons
will store the Ion Output Set Point.
Selecting “No” will exit setup and leave the set point unchanged.
Setting the Rate
The 977HL features a variable output frequency. The frequency that should be set
depends on the ionising product and the distance to the target object.
To set the rate
1. Press
Samples of Meech user interface icons
to enter menu
2. Use
Samples of Meech user interface icons
and
Samples of Meech user interface icons
to select option 2 “Rate”
3. Use
Samples of Meech user interface icons
and
Samples of Meech user interface icons
to set the required value.
4. Press
Samples of Meech user interface icons
to accept value.
Ionising Bars: For best operation at long distance a slow rate should be set.
Conversely at short range, select a fast rate. An approximate guide is as
follows:
25
Do not use closer
than 150mm
20 20
15
10
5
5
1
0
0.5
100 150 200 250 300 350 400 450 500 550 600
Operating Distance (mm)
Frequency Rate (Hz)
Suggested Frequency Vs Operating Distance for 976/977HL

12
Setting the Balance
The output of the 977HL can be biased to negative or positive. The
adjustment changes the percentage of time that each HT output is switched on. The
maximum bias is 80% to either positive or negative.
Changing the balance of the output changes the relative amount of positive and
negative ions produced by the ioniser. With the help of a static locator the
balance can be adjusted for more accurate neutralisation of the target
material.
To set the balance:
1. Press
Samples of Meech user interface icons
to enter menu
2. Select option 3 “Balance” and press
Samples of Meech user interface icons
3. Use the up and down button to change the value
4. Press
Samples of Meech user interface icons
to store the setting
+
V
Time
_
50% Positive / 50% Negative
+
V
Time
_
20% Positive / 80% Negative
TIME
TIME

Setting the Alarm Point
The 977HL features an adjustable alarm that will alert the operator when the Ion
Output of the ionising system falls below a desired level or when a system fault is
detected.
To set the Alarm Point.
1. Press
Samples of Meech user interface icons
to enter menu
2. Select option 4 “Alarm” and press
Samples of Meech user interface icons
3. Use the up and down button to change the value
4. Press
Samples of Meech user interface icons
to store the setting
Locking and Unlocking the Controls
The front panel controls of the 977HL can be locked to prevent unauthorised
adjustment of the ionising system. The lock code is a user selected three digit code. A
dierent code can be chosen each time the unit is locked.
13
As the ionisers become contaminated, the Ion Output will slowly start to decrease and
will reduce the system’s performance. At this point the ionisers need cleaning.
To alert the operator to the need for cleaning, the 977HL will trigger an in-built audible
alarm and the LCD screen will ash on and o. A remote alarm can also be triggered
using the alarm relay connections on the output socket.
The alarm point is set as a percentage of maximum Ion Output. An initial value of 60%
is recommended.
The performance of the ionising system depends on being run at the correct power,
rate and balance. Unauthorised or accidental changes to any of these settings can
greatly reduce its eectiveness.

To lock the controls:
1. Select a three digit lock code. Keep this number safe as you will need it to unlock
the unit at a later date.
2. Press
Samples of Meech user interface icons
to enter menu
3. Select option 5 “Lock” and press
Samples of Meech user interface icons
4. Use the up and down button to change the value of the rst digit.
5. Press
Samples of Meech user interface icons
to move to the next digit and set its value.
6. Finally, press
Samples of Meech user interface icons
to lock the controls.
Note that when locked a Padlock icon will appear at the top of the screen.
To unlock the controls:
1. Press
Samples of Meech user interface icons
to enter menu.
2. Select option 5 “Unlock” and press
Samples of Meech user interface icons
3. Use the up, down and
Samples of Meech user interface icons
buttons to enter the three digit code.
4. Press
Samples of Meech user interface icons
to unlock the controls.
Changing the System Set Up
The Set Up option allows the setting of the Feedback gain and controls the operation
of the in-built audible alarm.
If the three digit code is forgotten or lost, contact your local Meech oce or your
Meech distributor to get the Master Unlock Code.
14

The 977HL allows the use of an external Feedback sensor bar to monitor the accuracy
of the system’s static neutralisation. When a Meech 988 Feedback bar is connected to
the 977HL, a bar chart on the LCD display shows the residual balance of static charge
on the material after passing the ionising bar. The feedback gain adjusts the sensitivity
of the bar graph. The setting is from 1 to 10. An increase of 1 represents a doubling of
sensitivity of the bar graph.
See the section on Feedback on page 18 for full details of how to use the Feedback system.
The In-built audible alarm can be enabled or disabled to suit the installation
To set the Feedback gain and audible Alarm operation
1. Press
Samples of Meech user interface icons
to enter menu.
2. Select option 6 “Setup” using the down button and press
Samples of Meech user interface icons
3. Set the desired gain level using the Up and Down buttons and store the value by
pressing
Samples of Meech user interface icons
4. The screen will now display “Buzzer Enabled” .
5. Select “Yes” or “No” using the
Samples of Meech user interface icons
or
Samples of Meech user interface icons
button and press
Samples of Meech user interface icons
to store the
setting.
Input/ Output Connections
Remote On/O
The output of the 977HL can be turned on and o remotely via the socket located on
the connection panel.
A 2.5mm Jack plug connected to volt-free contacts will allow the 977HL to be switched
on when the contacts are made.
Relay Contact
(Volt Free)
15

Output Signals
The 8 Way Mini DIN connector oers the following outputs:
Oset: When the system is used in feedback mode with a model 988
feedback sensor bar connected, the oset output mimics the bargraph on the LCD
display. 0 Volts equates to a suciently large negative voltage being detected to give
full scale deection to negative. 2.5 Volts equates to no voltage being detected. 5V
equates to a positive voltage large enough to give full scale deection to positive.
Ion Output: 0-5V mimics the Ion output bargraph on the LCD display. 5V=100%
Alarm: The alarm relay changes state when the system detects an alarm
condition, including low ion output.
A pre-wired, 2 metre, output cable is available upon request. Please, contact Meech
representative for details. Cable connections are as follows:
16
Funcon 2 Metre Cable 5 Metre Cable
Terminal 1 Ground (0V) Black Orange
Terminal 2 Oset 0-5V Brown Red
Terminal 3 Not Used Red Yellow
Terminal 4 12V (200mA max) Orange Blue
Terminal 5 Ion Output 0-5V Yellow Brown
Terminal 6 Alarm Relay NC Green Green
Terminal 7 Alarm Relay COM Blue Purple
Terminal 8 Alarm Relay NO Purple Black
Diagram Male Plug
5
6 7 8
4
21
3
1 2
3 4 5
678

Feedback
The addition of a Meech 988 Feedback sensor bar can greatly increase the accuracy of
the neutralisation of static charges. By providing closed-loop control of the 977HL the
residual static charges on materials can be minimised despite changing conditions and
machine running speeds. This is particularly useful on rewinds, where large charges
can build up if the ionising system is not adjusted correctly. The feedback system is
intended for use on installations using Meech model 976EX Pulsed DC Ionising bars.
In normal operation, the 977HL operates at a xed rate and balance. The
frequency is set dependent on the distance from the ionising bar to the target
material. Using a static locator (983V2) the charge on the material after it has
passed the ionising bar can be measured. Ideally, the Ion balance of the
output can be adjusted by the operator, to remove all the charge on the
material.
In reality, changes in running conditions, materials and cleanliness of the bar
means that this ideal state cannot be reached without constant adjustment of
the pulsed DC controller.
The implementation of a feed back sensor bar allows this measurement and
adjustment to happen continuously. This results in the most accurate
neutralisation possible, regardless of changing conditions.
The positioning of the sensor bar is critical. It must be located in such a way that it
detects the voltage on the material only and is not inuenced directly by the Model
976 Pulsed DC Ionising bar. Your Meech engineer will be able to advise you on this.
General examples of positioning follow.
976 Bars
988 Sensors
Wound Reel
976 Pulsed DC Bar
Web Path
988 Sensor
Lay On Roller
17

Feedback Setup:
1. Switch o the 977HL and connect the feedback sensor bar using the 3.5mm jack
plug.
2. Switch on the 977HL. The LCD display will now display an additional
bargraph that represents the voltage being detected by the sensor bar.
3. Use the front panel controls to set the correct output voltage (page 9) and the rate
(page 11).
4. The 977HL will now continuously adjust the balance of the output to attain the most
accurate neutralisation of charge possible.
18
Table of contents
Other Meech Controllers manuals
Popular Controllers manuals by other brands

Vais Technology
Vais Technology SoundLinQ SL2xD2 owner's manual

Sven
Sven VR-R600 Operation manual

Ambery
Ambery IP-P4 Operation manual

Vent-Axia
Vent-Axia Visionex Fitting & Wiring Instructions

Honeywell
Honeywell epc T5068A manual

Thermal Dynamics
Thermal Dynamics iCNC Performance Service and installation manual