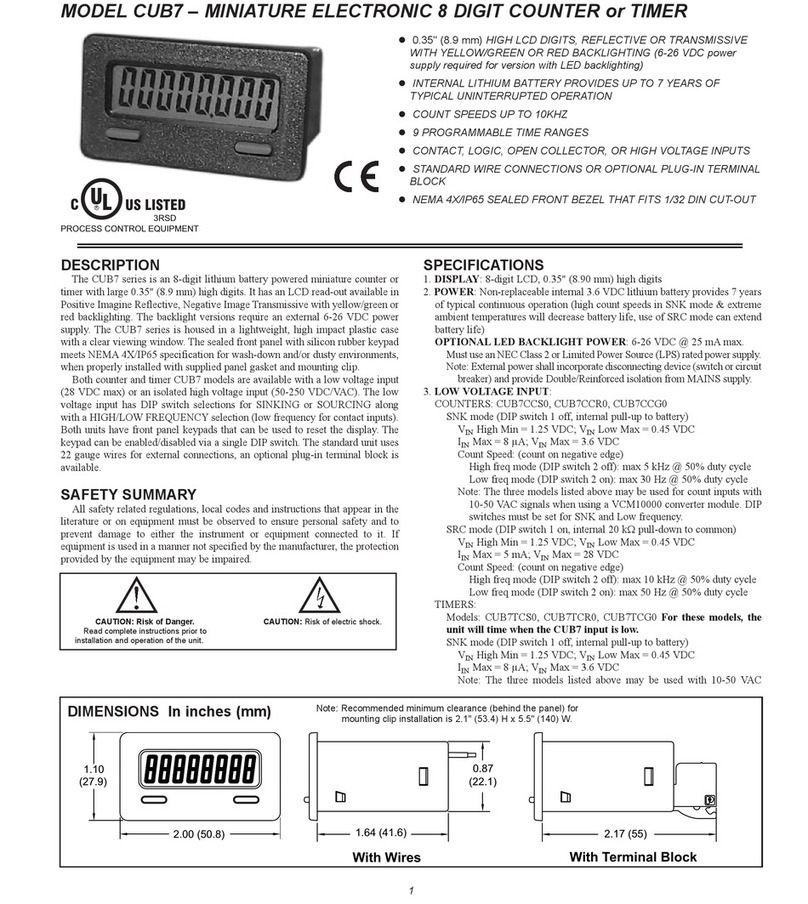
Meister TGE-20 User manual

Nr. WU7474180
Bedienungsanleitung
Digitale Wochen-Zeitschaltuhr IP44
(Modell-Nr.: TGE-20)
Spezifikation/Technische Daten
· programmierbare digitale Wochen-Zeitschaltuhr mit erhöhtem Berührungs-
schutz
· 16 Programmiermöglichkeiten pro Tag oder Woche, durch Blockbildung
(z.B. MO-FR, SA-SU usw.)
· kleinste Einstellzeit 1 Minute
· Zufallsgenerator: schaltet Verbraucher zufällig EIN und AUS
· Countdown-Funktion: angeschlossener Verbraucher wird nach Ablauf der
eingestellten Zeit ein- oder ausgeschaltet
· Uhrzeitanzeige umschaltbar: 12/24-Stunde Sommer-/ Winterzeit Modus
· manuelles Ein- und Ausschalten
· eingebauter NiMH-Akku 1,2V für Datenerhalt bei Stromausfall
· Anschluss: 230 V~, 50 Hz
· max. Anschlussleistung: 1800 W
· Umgebungstemperatur: -10°C - +40°C
· IP44 spritzwassergeschützt, Anwendung im Innenbereich und im geschütz-
ten Außenbereich.
Inbetriebnahme
· Stecken Sie die Zeitschaltuhr in eine Netzsteckdose. Der integrierte NiMH-
Akku benötigt nun ca. 14 Stunden, um seine volle Ladekapazität zu errei-
chen.
Tipp: Bei längerem Nichtgebrauch sollte die Uhr mindestens einmal im
Monat für zwei Stunden angeschlossen werden, um die Lebensdauer der
Akkus zu erhalten.
· Nach erfolgreichem Laden trennen Sie die Uhr von der Netzspannung. Um
die Uhr neu einstellen zu können, löschen Sie alle vorhandenen Informatio-
nen, indem Sie mit einem spitzen Gegenstand (z.B. Bleistift, Kugelschreiber
oder mit dem Ende einer Büroklammer) den R „RESET“ drücken.
· Die Uhr kann nun programmiert werden.
Tipp: Die Zeitschaltuhr kann auch mit einem leeren Akku eingestellt wer-
den. Verbinden Sie die Uhr mit einer Netzsteckdose und programmieren Sie
diese während des Ladevorgangs.
Einstellen 12/24-Stunden-Modus
· Drücken Sie zeitgleich die CD-Taste und die Set-Taste. Im Display wechselt
der Zeitmodus von 12 auf 24 Stunden. Beim 12-Stunden-Modus erscheint
die Anzeige „AM“ (erste Tageshälfte) bzw. „PM“ (zweite Tageshälfte) links
oben im Display. Im 24-Stunden-Modus ist diese Anzeige nicht erforderlich.
Einstellen Sommer-/Winterzeit
· Drücken Sie gleichzeitig die beiden Tasten Manuel und Taste Set um zwi-
schen Sommer- und Winterzeit umzuschalten. Auf Einstellung Sommerzeit
wird die aktuelle Zeit um eine Stunde vorgestellt und das Symbol „S“ er-
scheint im Display.
Einstellen Wochentag und Uhrzeit
· Halten Sie die Taste „SET“ für ca. 2 Sekunden gedrückt. Oben im Display be-
ginnt der Wochentag zu blinken. Stellen Sie den aktuellen Wochentag mit den
Tasten „UP+“ oder „down-“ ein. Drücken Sie die Taste „SET“, um die Einstel-
lung zu speichern. (Anmerkung: die Kurzbezeichnungen für die Wochentage
lauten: MO = Montag, TU = Dienstag, WE = Mittwoch, TH = Donnerstag, FR
= Freitag, SA = Samstag, SU = Sonntag)
· Stunden blinken. Stellen Sie die Stunden mit den Tasten „UP+“ oder
„DOWN-“ ein. Drücken Sie die Taste „SET“, um die Einstellung zu spei-
chern.
· Minuten blinken. Stellen Sie die Minuten mit den Tasten „UP+“ oder
„DOWN-“ ein. Dabei werden auch die Sekunden jeweils immer auf „00“ zu-
rückgesetzt. Drücken Sie die Taste „SET“, um die Einstellung zu speichern.
· Anmerkung: Werden die Tasten „UP+“ oder „DOWN-“ gedrückt gehalten,
erfolgt die Anzeige der Werte im Schnelldurchlauf.
· Der Einstellmodus wird automatisch beendet.
Einstellen der Programme
· Tipp: Die Einstellung kann nur erfolgen, wenn auf dem Display die Uhrzeit
angezeigt wird. Sollten Sie sich im Einstellmodus befinden, betätigen Sie
die Taste „SET“ um wieder in den Uhrzeitmodus zu gelangen!
· Mit dieser Zeitschaltuhr können bis zu 10 Programme (tägliche oder
wöchentliche) eingestellt werden. Um die verschiedenen Programme zu
überprüfen bzw. einzustellen, drücken Sie die Taste „UP+“. Auf dem Display
erscheint: (Programm) 1 ON (Ein). Drücken Sie die Taste nochmals und im
Display erscheint: (Programm) 1 OFF (Aus). Die weitere Reihenfolge:
(Programm) 2 ON
(Ein) (Programm)
2 OFF (Aus)
--------------------------------
(Programm) 10 ON (Ein)
(Programm) 10 OFF (Aus)
(Programm) (Count- down)
Drücken Sie die Taste „DOWN-“, erfolgt derselbe Ablauf, allerdings in umge-
kehrter Reihenfolge. Halten Sie die Tasten „UP+“ oder „DOWN-“ länger ge-
drückt, erfolgt die Ansicht der Programme im Schnelldurchlauf.
· Beispiel zur Einstellung eines Programms (Samstag und Sonntag soll die
Zeitschaltuhr um 17:15 Uhr eingeschaltet und um 22:30 Uhr ausgeschaltet
werden).
· Drücken Sie die Taste „UP+“. Im Display erscheint die Anzeige: (Programm)
1 ON. Drücken Sie die Taste „SET“. Die Anzeige der Wochentage blinkt. Mit
der Taste „UP+“ wählen Sie den entsprechenden Tag oder den Block von
verschiedenen Tagen aus. Sie haben 16 Kombinationsmöglichkeiten um die
Reihenfolge des Ablaufs festzulegen:
· In unserem Beispiel sind die gewünschten Tage: Samstag und Sonntag.
Nachdem Sie SA – SU ausgewählt haben, drücken Sie wieder die Taste
„SET“.
· Jetzt blinkt die Stundenanzeige. Mittels der Tasten „UP+“ oder „DOWN-“
wählen Sie die 17 aus und fixieren diese wieder mit der Taste „SET“.
· Nun blinkt die Minutenanzeige. Mittels der Tasten „UP+“ oder „ DOWN- “
wählen Sie die 15 aus und fixieren diese ebenso wieder mit der Taste
„SET“. Die Einschaltzeit vom Programm 1 ist damit erledigt.
Anmerkung: Beachten Sie, dass bei der Zeiteingabe keine Sekunden ein-
gestellt werden können.
· Drücken Sie die Taste „UP+“. Im Display erscheint die Anzeige: (Programm)
1 OFF.
Um das Programm am Samstag und Sonntag um 22:30 wieder auszuschal-
ten, folgen Sie dem gleichen Eingabeschema wie unter (Programm) 1 ON.
· Für weitere Programmierungen verfahren Sie wie unter Einstellung der
Programme 1 ON und 1 OFF.
· Tipp: Sie sollten jeweils immer zu einer Einschaltzeit auch eine Ausschalt-
zeit programmieren. Andernfalls wird der Verbraucher (z. B. eine Leuchte)
zwar zu einer bestimmten Zeit eingeschaltet, jedoch nicht ausgeschaltet.
· Tipp: Der Programmiermodus wird automatisch verlassen, wenn Sie 15
Sekunden lang keine Taste betätigen.
Programme löschen
· Suchen Sie mit den Tasten „UP+“ oder „DOWN-“ das Programm, welches
gelöscht werden soll.
· Drücken Sie die Taste „MANUEL“. Es erscheint eine Strichlinie. Das Pro-
gramm ist gelöscht. Ein- und Ausschaltzeiten müssen einzeln gelöscht
werden.
Manuelles Schalten
Die Zeitschaltuhr bietet Ihnen die Möglichkeit, angeschlossene Verbraucher
manuell ein- (ON) und auszuschalten (OFF).
Drücken Sie die Taste „MANUEL“. Die Anzeige wechselt von OFF auf AUTO
(Programme sind aktiv) und dann auf ON.
ACHTUNG: Sollte die Anzeige nicht auf „AUTO“ stehen, sind die Programme,
Countdown und Zufallsgenerator nicht aktiv.
· MO
· TU
· WE
· TH
· FR
· SA
· SU
· MO-TU-WE-TH-FR-SA-SU
· MO-TU-WE-TH-FR
· SA-SU
· MO-TU-WE-TH-FR-SA
· MO-WE-FR
· TU-TH-SA
· MO-TU-WE
· TH-FR-SA
· MO-WE-FR-SU

Conmetall Meister GmbH
Hafenstraße 26
29223 Celle
GERMANY
www.conmetallmeister.de
Countdown-Funktion (CD)
· Diese Funktion erlaubt das gezielte Ein- oder Ausschalten in einem Zeitraum
von 1 Sekunde bis 99 Stunden, 59 Minuten und 59 Sekunden.
· Beispiel: Ein Verbraucher soll in 2 Stunden, 15 Minuten und 45 Sekunden
eingeschaltet werden.
· Stellen Sie die Tasten „UP+“ oder „DOWN-“ für das CD (Countdown-Pro-
gramm) so ein, bis auf dem Display das Symbol CD erscheint
· Drücken Sie die Taste „SET“. Das Symbol ON oder OFF blinkt auf. Mittels
der Tasten „UP+“ oder „DOWN-“ müssen Sie nun auf OFF einstellen.
· Die Taste „SET“ drücken. Die Stundenanzeige blinkt. Stellen Sie die Stun-
denanzeige mit den Tasten „UP+“ oder „DOWN-“ auf 2.
· Drücken Sie die Taste „SET“. Die Minutenanzeige blinkt. Stellen Sie die
Minuten auf 15.
· Drücken Sie die Taste „SET“. Die Sekundenanzeige blinkt. Stellen Sie die
Sekunden auf 45.
· Drücken Sie die Taste „SET“ nochmals. Die Programmeingabe ist beendet
und die CD- Funktion ist nun eingestellt.
· Drücken Sie nun die Taste „CD“, um die Countdown-Funktion zu aktivieren.
Wird das Programm im Display angezeigt, sehen Sie wie die Zeit rückwärts
bis 0 gezählt wird. Wenn die Zeit abgelaufen ist, schaltet die Zeitschaltuhr
den angeschlossenen Verbraucher ein.
· Im Uhrzeitmodus erkennen Sie die eingeschaltete Countdown-Funktion an
dem blinkendem „CD“, links unten im Display.
· ACHTUNG: Die Zeitschaltuhr muss auf „AUTO“ stehen und mit einer span-
nungsführenden Netzsteckdose verbunden sein!
Zufallsgenerator (RND)
· Der Zufallsgenerator schaltet einen Verbraucher in unregelmäßigen Zeitab-
ständen ein oder aus. Der an der Uhr angeschlossene
· Verbraucher bleibt zwischen 10 und 31 Minuten eingeschaltet, im Zeitraum
6:00PM und 06:00AM.
· Tipp: Diese Funktion ist besonders geeignet um z.B. in einem Haus oder
einer Wohnung eine Anwesenheit vorzutäuschen!
· Dies dient zur Vorbeugung vor Einbruch und Diebstahl.
· Drücken Sie die Taste „RND“. Das Symbol „R“ erscheint im Display und
signalisiert Ihnen, dass der Zufallsgenerator aktiv ist. Mit derselben Taste
„RND“ schalten Sie das Programm auch wieder aus.
· ACHTUNG: Ist der Zufallsgenerator in Betrieb, sind alle anderen Programme
automatisch inaktiv. Außerdem muss die
· Zeitschaltuhr auf „AUTO“ stehen und mit einer spannungsführenden Netz-
steckdose verbunden sein!
Sicherheitshinweise
Anwendung im trockenen Innenbereich und im geschützten Außenbereich. Die
Uhr ist spritzwassergeschützt, nicht wasserdicht!
Keine Geräte einstecken, die eine höhere Leistung als die maximal zulässige
Anschlussleistung der Zeitschaltuhr haben.
· Immer sicherstellen, dass der Stecker eines Gerätes vollständig in der Uhr
eingesteckt ist.
· Zeitschaltuhren niemals hintereinander stecken.
· Spannungsfrei nur bei gezogenem Stecker.
· Ventilatoren, Heizgeräte und Heizlüfter mit offenen Elementen sollten nicht
unbeaufsichtigt gelassen werden.
· Setzen Sie das Produkt nicht dauerhaft der direkten Sonneneinstrahlung
aus.
· Das Produkt muss frei zugänglich sein und in der Nähe des zu schaltenden
Geräts angebracht sein.
· Führen Sie keine Änderungen / Reparaturen am Gerät durch.
· Das Produkt dient nur für die normalen Haushaltsanwendungen, es darf
nicht als Sicherheitseinrichtung eingesetzt werden.
· Die Verwendung des Produkts ist für Personen (einschließlich Kinder) mit
eingeschränkten physischen, sensorischen bzw. geistigen Fähigkeiten o.
mangelnde Erfahrung und Kenntnis, nicht gestattet.
· Stellen Sie sicher, dass das Produkt nicht in die Hände von Kindern oder
unbefugten Personen gelangt.
· Es ist möglich, dass die Zeitschaltuhr keine oder unvollständige Zeichen im
Display anzeigt. In diesem Fall drücken Sie die Taste „RESET“ und geben die
Uhrzeit und Programme neu ein.
Wartung & Pflege
· Die Zeitschaltuhr ist wartungsfrei. Öffnen oder zerlegen Sie die Uhr nicht.
· Bevor Sie die Uhr reinigen, trennen Sie sie immer von der Netzsteckdose und
entfernen den angeschlossenen Verbraucher.
· Reinigen Sie die Außenseite nur mit einem trockenen, sauberen, weichen
Tuch. Verwenden Sie keine aggressiven Reinigungsmittel oder chemische
Lösungen, da dadurch das Gehäuse angegriffen oder die Funktion beein-
trächtigt werden könnte. Reiben Sie nicht zu stark am Display, dies könn-
te Kratzspuren verursachen. Staub kann mit Hilfe eines weichen, sauberen
Pinsels entfernt werden.
Gewährleistung
Gewährleistungsansprüche entsprechenden gesetzlichen Bestimmungen.
Technische Änderungen vorbehalten.
Verpackung entsorgen
Das Produkt und die Verpackungsmaterialien sind recycelbar, entsorgen Sie
diese getrennt für eine bessere Abfallbehandlung.
Werfen Sie ihr Produkt, wenn es ausgedient hat, im Interesse des Umwelt-
schutzes nicht in den Hausmüll, sondern führen Sie es einer fachgerechten
Entsorgung zu. Über Sammelstellen und deren Öffnungszeiten können Sie sich
bei Ihrer zuständigen Verwaltung informieren.
Defekte oder verbrauchte Akkus müssen gemäß Richtlinie 2006/66/EG und
deren Änderungen recycelt werden. Geben Sie Akkus und / oder das Produkt
über die angebotenen Sammelstellen zurück.
Akkus dürfen nicht mit dem Hausmüll entsorgt werden. Sie können giftige
Schadstoffe oder Schwermetalle enthalten und unterliegen der Sondermüll-
behandlung.
IP 44

No. WU7474180
Operating instructions
Digital weekly time switch IP44
(Model No.: TGE-20)
Specifications/Technical data
· Programmable digital weekly time switch with enhanced accidental touch
protection
· 16 programming options per day or week thanks to individual block forma-
tion (e.g. MO-FR, SA-SU etc.)
· Minimum time setting 1 minute
· Random generator that switches connected devices randomly on and off
· Countdown feature: a connected device is switched on or off after expiry of
a set time
· Clock display switchable: can be set to 12/24 hour and standard time/day
light saving time modes
· Can be used to manually switch devices on and off
· Integrated 1.2 V NiMH rechargeable battery ensures continued operation on
mains power failure
· Required power supply: 230 V~, 50 Hz
· Max. power input: 1800 W
· Ambient temperature: -10°C - +40°C
· IP44 splash-proof, can be used in rooms indoors and in protected areas
outdoors.
Preparation for use
· Plug the time switch into a mains power socket. The integrated NiMH
rechargeable battery will require roughly 14 hours to reach its full charge
capacity.
Tip: If the switch will not be used for a longer period, it is advisable to
charge it for 2 hours every month to safeguard the service life of the re-
chargeable battery.
· On completion of charging, remove the switch from the power socket.
In order to reset the clock, delete any existing information by using a
sharp-pointed object (such as a pencil or pen tip or the end of a paper clip)
to press in the R "RESET" button.
· The time switch can now be programmed.
Tip: It is also possible to set the time switch without charging the battery.
Simply insert the switch in a mains power socket and program it during the
charging process.
Setting to 12/24 hour mode
· Press the "CD" button and the "SET" button simultaneously. The time mode
of the clock will change from 12 to 24 hour mode. In 12 hour mode, the dis-
play will show "AM" (first half of the day) or "PM" (second half of the day)
in the top left. These are not displayed if the switch is set to 24 hour mode.
Setting to standard time or daylight saving time mode
· Press the "MANUAL" and "SET" buttons simultaneously to move between
standard time or daylight saving time mode. In daylight saving time mode,
the clock will be set 1 hour forward and the symbol "S" will appear in the
display.
Setting weekday and time
· Press and hold the "SET" button for roughly 2 seconds. The symbols for
weekday in the display will now begin to flash. Set to the current weekday
using the "UP+" or "DOWN-" buttons. Press the "SET" button to save the
setting. (Note: the names of weekdays are abbreviated in the display as fol-
lows: MO = Monday, TU = Tuesday, WE = Wednesday, TH = Thursday, FR =
Friday, SA = Saturday, SU = Sunday)
· The display for hours will now flash. Set the hours using the "UP+" or
"DOWN-" buttons. Press the "SET" button to save the setting.
· The display for minutes will now flash. Set the hours using the "UP+" or
"DOWN-" buttons. Seconds are always automatically reset to "00“. Press
the "SET" button to save the setting.
· Note: Press and hold the "UP+" or "DOWN-" buttons to rapidly run through
the display of the various values.
· Setting mode is automatically terminated.
Setting operating programs
· Tip: The switch can only be programmed if the clock is displaying the time.
If you are in setting mode, press the "SET" button to return to the clock
mode.
· This time switch can be preprogrammed with up to 10 different settings
(daily or weekly). To check program settings or to set programs, press the
"UP+" button. The display will show: (Program) "1 ON". Press the button
again and the display will show: (Program) "1 OFF". Press the button again
to progress through the various programs:
(Program) "2 ON"
And
"2 OFF"
etc. You can continue to
(Program) "10 ON".
(Program) "10 OFF".
(Program) (Countdown)
To automatically run through the programs in the opposite sequence, press the
"DOWN-" button. Press and hold the "UP+" or "DOWN-" buttons for longer to
rapidly run through the display of the various programs.
· Example program setting: (in 24 hour mode, the time switch is to turn on
the connected device on Saturdays and Sundays at 17:15 and turn it off
again at 22:30).
· Press the "UP+" button. The display will show: (Program) "1 ON" Press
the "SET" button. The weekday display will flash. Use the "UP+" button to
select the desired day or block of days. There are 16 combination options
for setting the program sequence:
· In our example, the desired days are: Saturday and Sunday. After you have
selected "SA - SU", press the "SET" button again.
· The hour display will now flash. Using the "UP+" or "DOWN-" buttons,
select "17" and save this by pressing the "SET" button.
· The minute display will now flash. Using the "UP+" or "DOWN-", select
"15" and save this by pressing the "SET" button. The switch on time for
program 1 is now set.
Note: Please note that it is not possible to set seconds when setting the
time.
· Press the "UP+" button. The display will show: (Program) "1 OFF"
In order to switch off the programme on Saturdays and Sundays at 22.30,
follow the instructions above from (program) "1 ON".
· To set further programmes, follow the instructions for setting as above,
from (program) "1 ON" to (program "1 OFF", for the other programs (pro-
gram "2 ON", program "2 OFF" etc.).
· Tip: Always make sure you set a switch off time for each switch on time.
Otherwise the connected device (such as a lamp) will switch on at the
desired time but will not be switched off!
· Tip: The time switch automatically exits programming mode if no button is
pressed over a 15 second period.
Deleting programs
· Select the program you wish to delete using the "UP+" or "DOWN-" but-
tons.
· Press the "MANUAL" button. The display will show a dashed line. The pro-
gram has been deleted. Switch on and switch off times must be separately
deleted.
Manual switching
With the time switch, you also have the option of switching on and off con-
nected devices manually.
Press the "MANUAL" button. The display will change from "OFF" to "AUTO"
(programs are active) and then to "ON".
IMPORTANT: Programs, the countdown feature and the random generator will
be inactive when the display does not show "AUTO".
· MO
· TU
· WE
· TH
· FR
· SA
· SU
· MO-TU-WE-TH-FR-SA-SU
· MO-TU-WE-TH-FR
· SA-SU
· MO-TU-WE-TH-FR-SA
· MO-WE-FR
· TU-TH-SA
· MO-TU-WE
· TH-FR-SA
· MO-WE-FR-SU

Conmetall Meister GmbH
Hafenstraße 26
29223 Celle
GERMANY
www.conmetallmeister.de
Countdown feature (CD)
· Using this option, it is possible to set devices to switch on and off over peri-
ods of 1 second to 99 hours, 59 minutes and 59 seconds.
· Example: A device is to be switched on in 2 hours, 15 minutes and 45 sec-
onds time.
· Use the "UP+" or "DOWN-" buttons for the "CD" countdown program until
the symbol "CD" is displayed.
· Press the "SET" button. The symbol "ON" or "OFF" will flash in the display.
Set to "OFF" if necessary using the "UP+" or "DOWN-" buttons.
· Now press the "SET" button. The hour display will flash. Set the hour to "2"
using the "UP+" or "DOWN-" buttons.
· Press the "SET" button. The minute display will flash. Set the minutes to
"15".
· Press the "SET" button. The second display will flash. Set the seconds to
"45".
· Now press the "SET" button again. The program is now set for operation of
the CD feature.
· Press the "CD" button to activate the countdown feature. If the clock is
displayed, you will see the time countdown from 0. When the set time is
reached, the time switch will turn on the connected device.
· In clock mode, you will be able to recognise that the countdown feature is
active from the flashing "CD" at the bottom left of the display.
· IMPORTANT: The time switch must be in "AUTO" mode and plugged in to an
active mains socket.
Random generator (RND)
· The random generator can be used to switch a connected device on and off
at irregular intervals. The device connected to the
· time switch will stay switched on for 10 to 31 minutes in the time period
from 06:00PM to 06:00AM.
· Tip: This feature is particularly useful to simulate that someone is at home
while you are away.
· This will discourage potential thieves and burglars.
· Press the "RND" button. The symbol "R" will be displayed, indicating that
the random generator is active. Press the "RND" button again when you
want to switch the random generator off.
· IMPORTANT: All other programs will be automatically inactivated when the
random generator is active. In addition,
· the time switch must be in "AUTO" mode and plugged in to an active mains
socket.
Safety information
Can be used in dry rooms indoors and in protected areas outdoors. The time
switch is splash-proof but not waterproof!
Do not connect to devices with a higher output than the maximum permitted
power input of the time switch.
· Always ensure that the plug of a device is fully inserted in the socket of the
time switch.
· Never plug one time switch into another.
· A time switch is only voltage-free when unplugged from a mains socket.
· Ventilators, heaters and fan heaters with uncovered elements should never
be left unmonitored during operation.
· Do not expose the product over longer periods to direct sunlight.
· The product must be freely accessible and positioned near the device it is
to control.
· Do not yourself attempt to modify or repair the product.
· This product is designed for normal domestic use only; it may not be used
as a safety or security device.
· The product may not be used by persons (including children) with restricted
physical, sensory or mental capacities or limited experience and knowledge
of the use of products of this kind.
· Keep the product out of the reach of children or unauthorised persons.
· It is possible that the symbols shown in the display of the time switch may
appear incomplete. In this case, press the "RESET" button and reprogram
the time switch.
Maintenance and care
· This time switch does not require maintenance. Do not open the time switch
or take it apart.
· Before cleaning the time switch, always unplug it from the mains socket and
detach the connected device.
· Wipe externally using a dry, clean and soft cloth only. Do not use aggressive
cleaning agents or chemical solutions as these can damage the housing and
impair the functioning of the time switch. Do not rub the display excessively
as this can result in scratching. Remove dust using a soft, clean brush.
Warranty
Warranty cover is provided in accordance with legal requirements. The right to
make technical alterations is reserved.
Disposal of packaging materials
The product and its packaging materials can be recycled: separate these from
other waste to ensure better processing.
In order to protect the environment, do not dispose of the product when you no
longer require it with domestic waste but bring it to an appropriate recycling
centre. Please contact your local authority for information on the location of
such centres and their opening times.
Defective and no longer operational rechargeable batteries must be recycled in
accordance with the stipulations of Directive 2006/66/EC and its subsequent
updates. Return rechargeable batteries and/or the product through the official
collection points.
Rechargeable batteries may not be disposed with domestic waste. They can
contain toxic substances or heavy metals and must be treated as hazardous
waste.
IP 44
This manual suits for next models
1
Table of contents
Languages:
Other Meister Timer manuals
Popular Timer manuals by other brands
Bosch
Bosch PST 6101.321 technical information
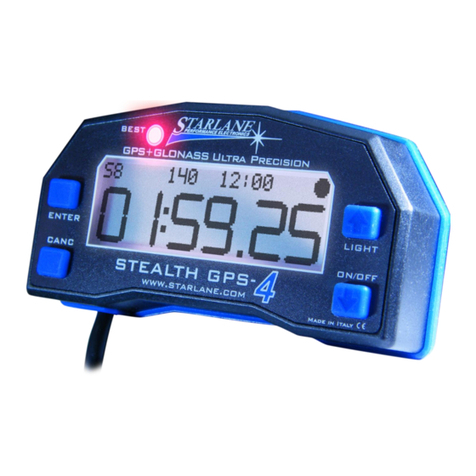
STARLANE
STARLANE STEALTH GPS-4 Installation and operation manual
Elkay
Elkay energysense 380A-1 Fitting and operating instructions
E.NEXT
E.NEXT E.CONTROL.T08M user guide

Intermatic
Intermatic KM2 SW-1G operating instructions
Intermatic
Intermatic TB121C instructions

