Melchioni IRRADIO STV-IR-3970-3 User manual

STV-IR-3970-3
Made in Turkey
Melchioni Spa
Via Pietro Colletta 37, 20135 Milano
www.melchioni-ready.com | clienti@ melchioni-ready.com
Art. 149302134
Supporto a parete a tre snodi per TV 39”- 70”
Wall bracket with three joints for 39”- 70” TV
Soporte de pared con tres juntas para TV de 39”- 70”
Support mural à trois articulations pour téléviseur 39”- 70” TV
Wandhalterung mit drei Gelenken für 39”- 70” TV


ITA
STV-IR-3970-3
Staa da muro per tv da 39” (99cm) a 70” (178cm)
GUIDA AL MONTAGGIO
Leggere attentamente le istruzioni e conservarle per consultazioni future.
Non utilizzare questo apparecchio per scopi diversi da quelli descritti.
Informazioni sulla sicurezza e speciche
ATTENZIONE: utilizzare questo prodotto per il solo scopo per cui è stato progettato.
Un diverso utilizzo può causare danni a persone o cose. In caso di dubbi o incertezze sull’utilizzo,
contattare il servizio clienti o un tecnico qualicato. Melchioni non è responsabile per danni o infortu-
ni dovuti a scorretto utilizzo o installazione. Il peso del televisore non deve essere maggiore di 40 kg.
Il muro deve essere in grado di sopportare il peso della staa e del TV assieme. Tenere il prodotto
lontano dalla portata dei bambini.
Attrezzi necessari per l’installazione.
Contenuto
Accertarsi di avere tutto il necessario per il montaggio del prodotto:
1- Stae verticali assemblate (2 pz.)
2- Braccio assemblato (1 pz)
Trapano
Cacciavite Livella a bolla
Metro e matita Punta da 8mm Chiave inglese
Martello
3- Busta in plastica, contenente dadi,
rondelle e accessori (pz 1)

Riga Componente Q.tà Riga Componente Q.tà
4
Vite a testa esagonale M8x60mm
4 12 Vite M5x12mm 4
5
Tassello da muro M8x60mm
4 13 Vite M5x30mm 4
6
Fermacavo
2 14 Vite M6x12mm 4
7Copridado 18 15 Vite M6x30mm 4
8
Rondella M8x22
6 16
Vite M8x16mm
4
9
Rondella M6x16
4 17
Vite M6x60mm
4
10 Vite M4x12mm 4 18
Tassello da muro M6x60mm
11 Vite M4x30mm 19
Distanziale
12
20
Livella
1
Istruzioni per l’installazione
Passo 1 – Vericare se il vostro televisore ha il retro piatto o ostruito o forma
irregolare
1. Posizionare il TV a faccia in giù su una supercie soce e pulita che possa proteggere lo
schermo da gra o danni.
2. Se il vostro TV ha una base di appoggio, rimuoverla. Vedere la documentazione a corredo
del TV.
3. Appoggiare provvisoriamente la staa sul retro del TV.
4. Allineare i fori di montaggio della staa e del TV.
5. Identicare che tipo di retro ha il vostro TV.
• Retro piatto: le stae si trovano a lo del retro della TV e non bloccano gli eventuali spi-
notti e non sono necessari distanziali durante il montaggio del supporto a parete.

• Retro ostruito: le stae bloccano alcuni spinotti sul retro della TV e
saranno sicuramente necessari distanziali durante il montaggio del supporto a parete.
• Retro irregolare: in questo caso, c’è spazio tra le stae e la supercie di
montaggio a parete. Saranno necessari distanziali durante il montaggio del supporto a
parete.
• Rimuovere le stae.
Passo 2 - Selezionare viti, rondelle e distanziali
1. Selezionare l’occorrente per il vostro TV (viti, rondelle e distanziali). Alcuni TV sono dotati
di viti già predisposte. (In questo caso, le viti sono inserite nei fori presenti sul retro del TV).
Se non si conosce la lunghezza corretta delle viti da utilizzare per il vostro TV, provare i vari
tipi avvitandoli a mano.
2. Selezionare uno dei seguenti tipi di viti:
3. M4x12mm (10)
M4x30mm (11)
M5x12mm (12)
M5x30mm (13)
M6x12mm (14)
M6x30mm (15)
M8x16mm (16)
Utilizzare le rondelle per qualsiasi vite.
Per TV con fondo irregolare o ostruito, utilizzare i distanziali.
Attenzione: per l’installazione, utilizzare le viti con la lunghezza corretta. Se si hanno dubbi
sulla installazione, fermarsi immediatamente e contattare il servizio assistenza. Utilizzare
viti troppo lunghe potrebbe danneggiare il TV mentre viti troppo corte non reggerebbero il
peso del TV che potrebbe cadere causando danni o ferite.
4. Rimuovere le viti per essere utilizzate altrove.
5. Per TV con retro piatto, attaccare le stae verticali direttamente.
Passo 3 - Opzione 1: attaccare le stae verticali a TV con retro piatto
1. Allineare i fori sul retro del TV con i fori della staa, che deve essere a livello.

2. Posizionare le rondelle M6x16 (6) concentriche ed allinearle ai fori sulle stae: inserire quin-
di le viti (10-14) nelle rondelle.
3. Stringere le viti per bloccare le stae al TV. Non stingere le viti esageratamente.
Passo 3 - Opzione 2: attaccare le stae verticali a TV con retro irregolare o
ostruito
1. Posizionare i distanziali sopra ai fori delle viti, tra le stae e il retro del TV.
2. Allineare le stae ai distanziali, quindi posizionare le rondelle sopra ai fori delle stae e in-
serire le viti nelle rondelle, stae e distanziali. Vericare che le stae siano livellate.
3. Stringere le viti nché non aderiscono alle stae verticali. Non stringere esageratamente.

Passo 4 - Determinare la posizione sul muro
Posizionare il TV al centro della piastra a muro sul braccio, prima di forare.
1. Misurare la distanza dal basso del TV alla mezzeria dei quattro fori di ssaggio. Questa è la
misurazione.
2. Scegliere il punto esatto sul muro, relativo al vostro disegno. Qui, misurare la distanza che
desiderate tra il basso del TV e il pavimento. Notare che il TV deve essere al di sopra di
eventuali mobili (porta TV, elementi decorativi, apparecchi blue ray e altoparlanti).
• La parte alta del TV deve essere livellata orizzontalmente.
3. Al termine di queste operazioni segnare con una matita il punto sul muro.

Passo 5 - Installare il braccio su muro di cemento pieno o forati
Attenzione: per evitare danni alla proprietà o lesioni personali, non forare mai nella malta
tra i mattoni. Forare direttamente nel cemento o calcestruzzo.
1. Allineare il centro della piastra a muro al braccio all’altezza determinata in precedenza e ve-
ricare che sia quella desiderata. Segnare la posizione dei 6 fori per le viti.
2. Forare i fori pilota con profondità 60mm e diametro 8mm.
3. Inserire i tasselli nei fori e utilizzare un martello per spingere i tasselli a lo con il muro.
4. Allineare la piastra a muro con i tasselli e inserire le viti nei fori. Stringere le viti no ad unire
la piastra ai tasselli.
5. Non stringere esageratamente per evitare danni alla proprietà o potenziali lesioni.
6. Notare che la piastra deve essere livellata orizzontalmente e verticalmente. L’angolo tra il
braccio e il muro deve essere di 90 gradi.
Passo 6 - Appendere il TV al braccio
1. Per semplicare l’attacco del TV al braccio, sollevare il TV prendendolo per gli angoli, in
modo da poter vedere il retro del TV stesso.
• Se il vostro TV è enorme o molto pesante o non si riesce a vedere la staa e il braccio,
farsi aiutare da qualcuno nell’operazione.
2. In primo luogo, inserire i ganci delle stae nella parte superiore della traversa del braccio.

3. Quindi stringere le viti nella parte inferiore della traversa.
4. Vericare che l’aggancio sia stabile e resistente.
Passo 7 - Regolazione e gestione dei cavi
1. E’ possibile modicare la posizione verticale del TV agendo sulle due viti sui ganci.
2. Nota: quando si è certi della posizione del televisore, stringere le
viti e i dadi per evitare movimenti indesiderati.
3. Posizionare i copridadi sui dadi per un migliore aspetto estetico.
4. Gestire tutti i cavi tramite i fermacavi presenti nella confezione.
Mettere i fermacavi sui due proli e far passare i cavi all’interno dei
fermacavi per prevenire qualsiasi allentamento, instradando i cavi
lungo i bracci e fornerno un aspetto pulito all’installazione.

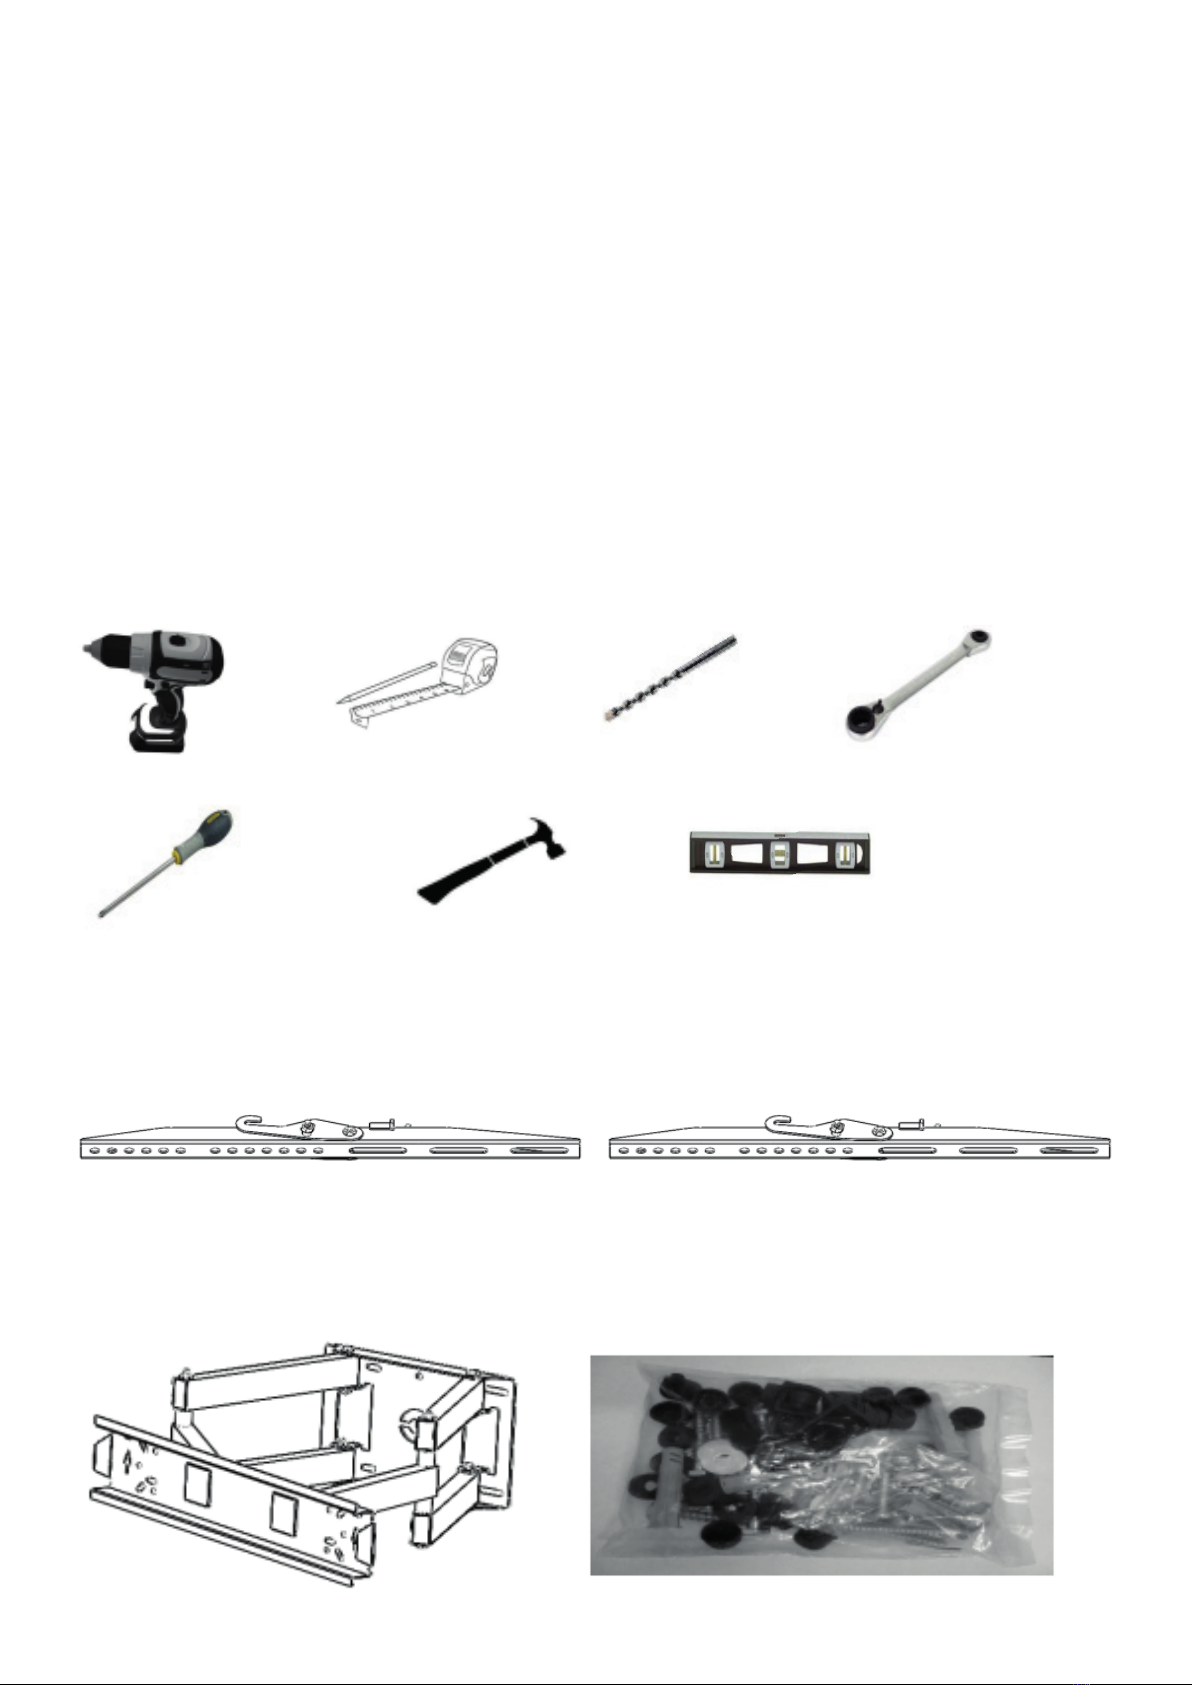
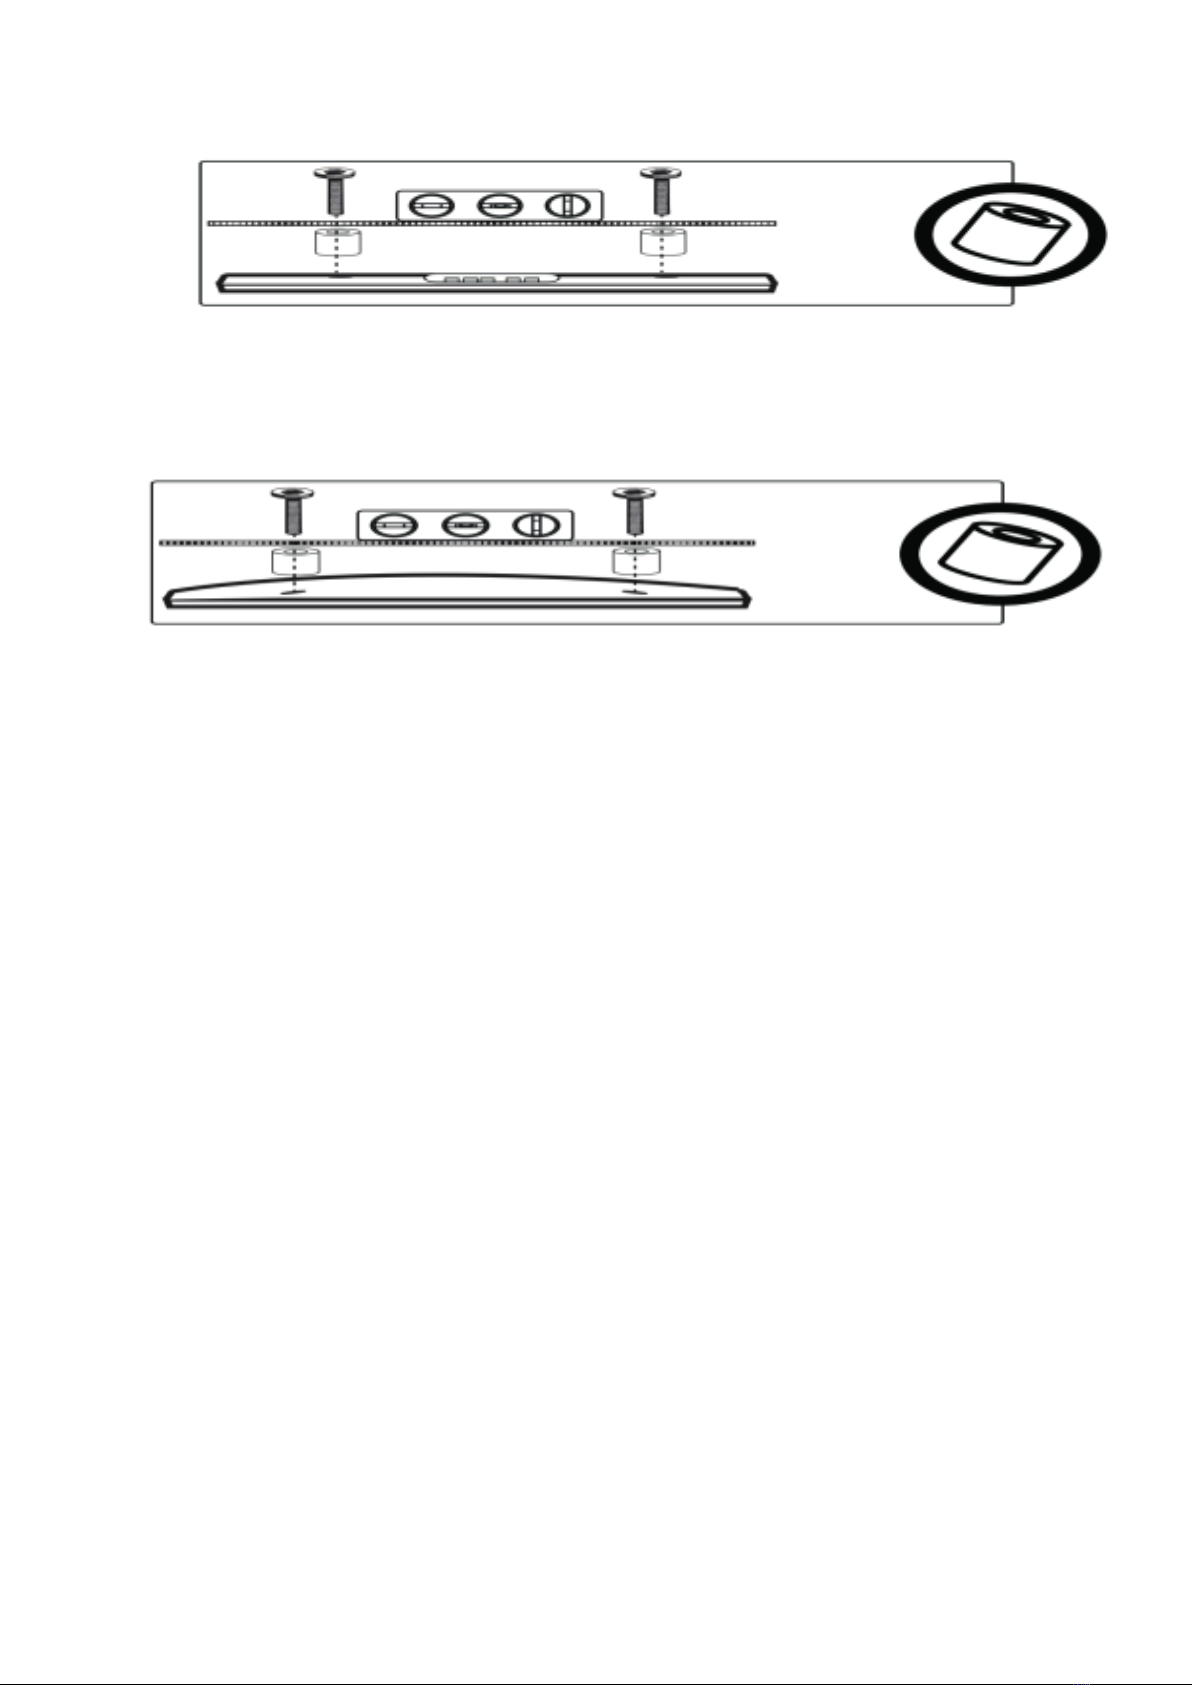
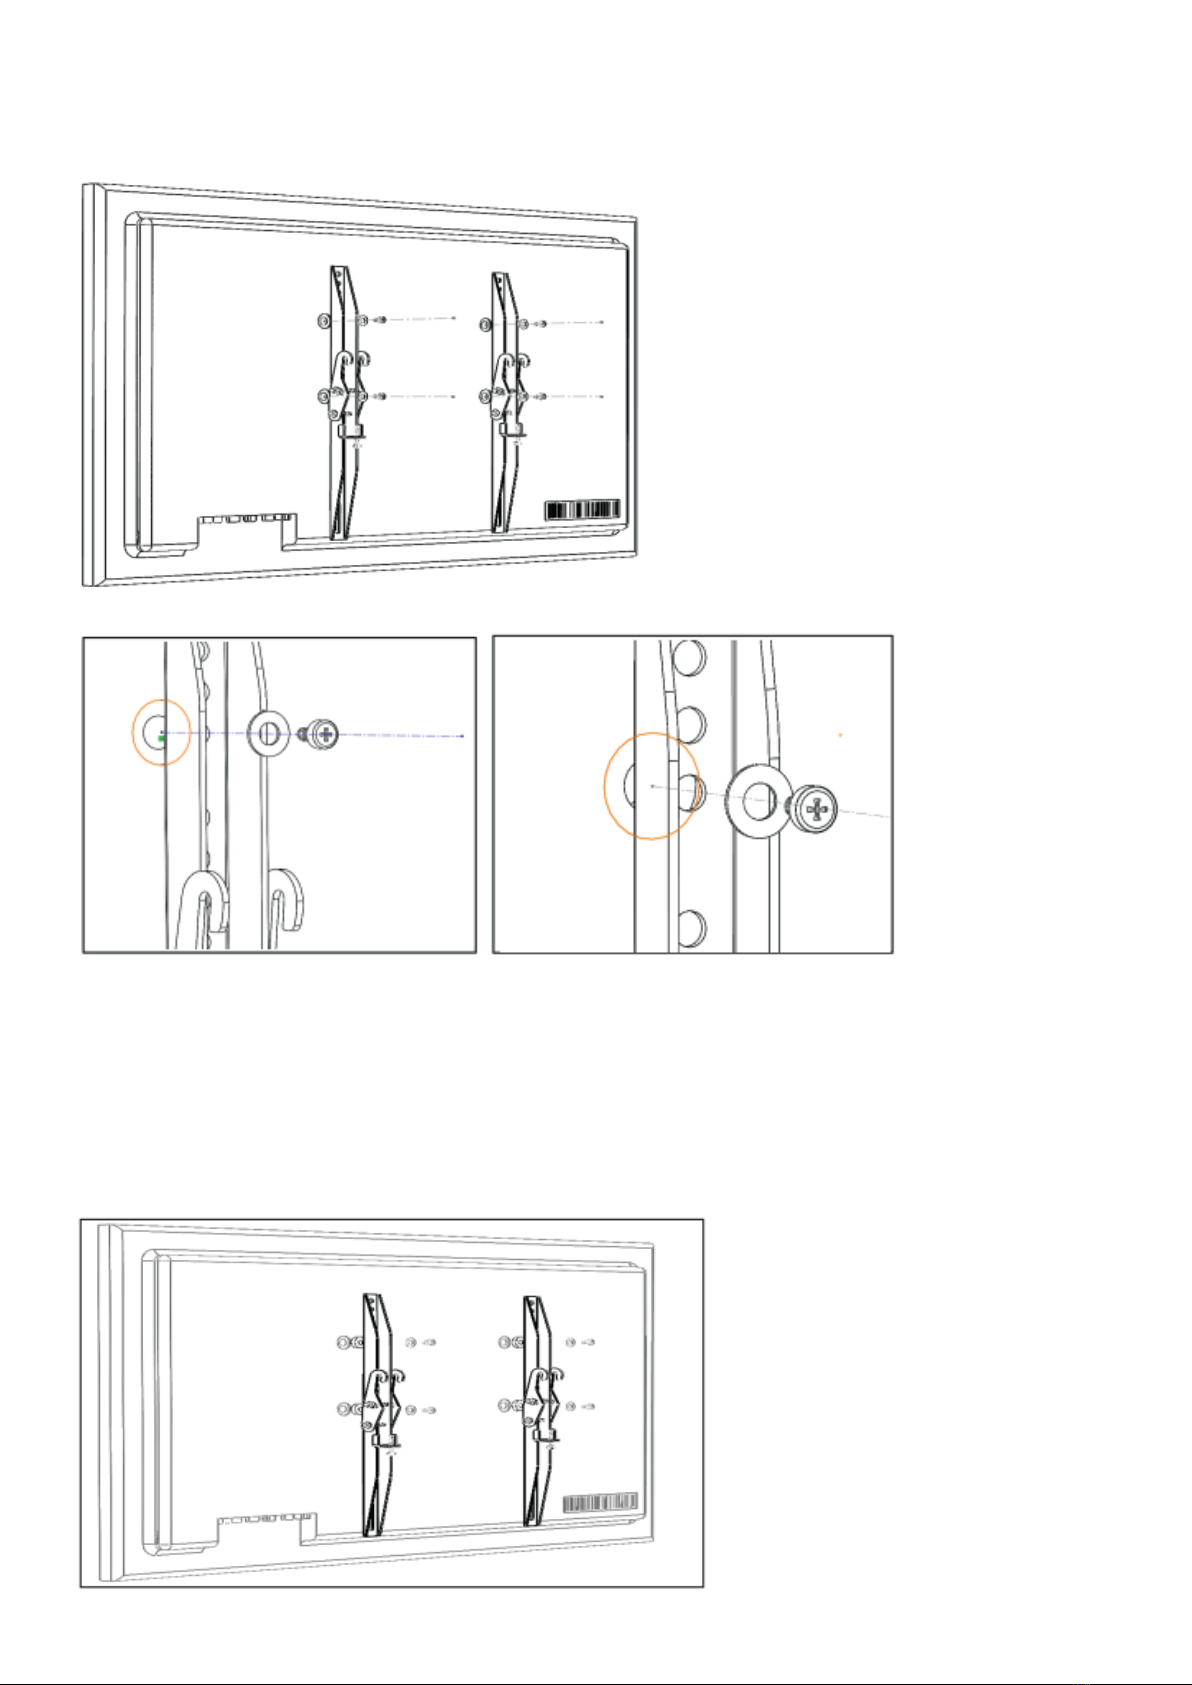
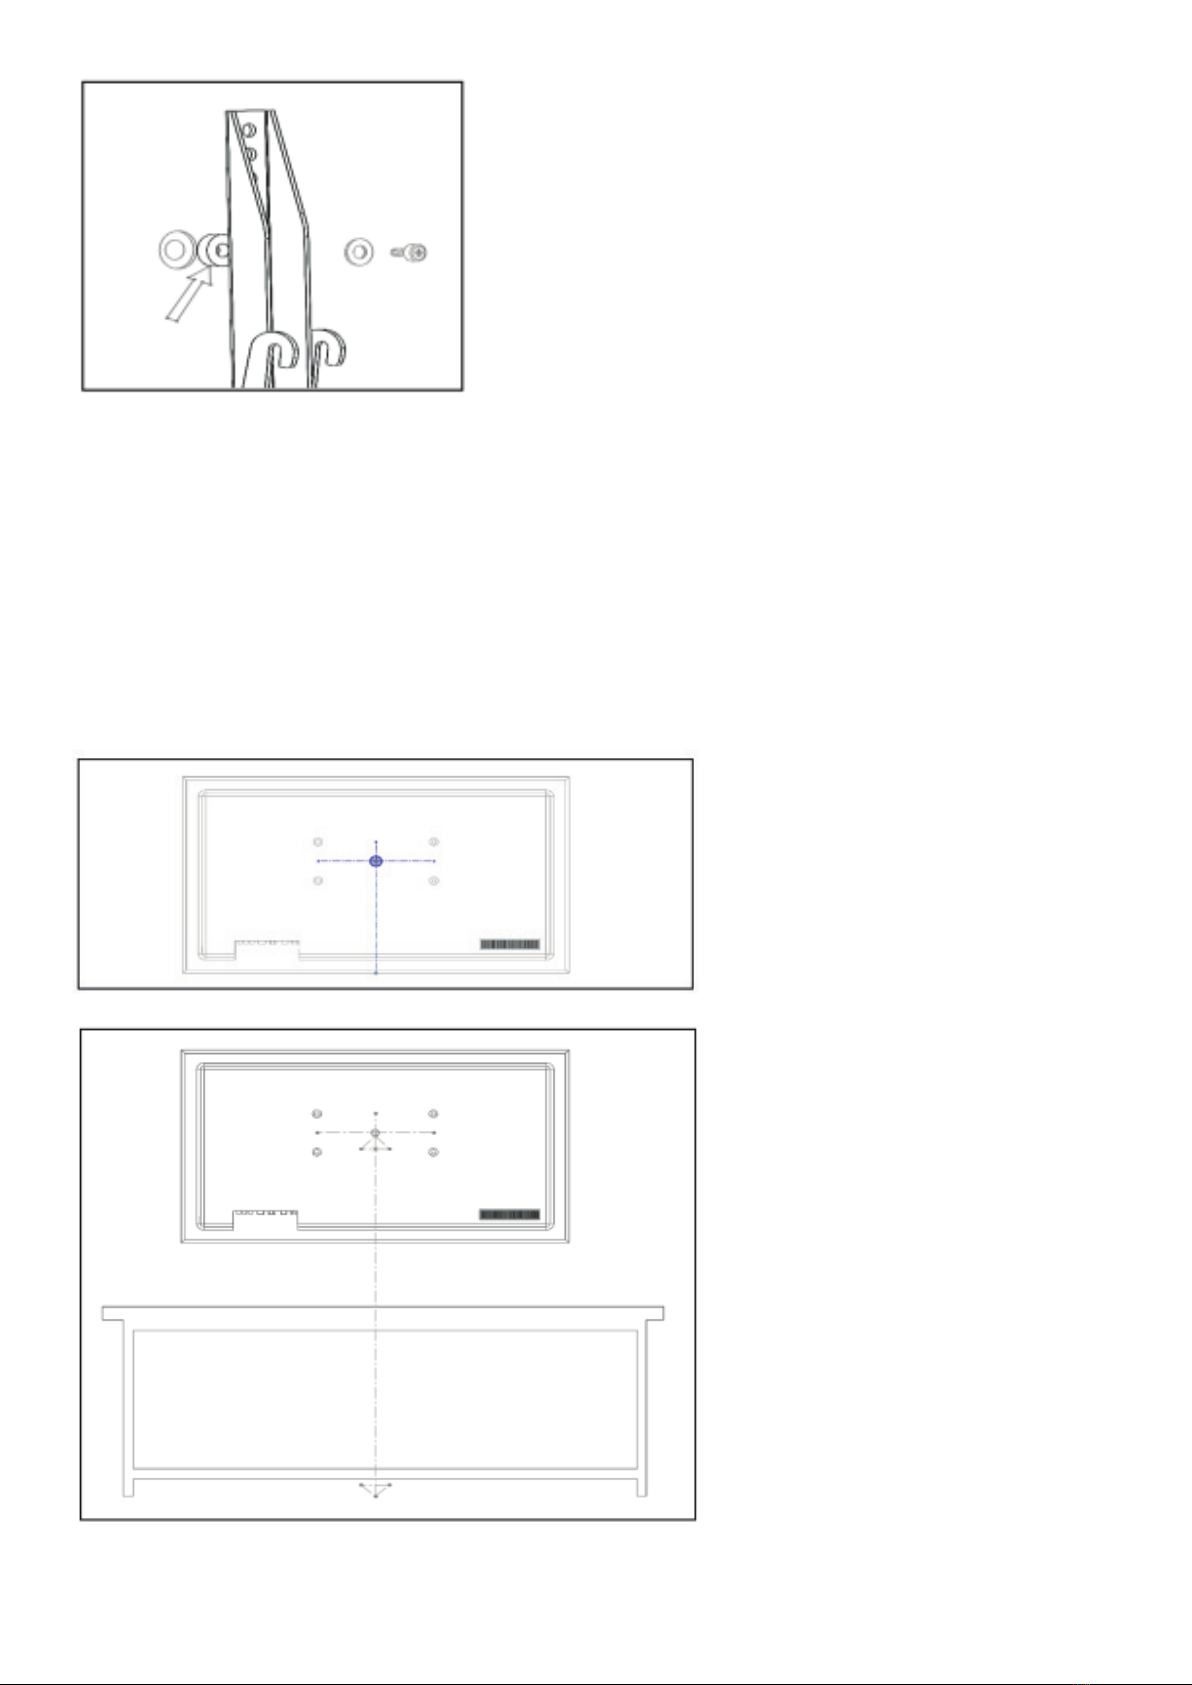
Rimuovere il TV dalla piastra a muro
Per rimuovere il TV dalla piastra a muro, scollegare tutti i cavi ed eseguire a ritroso la procedura
del passo 6.
Cura e manutenzione
Come buona prassi di cura e manutenzione, eettuare veriche periodiche al serraggio dei tasselli
e verica all’integrità del prodotto.
Garanzia
Melchioni Spa, con sede in Milano (Italia), via Colletta 37, riconosce garanzia convenzionale sul
prodotto per il periodo di due anni dalla data del primo acquisto da parte del consumatore. Tale ga-
ranzia lascia impregiudicata la validità della normativa in vigore riguardante i beni di consumo (D.L.
6 Settembre 2005 n. 206 art. 128 e seguenti), dei quali diritti il consumatore rimane titolare. Tale
garanzia si applica all’intero territorio dell’Unione Europea.
I componenti o le parti che risulteranno difettosi per accertate cause di fabbricazione saranno ripa-
rati o sostituiti gratuitamente per tramite del rivenditore, durante il periodo di garanzia di cui sopra.
Melchioni Spa si riserva il diritto di eettuare sostituzione integrale dell’apparecchio, qualora la ripa-
rabilità risultasse impossibile od eccessivamente onerosa, con altro apparecchio di simili caratteri-
stiche (D.L. 6 Settembre 2005 n. 206 art. 130) nel corso del periodo di garanzia. In questo caso la
decorrenza della garanzia rimane quella dell’acquisto originale: la prestazione erogata in garanzia
non prolunga il periodo della garanzia stessa.
Questo apparecchio non sarà in ogni caso considerato difettoso per materiali o fabbricazione qua-
lora dovesse essere adattato, cambiato o regolato, al ne di conformarsi a norme di sicurezza e/o
tecniche nazionali o locali, in vigore in un Paese diverso da quello per il quale è stato originariamen-
te progettato e fabbricato. Questo apparecchio è stato progettato e costruito per un impiego esclu-
sivamente domestico: qualunque altro utilizzo comporta il decadimento dei beneci della garanzia.
La garanzia non copre:
• parti soggette ad usura o logorio, né quelle parti che necessitano di una sostituzione e/o manu-
tenzione periodica
• uso professionale del prodotto
• malfunzionamenti o qualsiasi difetto dovuti ad errata installazione, congurazione, aggiorna-
mento di software / BIOS / rmware non eseguita da personale autorizzato Melchioni Spa
• riparazioni o interventi eseguiti da persone non autorizzate da Melchioni Spa
• manipolazioni di componenti dell’assemblaggio o, ove applicabile, del software
• difetti provocati da caduta o trasporto, fulmini, sbalzi di tensione, inltrazioni di liquidi, apertura
dell’apparecchio, intemperie, fuoco, disordini pubblici, aerazione inadeguata o errata alimenta-
zione
• eventuali accessori, ad esempio: scatole, borse, batterie, ecc. usate con questo prodotto
• interventi a domicilio per controlli di comodo o presunti difetti
Il riconoscimento della garanzia da parte di Melchioni Spa è subordinata alla presentazione di un
documento scale che comprovi l’eettiva data di acquisto. Lo stesso non deve presentare mano-
missioni o cancellature, in presenza dei quali Melchioni Spa si riserva il diritto di riutare l’erogazio-
ne del trattamento in garanzia.
La garanzia non sarà riconosciuta qualora la matricola o il modello dell’apparecchio risultassero
inesistenti, abrasi o modicati.
La presente garanzia non comprende alcun diritto di risarcimento per danni diretti o indiretti, di qual-
siasi natura, verso persone o cose, causati da un’eventuale inecienza dell’apparecchio. Eventuali
estensioni, promesse o prestazioni in merito, assicurate dal rivenditore, saranno a carico di quest’ul-
timo.


STV-IR-3970-3
Wall bracket for TV from 39’’ (99cm) to 70” (178cm)
ASSEMBLY GUIDE
Please, read the instructions carefully and keep them for future reference.
Do not use this appliance for purposes other than those described.
Safety information and specications
CAUTION: Do not use this product for any purpose not explicitly specied.
Using for other cases may cause properly damage or personal injury. On the other side if you cannot
understand of instruction or doubts about safety of this, contact to your customer service or call a
qualied contractor. Melchioni is not responsible for any damage or injury due to incorrect instal-
lation or use. The weight of your TV should not be more than 40 kg. The wall must be capable of
supporting weight of your TV and wall mount together. Keep these times away from young children.
You will need the following tools to assemble your TV wall mount:
Package contents
Make sure that you have all the hardware necessary to assemble your TV wall mount:
1- Vertical assembled Brackets (Q.ty 2)
2- Base assembled arm (Q.ty 1)
ENG
3- Hardware including Nuts, Bolts and
accessories in plastic package (Q.ty 1)
Drill
Screwdriver Level
Measuring tape and pencil 8/32” (8mm) drill bit Socket wrench (13mm)
Hammer

Row Hardware Q.tà Row Hardware Q.tà
4
M8* 60mm Head coach screw
4 12 M5* 12mm Screw 4
5
M8* 60mm Concrete anchor
4 13 M5* 30mm Screw 4
6
Cable keeper
2 14 M6* 12mm Screw 4
7Nut cap 18 15 M6* 30mm Screw 4
8
M8* 22 Washer
6 16
M8* 16mm Screw
4
9
M6* 16 Washer
4 17
M6* 60mm Screw
4
10 M4* 12mm Screw 4 18
M6* 60mm Concrete anchor
11 M4* 30mm Screw 19
Spacer
12
20
Level
1
Installation instructions
Step1 – Determine that your TV has a at back or an irregular form of TV or
obstructed back
1. Carefully place your TV screen face-down on a soft place, clean that surface to protect the
screen from any damages and scratches.
2. If your TV has a table-top stand attached, remove the stand. See the documentation that
came with your TV for instruction.
3. Temporarily lay the brackets on the back of your TV.
4. Align screws, brackets and TV with the mounting screw holes.
5. Identify that which type of back your TV may have:
• Flat back: the brackets lay ush the back of your TV and do not block any jacks and you
do not need spacers when assembling the wall mount or any other distances.

• Obstructed back: The brackets block any of the jacks on the back of your TV and
properly you will need spacers when assembling the wall mount.
• Irregularly shape back: In this type, there is gape between the brackets and surface
of wall mount. You will need spacers when assembling the wall mount.
• Remove the vertical brackets.
Step 2- Select screws, washers, and spacers
1. Select the hardware for your TV (screws, washers, and spacers). A limited number of TVs
come with number of hardware included. (If there are screws that came with the TV, there
are almost always in the holes on the back of the TV). If you don’t know the correct length
of the mounting screws your TV requires, test various sizes by hand threading the screws.
2. Select one of the following types of screws:
M4* 12 mm Screw (10)
M4* 30 MM Screw (11)
M5* 12 mm Screw (12)
M5* 30 mm Screw (13)
M6* 12 mm Screw (14)
M6* 30 mm Screw (15)
M8* 16 mm Screw (16)
Use washers for all screws.
For an irregular or obstructed TV back, you can use some spacers.
Caution: use the correct length of screws for installation. If you doubt about installation by
yourself, stop immediately and contact to customer service. Using hardware that is too long
may damage your TV and on the other hand using too short may cause your Tv fall from
the mount and do damage or injuries.
4. Remove the screws for tting other steps.
5. For at back TV, directly attaching the vertical brackets to TVs with irregular or obstructed
backs.
Step 3- Option 1: attaching the vertical brackets to TVs with a at back
1. Align TVs holes on the bracket holes with screws on the back of TV. The brackets must be
level.
2. Place washers M6 16 mm (6) concentric and align on the holes of brackets and then insert

the screws (10-14) through the washers.
3. Tighten the screws until fasting brackets to TV. Notice that do not over tighten
Step 3- Option 2: attaching the vertical brackets to TVs with irregular or ob-
structed backs
1. Place the spacers over the screw holes between brackets and TVs back.
2. Align the brackets over the spacers, after that place the washers over the holes in the
brackets and insert the screws through the washers, brackets and spacers. Make sure that
the brackets are level.
3. Tighten the screws until snug against the vertical brackets. Do not over tighten.

Step 4 – Determine wall-mount location
Place TV at the center of the wall plate at the arm, before drill holes.
1. Measure the distance from the bottom of TV to the middle of four mounting screw holes.
This is measurement.
2. Choose the exact place on the wall that related to your design. In this part, measure the
bottom of TVs place that you want from oor. But notice that Tv should place above any fur-
niture such as (TV stand, decoration box, blue ray box and speaker box).
• Top of the Tv should be level.
3. At the end of this step use pencil to mark TV spot on the wall.

Step 5- Installing arm on a solid concrete or concrete clock wall
Caution: To prevent property damage or personal injury, never drill into the mortar between
the blocks. Plate directly onto the concrete surface.
1. Align the center of the wall plate at the arm at the height determined in the previous step
and make sure that it is level as you know. Mark the 6 screw hole locations.
2. Drill pilot holes to the depth of 60mm and 8mm diameter.
3. Insert concrete wall anchors into the pilot holes and use a hammer to make sure that the
anchors are ush with the concrete surface.
4. Align the wall plate with the anchors and then insert the screws through the holes in the wall
plate assembly. Tighten the screws until fasting the wall plate and anchors.
5. Do not over tighten for avoiding potential injuries or property damage.
6. Notice that the wall plate should stand level vertically and horizontally. The degree between
the arm and the wall must be 90 degrees.
Step 6 – Attach the TV to the arm
1. To make it easier to attach the TV to the wall plate, pick the Tv up from the corners in a way
you can see back of your TV.
• If your TV is huge, heavy or inaccessibility to say brackets and arm, you will need assi-
stance into this step.
2. At rst, insert hooks that assembled to the brackets on top of the main body bent that as-
sembled to the arm.

3. Then, tight the screw that assembled on the brackets to the bottom bent part on the body.
4. Make sure that your TV stand resistantly on the body.
Step 7 – Making adjustment and managing cables
1. You can change the Tv position vertically by two screws that assembled on the hooks.
2. Note: When you sure that your TV is standing in place that you
want, tighten the screws and nuts to prevent unwanted movement.
3. Manage all cables by two cable keepers which are in your packet.
Put cable keepers to two proles and then pass cables from inside
of cable keeper to prevent any slack, routing cables along the arms
and providing a clean look to your installation.

Removing the TV from the wall mount.
To remove your TV from the wall plate assembly, disconnect all cables and then reserve the proce-
dures in step 6.
Care and maintenance.
As a good practice of care and maintenance, carry out periodic checks on the tightening of the an-
chors and check the integrity of the product.
Warranty
Melchioni Spa, based in Milan (Italy), via Colletta 37, recognizes a conventional guarantee on the
product for a period of two years from the date of the rst purchase by the consumer. This guarantee
does not aect the validity of the legislation in force concerning consumer goods (Legislative Decree
6 September 2005 n. 206 art. 128 and following), of which the consumer remains the owner. This
guarantee applies to the entire territory of the European Union.
The components or parts that are found to be defective for ascertained manufacturing causes will be
repaired or replaced free of charge through the dealer, during the above warranty period. Melchioni
Spa reserves the right to make a complete replacement of the device, if repairability is impossible
or excessively expensive, with another device of similar characteristics (Legislative Decree 6 Sep-
tember 2005 no. 206 art. 130) during the warranty period. In this case, the validity of the warranty
remains that of the original purchase: the service provided under warranty does not extend the
warranty period.
In any case, this appliance will not be considered defective in terms of materials or manufacture
should it be adapted, changed or adjusted, in order to comply with national or local safety and / or
technical standards, in force in a country other than that for which it is was originally designed and
manufactured. This appliance has been designed and built for domestic use only: any other use will
invalidate the benets of the guarantee.
The warranty does not cover:
• parts subject to wear or tear, nor those parts that require periodic replacement and / or mainte-
nance
• professional use of the product
• malfunctions or any defects due to incorrect installation, conguration, software / BIOS / rmwa-
re update not performed by authorized Melchioni Spa
• repairs or interventions carried out by persons not authorized by Melchioni Spa
• manipulation of assembly components or, where applicable, of the software
• defects caused by fall or transport, lightning, voltage uctuations, liquid inltration, opening of
the appliance, bad weather, re, public disturbances, inadequate ventilation or incorrect power
supply
• any accessories, for example: boxes, bags, batteries, etc. used with this product
• home interventions for convenience checks or presumed defects
The recognition of the guarantee by Melchioni Spa is subject to the presentation of a tax document
that proves the actual date of purchase. The same must not show any tampering or deletions, in
the presence of which Melchioni Spa reserves the right to refuse the provision of treatment under
warranty.
The warranty will not be recognized if the serial number or model of the appliance is non-existent,
abraded or modied.
This warranty does not include any right to compensation for direct or indirect damage, of any na-
ture, to people or things, caused by any ineciency of the appliance. Any extensions, promises or
services in this regard, insured by the retailer, will be borne by the latter.

STV-IR-3970-3
Soporte de pared para TV de 39 “(99 cm) a 70” (178 cm)
GUÍA DE MONTAJE
Por favor, lea atentamente las instrucciones y guárdelas para futuras consultas.
No utilice este aparato para nes distintos de los descritos.
Información y especicaciones de seguridad
PRECAUCIÓN: No utilice este producto para ningún propósito no especicado explícitamente.
El uso para otros casos puede causar daños o lesiones personales. Por otro lado, si no puede en-
tender las instrucciones o dudas sobre la seguridad de esto, comuníquese con su servicio al cliente
o llame a un contratista calicado. Melchioni no es responsable de ningún daño o lesión debido a
una instalación o uso incorrecto. El peso de su televisor no debe ser superior a 40 kg. La pared
debe ser capaz de soportar el peso de su televisor y el soporte de pared juntos. Mantenga estos
elementos lejos de los niños pequeños.
Necesitará las siguientes herramientas para montar el soporte de pared de su
televisor:
Contenido del embalaje
Asegúrese de tener todos los elementos necesarios para montar el soporte de pared de su televisor:
1- Soportes montados verticalmente (cant. 2)
2- Brazo montado base (cant. 1)
SPA
3- Material que incluye tuercas, pernos y acce-
sorios en el embalaje de plástico (pregunta 1)
Taladro
Destornillador Nivel
Cinta de medición y lápiz broca 8/32” (8 mm) Llave de tubo (13 mm)
Martillo
This manual suits for next models
1
Table of contents
Languages: