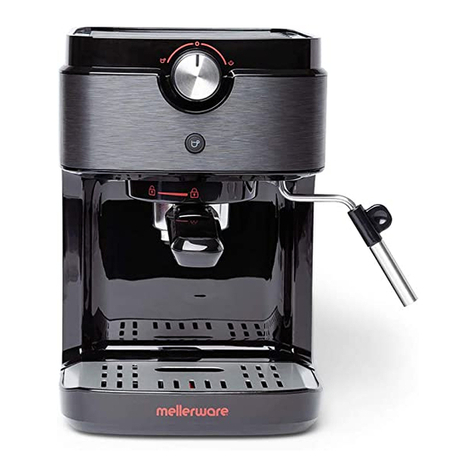
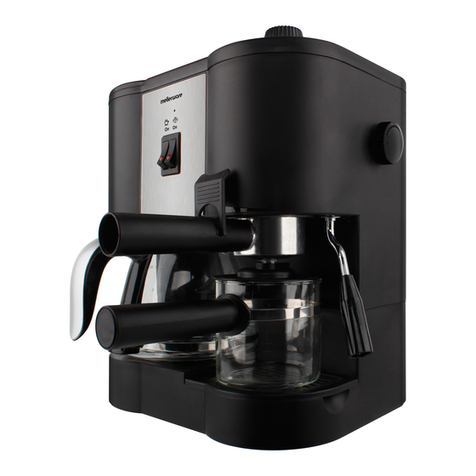
Mellerware Bari Legend User manual

Bari Legend
Coffee-maker
Cafetera
Kofemaker
Cafetière
Máquina de Café
Kaffeemaschine
Macchina per il caffè

Fig.1
1.1
1.2
1.3

A
B
C
D
E1
E2
E3
F
G
H
L
M
N
O
J
K
I

English
Coffee-maker
BARI LEGEND
Dear customer,
- Many thanks for choosing to purchase a
Mellerware brand product.
- Its technology, design and practicality, along
with fact that it has passed the strictest quality
tests, will bring total satisfaction for a long time,
and will enable you to discover the pleasure of
savouring real espresso coffee.
- Read these instructions carefully before switch-
ing on the appliance and keep them for future
reference. Failure to follow and observe these
instructions may result in an accident.
SAFETY ADVICE AND
WARNINGS
- Clean all the parts of the prod-
uct that will be in contact with
food, as indicated in the clean-
ing section, before use.
- This appliance is only for do-
mestic use, not for industrial
or professional use. It is not
intended to be used by guests
in hospitality environments such
as bed and breakfast, hotels,
motels, and other types of
residential environments, even
in farm houses, areas of the
kitchen staff in shops, ofces
and other work environments.
- This appliance can be used by
people unused to its handling,
disabled people if they have
been given supervision or in-
struction concerning use of the
appliance in a safe way and un-
derstand the hazards involved.
- This appliance can be used by
children aged from 8 years and
above if they have been given
supervision or instruction con-
cerning use of the appliance in
a safe way and understand the
hazards involved.
- Cleaning and user maintenance
shall not be made by children
unless they are older than 8
and supervised
- Keep the appliance and its
cable out of reach of children
under the age of eight.
- This appliance is not a toy.
Children should be supervised
to ensure that they do not play
with the appliance.
- Do not submerge the appliance
in water or any other liquid, or
place it under a running tap.
- If the connection is damaged
it must be replaced. Take the
appliance to an authorised
Technical Assistance Service.
Do not try to dismantle or repair
without assistance, as this may
be dangerous.
- Ensure that the voltage indicated on the name
plate matches the mains voltage before plug-
ging in the appliance.
- Connect the appliance to a base with an earth
socket withstanding a minimum of 10 amperes.
- The appliance’s plug must t into the mains
socket properly. Do not alter the plug. Do not
use plug adaptors.
- Never use the electric wire to lift up, carry or

unplug the appliance.
- Do not wrap the cable around the appliance.
- Do not clip or crease the power cord.
- Do not allow the power cord to come into con-
tact with the appliance’s hot surfaces.
- Check the condition of the electrical connection
cable. Damaged or tangled cables increase the
risk of electric shock.
- Do not touch the plug with wet hands.
- Do not use the appliance if the cable or plug is
damaged.
- If any of the appliance casings breaks, immedi-
ately disconnect the appliance from the mains
to prevent the possibility of an electric shock.
- Do not use the appliance if it has fallen on the
oor, if there are visible signs of damage or if it
has a leak.
- Keep the working area clean and well lit. Clut-
tered and dark areas invite accidents.
- Do not place the appliance on hot surfaces,
such as cooking plates, gas burners, ovens or
similar.
- -The appliance should be used and kept over a
at and stable surface.
- This appliance is not suitable for outdoor use.
- Supply cord should be regularly examined for
signs of damage, and if the cord is damaged,
the appliance must not be used.
- Do not use the appliance, in the case persons
insensitive to heat (the appliance has heated
surfaces).
- Do not touch the heated parts of the appliance,
as it may cause serious burns.
USE AND CARE:
- Fully unroll the appliance’s power cable before
each use.
- Do not use the appliance if its accessories are
not properly tted.
- Do not switch the appliance on without water.
- Do not use the appliance if the on/off switch
does not work.
- Do not move the appliance while in use.
- Respect the MAX and MIN levels.
- Disconnect the appliance from the mains when
not in use and before undertaking any cleaning
task.
- Unplug the appliance from the mains before
relling the water tank.
- Store this appliance out of reach of children
and/or persons with physical, sensory or
reduced mental or lack of experience and
knowledge.
- Do not store the appliance if it is still hot.
- Only use water with the appliance.
- The use of bottled mineral water adapted for
human consumption is recommended.
- Never leave the appliance connected and un-
attended if is not in use. This saves energy and
prolongs the life of the appliance.
- Do not remove the lter-holder when coffee is
being made, as at that time it is under pressure.
SERVICE:
- Make sure that the appliance is serviced only
by specialist personnel, and that only original
spare parts or accessories are used to replace
existing parts/accessories.
- Any misuse or failure to follow the instructions
for use renders the guarantee and the manu-
facturer’s liability null and void.
DESCRIPTION
A Front panel
B Water tank
C Hot plate for warming cups
D Espresso/Steam Control Knob
E1 Espresso Button (Single cup)
E2 Espresso Button (Double cup)
E3 Steam Button
F ON/OFF Switch
G Steamer Tube & nozzle
H Filter holder
I Measuring spoon
J Ground coffee lter (1 cup)
K Ground coffee lter (2 cups)
L Supply cable
M Drip tray
N Drip tray grid
O Retention clip for handle

Fig. 1 Milk frother assembly
1.1 Frothing grip
1.2 Frothing wand
1.3 Removable frothing sleeve
INSTRUCTIONS FOR USE
BEFORE USE:
- Make sure that all the product’s packaging has
been removed.
- Before using this product for the rst time, it is
advisable to test it only with water.
- Before using the product for the rst time, clean
the parts that will come into contact with food in
the manner described in the cleaning section.
- Before connecting the machine, check that ON/
OFF button (F) is not pressed, and Espresso/
Steam Control Knob (D) is in central position 0
BEFORE FIRST USE (PRIMING THE
CIRCUIT):
- This simple operation ensures optimum dis-
pensing and must be carried out:
- When rst starting.
- When the machine has been out of use for a
long time (1 or 2 weeks).
- When the tank has run out of water.
- Fill the receptacle taking care to observe the
MAX level.
- Connect the appliance to the mains.
- Press the on/off switch (F) to ON position. The
(E) pilot lights will come ashing on in red and
blue colour by turns.
- Without tting the lter holder (H) (or with the
lter holder tted, but without coffee), place a
recipient under the position of the coffee cup.
- Select the coffee position by rotating the (D)
control to this position.
- Press any buttons (E) to pump a small amount
of water.
- Water will exit through the lterholder position.
Wait until the water stops exiting automatically.
- The pilots of buttons (E) will be illuminated in
blue when preheating nished.
- To nish serving, rotate the selection control
(D) to the central position 0.
- This will complete the priming operation.
FILLING WITH WATER:
- The tank must be lled with water before turn-
ing the appliance on.
- Remove the tank from the appliance, with a
slight backward rotation
- Fill the tank taking care to observe the MAX
level. Do not leave the water beneath MIN
level.
- Replace the tank in its housing, ensuring that
it is well tted by the water tank buckle on the
back of the unit.
FILLING COFFEE:
- Remove the lter holder (H)
- Position the selected ground coffee lter (J or
K) in the lter holder
- Attention
- Filter extraction
- The lterholder includes a spring inside, whose
function is to avoid the fall of the sieve when
throwing the used coffee. That spring produces
a lateral tightening on the lter
- Due to this tightening, to remove the lter for
exchange or cleaning, it may be necessary to
use a tool.
- We recommend using the edge of the small
lter to pop out the double cup lter, a round-
tipped knife or a tip of a teaspoon, so that it
can be placed between the upper edge of the
lterholder and the bottom of the sieve wing
and make a little twist.
- Insert the desired ground coffee lter (J or K)
into the lter holder.
- We recommend using natural toast coffee,
as using some roasted coffee may affect the
operation of the machine.
- Fill the chosen removable lter (1 or 2 cups)
with ground coffee (6-7 gr per cup to be pre-
pared).
- Using measuring spoon (I): for 1 coffee, put
1 spoonful and for 2 coffees, put in 2 spoonfuls.
- Next lightly press down the ground coffee with
the back of the spoon.
- Before tting the lter holder in the coffee-mak-
er assembly, turn the ladle-holder (O) back-
wards.
- Fit the lter holder in the appliance once more.
- Position the lter holder in the coffee assem-
bly by inserting the assembly downwards and
aligning the handle with the position “open

lock”. Turn it anticlockwise, from left to right,
until it locks.
USE
- Connect the appliance to the mains.
- Turn the appliance ON using the on/off switch
(F).
- Be sure the knob is in the “0” position to start
preheating.
- The three buttons (E) pilot lights come on ash-
ing intermittently.
- Wait until the pilot lights (E) stop ashing and
illuminate blue. It means right temperature is
reached
- Place one or two pre-heated cups (as desired)
at the lter holder outlet.
- Turn the Control Knob (D) to the coffee posi-
tion.
- Press the desired Coffee Button (E1 or E2).
The light of the selected button will begin to
ash. The unit will start the pre-brewing and
after stop, it will continue with the brewing.
- The coffee infusion will begin to exit.
- The unit will stop automatically when coffee
brewing nished. Coffee button will illuminate.
- During coffee brewing, you can always press
the coffee button again to stop the operation if
you like.
- -To nish, turn back control knob (D) to the
central position 0.
- Once serving has nished, wait a few seconds
and remove the cups with the coffee.
- Remove the lter holder and empty the
grounds from it.
- Wash the lter holder with running water and
dry it well.
- Check that the removable lter is perfectly
tted into the lter holder.
- Fit the lter holder in the appliance once more.
NOTES:
- After the espresso is brewed and knob D rotat-
ed to central position 0, the machine automati-
cally creates a bit of steam and pushes the re-
maining water from the pump into the drip tray
(M). This ensures that there will be no rest-wa-
ter in the heating system. After preparing a few
cups of espresso, carefully pull the drip tray out
of the machine, empty and replace.
TIPS:
- After making coffee, always turn knob (D) to
position 0. It will facilitate the action of remov-
ing the lter holder.
IMPORTANT NOTICE
- The steam tube can be very Hot. Handle with
care during operation. Always grasp the froth-
ing grip (1.1) to direct the milk foam wand.
OBTAINING STEAM:
- The steam is used to foam milk for cappuccino,
and also to heat other liquids.
- Turn the appliance on using the on/off switch
(F) Be sure the knob is in the “0” position
- Select the steam button(E3) for pre-heating,
The pilot of the steam button will begin to ash
and illuminate in blue when the right tempera-
ture is reached.
- Place a recipient under the steam tube.
- Place the tube inside the liquid to be heated.
- Rotate the control knob D to the steam po-
sition. The steam button will illuminate. The
steam will start to ow out of the tube.
- To better froth the milk, move the jar with slight
movements of the jar from top to bottom.
- When you have enough, turn back the control
knob (D) to 0 position and remove the recipient.
- Use a damp cloth to clean the remains in the
steam pipe.
NOTE:
- The milk must be at refrigerator temperature
(not hot!).
- Always clean the steam tube & nozzle after
each use to remove the milk residue.
HOT WATER
- Rotate the control knob (D) to steam position
when unit is on Standby mode, the button E1
light on
- Place a cup right under the steam tube &
nozzle
- Press the single cup coffee button(E1). The
single cup coffee button will ash.
- The unit will start making hot water from the
steam tube & nozzle. When the desired water
volume is reached, rotate the control knob back
to the “0” position to stop hot water making.
- The unit will back to standby mode with coffee
buttons light on.

VOLUME ADJUSTING
- Select any lter to put into the porta-lter. Posi-
tion the porta-lter to the unit.
- Press any coffee button and keep pressing it
down until desired volume is reached. Then
release the selected button, the desired volume
will be reached.
NOTICE:
- Min. setting time for single cup and double cup
is 10S.
- Max. setting time for single cup: 60S.
- Max.setting time for double cup: 90S.
RESET TO DEFAULT SETTING
- 1 Plug the unit in.and power on.
- 2 pushing the on/off switch (F) to OFF. Rotate
the control knob to steam function.
- 3 Press down both single cup coffee button
and steam button simultaneously, pushing the
on/off switch (F) to ON position at the same
time.
- 4 The two espresso buttons will ash by turns.
- 5 The unit is now reset to the default setting.
AUTO-OFF FEATURE:
- The Mellerware machines are designed to save
energy.
- To that end, after some minutes, if during this
period the user has not performed any action
on it, the unit switches to energy saving mode.
- To return to normal operation you should just
press one of buttons (E).
- Once you have nished using the appliance:
- Turn the appliance off, pushing the on/off
switch (F) to OFF position
- Unplug the appliance to the mains.
- Remove the water from the water tank.
- Clean the appliance.
CLEANING
BASIC CLEANING
- Disconnect the appliance from the mains and
let it cool before undertaking any cleaning task.
- Clean the equipment with a damp cloth with a
few drops of washing-up liquid and then dry.
- Do not use solvents, or products with an acid or
base pH such as bleach, or abrasive products,
for cleaning the appliance.
- Do not let water or any other liquid get into the
air vents to avoid damage to the inner parts of
the appliance.
- Neither parts of this appliance are suitable for
cleaning in the dishwasher.
- After washing, dry all the parts before tting
them together and storing.
CLEANING THE FROTHING WAND (FIG 1)
- CAUTION! The frothing wand, frothing tip, and
frothing sleeve may be VERY HOT.
- It is recommended to purge and wipe the froth-
ing wand after steaming milk to prevent depos-
its of dirt and before turning off the machine.
- To do this, pull the frothing sleeve down and
clean under warm running water.
- Fill a cup with a bit of water, immerse the froth-
ing wand into the water, press the steam button
to start the pre-heating. When ready turn the
Control Knob to the “Steam icon” letting out a
little steam. turn the Control Knob (D) towards
the position “0”
- Use a cloth to dry the frothing wand and re-
place the frothing sleeve
- In case no steam comes out of the frothing
wand, hardened milk blocks its path.
- Carefully use a needle to loosen the milk resi-
due from the opening of the frothing tip
- (g 1) to remove any blockage.
- Once clean, rinse with running water from the
tap and reassemble it. Then steam again.
HOW TO DEAL WITH LIME SCALE
INCRUSTATIONS:
- For the appliance to work correctly it should be
kept free of lime scale or magnesium incrusta-
tions caused by the use of hard water.
- To prevent this kind of problem, we recommend
the use of water with low lime or magnesium
mineralisation.
- However, if it is not possible to use the kind of
water recommended above, you should period-
ically remove the lime scale from the appliance:
- Every 6 weeks if the water is “very hard”.
- Every 12 weeks if the water is “hard”.
- To do so, we recommend the use of the spe-
cic product Decal for this kind of machine,
which can be found in specialised shops and
authorised technical services.
- Homemade solutions are not recommended
in the de-scaling of this appliance, such as the
use of vinegar.
STEP 1
- 1. Fill in the water tank with decaling and water
till MAX mark.
- 2. Select any lter to put into the porta-lter.
Position the porta-lter to the unit.
- 3. Place a container right under the brewing
outlet and the steam tube & nozzle .
- 4. Rotate the knob to Coffee position, press
the steam button for 5 seconds. The unit will
start the descaling of coffee brewing system
for 5 minutes. During the descaling the lights
of (E) buttons will ash once one by one. When
the cycle is nished, the (E) buttons will ash
simultaneously.
- 5. Rotate the knob back to steam position to
start descaling of steam system.
- During the descaling, the button lights of sin-
gle cup, double cup and steam will ash once
one by one. The cycle will takes 5 min and
when it nishes, lights of single cup button and
double cup button will ash one by one, and
steam button light will be on. This means the
descaling completes.
STEP 2
- 1. Pour out the decaling mixture from the water
tank. Add fresh water into the water tank to
max mark, and put water tank back to the unit.
- 2. Rotate the knob (D) back to steam position,
press the steam button to start the steam sys-
tem cleaning. The button lights of single cup,
double cup and steam will ash twice one by
one. The cycle will take 1 min. When it nishes,
the button lights of single cup, double cup and
steam ash simultaneously.
- 3. Rotate the knob (D) to coffee function to
start again the cleaning of coffee brewing
system. The button lights of single cup, double
cup and steam will ash twice one by one The
cycle will take 1 min. When it nishes, the unit
will enter pre-heating mode.
ANOMALIES AND REPAIR
- Take the appliance to an authorised technical
support service if problems arise. Do not try to
dismantle or repair without assistance, as this
may be dangerous.
- If the connection to the mains has been
damaged, it must be replaced and you should
proceed as you would in the case of damage.
- If you detect any anomalies, refer to the follow-
ing table:

Anomaly Possible cause Solutions
- Water ows out of the
side of the holder - The lterholder is not tted
correctly.
- The Edge of the sieve is
covered with coffee.
- The brewing group is dirty.
- See Section “lling coffee”
- Clean the sieve around the edge and
clean the brewing of coffee group
- Clean With a damp cloth.
- No coffee comes out - There is no water
The water tank is not proper-
ly placed.
- The lter holes are clogged,
the coffee is ground too ne
or has been pressed too
much
- Fill the water tank
- Make sure the tank is properly
seated, pressing the tank forward
and ensure the tank is locked by the
water tank buckle
- Empty the lter basket and clean
with water. Clean the brewing unit
with a damp cloth. Fill the sieve
again and press the coffee slightly
- The coffee comes out
slowly or drop by drop - The coffee grinding is too
ne or too pressed - Make sure grinding is OK and it’s not
too pressed.
- The coffee comes
without cream - The used Coffee is out of
date
- The Coffee has not been
pressed enough.
- The Ground coffee is too
coarse.
- Use Fresh coffee and once opened
store in an airtight container.
- Press slightly the coffee.
- Grind ner the coffee
- The coffee comes out
too fast - The ground coffee is too
coarse.
- There is not enough coffee in
the sieve.
- The Coffee has not been
pressed enough
- Grind coffee ner
- Ensure that it’s the right amount of
coffee in the sieve.
Press slightly the coffee
- No steam escapes
from the evaporator
tube
- The Tube is clogged - Clean the steam tube with a damp
cloth to remove any traces of milk
have dried and unblock holes using
a needle. Press the corresponding
switch and remove steam until it
goes out continuously

- For EU product versions and/or in the case that
it is requested in your country:
ECOLOGY AND RECYCLABILITY OF THE
PRODUCT
- The materials of which the packaging of this
appliance consists are included in a collection,
classication and recycling system. Should you
wish to dispose of them, use the appropriate
public recycling bins for each type of material.
- The product does not contain concentrations of
substances that could be considered harmful to
the environment
This symbol means that in case you wish
to dispose of the product once its working
life has ended, take it to an authorised
waste agent for the selective collection of
waste electrical and electronic equipment
(WEEE)
This appliance complies with Directive 2014/35/
EU on Low Voltage, Directive 2014/30/EU on
Electromagnetic Compatibility, Directive 2011/65/
EU on the restrictions of the use of certain
hazardous substances in electrical and elec-
tronic equipment and Directive 2009/125/EC on
the ecodesign requirements for energy-related
products.
WARRANTY AND TECHNICAL ASSISTANCE
This product enjoys the recognition and protec-
tion bof the legal guarantee in accordance with
current legislation. To enforce your rights or inter-
ests you must go to any of our ofcial technical
assistance services.
You can nd the closest one by accessing the
following web link: www.mellerware-home.com.
You can also request related information by
contacting us. You can download this instruction
manual and its updates at www.mellerware-home.
com

Español
Cafetera
BARI LEGEND
Distinguido cliente:
Le agradecemos que se haya decidido por la
compra de un producto de la marca Mellerware
Su tecnología, diseño y funcionalidad, junto con
el hecho de superar las más estrictas normas de
calidad le comportarán total satisfacción durante
mucho tiempo y le permitirá encontrará el placer
de saborear el auténtico café exprés.
Leer atentamente este folleto de instrucciones
antes de poner el aparato en marcha y guardarlo
para posteriores consultas. La no observación
y cumplimiento de estas instrucciones pueden
comportar como resultado un accidente.
CONSEJOS Y ADVERTENCIAS
DE SEGURIDAD
- Antes del primer uso, limpiar
todas las partes del producto
que puedan estar en contacto
con alimentos, procediendo tal
como se indica en el apartado
de limpieza.
- Este aparato está pensado úni-
camente para un uso domés-
tico, no para uso profesional
o industrial. No está pensado
para ser usado por clientes en
entornos de hostelería de tipo
alojamiento y desayuno, hote-
les, moteles y otros entornos
de tipo residencial, tampoco en
casas rurales, zonas de cocina
reservadas para el personal en
tiendas, ocinas y otros entor-
nos de trabajo.
- Este aparato pueden utilizar-
lo personas con capacidades
físicas, sensoriales o mentales
reducidas o falta de experien-
cia y conocimiento, si se les ha
dado la supervisión o formación
apropiadas respecto al uso del
aparato de una manera segura
y comprenden los peligros que
implica.
- Este aparato puede ser utili-
zado por niños con edad de
8 años y superior, si se les ha
dado la supervisión o instruc-
ciones apropiadas respecto al
uso del aparato de una manera
segura y comprenden los peli-
gros que implica.
- La limpieza y el mantenimien-
to a realizar por el usuario no
deben realizarlos los niños a
menos que sean mayores de 8
años y estén supervisados.
- Mantener el aparato y su cone-
xión de red fuera del alcance de
los niños menores de 8 años.
- Este aparato no es un jugue-
te. Los niños deben estar bajo
vigilancia para asegurar que no
jueguen con el aparato.
- No sumergir el aparato en agua
u otro líquido, ni ponerlo bajo el
grifo.
- Si la conexión red está dañada,
debe ser substituida, llevar el
aparato a un Servicio de Asis-

tencia Técnica autorizado. Con
el n de evitar un peligro, no
intente desmontarlo o repararlo
por sí mismo.
- Antes de conectar el aparato a la red, vericar
que el voltaje indicado en la placa de caracte-
rísticas coincide con el voltaje de red.
- Conectar el aparato a una base de toma de co-
rriente provista de toma de tierra y que soporte
como mínimo 10 amperios.
- La clavija del aparato debe coincidir con la
base eléctrica de la toma de corriente. Nunca
modicar la clavija. No usar adaptadores de
clavija.
- No forzar el cable eléctrico de conexión.
Nunca usar el cable eléctrico para levantar,
transportar o desenchufar el aparato.
- No enrollar el cable eléctrico de conexión
alrededor del aparato.
- No dejar que el cable eléctrico de conexión
quede atrapado o arrugado.
- No dejar que el cable eléctrico de conexión
quede en contacto con las supercies calien-
tes del aparato.
- Vericar el estado del cable eléctrico de
conexión. Los cables dañados o enredados
aumentan el riesgo de choque eléctrico.
- No tocar la clavija de conexión con las manos
mojadas.
- No utilizar el aparato con el cable eléctrico o la
clavija dañada.
- Si alguna de las envolventes del aparato se
rompe, desconectar inmediatamente el aparato
de la red para evitar la posibilidad de sufrir un
choque eléctrico.
- No utilizar el aparato si ha caído, si hay seña-
les visibles de daños, o si existe fuga.
- Mantener el área de trabajo limpia y bien ilumi-
nada. Las áreas desordenadas y oscuras son
propensas a que ocurran accidentes.
- No colocar el aparato sobre supercies calien-
tes tales como placas de cocción, quemadores
de gas, hornos o similares.
- El aparato debe utilizarse y colocarse sobre
una supercie plana y estable.
- Este aparato no es adecuado para uso en
exteriores.
- El cable de alimentación debe ser examinado
regularmente en busca de signos de daño, y si
está dañado, el aparato no tiene que usarse.
- No usar el aparato, en el caso de personas
insensibles al calor (ya que el aparato tiene
supercies calefactadas).
- No tocar las partes calefactadas del aparato,
ya que pueden provocar quemaduras.
UTILIZACIÓN Y CUIDADOS:
- Antes de cada uso, desenrollar completamente
el cable de alimentación del aparato.
- No usar el aparato si sus accesorios no están
debidamente acoplados.
- No poner el aparato en marcha sin agua.
- No usar el aparato si su dispositivo de puesta
en marcha/paro no funciona.
- No mover el aparato mientras está en uso.
- Respetar los niveles MAX y MIN.
- Desenchufar el aparato de la red cuando no se
use y antes de realizar cualquier operación de
limpieza.
- Desenchufar el aparato de la red antes de
rellenar el depósito de agua.
- Guardar este aparato fuera del alcance de los
niños y/o personas con capacidades físicas,
sensoriales o mentales reducidas o falta de
experiencia y conocimiento
- No guardar el aparato si todavía está caliente.
- Utilizar el aparato solamente con agua.
- Se recomienda el uso de agua mineral embote-
llada apta para consumo humano.
- No dejar nunca el aparato conectado y sin vigi-
lancia. Además ahorrará energía y prolongará
la vida del aparato.
- No sacar el portaltros cuando se está hacien-
do café, ya que en este momento se encuentra
bajo presión.
SERVICIO:
- Cerciorarse que el servicio de mantenimiento
del aparato sea realizado por personal espe-
cializado, y que caso de precisar consumibles/
recambios, éstos sean originales.
Toda utilización inadecuada, o en desacuerdo
con las instrucciones de uso, puede comportar
peligro, anulando la garantía y la responsabilidad
del fabricante.

DESCRIPCIÓN
A Panel Frontal
B Depósito de agua
C Supercie calientatazas
D Mando de selección café/vapor
E1 Botón café espresso (café Corto)
E2 Botón café espresso (café Largo)
E3 Botón Vapor
F Interruptor Conexión (ON/OFF)
G Tubo vaporizador
H Portaltros
I Cuchara dosicadora
J Filtro para café molido (1 taza)
K Filtro para café molido (2 tazas)
L Cable de alimentación
M Bandeja recoge-gotas
N Rejilla bandeja
O Clip retención cacillo
Fig 1. Montaje espumador de leche
1.1 Agarre espumador
1.2 Tubo vaporizador
1.3 Funda vaporizador
MODO DE EMPLEO
NOTAS PREVIAS AL USO:
- Asegúrese de que ha retirado todo el material
de embalaje del producto.
- Antes de usar el producto por primera vez, es
aconsejable utilizarlo sólo con agua.
- Antes de usar el producto por primera vez,
limpie las partes en contacto con alimentos tal
como se describe en el apartado de Limpieza.
- Antes de conectar la máquina compruebe que
el botón (F) no esté pulsado y que el Selector
de café/vapor (D), está en la posición central 0
ANTES DEL PRIMER USO (CEBADO DEL
CIRCUITO):
- Esta simple operación asegura un suministro
óptimo y debe ser realizada:
- En la primera puesta en marcha;
- Cuando la máquina permanece un largo perio-
do sin usarse (1 ó 2 semanas)
- Cuando el depósito se ha quedado sin agua.
- Llenar el depósito de agua, procurando no
sobrepasar la marca de nivel “MAX”.
- Enchufar el aparato a la red eléctrica.
- Pulsar el interruptor de encendido/apagado
(F) a la posición de encendido. Los pilotos
luminosos (E) se encenderán en rojo y azul por
turnos.
- Sin poner el portaltros (H) (o con el portal-
tros puesto, pero sin café), coloque un reci-
piente en la posición de la taza de café.
- Seleccione la posición de café, rotando el
mando (D) hacia esa posición.
- Pulse cualquiera de los botones (E) para bom-
bear una cantidad pequeña de agua
- El agua saldrá por la posición del portaltro.
Espere hasta que el agua deje de salir automá-
ticamente.
- Los pilotos de los botones (E) quedará ilumina-
do en azul cuando acabe el precalentamiento
- Para terminar el suministro, rotar el mando de
selección (D) a la posición central 0, posición
de espera
- Con eso habrá nalizado la operación de
cebado.
LLENADO DE AGUA:
- Es imprescindible haber llenado previamente
el depósito con agua antes de poner el aparato
en marcha.
- Extraer el depósito del aparato, con un ligero
giro hacia atrás.
- Llenar el depósito con agua fría, respetando
el nivel MAX y MIN. No deje bajar el agua por
debajo del nivel mínimo.
- Volver a colocar el depósito en su alojamiento,
asegurándose que esté debidamente ajustado
en el encaje de la parte trasera de la máquina
LLENADO DE CAFÉ
- Extraer el porta-ltros (H)
- Introducir el ltro para café molido deseado (J
ó K) en el portaltros.
EXTRACCIÓN CACILLO
- El portaltro incluye un muelle en su interior
cuya función es evitar la caída del cacillo al
tirar el marro. Ese muelle produce un apriete
lateral sobre el cacillo.

- Debido a ese apriete, para sacar el cacillo para
su intercambio o limpieza, puede ser necesario
el uso de una herramienta.
- Aconsejamos utilizar el borde del cacillo no
utilizado, para hacer salir el otro cacillo, o un
cuchillo de punta redonda o una punta de una
cucharilla, de forma que se pueda poner entre
el borde superior del portaltros y el inferior del
ala del cacillo y hacer un pequeño giro
- Introducir el ltro para café molido deseado (J
ó K) en el portaltros.
- Aconsejamos el uso de café de tueste natural.
El uso de café torrefacto puede afectar al
funcionamiento de la máquina
- Llenar con café molido el ltro extraíble escogi-
do (de 1 ó 2 cafés), (deben colocarse de 6-7gr
de café molido por taza de café a preparar).
- Utilizando la cuchara dosicadora (I): para 1
café ponga 1 cucharada, y para 2 cafés, pon-
ga 2 cucharadas.
- Después, prense ligeramente el café molido
con la parte posterior de la cuchara.
- Antes de colocar el portaltros en el grupo de
la cafetera, gira hacia atrás el sujeta-cacillo (O)
- Acoplar de nuevo el portaltros al aparato.
- Situar el portaltro en el grupo de café intro-
duciéndolo desde abajo del grupo y alineando
el mango con la posición “candado abierto”.
Girarlo en el sentido antihorario hasta situarlo
en posición de bloqueo
USO:
- Enchufar el aparato a la red eléctrica.
- Poner el aparato en marcha, accionando el
botón marcha/paro (F).
- Asegúrese de que la mando esté en la posición
“0” para comenzar el precalentamiento.
- Los tres botones (E) se iluminarán intermiten-
temente.
- Esperar hasta que los pilotos (E) dejen de par-
padear y se ilumine en azul, lo que indica que
se ha llegado a la temperatura adecuada.
- Colocar una o dos tazas precalentadas a la
salida del portaltros.
- Girar el selector de café/vapor (D), a la posi-
ción café.
- Pulsar el Botón de café deseado (E1 ó E2).
La luz del botón seleccionado (E) empezará a
parpadear. La unidad empezará la pre-infusión
y tras pequeño paro, seguirá con la infusión.
- La infusión comenzará a salir.
- La máquina se detendrá automáticamente
cuando nalice la preparación del café. El
botón de café se iluminará.
- Durante la preparación del café, siempre pue-
de presionar nuevamente el botón de café para
detener la operación si lo desea.
- Para terminar el suministro gire el mando de
selección (D) a la posición central 0, posición
de espera.
- Finalizando el suministro esperar unos segun-
dos, retirar las tazas con el café.
- Extraer el portaltro y vaciarlo de los posos.
- Lavar el portaltro con agua corriente y secar
bien.
- Vericar que el ltro extraíble esté perfecta-
mente colocado en el portaltros.
- Acoplar de nuevo el portaltros al aparato.
NOTA:
- Finalizada la infusión del café y con el mando
de selección (D) girado hacia la posición cen-
tral 0 la máquina desagua automáticamente el
circuito de calefacción del agua, hacia la ban-
deja (M). Eso asegura que no quedarán restos
de agua en el sistema calefactor. Después de
preparar algunas tazas de café, será necesario
sacar y vaciar la bandeja de residuos.
CONSEJOS:
- Después de hacer café, gire siempre el mando
(D) a la posición 0. Facilitará la acción de sacar
el portaltros.
IMPORTANTE
- El vapor puede prducir quemaduras. Manipule
con cuidado durante la operación. Siempre
agarre el tubo por su protector (1.1)
OBTENCIÓN DE VAPOR:
- El vapor sirve para espumar leche para
cappuccino, y también puede calentar otros
líquidos.
- Poner el aparato en marcha, accionando el
mando interruptor marcha/paro (F). Asegúrese
que el mando (D) está en la posición 0.
- Seleccione el botón de vapor (E3) para preca-
lentar. El piloto del botón de vapor comenzará

a parpadear y se iluminará en azul cuando se
alcance la temperatura adecuada.
- Colocar un recipiente debajo del tubo de vapor.
- Coloque el tubo en el interior del líquido a
calentar.
- Gire el mando (D) a la posición vapor. El botón
de vapor se iluminará. Empezará a salir vapor
por el tubo.
- Para mejor espumar la leche, desplace la jarra
con ligeros movimientos de la jarra de arriba
abajo.
- Cuando tenga suciente, volver el mando (D) a
posición 0 y retirar el recipiente.
- Utilice un trapo húmedo para limpiar los restos
en el tubo de vapor.
NOTA:
- La leche debe estar a temperatura del refrige-
rador (¡no caliente!).
- Siempre limpie el tubo de vapor y la boquilla
después de cada uso para eliminar los resi-
duos de leche
AGUA CALIENTE
- Gire el mando de control (D) a la posición de
vapor cuando la unidad está en modo de espe-
ra, el botón E1, se ilumina.
- Coloque una taza debajo del tubo de vapor y
la boquilla
- Pulse el botón de café de una taza (E1). El
botón de café de una taza parpadeará.
- La máquina comenzará a producir agua calien-
te que saldrá por el tubo de vapor y la boquilla.
Cuando se alcanza el volumen de agua
deseado, gire el mando de control de nuevo a
la posición “0” para detener la producción de
agua caliente.
- La unidad volverá al modo de espera con los
botones de café encendidos.
AJUSTE DE VOLUMEN
- Seleccione cualquier ltro para poner en el
porta-ltro. Coloque el portaltros en la unidad.
- Presione cualquier botón de café y manténgalo
presionado hasta alcanzar el volumen desea-
do. Luego suelte ese botón seleccionado, y se
guardará ese volumen deseado.
NOTAS:
- El Minimo tiempo de funcionamiento para una
taza sencilla y para doble taza es 10S.
- El Máximo tiempo de funcionamiento para una
taza sencilla: 60S.
- El Máximo tiempo de funcionamiento para taza
doble: 90S.
RESTABLECER A LA CONFIGURACIÓN
PREDETERMINADA
- Enchufe la unidad y ponga en marcha.
- Para ello, presione el interruptor de encendido
/ apagado (F) a OFF. Gire el mando de control
a la función de vapor.
- Presione simultáneamente el botón de café de
una sola taza y el botón de vapor, presionando
el interruptor de encendido / apagado (F) a la
posición de ENCENDIDO al mismo tiempo.
- Los dos botones de espresso parpadearán por
turnos.
- La máquina ahora se restablece a la congura-
ción predeterminada.
FUNCIÓN AUTO DESCONEXIÓN
- Las máquinas Mellerware están diseñadas
para ahorrar energía
- Con esta nalidad, al cabo de unos minutos, si
durante ese período el usuario no ha realizado
ninguna acción sobre él, el apartato se apaga
automáticamente
- Para volver al funcionamiento normal simple-
mente deberá pulsar uno de los botones (E)
UNA VEZ FINALIZADO EL USO DEL
APARATO:
- Parar el aparato presionando el botón marcha/
paro (F) a la posición OFF
- Desenchufar el aparato de la red eléctrica.
- Retirar el agua del depósito.
- Limpiar el aparato
LIMPIEZA
A. LIMPIEZA BÁSICA
- Desenchufar el aparato de la red y dejarlo
enfriar antes de iniciar cualquier operación de
limpieza.

- Limpiar el aparato con un paño húmedo
impregnado con unas gotas de detergente y
secarlo después.
- No utilizar disolventes, ni productos con un fac-
tor pH ácido o básico como la lejía, ni produc-
tos abrasivos, para la limpieza del aparato.
- No deje entrar agua u otro líquido por las aber-
turas de ventilación para evitar daños en las
partes operativas interiores del aparato.
- Ninguna de las partes de este aparato es apta
para su limpieza en el lavavajillas.
- A continuación, seque todas las piezas antes
de su montaje y guardado.
B. LIMPIEZA DE VAPORIZADOR (FIG. 1)
- ATENCION! porque todas las piezas del vapo-
rizador pueden estar muy calientes .
- Es aconsejable limpiar el tubo vaporizador des-
pués de hacer vapor para prevenir depósitos
de suciedad y antes de apagar la máquina.
- Para ello, saque la funda del vaporizador, y
límpiela debajo de un grifo, con agua corriente
templada.
- Llene una taza con un poco de agua, sumerja
el tubo de vapor en el agua, presione el botón
de vapor para iniciar el precalentamiento.
Cuando esté listo, gire el mando de control
al “icono de vapor” dejando salir un poco de
vapor. Gire el mando de control (D) hacia la
posición “0”
- Use un trapo para secar el tubo y vuelva a
poner la funda.
- Caso de que no salga vapor puede ser porque
leche seca tapone la salida. Es ese caso, con
cuidado, utilice una aguja para desembozar la
punta del vaporizador (Fig 1).
- Una vez limpio, enjuague con agua corriente
del grifo y vuelva a montarlo. Vuelve a vapo-
rizar.
TRATAMIENTO DE LAS INCRUSTACIONES
CALCÁREAS:
- Para un perfecto funcionamiento del aparato,
éste deberá estar libre de incrustaciones de cal
o magnesio, originadas por el uso de aguas de
alta dureza.
- Para evitar este tipo de problema se recomien-
da el uso de aguas de baja mineralización
calcárea o magnésica.
- En todo caso, si no es posible el uso del tipo
de agua recomendado anteriormente, deberá
proceder periódicamente a un tratamiento de
descalcicación del aparato, con una periodi-
cidad de:
- Cada 6 semanas si el agua es “muy dura”.
- Cada 12 semanas si el agua es “dura”.
- Para ello recomendamos el uso de un producto
especíco antical para este tipo de aparato,
de venta en tiendas especializadas y servicios
técnicos autorizados.
- No se recomiendan soluciones caseras, tal
como el uso de vinagre, en los tratamientos de
descalcicación del aparato.
PASO 1
- 1. Rellene el depósito de agua con descalci-
cador y agua hasta la marca MAX.
- 2.Seleccione cualquier ltro para poner en
el porta-ltro. Coloque el portaltros en la
máquina.
- 3. Coloque un recipiente justo debajo de la sa-
lida de de café y el tubo de vapor y la boquilla.
- 4. Gire la mando a la posición de café, pre-
sione el botón de vapor durante 5 segundos.
La unidad iniciará la descalcicación del
sistema de café durante 5 minutos. Durante
la descalcicación, las luces de los botones
(E), parpadearán una a una. Cuando el ciclo
haya terminado, los botones (E) parpadearán
simultáneamente.
- 5. Gire el mando a la posición de vapor. La uni-
dad comenzará la descalcicación del sistema
de vapor.
- Durante la descalcicación, las luces de los
botones (E) se iluminan una por una. El ciclo
durará 5 minutos y cuando nalice, las luces
del botón de una taza y el botón de la doble
taza parpadearán una a una, y la luz del botón
de vapor estará encendida. Esto signica que
la descalcicación está completa
PASO 2
- 1. Saque la mezcla descalcicadora del tanque
de agua. Agregue agua fresca en el tanque
de agua hasta la marca máxima y vuelva a
colocar el tanque de agua en la unidad.
- 2. Gire el mando de control (D) a la posición
vapor y presione el botón de vaoor para empe-
zar la limpieza del sistema de vapor. Las luces
de los botones (E) parpadean dos veces, uno a
uno. El ciclo tomará aprox. 1 min. Cuando aca-
be, las luces de los 3 botones (E) parpadearán
simultáneamente.

- 3. Gire el mando (D) a la posición de café, para
iniciar otra vez la limpieza del sistema de café.
Las luces de los botones (E) parpadean dos
veces, uno a uno. El ciclo durará aprox 1 minu-
to. Cuando nalice el ciclo, la máquina volverá
al modo de espera.
ANOMALÍAS Y REPARACIÓN
En caso de avería llevar el aparato a un Servicio
de Asistencia Técnica autorizado. No intente des-
montarlo o repararlo ya que puede existir peligro.
Si la conexión red está dañada, debe ser substi-
tuida, proceder como en caso de avería
En caso de detectar cualquier anomalía consulte
la siguiente tabla:
Anomalía Causa posible Solucione
- Sale agua por el la-
teral del portaltros - El portaltros no está colo-
cado correctamente.
- El borde del cacillo está
cubierto de café.
- El grupo de erogación está
sucio.
- Ver apartado “llenado de café”
- Limpiar el cacillo alrededor del borde y
limpiar el grupo de erogación de café.
- Limpiar con un trapo húmedo.
- No sale café - No hay agua
- El depósito de agua no
está correctamente colo-
cado.
- Los agujeros del cacillo
están atascados, el café
esta molido demasiado
no o se ha presionado en
exceso.
- Rellenar el depósito de agua.
- Comprobar que el depósito está colocado
correctamente, presionando el tanque
hacia adelante y asegúrese de que el
tanque esté bloqueado en el encaje de la
parte trasera y limpiar con agua. Limpiar
el grupo de erogación con un trapo
húmedo. Recargar de nuevo el cacillo y
presionar el café ligeramente.
- El café sale lenta-
mente o gota a gota - El café está demasiado
molido o está demasiado
prensado.
- Asegurarse que el tamaño del molido es
el adecuado y que no se ha prensado en
exceso.
- El café sale sin
crema - El café que se ha utilizado,
esta pasado o se ha
secado.
- El café no se ha prensado
lo suciente.
- El molido del café es
demasiado grueso.
- Usar café fresco y una vez abierto con-
servar en un envase hermético.
- Prensar rmemente el café.
- Moler el café más no.
- El café sale demasi-
ado rápido - El café esta molido muy
grueso.
- No se ha puesto suciente
café en el cacillo.
- El café no se ha prensado
lo suciente.
- Moler el café más no.
- Asegurarse que se ha puesto la cantidad
correcta de café en el cacillo.
- Prensar más el café.
- No sale vapor por el
tubo vaporizador - El tubo está atascado - Limpiar el tubo vaporizador con un trapo
húmedo para extraer los posibles restos
de leche que se han secado y desembo-
zar los agujeros con ayuda de una aguja.
Pulsar el interruptor correspondiente y
extraer vapor hasta que salga con fuerza
y de forma continua.

Para las versiones EU del producto y/o en el caso
de que en su país aplique:
ECOLOGÍA Y RECICLABILIDAD DEL
PRODUCTO
Los materiales que constituyen el envase de
este aparato, están integrados en un sistema de
recogida, clasicación y reciclado de los mismos.
Si desea deshacerse de ellos, puede utilizar los
contenedores públicos apropiados para cada tipo
de material.
El producto está exento de concentraciones de
sustancias que se puedan considerar dañinas
para el medio ambiente.
Este símbolo signica que si desea
deshacerse del producto, una vez
transcurrida la vida del mismo, debe
depositarlo por los medios adecuados a
manos de un gestor de residuos autoriza-
do para la recogida selectiva de
Residuos de Aparatos Eléctricos y Electrónicos
(RAEE).
Este aparato cumple con la Directiva 2014/35/EU
de Baja Tensión, con la Directiva 2014/30/EU de
Compatibilidad Electromagnética, con la Directiva
2011/65/EU sobre restricciones a la utilización de
determinadas sustancias peligrosas en apara-
tos eléctricos y electrónicos y con la Directiva
2009/125/EC sobre los requisitos de diseño
ecológico aplicable a los productos.
GARANTÍA Y ASISTENCIA TÉCNICA
Este producto goza del reconocimiento y protec-
ción de la garantía legal de conformidad con la
legislaciónvigente. Para hacer valer sus derechos
o intereses debe acudir a cualquiera de nuestros
servicios de asistencia técnica ociales. Podrá
encontrar el más cercano accediendo al siguiente
enlace web: www.mellerware-home.com También
puede solicitar información relacionada poniéndo-
se en contacto con nosotros por el teléfono que
aparece al nal de este manual. Puede descargar
este manual de instrucciones y sus actualizacio-
nes en www.mellerware-home.com

Afrikaans
Kofemaker
BARI LEGEND
Liewe kliënt,
Baie dankie dat u gekies het om ‘n Mellerwa-
re-handelsmerk te koop.
Danksy sy tegnologie, ontwerp en praktiese
eienskappe, asook die feit dat dit die strengste
gehaltetoetse geslaag het, sal dit totale satisfak-
sie vir ‘n lang tyd tot gevolg hê, en jou in staat stel
om die genot van regte espressokofe te geniet.
Lees hierdie instruksies sorgvuldig deur voordat
jy die toestel aanskakel en hou dit vir toekomstige
verwysing. Versuim om hierdie instruksies te volg
en te onderhou kan lei tot ‘n ongeluk.
VEILIGHEIDSADVIES EN
WAARSKUWINGS
- Maak alle dele van die pro-
duk voor gebruik skoon wat in
kontak met kos sal wees, soos
aangedui in die skoonmaakaf-
deling.
- Hierdie toestel is slegs vir
huishoudelike gebruik en nie
vir professionele of industriële
gebruik nie. Dit is nie bedoel vir
gebruik nie deur gaste in gas-
vryheidsomgewings soos bed-
en-ontbyt, hotelle, motelle en
ander tipes woonomgewings,
selfs in plaashuise, areas van
kombuispersoneelareas in win-
kels, kantore en ander werks-
omgewings.
- Hierdie toestel kan gebruik word
deur mense wat nie gewoond
is aan die gebruik daarvan nie,
asook gestremdes indien hulle
toesig of onderrig verskaf is
oor die veilige gebruik van die
toestel en die betrokke gevare
verstaan.
- Hierdie toestel kan gebruik
word deur kinders vanaf 8 jaar
en ouer as hulle op ‘n veilige
manier toesig of instruksies
aangaande die gebruik van die
toestel verskaf is en die betrok-
ke gevare verstaan.
- Skoonmaak en onderhoud van
die toestel moet nie deur kin-
ders gedoen word nie, tensy
hulle ouer as 8 is en onder
toesig is.
- Hou die toestel en sy kabel bui-
te die bereik van kinders onder
die ouderdom van agt jaar.
- Hierdie toestel is nie ‘n speel-
ding nie. Toesighouding vir
kinders word aanbeveel om te
verseker dat hulle nie met die
toestel speel nie.
- Moenie die toestel in water of
enige ander vloeistof dompel
nie of dit onder lopende water
plaas nie.
- As die konnektering beska-
dig is, moet dit vervang word.
Neem die toestel na ‘n gemag-
tigde Tegniese Ondersteunings-
diens. Moenie probeer om dit
uitmekaar te haal of te herstel
sonder hulp nie, aangesien dit
gevaarlik kan wees.
Table of contents
Languages:
Other Mellerware Coffee Maker manuals

Mellerware
Mellerware 29001 User manual

Mellerware
Mellerware Treviso 29500A User manual

Mellerware
Mellerware TRENTO User manual

Mellerware
Mellerware TRENTO 1200W User manual

Mellerware
Mellerware PALERMO 29002 User manual

Mellerware
Mellerware Tempus 29800 User manual

Mellerware
Mellerware SEATTLE 29801 User manual

Mellerware
Mellerware Mmmm! User manual

Mellerware
Mellerware SEATTLE 1000W User manual

Mellerware
Mellerware Koffy! User manual