Meraw Aspen User manual
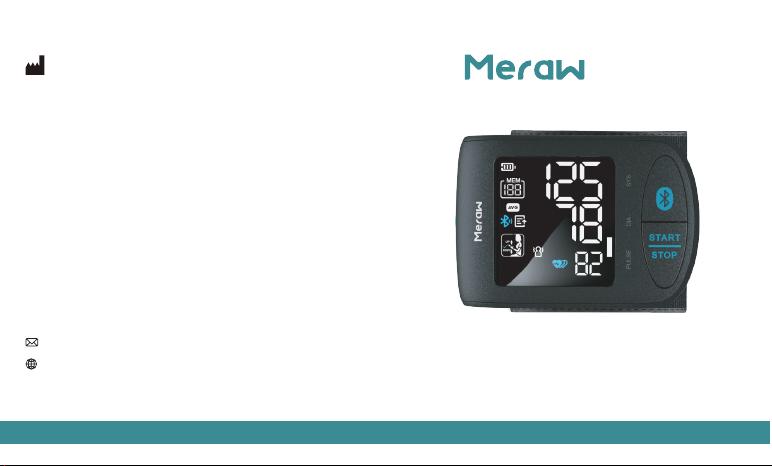
Aspen
Wrist Blood Pressure Monitor
www.merawlabs.com
V1.0
Global Customer Service
Guangdong Transtek Medical Electronics Co., Ltd.
Zone A, No.105, Dongli Road, Torch Development District,
528437 Zhongshan, Guangdong, China
Distributor & Address
Meraw Labs Inc.
4500 Great America Parkway, Suite 1023, Santa Clara, CA 95054


Aspen
Device Overview
Device Set Up
Measurement
Bluetooth & App
Data Management
About Blood Pressure
Information For Users
Compliance
Table of Contents
1 2

01
Device Overview
Indication for use
Contraindications
Safety information
Monitor components
LCD display
Indications for Use
This Blood Pressure Monitor Meraw aspen
is a digital monitor intended for use in
measuring blood pressure and heartbeat
rate with wrist circumference ranging from
5/˝-8½˝(13.5 cm to 21.5 cm) . It is intended
for indoor, adult use only.
1. The device is not suitable for use on the
women who are or may be pregnant.
2. The device is not suitable for use on
patients with implanted electrical devices,
such as cardiac pacemakers, defibrillators.
Contraindications
3 4
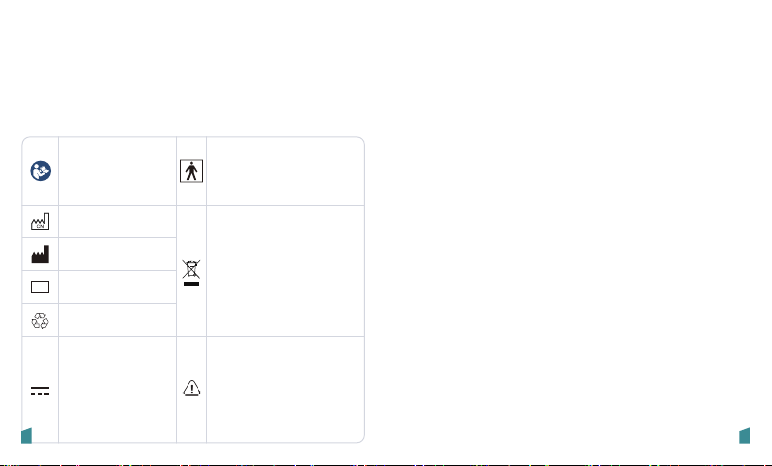
Safety Information
The signs below might be in the user
manual, labeling or other component.
They are the requirement of standard and
using.
Symbol for
“MANUFACTURER”
Symbol for “SERIAL
NUMBER”
Symbol for “TYPE BF APPLIED
PART”
Symbol for “DIRECT
CURRENT”
SN
Symbol for “RECYCLE”
The symbol indicates that the
product should not be
discarded as unsorted waste
but must be sent to separate
collection facilities for recovery
and recycling.
DateandCountryof
manufacture
Refer to instruction
manual/booklet
To signify that the
instruction manual/
booklet must be read.
Caution Indicates that caution is
necessary when operating the
device or control close to where
the symbol is placed, or that the
current situation needs operator
awareness or operator action in
order to avoid undesirable
consequences.
This product uses the Oscillometric
Measuring Method to detect blood
pressure. Before every measurement, the
unit establishes a “zero point” equivalent
to the atmospheric pressure. Then it starts
inflating the cuff. Meanwhile, the unit
detects pressure oscillation generated by
beat-to-beat pulsatile, which is used to
determine the systolic pressure and
diastolic pressure as well as pulse rate.
Measurement Principle
5 6
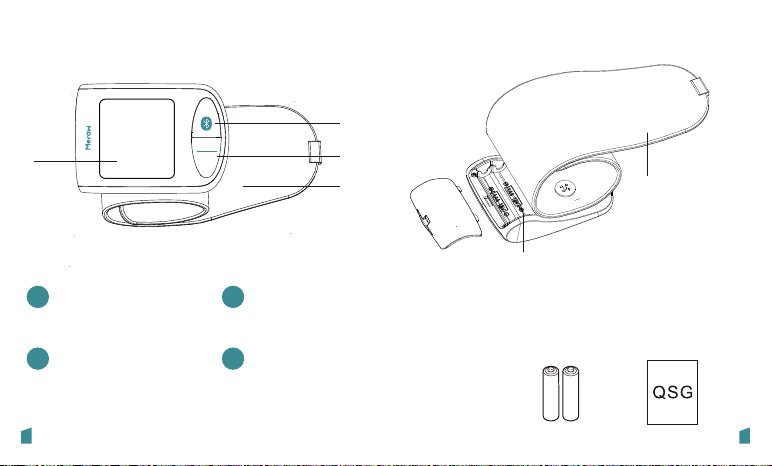
LCD DISPLAY
2
BLUETOOTH
BUTTON
1
START/STOP
BUTTON
2
34
CUFF
Component list of pressure measuring system:
1. PCBA;
2. Air Pipe;
3. Pump;
4. Valve;
5. Cuff.
List
1. Blood Pressure Monitor TMB-2085-K
2. 2× AAA Batteries
3. User manual
CUFF
(Type BF applied part)
BATTERY COMPARTMENT
Monitor Components
SYS
DIA
PULSE
3
2
4
1
7 8
START
STOT

Systolic blood
pressure The high pressure measured.
Diastolic blood
pressure The low pressure measured.
Average value Displays average of last 3
readings.
Irregular heartbeat detected
during measurement.
Irregular
heartbeat
Heartbeat Heartbeat dectetion during
measurement.
mmHg Measurement Unit of the
blood pressure
Pulse display Pulse in beats per minute.
SYMBOL DESCRIPTION EXPLANATION
PULSE
/min
Wrist
Positioning
Guide
Guide for you to make the
wrist in ideal position.
LCD Display
mmhg
DIA
SYS
9 10
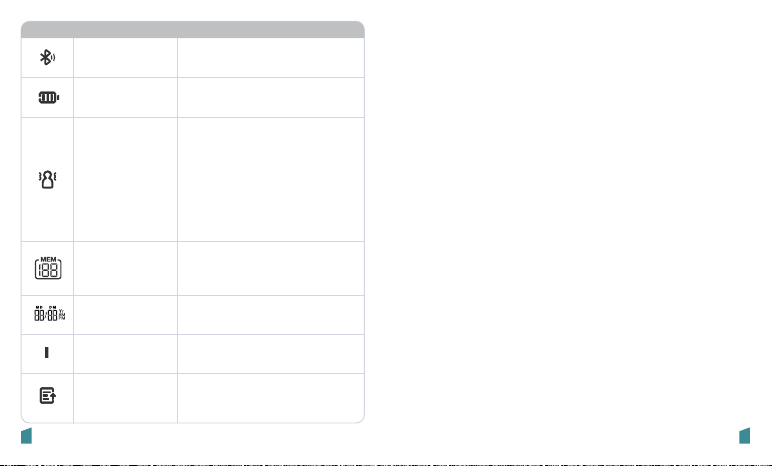
Data pending
to transmit
Appears in next
measurement, when the
data transmission fails.
Current time Time and date
(year/month/day; hour:minute)
Memory
display
Indicate it is in the memory
mode and which group of
memory it is.
Blood pressure
level
Indicates the blood pressure
level, See page 24 for more
information.
11 12
Bluetooth
transfer icon
The bluetooth transfer icon
blinks when the bluetooth
is working.
Battery
indicator Indicate the current battery.
Excessive Body
Motion
Detector
Appears when talking,
moving, or hand shaking is
detectedduring the
measurement. NOTE: The
measured blood
pressure reading may not
beaccurate if the icon is
displayed.
SYMBOL DESCRIPTION EXPLANATION 02
Device Set Up
Power supply
Installing Batteries
Setting date and time
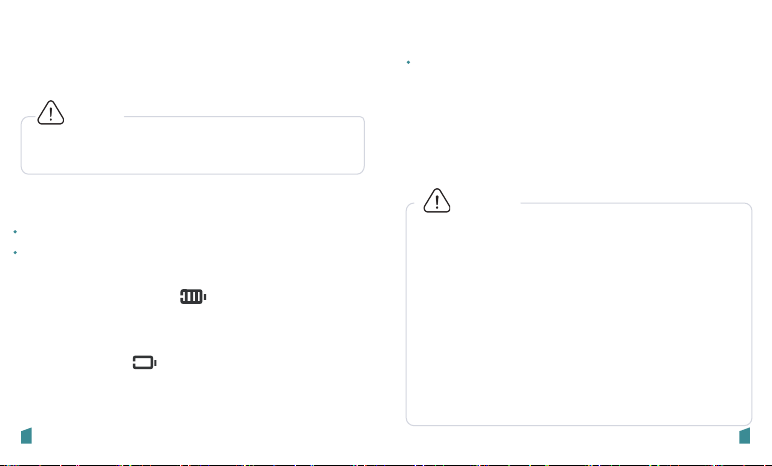
In order to get the best effect and protect your monitor,
please use the right batteries which complies with local
safety standard.
CAUTION
CAUTION
Power Supply
Battery powered mode: 3V DC 2× AAA
Do not use new and used batteries together.
Do not use different types of batteries together.
Do not dispose the batteries in fire. Batteries may explode
or leak.
Remove batteries if the device is not likely to be used for
some time.
Worn batteries are harmful to the environment. Do not
dispose with daily garbage.
Remove the old batteries from the device following your
local recycling guidelines.
3.Close the battery cover.
Replace the batteries if:
• The low battery symbol appears on the display.
• When any button is pressed and nothing is displayed on
the screen.
Installing Batteries
1.Slide off the battery cover.
2.Install or replace 2× AAA size batteries
as indicated in the battery compartment. The display will
light up and show the icon . Press “START/ STOP”
button to turn off, otherwise it will power off automatically
after 10 seconds. Any time the battery is low, it will display
the icon“ bAt Lo” & . It will power off automatically after
5 seconds.
13 14
batteries
2. Press the “START/ STOP ” button to
confirm the date format, then the year will
flash. Press the “Bluetooth”button to
change the year.
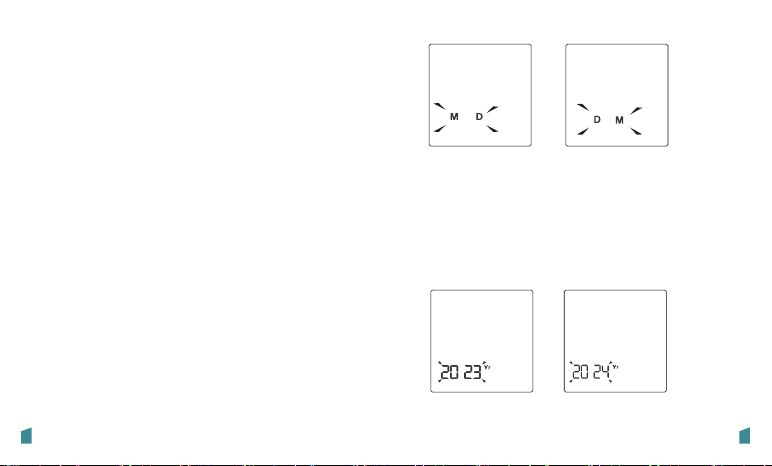
Setting Date and Time
It is important to set the clock before using
your blood pressure monitor, so that a
time stamp can be assigned to each
record that is stored in the memory.
1. When the monitor is off, press and hold
the “START/ STOP ” button to display the
date format. Press the “Bluetooth” button
to switch the date format between
[month/day] and [day/month].
Once connected to smartphone App via
Bluetooth, date and time will be syned to
BPM automatically.
Auto Setting
Manual Setting
15 16

3.When you get the right year, press the
“START / STOP” button to confirm the year.
The screen will then show a blinking
number representing the [MONTH].
4.Repeat steps 2 and 3 to set the [MONTH]
and [DAY].
5.Repeat steps 2 and 3 to set the time
format.
6.Repeat steps 2 and 3 to set the [HOUR]
and [MINUTE].
7.Repeat steps 2 and 3 to confirm [Wrist
Positioning Guide] on or off.
17 18

Note: When the Wrist Positioning Guide is OFF, the
instruction will not appear at the start of the measurement.
8.After confirming the [Wrist Positioning
Guide],the LCD will display"donE"and then
the monitor will turn off.
When using wrist blood pressure monitor, it is important to
take the measurement while relaxing your wrist at heart
level. This will help ensure an accurate reading will be
taken. Because it is dicult to find the ideal location for a
wrist measurement, we have included an optional Wrist
Positioning Sensor that will assist in directing your wrist to
the ideal location for a blood pressure measurement.
Each time you take a measurement, the display will
illuminate with different icons that are designed to help
you move your wrist. Once the ideal location is found, the
wrist symbol will flash and after several seconds,
measurement will begin. Keep your arm still until
measurement is completed.
WRIST POSITIONING GUIDE
Move your wrist up. Move your wrist down.
Note: Due to differences in individual sizes and physique, this
feature may not be helpful in all cases and you may wish to
turn this feature OFF. If you feel the suggested wrist position
does not match your heart level, please turn this feature OFF
and follow your judgment.
Do not move,
Measurement start.
Wrist in ideal position,
the symbol flash.
19 20

Measurement
Put on device
Sit correctly
Start the measurement
Measurement tips
Put on device
Remove all accessories (watch, bracelet,etc) from your
wrist. If your physician has diagnosed you with poor
circulation in your wrist, use the other one.
Roll or push up your sleeve to expose the skin.
Apply the cuff to your wrist with your palm facing up.
Position the edge of the cuff about 1cm~2cm from wrist
joints.
Fasten the wrist cuff around your wrist, leaving no extra
room between the cuff and your skin. If the cuff is too
loose, the measurement will not be accurate.
Sit comfortably with your tested wrist resting on a flat
surface. Place your elbow on a table so that the cuff is at
the same level as your heart. Turn your palm upwards. Sit
upright in a chair, and take 5-6 deep breaths.
03
21 22

Sit Correctly
To take a measurement, you need to be
relaxed and comfortably seated, under
comfortable room temperature. Avoid
bathing, drinking alcohol or caffeine,
smoking, exercising or eating 30 minutes
before taking a measurement.
• Keep palm relaxed during measurement
• Sit in a chair with your legs uncrossed
and feet flat on the floor.
• Sit with your back and arm supported.
23 24
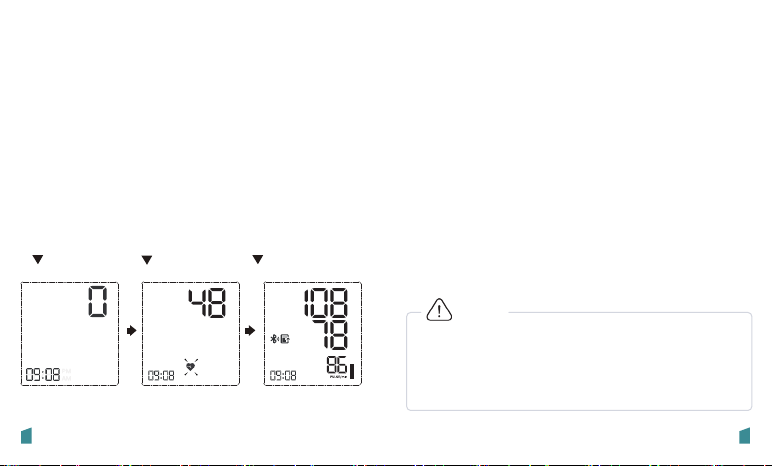
Start The Measurement
Notes:
-To stop the measurement, press the START/STOP button
once to defalte the arm cuff.
-Remain still and quiet while taking a measurement.
Press the START/STOP button.
-The arm cuff will start to inflate automatically.
-The whole measurement takes around 35
seconds.
START INFLATING COMPLETED
Patients with Hypertension:
The middle of the cuff should be at the level of the right
atrium of the heart; Before starting measurement, please sit
comfortably with legs uncrossed, feet flat on the floor, back
and wrist supported.Rest for 5 minutes before
measuring.Wait at least 3 minutes between measurements.
This allows your blood circulation to recover.The patient
must relax as much as possible and do not move and talk
during the measurement procedure.For a meaningful
comparison, try to measure under similar conditions. For
example, take daily measurements at approximately the
same time, on the same wrist, or as directed by a
physician.Take the measurement in a silent room.The cuff
should maintain at the same level as the right atrium of the
heart.Do not cross your legs and keep your feet on the
ground.
Keep your back against the backrest of the chair.
CAUTION
• Avoid bathing, drinking alcohol or caffeine, smoking,
exercising and eating for at least 30 minutes before
taking a measurement.
• Rest for at least 5 minutes before taking a
measurement.
Measurement Tips
mmHg
25 26

Download App
Meraw Health app is available both on
Google play and App Store, search and
download.
Make sure your phone has enough storage
and meet lowest system version require-
ment before downloading.
Scan above QR code to download App and
get App instruction.
Bluetooth & App
Download App
Add My device
View data
Track trends
04
27 28

16
Add My Device
After opening Meraw
App for the first time,
it will guide you to
add new device.
Step 1. Add device
Choose Meraw
Aspen and continue.
Step 2. Choose
device
29 30
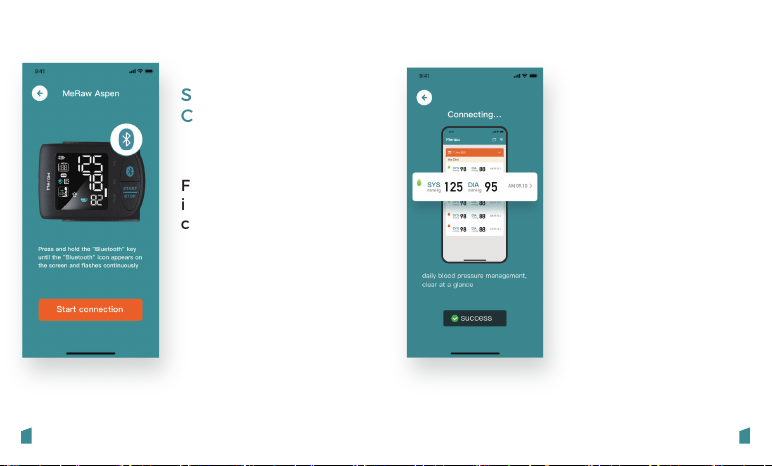
Follow the
instruction and start
connection.
Step 3. Start
Connection
The connection
process will complete
automatically.
Step 4. Connection
successfuly
31 32

View Data
All synced data will be
listed by month, and
show brief information
including:
-Blood pressure level
-SYS
-DIA
-measured time
Some factors may
influence the
accuracy of measure-
ment,click a data and
add remark
on it.
33 34

Track Trends
Data Management
View your blood
pressure in trend,
clear at a glance
05
Recall the records
Sync the records
Delete the records
35 3635 36
Table of contents
Other Meraw Blood Pressure Monitor manuals

Popular Blood Pressure Monitor manuals by other brands


HealthSmart
HealthSmart 04-625-001 quick start guide

alvita
alvita Plus manual

Omron
Omron R2 instruction manual

Hangzhou Hua'an Medical & Health Instruments
Hangzhou Hua'an Medical & Health Instruments MW-300C Operation guide

HealthSmart
HealthSmart 04-610-001 quick start guide

Nokia
Nokia BPM+ Quick installation guide