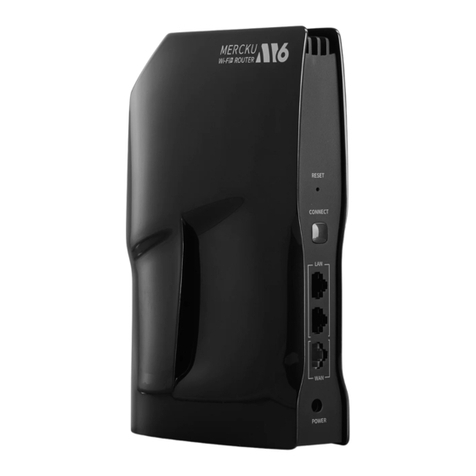
Mercku Tech M6 User manual

USER GUIDE
M6 AX1800 Mesh Wi-Fi Router

Page | 1
Contents
About This Guide ...................................................................................................................... 4
Support ..................................................................................................................................... 4
Chapter 1: Mercku M6 Overview .............................................................................................. 5
1.1. M6 Technical Specifications .......................................................................................... 6
1.2. LEDs ............................................................................................................................... 8
Chapter 2: Managing Your System ........................................................................................... 9
2.1 Installing the Mercku App ..............................................................................................10
2.2 Creating an Account on the Mercku App.......................................................................10
2.2.1 Using your Phone Number .......................................................................................10
2.2.2 Using your Google or Facebook Account ...............................................................11
2.3 Set Up Your Network Without an Account ....................................................................11
2.4 Managing Your Network from the Mercku App .............................................................12
2.5 Using the Mercku Web Portal ........................................................................................12
2.6 Unbinding Your Router ...................................................................................................12
2.7 Time Zone Settings ........................................................................................................12
2.8 Country/Region Settings ................................................................................................13
Chapter 3: Installation and Mesh Set -Up ................................................................................15
3.1 Tips When Installing Your M6 Router or Nodes .............................................................16
3.2 Installing Your M6 Using the Mercku App/Portal..............................................................16
3.3 Connect a Device to Your M6 via Ethernet Cable............................................................17
3.4 Adding an M6 Node to Your Ex isting Mesh ...................................................................17
3.5 Positioning Your Mesh Nodes ........................................................................................21
Chapter 4: Router Management ..............................................................................................22
4.1 Increase Mesh Coverage................................................................................................23
4.2 Mesh Topology and Connection Quality ........................................................................24
4.3 Managing Your Mercku Hardware .................................................................................24
4.3.1 Opening Your Device List ........................................................................................24
4.3.2 Reboot ......................................................................................................................26
4.3.3 Factory Reset ...........................................................................................................26
4.4.1 From Device to Router .............................................................................................28

Page | 2
4.4.2 From Router to Internet ...........................................................................................28
4.5 Monitor Internet Traffic Usage .......................................................................................29
Chapter 5: Wi-Fi Settings.........................................................................................................30
5.1 Wi-Fi Name and Router Management ............................................................................31
5.1.1 How to Change Your Wi-Fi Name and Password ...................................................31
5.1.2 Change Router Encryption ......................................................................................32
5.2 Smart Connect ................................................................................................................34
5.3. Channel Switching .........................................................................................................35
5.4 Adjusting Channel Width ................................................................................................37
Chapter 6: Guest Network .......................................................................................................39
6.1. Setting Up Your Guest Network ....................................................................................40
6.2 Customizing your Guest Network ..................................................................................41
Chapter 7: Network Security ....................................................................................................42
7.1 Firewall ...........................................................................................................................43
7.2 WAN Ping........................................................................................................................43
7.3 Blocklisting Devices .......................................................................................................43
7.4 UPnP ...............................................................................................................................44
Chapter 8: Parental Controls ...................................................................................................47
8.1 Set Time Limits ...............................................................................................................48
8.2 Set Rate Limits ...............................................................................................................50
8.3 Website Blocklisting .......................................................................................................51
Chapter 9: Advanced Settings .................................................................................................53
9.1 Port Forwarding ..............................................................................................................54
9.2 DMZ Host........................................................................................................................55
9.3 Change DHCP LAN IP ....................................................................................................56
9.4 Set Up a Static DHCP Lease ..........................................................................................58
9.5 Clone MAC Address .......................................................................................................59
9.6 Set Up a Dynamic DNS Service Account .......................................................................60
9.7 VPN .................................................................................................................................62
9.8 Set Up Bridge Mode .......................................................................................................63
Chapter 10: Internet Protocol Settings ....................................................................................66
10.1 Internet Protocol Setup ................................................................................................67
10.2 Internet VLAN Configuration (For PPPoE) ....................................................................68
10.3 IPv6 ...............................................................................................................................70

Page | 3
Chapter 11: Upgrading Devices...............................................................................................72
11.1 Firmware Upgrades ......................................................................................................73
11.1.1 Online Upgrade ......................................................................................................73
11.1.2 Offline Upgrade ......................................................................................................74
11.2 Automatic Upgrade ......................................................................................................75
Chapter 12: Diagnostic Tools ..................................................................................................78
12.1 Network Diagnosis .......................................................................................................79
12.2 System Log ...................................................................................................................79
12.3 Technical Feedback .....................................................................................................80
FAQ ..........................................................................................................................................81
1.3.0 Update –2021-06-24.......................................................................................................86
1.3.0-1. Automatic Channel Selection ..................................................................................86
1.3.0-2. LED Control .............................................................................................................87
1.3.0-3. Wi-Fi 5 Compatibility Switch ...................................................................................89

Page | 4
About This Guide
Thank you for purchasing Mercku's M6 AX1800 Mesh System! This User Guide is meant to
compliment the Quick Start Guide provided with the device. The Quick Start Guide walks you
through quick set-up and node addition instructions for your new Mercku M6, whereas this
User Guide provides a detailed description of each function and shows you how to optimize
your function configurations to best suit your needs. When using this guide, please note
that the features of your router may vary slightly depending on the model and firmware
version you have, and on your location, language, and internet service provider.
Support
You can visit www.mercku.com to learn further information about your products, get
assistance, access the latest firmware versions, and join our community. We recommend
that you use only official Mercku support resources.
You can find your Quick Start Guide inside the packaging of your new Mercku device.
If you require any further assistance, please refer to our FAQs which can be found here:
https://www.mercku.com/support/faqs/.

Page | 6
1.1. M6 Technical Specifications
The M 6 router, when placed in an open location, can provide coverage for a home of up to
3,000 ft2(280 m2). Please refer to the information below for technical specifications for the
M6.
Basic Information
Model
M6R0
Role
Wireless Mesh Router
Certification of Compliance
Name
M6 Mesh Wi-Fi Router
Brand
Mercku
Transmission Band
2.4 GHz & 5 GHz
Mesh
Yes
Color
Black, Red, White
Size
140 x 52.6 x 206 mm
Antenna
Frequency
2.4 GHz & 5 GHz
Antenna
WHEMS antenna
Wireless Rate
2.4 GHz: 573 Mbps 2x2
5 GHz: 1201 Mbps 2x2
Wireless Protocol
802.11a/b/g/n/ac/ax
Dual-Frequency
Concurrency
Yes
Antenna Gain
2.4 GHz: 5.0 dBi
5 GHz: 5.0 dBi
Port
WAN
1000 Base-T Ethernet x 1
LAN
1000 Base-T Ethernet x 2
LED
1 (internet and mesh status)
Reset Button
1
Connect Button
1
Hardware
CPU
Quad ARM Cortex A53 at
1.2 GHz (Quad-Core
Processor)
Flash
1 Gb NAND
RAM
512MB DDR3
WAN access mode
PPPoE/DHCP/static IP
Power Adapter
DC 12 V/1.5 A
100-240 V 56/60 Hz
Software
STA access mode
DHCP/static IP
STA ACL
URL filter/mac filter/rate
limit/time lim it
App Management
iOS/Android
Web local management
http://mywifi.mercku.tech
VPN client
PPTP/L2TP/OpenVPN
DDNS
DynDNS/Oray
LAN DHCP Setting
LAN IP/pool/lease
Static DHCP lease
MAC and IP binding

Page | 7
Port forwarding
Yes
DMZ
Yes
WAN MAC Clone
Yes
Firewall
ICMP Smurf, IP Land, IP
Spoof, IP Teardrop, Ping of
Death, TCP Scan, TCP
SynwithData, UDP Bomb,
UDP Echochargen
System log
Yes
Customized DNS
Yes
Network diagnosis
ping / traceroute / nslookup
Smart connect
2.4 GHz /5 GHz SSID
separation
Guest Network
Yes
Certification
IC
Yes
CE
Yes
RoHS
Yes
FCC
Yes

Page | 8
1.2. LEDs
The LED indicator at the front of the M6 indicates its status:
Blinking
slowly:
operation in progress (e.g. booting up,
upgrading firmware)
Blinking quickly: undergoing factory reset
Blinking: router is in pairing mode
No internet connection
Steadily illuminated: stable network
connection
Blinking: network connection available,
however mesh connection could be better

Page | 9
Chapter 2: Managing Your
System
This chapter goes through options for managing and accessing your new Mercku wireless
network.
•Installing the Mercku App
•Creating an Account in the Mercku App
oUsing your Phone Number
oUsing your Google or Facebook Account
•Set Up Your Network Without Registering
•Managing Your Network from the Mercku App
•Using the Mercku Web Portal
•Unbinding Your Router
•Time Zone Settings
•Country/Region Settings

Page | 10
2.1 Installing the Mercku App
The Mercku App runs on iOS and Android devices, such as smartphones and tablets. Go to
the Apple App Store for iOS devices or Google Play for Android devices and search
" Mercku" or simply scan the QR code to download and install the app.
2.2 Creating an Account on the Mercku App
2.2.1 Using your Phone Number
1. Open the Mercku App and click Login > Go to Register
2. Enter your phone number and click Send Pin
Please Note: You will receive a text message containing the PIN and will have 1 minute
to complete the registration before the PIN expires.
3. Once you have registered, follow the instructions to set up your Mercku network
through the app. Please note that Chapter 3 has setup instructions.

Page | 11
2.2.2 Using your Google or Facebook Account
Go to the Mercku App and click on "Login", select or
2.3 Set Up Your Network Without an Account
When you open the Mercku App, you can select the Setup without login option to set up your
network without linking an account to your phone number, Facebook, or Google account.
Doing so will redirect you to http://mywifi.mercku.tech. Please follow the instructions to set
up your network. Chapter 3 has full setup instructions.

Page | 12
2.4 Managing Your Network from the Mercku App
After setting up your Mercku account, you can "bind" the M6 to your phone' s Mercku App
for remote and on-site access to the network. The M6 network may only be bound to a
single device at any given time.
1. Connect your device to your router's wireless network.
2. Open the Mercku App on your device and follow instructions on the screen.
2.5 Using the Mercku Web Portal
1. Connect to the Mercku network and go to http://mywifi.mercku.tech.
2. Enter your Router Admin Password to access the portal and manage your network.
2.6 Unbinding Your Router
Unbinding a device dissociates your router from the Mercku App and your account.
Please ensure that you are using the latest App version. There are two different ways to
unbind your M6 from your account:
•Open the Mercku App and log in > Click Settings > Select Unbind
•You can also factory reset your M6 router to unbind your account
2.7 Time Zone Settings
When you first set up your router, please ensure that your system' s time zone is correct.
This will ensure that any time-based system functions, such as parental controls, are
operating as expected.
The time zone may be updated in either the Mercku App or the Portal.
Using the Mercku App:
1. Open the Mercku App on your mobile device.
2. Go to Settings > Timezone
3. Select your time zone from the list.

Page | 13
Using the Mercku
web portal:
1. Visit http://m ywifi.mercku.tech and log in using your Router Admin Password.
2. Go to Settings > Timezone
3. Select your time zone
2.8 Country/Region Settings
You can set the country/region for your Mercku network. This may influence the channels
available for certain settings including Wi-Fi channel switching, as well as other Wi-Fi time
management settings such as parental controls and guest Wi-Fi.

Page | 14
You can change your country/region using either the Mercku App or the web portal.
Using the Mercku App:
1. Open the Mercku App on your mobile device.
2. Go to Settings > Country/Region > Select your country/region from the list.
Using the Mercku web portal:
1. Visit http://m ywifi.mercku.tech and log in using your Router Admin Password.
2. Go to Settings > Country/Region > Select your country/region from the list.

Page | 15
Chapter 3: Installation and
Mesh Set-Up
This chapter will go through how to position and connect your Mercku devices for the best
experience with your new mesh Wi-Fi network.
•Tips When Installing Your M6 Router
•Installing the M6 Using the Mercku App/ Portal
•Connecting a Device Directly to the M6
•Adding an M6 Node to Your Existing Mesh
•Positioning Your Mesh Nodes

Page | 16
3.1 Tips When Installing Your M6 Router or Nodes
The following factors may affect connectivity during installation and between your mesh
nodes: housing structure, indoor obstacles, interference emitted by electronic appliances,
and distance between mesh nodes relative to the M6 router. Here are some tips to ensure
that your coverage is optimized within your home:
•The router should be placed in a dry place without exposure to excessive heat.
•Make sure the cables and power cord are safely placed out of the way, as to not
create a hazard.
•For optimized performance and coverage, the M6 should be placed in an open and
unobstructed area
•Keep the router away from devices with strong electromagnetic interference such as
microwave ovens, 2.4 GHz wireless mouse, 2.4 GHz wireless phones or other
electrical appliances that use the 2.4 GHz band.
•Do not place nodes in a straight line
•Wi-Fi signals are weakened by concrete walls and floors, metal and glass. Please
ensure you place your router in an open location.
3.2 Installing Your M6 Using the Mercku App/Portal
1. Plug in the M6 and connect the one end of the provided ethernet cable to the WAN
port of the M6 and the other end to the LAN port of your modem. Once connected
via ethernet cable, a white light in front of the M6 will light up, confirming a
successful connection.
2. Connect to the Open Mercku network: MERCKU-X XXX
3. Use the Mercku App or Mercku Portal (http://mywifi.mercku.tech) and follow the
instructions to set up your SSID.
4. Once your network is set up, please upgrade the firmware on your Mercku devices.
Refer to Chapter 14 for instructions on how to upgrade your firmware.
Did you know?
Walls and materials impact Wi-Fi strength. When placed in an open area, the optimal
distance between nodes is within 23 ft (7 m), but can be reduced by the following types of
materials:
•Wood or plastic: 16.5 ft (5 m)
•Glass: 6.5 ft (2 m)
•Cement or metal: 3.3 ft (1 m)

Page | 17
Please note that the name of the network is shown at the bottom of the router as shown
below:
3.3 Connect a Device to Your M6 via Ethernet Cable
Whether your M6 is being used as your main router or as a wireless node, you can establish
wired internet connectivity to devices such as computers, laptops, or gam ing consoles.
Simply plug in your device' s ethernet cable to the LAN port of the M6. When the M6 is
powered up, a red light shows up, and the LED light in front of the router will change to
white once a successful local connection has been established.
3.4 Adding an M6 Node to Your Existing Mesh
There are 3 different ways to add an M6 node to your existing mesh network:
1) Without using the Mercku App or Portal:
a. Plug in the power to the M6 node and wait until the LED indicator is orange
b. Press the "Connect" button on the main M6 router
c. Press the "Connect" button on the M6 node

Page | 18
Once the M6 node is meshed, you' ll see its LED indicator become white.
2) Via Mercku App:
a. Open the Mercku App on your mobile device.
b. Select the "+" sign at the right-top corner > Start
c. Plug in the M6 node - the indicator light on the front will start off as red, then
orange

Page | 19
d. Press the "Connect" button on the M6 node until the indicator light blinks blue,
follow the instructions in the App, and wait for about to 1 minute for the M6 node
to be added
e. When the nodes are meshing, an animation of this activity shows up, please wait
for 1 minute until the "Successfully added" message appears.
f. Go to back to the homepage and click on Wi-Fi point to see the new node added
to the network.
3) Via Mercku Portal:
Other manuals for M6
1
Table of contents
Other Mercku Tech Wireless Router manuals

