Mercoid Series MPC User manual

Bulletin L-20
MERCOID
A Division of Dwyer Instruments, Inc.
P.O. BOX 258 • MICHIGAN CITY, INDIANA 46361, U.S.A.
Phone: 219/879-8000 • Fax: 219/872-9057
www.dwyer-inst.com • e-mail: lit@dwyer-inst.com
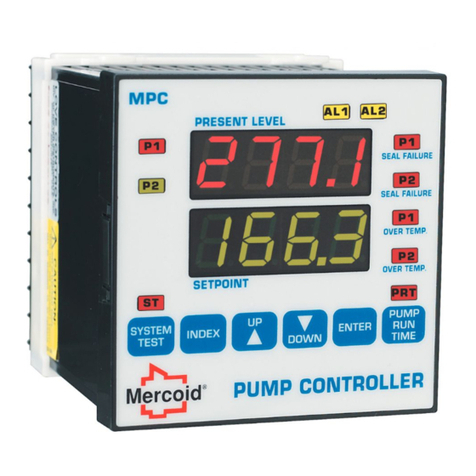
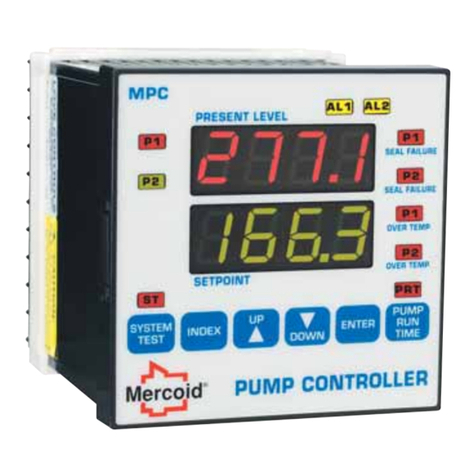
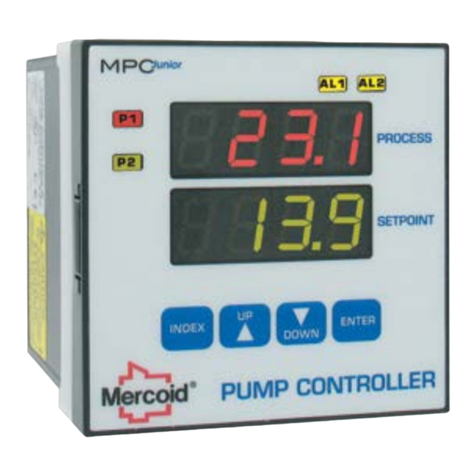
Series MPC Pump Controller
Installation and Operating Manual
FR # MI-443247-00, Rev. 1
L-20 12/29/04 8:47 AM Page 1

1
CONTENTS
Dimensions . . . . . . . . . . . . . . . . . . . . . . . . . . . . . . . . . . . . . . . . . . . . . . . . . . . . . . . . . . . . . 1
Specifications. . . . . . . . . . . . . . . . . . . . . . . . . . . . . . . . . . . . . . . . . . . . . . . . . . . . . . . . . . . . 2
Getting Started. . . . . . . . . . . . . . . . . . . . . . . . . . . . . . . . . . . . . . . . . . . . . . . . . . . . . . . . . . . 3
Model Identification . . . . . . . . . . . . . . . . . . . . . . . . . . . . . . . . . . . . . . . . . . . . . . . . . . . . . . . 3
Installation . . . . . . . . . . . . . . . . . . . . . . . . . . . . . . . . . . . . . . . . . . . . . . . . . . . . . . . . . . . . . . 4
Wiring . . . . . . . . . . . . . . . . . . . . . . . . . . . . . . . . . . . . . . . . . . . . . . . . . . . . . . . . . . . . . . . . 5-7
Front Panel Functions . . . . . . . . . . . . . . . . . . . . . . . . . . . . . . . . . . . . . . . . . . . . . . . . . . . . 8-9
Home Display. . . . . . . . . . . . . . . . . . . . . . . . . . . . . . . . . . . . . . . . . . . . . . . . . . . . . . . . . . . . 9
Security Level Selection . . . . . . . . . . . . . . . . . . . . . . . . . . . . . . . . . . . . . . . . . . . . . . . . . . . 10
Lead/Lag Operation . . . . . . . . . . . . . . . . . . . . . . . . . . . . . . . . . . . . . . . . . . . . . . . . . . . . . . 11
Seal Failure Operation. . . . . . . . . . . . . . . . . . . . . . . . . . . . . . . . . . . . . . . . . . . . . . . . . . 11-12
Over Temperature Operation. . . . . . . . . . . . . . . . . . . . . . . . . . . . . . . . . . . . . . . . . . . . . 12-13
Analog Retransmission Operation . . . . . . . . . . . . . . . . . . . . . . . . . . . . . . . . . . . . . . . . . . . 13
Serial Communication Operation . . . . . . . . . . . . . . . . . . . . . . . . . . . . . . . . . . . . . . . . . . . . 14
Menu Selections . . . . . . . . . . . . . . . . . . . . . . . . . . . . . . . . . . . . . . . . . . . . . . . . . . . . . . . . 15
Secondary Menu . . . . . . . . . . . . . . . . . . . . . . . . . . . . . . . . . . . . . . . . . . . . . . . . . . . . . 15-16
Secure Menu . . . . . . . . . . . . . . . . . . . . . . . . . . . . . . . . . . . . . . . . . . . . . . . . . . . . . . . . 17-23
Alarm Type and Action . . . . . . . . . . . . . . . . . . . . . . . . . . . . . . . . . . . . . . . . . . . . . . . . . 20-22
Diagnostic Error Messages . . . . . . . . . . . . . . . . . . . . . . . . . . . . . . . . . . . . . . . . . . . . . . 24-25
Programming Chart . . . . . . . . . . . . . . . . . . . . . . . . . . . . . . . . . . . . . . . . . . . . . . . . . . . 26-28
Programming Example . . . . . . . . . . . . . . . . . . . . . . . . . . . . . . . . . . . . . . . . . . . . . . . . . 28-31
3.596
(91.3 mm)
Panel Thickness
0.250 (6.53 mm) Max.
Panel cut-out: 3.620 x 3.620 in, +0.032/-0.000
(92 x 92 mm, +0.8/-0.0).
Allow for 0.5 in (13 mm) clearance
at the rear of the instrument.
Meets IP66 (UL Type 4X)
3.774
(95.9)
3.774
(95.9)
4.500
(114.3) 0.530
(13.5)
DIMENSIONS
L-20 12/29/04 8:47 AM Page 1

SPECIFICATIONS
Inputs: 4 to 20 mA DC or 2.0 to 10.0 V DC selectable.
Input Impedance: Current input: 10 ohms, Voltage input: 100K ohms.
Output Ratings:
Control Relays: SPDT, rated 10A @ 240 VAC res., 1/4 hp @120 VAC,
1/3 hp @ 240 VAC.
Alarm Relays: SPST, 3A @ 240 VAC res., 1/10 hp @ 120 VAC.
Control Type: on/off, reverse or direct acting.
Power Requirements: 100 to 240 VAC nominal, +10%-15%, 50 to 400 Hz, single
phase; 132 to 240 VDC nominal, +10%-15%.
Power Consumption: 7.5 VA maximum.
Accuracy: 0.25% of span, 1 least significant digit.
Display: Two 4 digit, 7 segment 0.56” high LED’s.
Display Resolution: 1 count.
Memory Backup: Nonvolatile memory (no batteries required).
Serial Communications: Optional RS-232 or RS-485 with Modbus® protocol.
Ambient Operating Temperature / RH: 14 to 131° F (-10 to 55° C) / 0 to 90% up
to 104° F (40° C) non-condensing, 10 to 50% at 131° F (55° C) non-condensing.
Weight: 16 oz. (454 g).
Front Panel Rating: Meets UL Type 4X (IP66).
Loop Power Supply (isolated): 24 VDC @ 50 mA, regulated.
Seal Failure (Moisture Sensor):
Power Supply to Moisture Sensor: 2.5 VDC.
Search Current: 3 micro amps.
Resistance Sensitivity: 10K to 500K ohms.
Resistance Resolution: 10K ohm steps.
Over Temperature:
Input: Dry contact on Transistor switch (NPN open collector type).
Current: 1 mADC.
Isolation: Shares common ground with transmitter input.
Alarm On-Off Differential: 1 count.
Set Point Range: Selectable.
Power Voltage Stability: 0.05% over the power voltage range.
Temperature Stability: 100 ppm / °C typical, 200 ppm / °C maximum.
Common Mode Rejection: 140 db minimum at 60 Hz.
Normal Mode Rejection: 65 db typical, 60 db at 60 Hz.
Isolation:
Relay: 1500 VAC to all other inputs and outputs.
24 VDC Loop Power: 500 VAC to other inputs and outputs.
Process Output: 500 VAC to other inputs and outputs.
Seal Failure Input: 500 VAC to other inputs and outputs.
Storage Temperature: -40 to 176° F (-40 to 80° C).
Agency Approvals: UL 508.
2
L-20 12/29/04 8:47 AM Page 2

3
GETTING STARTED
1. Install the control as described on page 4.
2. Wire the control following the instructions on pages 5 through 7. Page 5 contains
basic wiring for the control. If using the Series MPC’s transmitter power supply follow
the additional directions on page 6. Wiring instructions for the 232 and 485 series
communication options is included on page 7.
3. Familiarize yourself with the front key pad functions and read the menu structure
prior to starting the programming process. A programming chart with the menu struc-
ture and spaces to write your programming values is included on pages 26 through
28. This chart can be a helpful tool to save time in programming. For further assis-
tance programming examples are included on pages 28 through 31.
MODEL IDENTIFICATION
Model MPC -
Options
Options:
232 RS-232 Modus-RTU Serial Communications. Allows remote
computer to read and write all control parameters.
485 RS-485 Modbus-RTU Serial Communications. Allows remote
computer to read and write all control parameters.
RV Analog retransmission of input, 2 to 10 VDC.
Input Ranges
Process Input Types
The 0 to 20 mADC, 4 to 20 mADC, 0 to 10 VDC, and 2 to 10 VDC inputs are fully
scalable from a minimum of 100 count span placed anywhere within the range of
-1999 to +9999. Decimal point position is adjustable from the zero place (9999),
tenths (999.9), hundredths (99.99), or thousandths (9.999).
L-20 12/29/04 8:47 AM Page 3

4
INSTALLATION
Mount the instrument in a location that will not be subject to excessive temperature,
shock, or vibration (see Specifications for specific tolerances). All models are designed
for mounting in an enclosed panel.
Select the position desired for the instrument on the panel. Prepare the panel by cut-
ting and deburring the required opening.
From the front of the panel, slide the housing through the cut out. The housing gas-
ket should be against the housing flange before installing.
From the rear of the panel slide the mounting collar over the housing. Hold the hous-
ing with one hand and using the other hand, push the collar evenly against the panel
until the springs are compressed. The ratchets will hold the mounting collar and hous-
ing in place.
Figure 1 – Panel Cut Out Dimensions
CAUTION: It is not necessary to remove the instrument chassis from
the housing for installation. If the instrument chassis is removed
from the housing, you must follow industry standard practice for
control and protection against Electro-Static Discharge (ESD).
Failure to exercise good ESD practices may cause damage to the instrument.
Panel cut-out:
3.620 x 3.620 in,
+0.032/-0.000
(92 x 92 mm,
+0.8/-0.0)
L-20 12/29/04 8:47 AM Page 4

5
Pump 1 Over Temp
Pump 2 Over Temp
Voltage
Current
Seal
Sensor
Inputs
Pump 1
Alarm 1
Contacts
Alarm 2
Contacts
Pump 1
Output
Pump 2
Output
24 VDC
@
50 mA
Isolated
Pump 2
N.O.
COM.
N.O.
COM.
NOTES:
1. For supply connections use
No. 16 AWG or larger wires rated
for at least 167˚F (75˚C) or, in
accordance with an equivalent
national standard.
2. Maximum ambient temperature
rating 131˚F (55˚C).
3. Use copper conductors only.
4. Terminals 1-6, 11, 12, 21-32
are class 2 "SELV".
Line Input
100 to 240 VAC 50-
400 Hz. Single PH.
132 to 240 VDC 5VA.
Max. Output Ratings:
Relay: 10A @ 240 VAC Res.
1/4 HP @ 120 VAC
1/3 HP @ 240 VAC
Alarm: 3A @ 240 VAC Res.
1/10 HP, 120 VAC
290-3120
Analog Retransmission
Figure 2 - Wiring
WIRING
Do not run transmitter wiring or other class 2 wiring in the same conduit as power
leads. Use only the probe or transmitter for which the control has been programmed.
Maintain separation between wiring of sensor, auxiliary in or out, and other wiring. See
the "Secure Menu" for input selection.
Supply connections should be made in accordance with the National Electrical Code
per Article 300, and local regulations. All line voltage output circuits must have a com-
mon disconnect and be connected to the same pole of the disconnect.
Input wiring for probe or transmitter is rated CLASS 2.
Control wiring is as shown in Figure 2 below.
If not using pump over temperature inputs then jumper terminals 22 to 23 and
22 to 24.
L-20 12/29/04 8:47 AM Page 5

6
Connect Jumper between terminals 2 and 12
Level
Transmitter
Connect Transmitter Plus (+) to terminal 11
Connect Transmitter
minus (-) to terminal 3
WIRING FOR TRANSMITTER INPUTS USING INTEGRAL
POWER SUPPLY
Wire power and outputs as shown on previous page. Wiring for two-wire transmit-
ters shown below in Figure 3. All wiring shown in Figure 3 is Class 2.
Figure 3 - Transmitter Wiring
For three or four wire transmitters follow the wiring instructions provided with your
transmitter.
DO NOT wire the 24 Volt Power Supply across the input of the
control. Damage to the control input circuitry will result.
L-20 12/29/04 8:47 AM Page 6

7
WIRING FOR 485 AND 232 SERIAL COMMUNICATION OPTIONS
Wire power and outputs as shown on page 5. Wiring for options is shown in Figure
4 below. All wiring shown below is Class 2. Shielded twisted pair is recommended
for Option 485.
DO NOT run signal wiring in the same conduit or chase as the power
wiring. Erratic operation or damage to the control circuitry will
result.
Figure 4 – Wiring for Options
10
9
8
7
27 28
29
30
31
32 20
19
18
17
6
5
4
3
2
1
21
22
23
24
25
26
16
15
14
13
12
11
Terminal 29 30 31 32
Option 485 Y (receive -) Z (receive +) A (transmit -)* B (transmit +)*
Option 232 not used data out data ground data in
*For half-duplex operation wire only A and B. Do not connect to Y and Z.
Option 485 DIP Switch Positions*
Half Duplex* Full Duplex
1 2 3 4 5 6 1 2 3 4 5 6
1 2 3 4 5 6 7 8 9 10 11 12 13
14 15 16 17 18 19 20 21 22 23 24 25
DATA IN 30
DATA OUT 32
DATA GROUND 31
PIN DESCRIPTION
1 SHIELD
2 TRANSMIT
3 RECEIVE
4 RTS
5 CTS
PIN DESCRIPTION
6 DSR
7 GROUND
8 DCD
20 DTR
DB-25 WIRING
(VIEWED FROM WIRE SIDE)
1 2 3 4 5
6 7 8 9
RS-232 DB-9 WIRING
(VIEWED FROM WIRE SIDE)
PIN DESCRIPTION
1 DCD
2 RECEIVE
3 TRANSMIT
4 DTR
5 GROUND
6 DSR
7 RTS
8 CTS
DATA OUT 32
DATA IN 30
DATA GROUND 31
ON
OFF
L-20 12/29/04 8:47 AM Page 7

FRONT PANEL FUNCTIONS
Key functions are as follows:
INDEX: Pressing the INDEX key for 2 seconds will bring up the
Secondary menu starting at the
SSPP11HH
menu item. Holding the key for 5 sec-
onds will bring up the Secure menu starting with the menu item
SSEECC
r.Once
in the menus, pressing the INDEX key advances the display to the next
menu item. May also be used in conjunction with other keys as noted below.
SYSTEM TEST: When Test menu item is "On" depressing this key for three
seconds will make the MPC Pump Controller go through a system test. See
page 18 for explanation of system test function.
UP ARROW: Increments a value, changes a menu item, or selects the item to
ON. The maximum value obtainable is 9999 regardless of decimal point place-
ment.
DOWN ARROW: Decrements a value, changes a menu item, or selects the
item to OFF. The minimum value obtainable is -1999 regardless of decimal
point placement.
ENTER: The ENTER key is used to store the value of menu items once
they are changed to a new value. If the ENTER key is not pressed after
changing the value the item will revert to the previously stored value.
PUMP RUN TIME: Pressing this key will cause the MPC Pump Controller to
display the total run time (in hours) that the pump(s) have been on since the
last reset.
8
L-20 12/29/04 8:47 AM Page 8

INDEX & DOWN ARROW: Pressing these keys simultaneously
will allow backing up one menu item, or if at the first menu item they will
cause the display to return to the primary menu. If an alarm condition has
occurred, these keys may be used to reset the alarm.
INDEX & ENTER: Pressing these keys simultaneously and holding
them for 5 seconds allows recovery from the various error messages.
The following menu items will be reset:
AALLiiHH
: Alarm inhibit
CCHHEECCCCAALL
: Check calibration error
Correct the problems associated with the above conditions before using these
reset keys. More than one error could be present. Caution is advised since several
items are reset at one time.
THE HOME DISPLAY
The home display is the normal display while the control is operating. If no errors or
functions are active, the HOME display will indicate the Process Variable (the level
that is being measured) on the top display and the
SSPP11HH
value, Pump 1 On Set
Point, on the bottom display.
Error messages may over-ride the HOME display. See ERROR MESSAGES on
pages 24 and 25.
While in the Secondary Menu, if no key is pressed for a period of 30 seconds, the
display will return to the HOME position displaying the process value. While in the
Secure Menu, if no key is pressed for a period of 60 seconds, the display will
return to the HOME position displaying the process value. Outputs are disabled
(turned off) when the Secure Menu is active.
9
L-20 12/29/04 8:47 AM Page 9

SECURITY LEVEL SELECTION
Three levels of security are provided. The
SSEECCrr
menu item security level may be
viewed or changed at any time regardless of the present security level in the Secure
menu. The display shows the current security level. To change security levels
change the password value using the UP ARROW or DOWN ARROW
keys and pressing the ENTER key. Refer to the password table (following) for
the correct value to enter for the security level desired.
To set the access level to, for example,
22
,at the
SSEECCrr
menu item press the
UP ARROW key until the upper display shows the password,
11110011
.Press the
ENTER key. The display will blink, and return with the level value,
22
,inthe
upper display.
The password values shown in the table cannot be altered. Retain a copy of these
pages for future reference. This is the only reference made to password values in
this instruction book.
Password Table
Menu
Secondary Locked
Secure Locked
Secondary Unlocked
Secure Locked
Secondary Unlocked
Secure Unlocked
Displayed Value
When Viewed
2
3
4
Password Value To
Enter
1101
1011
111
10
Security Level
Status
L-20 12/29/04 8:47 AM Page 10

LEAD/LAG OPERATION
The Mercoid MPC pump controller is designed to easily operate a pair of pumps in
the most efficient manner possible. The controller has a 'lead/lag' feature that allows
two pumps to operate in an alternating fashion to minimize wear.
The Mercoid MPC pump controller has a pair of set points each for pump 1 and
pump 2. If the lead/lag feature is turned off,
SSPP11HH
and
SSPP11LL
control pump 1 and
SSPP22HH
and
SSPP22LL
control pump 2. If the lead/lag feature is turned on, pumps 1 and
2 will be controlled in the alternating fashion described below. In all cases the P1
lamp will indicate activity of pump 1 and the P2 lamp will indicate activity of pump 2.
The lead/lag operation is set in the Secure menu with the item
LLddLLgg
.
Lead/Lag On
After installation, set the
SSPP11HH
to the high level (pump on point) for standard opera-
tion. Set
SSPP11LL
to the low level (pump off point). Set the
SSPP22HH
to the level where
you want BOTH pumps to turn on (emergency pump on). Set the
SSPP22LL
to the level
where you want the second pump to turn off (emergency pump off).
The controller will not allow you to set
SSPP11HH
below
SSPP11LL
,
SSPP11LL
above
SSPP11HH
,
SSPP22HH
below
SSPP22LL
, or
SSPP22LL
above
SSPP22HH
. The controller will not allow you to set
any set point or alarm point above or below the programmed scale. No error mes-
sages are generated. The displayed value will stop at an allowable point just above
(or below, as the case may be) the maximum or minimum allowed.
In normal operation, when the
SSPP11HH
point is reached, one of the pumps will turn
on. When lead/lag is turned on, pumps 1 and 2 will alternate. If the level reaches the
SSPP22HH
point, both pumps will be turned on until the
SSPP22LL
point is reached, where
one of the pumps will turn off. When
SSPP11LL
is reached, remaining running pump will
turn off. The last pump off will not be the next pump on.
Lead/Lag Off
If lead/lag is turned off,
SSPP11HH
and
SSPP11LL
control pump 1 and
SSPP22HH
and
SSPP22LL
con-
trol pump 2. There is no alternating function.
SEAL FAILURE OPERATION
The Mercoid MPC Pump Controller is designed to work with most types of sub-
mersible pump moisture sensors to detect outer seal failure. Most often the mois-
ture sensor is a conductance device that detects moisture in the oil chamber indicat-
ing an outer seal failure. Using a 2.5 VDC power supply sent to the moisture sensor
the MPC Pump Controller monitors the resistance between the probe lead wires or
the single probe lead wire and ground. The resistance set point is adjustable over
the range of 10K to 500K ohms adjustable in 10K ohm steps, and is set with
Secondary menu items
SSFFSS11
and
SSFFSS22
. When the resistance of the moisture
sensor decreases below the resistance set point the MPC controller goes into the
programmed seal failure mode.
11
L-20 12/29/04 8:47 AM Page 11

In the Secure menu the value of
PPSSFF
is programmed for the action of the MPC
based on the condition of a seal failure. If set to "
AAUUttOO
", when pump moisture
sensor indicates that there is a seal failure condition then the corresponding pump
seal failure lamp is lit on the controller. The pump will remain in service with only the
lamp indication of failure. The lamp will be turned off automatically when the seal
failure condition has ceased.
If
PPSSFF
is set to “
rrEESS
”, when pump moisture sensor indicates that there is a seal
failure condition then the corresponding pump seal failure lamp is lit on the con-
troller. If the MPC is only being used with one pump or being used with two pumps
with the lead/lag function turned off then no action is taken by the MPC with the
operation of the pumps. The failure indication lamp will be manually reset as
described in the next paragraph. If the MPC is being used with two pumps with the
lead/lag function turned on then the failed pump will automatically become the lag
pump, the remaining pump will become the lead pump, and the alternation will be
discontinued. The lamp indication and pump alternation can be manually reset as
described in the next paragraph.
Once the pump has been repaired the seal failure action can be reset with the val-
ues of
PP11SSFF
and
PP22SSFF
in the Secondary menu. The item
PP11SSFF
or
PP22SSFF
will
display
FFAAIILL
if the corresponding pump has met the condition of a seal failure.
Press the ENTER key to reset. If the pump moisture sensor is still in the fail
condition then the control will not reset. If the moisture sensor is no longer in the fail
condition then the display will revert to “----“.
OVER TEMPERATURE OPERATION
Most pumps have an installed normally closed thermostat for over temperature pro-
tection of the pump. The thermostat has a preset value from the pump manufactur-
er at which point the pump needs to be shut down. The Mercoid MPC detects
when the thermostat signal changes to open and shuts down the pump.
In the Secure menu the value of
PPOOTT
is programmed for the action of the MPC
based on the condition of the over temperature. When the pump temperature sen-
sor indicates that there is an over temperature condition the pump will be held out of
service and the corresponding pump over temperature lamp is lit on the controller. If
using the MPC with two pumps with the lead/lag function turned on then the failed
pump will automatically be taken out of service, the remaining pump will become the
lead pump, and the alternation will be discontinued. When controlling two pumps
with the lead/lag function off the failed pump will automatically be taken out of service
and the remaining pump will be controlled by the
SSPP11HH
and
SSPP11LL
set points.
If
PPOOTT
is set to "
AAUUttOO
" then the pump will be automatically placed back into serv-
ice and the lamp turned off when the over temperature condition has ceased. If set
to “
rrEESS
” then the pump will remain out of service and the lamp lit until the corre-
sponding manual reset
PP11OOtt
or
PP22OOtt
is reset in the Secondary menu (described
in the next paragraph). The pump cannot be brought back into service until the
12
L-20 12/29/04 8:47 AM Page 12

over temperature condition has ceased.
Once the pump has cooled down the MPC Pump Controller can be reset with the
values of
PP11OOTT
and
PP22OOTT
in the Secondary menu. The item
PP11OOTT
or
PP22OOTT
will
display
FFAAIILL
if the pump has met the condition of over temperature. Press the
ENTER key to reset. If the pump temperature sensor is still in the fail condition
then the control will not reset. If the temperature input is no longer in the fail condi-
tion then the display will revert to “----“.
ANALOG RETRANSMISSION OPERATION
The analog retransmission allows the Process Variable to be sent as an analog sig-
nal to an external device. The signal may be either 2 to 10 VDC (option RV) or 4 to
20 mADC (standard). The output may be changed in the field from one to the other
by the toggle switch located on the top printed circuit board, factory standard is
mADC.
Wire the output as shown on page 5.
To set up the analog retransmission, first determine the scale range that the analog
signal will represent. The maximum scale is 9999 counts. In the Secure menu set
PPOOLL
for the scale value that will be represented by the low end of the analog signal
(2 Volts or 4 mA). Set
PPOOHH
for the scale value that will be represented by the high
end of the analog signal (10 Volts or 20 mA). Operation is automatic. There are no
further programming steps required. The values of
PPOOLL
and
PPOOHH
must be within
the programmed scale range. The scale range is set by the
SSCCAALL
and
SSCCAAHH
in the
Secure menu.
13
L-20 12/29/04 8:47 AM Page 13

OPTION 232, 485 SERIAL COMMUNICATION OPERATION
The serial communications options allow the control to be written to and read from a
remote computer or other similar digital device. Communication is allowed either
through a RS-485 (Option 485) port, or a RS-232 (Option 232) port.
Wire the communication lines as shown on Page 7. Wiring for the RS-485 is run
from control to control in a daisy chain fashion with a termination resistor (120 ohms)
across the transmit and receive terminals of the last control in the chain. Set the RS-
485 DIP switch for half or full duplex as appropriate for your application. The DIP
switch is located on the communications board plugged into the center of the bot-
tom board of the control.
Select the control address and communication baud rate with the
AAddddrr
and
bbAAUUdd
menu items in the Secure Menu. THE BAUD RATE AND ADDRESS MENU
ITEMS WILL TAKE EFFECT ON THE NEXT POWER UP OF THE CONTROL. BE
SURE TO POWER CYCLE THE CONTROL BEFORE USING THE NEW BAUD RATE
AND ADDRESS.
In operation, you have the option of preventing a write command from the host
computer. To prevent the host from writing to the control change the
LLOOrrEE
menu
item in the Secondary Menu to
LLOOCC
. To allow the host to write commands to the
control set
LLOOrrEE
to
rrEE
. (The host does have the ability to change the
LLOOrrEE
state, but it is not automatic.)
If your system depends on constant reading or writing to and from the host, you
may wish to set the No Activity Timer (
nnAAtt
) to monitor the addressing of the con-
trol. When the
LLOOrrEE
is set to
rrEE
and the
nnAAtt
is set to any value other than
OOFFFF
,
the control will expect to be addressed on a regular basis. If the control is not
addressed in the time set by the value of
nnAAtt
, then the control will display the error
message
CCHHEECCLLOOrrEE
. To clear the message set
LLOOrrEE
to
LLOOCC
.
14
L-20 12/29/04 8:47 AM Page 14

MENU SELECTIONS
Notation Conventions for the Menus
Because of the number of features available in this control, information is included
that may not apply to your specific control. All usable features are included in this
book, but may not be used in your process. To increase clarity the following con-
ventions are used:
1. Certain features or functions shown in this book are contextual. This means that
Menu Items may or may not appear, depending on other Menu Item selections.
Whenever this occurs, a notation is made in the Menu Item that "controls" or
"directs" other menu items. If you are looking for a particular menu item and can't
find it, check the menu item that is its "control" for proper setting.
2. The "#" symbol is used in two ways. It is used inside a group of characters to
indicate which set point function (SP1 or SP2) is being affected. It is also used
before a group of characters of a menu item to indicate that there may be more
than one selection or value for that menu item.
Secondary Menu
Press the INDEX key for 2 seconds to start the menu. Press INDEX to
advance to the next menu item. Press UP ARROW or DOWN ARROW
to change the value in the display. Press ENTER to retain the value.
SSPP11HH
Pump 1 On Set Point. Factory Default
2233..11
(feet).
SSPP11LL
Pump 1 Off Set Point. Factory Default
00..00
(feet).
SSPP22HH
Pump 2 On Set Point. Factory Default
2233..11
(feet).
SSPP22LL
Pump 2 Off Set Point. Factory Default
00..00
(feet).
AA11HHii
Alarm 1 High: Factory Default
2233..11
(feet).
AA22LLoo
Alarm 2 Low: Factory Default
22..00
(feet).
SSFFSS11
Pump 1 Seal Failure Set Point: Select 10 to 500 in any increment of 10.
Sets the resistance set point at which the controller will trip the Seal Failure
based on the input from the pump moisture sensor. The controller will
activate the Seal Failure condition based on a decrease of resistance to the
set point. Selectable resistance range is from 10K to 500K ohms with the
factory default at 120K ohms.
SSFFSS22
Pump 2 Seal Failure Set Point: Select 10 to 500 in any increment of 10.
Sets the resistance set point at which the controller will trip the Seal Failure
based on the input from the pump moisture sensor. The controller will
activate the Seal Failure condition based on a decrease of resistance to the
set point. Selectable resistance range is from 10K to 500K ohms with the
factory default at 120K ohms.
15
L-20 12/29/04 8:47 AM Page 15

PP11rrnn
Pump 1 Run Time: Total ON Time for Pump 1 in HOURS since last reset
(0000 - 9999 hours).
PP22rrnn
Pump 2 Run Time: Total ON Time for Pump 2 in HOURS since last reset
(0000 - 9999 hours).
PP11SSFF
Pump 1 Reset for Seal Failure. Displays “----” when pump 1 is in normal
operating condition based on seal failure input. Displays
FFAAIILL
if pump 1
has met the condition of a seal failure. Press the ENTER key to reset. If
pump 1 seal failure is still in the fail condition then the control will not reset.
If the seal failure input is no longer in fail condition then the display will
revert to “----”.
PP22SSFF
Pump 2 Reset for Seal Failure. Displays “----” when pump 2 is in normal
operating condition based on seal failure input. Displays
FFAAIILL
if pump 2 has
met the condition of seal failure. Press the ENTER key to reset. If
pump 2 seal failure is still in the fail condition then the control will not reset.
If the seal failure input is no longer in fail condition then the display will
revert to “----”.
PP11OOTT
Pump 1 Reset for Over Temperature. Displays “----” when pump 1 is in
normal operating condition based on temperature input. Displays
FFAAIILL
if pump 1 has met the condition of over temperature. Press the
ENTER key to reset. If pump 1 temperature input is still in the fail
condition then the control will not reset. If the temperature input is no
longer in fail condition then the display will revert to “----”.
PP22OOTT
Pump 2 Reset for Over Temperature. Displays “----” when pump 2 is in
normal operating condition based on temperature input. Displays
FFAAIILL
if
pump 2 has met the condition of over temperature. Press the
ENTER key to reset. If pump 2 temperature input is still in the fail
condition then the control will not reset. If the temperature input is no
longer in fail condition then the display will revert to “----”.
16
L-20 12/29/04 8:47 AM Page 16

Secure Menu
Press the INDEX key for 5 Seconds to start the menu. Press INDEX to
advance to the next menu item. Press UP ARROW or DOWN ARROW to
change the value in the display. Press ENTER to retain the value. OUTPUTS
ARE DISABLED (TURNED OFF) WHILE CONTROL IS IN THE SECURE MENU.
SSEECCrr
Security Code: See the Security Level Selection and the Password Table on
page 10, in order to enter the correct password. Factory Default is
44
.
SSCCAAHH
Scale High: Select
110000
to
99999999
counts above
SSCCAALL
. The total span
between
SSCCAALL
and
SSCCAAHH
must be within 11998 counts. Maximum setting
range is
--11999999
to
++99999999
counts. Factory Default is
2233..11
.
SSCCAALL
Scale Low: Select
110000
to
99999999
counts below
SSCCAAHH
. The total span
between
SSCCAALL
and
SSCCAAHH
must be within 11998 counts. Maximum setting
range is
--11999999
to
++99999999
counts. Factory Default is
00..00
.
ddPPTT
Decimal Point Positioning: Select
00
,
00..00
,
00..0000
, or
00..000000
. All Menu items
related to the input will be affected. Factory default is
00..00
.
SS11SStt
Set Point 1 State: Select
PPIInn
or
PPOOuutt
.Factory default is
PPOOuutt
.
PPIInn
Pump In (Direct Action). As the input increases the output
will increase.
PPOOuutt
Pump Out (Reverse Action). As the input increases the output
will decrease.
SS22SStt
Set Point 2 State: Select
PPIInn
,
PPOOuu
t or
OOFFFF
. Factory default is
PPOOuutt
.
PPIInn
Pump In (Direct Action). As the input increases the output
will increase.
PPOOuutt
Pump Out (Reverse Action). As the input increases the output
will decrease.
OOFFFF
This setting is for applications when the MPC is used with only one
pump systems. All Menu items relating to Set Point 2 will not
appear.
LLddLLgg
Lead / Lag: Select
OOnn
or
OOFFFF..
Factory default is
OOnn
. ( See page 11)
OOnn
The Lead/Lag function is enabled. The outputs of
SSPP11
and
SSPP22
will alternate.
OOFFFF
The Lead/Lag function is disabled.
IInnPPCC
Input Correction: Select ±500 counts. This feature allows the input value to
be changed to agree with an external reference or to compensate for
sensor error. Note:
IInnPPCC
is reset to zero when the input type is changed, or
when decimal position is changed.
17
L-20 12/29/04 8:47 AM Page 17

OOSSUUPP
Zero Suppression: Select
OOnn
or
OOFFFF
. Factory default is
OOnn
.
OOFFFF
The input range will start at 0 (zero) Input.
OOnn
The input range will start at 4.00 mA or 2.00 V.
IInnPP
Input Type: Select one of the following. Refer to the Input wiring section for
the proper wiring. Factory Default is
CCuurrrr
.
CCuurrrr
DC Current Input 0.0 to 20.0 or 4.0 to 20.0 mA.
UUooLLtt
DC Voltage Input 0.0 to 10.0 or 2.0 to 10.0 volts.
- - - - Reserved
PPOOtt
Pump Over Temperature: Select
AAUUTToo
or
rrEESS
. When pump temperature
sensor indicates that there is an over temperature condition the pump will be
held out of service and the corresponding pump over temperature lamp is lit
on the controller. If using the MPC with two pumps and lead/lag on then the
remaining pump becomes the lead pump. If lead/lag is turned off then the
remaining pump becomes controlled by Set Point 1. See page 12.
AAUUttOO
The pump will be automatically placed back into service and the
lamp turned off when the over temperature condition has ceased.
rrEESS
The pump will remain out of service and the lamp lit until the
corresponding manual reset
PP11OOtt
or
PP22OOtt
is reset in the
Secondary menu. The pump cannot be brought back into service
until the over temperature condition has ceased.
PPSSFF
Pump Seal Failure: Select
AAUUTToo
or
rrEESS
. See page 11.
AAUUttOO
When pump moisture sensor indicates that there is a seal failure
condition the corresponding pump seal failure lamp is lit on the
controller. The pump will remain in service with only the lamp indication
of failure. The lamp will automatically turn off when failure condition
ceases.
rrEESS
When pump moisture sensor indicates that there is a seal failure
condition the corresponding pump seal failure lamp is lit on the
controller. If the MPC is being used with two pumps and the
lead/lag feature turned on then the failed pump will automatically
become the lag pump, the remaining pump the lead pump, and the
alternation discontinued. The seal failure action is reset manually
with the values of
PP11SSFF
and
PP22SSFF
in the Secondary menu. The
control will only reset if the pump moisture sensor is no longer in a
failed condition.
TTEESSTT
System Test: Select
OOnn
or
OOFFFF
. When
OOnn
is selected the "System Test"
key on the front panel will be activated. By depressing this key for 3
seconds the controller will simulate an input from
SSCCAALL
to
SSCCAAHH
and back
to
SSCCAALL
over a period of 32 seconds. This test will run continuously until
the SYSTEM TEST key is pressed again. When the controller is in System
Test Mode the lamp above the System Test Key will be ON.
18
L-20 12/29/04 8:47 AM Page 18

PPrrSStt
Pump Run Time Reset: Select
OONN
or
OOFFFF
. Selecting
OONN
will allow Pump
Run Time to be reset in the Secondary menu while an
OOFFFF
selection will not
allow Pump Run Time to be reset.
SSPPHH
Set Point High: Select from the highest input range value to
SSPPLL
value. This
will set the maximum
SSPP11HH
or
SSPP22HH
value that can be entered. The value
for
SSPP11HH
or
SSPP22HH
will stop moving when this value is reached. Factory
Default is
2233..11
.
SSPPLL
Set Point Low: Select from the lowest input range value to
SSPPHH
value. This
will set the minimum
SSPP11LL
or
SSPP22LL
value that can be entered. The value
for
SSPP11LL
or
SSPP22LL
will stop moving when this value is reached. Factory
Default is
00..00
.
SS11PPII
Setpoint 1 Power Interrupt. Select
OOnn
or
OOFFFF
. Factory default is
OOFFFF
.
OOnn
Alarm Power Interrupt is
OOnn
. Output will automatically reset on
power-up if no alarm condition exists.
OOFFFF
Alarm Power Interrupt is
OOFFFF
. Output will be in the alarm condition
on power-up regardless of condition of process.
SS11IIHH
Setpoint 1 Inhibit: Select
OOnn
or
OOFFFF
. Factory default is
OOFFFF
.
OOnn
Alarm Inhibit is
OOnn
. Alarm action is suspended until the process
value first enters a non-alarm condition.
OOFFFF
Alarm Inhibit is
OOFFFF
.
SS22PPII
Setpoint 2 Power Interrupt. Select
OOnn
or
OOFFFF
. Factory default is
OOFFFF
.
OOnn
Alarm Power Interrupt is
OOnn
. Output will automatically reset on
power-up if no alarm condition exists.
OOFFFF
Alarm Power Interrupt is
OOFFFF
. Output will be in the alarm condition
on power-up regardless of condition of process.
SS22IIHH
Setpoint 2 Inhibit: Select
OOnn
or
OOFFFF
. Factory default is
OOFFFF
.
OOnn
Alarm Inhibit is
OOnn
. Alarm action is suspended until the process
value first enters a non-alarm condition.
OOFFFF
Alarm Inhibit is
OOFFFF
.
PPEEAA
The Peak feature stores the highest input the control has measured since
the last reset or Power On. At Power On
PPEEAA
is reset to the present input.
To manually reset the value
PPEEAA
must be in the lower display. Press the
ENTER key to reset.
PPEEAA
will be reset and display the present input
value.
UUAALL
The Valley feature stores the lowest input the Controller has measured since
the last reset or Power On. At Power On
UUAALL
is reset to the present input.
To manually reset the value
UUAALL
must be in the lower display. Press the
ENTER key.
UUAALL
will be reset and display the present input value.
19
L-20 12/29/04 8:47 AM Page 19
Other manuals for Series MPC
2
Table of contents
Other Mercoid Controllers manuals
Mercoid
Mercoid PPQ Series User manual
Mercoid
Mercoid D Series Installation and operating instructions
Mercoid
Mercoid 123 Series Installation and operating instructions
Mercoid
Mercoid EDA series User manual
Mercoid
Mercoid Series MPC Installation and operating instructions
Mercoid
Mercoid Series MPC User manual
Mercoid
Mercoid MPCJR Series Installation and operating instructions
