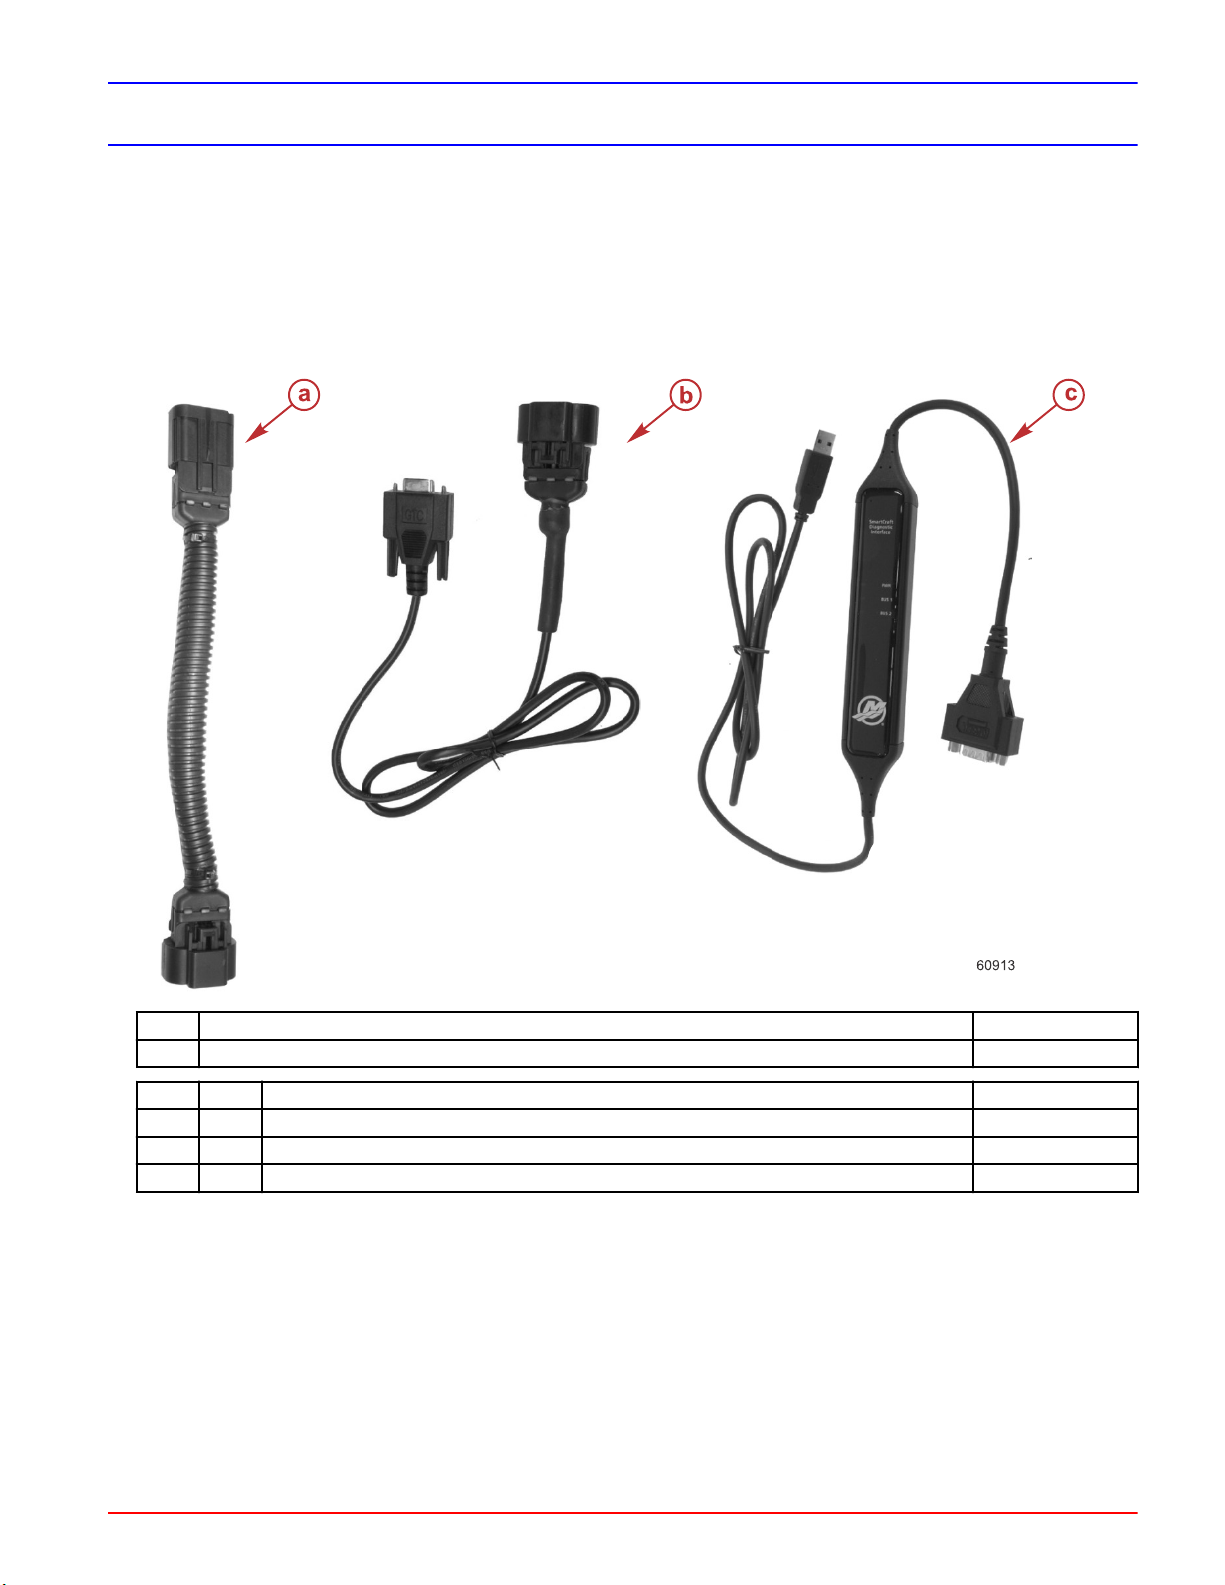
CDS G3 INTERFACE KIT
Page 2 / 8 © 2016 Mercury Marine 90-8M0114146 eng FEBRUARY 2016
To install CDS G3, double‑click the executable (.exe) that you downloaded from the service.mercurymarine.com website.
During installation, the following programs may be installed:
•Microsoft® ReportViewer 2010
• Microsoft Visual C++ 2010 SP1 Redistributable Package (x86)
• Microsoft .NET Framework 4.5.2 Web
• Windows Installer 4.5
•Kvaser® 4.9 CAN Adapter Driver
These additional programs are required for CDS G3 to deliver a rich, interactive user experience.
When the Literature feature is installed, the following applications and libraries may also be installed:
• IIS Express 8.0
• Microsoft .NET Framework 4.5.1
• Microsoft Internet Explorer 11
Administrative Rights
The user performing the CDS G3 program installation must have administrative rights. If the computer has an MCDS user
account, that user account was given administrative rights when it was created by an earlier CDS installation.
NOTE: Some information technology (IT) departments may restrict user rights for these accounts. If this has occurred, either
the IT department must perform the installation, or they must grant administrative rights to the user accounts performing the
installation.
Computer Requirements
The following specifications are established to support both CDS and CDS G3. Minimum and recommended specifications
are listed below. Please adhere to the minimum specifications when upgrading CDS G3 on an existing computer. The
recommended specifications have been established to provide a guideline for both best experiences and what we suggest
when purchasing a new computer.
PC Minimum Hardware Specifications
• 1.2 GHz multi‑core processor (two cores or more)
• 1024 x 768 screen resolution
• 10.1 in. screen size
• 2 GB RAM
• 120 GB hard drive
• 802.11 b/g/n wireless or 10/100 Ethernet
• DVD ROM optical drive (an external USB DVD drive is acceptable)
• Three USB 2.0 or 3.0 ports to accommodate CDS USB components. Alternatively, a single USB port and a USB port hub
may be used.
• Optional 9‑pin serial port (The serial port is no longer required, but is still preferred. The use for a serial port is for CDS
only.)
Recommended Computer Specifications (Where Different from Above)
•Intel® I5 processor, 2.4 GHz or higher
• 8 GB RAM
• 128 GB solid‑state drive
• 802.11n+ wireless connection
Operating System Requirements
Microsoft Windows® 7 Professional with Service Pack 1, Windows® 8.1 Professional, and Windows® 10 Pro are the only
operating systems that have been tested to work with the CDS G3 product. For best performance, Windows® 10 Pro is
strongly recommended. CDS G3 1.7 and greater versions will not support and will not operate on Windows® XP Professional
or Windows® 8 Professional.
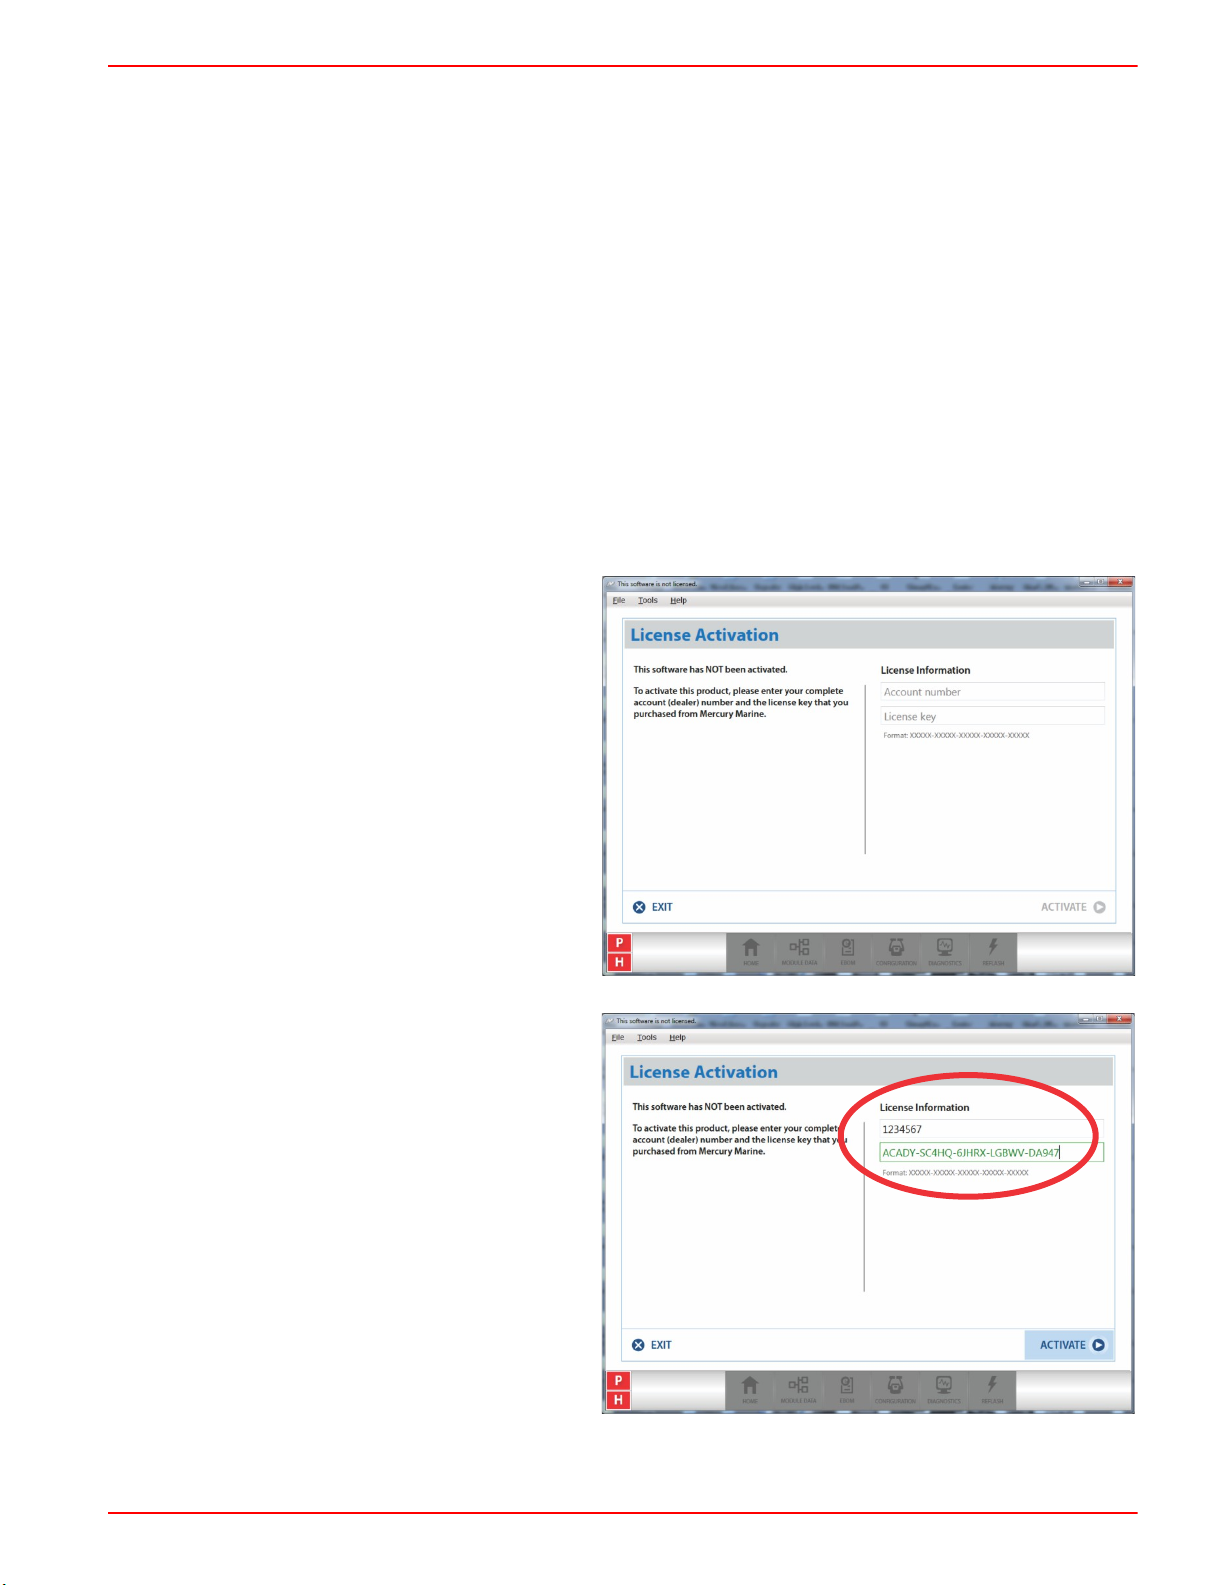
License Key
A license key is a 25‑character alphanumeric key (for example X1X1X‑X2X2X‑X3X3X‑X4X4X‑X5X5X) that is used to unlock
the CDS G3 application and that ties a PC to a license.