MultimediaMultimedia
P.2
P.2-4
P.5-6
P.7
○○○ ○○○ ○○○○○○○○○○○○○
○○○○○○○○○○○○○○
○○○ ○○○○○○○○○○○
C
RADEONTM Series/
RAGETM 128 ULTRA / RAGETM 128 PRO
Getting Started Guide
Getting Started
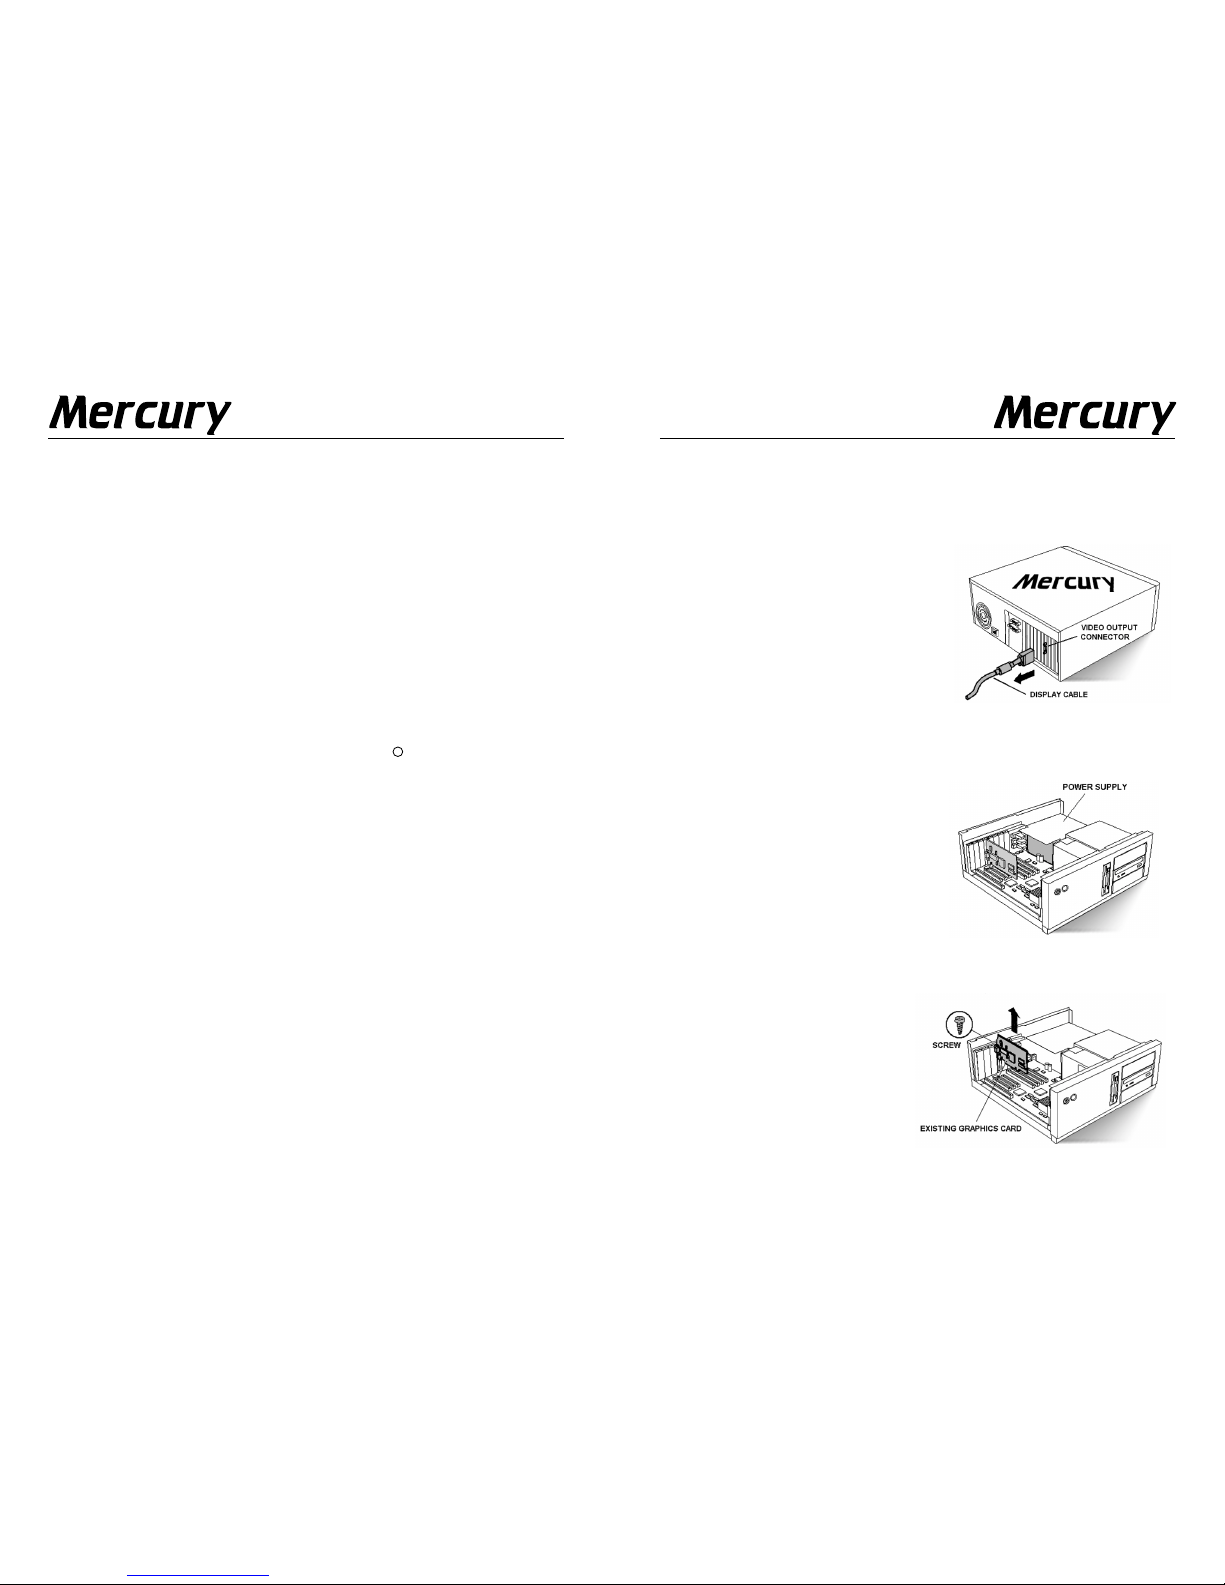
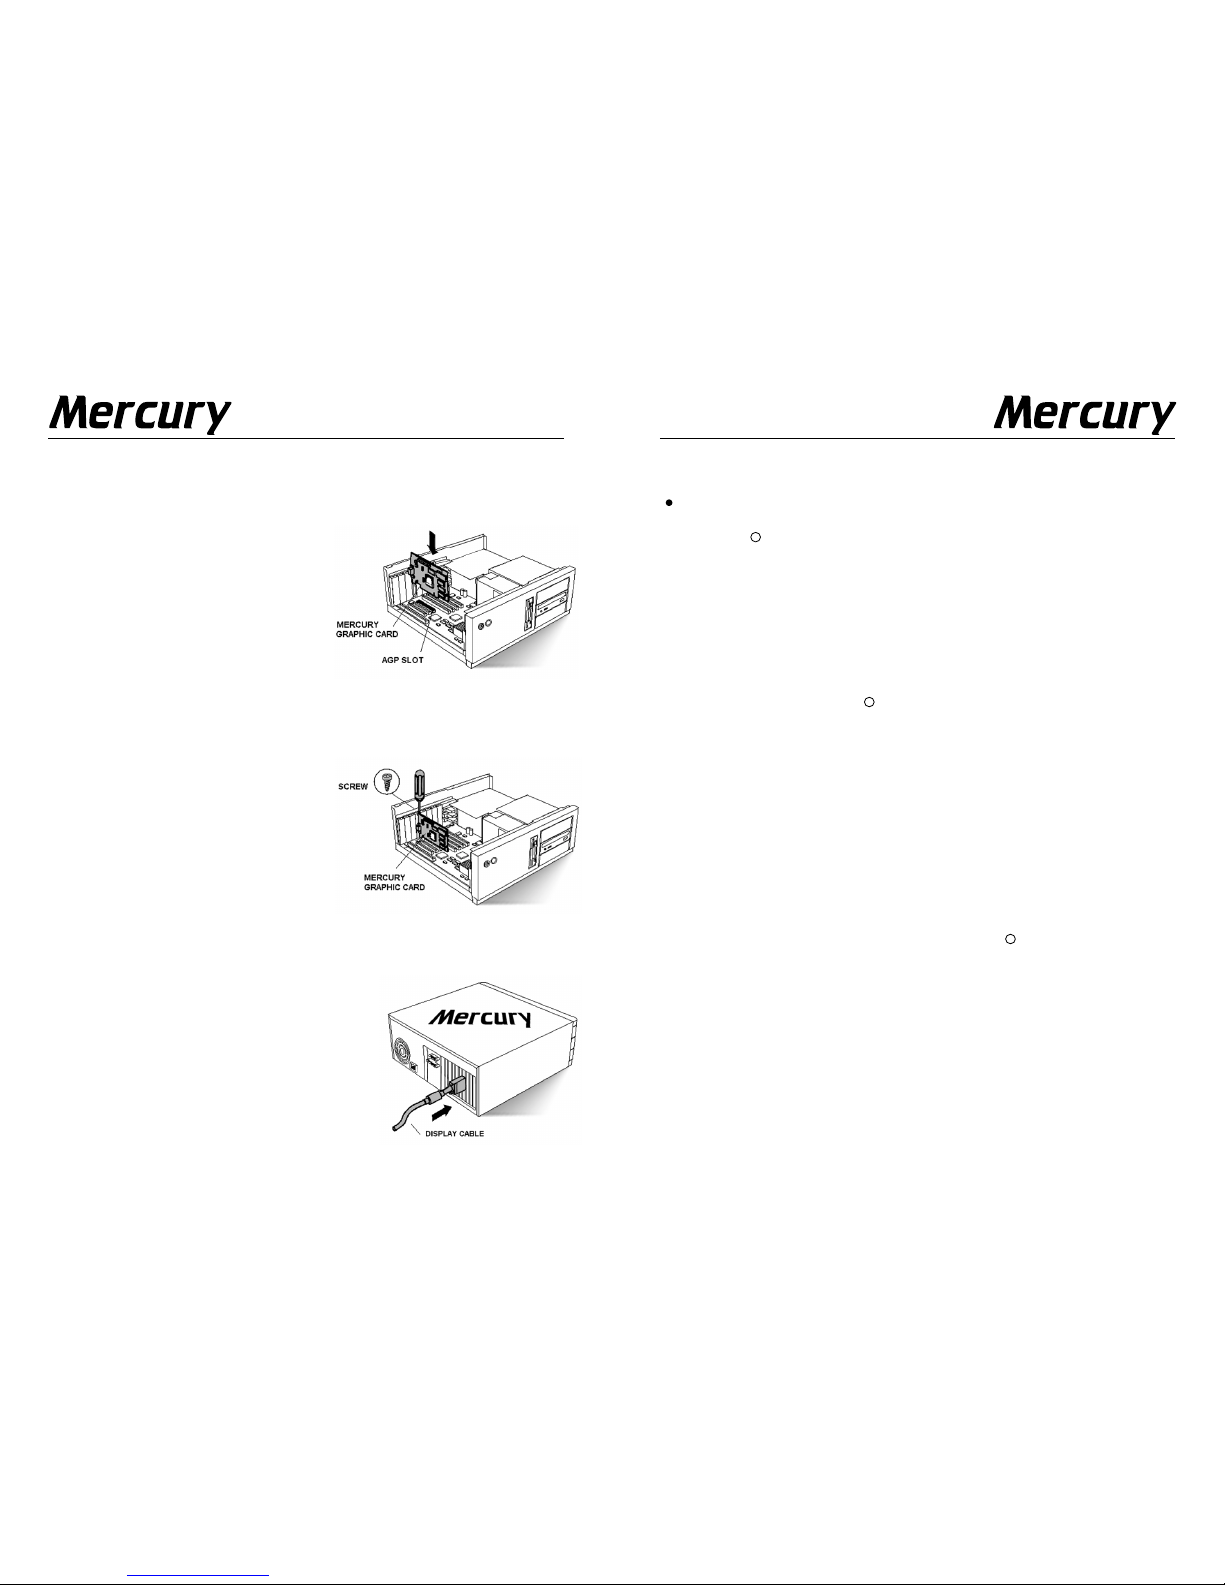
Hardware Installation
Installing AGP Card En anced Drivers
Troubles ooting Tips
IMPORTANT SAFETY INSTRUCTIONS
Read Instructions - All the safety and operating instructions should be
read before the product is operated.
Retain Instructions - The safety and operating instructions should be
retained for future reference.
Heed Warnings - All warnings on the product and the operating
instructions should be adhered to.
Compatibility - This option card is for use only with IBM AT or
compatible UL listed personal computers that have Installation Instructions
detailing user installation of card cage accessories.
Grounding - AUTION: For continued protection against risk of electric
shock and fire, this accessory should be installed only in products
equipped with a three-wire grounding plug, a plug having a third
(grounding) pin. This plug will only fit into a grounding-type power outlet.
This is a safety feature. If you are unable to insert the plug into the
outlet, contact your electrician to replace the obsolete outlet. Do not
defeat the safety purpose of the grounding-type plug.
FCC Compliance Statement
This equipment has been tested and found to comply with limits for a lass B
digital device, pursuant to Part 15 of the F rules. These limits are designed to
provide reasonable protection against harmful interference in residential installa-
tions. This equipment generates, uses, and can radiate radio frequency energy,
and if not installed and used in accordance with the instructions, may cause
harmful interference to radio communications. However, there is no guarantee
that interference will not occur in a particular installation. If this equipment does
cause interference to radio or television equipment reception, which can be
determined by turning the equipment off and on, the user is encouraged to try to
correct the interference by one or more of the following measures:
- Reorient or relocate the receiving antenna
- Move the equipment away from the receiver
- Plug the equipment into an outlet on a circuit different from that to which the
receiver is connected
- onsult the dealer or an experienced radio/ television technician for
additional suggestions
Only equipment certified to comply with lass B should be attached to this
equipment, and must have shielded interface cables. You are cautioned that any
change or modifications to the equipment not expressly approved by the party
responsible for compliance could void your authority to operate such equipment.
This device complies with Part 15 of the F rule. Operation is subjected to the
following two conditions:
- This device may not cause harmful interference.
- This device must accept any interference received, including interference
that may cause undesired operation.
Disclaimer
The information in this document is subject to change without notice. The
manufacturer makes no representations or warranties with respect to the
contents hereof and specifically disclaims any implied warranties of merchant-
ability or fitness for any particular purpose. Further, the manufacturer reserves
the right to revise this publication and to make changes from time to time in the
content hereof without obligation of the manufacturer to notify any person of
such revision or changes.
Copyrig t Notice
opyright 2000-2002, Kobian Group
All rights reserved.
ATI is a registered trademark of ATI Technologies Inc. RAGE and RADEON are trademarks of ATI
Technologies Inc. Microsoft and Windows are registered trademarks of Microsoft orporation. All other
trademarks and/or registered trademarks are properties of their respective owners.
Printed in hina
http:// .kobian.com
ver 1.1