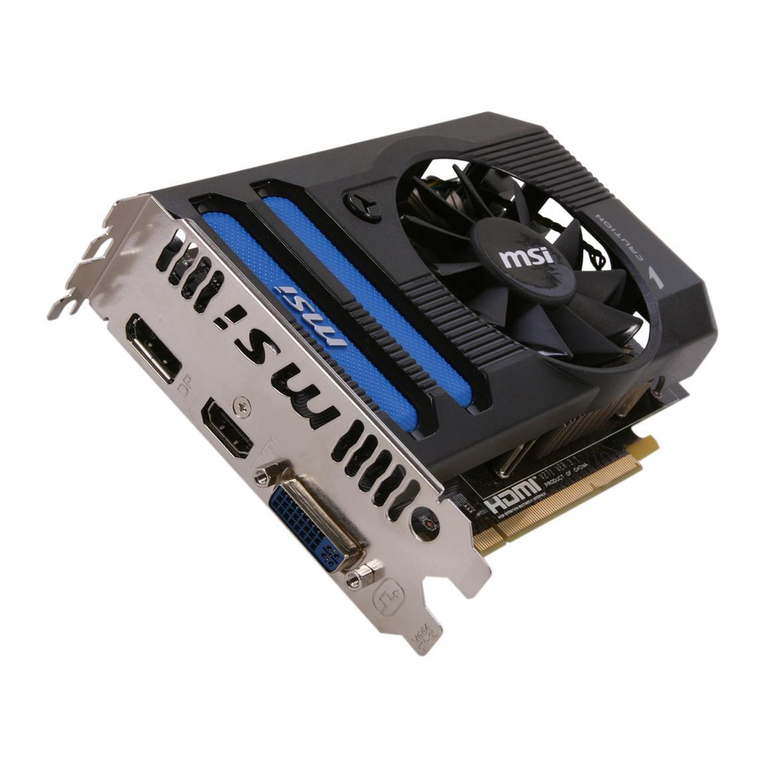
ELSA GLADIAC User manual

EN
GLADIACTM
21663_DE_0300.book Seite 1 Montag, 10. April 2000 12:22 12

EN
2000 ELSA AG, Aachen (Germany)
While the information in this manual has been compiled with great care, it may not be deemed an assurance of product
characteristics. ELSA shall be liable only to the degree specified in the terms of sale and delivery.
The reproduction and distribution of the documentation and software supplied with thisproduct and the use of its contents
is subject to written authorization from ELSA. We reserve the right to make any alterations that arise as the result of
technical development.
ELSA is DIN EN ISO 9001 certified. The accredited TÜV CERT certification authority has confirmed ELSA conformity to the
worldwide ISO 9001 standard in certificate number 09 100 5069, issued on June 15, 1998.
Declarations of conformity and certificates, in as far as they were available at the time of publication, can be found in the
the appendix of this documentation.
Trademarks
Windows®, Windows NT®and Microsoft®are registered trademarks of Microsoft, Corp.
OpenGL®is a registered trademark of Silicon Graphics, Inc.
The ELSA logo is a registered trademark of ELSA AG. All other names mentioned may be trademarks or registered
trademarks of their respective owners.
Subject to change without notice. No liability for technical errors or omissions.
Aachen, April 2000
ELSA, Inc.
1630 Zanker Road
San Jose, CA 95112
USA
www.elsa.com
ELSA AG
Sonnenweg 11
52070 Aachen
Germany
www.elsa.de
21663/0400
21663_DE_0300.book Seite 2 Montag, 10. April 2000 12:22 12

| ELSA GLADIAC |
EN
Preface
Thank you for placing your trust in this ELSA product.
In choosing the GLADIAC, you have selected a graphics board which is just
as well suited to professional users as to ambitious players. ELSA products
are subject to the highest of standards in production and quality control
which are the foundation for consistently high product quality.
This manual provides all the information you will need to get the best out of
your ELSA graphics board. For instance, which resolution is best for which
monitor, or how is the board upgraded? The accompanying utility programs
are described, and you will find detailed information about 3D acceleration.
ELSA products are subject to continual further development. It is therefore
possible that the information printed in this manual is not current in all
respects.
The README files on the GLADIAC CD contain the latest information about
updates.
Our online services (www.elsa.com) are available to you around the clock
should you have any queries regarding the topics discussed in this manual or
require any further support. In the Support file section under 'Know-How',
you can find answers to frequently asked questions (FAQs). The Knowledge-
Base also contains a large pool of information. Current drivers, firmware,
tools and manuals can be downloaded at any time.
21663_DE_0300.book Seite 3 Montag, 10. April 2000 12:22 12

| ELSA GLADIAC |
EN
Before you read on...
The installation of the GLADIAC hardware and software drivers is described
in full in the Installation Guide which accompanies this manual. You should
refer to that document before attempting to install your board, and before
reading this manual.
21663_DE_0300.book Seite 4 Montag, 10. April 2000 12:22 12

|ELSA GLADIAC |
EN
Content
쎲Introduction . . . . . . . . . . . . . . . . . . . . . . . . . . . . . . . . . . . . . . . . . . . . . . . . . . . . . . . . . . . . . 9
Highlights of the ELSA GLADIAC . . . . . . . . . . . . . . . . . . . . . . . . . . . . . . . . . . . . . . . . . . . 9
What's in the box? . . . . . . . . . . . . . . . . . . . . . . . . . . . . . . . . . . . . . . . . . . . . . . . . . . . . . . 9
What hardware do I need? . . . . . . . . . . . . . . . . . . . . . . . . . . . . . . . . . . . . . . . . . . . . . . . 10
쎲After installing the drivers . . . . . . . . . . . . . . . . . . . . . . . . . . . . . . . . . . . . . . . . . . . . . . . . 11
Software installation from the CD . . . . . . . . . . . . . . . . . . . . . . . . . . . . . . . . . . . . . . . . . 11
The right settings . . . . . . . . . . . . . . . . . . . . . . . . . . . . . . . . . . . . . . . . . . . . . . . . . . . . . . 11
What are your options?. . . . . . . . . . . . . . . . . . . . . . . . . . . . . . . . . . . . . . . . . . . . . . . 12
What is best for what situation? . . . . . . . . . . . . . . . . . . . . . . . . . . . . . . . . . . . . . . . 12
Changing the resolution . . . . . . . . . . . . . . . . . . . . . . . . . . . . . . . . . . . . . . . . . . . . . . . . . 13
Settings for . . . . . . . . . . . . . . . . . . . . . . . . . . . . . . . . . . . . . . . . . . . . . . . . . . . . . . . . 13
쎲Useful stuff and more . . . . . . . . . . . . . . . . . . . . . . . . . . . . . . . . . . . . . . . . . . . . . . . . . . . . 19
The Multimedia Player . . . . . . . . . . . . . . . . . . . . . . . . . . . . . . . . . . . . . . . . . . . . . . . . . . 19
ELSA WINman Suite . . . . . . . . . . . . . . . . . . . . . . . . . . . . . . . . . . . . . . . . . . . . . . . . . . . . 20
Fine-tuning for performance freaks . . . . . . . . . . . . . . . . . . . . . . . . . . . . . . . . . . . . . . . . 20
Overclocking . . . . . . . . . . . . . . . . . . . . . . . . . . . . . . . . . . . . . . . . . . . . . . . . . . . . . . . . . . 21
ELSAinfo . . . . . . . . . . . . . . . . . . . . . . . . . . . . . . . . . . . . . . . . . . . . . . . . . . . . . . . . . . . . . 22
쎲Graphics know-how . . . . . . . . . . . . . . . . . . . . . . . . . . . . . . . . . . . . . . . . . . . . . . . . . . . . . 23
3D graphics representation . . . . . . . . . . . . . . . . . . . . . . . . . . . . . . . . . . . . . . . . . . . . . . 23
The 3D pipeline . . . . . . . . . . . . . . . . . . . . . . . . . . . . . . . . . . . . . . . . . . . . . . . . . . . . . 23
3D interfaces . . . . . . . . . . . . . . . . . . . . . . . . . . . . . . . . . . . . . . . . . . . . . . . . . . . . . . . . . 26
What APIs are available? . . . . . . . . . . . . . . . . . . . . . . . . . . . . . . . . . . . . . . . . . . . . . 26
Direct 3D . . . . . . . . . . . . . . . . . . . . . . . . . . . . . . . . . . . . . . . . . . . . . . . . . . . . . . . . . . 26
OpenGL . . . . . . . . . . . . . . . . . . . . . . . . . . . . . . . . . . . . . . . . . . . . . . . . . . . . . . . . . . . 27
Color palettes, TrueColor and gray scales . . . . . . . . . . . . . . . . . . . . . . . . . . . . . . . . . . . 28
VGA . . . . . . . . . . . . . . . . . . . . . . . . . . . . . . . . . . . . . . . . . . . . . . . . . . . . . . . . . . . . . . 28
DirectColor . . . . . . . . . . . . . . . . . . . . . . . . . . . . . . . . . . . . . . . . . . . . . . . . . . . . . . . . 29
VESA DDC (Display Data Channel) . . . . . . . . . . . . . . . . . . . . . . . . . . . . . . . . . . . . . . . . . 29
DDC2B . . . . . . . . . . . . . . . . . . . . . . . . . . . . . . . . . . . . . . . . . . . . . . . . . . . . . . . . . . . . 30
DDC2AB. . . . . . . . . . . . . . . . . . . . . . . . . . . . . . . . . . . . . . . . . . . . . . . . . . . . . . . . . . . 30
쎲Technical data . . . . . . . . . . . . . . . . . . . . . . . . . . . . . . . . . . . . . . . . . . . . . . . . . . . . . . . . . . 31
Characteristics of the graphics board . . . . . . . . . . . . . . . . . . . . . . . . . . . . . . . . . . . . . . . 31
21663_DE_0300.book Seite 5 Montag, 10. April 2000 12:22 12
|ELSA GLADIAC |
EN
ELSA graphics board addresses . . . . . . . . . . . . . . . . . . . . . . . . . . . . . . . . . . . . . . . . . . . 31
Ports on the graphics board . . . . . . . . . . . . . . . . . . . . . . . . . . . . . . . . . . . . . . . . . . . . . . 32
The VGA D-shell socket . . . . . . . . . . . . . . . . . . . . . . . . . . . . . . . . . . . . . . . . . . . . . . 32
쎲Appendix . . . . . . . . . . . . . . . . . . . . . . . . . . . . . . . . . . . . . . . . . . . . . . . . . . . . . . . . . . . . . . . 33
CE conformity and FCC radiation standard . . . . . . . . . . . . . . . . . . . . . . . . . . . . . . . . . . . 33
Declarations of conformity . . . . . . . . . . . . . . . . . . . . . . . . . . . . . . . . . . . . . . . . . . . . . . 34
Warranty conditions . . . . . . . . . . . . . . . . . . . . . . . . . . . . . . . . . . . . . . . . . . . . . . . . . . . . 35
쎲Glossary . . . . . . . . . . . . . . . . . . . . . . . . . . . . . . . . . . . . . . . . . . . . . . . . . . . . . . . . . . . . . . . 37
쎲Index . . . . . . . . . . . . . . . . . . . . . . . . . . . . . . . . . . . . . . . . . . . . . . . . . . . . . . . . . . . . . . . . . . 43
21663_DE_0300.book Seite 6 Montag, 10. April 2000 12:22 12

|Introduction 9
|ELSA GLADIAC |
EN
Introduction
“Reading the manual is a waste of time.”A prejudice you are proving to be
wrong right now by reading this manual. And rightly so. In this case, it is
really worth the effort. Because the ELSA GLADIAC has some smart features
that are only described here in the manual.
So only those who read the manual will truly be taken with this card. We'll
make it as short and easy as we can—promise.
Highlights of the ELSA GLADIAC
쎲The latest 3D graphics technology with the NVIDIA GeForce2 GTS
processor
쎲32-MB DDR RAM give you scope for image processing and huge textures
쎲4 HyperTexel pipelines and per-pixel shading for even greater realism
쎲High-definition picture—high performance with up to 2048x1536 pixels,
over 16 million colors and refresh rates of 200Hz provide an astounding
picture—ideal for 19" to 24" monitors
쎲ELSA SmartRefresh and ELSA SmartResolution ensure optimized monitor
use by providing the ability to modify resolution and refresh rate
separately.
쎲Supports the ELSA 3D REVELATOR 3D shutter glasses
쎲Support via Internet and hotline
쎲CE and FCC conformity
쎲Six-year warranty
What's in the box?
You will notice if your graphics board is missing. But you need to check that
the box contains all of the following:
쎲Graphics board
쎲Installation Guide
쎲Manual
쎲CD-ROM with installation and driver software and utilities
21663_DE_0300.book Seite 9 Montag, 10. April 2000 12:22 12

Introduction |
|ELSA GLADIAC |
10
EN
쎲Optionally available:
Video-in/out module for video editing, video chat, video capture or video
e-mail
If any part is missing please contact your retailer. ELSA reserves the right to
vary the products supplied without prior notice. The current scope of delivery
is described on our web site.
What hardware do I need?
쎲Computer: Minimum requirements are a Celeron 300, Pentium II 300 or
AMD K6 300 processor.
쎲Bus: The GLADIAC is available as an AGP version. Your computer must
have an AGP bus.
쎲Monitor: The GLADIAC works with the standard IBM VGA compatible
horizontal scan frequency of 31.5 kHz while booting and in DOS
operation.
21663_DE_0300.book Seite 10 Montag, 10. April 2000 12:22 12

|After installing the drivers 11
|ELSA GLADIAC |
EN
After installing the drivers
In this chapter you will find descriptions of
쎲where you can find the software for operating your ELSA graphics board,
쎲the performance characteristics of your graphics board, and
쎲the most effective tuning for the combination of monitor and ELSA
graphics board.
Software installation from the CD
The ELSA graphics board is normally supplied with software on a CD-ROM.
You will find all the utilities described in this manual on the Gladiac CD—
unless they are a component of the operating system.
Once you have successfully completed the steps described in the Installation
Guide, your graphics board is integrated into your computer system with the
installed ELSA driver. You are now likely to be familiar with the program
ELSA CD setup. If the autostart function for your CD-ROM drive under
Windows has been switched off, the setup program on the Gladiac CD will
not start automatically. It can be found and started manually from the root
directory of the CD and is called SETUP.EXE.
The greater part of the installation is automated; ELSA setup detects the
installed operating system and ELSA graphics board(s). First of all select the
language for the installation and then the components you wish to install.
The right settings
Our tip is: Invest a little time at this stage and you won’t regret it. Take your
time to set up your system just right. Your eyes will thank you for it, and you
are guaranteed to have more fun in front of your screen.
To set up your system properly, the following questions should be answered:
쎲What is the maximum resolution I can set on my system?
쎲Which color depth do I want to use?
쎲How high should the refresh rate be set?
To help you find the answers to these questions, this chapter has been
divided according to the operating systems available. Just look for the
section about the operating system you use. All you need to know you will
21663_DE_0300.book Seite 11 Montag, 10. April 2000 12:22 12

After installing the drivers |
|ELSA GLADIAC |
12
EN
find there. All the software you need, if not already a part of your operating
system, is on the Gladiac CD.
What are your options?
The tables below show the maximum possible resolutions for the ELSA
graphics board. Note that these resolutions cannot be achieved under all
operating conditions.
What is best for what situation?
There are some basic ground rules for you to follow when setting up your
graphics system. On the one hand, there are the ergonomic guidelines,
although nowadays these are met by most systems, and on the other hand
there are limitations inherent to your system, e.g. your monitor. The question
of whether your applications need to run using large color depths—perhaps
even TrueColor—is also important. This is an important condition for many
DTP or CAD workstations.
“More pixels, more fun”
This is an opinion which is widespread, but which is not entirely true under
all circumstances. The general rule is that a refresh rate of 85Hz meets the
minimum ergonomic requirements. The resolution to be selected also
Max. refresh rate (Hz)
Color depth: 256 colors (8 bit) HighColor (16 bit) TrueColor (32 bit)
2048 x 1536 75Hz ––
1900 x 1440 60 –85 60 –85 60 –85
1600 x 1200 60 –120 60 –120 60 –100
1280 x 1024 60 –170 60 –170 60 –150
1024 x 768 60 –200 60 –200 60 –200
800 x 600 60 –200 60 –200 60 –200
640 x 480 60 –200 60 –200 60 –200
HighColor = 65,536 colors, TrueColor = 16.7 million colors
21663_DE_0300.book Seite 12 Montag, 10. April 2000 12:22 12

|After installing the drivers 13
|ELSA GLADIAC |
EN
depends on the capabilities of your monitor. The table below is a guide to the
resolutions you might select:
Changing the resolution
You set the resolution of your graphics board in the Control Panel under
Windows.
Settings for Windows 95 and Windows 98
The 'ELSA Settings' are automatically integrated into the Control Panel during
the installation of the WINman Suite. You can use these Settings to tweak
your graphics system for the best performance.
The 'ELSA Settings' provide some great features. Once you have specified
the graphics board model and the monitor data, the program will
automatically detect which settings are possible and which are not. This
means, for instance, that it is impossible for you to select an incorrect refresh
rate which might damage your monitor.
햲Click on Start, then select Settings 왘Control Panel.
햳You will find the Display icon in the Control Panel. When you start this
program, you are shown a dialog box where you can modify the display
settings.
햴Here you should click on the ELSA Settings tab.
Monitor
size
Typi cal
image size
Minimum
resolution
Maximum
resolution
Ergonomic
resolution
17" 15.5"–16" 800 x 600 1024 x 768 1024 x 768
19" 17.5"–18.1" 1024 x 768 1280 x 1024 1152 x 864
20"/21" 19"–20" 1024 x 768 1600 x 1200 1280 x 1024
24" 21"–22.5" 1600 x 1000 1920 x 1200 1600 x 1000
21663_DE_0300.book Seite 13 Montag, 10. April 2000 12:22 12

After installing the drivers |
|ELSA GLADIAC |
14
EN
Under Windows 98, you can change the 'ELSA settings' by selecting the
'Settings' tab and pressing the Advanced options... button.
It is important to carry out the following settings or checks step by step:
쎲the monitor type
쎲the resolution of the monitor
image (Scheme, Data Set)
쎲the color depth, and
쎲the refresh rate.
Choosing the monitor
If your monitor supports DDC, the preset values will be displayed under
'Scheme'.
If this is not the case, click on Change... to call up the database of monitor
types. You will be presented with a list of monitor manufacturers and
monitor models. If your manufacturer is present, click on the entry and then
select your model. If your monitor is not listed, there are two options. One
option is to select the '_Standard monitor' from the list of manufacturers and
then select the highest permitted resolution. If you are not sure, select a
lower resolution to be safe.
A second option requires information about the technical specifications for
your monitor. Consult your monitor manual to ensure that you have the
correct information. Click on Change... in the 'Monitor type database'
window. In addition to the information regarding the monitor manufacturer,
'Settings' has all the options for
setting up the graphics board for your
monitor.
21663_DE_0300.book Seite 14 Montag, 10. April 2000 12:22 12

|After installing the drivers 15
|ELSA GLADIAC |
EN
and the model designation, you will have to enter the frequency ranges for
the horizontal and vertical scan frequencies and specify the diagonal size of
your monitor.
Check your entries for the image frequencies carefully, as otherwise you
might damage your monitor. Look these up in your monitor manual or consult
the monitor manufacturer.
After you have registered and installed the monitor under Windows, you can
set the desired color depth, the optimum resolution and an ergonomic refresh
rate.
ELSA SmartRefresh and ELSA SmartResolution
Click the Details button in the 'Settings' to open a dialog where you can
adjust the refresh rates and video timings individually. In addition you can
change the resolution in steps of 32 pixels. The graphics mode fine-tuning
tool is especially for screens in portrait or wide-angle format, or with the 4:3
aspect ratio. In such cases it is clearly advantageous to have the option of
freely-selectable values.
If your monitor type is not listed in
the monitors database you can enter
the monitor manufacturerand model
type here.
The vertical and horizontal frequency
ranges and the diagonal size of the
screen are the important settings.
21663_DE_0300.book Seite 15 Montag, 10. April 2000 12:22 12

After installing the drivers |
|ELSA GLADIAC |
16
EN
Windows 2000
The settings for the graphics driver are included in the Control Panel under
Windows 2000. Use the command sequence
Start 왘Settings 왘Control Panel
to call the dialog window where you should find the icon for Display. Double
click on this symbol to open the window with its various tabs.
햲Click on the 'Settings' tab.
햳Click Advanced... in the 'Settings' dialog.
햴Select the 'Graphics Board' tab in the dialog that opens.
햵A button labeled Display Mode... is located in the lower part of the
window. Click it to view a list of all configurable combinations of
resolution, color depth and refresh rate. The values in the list depend on
the capabilities of the monitor and graphics board. Select the desired
combination and confirm by pressing OK.
햶When finished, click Apply... to check the new settings. You are then
given the option of selecting or canceling the chosen settings. If you are
satisfied with the new combination, confirm your selection by pressing
OK.
If using Windows 2000, you will not have to reboot your system.
Note: The settings for the monitor
timings should only be changed by
specialists.
SmartResolution: Allows you to
adjust the resolution in steps of 32
pixels.
SmartRefresh: Allows you to
accurately adjust the refresh rate.
21663_DE_0300.book Seite 16 Montag, 10. April 2000 12:22 12

|After installing the drivers 17
|ELSA GLADIAC |
EN
You will find further information on how to customize your graphics settings
under Windows 2000 in your system manual.
Windows NT 4.0
The settings for the graphics driver are included in the Control Panel under
Windows NT 4.0. Use the command sequence
Start 왘Settings 왘Control Panel
to call the dialog window where you should find the icon for Display. Double
click on this symbol to open the window with its various tabs. Click on the
'Settings' tab.
You can select the possible settings for 'Color palette', 'Font size',
'Resolution' and 'Display frequency' from this dialog box. The available
selection is determined by the ELSA driver you have installed. You should
always check the configuration you have selected by clicking on the Test
button.
You will find further information on how to customize your graphics settings
under Windows NT 4.0 in your system manual.
21663_DE_0300.book Seite 17 Montag, 10. April 2000 12:22 12

After installing the drivers |
|ELSA GLADIAC |
18
EN
21663_DE_0300.book Seite 18 Montag, 10. April 2000 12:22 12
|Useful stuff and more 19
|ELSA GLADIAC |
EN
Useful stuff and more
Apart from the ELSA drivers, the ELSA CD also contains additional programs
and utilities for use with the ELSA GLADIAC, a selection of which we will
introduce here. Information about other programs can be taken from the
README files on the CD.
The Multimedia Player
Until now, a variety of programs for playing CDs, videos and other media was
available under Multimedia in the Accessories folder of the Windows start
menu. These have now been succeeded by the Microsoft Multimedia Player.
It handles the most common multimedia formats, all under one common user
interface—regardless of whether the data is coming from the Internet or the
local hard disk. The Multimedia Player is responsible for the playback of
RealAudio and RealVideo, as well as WAV, AVI and Quicktime files.
After the installation, the file extensions of media files are permanently
associated with the Multimedia Player. You can thus double-click the media
files in the Windows Explorer or My Computer folder to conveniently launch
the Player and start the playback.
Video playback or Internet live radio: The
Microsoft Multimedia Player handles all
common multimedia formats.
21663_DE_0300.book Seite 19 Montag, 10. April 2000 12:22 12
Useful stuff and more |
|ELSA GLADIAC |
20
EN
The use of the Multimedia Player is intuitive, and it includes a comprehensive
help function to clarify questions or solve problems while working with the
program.
ELSA WINman Suite
Installing the ELSA drivers also places the WINman Suite in
the Windows taskbar. WINman Suite provides you with
quick access to all ELSA tools, letting you bypass the
indirect route to the tools through the Control Panel.
This program is loaded automatically at system startup. If you do not want
the WINman Suite to load at startup, you can disable this option in the
WINman Suite menu.
If you want to load the program later, you can call it up by selecting
Start 왘Programs 왘ELSAware 왘WINman Suite.
Fine-tuning for performance freaks
After installing the ELSA graphics drivers under Windows 95 and
Windows 98 you will find a new tab in the 'Display Properties': The ' 3D
Settings'
21663_DE_0300.book Seite 20 Montag, 10. April 2000 12:22 12
|Useful stuff and more 21
|ELSA GLADIAC |
EN
Because Windows 98 allows the operation of multiple graphics boards, the
3D settings for the ELSA GLADIAC are to be found in another location. Under
'Display Properties' select in turn: 'Settings' 왘Advanced... 왘'3D
Settings'.
These settings let you set up the optimal games performance on your system.
In most cases you don’t need to adjust anything. In some cases, for example
if you see display errors on screen or if there are problems with the speed,
you can adjust the driver settings. The settings which are optimal for any
game can saved under an identifiable name and quickly recalled without
having to restart your system.
Experimentation pays! Give your combatant a little extra “zip”and optimize
his chances against the competition. If the descriptions here are too cryptic,
just take a look at the glossary in this manual or use the comprehensive help
system. Simply click on the question mark at the top right-hand corner of the
dialog window, and then click on the item in question. If you accidentally
dump your system into the crawler-lane, just click on the emergency button
Restore Defaults. The standard settings will be called into action.
The question mark provides the answers! If
you want more information about any
setting, just click on this symbol and then
select the area in the dialog about which you
want to know more.
Overclocking
The overclocking tool enables
you to increase the values for
memory clock and core clock in
order to push the performance
of the graphics board
If you like to increase these
values please be careful! In
any case you should do it in
little steps (1 MHz). Changing
the settings becomes active
when you click the button
Accept.
21663_DE_0300.book Seite 21 Montag, 10. April 2000 12:22 12

Useful stuff and more |
|ELSA GLADIAC |
22
EN
The first sign when putting great strain on the graphics board are pixel errors,
which you can easily notice on your monitor.
ELSA info
Use ELSA info to investi-
gate your system. In
addition to the details
about your graphics board
you will find information
about your computer
system, the DirectX and
OpenGL driver versions and
the ELSA software you
have installed. This information provides a basis for generating a report that
can be of use in case you require support. This collection of information
provides the ELSA Support with all the information they need to guarantee
you fast and relevant help.
21663_DE_0300.book Seite 22 Montag, 10. April 2000 12:22 12
Table of contents
Other ELSA Video Card manuals