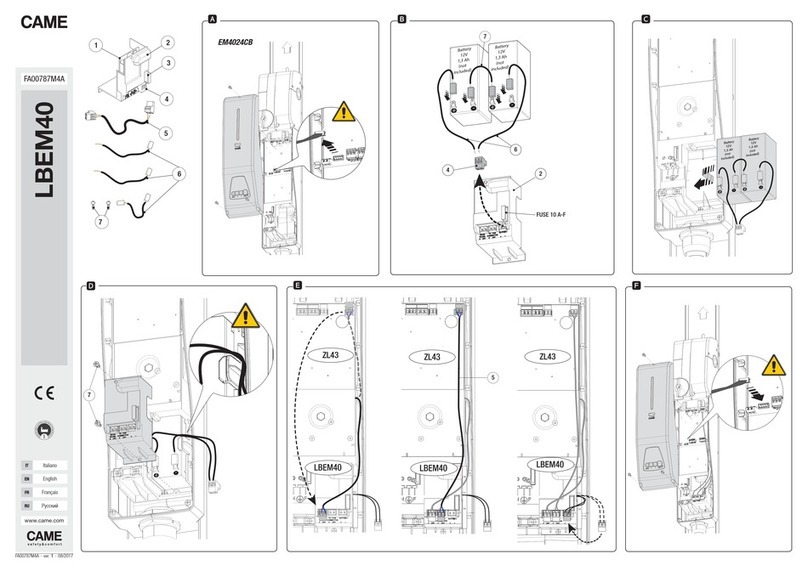
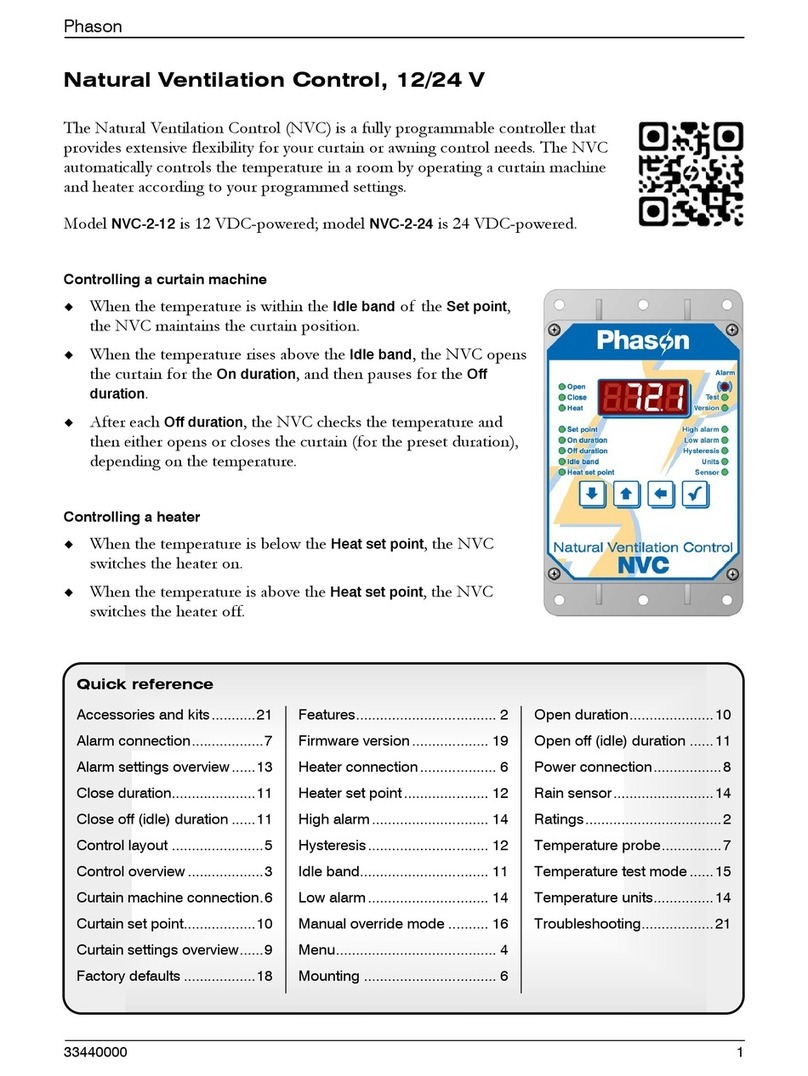
merten REG-K/4x(1x230)/6 User manual

D
GB
Easy Rollladenaktor REG-K/4x(1x230)/6
Easy shutter actuator REG-K/4x(1x230)/6
A: B:
E: F:
1
2
3
4
5
6
2
3
Bus
1
Bus
Bus
4
3
777204_u.fm Seite 1 Montag, 14. Oktober 2002 7:38 19
Bei Warenrücksendungen auf Grund von
Beanstandungen wenden Sie sich bitte an unser
Service Center:
Merten GmbH & Co. KG, Lösungen für intelligente
Gebäude, Service Center, Fritz-Kotz-Straße 8,
Industriegebiet Bomig-West, D-51674 Wiehl
Telefon: +49 2261 702-204
Telefax: +49 2261 702-136
E-Mail: ser[email protected]
Internet: www.merten.de
Bei technischen Fragen wenden Sie sich bitte an
unsere InfoLine:
Telefon: +49 1805 212581* oder +49 800 63783640
Telefax: +49 1805 212582* oder +49 800 63783630
E-Mail: [email protected]
*kostenpflichtig / fee required
V7772-581-02 10/05

G:
H:
5 mm
A A B B
C C D D
5
4 mm
230 V
Bus
777204_u.fm Seite 2 Montag, 14. Oktober 2002 7:38 19

D:
Kanal C Ab
Kanal C Auf
Kanal B Ab
Kanal D Auf
Kanal D Ab
Kanal B Auf
Kanal A Ab
Kanal A Auf
L1 L3
6A
M
M
M
M
6A
-
Bus
+
-
+
N
777204_u.fm Seite 3 Montag, 14. Oktober 2002 7:38 19

C:
Kanal C Ab
Kanal C Auf
Kanal B Ab
Kanal D Auf
Kanal D Ab
Kanal B Auf
Kanal A Ab
L2L1 L1L3
6A
M
M
M
M
6A 6A 6A
-
Bus
+
-
+
N
Kanal A Auf
777204_u.fm Seite 4 Montag, 14. Oktober 2002 7:38 19

D
GB
1
Gebrauchsanweisung 2
Operating instructions 13
Anleitung_777204.book Seite 1 Montag, 14. Oktober 2002 7:37 19
2
Artikel-Nr. 7772 04
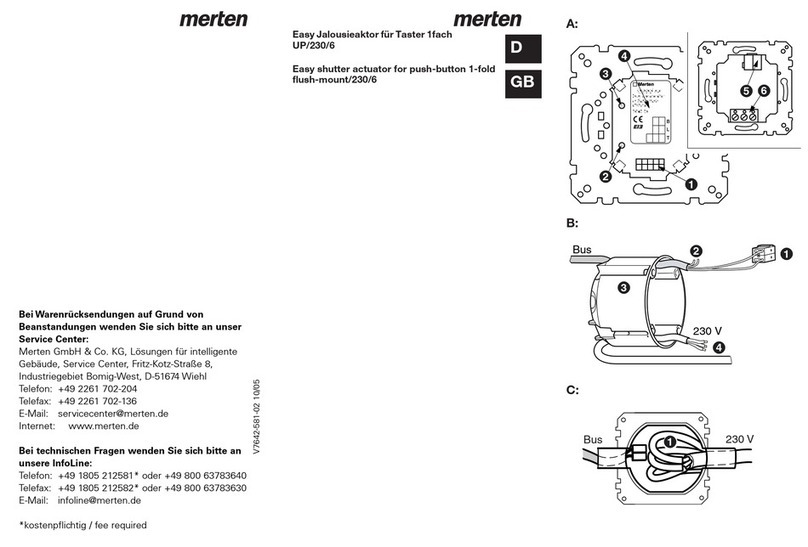
Bild A:
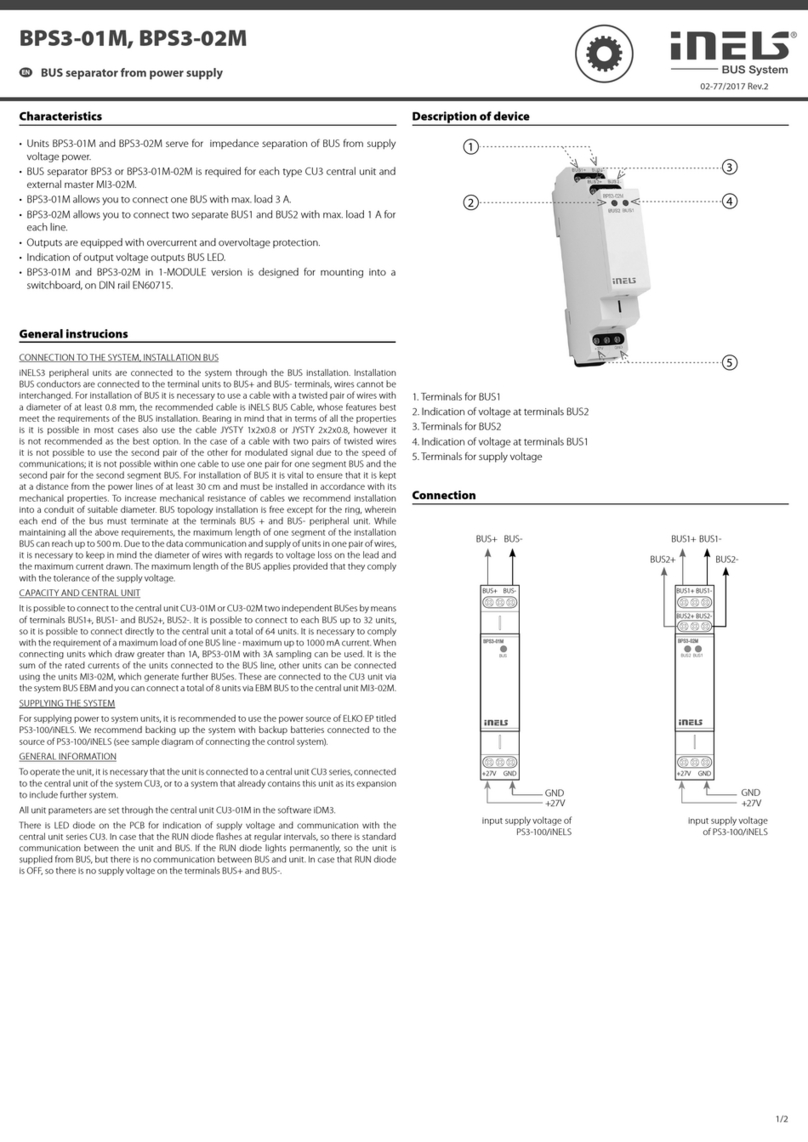
➊Leitungsabdeckung
➋Beschriftungsfeld
➌Grüne LED, Betriebsanzeige
➍4 Kanaltasten (A - D) mit roter LED,
Statusanzeige, Auffahren
➎4 Kanaltasten (A - D) mit roter LED,
Statusanzeige, Abfahren
➏4 Kanalanschlüsse (A - D) über 2fach
Schraubklemmen
Bild B:
➊Busanschlussklemmen, max. 4 Adern-
paare
➋Rote LED, Programmierkontrolle
➌Programmiertaste, manuell
Easy Rollladenaktor REG-K/4x(1x230)/6
Anleitung_777204.book Seite 2 Montag, 14. Oktober 2002 7:37 19
3
Der Easy Rollladenaktor REG-K/4x(1x230)/
6 ist nur verwendbar in Verbindung mit
dem EIB Easy Basisgerät (Artikel-Nr. 7900
29) oder einem anderen externen EIB Easy
Einstellgerät.
Zusätzlich zur 230 V Netzleitung benötigt
der Easy Rollladenaktor REG-K/4x(1x230)/
6 eine Busleitung. Informationen zur Verle-
gung der Busleitung finden Sie in der Be-
dienungsanleitung „Basisgerät“ und im
ZVEI/ZVEH Handbuch „Gebäudesystem-
technik, Grundlagen“ (Artikel-Nr. 6160 01).
Es gelten die einschlägigen Normen,
Richtlinien, Vorschriften und Bestimmun-
gen des jeweiligen Landes. Arbeiten am In-
stallationsbus dürfen nur von Elektro-
Fachkräften ausgeführt werden. Gerät bei
Transport, Lagerung und im Betrieb vor
Feuchtigkeit, Schmutz und Beschädigung
schützen. Gerät nicht außerhalb der spezi-
fischen technischen Daten betreiben.
Wichtiger Hinweis
Anleitung_777204.book Seite 3 Montag, 14. Oktober 2002 7:37 19

4
Der Easy Rollladenaktor REG-K/4x(1x230)/
6 verfügt über 4 unabhängige, potential-
freie Kanäle. Sie ermöglichen die Auf- und
Abwärtssteuerung von Rollladen. Das
Schalten der Rollladen kann sowohl über
die eingebauten Taster (A - D) als auch mit
einem extern zugeordneten Taster erfol-
gen.
- Schalten mit Kanaltasten
Verbraucher am gewünschten Relaisaus-
gang (A - D) anschließen.
Entsprechenden Taster (A - D, oben/unten)
betätigen, rote LED im Taster leuchtet.
- Schalten mit einem extern
zugeordneten Taster
Verbraucher am gewünschten Relaisaus-
gang (A - D) anschließen.
Gewünschten Relaisausgang (A - D) am
Basisgerät einem externen Taster zuord-
nen.
Externen Taster, z. B. oben/links (unten/
rechts), betätigen, rote LED im eingebau-
ten Taster leuchtet.
Funktion
Anleitung_777204.book Seite 4 Montag, 14. Oktober 2002 7:37 19
5
- Rollladen Auf / Ab
Rollladen öffnen (Auf) durch langes
(> 0,8 s) Betätigen des Tasters oben (bei
externen Taster oben/links).
Rollladen schließen (Ab) durch langes
(> 0,8 s) Betätigen des Tasters unten (bei
externem Taster unten/rechts).
Hinweis
Ein in Bewegung gesetzter Antrieb
stoppt selbständig nach Ablauf einer
Fahrzeit von 2 min. Wird vor Ablauf die-
ser Zeit die Taste erneut (> 0,8 s) betä-
tigt, wird die Fahrzeit von 2 min neu
gestartet.
Bei Änderung der Bewegungsrichtung
stoppt der Antrieb zunächst und setzt
sich nach Ablauf einer Umschaltzeit
von 0,5 s in die vorgesehene Richtung
in Bewegung.
Rollladen stoppen durch kurzes (< 0,8 s)
Betätigen eines Tasters.
Anleitung_777204.book Seite 5 Montag, 14. Oktober 2002 7:37 19
6
- Sicherheit (z. B. Windalarm)
Erhält der Easy Rollladenaktor REG-K/
4x(1x230)/6 das Signal „Alarm“ vom zuge-
hörigen Sensor (z. B. Windsensor), fährt
der Antrieb in die sichere Position.
Hinweis
Siehe Parameter
Das Öffnen/Schließen der Rollladen über
Taster ist solange gesperrt, bis der Sensor
die Rollladenfunktion wieder frei gibt.
Elektrischer Anschluss
Achtung
Die Schaltausgänge verfügen über bistabi-
le Relais. Der Schaltkontakt der Ausgänge
kann durch starke Erschütterungen beim
Transport in den durchgeschalteten Zu-
stand wechseln. Beim Zuschalten der
Netzspannung kann an den Ausgängen
Spannung anliegen!
(Siehe auch Kapitel Inbetriebnahme
Rollladenaktor)
Anschlussbeispiel 1:
Bild C:
Montage
Anleitung_777204.book Seite 6 Montag, 14. Oktober 2002 7:37 19

7
Anschlussbeispiel 2:
Bild D:
Installationsvorschlag:
Bild E:
➊Die rote Busleitung an die rote Klemme
(+) und schwarze an die dunkelgraue
Klemme (-) anschließen.
➋Schirm und Beilaufdraht sowie weiße
und gelbe Ader der Busleitung werden
nicht benötigt. Isolieren und in der Lei-
tungsabdeckung ➌unterbringen.
Bild F:
➌Leitungsabdeckung auf Busanschluss
aufstecken.
➍Klappe schließen.
Bild G:
➎Die 4 Kanalanschlüsse (A - D) gemäß
Anschlussbeispiel an die 2fach
Schraubklemmen anschließen. Die
2fach Schraubklemmen am Easy
Rollladenaktor REG-K/4x(1x230)/6 ein-
stecken.
Anleitung_777204.book Seite 7 Montag, 14. Oktober 2002 7:37 19
8
Montagevorschlag:
1. Easy Rollladenaktor
REG-K/4x(1x230)/6 gemäß Anschluss-
beispiel anschließen und von unten in
die DIN-Hutschiene EN 50022 einset-
zen.
2. Easy Rollladenaktor
REG-K/4x(1x230)/6 nach oben schie-
ben (Federn zusammendrücken) und in
die DIN-Hutschiene einhängen.
Hinweis
Eine Datenschiene ist nicht erforder-
lich.
Busleitung:
Zur Vermeidung von Schleifen (Überspan-
nung) sollte die Busleitung ohne Abstand
zur Starkstromleitung verlegt werden. Der
Mindestabstand der isolierten Ader der
Busleitung zur isolierten Ader der Stark-
stromleitungen beträgt hierbei 4 mm.
Bild H:
Hinweis
Weitere Informationen zur Velegung
der Busleitung finden Sie in der Bedie-
nungsanleitung „Basisgerät“ und im
ZVEI/ZVEH Handbuch „Gebäude-
systemtechnik“, Grundlagen (Artikel-
Nr. 6160 01).
Anleitung_777204.book Seite 8 Montag, 14. Oktober 2002 7:37 19
9
Nach der Verdrahtung des Aktors:
1 Busspannung zuschalten
- Grüne Betriebsanzeige leuchtet
- Alle Relais schalten aus
2 Spannung der Motoren zuschalten
Die Busspannung ist zugeschaltet.
Automatische Erkennung:
Im Easy Basisgerät den Menüpunkt „Neue
Funktion“ oder „Funktion bearbeiten“ wäh-
len.
Das Gerät wird automatisch durch das Ba-
sisgerät erkannt und in der Kanalliste mit
der vergebenen Gerätenummer angezeigt.
Manuelle Erkennung:
Ist das Gerät nicht mehr im Auslieferungs-
zustand, so ist zur Erkennung die Pro-
grammiertaste kurz (< 2 Sekunden) zu
betätigen. Die rote LED (hinter Klappe)
leuchtet während des Erkennungsvorgan-
ges.
Das Gerät wird durch das Basisgerät er-
kannt und in der Kanalliste mit der verge-
benen Gerätenummer angezeigt.
Inbetriebnahme Rollladenaktor
Inbetriebnahme am Easy Basisgerät
Anleitung_777204.book Seite 9 Montag, 14. Oktober 2002 7:37 19

10
Inbetriebnahme:
Ist das Gerät erkannt worden, so erschei-
nen die 4 Kanäle des Gerätes in der Kanal-
übersicht des Easy Basisgerätes.
Für die Verbindung (Auswahl) des ge-
wünschten Rollladenaktorkanals, die ent-
sprechende Kanaltaste am Gerät
betätigen. Der Relaisausgang schaltet in
die Auf- bzw. Abposition. Erneutes Betäti-
gen der Kanaltaste stoppt den Antrieb. Der
entsprechende Kanal des Gerätes wird in
der Kanalübersicht markiert.
Weiterführende Informationen finden Sie in
der Bedienungsanleitung des Easy Basis-
gerätes oder in den entsprechenden Doku-
mentationen zu anderen externen EIB Easy
Einstellgeräten.
Verhalten bei Anlegen/Wiederkehr
der Busspannung
Die Antriebe werden ausgeschaltet.
Verhalten bei Ausfall der Busspannung
Keine Reaktion.
Anleitung_777204.book Seite 10 Montag, 14. Oktober 2002 7:37 19
11
Einstellbare Parameter
(am Basisgerät einstellbar)
Alarmverhalten
(z. B. Windalarm)
1) Werkseinstellung
Kein Alarm1)
Auffahren
Abfahren
Anleitung_777204.book Seite 11 Montag, 14. Oktober 2002 7:37 19
12
Technische Daten
Busversorgung: 24 V / I ca. 10 mA
Umgebungstemperatur:
Betrieb:
Lagerung:
Transport:
-5 °C bis +45 °C
-25 °C bis +55 °C
-25 °C bis +70 °C
Das Gerät ist für eine Ein-
satzhöhe bis 2000 m über
Meeresspiegel (MSL) aus-
gelegt.
Bedienelemente: Programmiertaste, manuell
8 Kanaltasten (2 je Kanal)
Anzeigeelemente: 1 rote LED:
Programmierkontrolle
8 rote Status-LEDs, unter
den Kanaltasten (A - D)
1 grüne LED:
Betriebsanzeige
Anschlüsse: Busanschlussklemme über
zwei 1 mm Stifte
8 Außenleiter über 2fach
Schraubklemmen für max. 2
x 1,5 mm2 oder 1 x 2,5 mm2
Isolationsspannung: 4 kV AC zwischen Bus und
230 V AC
Schaltkontakte
Kanal A-D:
4 x Wechsler, potentialfrei
Nennspannung: AC 230 V, 50 bis 60 Hz
Belastung:
induktive: 230 V~, 6 A, cos ϕ= 0,6
Schalthäufigkeit: max. 15 pro Min bei Nenn-
last
Anschlussleistung:
Motoren: 230 V~, max. 1000 W
Einbaubreite: 4 TE = ca. 70 mm
EG-Richtlinien: Entspricht Niederspan-
nungsrichtlinie 73/23/EWG
Entspricht EMV-Richtlinie
89/336/EWG
Anleitung_777204.book Seite 12 Montag, 14. Oktober 2002 7:37 19

13
Article no. 7772 04
Fig. A:
➊Line cover
➋Labelling field
➌Green LED, operation indicator
➍4 channel keys (A - D) with red status
LED, Up
➎4 channel keys (A - D) with red status
LED, Down
➏4 channel connections (A - D) via twin
screw terminals
Fig. B:
➊Bus supply terminals, max. 4 pairs of
wires
➋Red LED, programming control
➌Programming key, manual
Easy shutter actuator
REG-K/4x(1x230)/6
Anleitung_777204.book Seite 13 Montag, 14. Oktober 2002 7:37 19
14
The Easy shutter actuator REG-K/
4x(1x230)/6 can only be used in con-
junction with the EIB Easy base unit (Article
no. 7900 29) or another external EIB Easy
setting device.
In addition to the 230 V power line, the
Easy shutter actuator REG-K/4x(1x230)/6
requires a bus line. Information on laying
the bus line can be found in the ”base unit”
operating instructions and in the ZVEI/
ZVEH ”Building management system, Ba-
sic principles” handbook.
The relevant norms, guidelines, rules and
regulations of each country apply. Any
work on the installation bus must only be
carried out by qualified electricians. The
device should be protected against moi-
sture, dirt and damage during transportati-
on, storage and operation. Do not operate
the device beyond the specified technical
data.
Important advice
Anleitung_777204.book Seite 14 Montag, 14. Oktober 2002 7:37 19
15
The Easy shutter actuator REG-K/
4x(1x230)/6 has 4 independent, floating
channels. They enable the up and down
control of shutters. The shutters can be
switched with the built-in keys (A - D) as
well as with an externally assigned push-
button.
- Switching with channel keys
Connect the load to the chosen relay out-
put (A - D).
Press the relevant key (A - D, top/bottom),
red LED behind key lights up.
- Switching with an externally assigned
push-button
Connect the load to the chosen relay out-
put (A - D).
Assign chosen relay output (A - D) on base
unit to an external push-button.
Press external push-button, e.g. top/left
(bottom/right), red LED behind built-in key
lights up.
Function
Anleitung_777204.book Seite 15 Montag, 14. Oktober 2002 7:37 19

16
- Shutter up / down
Open shutter (up) by pressing top push-
button for longer (> 0.8 s) (top/left in the
case of external push-buttons).
Close shutter (down) by pressing bottom
push-button for longer (> 0.8 s) bottom/
right in the case of external push-buttons.
Note
A drive that has been set in motion
stops itself after a period of operation
of 2 min. If the key is pressed again
(> 0,8 s) before this period elapses, the
period of operation of 2 min is restar-
ted.
If the direction of movement is chan-
ged, the drive first stops and then starts
moving in the selected direction after a
switchover time of 0.5 s.
The shutters can be stopped by briefly
(< 0,8 s) pressing a push-button.
Anleitung_777204.book Seite 16 Montag, 14. Oktober 2002 7:37 19
17
- Safety (e.g. wind alarm)
If the Easy shutter actuator REG-K/
4x(1x230)/6 receives the ”alarm” signal
from the relevant sensor (e.g. wind sensor),
the drive moves into the safe position.
Note
See parameters
Opening / closing of the shutter via push-
buttons is locked until the sensor unlocks
the shutter function again.
Electrical connection
Caution
The switch outputs have a bistable relay.
Strong vibrations during transportation can
cause the switching contacts of the out-
puts to change to the switched-on state.
When connecting to the mains, the outputs
may contain a voltage!
(Also see chapter Start-up with shutter
actuator)
Connection example 1:
Fig. C:
Installation
Anleitung_777204.book Seite 17 Montag, 14. Oktober 2002 7:37 19
18
Connection example 2:
Fig. D:
Installation proposal:
Fig. E:
➊Connect the red bus wire to the red
terminal (+) and the black one to the
dark grey terminal (-).
➋The screen and the stability wire as
well as the white and yellow wires of
the bus line are not required. Insulate
and put in them in the line cover ➌.
Fig. F:
➌Push line cover onto bus connection.
➍Close flap.
Fig. G:
➎Connect the 4 channel connections (A
- D) to the twin screw terminals as
shown in the connection example.
Plug the twin screw terminals into the
Easy shutter actuator REG-K/
4x(1x230)/6.
Anleitung_777204.book Seite 18 Montag, 14. Oktober 2002 7:37 19

19
Installation proposal:
1. Connect the Easy shutter actuator
REG-K/4x(1x230)/6 as shown in the
connection example and mount on the
DIN rail EN 50022 from below.
2. Push the Easy shutter actuator REG-K/
4x(1x230)/6 up (push springs toge-
ther) and lower it onto the DIN rail.
Note
A data rail is not required.
Bus line:
In order to avoid loops (over-voltage), the
bus line should be laid without a gap to the
power line. The minimum gap between the
insulated wire of the bus line and the insu-
lated wire of the power line is 4 mm.
Fig. H:
Note
Further information on laying the bus
line can be found in the ”base unit”
operating instructions and in the ZVEI/
ZVEH ”Building management system,
Basic principles” handbook.
Anleitung_777204.book Seite 19 Montag, 14. Oktober 2002 7:37 19
20
After wiring the actuator:
1 Switch on bus voltage
- Green operation indicator comes on
- All relays are switched off
2 Switch on voltage for motors
The bus voltage is switched on.
Automatic recognition:
Choose the menu option ”New function” or
”Edit function” in the Easy base unit.
The device is automatically recognised by
the base unit and displayed in the channel
list with the allocated device number.
Manual recognition:
If the device is no longer in the delivery sta-
tus, you should press the programming key
briefly (< 2 seconds) for recognition. The
red LED lights up during the recognition
process.
The device is recognised by the base unit
and displayed in the channel list with the
allocated device number.
Start-up with shutter actuator
Start-up with the Easy base unit
Anleitung_777204.book Seite 20 Montag, 14. Oktober 2002 7:37 19
21
Start-up:
If the device has been recognised, the 4
channels of the device appear in the chan-
nel overview of the Easy base unit.
Press the relevant channel key on the de-
vice in order to connect (select) the chosen
shutter channel. The relay output switches
in the position up and down. For stopping
the drive press the channel key again. The
channel of the device is marked in the
channel overview.
Further information can be found in the
operating instructions for the Easy base
unit or in the relevant documents for other
external EIB Easy setting devices.
Behaviour when bus voltage is esta-
blished/returns
The drives are switched off.
Behaviour when bus voltage fails
No reaction.
Anleitung_777204.book Seite 21 Montag, 14. Oktober 2002 7:37 19

22
Adjustable parameters
(adjustable on base unit)
Alarm mode
(e.g. wind alarm)
1) Factory setting
No alarm1)
Up
Down
Anleitung_777204.book Seite 22 Montag, 14. Oktober 2002 7:37 19
23
Technical data
Bus supply 24 V / I approx. 10 mA
Ambient temperature:
Operation:
Storage:
Transport:
-5 °C to +45 °C
-25 °C to +55 °C
-25 °C to +70 °C
The device is designed for use
at a height of up to 2000 m
above sea level (MSL).
Control elements: Programming key, manual
8 channel keys (2 per channel)
Display element: 1 red LED,
programming control
8 red status-LEDs, under the
channel keys (A - D)
1 green LED:
operation indicator
Connection: Bus supply terminal via two 1
mm pins.
8 outer conductors via two
screw terminals for max. 2 x
1,5 mm2 or 1 x 2,5 mm2
Insulation voltage: 4 kV AC between bus and
230 V AC
Switching contacts
Channel A-D:
4 x changeover,
voltage-free
Nominal voltage: AC 230 V, 50 to 60 Hz
Load:
inductive: 230 V~, 6 A, cos ϕ= 0,6
Switching frequency: max. 15 per min. at nominal
load
Connected load:
motors: 230 V~, max. 1000 W
Device width: 4 depth units = approx.
70 mm
Anleitung_777204.book Seite 23 Montag, 14. Oktober 2002 7:37 19
24
EC Directives: Complies with low voltage
directive 73/23/EEC
Complies with EMC directive
89/336/EEC
Anleitung_777204.book Seite 24 Montag, 14. Oktober 2002 7:37 19
Table of contents
Languages:
Other merten Controllers manuals


