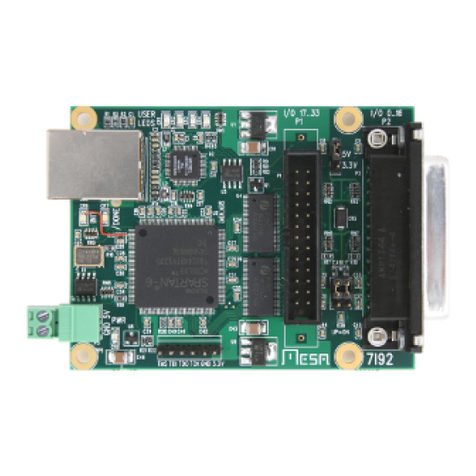
Mesa 4I33 User manual

4I33 MANUAL
PRELIMINARY V1.0

page intentionally not blank

iii
Table of Contents
GENERAL ..................................................... 1
DESCRIPTION ............................................. 1
HARDWARE CONFIGURATION ..................................... 2
GENERAL ................................................ 2
LOCAL TRANSCEIVER POWER ................................ 2
BNC TERMINATION ......................................... 2
SERIAL PORT LOCATION .................................... 2
PARALLEL PORT LOCATION .................................. 3
SERIAL INTERRUPT ........................................ 3
RS-485 RE OPTION ......................................... 3
PNP/EEPROM SETUP SELECT ................................ 4
CONNECTORS ................................................. 5
CONNECTOR LOCATIONS AND DEFAULT JUMPER POSITIONS ....... 5
PARALLEL CONNECTOR ..................................... 6
AUI CONNECTOR .......................................... 6
EXTERNAL 10BASET CONNECTOR ............................. 7
SERIAL CONNECTOR ....................................... 7
4I33 OPERATION ............................................... 8
CONFIGURATION .......................................... 8
CONFIGURATION OPTIONS ................................... 8
AUTO OPERATION ......................................... 9
DEFAULT CONFIGURATION ................................... 9

4I33 1
GENERAL
DESCRIPTION
The 4I33 is a low cost NE2000 compatible Ethernet card for the PC/104 bus
that includes an RS-232/RS-485 serial port and 24 parallel I/O bits.
The 4I33 Ethernet is NE2000 compatible and uses the RTL8019AS chipset. It
supports both EEPROM configuration and Plug-and-Play modes of operation.
10BaseT, 10Base2 (BNC), and AUI interfaces are provided.
The 4I33 also supports external panel mount 10BaseT or BNC connectors. The
panel mount BNC tranceiver (MAU) connects to the 4I33's AUI connector. The panel
mount 10BaseT connector has link and activity LEDS.
The serial port is a standard COMX compatible port using a 16550 compatible
FIFOed UART. The serial port is available with either RS-232 or RS-485 level shifters.
The serial port has 4 selectable I/O locations and can use IRQ 2, 3, 4, 5, 7, 9, 10, 11,
12, or 15.
The parallel port uses a 82C55 and provides 24 general purpose I/O bits. All
I/O bits are provided with pullup resistors to simplify connection to switches, sensors,
etc. The parallel port has 4 selectable I/O port locations.

4I33 2
HARDWARE CONFIGURATION
GENERAL
Hardware setup jumper positions assume that the 4I33 card is oriented in an
upright position, that is, with the PC/104 connectors towards the person doing the
configuration.
LOCAL TRANSCEIVER POWER
The on card BNC transceiver power can be enabled or disabled via jumper
block W2. BNC Tranceiver power should only be disabled when an external BNC
transceiver such as MESAs MAU is used. Make sure that local transceiver power is
disabled if a MESA MAU is used. If left enabled when a MAU is used, an
overload will occur and power supply damage may result!
It is not necessary to disable transceiver power to save current consumption in
10BaseT mode, since the Ethernet chip will automatically disable the DC-DC converter
when the 10BaseT interface is used.
Moving W2 to the UP position enables local transceiver power, moving W2 to
the DOWN position disables local transceiver power.
BNC TERMINATION
The local BNC port can be terminated on card if desired. This can be useful to
avoid the space used by a BNC terminator where space is at a premium. It must not
be enabled unless the 4I33 card is at one end of the BNC cable run. JumperW3 is set
to the UP position to enable termination, and the DOWN position to disable
termination.
SERIAL PORT LOCATION
The optional on-card serial port can be located at 4 different I/O addresses,
COM3, COM4,COM5, or COM6. These locations are determined by a PAL and can be
changed if needed.. Jumpers W4 and W5 (labeled SLOC on card) set the serial port
locations as follows:
W4 W5 LOCATION
DOWN DOWN COM3 = 3E8H
DOWN UP COM4 = 2E8H
UP DOWN COM5 = 100H
UP UP COM6 = 108H

4I33 3
HARDWARE CONFIGURATION
PARALLEL PORT LOCATION
The optional on-card parallel port can be located at 4 different I/O addresses,
204H,208H,224H and 228H. These locations are determined by a PAL and can be
changed if needed. Jumpers W6 and W7 (labeled PLOC on card) set the parallel port
locations as follows:
W6 W7 LOCATION
DOWN DOWN 204H
DOWN UP 208H
UP DOWN 224H
UP UP 228H
SERIAL PORT INTERRUPT
The optional serial port can select from 8 interrupts. The interrupt is selected by
placing a jumper on one of the jumper locations from W8 through W15. These
jumpers are labeled with the IRQ number on the card. Interrupts are selected as
follows:
W8 W9 W10 W11
IRQ9 IRQ3 IRQ4 IRQ5
W12 W13 W14 W15
IRQ7 IRQ10 IRQ11 IRQ12
RS-485 RE OPTION
If the RS-485 option is installed, jumper W16 can be used to select whether the
RS485 receiver is enabled when transmitting. This can be useful for ‘collision
detection’ schemes. The disadvantage of having receive always enabled is that all
transmitted characters must be dumped from the receive buffer when done
transmitting.
When W16 is in the DOWN position, receive enable is always on. When W16 is
in the UP position, receive enable is off when transmitting.

4I33 4
HARDWARE CONFIGURATION
PNP/EEPROM SETUP SELECT
The 4I33 can operate in 2 different configuration modes: Plug and Play (PNP)
where the system BIOS sets up the I/O location and interrupts, and EEPROM mode,
where the on card EEPROM determines the I/O location and interrupts. If the system
BIOS does not support Plug and Play, you must use the EEPROM configuration
mode.
W17 determines the configuration mode. When W17 is in the UP position, PNP
mode is selected, When W17 is in the DOWN position, EEPROM setup mode is
selected.

4I33 5
CONNECTORS
CONNECTOR LOCATIONS AND DEFAULT JUMPER POSITIONS

4I33 6
CONNECTORS
PARALLEL CONNECTOR
P2 is the parallel connector. P2 is a 26 pin .1" header that provides access to
the 4I33s 82C55 based 24 bit parallel I/O. The 26 pin connector uses the ISO
standard pinout.The parallel connector pinout is as follows:
PIN FUNCTION PIN FUNCTION PIN FUNCTION PIN FUNCTION
1 PA0 2 VCC 3 PA1 4 PA2
5 PA3 6 PA4 7 PA5 8 PA6
9 PA7 10 PB0 11 PB1 12 PB2
13 PB3 14 PB4 15 PB5 16 PB6
17 PB7 18 PC0 19 PC1 20 PC2
21 PC3 22 PC4 23 PC5 24 PC6
25 PC7 26 GND
AUI CONNECTOR
P4 is AUI connector. P4 is a 16 pin connector. When P4 is terminated with a 15
pin female IDC DSUB connector (with cable conductor pin unused), that connector will
have the standard Ethernet AUI pinout. P4 gets its +12 volt transceiver power from
the PC/104 bus so +12V must be supplied if using and external transceiver. It is
suggested that the cable connecting P4 to the DSUB female connector be 12 inches
or shorter in length, as the flat cable creates an impedance mis-match.
P4 is also used for connecting to MESA’s MAU external BNC adapter. This
adapter gets its isolated transceiver power from the 4I33s on card DC-DC converter,
and so does not require +12V on the PC/104 bus.

4I33 7
CONNECTORS
EXTERNAL 10BASET CONNECTOR
P5 Is a connector for an external, panel mount RJ45 connector. P5 is a 10 pin
.1" header. MESA can supply the panel mount adapter (The TAU).
SERIAL CONNECTOR
P7 standard. P7 is a 10 pin .1" header that matches a standard AT type DB9
pin serial ports when terminated to IDC type 9 pin connector. In this case pin 10 is not
used. Pin 10 is connected to +5V to support RS232-RS422 adapters etc. P7 pinout is
as follows:
HEADER PIN DB9 PIN RS-232 FUNCTION RS-485 FUNCTION
1 1 DCD
2 6 DSR
3 2 RXD
4 7 RTS
5 3 TXD
6 8 CTS 485-A
7 4 DTR
8 9 RI 485-B
9 5 GND
10 XX VCC

4I33 8
4I33 OPERATION
CONFIGURATION
If not used in PNP mode, an on card EEPROM is used to store the 4I33
configuration parameters. A supplied DOS program: RSET8019 is used to change
these parameters.
CONFIGURATION OPTIONS
RSET8019 allows setting of the following options:
I/O ADDRESS
200H 220H 240H 260H 280H 2A0H 2C0H 2E0H
300H 320H 340H 360H 380H 3A0H 3C0H 3E0H
Note that some of these addresses will be unavailable due to conflicts with
existing peripherals.
IRQ
2/9 3 4 5 10 11 12 15
MEDIA
10Base2 10Base5 10BaseT Auto
If MESAs external panel mount transceiver (MAU) is used, the 10 Base2 mode
should be selected. This is because the MAU gets its isolated transceiver power from
the 4I33s DC-DC converter and 10Base5 mode will disable on DC-DC converter.

4I33 9
4I33 OPERATION
CONFIGURATION OPTIONS
BOOT PROM ENABLE/DISABLE
BOOT PROM ADDRESS/SIZE:
C000H/64K D000H/64K
C000H/32K C800H/32K D000H/32K D800H/32K
C000H/16K C400H/16K C800H/16K CC00H/16K
D000H/16K D400H/16K D800H/16K DC00H/16K
C000H/PAGE C400H/PAGE C800H/PAGE CC00H/PAGE
D000H/PAGE D400H/PAGE D800H/PAGE DC00H/PAGE
AUTO MEDIA DETECT
The configuration program lets you select an ‘auto’ mode for media type. The
auto media detect mode operates as follows: At power up, the RTL8019 MAC chip
starts up in 10BaseT mode and senses the 10BaseT link status. If the link status is
good, it remains in 10BaseT mode, if the link status is bad, it will switch to BNC mode.
It only does this at startup, so it will never switch back to 10BaseT even if the link
becomes operational some time after power up.
DEFAULT CONFIGURATION
The default 4I33 configuration as shipped from MESA is as follows:
IO ADDRESS IRQ MEDIA
300H 5 AUTO
The default 4I33T configuration as shipped from MESA is as follows:
IO ADDRESS IRQ MEDIA
300H 5 10BASET
.
Table of contents
Other Mesa Network Card manuals
