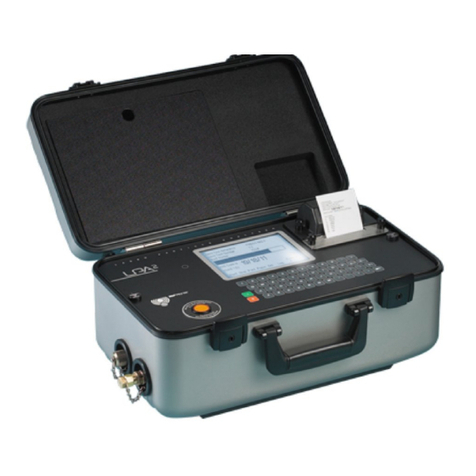
Messtechnik SITA science line t60 User manual

S I T A s c i e n c e l i n e t 6 0
- M a n u a l -

2
SITA Messtechnik GmbH
1 Contents
1 CONTENTS 2
2 SITA-ONLINE T60 4
3 TECHNICAL DATA 5
4 CONNECTORS 6
5 SETTING UP THE DEVICE 7
6 INSERTING OR CHANGING THE BATTERY 7
7 CAPILLARY AND TEMPERATURE SENSOR 8
8 DRYING AGENT 9
9 KEYBOARD 10

3
SITA Messtechnik GmbH
10 TURNING THE ON-LINE TENSIOMETER ON AND OFF 12
11 DISPLAY 12
11.1 DISPLAYS 12
11.2 ADJUSTING CONTRAST AND BRIGHTNESS 13
12 MODES 14
12.1 CALIBRATION 14
12.2 ON-LINE MEASUREMENT 15
12.3 AUTO-MEASUREMENT 18
12.4 CLEANING MODE 20
13 MEMORY AND DEVICE PARAMETERS 20
13.1 MEMORY 20
13.2 SETTING THE OPTIONS 21
13.3 DEVICE INFO 24
14 PC-SOFTWARE 25
15 SURFACE TENSION OF WATER 27
16 SOFTWARE LICENCE AGREEMENT 28

4
SITA Messtechnik GmbH
2 SITA science line t60
SITA science line t60 is a hand hold tensiometer for measuring the dynamic
surface tension of liquids up to the semi-static range. The device works by
measuring bubble pressure. This is done by pumping air through a capillary
with the radius r into the liquid to be analysed. According to Young-Laplace,
the difference in pressure p which is needed to form a bubble is
proportional to the surface tension :
The device measures the
difference in pressure p and
transforms it into a reading of surface tension. Simultaneously, it records the
bubble frequency, the lifetime of the bubbles and the temperature of the
liquid.
p r
2

5
SITA Messtechnik GmbH
3 Technical Data
Device: SITA science line t60-1 / t60-2
Memory: 16 Mbyte, non-volatile
(several hundred measurements)
Power Supply: (100...240)V / (47...63)Hz
bzw. 4 x Mignon (AA)
max./min. Ambient Temp.
(Storage/Operation): (-20...80)°C / (0...50)°C
max. Power Consumption: about 3,5 VA
Total Weight
(including suitcase): 6300 g
Material of Capillary: PEEK
Capillary Connector: Luer Lock Connector
Surface Tension
Measuring Range
(10...100) mN/m (dyn/cm)
Error
max. 1% f.s.
Resolution
0,1mN/m
Repeatability Error
0,5mN/m
Temperature of Liquid
Measuring Range
(-10...130)°C
Error
max. 1% f.s.
Resolution
0,1°C
Repeatability Error
0,3K
Bubble Lifetime
Controlled Range
t60-1: (1000...60000)ms / t60-2: (30...60000)ms
System Deviation
auto-mode: max. 10% / online-mode: adjustable
Resolution
1ms
Bubble Frequency
Controlled Range
t60-1: (0,008...1)Hz / t60-2: (0,008...10)Hz
System Deviation
auto-mode: max. 10% / online-mode: adjustable
Resolution
3 digits

6
SITA Messtechnik GmbH
4 Connectors
1 Drying agent (exchangeable)
2 Socket for pneumatic cable to the sensor head
3 Socket for PC connection
4 Socket for power supply

7
SITA Messtechnik GmbH
5 Setting up the Device
Prior to measuring, the device needs to be set-up. Screw the rod into the
base-plate and stand it on a stable surface. Slide the sensor head onto the
rod while pushing the lever down. Release the lever once the desired
position is reached. Now, connect the sensor head’s pneumatic cable to the
measuring device. Note that the red markings on both the plug and the
socket need to be aligned. Activate the power supply by plugging it into
mains or insert 4 mignon (AA) batteries into the battery compartment (watch
for the right polarisation!). Additionally, you may want to connect the
device to the serial port of your PC. This can be done by means of the
interface cable included. Plug the capillary onto the Luer connector on the
sensor head (slightly push and then turn right). The tensiometer is now ready
for measuring.
6 Inserting or Changing the Battery
For inserting and changing the batteries (4 x Mignon (AA)) open the bottom
of the device by depressing the ends of the battery box. Please take care for
the correct polarisation.
Warning
Use this device for the described
application only!
Other uses might be dangerous.

8
SITA Messtechnik GmbH
7 Capillary and Temperature Sensor
Capillaries from PEEK are used to make the bubbles. PEEK can withstand
temperatures and is resistant to highly concentrated alkaline solutions as well
as non-oxidising acids. The resistance against solvents is excellent, too.
PEEK is highly hydrolysis resistant to boiling water.
In order to quickly change the capillaries, they come with a Luer Lock
connector. For attaching the capillary to the sensor head simply plug it onto
the Luer connector and turn to the right. Please, keep the inner seal clean in
order to guaranty a sealed system.
Note that the PEEK capillaries are not resistant against
concentrated sulphuric acid and oxidising chemicals such
as concentrated nitric acid and wet chlorine gas.
Do not immerse the complete capillary into the
ultrasonic cleaning bath and/or any solvent!
For cleaning the capillary refer to chapter 12.4!
The temperature sensor (Pt 100) is from stainless steel
and should be resistant to most chemicals. For critical
cases or if you have doubts, you are asked to use a
protective sheath from PTFE which the manufacturer can
supply on demand.

9
SITA Messtechnik GmbH
8 Drying Agent
The tensiometer has a desiccant cartridge which dries the air used to make
the bubbles. This is only necessary when the temperature of the liquid to be
measured is considerably lower than the ambient temperature. Without the
desiccant cartridge, moisture would condense in the capillary. The drying
agent in the cartridge absorbs most of the moisture lowering the dew-point.
(The dew-point marks the beginning of condensation).
The desiccant cartridges come in lockable, air tight bags. When new, the
drying agent is blue. When the agent is saturated with moisture it turns pink.
The desiccant cartridge should be changed if half of the drying agent has
changed colour or if the measurements are getting unstable when measuring
in cold liquids. Additional desiccant cartridges can be supplied by the
manufacturer.

10
SITA Messtechnik GmbH
9 Keyboard

11
SITA Messtechnik GmbH
For turning the device on and off
hold down for 1 second
(2x)
Start on-line measurement
(2x)
Start auto-measurement
Start cleaning-mode
Call menu
Escape
Confirm
Cursor keys
Display illumination
Help button

12
SITA Messtechnik GmbH
10 Turning the on-line Tensiometer on and off
For switching the tensiometer on/off you need to hold down the on/off key
for at least a second.
11 Display
11.1 Displays
The status of the device, information on the measurement and options, and
the current function of the software keys are shown in different areas of the
display.
The Status is displayed in the first line and second to the last line of the
display. The first line shows the title of the current menu. In the second to the
last line of the display shows the current measuring mode (online/auto/clean)
or error symbols and a bar indicator of the bubble pressure are shown.

13
SITA Messtechnik GmbH
The Information area shows diagrams, tables and options.
The last line of the display shows the (changing) meaning of the 3 Software
keys.
11.2 Adjusting Contrast and Brightness
(The procedure here described in detail similarly applies to other set-up
procedures as well)
In order to adjust contrast and brightness you need to press the menu button
and chose "device set-up" by pressing the arrow keys and confirming
with the ENTER button. From the menu which is displayed, now chose
"display setting" and press ENTER. The options "contrast" and "backlight"
can be chosen with the arrow keys . Now, adjust contrast or brightness
to the desired value using the arrow keys .
Save the settings by pressing the software key "save". This takes you back to
the "Set-up" menu. Alternatively, you may press the software key "exit" which
exits the set-up mode without saving.
Press the menu or ESC key to return to the "Main Menu".

14
SITA Messtechnik GmbH
12 Modes
12.1 Calibration
Prior to measuring, it is necessary to calibrate the tensiometer. Generally, the
device should be calibrated after any change at the sensor head and after
changing or externally cleaning the capillary. If the readings are considerably
different from the values given by Teitelbaum (refer to Surface Tension of
Water) when measuring clear water, then the device needs to be calibrated
as well. Please, consider the influence of the temperature on the surface
tension when comparing the readings with the table in Surface Tension of
Water.
For calibrating the tensiometer, the sensor head’s capillary and temperature
sensor must be immersed in water. Lower the sensor head until the water
surface is within the grey marking on the temperature sensor.
Then, press the menu key and choose the menu item CALIBRATION using
the cursor keys . The calibration window will be shown in the display
after pressing the ENTER key. You can start the calibration by pressing
"start". If a measurement is running at this moment you need to press the left
software key ("yes") in order to terminate the measurement.
The water used for calibration must be free of any surface
active substances. If you are uncertain about the water
quality, use distilled or de-ionised water.

15
SITA Messtechnik GmbH
The progress of the calibration is shown with a bar indicator in the display.
During calibration the device sweeps through bubble lifetimes from 0.03s to
2s. The tensiometer then automatically ends the calibration and returns to
the main menu.
12.2 On-line Measurement
The readings taken during an on-line measurement can be displayed as
either a plot or a table. You may switch the display between these two modes
by pressing the middle software key ("table" "graph").
When in online-mode the surface tension will be measured at the set
frequency. Make sure that the tensiometer has already been calibrated (the
calibration is explained in Calibration).
Switch on the device and lower the sensor head until the grey marking on the
temperature sensor is level with the surface of the liquid to be measured. In
order to start a measurement you need to press the online key two times.
(The first punch takes you to the measuring and display options menu. Here,
you may check or change the parameters of the measurement to be started).

16
SITA Messtechnik GmbH
You can start the on-line measurement from the menu, too. Press the menu
key and select online measure using the cursor keys . Select the on-
line measurement by pressing the ENTER key. The device automatically
displays the menu for setting the measuring parameters and display options.
The measurement starts as soon as the software key "start" is hit.
In case an on-line measurement is already running, the set-up menu will not
be displayed and the right software keys show "stop". Pressing the left
software key "set" takes you to the set-up menu. In order to continue the
measurement you need to press the middle software key "go on".
By using the cursor keys you can scroll the x-axis (number of
reading).
The following measuring parameters and display options can be set (saving
in case of starting a new measurement):
control: Either the bubble "lifetime" or the bubble "frequency".
tlife / freq: Desired bubble lifetime / bubble frequency.
average: Number of readings to be averaged. Can be set in the range
from 1 to 32.
auto clr data: Clear the shown data (diagram or table) by starting a new
measurement („on“ / “off“)
autosave: Save the shown data (diagram or table) into the device
memory after the measurement is finished ("on" / "off"). It is
useful to set “auto clr data” on.

17
SITA Messtechnik GmbH
graphic settings...
Setting the range of the y-axis of the plot (minimum and
maximum value).
table settings...
Menu for the table options ("EDIT TABLE“). Go to the
various settings by choosing a menu entry with the arrow
keys , confirm with ENTER or by pressing the left
software key ("edit").
add new value: Determines at which position new readings will be
inserted into the table: at the "top" or appended at the
"end".
show value of: Defines which measured value is to be shown: the
bubble lifetime ("t-life"), the bubble frequency
("frequency") or period ("t-period“).
sort Parameter: Defines which parameter the readings are to be sorted
by: "number", period ("t-period“), "frequency" or bubble
lifetime ("t-life“).
cursor speed: Sets the cursor speed for navigating in the table: "slow",
"medium", "fast".
Press the right software key ("return") to exit the "EDIT TABLE“ menu.

18
SITA Messtechnik GmbH
12.3 Auto-Measurement
The auto-mode is useful for analysing the dynamic behaviour of surface
tension. Switch on the device, calibrate and lower sensor head until the grey
marking on the temperature sensor is level with the surface of the liquid to be
measured. The calibration is explained in Calibration. Press the auto key
twice to start the auto-measurement. In order to start a measurement you
need to press the online key two times. (The first punch takes you to the
measuring and display options menu. Here, you may check or change the
parameters of the measurement to be started).
You can start the auto measurement from the menu, too. Press the menu
key and select auto measure using the cursor keys . Select the auto
measurement by pressing the ENTER key. The device automatically displays
the menu for setting the measuring parameters and display options. The
measurement starts as soon as the software key "start" is hit. In case the
menu item "auto-measurement" was selected and an auto measurement is
already running the set-up menu will not be displayed and the right software
key will show "stop". Pressing the left software key "set" takes you to the set-
up menu. In order to continue the measurement you need to press the
middle software key "go on".

19
SITA Messtechnik GmbH
By using the cursor keys the x-axis (bubble lifetime) can be zoomed
in and out.
The following measuring parameters and display options can be set (saving
in case of starting a new measurement):
control: Either the bubble "lifetime" or the "frequency" can be
controlled. (For setting the control to "frequency" assume
"bubble frequency" instead of "bubble lifetime" in the
following explanation.)
bubble lifetime / bubble frequency
start: Start value of bubble lifetime / frequency.
stop: End value of bubble lifetime / frequency.
factor: Determines the step by which the start value will be changed
until the end value was reached. For each step the current
lifetime / frequency will be multiplied by this factor.
auto clr data: Clear the shown data (diagram or table) by starting a new
measurement („on“ / “off“)
autosave: Save the shown data (diagram or table) into the device
memory after the measurement is finished ("on" / "off"). It is
useful to set “auto clr data” on.
graphic settings...
Please, refer to 12.2 "On-line Measurement“.
table settings...
Please, refer to 12.2 "On-line Measurement“.

20
SITA Messtechnik GmbH
12.4 Cleaning Mode
In cleaning mode, air is blown through the capillary, removing particles of
dust and fuzz which may have settled on the capillary’s surface. Cleaning
should be carried out when unstable readings occur or when the device can
not control the bubble frequency any longer. It helps to carry out the cleaning
procedure with the tip of the capillary (about 10mm) in an ultrasonic cleaning
bath. Do not immerse the complete capillary into the ultrasonic cleaning
bath, especially into acetone! This can heavily damage the glued
capillary assembly and so causing air leakage.
Press the clean key to start the cleaning procedure. You can also start the
cleaning by choosing CLEANING from the main menu (menu key). Press
the right software key ("stop") to end the cleaning procedure.
13 Memory and Device Parameters
13.1 Memory
The device has a memory for storing the data which are shown in diagram or
table. The readings will be stored in case of switching of the device too.
The menu “Memory” has the options as follow:
save data to mem : save the actual measurement
(refer to autosave 12.2, 12.3)
load saved data : show saved measurements
clear data : clear showed data (diagram or table)
clear memory : clear all saved measurement
This manual suits for next models
2
Table of contents
Other Messtechnik Measuring Instrument manuals

