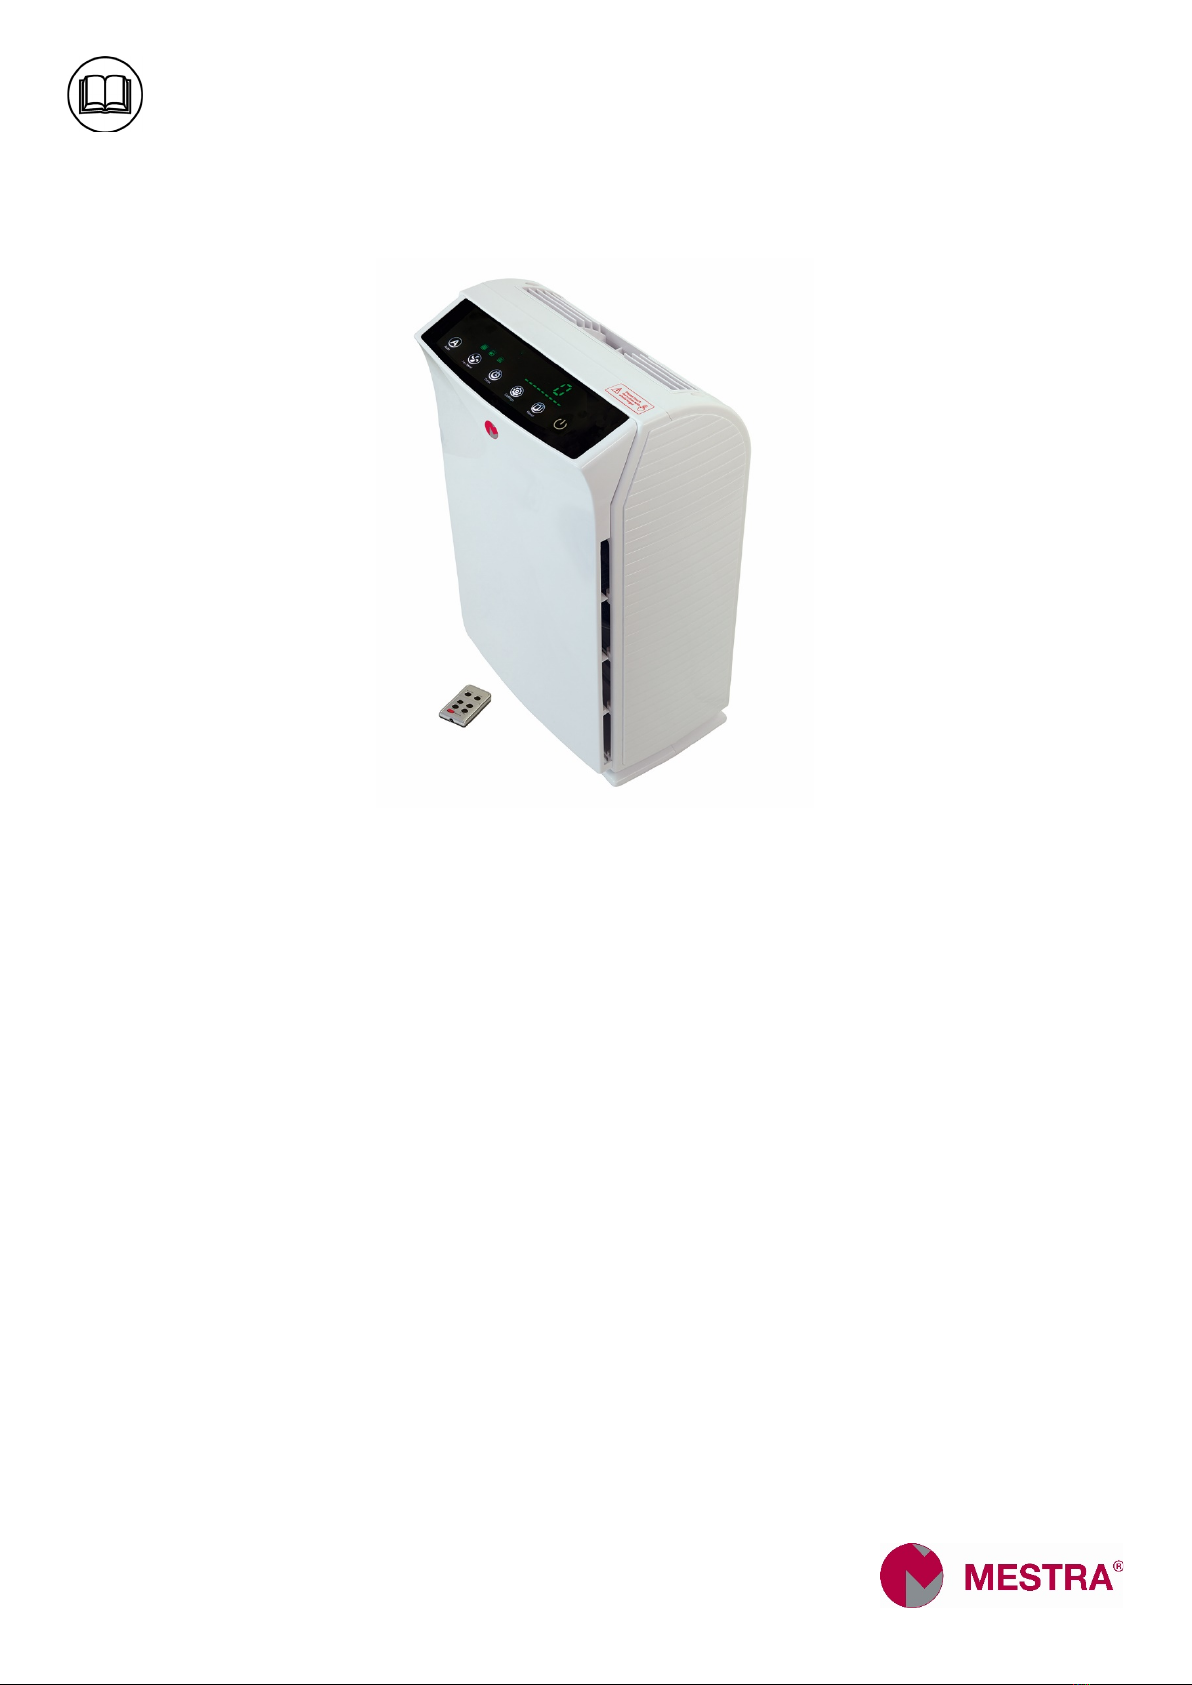
Mestra 100514 User manual
Rev. 10/09/2020
Ref. 100514
ES .............................4
Manual original
EN...........................10

2
①Panel de control / Control panel
②Cubierta frontal / Front cover
③Entrada aire / Air inlet
④Base / Base
⑤Asa / Handle
⑥Salida aire / Air outlet
⑦Back cover / Cuberta trasera
⑧Etiqueta / Label
⑨Agujero cable alimentación / Power cord hole
⑩Cubierta frontal / Front cover
⑪Pre-filtro / Pre-filter
⑫Filtro HEPA / HEPA filter
⑬Filtro carbón activado + fotocatalizador /
Activated carbon and photo catalystfilter
⑭Cuerpo principal / Main body
⑮Lámpara UV / UV lamp
①
②
③
④
⑤
⑥
⑦
⑧
⑨
⑩
⑪
⑫
⑬
⑭
⑮
3
Atención:
- Retirar bolsa de los filtros antes de poner en marcha el aparato.
- Salga de la habitación cuando se esté generando ozono.
Attention:
- Remove the filter bag before starting the appliance.
Leave the room when ozone is being generated.
4
Purificador de aire ES
ADVERTENCIA (Mal uso puede causar muerte)
Supervise a los niños y evite que
toquen o utilicen la máquina.
EVITAR
HUMEDAD
No conecte ni desconecte la
alimentación con las manos
mojadas.
Puede provocar una descarga
eléctrica.
NO DESMONTAR
No desmonte, repare ni reconstruya
el aparato.
Puede provocar un incendio o daños.
Envíelo al distribuidor para su
reparación.
PROHIBIDO
Utilice el voltaje indicado.
Puede provocar un incendio.
Enchufe completamente el cable en
el enchufe.
Puede provocar un incendio debido al
calentamiento o descargas eléctricas.
No utilice el enchufe si está dañado o
el suelto.
EVITAR
HUMEDAD
Evite el agua en la superficie de la
unidad.
Puede provocar un cortocircuito o una
descarga eléctrica.
DESCONECTAR
El aparato debe desconectarse de la
red eléctrica antes de realizar la
limpieza u otro mantenimiento.
De lo contrario, la unidad puede
comenzar a funcionar repentinamente,
lo que puede provocar descargas
eléctricas o lesiones.
No inserte ningún objeto metálico
en la unidad.
Puede causar lesiones o descargas
eléctricas.
PROHIBIDO
No lo repare cuando el cable o el
enchufe estén dañados.
Puede provocar cortocircuitos,
descargas eléctricas o incendios.
Envíelo al distribuidor para su
reparación.
Do clean the
plug termly
If there is dust on the plug, it may
weaken the insulation, even cause
fire.
Take out the plug and clean it with dry
cloth. Please remove the plug from the
socket if not using for a long period.
ATENCIÓN (Mal uso puede causar heridas)
PROHIBIDO
No encienda la unidad con
insecticida en la habitación.
De lo contrario, el insecticida
puede almacenarse en la unidad y
explotar durante el tiempo
normal de trabajo. Es perjudicial
para la salud. Ventile
completamente después de haber
usado el insecticida antes de
encender la unidad.
No lo use en la habitación
con humo, como una cocina.
Puede causar daño porque la
máquina no es un ventilador.
No encienda ningún
combustible ni cigarrillo.
Puede provocar un incendio.
No lo use en una habitación
húmeda o con alta
temperatura (como el baño).
De lo contrario, puede
provocar fugas, descargas
eléctricas o incendios.
Mantener alejado de
alcohol, impregnantes
orgánicos o insecticidas.
Puede provocar un
cortocircuito, descargas
eléctricas, lesiones o
incendios.
Ventile a tiempo cuando se
use con fuego en la
habitación.
Podría causar intoxicación por
CO, (no es un ventilador).
Agarre por el enchufe en
lugar del cable cuando
desconecte la alimentación.
De lo contrario, puede
provocar un cortocircuito,
rotura del cable, descarga
eléctrica o fuego.
Desconecte el enchufe si se presenta alguna de las
siguientes condiciones:
-Si no funciona ningún interruptor.
-Si el cable de alimentación o el enchufe se calientan
anormalmente.
-Si percibe algún olor peculiar, ruido o vibración
excepcional.
-Cualquier otra anomalía o fallo.
5
Si el cable de alimentación está dañado, envíelo al
distribuidor, al centro de servicio o al técnico para su
reparación. No lo cambie ni repare por su cuenta.
Funcionalidad del producto
Pre-filtro:elimina eficazmente partículas PM10.0 o
más largas.
HEPA: utilizando una nueva generación de materiales
compuestos, puede eliminar partículas de forma eficaz.
Filtro de carbón activado: biosíntesis de cáscara de
nuez, el área de adsorción es más grande, puede eliminar
eficazmente humo y formaldehidos.
Fotocatalizador: al utilizar dióxido de titanio (TiO2),
su función de oxidación puede dañar el filtro capturado
en la membrana celular de las bacterias o inhibir la
actividad de los virus.
Lámpara UV: La tasa de muerte de bacterias puede
superar el 96%.
Anión: Emisión de iones negativos.
Características técnicas
Detección inteligente de la calidad del aire: sensor de
partículas PM2.5 incorporado.
Panel de control táctil muy cómodo.
Pantalla digital: PM2.5, temperatura, humedad,
indicador de temporizador, intuitivo y fácil de entender.
Alarma automática: indicador de advertencia de
reemplazo de filtro y lámpara UV.
Potencia en reposo ≤0,5 W.
Motor silencioso.
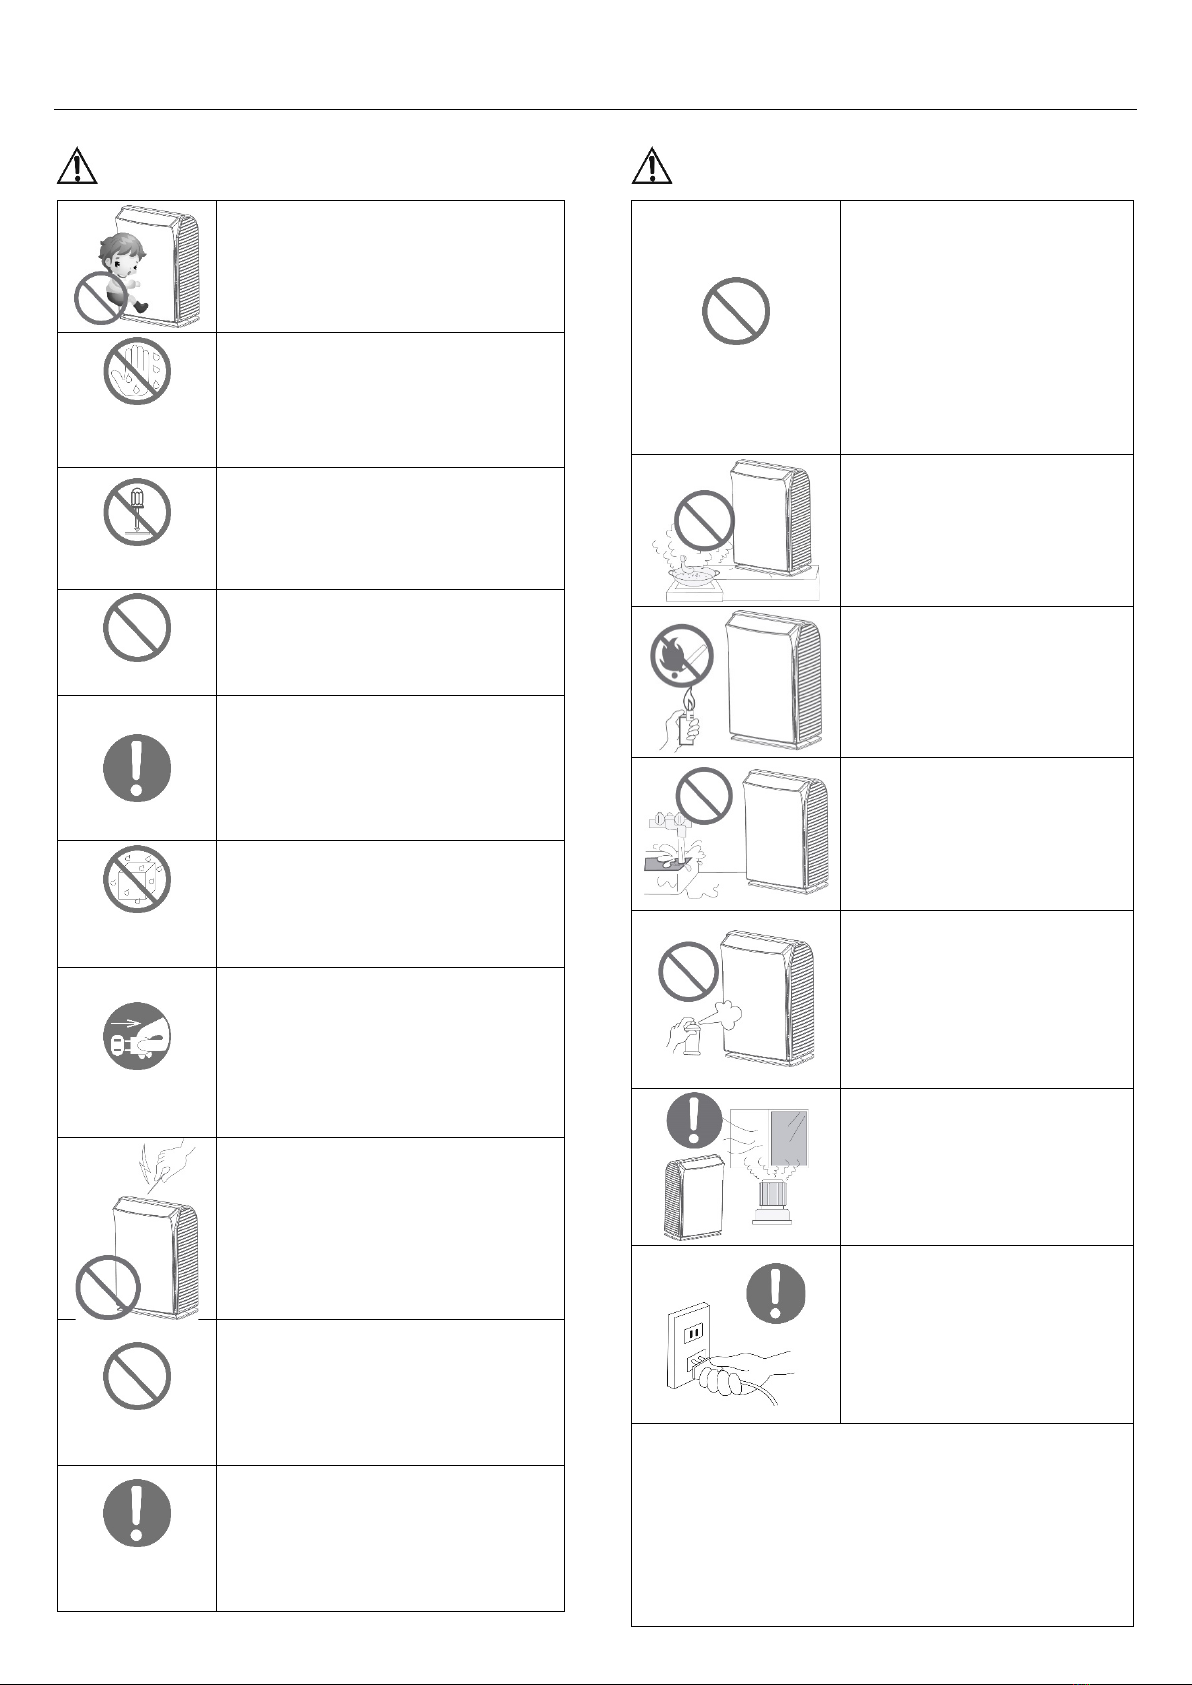
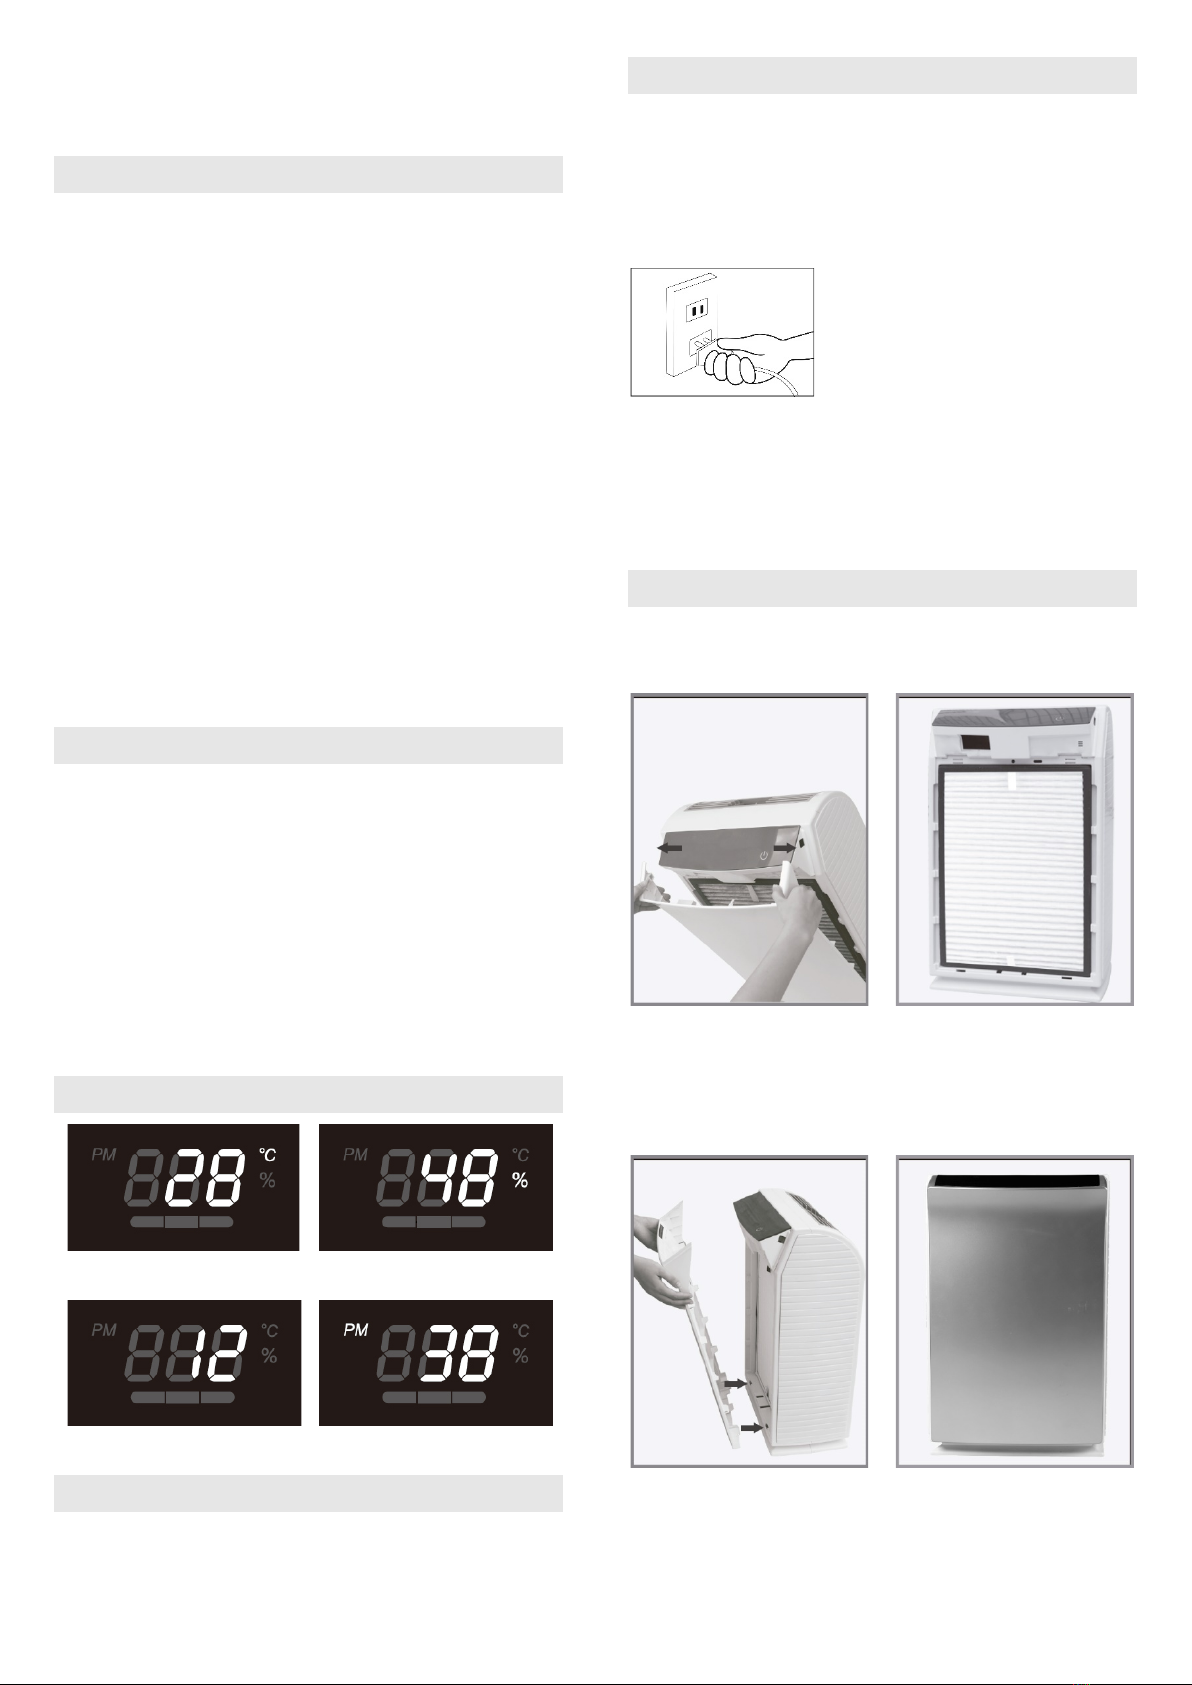
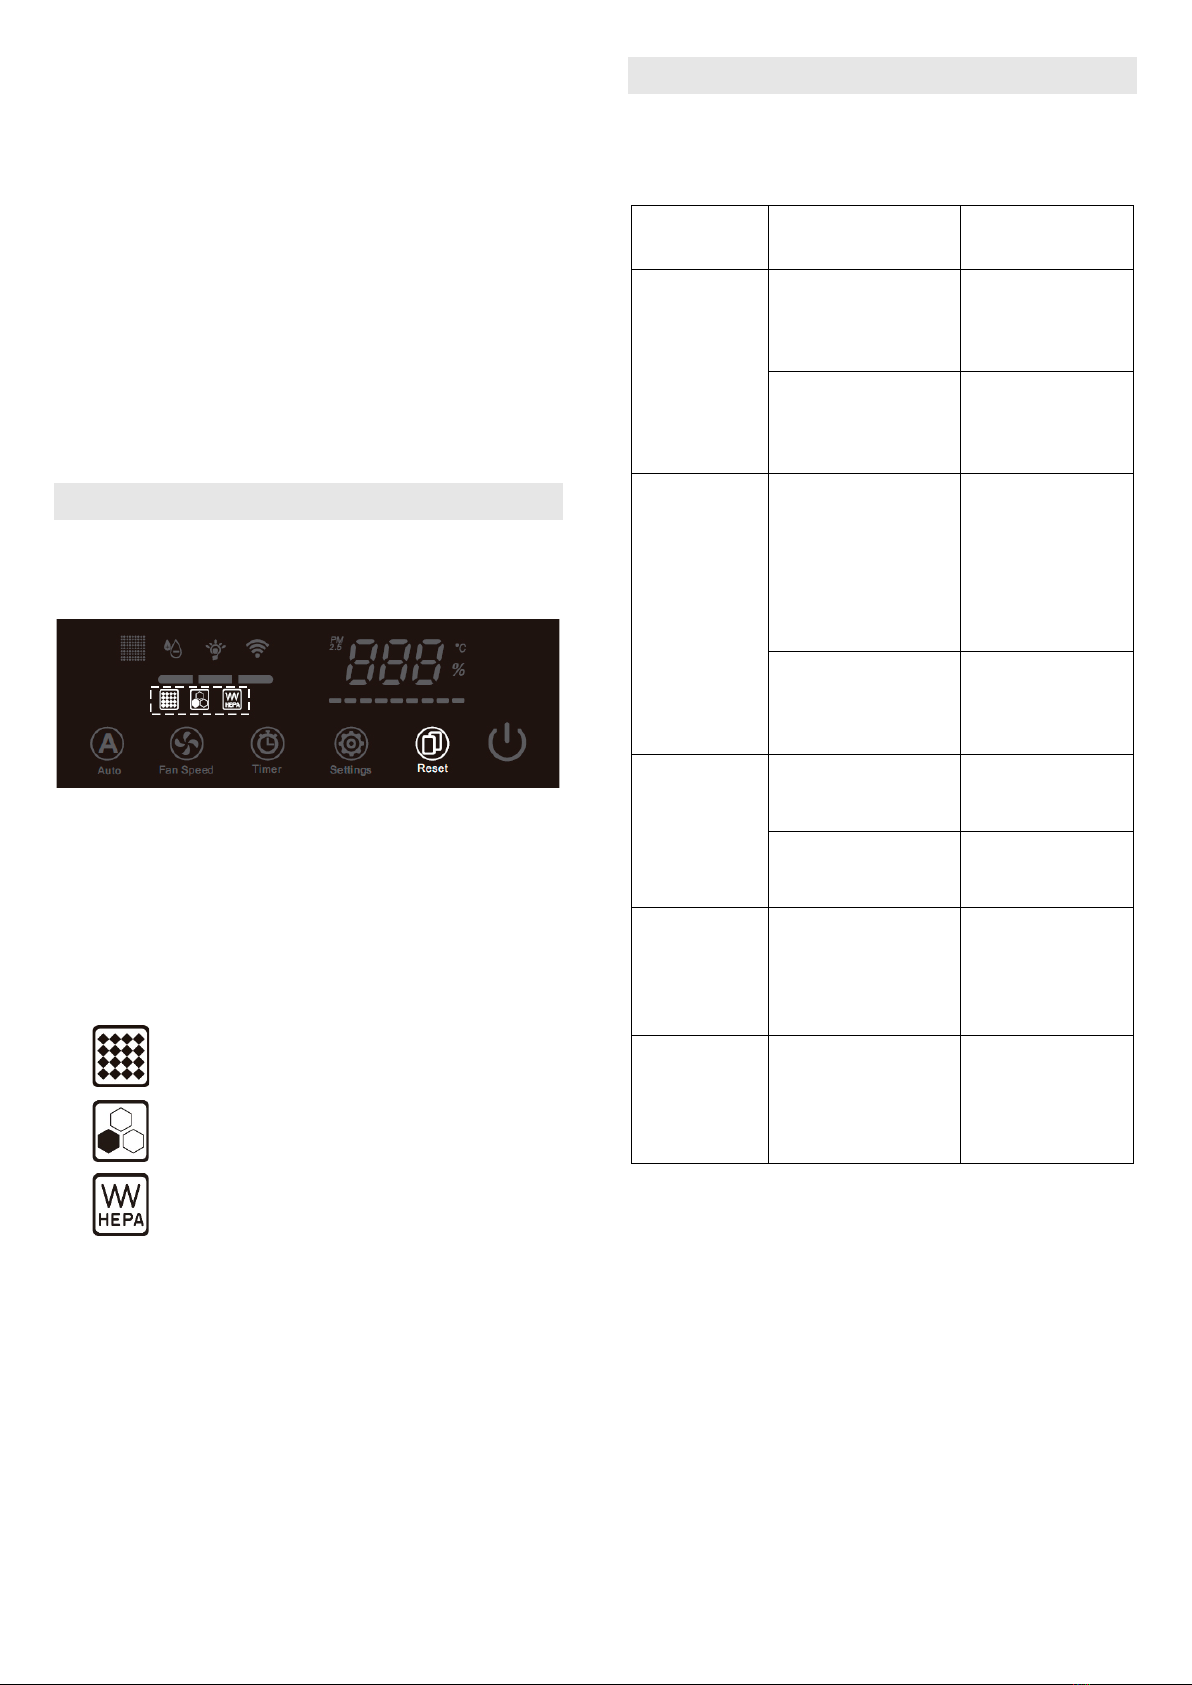
Indicadores digitales
Temperatura
Humedad
Temporizador
PM2.5
Colocación
Mantenga la entrada y salida de aire de la máquina a
30 cm o más de la pared y de los muebles.
No utilice la máquina frente a la salida de una fuente de
calor.
Alimentación
Voltaje corriente alterna (CA)
No conecte el aparato a una toma de corriente con un
voltaje incorrecto. Inserte el enchufe firmemente en la
toma de corriente.
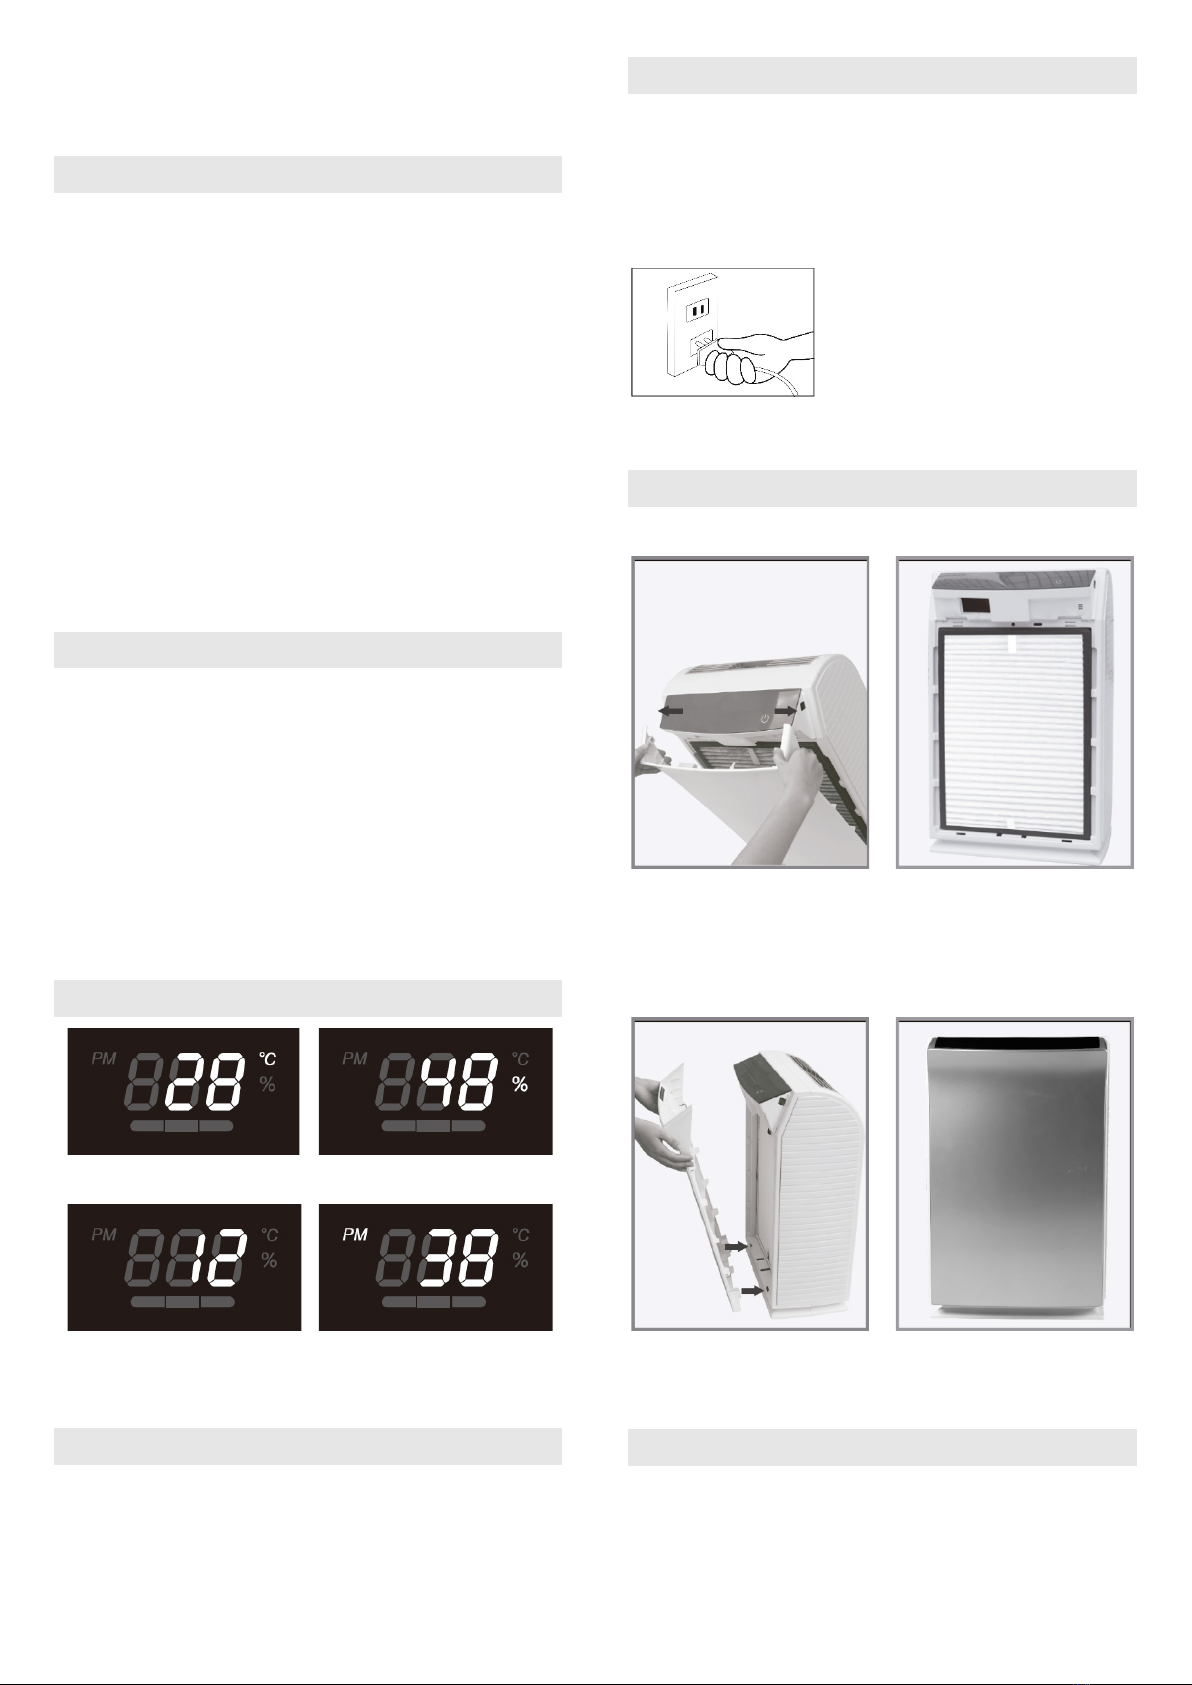
Desmontaje de la tapa del filtro
Desmontaje
Sujete la unidad con una mano y tire con la otra mano
para abrir la cubierta frontal del filtro.
Instalación
Inserte los dos pines de la parte inferior en las dos ranuras
del cuerpo principal.
Instalación de los filtros
Abra la cubierta frontal.
Saque el pre-filtro, el filtro HEPA y el cartucho de carbón
activo + fotocatalizador y retire sus bolsas de plástico.
Instale los filtros secuencialmente.
6
Retire la cubierta frontal
Instale el filtro de carbon
activo
+ filtro fotocatalizador
Instale el filtro HEPA
Instale el pre-filtro
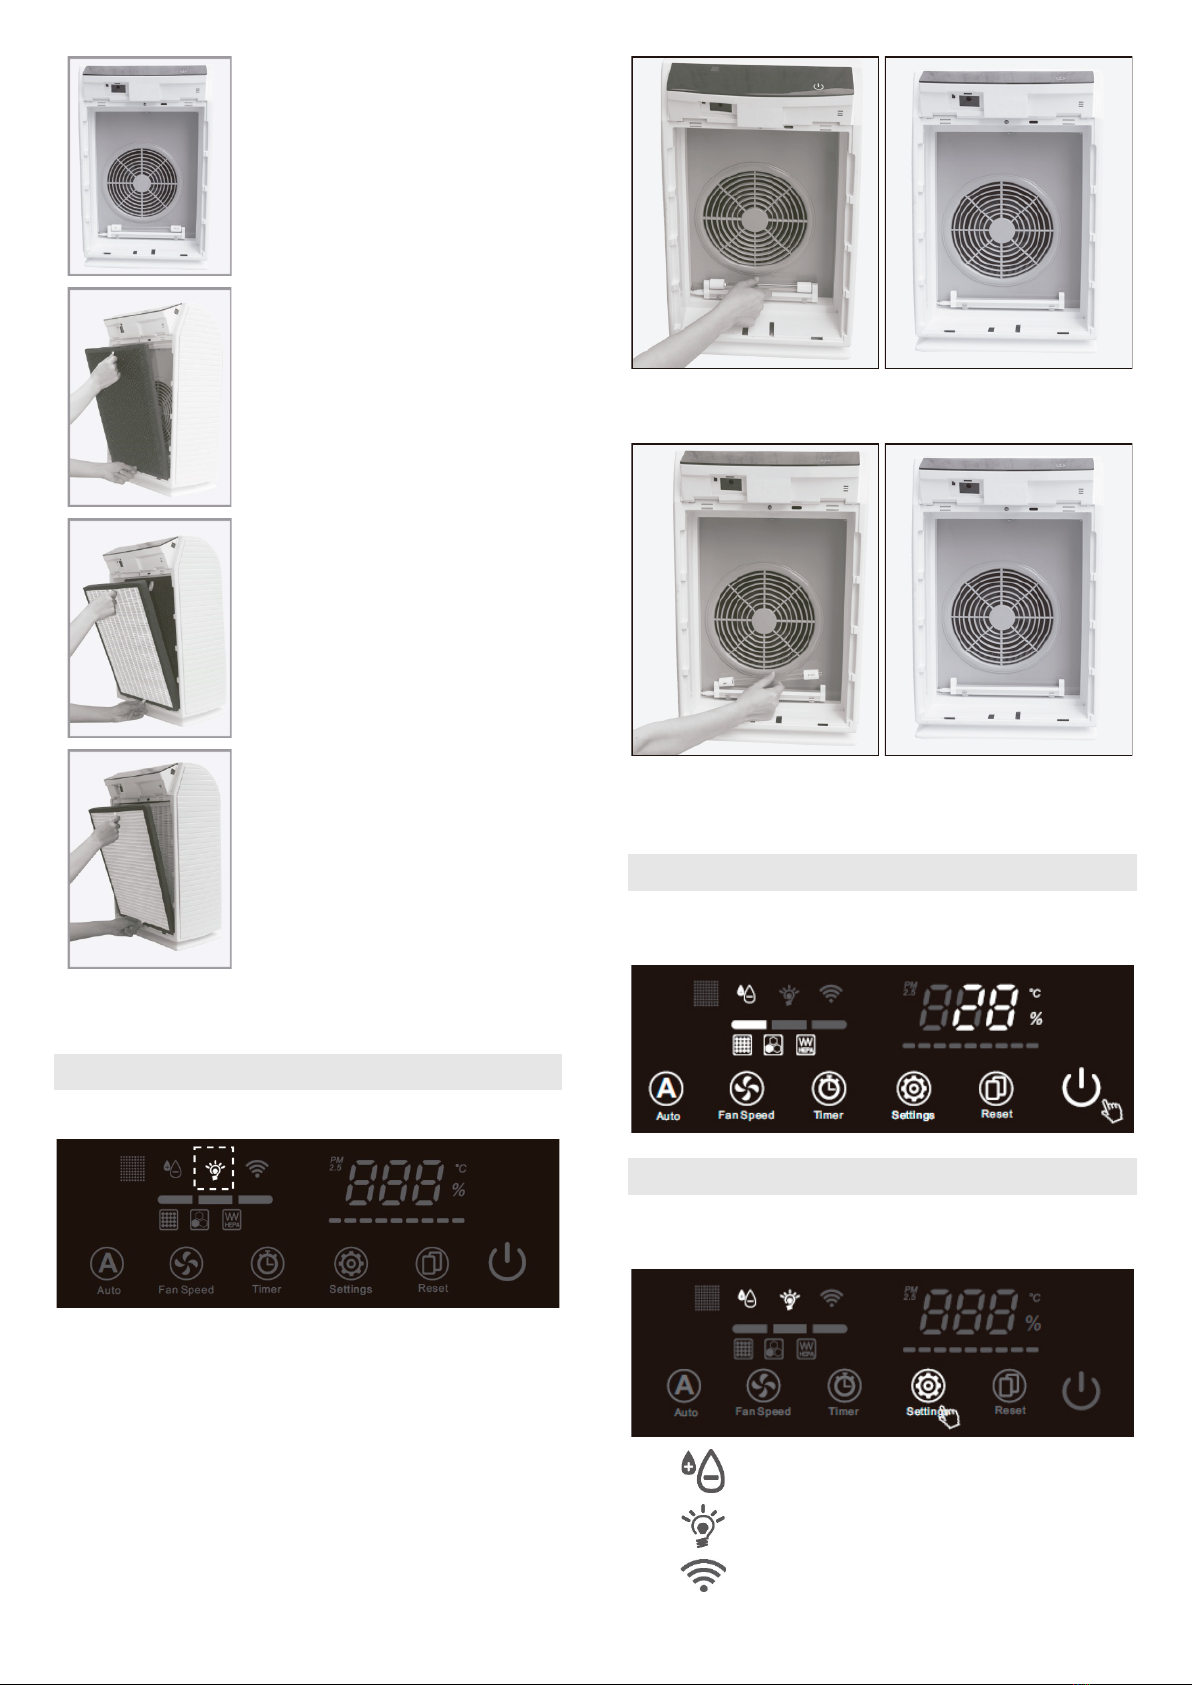
Sustitución de la lámpara UV
Hay un sensor de luz integrado en el dispositivo. Si la luz
ultravioleta es muy débil o no está encendida, el icono de
luz ultravioleta en el panel de funcionamiento del
producto parpadeará; significa que se debe reemplazar la
lámpara UV:
1. Quite la tapa frontal y saque todos los filtros.
entonces se puede reemplazar la lámpara UV.
2. Sostenga la lámpara UV y gírela 90 en sentido horario
o antihorario. Luego sáquela.
3. Sostenga la lámpara UV y gírela 90 en sentido horario
o antihorario de manera que quede firme.
Encendido
Pulse el botón "POWER" en el panel frontal. El aparato
entra en el estado de trabajo inicial.
Selección de funciones
Pulsando el botón “Settings” se activará generación de
aniones y la lámpara UV, individualmente o juntas.
Aniones
Lámpara UV
Función opcional
7
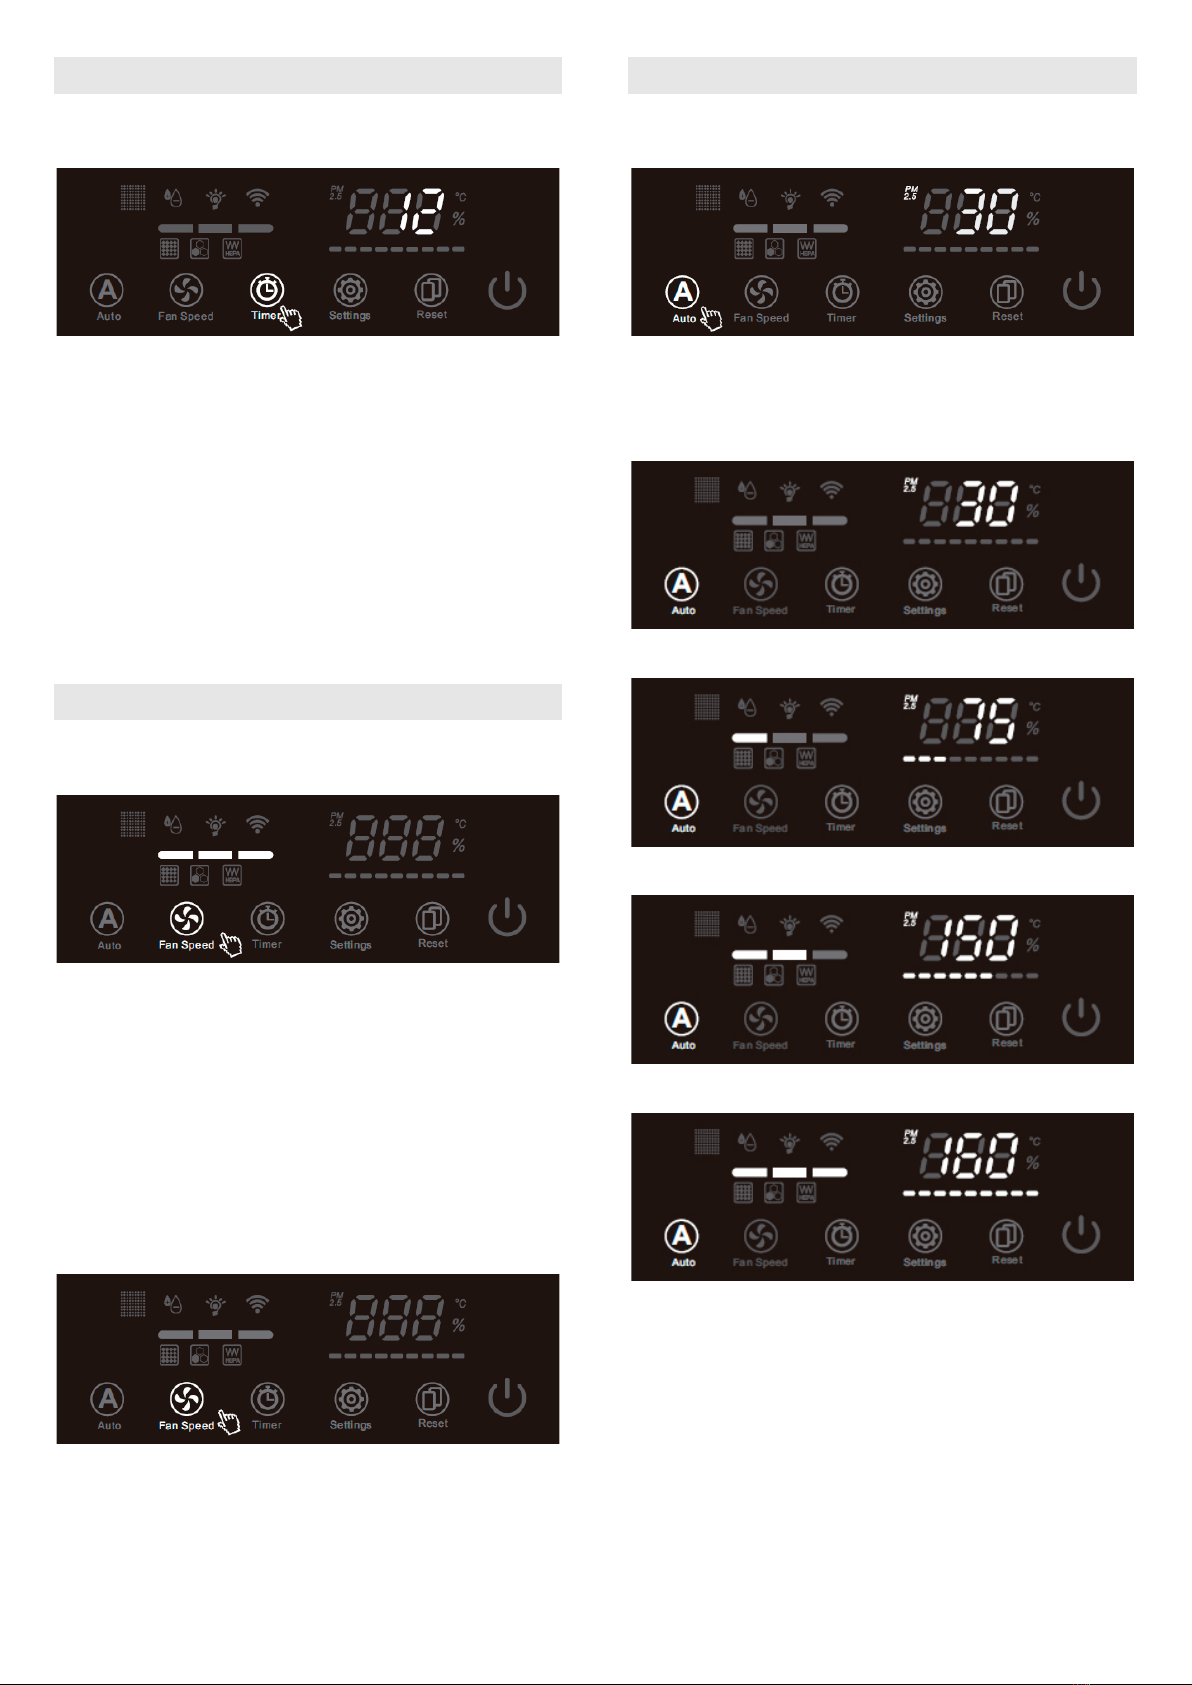
Selección del temporizador
Pulse prolongadamente el botón “Timer”. Arrancará el
modo temporizador.
Pulse repetidamente el botón “Timer”. Podrá seleccionar
un tiempo entre 0 y 12 horas. La función arrancará
después de 5 segundos.
Observaciones:
(1) Pulse el botón para previsualizar el tiempo.
(2) Mantenga el botón si desea cancelar.
(3) Al finalizar la temporización, el aparato vuelve al
modo normal.
Ajuste de velocidad del ventilador
Si la máquina está ajustada en el modo inteligente, no se
puede ajustar la velocidad del ventilador.
Pulse el botón “Fan Speed” para seleccionar la velocidad
del ventilador:
HIGH ALTO
MIDDLE MEDIO
LOW BAJO
Pulse el botón “Fan Speed” durante 3 segundos para
entrar en el modo sueño. Pulse cualquier botón para
detener el modo sueño.
Ajuste inteligente
El aparato dispone de un sensor PM2.5, que comprueba
el nivel de polvo o partículas y muestra el dato.
El indicador de calidad del aire se iluminará después de
pulsar el icono “Auto”. El aparato comprobará la calidad
del aire y controlará el estado de trabajo de manera
automática.
Óptimo
Bueno
Polución media-moderada
Peor polución
Observaciones:
-El indicador de la cantidad de la calidad del aire
significa nivel de calidad del aire y su estado de
trabajo.
-Cuando se escoge el modo inteligente, el aparato
tarda 3 minutos en calentar. El icono “Settings” no
está operativo en este modo.
-Cuando la humedad está por encima del 80%, afecta
a la sensibilidad del sensor. El dato PM2.5 es solo de
referencia.

8
Corrección del mal funcionamiento del PM2.5
Después de usar el sensor PM2.5 durante un largo tiempo,
pequeñas cantidades de partículas se adherirán al sensor
inductivo, lo que podría causar errores.
Si observa una medición muy desviada del rango normal,
le recomendamos que tome como referencia el valor
PM2.5 ofrecido por los servicios meteorológicos de su
zona:
1. Abra la ventana y ventile durante 5 minutos.
2. Pulse prolongadamente el botón “Settings”, hasta oír
un “click”. Habrá entrado en el modo de corrección
del sensor.
3. Cada vez que pulse el botón “Settings”, el valor
numérico de PM2.5 aumenta en 2 µg/m3.
4. Cada vez que pulse el botón “Auto”, el valor
numérico de PM2.5 disminuye en 2 µg/m3.
5. Una vez ajustado el valor, espere 5 segundos y se
guardará.
Restablecimiento del contador de
tiempo de uso de los filtros
Si los iconos de los filtros siempre están parpadeando,
significa que la vida útil de los filtros ha llegado al final,
límpielos o remplácelos por filtros nuevos.
Después de limpiar o reemplazar filtros nuevos, presione
el ícono "Reset". Los íconos de filtro dejarán de parpadear
y la máquina comenzará contar el tiempo de uso de los
nuevos los filtros.
Observación: el icono "Reset" tiene función de
actualización, los datos de PM2.5 se pueden actualizar
después de presionar el icono "Reset".
Pre-filtro
Filtro de carbón activo
Filtro HEPA
Preguntas más frecuentes
Si la máquina no funciona correctamente, compruebe lo
siguiente antes de enviarla para su reparación.
Problema
Comprobación
Solución
No funciona
Compruebe si el
enchufe está
desconectado de la
toma.
El enchufe de
alimentación
debe estar
conectado
correctamente.
Compruebe si la
tapa del filtro está
completamente
instalada.
Recupere la tapa
del filtro
correctamente.
No se
elimina el
olor
¿Hay un olor muy
fuerte en el
entorno de uso?
(Nota: el aire debe
purificarse
continuamente).
Ventilar antes de
poner en marcha
la máquina.
¿Se ha terminado
la vida útil del
filtro de carbón
activado?
Reemplace los
filtros.
Mucho ruido
¿Se quitó la bolsa
de plástico del
filtro?
Saque los filtros
y quite la bolsa
de plástico.
¿Se ha terminado
la vida útil del
filtro HEPA?
Reemplace el
filtro HEPA.
El indicador
de calidad
del aire no
funciona
bien
¿La humedad del
aire es muy alta?
¿Está el aparato
afectado por humo
o esprays?
Lleve el aparato
a otra habitación
para volver a
probar.
Pequeños
cambios del
dato de
humedad o
temperatura
¿Se está utilizando
el aparato en un
área demasiado
grande?
Utilice el aparato
en una
habitación con el
tamaño indicado.
Si el problema persiste después de las inspecciones
anteriores, desconecte la alimentación y envíe el aparato
para su reparación.
9
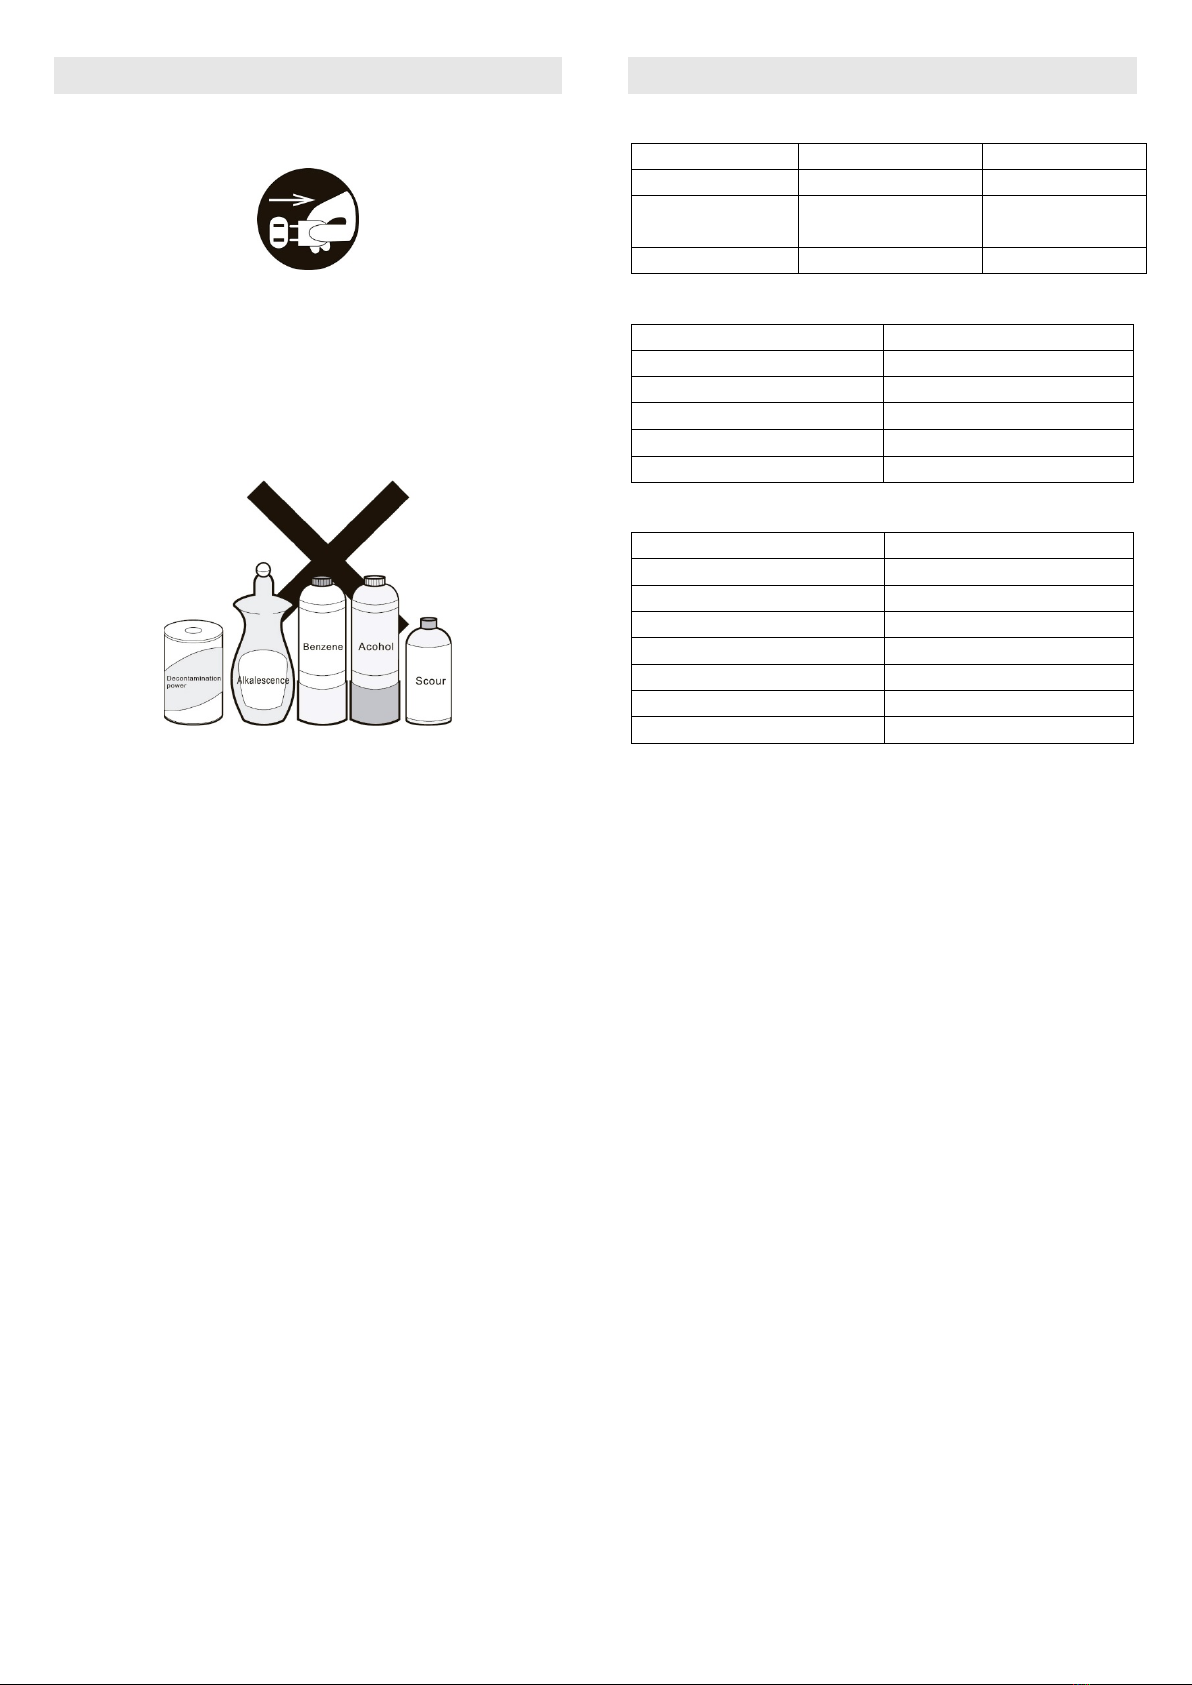
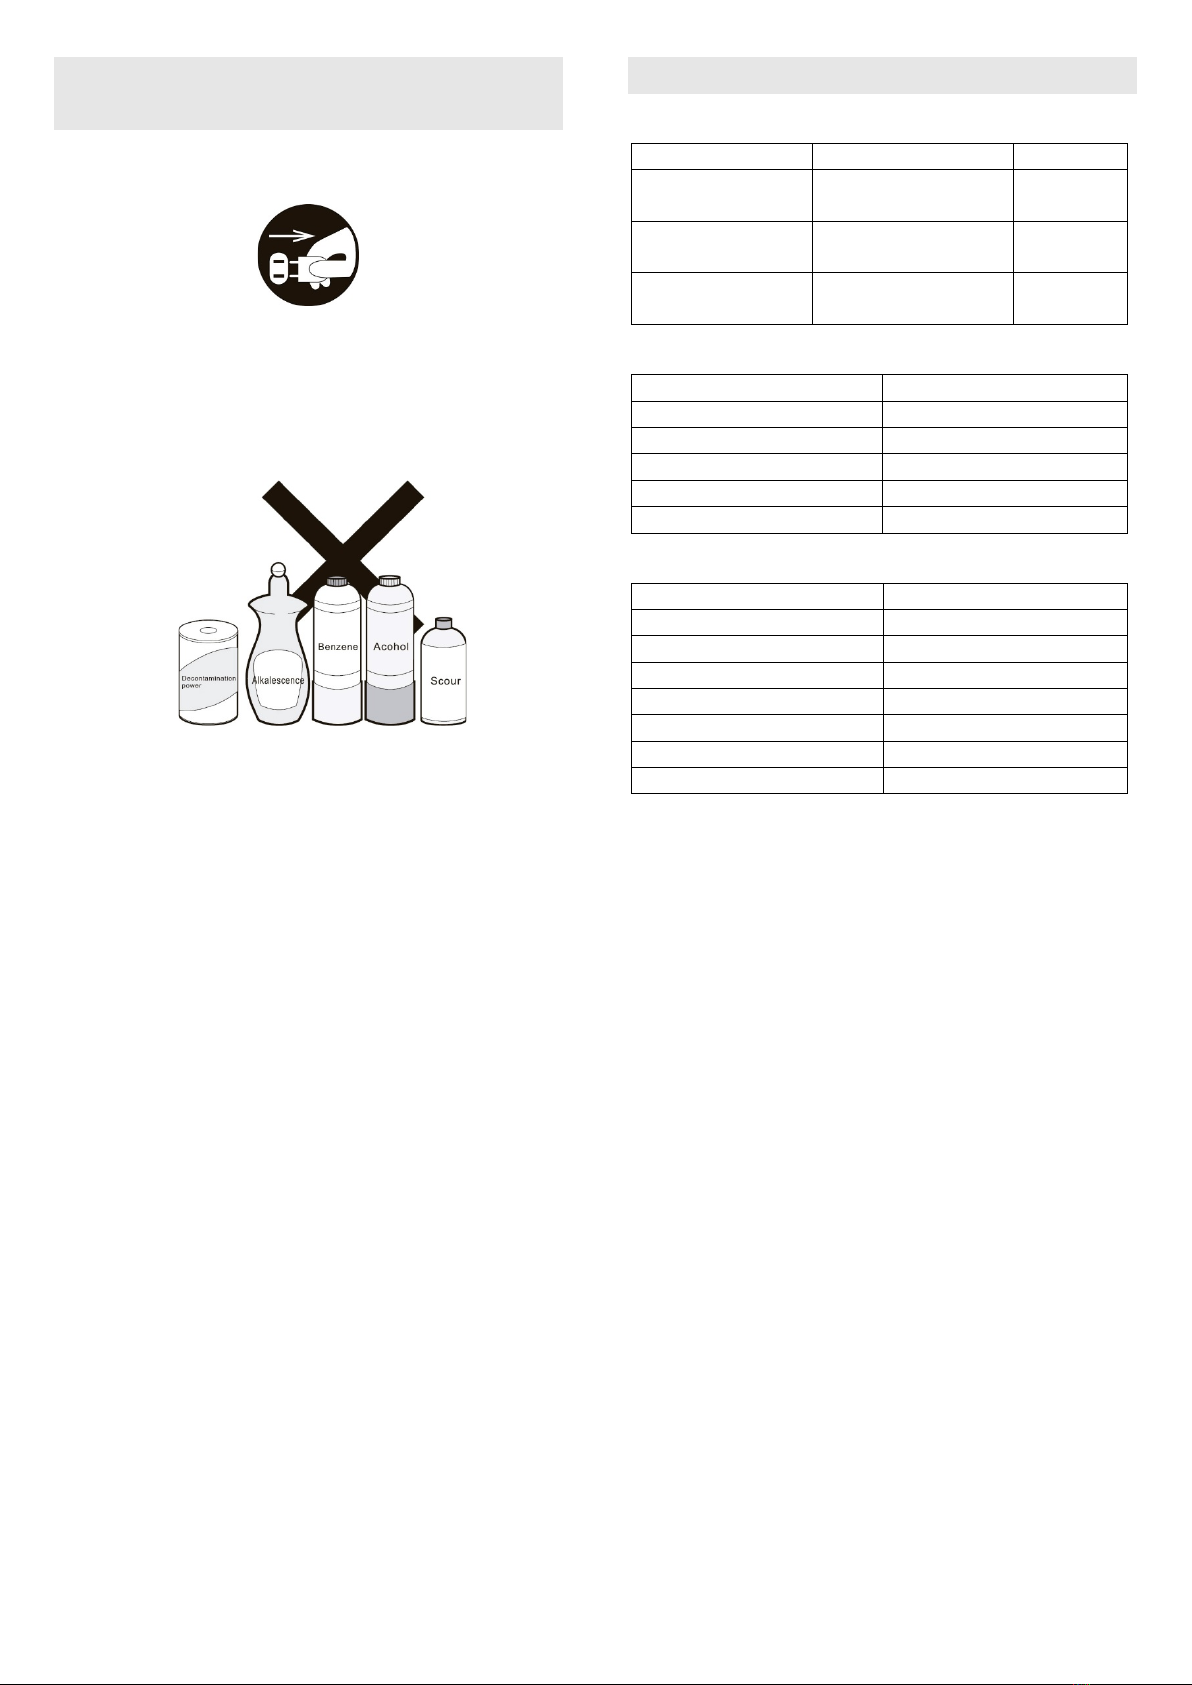
Mantenimiento y limpieza
Retire el enchufe de la corriente antes de la limpieza o el
mantenimiento.
Limpiar el cuerpo del aparato con un paño húmedo y
luego secarlo.
Si la máquina está demasiado sucia, se puede usar
detergente neutro para limpiar, pero diluya el
detergente antes de usarlo.
No limpie la unidad con disolventes.
Datos técnicos
Datos del filtro
Descripción
Tamaño
Vida útil
HEPA
415x315x25 mm
12 meses aprox.
Carbon activo y
fotocatalizador
415x315x15 mm
6 meses aprox.
Pre-filtro
412.5x312.5x21 mm
6 meses aprox.
Datos de la lámpara UV
Descripción
UV lamp
Modelo
T5
Potencia
6 W
Voltaje
220∼240 V
Longitud de onda
254 nm
Vida útil
8000 h
Datos de la unidad
Voltaje:
220-240 V, 50 Hz
Flujo de aire:
≥560 m3/h
Ruido:
≤45 dB(A)
Longitud del cable:
≥1.4 m
Dimensiones:
370 x 265 x 570 mm
Peso:
8.7 kg
Potencia:
72 W
Área aplicable:
60-70 m2

10
Air purifier EN
WARNING (Misusing may cause death)
Please supervise children and avoid
them from touching or using the
machine.
AVOID WET
Do not connect or disconnect the
power with wet hand.
It may cause electrical shock.
NO
DISSASEMBLE
Do not disassembly, repair and
reconstruct.
It may cause fire or damage.
Please send it to the retailer for repair.
FORBID
Do not use the overrun socket or
wiring connector. Do use the rated
voltage.
It may cause fire.
Do plug the power into the socket
completely.
It may cause fire because of heating
or electrical shocking. Do not use the
damaged plug or loose socket.
AVOID WET
Avoid any water on the surface of
the unit.
It may cause short circuit or electrical
shocking.
DISCONNECT
POWER
The appliance must be
disconnected from the supply
mains before cleaning or other
maintenance.
Otherwise the unit may start working
in a sudden which may cause
electrical shocking or hurt.
Do not insert any metal objects into
the unit.
It may cause hurt or electric
shocking.
FORBID
Do not repair it when the cord or
plug is damaged.
It may cause short circuit, electric
shocking or fire.
Please send it to the retailer for repair.
Do clean the
plug termly
If there is dust on the plug, it may
weaken the insulation, even cause
fire.
Take out the plug and clean it with
dry cloth. Please remove the plug
from the socket if not using for a long
period.
ATTENTION (Misusing may cause hurt)
FORBID
Do not power the unit on
when using insecticide in the
room.
Otherwise the insecticide may
be stored in the unit and will
blow out during the normal
working time. It is harmful to
the health.
Please ventilate completely
after having used the
insecticide before turn on the
unit.
Do not use in the room with
lampblack such as kitchen.
It may cause hurt because the
machine is not a ventilator.
Do not blow in any
combustible or fired
cigarette into the unit.
It may cause fire.
Do not use in the watery or
high temperature room such
as the bathroom etc.
Otherwise it may cause
creepage, electric shocking or
fire.
Keep away from alcohol,
organic impregnant or
insecticide.
It may cause cracking short
circuit, electric shocking, hurt
or fire.
Please ventilate timely when
used with fire in the room.
Otherwise it may cause
poisoning of CO, as the
machine is not a ventilator.
Please hold the plug instead
of the cord when unplug the
power.
Otherwise it may cause short
circuit, breaking of the cord,
electric shocking of fire.
Please remove the plug from the socket if any
conditions as below:
-If all switches do not work.
-If the power cord or plug hot singularly.
-If any peculiar smell, exceptional noise or vibration.
-Any other abnormality or failure.
11
If the power cord is damaged, please send it to the retailer
or service center or technician for repairing. Do not
change or repair it by yourself.
Product performance
Pre-filter: effectively removes particle PM10.0 or over
larger.
HEPA: Using a new generation of composite materials,
can effectively remove of particle.
Activated carbon filter: Biosynthesis of walnut shell,
the adsorption area is bigger, it can effectively remove
smoke and formaldehyde.
Photo catalyst: Using titanium dioxide (TiO2) material,
its oxidation function can damage the filter captured the
cell membrane of bacteria o inhibit virus activity.
UV lamp:Bacteria killing rate can reach more than
95 %.
Anion: Negative ion emission.
Ozone: Strong degradation of organic odor and
sterilizing function.
(Ozone and UV function are optional, please refer to the
actual machine for configuration).
Technical features
Air quality intelligent detection: built-in PM2.5 particle
sensor.
Convenient control.
Digital display: PM2.5, temperature, humidity, timer
indicator, intuitive and easy to understand.
Automatic alarm: filer and UV lamp replacement
warning indicator.
Standby power ≤0.5 W.
Quiet motor.
Digital indicators
Temperature
Humidity
Timer
PM2.5
Placement
Please keep the machine air inlet and outlet 30 cm or more
away from the wall and home furniture.
Do not use the machine in front of heat source outlet.
Power supply
AC voltage
Please don’t connect this machine with wrong voltage of
power supply, inserting the plug firmly into the power
socket.
Power plug
Disassembling filter cover
Disassembly diagram
Hold the unit with one hand and open the front cover with
another hand.
Installation diagram
Insert the two pins of the bottom side into the two slots of
the main body.

12
Installation of the filters
Take off right front cover.
Take out the pre-filter, HEPA, activated carbon + photo
catalyst filter, and tear off its PE bag. Please install filters
sequentially.
Take off right side cover
Install activated carbon
+ photo catalyst filter
Install HEPA
Install pre-filter
UV lamp replacing
Photo sensor is built-in the device, if the UV light is very
weak or not lighted, the UV icon on the product operating
panel will be flashing; it means UV lamp should be
replaced:
1. Take off the filter cover, and take out all filters. then
UV lamp can be replaced.
2. Hold the UV lamp and rotate it for 90 clockwise or
anticlockwise, then take it out.
3. Hold the UV lamp and rotate it for 90 clockwise or
anticlockwise, then install it well.
Power setting
Press the “POWER” icon on the product operating panel,
machine is entered the initial working status.
Function setting
Press the “Settings” icon on the product operating panel.
The anions and UV lamp can be chosen individually or
together.
Anions
UV lamp
Optional function

13
Timer setting
Long press “Timer” icon. The timing mode will start.
Press “Timer” icon several times. You can choose a time
from 0 to 12 hours. The function will start after 5 seconds.
Remarks:
(1) Press “Timer” button to preview time set.
(2) Keep pressing “Timer” button if you want to cancel
time setting.
(3) When time setting is finished, the unit turns to
normal working mode.
Fan speed setting
If the unit is set as intelligent mode, the fan speed can’t
be adjusted.
Press the “Fan Speed” button to select the fan speed:
HIGH - MIDDLE - LOW
If you keep pressing it for 3 seconds, you will start the
sleep mode. Press any icon to cancel.
Intelligent setting
PM2.5 sensor is built-in. It checks the dust or particles
and display it by data.
The air quality indicator will be lighted after pressing the
“Auto” button. The machine checks the air quality and
control its working status automatically.
Best
Good
Mild-to-moderate polluted
Worst polluted
Remarks:
-The quantity of the air quality indicator means air
quality level and its working status.
-When you choose the intelligent mode, the device
will take 3 minutes to warm up, "Settings" icon is not
operative in this mode.
-When air humidity is above 80%, it will affect the
sensitivity of sensor, the PM2.5 data is just for your
reference.
PM2.5 abnormal performance correcting
After using the PM2.5 sensor for a long time, trace
amounts of particulate will adhere to the sensor inductive
head, it may cause the PM2.5 numerical display
abnormal.
When you find PM2.5 numerical severely deviated from
the normal range, here we advise you collect it as follow
steps
based on the weather forecast's PM2.5 numerical in your
city.
14
1. Open the window ventilated for 5 minutes (PM2.5
sensor will re-collection current environmental data).
2. Long press "function" icon, after heard a "click",
showing it antomatic switch to PM2.5 display
window, then enter PM2.5 correcting mode.
3. Each time you press "function" icon, the machine's
PM2.5 numerical will increase 2 ug/m3, each time
you press "smart" icon,
4. PM2.5 numerical will decrease 2 µg/m3.
5. When the PM2.5 numerical adjust to the PM2.5
numerical of your city's weather forecast, waiting 5
seconds, PM2.5 sensor collection finished.
Filters life time reset
If the filter icons are always flashing, it means the filters
life time comes to the end. Please clean or replace with
new filters.
After cleaning or replacing the filters, press “Reset” icon.
Filter icons will stop flashing and the unit will start to
record the filters using time.
Remark: “Reset” icon has refresh function. PM2.5 data
can be refreshed after pressing the “Reset” icon.
Pre-filter
Activated carbon
HEPA filter
FAQ
If the machine can't work properly, please kindly check
as below before you send it out for repair.
Problem
Checking
methods
Solution
Do not work
Please check if the
plug is
disconnected from
the socket.
Power plug
should be
plugged properly
Please check if the
filter cover is
installed
completely
Recover the
filter cover
correctly
Odor cannot
be removed
Is there a very
strong odor in the
using
environment?
(Notes: air should
be purified
continuously)
Suggesting to
ventilate, then
start up the
machine.
Does the using life
time for activated
carbon filter come
to the end?
Please replace
new filters.
High noise
Is the PE bag for
filter removed?
Please take out
filters and tear
off PE bag.
Does the using life
time for HEPA
come to the end?
Please replace
new HEPA.
Air quality
indicator
doesn’t
work
properly
Is the air humidity
very high?
Is the machine
affected by fume
or sprays?
Please move the
machine to
another
room to test
again.
Small
changes for
humidity or
temperature
data
Is the machine
using area too big?
Please use this
machine in
applicable room.
If the problem still existed after above inspections, please
disconnect the power and send it for repair.
15
Maintenance and cleaning
instruction
Please remove plug from the socket before cleaning and
maintenance.
Cleaning the body for this device by damp cloth, then
wipe it dry.
If machine is too dirty, neutral detergent can be used
for cleaning, but please dilute the detergent before use.
Do not clean the unit with solvent.
TECHNICAL PARAMETERS
Filter parameters
Description
Size
Life time
HEPA
250x100x20 mm
About 12
months
Activated carbon
+ photo catalyst
238x100x10 mm
About 6
months
Pre-filter
412.5x312.5x21mm
About 6
months
UV parameters
Description:
UV lamp
Model:
T5
Power rating:
6 W
Voltage:
220∼240 V
Wave length:
254 nm
Life time:
8000 h
Parameters of the unit
Voltage supply:
220-240 V, 50 Hz
Air flow volume:
≥560 m3/h
Noise level:
≤45 dB(A)
Length of power cord:
≥1.4 m
Product size:
370 x 265 x 570 mm
Net weight:
8.7 kg
Power rating:
72 W
Applicable area:
60-70 m2

Your trusted brand
Talleres Mestraitua S.L.
Txori-erri Etorbidea, 60
T: (+34)944530388 - F: (+34)944711725
mestra@mestra.es - www.mestra.es
48150 SONDIKA - BILBAO - ESPAÑA
Table of contents
Languages:
Other Mestra Air Cleaner manuals


