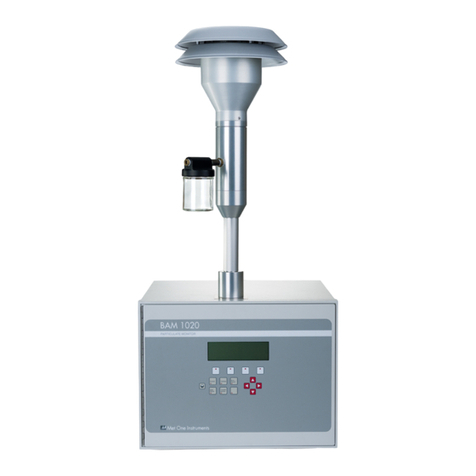
Met One Instruments BAM-1020 Installation and operating instructions

Met One Instruments, Inc.
1600 NW Washington Blvd.
Grants Pass, OR 97526
Telephone: (541) 471-7111
Facsimile: (541) 471-7116
www.metone.com
BAM-1020 Leak Check Addendum - © Copyright 2018 Met One Instruments, Inc. All Rights Reserved worldwide. No part of
this publication may be reproduced, transmitted, transcribed, stored in a retrieval system, or translated into any other language in any
form without the express written permission of Met One Instruments, Inc.
BAM-1020 LEAK CHECK
ADDENDUM
BAM-1020-9804LEAK CHECK REV A

Page 2 BAM-1020-9804 Leak Check REV A

BAM-1020-9804 Leak Check REV A Page 3
Table of Contents
1INTRODUCTION 4
1.1 About This Addendum ......................................................................................................4
1.2 Technical Service .............................................................................................................4
2Leak Checks 5
2.1 Basic Leak Check.............................................................................................................5
2.2 Advanced Leak Checks....................................................................................................7
2.2.1 Total System Leak Test....................................................................................................7
2.2.2 Lower Leak Test...............................................................................................................8
2.2.3 Filter Tape Leak Test........................................................................................................9
Table of Figures
Figure 2-1 BX-305 Leak Check Valve Installed on Inlet Tube.............................................................5
Figure 2-2 Nozzle Seal Tool with Hole Under the Nozzle...................................................................7
Figure 2-3 Nozzle Seal Tool with Solid Side Under the Nozzle ..........................................................8

Page 4 BAM-1020-9804 Leak Check REV A
1 INTRODUCTION
1.1 About This Addendum
This addendum has been written to address the minor disparity seen when performing leak checks
with different types of filter tapes with the BAM-1020 monitor. A future revision of the product
manual will incorporate the tests and troubleshooting located within this document.
1.2 Technical Service
Should support still be required after consulting the printed documentation, contact one of the expert
Met One Instruments, Inc. Technical Service representatives during normal business hours of 7:00
a.m. to 4:00 p.m. Pacific Standard Time, Monday through Friday. In addition, technical information
and service bulletins are often posted on our website. Please contact us and obtain a Return
Authorization (RA) number before sending any equipment back to the factory. This allows us to
track and schedule service work and to expedite customer service.
Contact
Information:
Address:
Met One Instruments, Inc.
1600 Washington Blvd
Grants Pass, Oregon
97526 U.S.A.
Please have the instrument serial number available when contacting the manufacturer. On most
models manufactured by Met One Instruments, it will be located on a silver product label on the unit,
and also printed on the calibration certificate. The serial number will begin with a letter and be
followed by a unique five-digit number such as U15915.

BAM-1020-9804 Leak Check REV A Page 5
2 Leak Checks
The BAM-1020 requires periodic leak checks to ensure that the sample flow is not being diluted.
Most leaks will occur at the nozzle - tape interface. A leak may also be caused by degraded O-rings,
or an improper inlet tube to receiver connection.
NOTE: Only Met One Instruments, Inc. factory authorized tape should be used with the BAM-1020
monitor. Tape supplied by other vendors has not been tested or approved for use and any data
collected using third party filter tape will not be considered valid.
Required Tools: Leak Check Valve (Part No. BX-305 or included as part of the BX-302)
Minimum Suggested Interval: Monthly and whenever the filter tape is changed.
2.1 Basic Leak Check
Use the following steps to perform the basic leak check:
1. Go to the TEST>PUMP menu. This will stop the current sample, if one is in progress.
2. Remove the PM10 size selective inlet from the sample tube and install the BX-305 leak check
valve (or BX-302 zero filter). If a PM2.5 cyclone is being used, it should be left in place and
included in the leak check. Verify that the leak valve is in the open position,
3. Press the PUMP button. The BAM-1020 will automatically lower the nozzle (if needed) and
start the pump.
4. Allow sufficient time for the flow to stabilize at 16.7 LPM on the BAM-1020 display and then
press the LEAK button. Verify the status changes to indicate LEAK ON.
5. Turn the BX-305 leak valve on the inlet to the closed position as shown in Figure 2-1.
Figure 2-1 BX-305 Leak Check Valve Installed on Inlet Tube
6. The pump flow rate should drop below 1.5 LPM.
a. If the flow rate is 1.5 LPM or less, the leak check is satisfactory. Proceed to step 7.
b. If the flow rate is greater than 1.5 LPM, the leak check fails. Proceed to step 7 and
then repeat the leak test after completing step 11. If it fails a second time, go to
section 2.2.
7. Slowly open the BX-305 valve to restore normal flow through the BAM-1020.
8. Press the PUMP button to turn off the pump and then go to the TEST > TAPE menu.

Page 6 BAM-1020-9804 Leak Check REV A
9. Advance the tape forward seven windows by pressing the UP arrow to set the WINDOWS
field to 7 and then pressing the FWD button. The nozzle should raise automatically and then
advance the tape. If the last sample spot is not clearly visible, advance the tape one window
at a time until it is.
10.Inspect the last sample spot on the tape roll. Examine it closely for any abnormal
deformation or holes. The presence of abnormalities indicates debris build up at that location
of the nozzle / vane interface. These indicate areas of the interface that may require
additional cleaning. Note that in low concentrations the sample spot may not be easily
located.
11.Remove the tape and thoroughly clean the nozzle / vane interface as instructed in the
MAINTENANCE, DIAGNOSTICS and TROUBLESHOOTING section of the BAM-1020
Operation Manual. Pay particular attention to areas shown to have build up in step 10 above.
12.Reinstall the filter tape as directed in the Filter Tape Loading section of the BAM-1020
Operation Manual. If step 6 failed, repeat the above leak check procedure now. If step 6
passed, continue on to step 13.
13.Exit to the Main Menu
14.Remove the BX-305 and replace the PM10 size selective inlet.
15.Resume normal sampling operations.

BAM-1020-9804 Leak Check REV A Page 7
2.2 Advanced Leak Checks
If the basic leak check detailed in section 2.1 fails, the following procedures will isolate the problem.
Required Tools: Leak Check Valve (Met One Instruments Part No. BX-305 or BX-302)
Nozzle Seal Tool (Part No. 7440)
2.2.1 Total System Leak Test
This procedure will create a positive seal at the nozzle / vane interface. With this seal in place, the
rest of the flow system can be tested for leaks.
The following procedure assumes steps 1 through 6 in section 2.1 have just been completed and a
flow rate of greater than 1.5 LPM was found.
1. If running, press the PUMP button to turn off the pump. Slowly open the BX-305 valve and
then press the NOZZLE button to raise the nozzle.
2. Remove the filter tape from beneath the nozzle and insert the Nozzle Seal Tool with the hole
positioned beneath the nozzle. See Figure 2-2.
Figure 2-2 Nozzle Seal Tool with Hole Under the Nozzle
3. Verify the BX-305 valve is still mounted on the inlet and is in the open position.
4. In the TEST>PUMP menu. Press the PUMP button. The BAM-1020 will automatically lower
the nozzle and start the pump.
5. Allow sufficient time for the flow to stabilize at 16.7 LPM on the BAM-1020 display and then
press the LEAK button. Verify the status changes to indicate LEAK ON.
6. Turn the BX-305 leak valve on the inlet to the closed position as shown in Figure 2-1.
7. The pump flow rate should drop below 0.3 LPM.
a. If the flow rate is 0.3 LPM or less, the leak check is satisfactory. The high flow rate
observed during the basic leak test is located at the nozzle / tape interface. Proceed
to section 2.2.3
b. If the flow rate is greater than 0.3 LPM, then there is a leak somewhere in the system.
Go to section 2.2.2 to locate the leak.

Page 8 BAM-1020-9804 Leak Check REV A
2.2.2 Lower Leak Test
This procedure will split the flow system at the nozzle / vane interface. With this seal in place, only
the portion of the flow system downstream of this location will be placed under vacuum and tested
for leaks.
The following procedure assumes the steps listed in section 2.2.1 were performed and a leak of
greater than 0.3 LPM was found.
1. If running, press the PUMP button to turn off the pump. Then, press the NOZZLE button to
raise the nozzle.
2. Rotate the Nozzle Seal Tool so that the solid portion of the tool is positioned beneath the
nozzle. See Figure 2-3.
Figure 2-3 Nozzle Seal Tool with Solid Side Under the Nozzle
3. Verify the LEAK status still indicates LEAK ON. If not, press the LEAK button to turn it on
and then press the PUMP button. The BAM-1020 should automatically lower the nozzle and
start the pump.
4. The pump flow rate should drop below 0.3 LPM.
a. If the flow rate is 0.3 LPM or less, the leak check is satisfactory. This confirms that the
leak is above the nozzle. Investigate all mating connections and O-rings in the flow
path before the nozzle / vane interface to locate and correct the leak.
b. If the flow rate is greater than 0.3 LPM, then there is a leak downstream of the nozzle.
Investigate all mating connections and O-rings in the flow path after the nozzle / vane
interface to locate and correct the leak.
c. Once resolved, repeat the steps listed in section 2.1 to verify the flow system integrity.

BAM-1020-9804 Leak Check REV A Page 9
2.2.3 Filter Tape Leak Test
Use this procedure to assess the actual leak rate at the nozzle / tape interface. It is assumed that
the Basic Leak Check and the Total System Leak Test have both already been performed and a
high flow rate (greater than 1.5 LPM) at the nozzle / tape interface was found. It is also assumed
that the filter tape is still not installed.
Required Tools: Certified Calibration Transfer Standard (CTS) such as the BX-307
Nozzle Seal Tool (Part No. 7440)
Filter Tape (Part No. 460180)
1. Remove the BX-305 from the sample tube and install the calibration transfer standard (CTS).
2. Navigate to the TEST>PUMP menu.
3. The Nozzle Seal tool may already be installed with the hole positioned beneath the nozzle
(see Figure 2-2). If this is not the case, press the NOZZLE button to raise the nozzle (if
needed), position the sealing tool in this configuration, and then lower the nozzle.
4. If the LEAK status is set to LEAK ON, press the LEAK button to set the status to LEAK OFF.
5. Press the PUMP button to start the pump.
6. Allow at least 2-3 minutes for the flow to fully stabilize. When the flow rate stabilizes, write
down the CTS flow rate value. This is the “Without Tape” value.
NOTE: If after 5 minutes, the flow still has minor fluctuations, estimate the average flow rate
and use that for the “Without Tape” value.
7. Stop the pump and raise the nozzle.
8. Remove the Nozzle Seal Tool.
9. Place a three-inch-long piece of filter tape directly below the nozzle.
10.Press the PUMP button. The BAM-1020 should automatically lower the nozzle onto the strip
of tape and start the pump.
11.When the flow rate stabilizes, write down the CTS flow rate value. This is the “With Tape”
value.
12.Stop the pump and raise the nozzle.
13.Remove the strip of filter tape.
14.Subtract the “With Tape” value from the “Without Tape” value using the following equation:
WithoutTape –WithTape = LeakRate
The result should be a positive value of 0.3 LPM or less. A typical example might look like
this: 16.71 LPM –16.58 LPM = 0.13 LPM
a. If the difference is 0.3 LPM, or less, the leak test passes. Record the results (as
needed), remove all test equipment, and resume normal sampling operations.
b. If the difference is greater than 0.3 LPM, an out of tolerance leak exists at the
nozzle / tape interface. Thoroughly clean the nozzle and vane area and then
perform this test again. Repeat this test. If after a couple of attempts this test still
fails, contact the Met One Instruments, Inc. service department (see section 1.2)
for assistance.
Other manuals for BAM-1020
4
Table of contents
Other Met One Instruments Monitor manuals

Met One Instruments
Met One Instruments AEROCET-380 User manual

Met One Instruments
Met One Instruments BAM 1022 Installation manual

Met One Instruments
Met One Instruments BAM-1020 User manual

Met One Instruments
Met One Instruments BAM-1020 User manual

Met One Instruments
Met One Instruments C-12 User manual

Met One Instruments
Met One Instruments E-Sampler User manual