Metabyte Wicked3D eyeSCREAM User manual

Wicked3DTM eyeSCREAMTM
Stereoscopic Eyewear System
QUICKSTART GUIDE
Copyright 1998 Metabyte, Inc. All rights reserved. Metabyte, Wicked3D, eyeSCREAM and DriveThru are trademarks
and/or registered trademarks of Metabyte, Inc. Copyright 1998 3Dfx Interactive, Inc. The 3Dfx Interactive logo, Voodoo
Graphics, Voodoo Rush and Voodoo2 are trademarks and/or registered trademarks of 3Dfx Interactive, Inc. All rights
reserved. This product may be covered by one or more of the following U.S. patents: 5,724,561 5,740,343. Copyright All
other product names are the service marks, trademarks, or registered trademarks of their respective holders.
Disclaimer: Metabyte, Inc. reserves the right to make changes to this document and to the product specification without
notice. While every effort is made to ensure that the information contained in this document is accurate and reliable,
Metabyte assumes no responsibility for any errors, omissions or changes. No reproduction of this document is allowed
without the written permission of Metabyte, Inc.
ESQS Ver 1.0 1-25-99 AKC
1
Wicked3D eyeSCREAM QuickStart Guide
We all know that you purchased this Wicked3D eyeSCREAM system to enhance your 3D gaming
experience. You want to play games, not read a long and boring manual! Well, if you don’t read anything
else, please take some time to read through this QuickStart Guide. Follow the 6 easy sections to properly
install and configure your eyeSCREAM system. If you do, you’ll quickly learn to make the most of your
Wicked3D eyeSCREAM system and your games will never look better.
Sections:
1. Installing eyeSCREAM hardware
2. Installing eyeSCREAM software/drivers
3. Understanding eyeSCREAM
4. eyeSCREAM test
5. Configuring eyeSCREAM for Direct3D Games
6. Configuring eyeSCREAM for Glide Games
Section 1: Installing the eyeSCREAM hardware:
Note: These instructions assume that a Wicked3D or other eyeSCREAM-compatible Voodoo2 3D
accelerator card is properly installed in your system. If your 3D accelerator hardware is not yet
installed, please follow its manufacturer’s instructions to install the 3D accelerator hardware prior to
installing eyeSCREAM.
1. As a precaution to protect your PC and the eyeSCREAM hardware, shut down your system and turn off
the power to your computer before beginning installation.
Note: To avoid the chance of electric shock to you and damage to your computer and
components, we strongly recommend disconnecting the power supply cord from your
computer during the installation process.
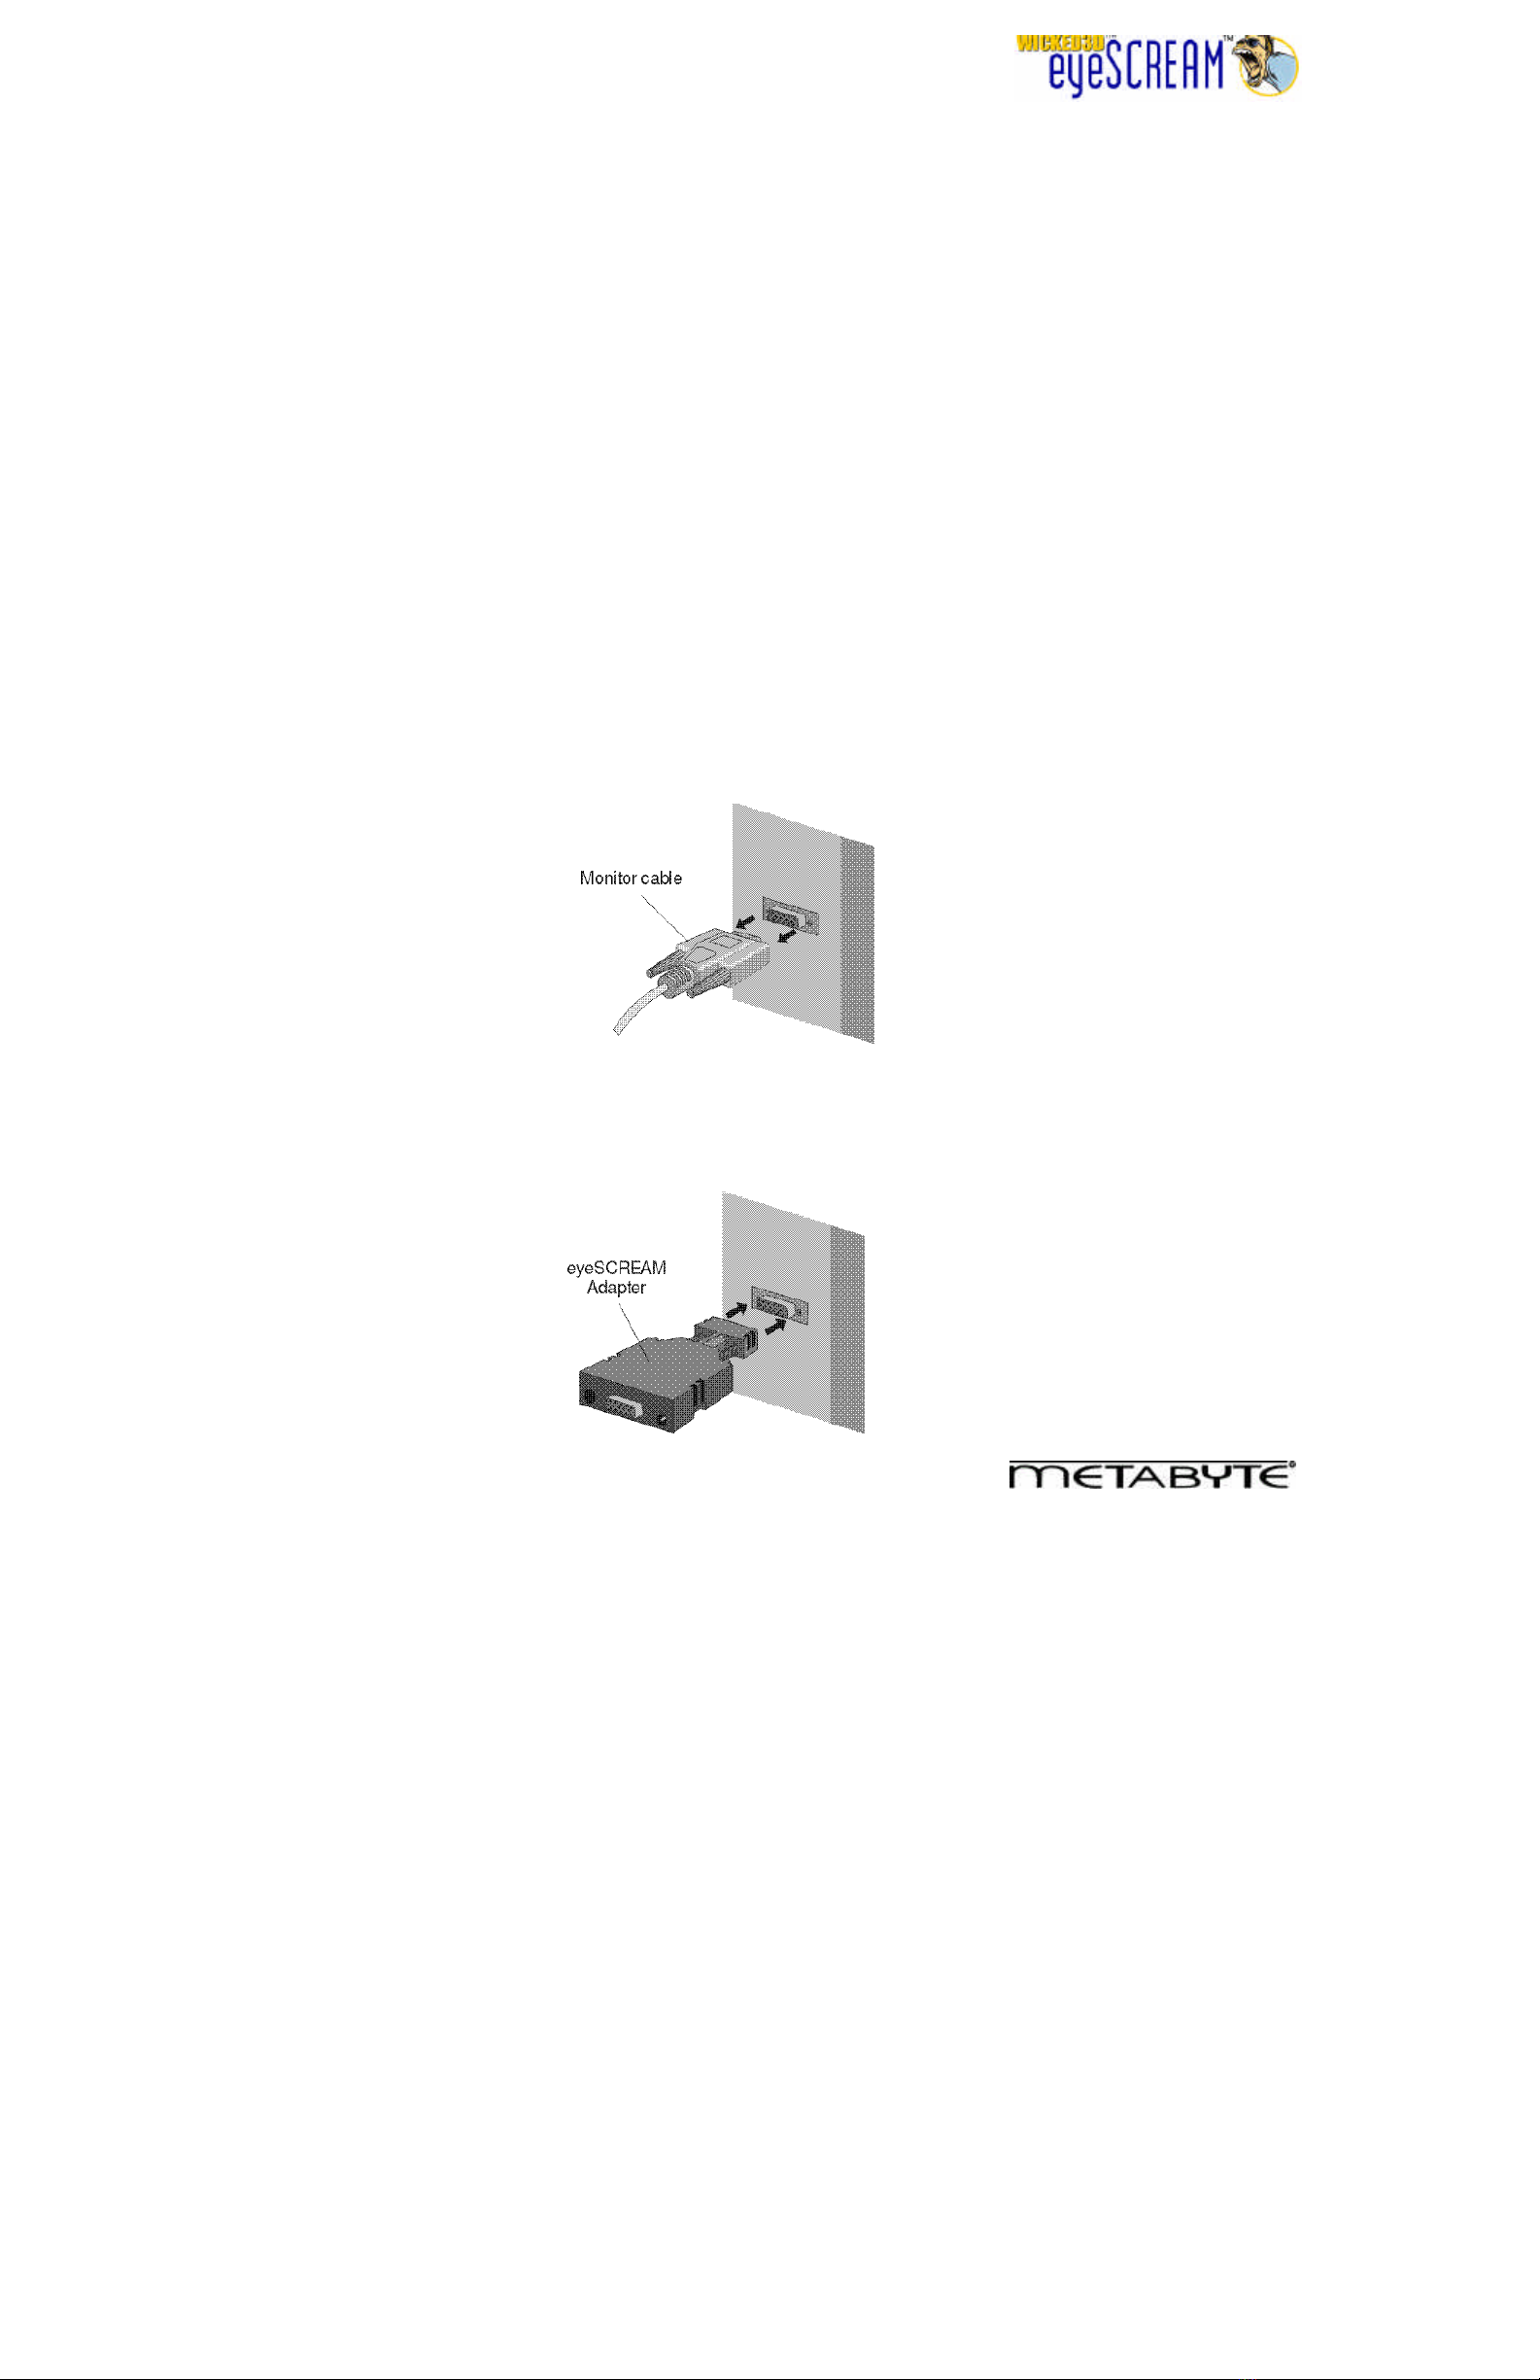
2. Locate the VGA cable that leads from your monitor to your PC. Disconnect the end of the cable that
attaches to your PC.
3. Attach the narrow end of the eyeSCREAM Adapter to the same VGA port that your monitor cable was
previously attached to. Secure the eyeSCREAM Adapter to your PC by fastening the screws on the
eyeSCREAM Adapter.
2
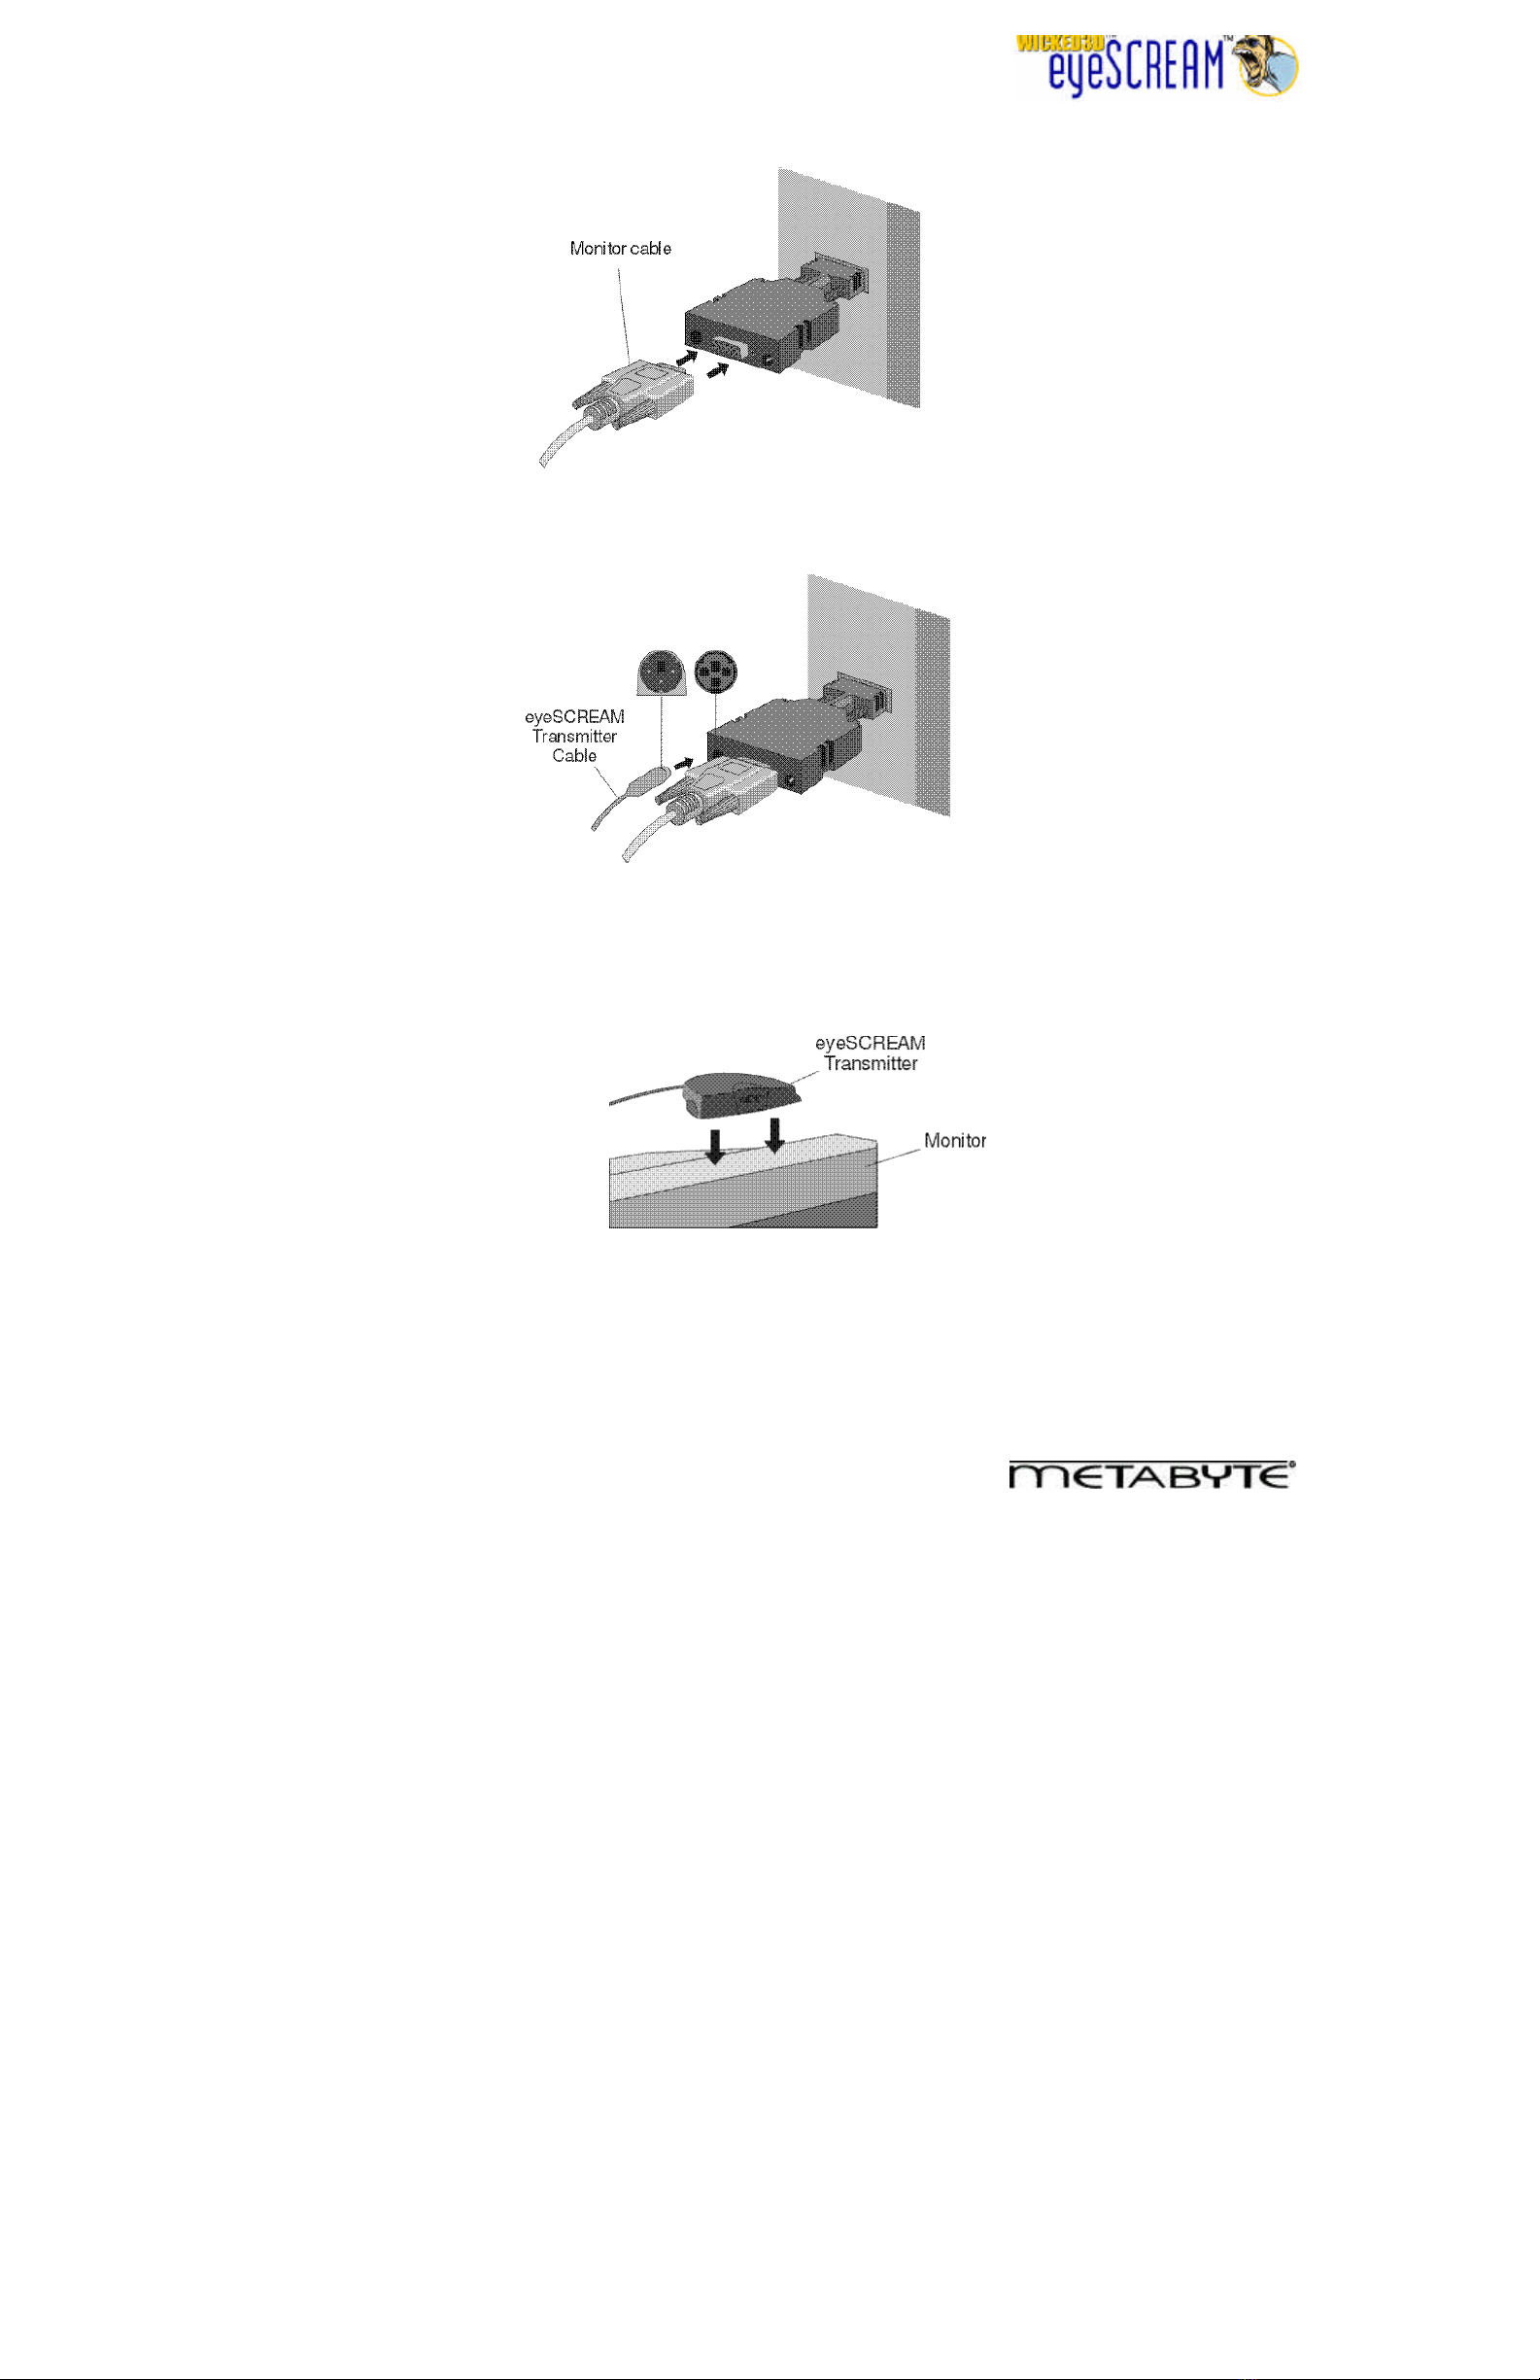
4. Re-attach the monitor cable to the wide end of the eyeSCREAM Adapter.
5. Attach the eyeSCREAM Transmitter cable to the appropriate connector on the wide end of the
eyeSCREAM Adapter.
6. Place the eyeSCREAM Transmitter on top of your monitor or, if you prefer, another flat surface near the
monitor. There must be a direct line of sight between the eyeSCREAM Transmitter and the
eyeSCREAM Eyewear while viewing the monitor. You can use the retractable stand on the bottom of
the transmitter to adjust the angle at which the Transmitter sits.
3
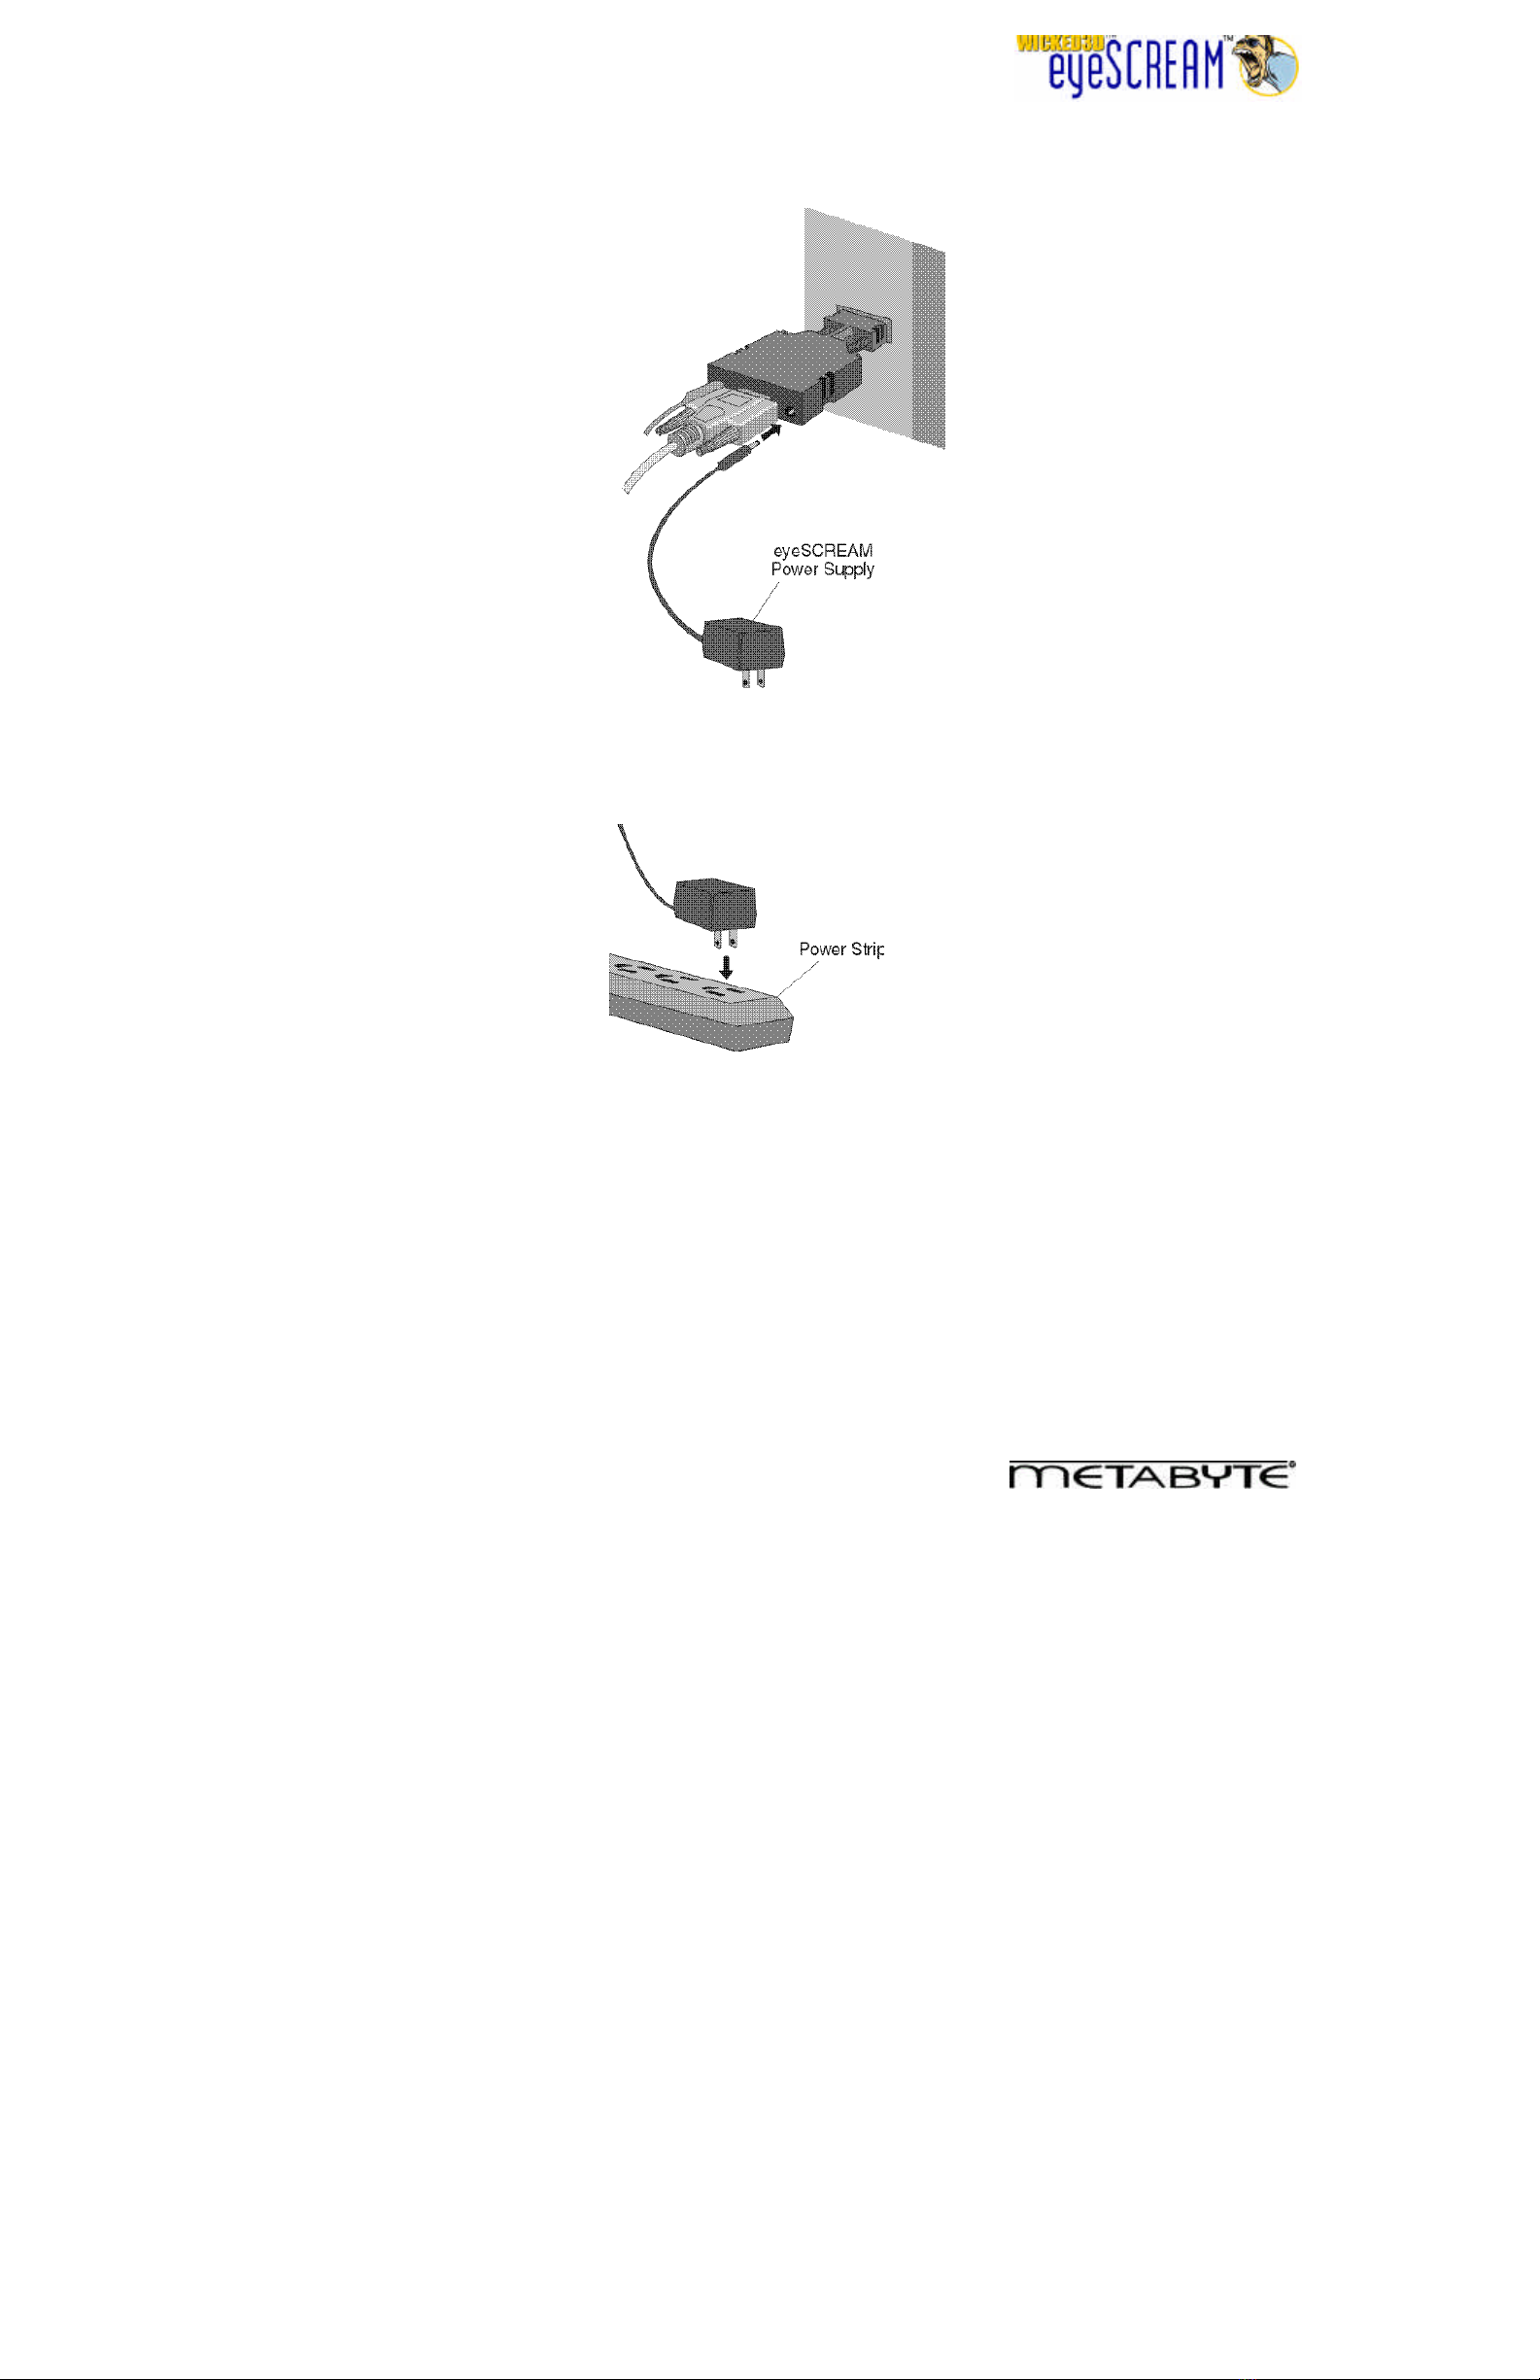
7. Attach the eyeSCREAM power supply to the appropriate connector on the wide end of the eyeSCREAM
Adapter.
8. Finally, attach the eyeSCREAM power supply to a standard power outlet or power strip.
Section 2: Installing the eyeSCREAM software/drivers:
Upon successfully installing the Wicked3D eyeSCREAM hardware, use the following installation procedures
to install the Wicked3D eyeSCREAM software in Windows 95 or Windows 98.
Note1: Installing these drivers will replace your current 3D graphics card (Voodoo2) drivers. This is
required for full eyeSCREAM software functionality
Note2: If you have a Wicked3D featuring Voodoo2 or Wicked3D Vengeance product, you do not need
to install the eyeSCREAM software. Wicked3D 3D graphics accelerators have eyeSCREAM support
built-in. Install the latest versions of the software for your Wicked3D product instead.
4
1. Turn on your system and start Windows 95/98.
2. Place your Wicked3D eyeSCREAM CD in your CD ROM drive.
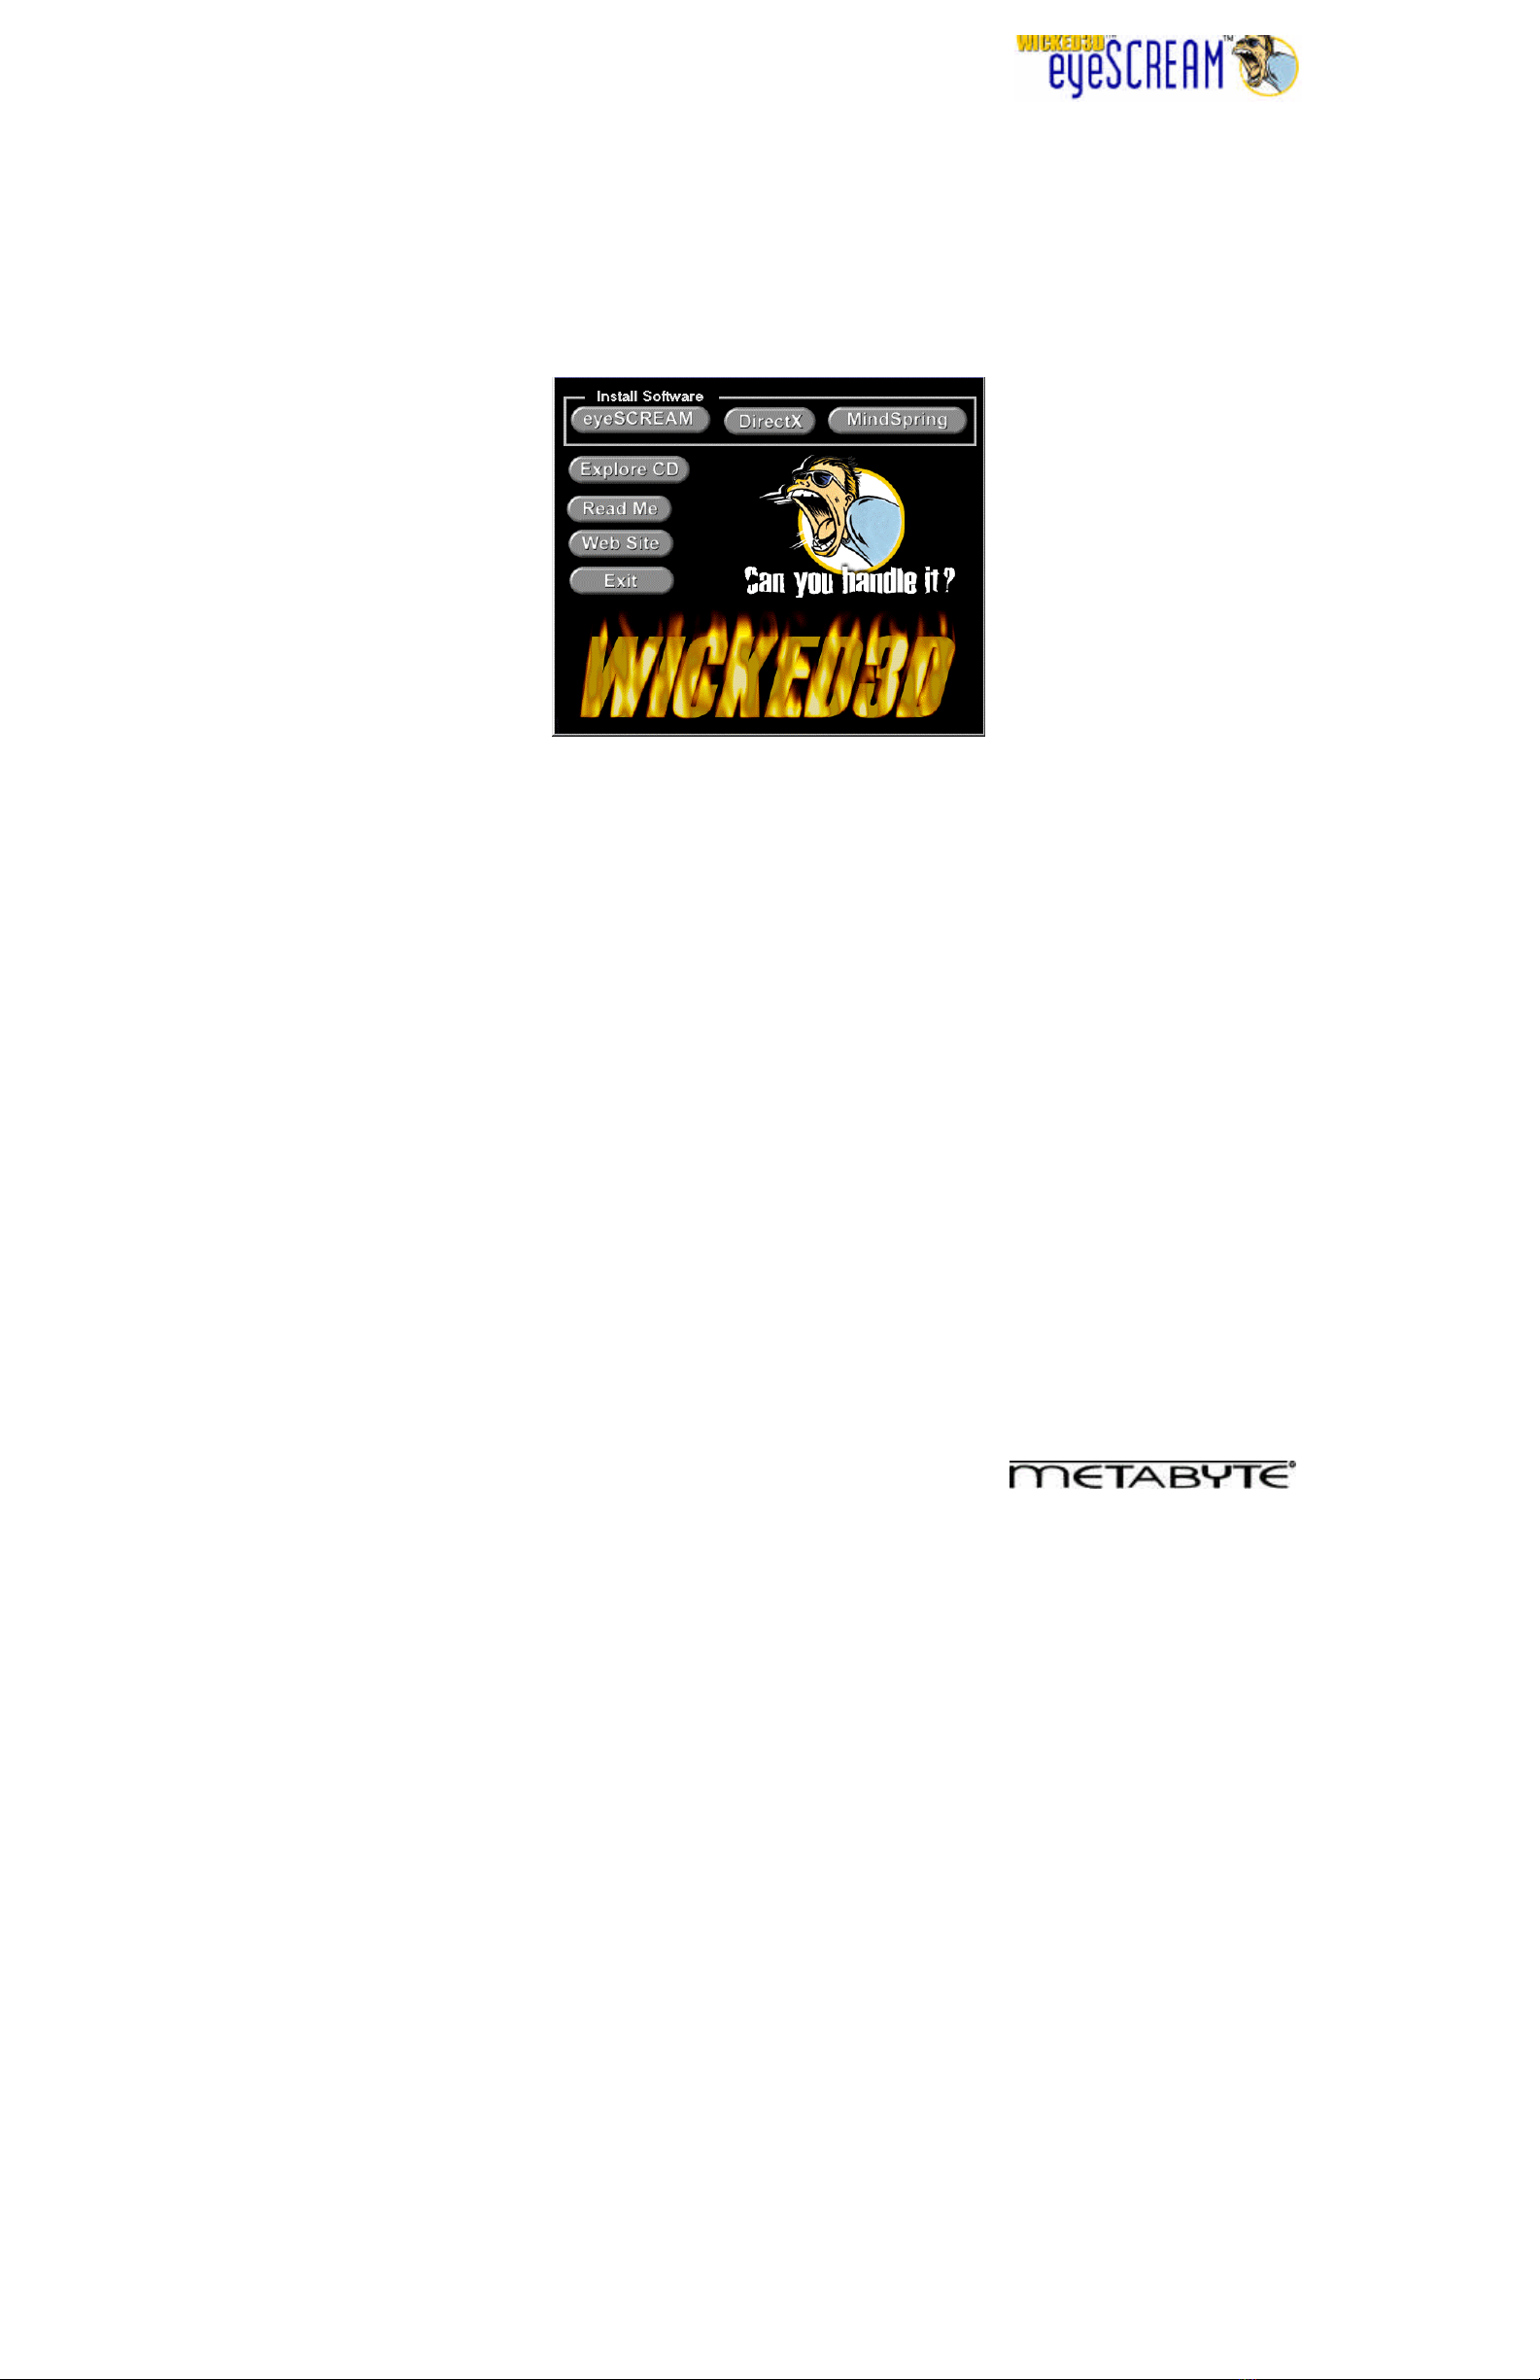
3. The Windows 95/98 Auto-run feature will start, and you will be given a pop-up menu with the following
choices: “Install Wicked3D eyeSCREAM software”, “Install DirectX 6”, “Install MindSpring software”, or
“Explore CD”.
3a. If the menu does not automatically show up: From the Start menu, choose Run…, then Browse.
Double-click on your CD-ROM drive and select AutoRun.exe. Once you return to the Run dialog box,
click on OK.
4. Click on the “eyeSCREAM” button in the “Install Software” section. You will receive a popup dialogue
box with "InstallShield Self-extracting EXE" on the title bar. The message reads "This will install
Wicked3D eyeSCREAM. Do you wish to continue?" Click the Yes button.
5. InstallShield will extract setup files to your hard drive. After doing so, you will receive the "Software
License Agreement" dialogue box. Read the Software License Agreement. Click the Yes button to
accept the terms and continue the installation procedure.
Note: Clicking the No button will terminate the setup program.
6. You will then receive a "Medical Warning" dialogue box. Carefully read the eyeSCREAMTM Medical
Warning. Click the Yes button to accept the terms and continue the installation procedure.
Note: Clicking the No button will terminate the setup program.
7. You will proceed to the "Wicked3D Setup/Update" dialogue box. The message will inform you that "This
Setup program will Install/Update the Metabyte Wicked3D Software on your computer." Click Install to
proceed with the installation.
8. After the necessary files are installed, you will receive a "Setup Complete" dialogue box. You may
choose to review the README file for the latest information on the software release. Click the Finish
button.
9. Reboot your computer to complete driver installation.
10. Congratulations! You are now ready to experience the ultimate in 3D gaming!
Note: For full eyeSCREAM functionality, DirectX 6.0 or higher must be installed. If DirectX 6.0 or
higher is not installed on your system, run the eyeSCREAM menu (step 3a) again and select DirectX
installation.
5
Section 3: Understanding eyeSCREAM
In order to quickly learn to use and enjoy the eyeSCREAM stereoscopic eyewear system, it is
important to understand some basic eyeSCREAM concepts:
Direct3D vs. Glide Games –All current eyeSCREAM-compatible 3D accelerator cards support both of
these types of games. In order to configure the eyeSCREAM software correctly, it is important to know
whether each game you want to play is written in Direct3D or Glide. This information can usually be found
printed on the box of the game as well as on a “video settings” setup screen within the game. Note that
some games have both Direct3D and Glide versions. In this case, we usually recommended that you run the
Glide version. This is also true with OpenGL titles. All current eyeSCREAM-compatible OpenGL titles can be
run as Glide games. You can also check the Wicked3D eyeSCREAM Game Ratings List at
http://wwww.wicked3d.com for information on whether a particular game is Direct3D or Glide.
Wrappers - The individual components of the eyeSCREAM software that enable eyeSCREAM functionality
(Stereo, Re2Flex, and Resolution Override) in Direct3D and Glide titles are referred to as "Wrappers". These
wrappers must be active to use eyeSCREAM functionality. For Direct3D games, the Direct3D Wrapper is
built into the driver and is always active; no manual activation is necessary. For Glide games, you must
explicitly choose to "Use Glide wrapper for Glide games" in the eyeSCREAM Glide Control Panel. (See
Section 6 for more details.) The option to "Use original glide" is available for Glide titles that do not support
eyeSCREAM. Note that there is also an OpenGL wrapper. However, currently in all cases, it is preferable to
use the Glide wrapper for OpenGL titles.
Resolution Override –Resolution override is an exclusive feature of the eyeSCREAM software that allows
you to specify the resolution you want a game to run at, even if the game doesn’t natively offer or support
that resolution. There are two major benefits of Resolution Override: First, Resolution Override allows you to
play any compatible game at the highest resolution your 3D hardware supports. Second, in stereo mode,
resolution override maximizes the legibility of in-game text by allowing you to set an actual displayed
resolution that is higher than the in-game resolution. For example, you can set the game resolution at
640x480, making text larger and easily readable while overriding the overall displayed resolution to
1024x1024 for higher quality, more detailed stereo gameplay.
Stereo Configuration Files - stereo configuration files or stereo.cfg files are files available from Wicked3D
that should be copied into individual game directories in order to enjoy the highest quality stereo with the
least amount of visual anomalies for each game. Note that not all games require stereo.cfg files. Check
http://www.wicked3d.com for the latest stereo.cfg files. Stereo.cfg files for many popular games are
copied into the C:\program files\metabyte\wicked3d\stereo.cfg directory during eyeSCREAM installation. A
list of the included stereo.cfg files called stercfg.txt is also copied to the same directory. Check this file to see
if there is a stereo.cfg file for the game that you want to play. If one exists, copy it from the corresponding
game directory to the directory where the game executable actually resides.
Keyboard Hotkeys - Keyboard hotkey controls provide you with keyboard key combinations that you can
define to dynamically adjust eyeSCREAM functionality during gameplay. For example, you can toggle stereo
or resolution override on and off and change the stereo separation to a setting that is most comfortable for
you. The eyeSCREAM hotkeys have been pre-defined with convenient key combinations when
eyeSCREAM was installed. However, you may choose to re-define the hotkeys to suit your preference. Here
is the list of predefined keys:
Toggle Stereo <Ctl + T> Less Stereo Separation <Ctl + O>
Toggle Resolution Override <Ctl + F> More Stereo Separation <Ctl + P>
Toggle Stereo and Resolution
Override <Alt + G> Less Vertical Separation <Ctl + U>
Reset Stereo <Ctl + R> More Vertical Separation <Ctl + I>
Toggle Stereo Separation <Ctl + S>
6
Section 4: eyeSCREAM Test
You are now ready to experience eyeSCREAM for the first time! Wicked3D eyeSCREAM software includes
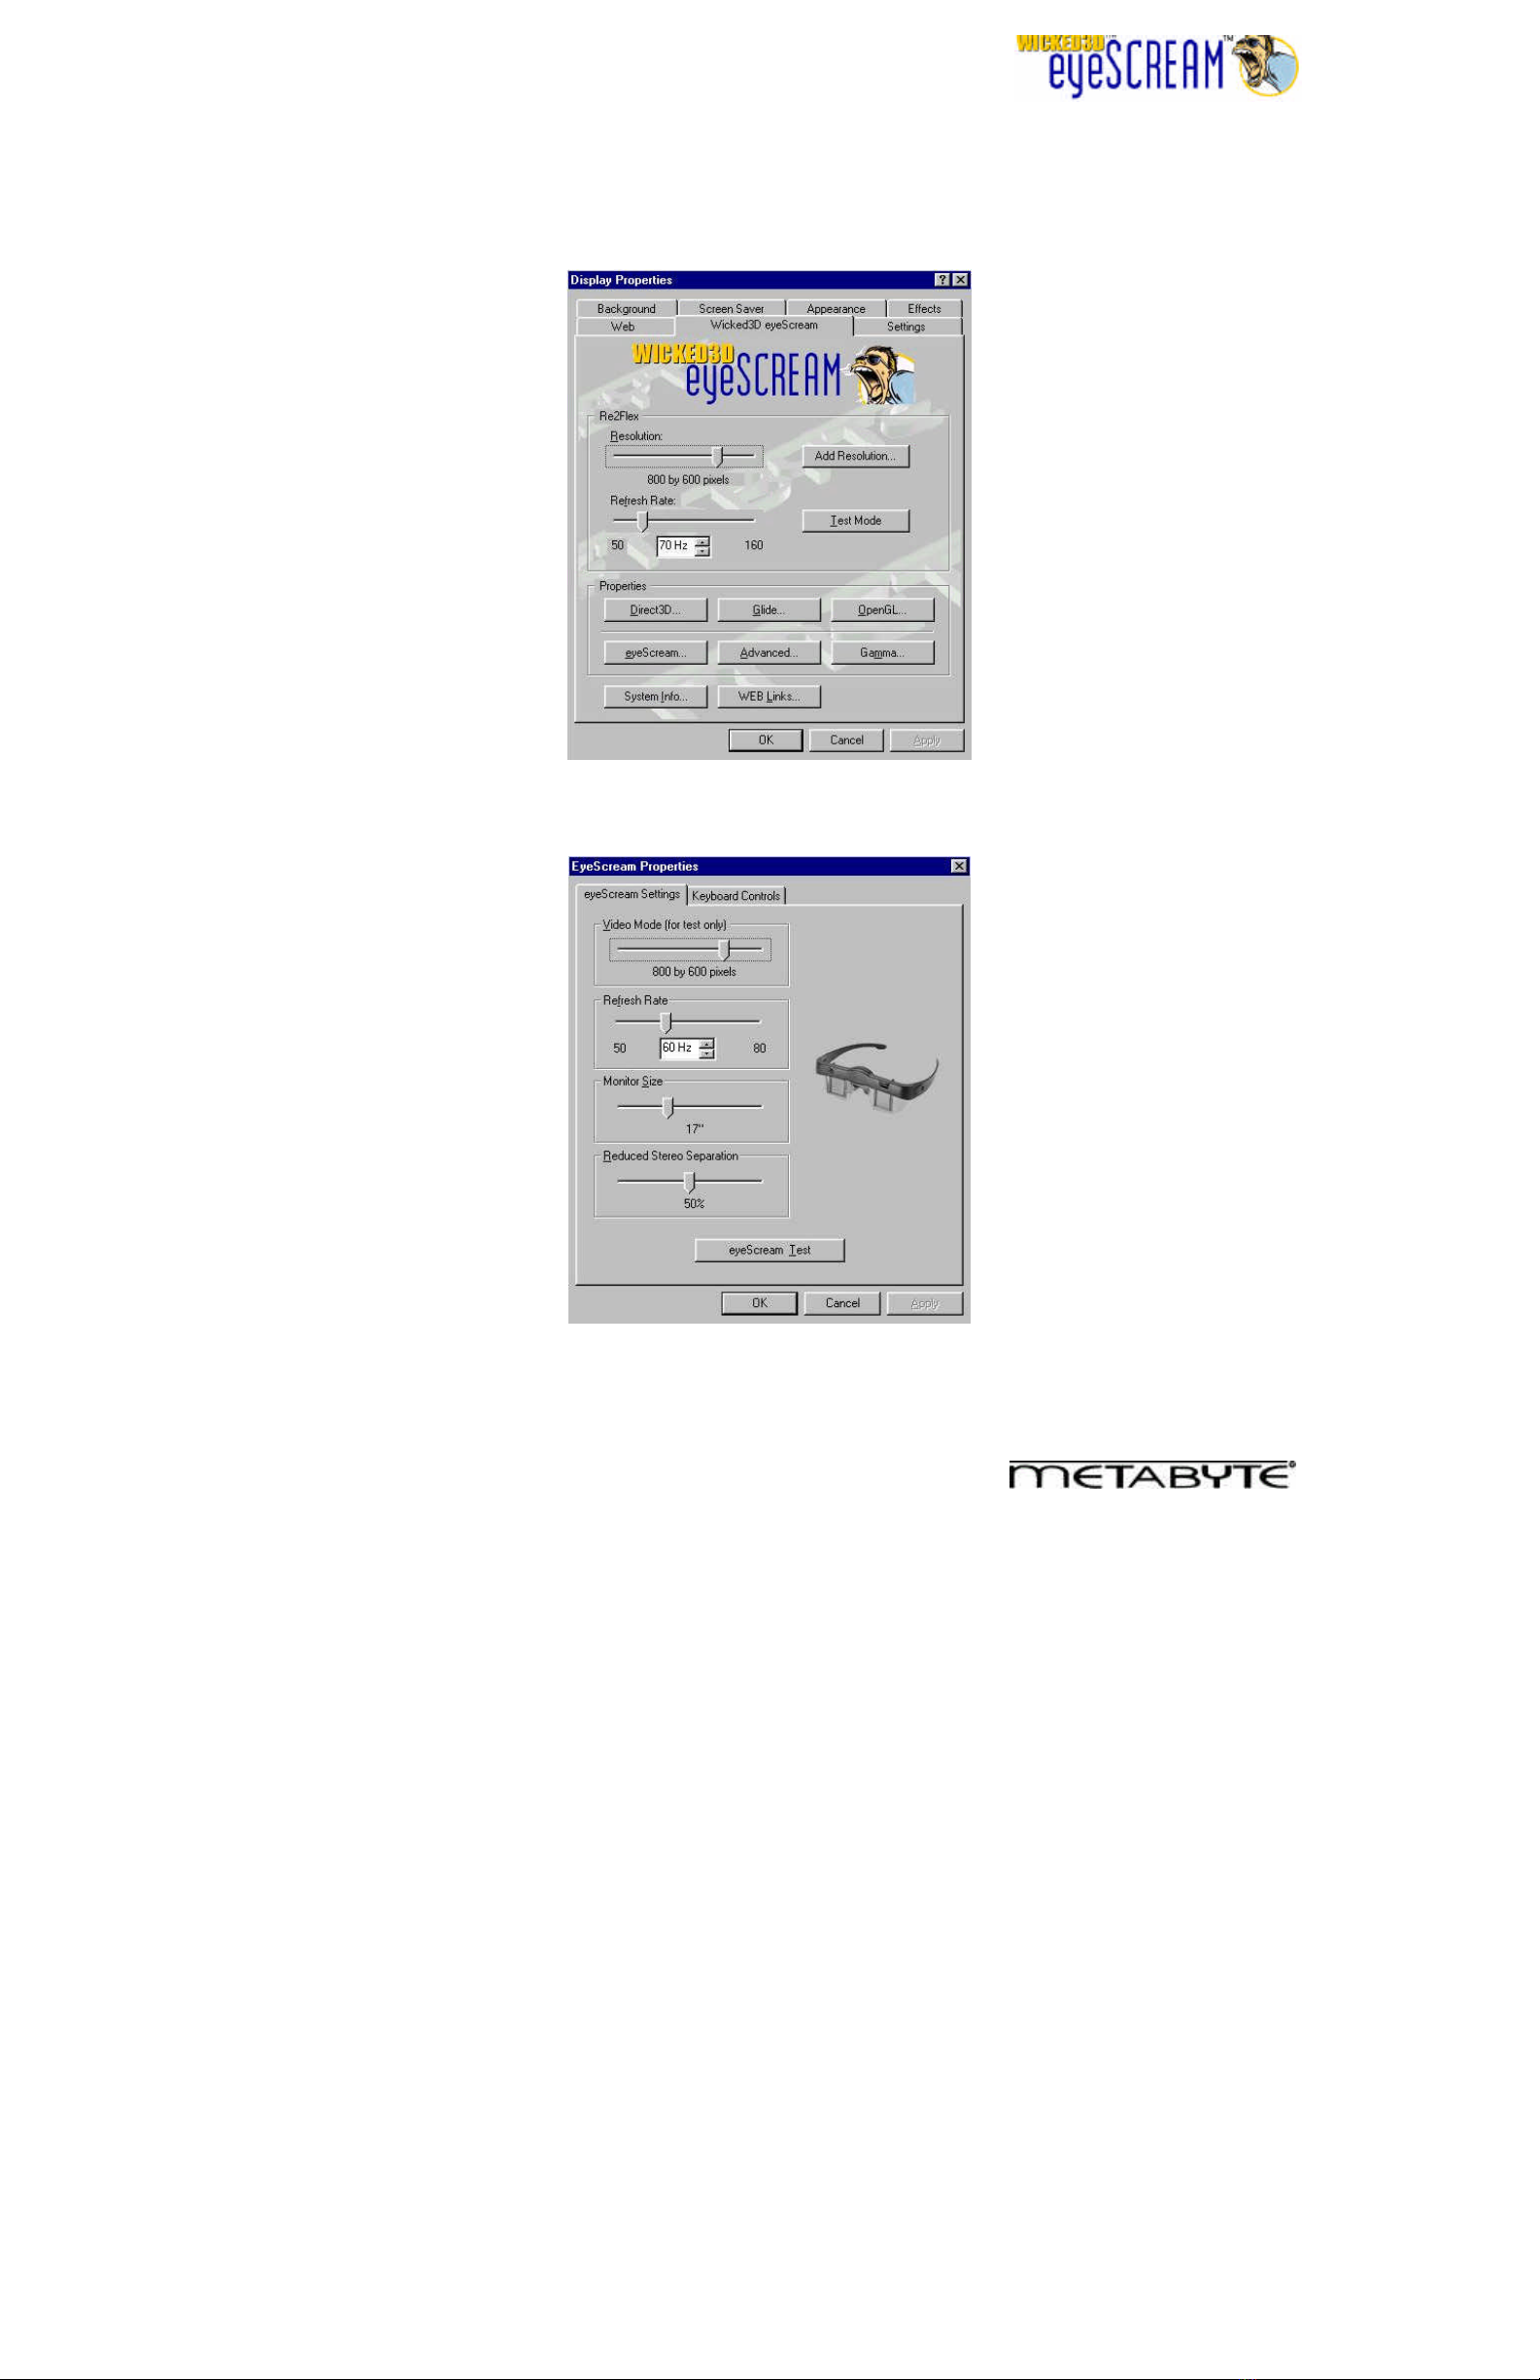
a stereo test screen which you can use to verify that your hardware and software are set up properly. Open
the Wicked3D eyeSCREAM Display Properties by right-clicking on your desktop, selecting “Properties” from
the drop-down menu, and clicking on the Wicked3D eyeSCREAM tab. You should see the following:
Main Wicked3D eyeSCREAM Display Properties Sheet
Click on the eyeSCREAM button to bring up the eyeSCREAM settings tab:
eyeSCREAM Settings Tab

7
As an initial test, the default resolution and refresh rate for the test should be compatible with most monitors.
You may use the Monitor Size slider bar to choose the size that matches your monitor. Keep the Reduced
Stereo Separation slider bar at 50% for now. Click on the eyeSCREAM Test button to enjoy your first
eyeSCREAM experience. Put on your eyeSCREAM stereo eyewear and you should see the following
screen in real 3D:
eyeSCREAM Test Screen
Take this opportunity to align the vertical separation. This is important for a comfortable 3D gaming
experience. The eyeSCREAM system has automatic vertical alignment; however, slight adjustments may be
necessary. Remove your eyeSCREAM stereo eyewear and look at the text on the screen. If necessary, use
the U and I keys to adjust the display so that the text is vertically aligned. (Note that the Test Screen text will
not show the horizontal shift displayed in the following images. However, the text in many games will.)
Put on your eyeSCREAM eyewear again and notice the improvement. You can now use the O and P keys to
adjust the stereo separation to a setting that feels the most comfortable for your eyes. Keep in mind that the
wider the separation, the better the stereo effect will be. At this point, you should see a single 3D image on
the screen. You can also use the other on-screen keys to adjust screen location and size. Press <Esc> to
return to the eyeSCREAM Settings tab. Try the eyeSCREAM test on various resolutions and refresh rates to
explore the capabilities of your monitor. If you see 2 separate screens, one on top of the other, try pressing
R to reset the stereo hardware. If this doesn’t work, press <Esc> and reduce the refresh rate and/or
resolution in the display properties sheet and try again.
Moving on to the Real Thing…
Now you are ready to try eyeSCREAM on real games. Steps to configure eyeSCREAM for both Direct3D
and Glide games are given. Again, it is important to know whether the game you want to play with
eyeSCREAM is written for Direct3D or Glide. Before beginning, however, check to see if there is a stereo.cfg
file for the particular game that you want to play into the C:\program files\metabyte\wicked3d\stereo.cfg
directory. If so, copy the corresponding stereo.cfg file for the game into the game’s directory. Note that some
of the stereo.cfg files come with readme files that specify a unique location where the stereo.cfg file needs to
be copied to. If there is no readme file, copy the stereo.cfg file to the same directory as the game
executable.
Section 5: Configuring eyeSCREAM for Direct3D games
As mentioned before, the Direct3D Wrapper needed for eyeSCREAM functionality is built into the driver and
is always active. This means that you can always use the keyboard Toggle Stereo key(s) to enable stereo
after starting the game. However, you need to make sure that your eyeSCREAM-compatible 3D accelerator
8
is being used by the game. This can usually be checked in the “Video Options” or “Video Settings” area in a
game. For Direct3D games, it is recommended that stereo be toggled on after the game has started. This
will prevent difficulties in reading the startup and option screens on certain Direct3D games.
Simple Steps to get eyeSCREAM stereo working in Direct3D games:
1. Run the Direct3D game.
2. Make sure that your eyeSCREAM-compatible 3D accelerator card is being used. If necessary, choose
the eyeSCREAM-compatible accelerator card in the Video Options or Video Settings screen within the
game.
3. Choose the resolution you want to run from within the game. Note that stereo gameplay looks much
better at higher resolutions.
4. When gameplay begins, hit your Toggle Stereo hotkey (which is <Ctl + T> by default) to turn on
eyeSCREAM stereo.
5. An “Activating eyeSCREAM” splash screen may appear briefly, followed by your game in stereo.
6. Check to see that the images are vertically aligned. If necessary, use the Hotkeys specified in Section 3
to vertically align the images.
7. Experience 3D gameplay like never before!
Resolution Override in Direct3D Games
Because enabling stereo essentially reduces the vertical resolution of your game by one half, small items
such as text may become hard to read when stereo is enabled. In order to make text more legible in stereo,
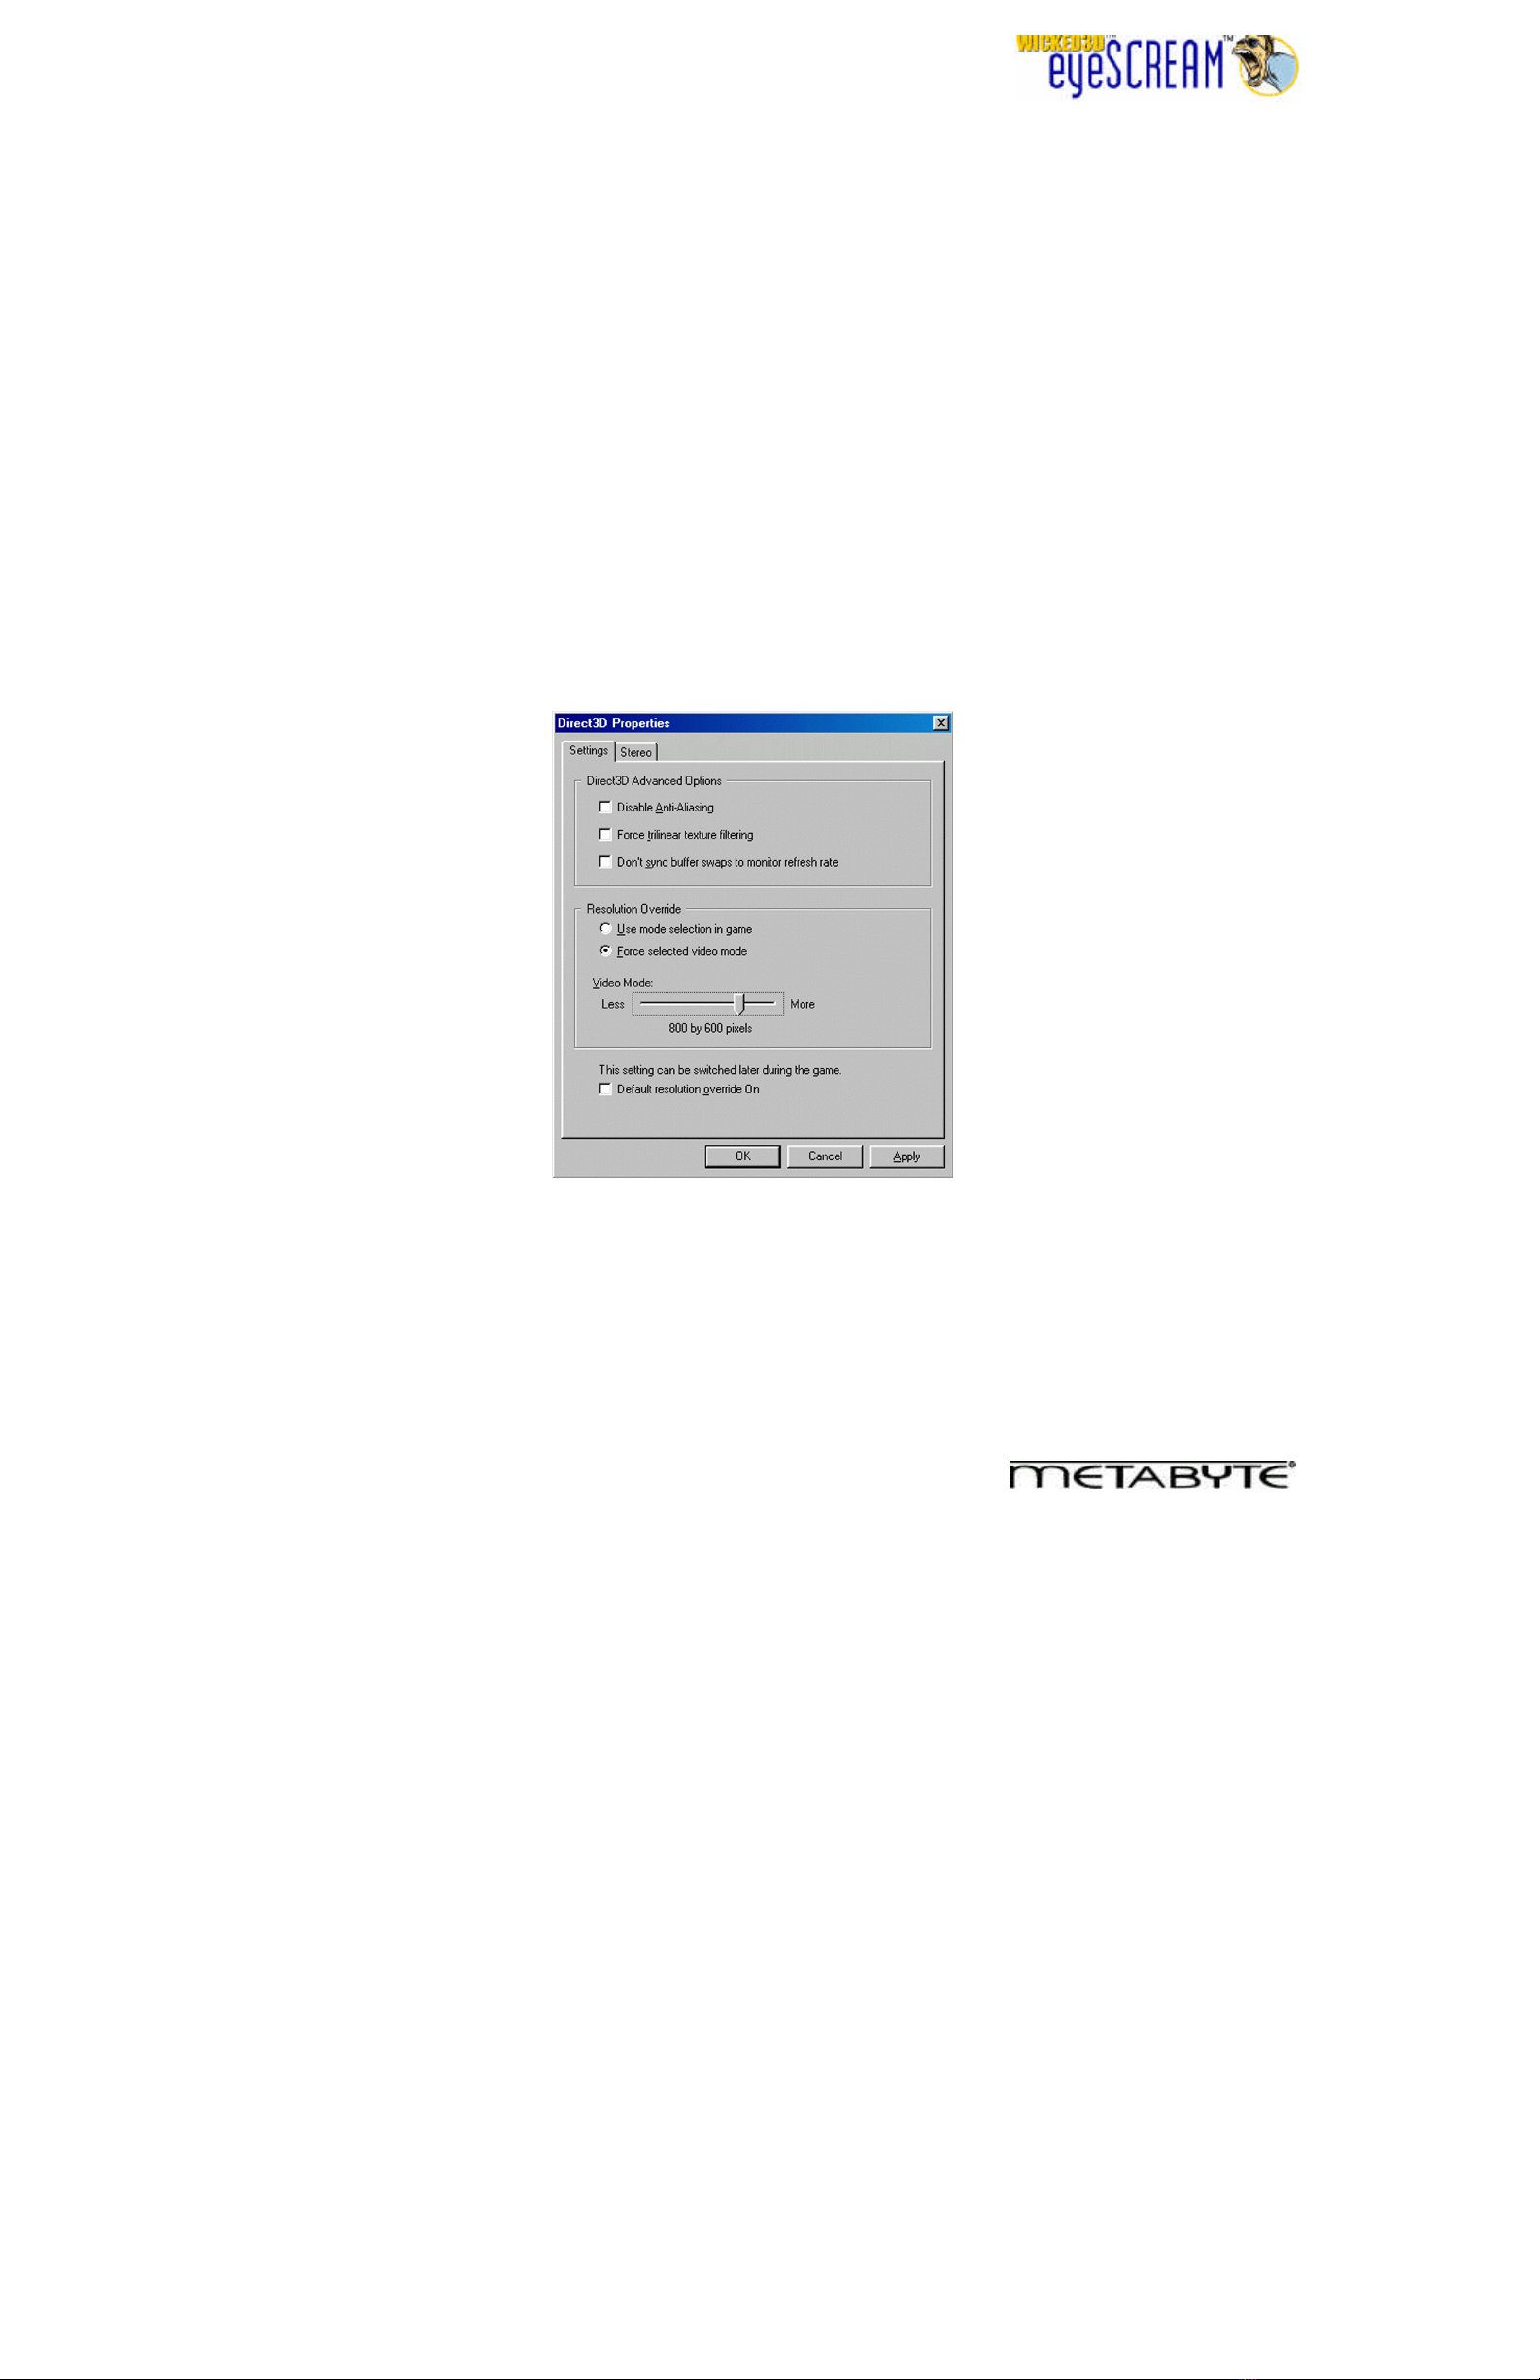
you can use eyeSCREAM’s Resolution Override feature. Go to the Wicked3D eyeSCREAM Display
Properties Sheet again and click on the “Direct3D…” button. You will see the following Direct3D settings tab:
Direct3D Settings
Simple Steps to Enable Resolution Override in Direct3D Games:
1. Select the “Force selected video mode” radio button.
2. Use the “Video Mode” slider bar to select the resolution that you want to run the game in. You want to
choose a relatively high resolution here, 800x600 or higher if your monitor supports it.
3. Leave the “Default resolution override On” checkbox unchecked.
9
4. Click OK to exit the Direct3D Settings tab.
5. Run the Direct3D game.
6. Make sure that your eyeSCREAM-compatible 3D accelerator card is being used. If necessary, choose
the eyeSCREAM-compatible accelerator card in the Video Options or Video Settings screen within the
game.
7. Choose a resolution in the game that is lower than the resolution that you chose on the Direct3D
Settings Tab. The lower the resolution you choose, the larger and more easily read the in-game text will
be.
8. When gameplay begins, hit your Toggle Stereo and Resolution Override hotkey (which is <Alt + G> by
default) to turn on both Resolution Override and eyeSCREAM stereo.
9. An “Activating eyeSCREAM” splash screen may appear briefly.
10. Check to see that the images are vertically aligned. If necessary, use the Hotkeys to vertically align the
images.
11. Experience 3D gameplay like never before!
Section 6: Configuring eyeSCREAM for Glide games
Glide games differ from Direct3D games in that they generally can be started in stereo without difficulties in
reading the game’s startup and options screens. The same is true with Resolution Override in Glide games.
In addition, you always have the option to Toggle Stereo and Resolution Override during Glide games as is
recommended with Direct3D games. However, unlike the Direct3D Wrapper, the Glide wrapper must be
explicitly activated in order to have eyeSCREAM functionality in Glide games.
Simple steps to get eyeSCREAM working in Glide games:
1. Open the eyeSCREAM Display Properties Sheet by right-clicking on the windows desktop and selecting
“Properties” from the drop-down menu. Click on the Wicked3D eyeSCREAM tab.
2. Click on the “Glide…” button.
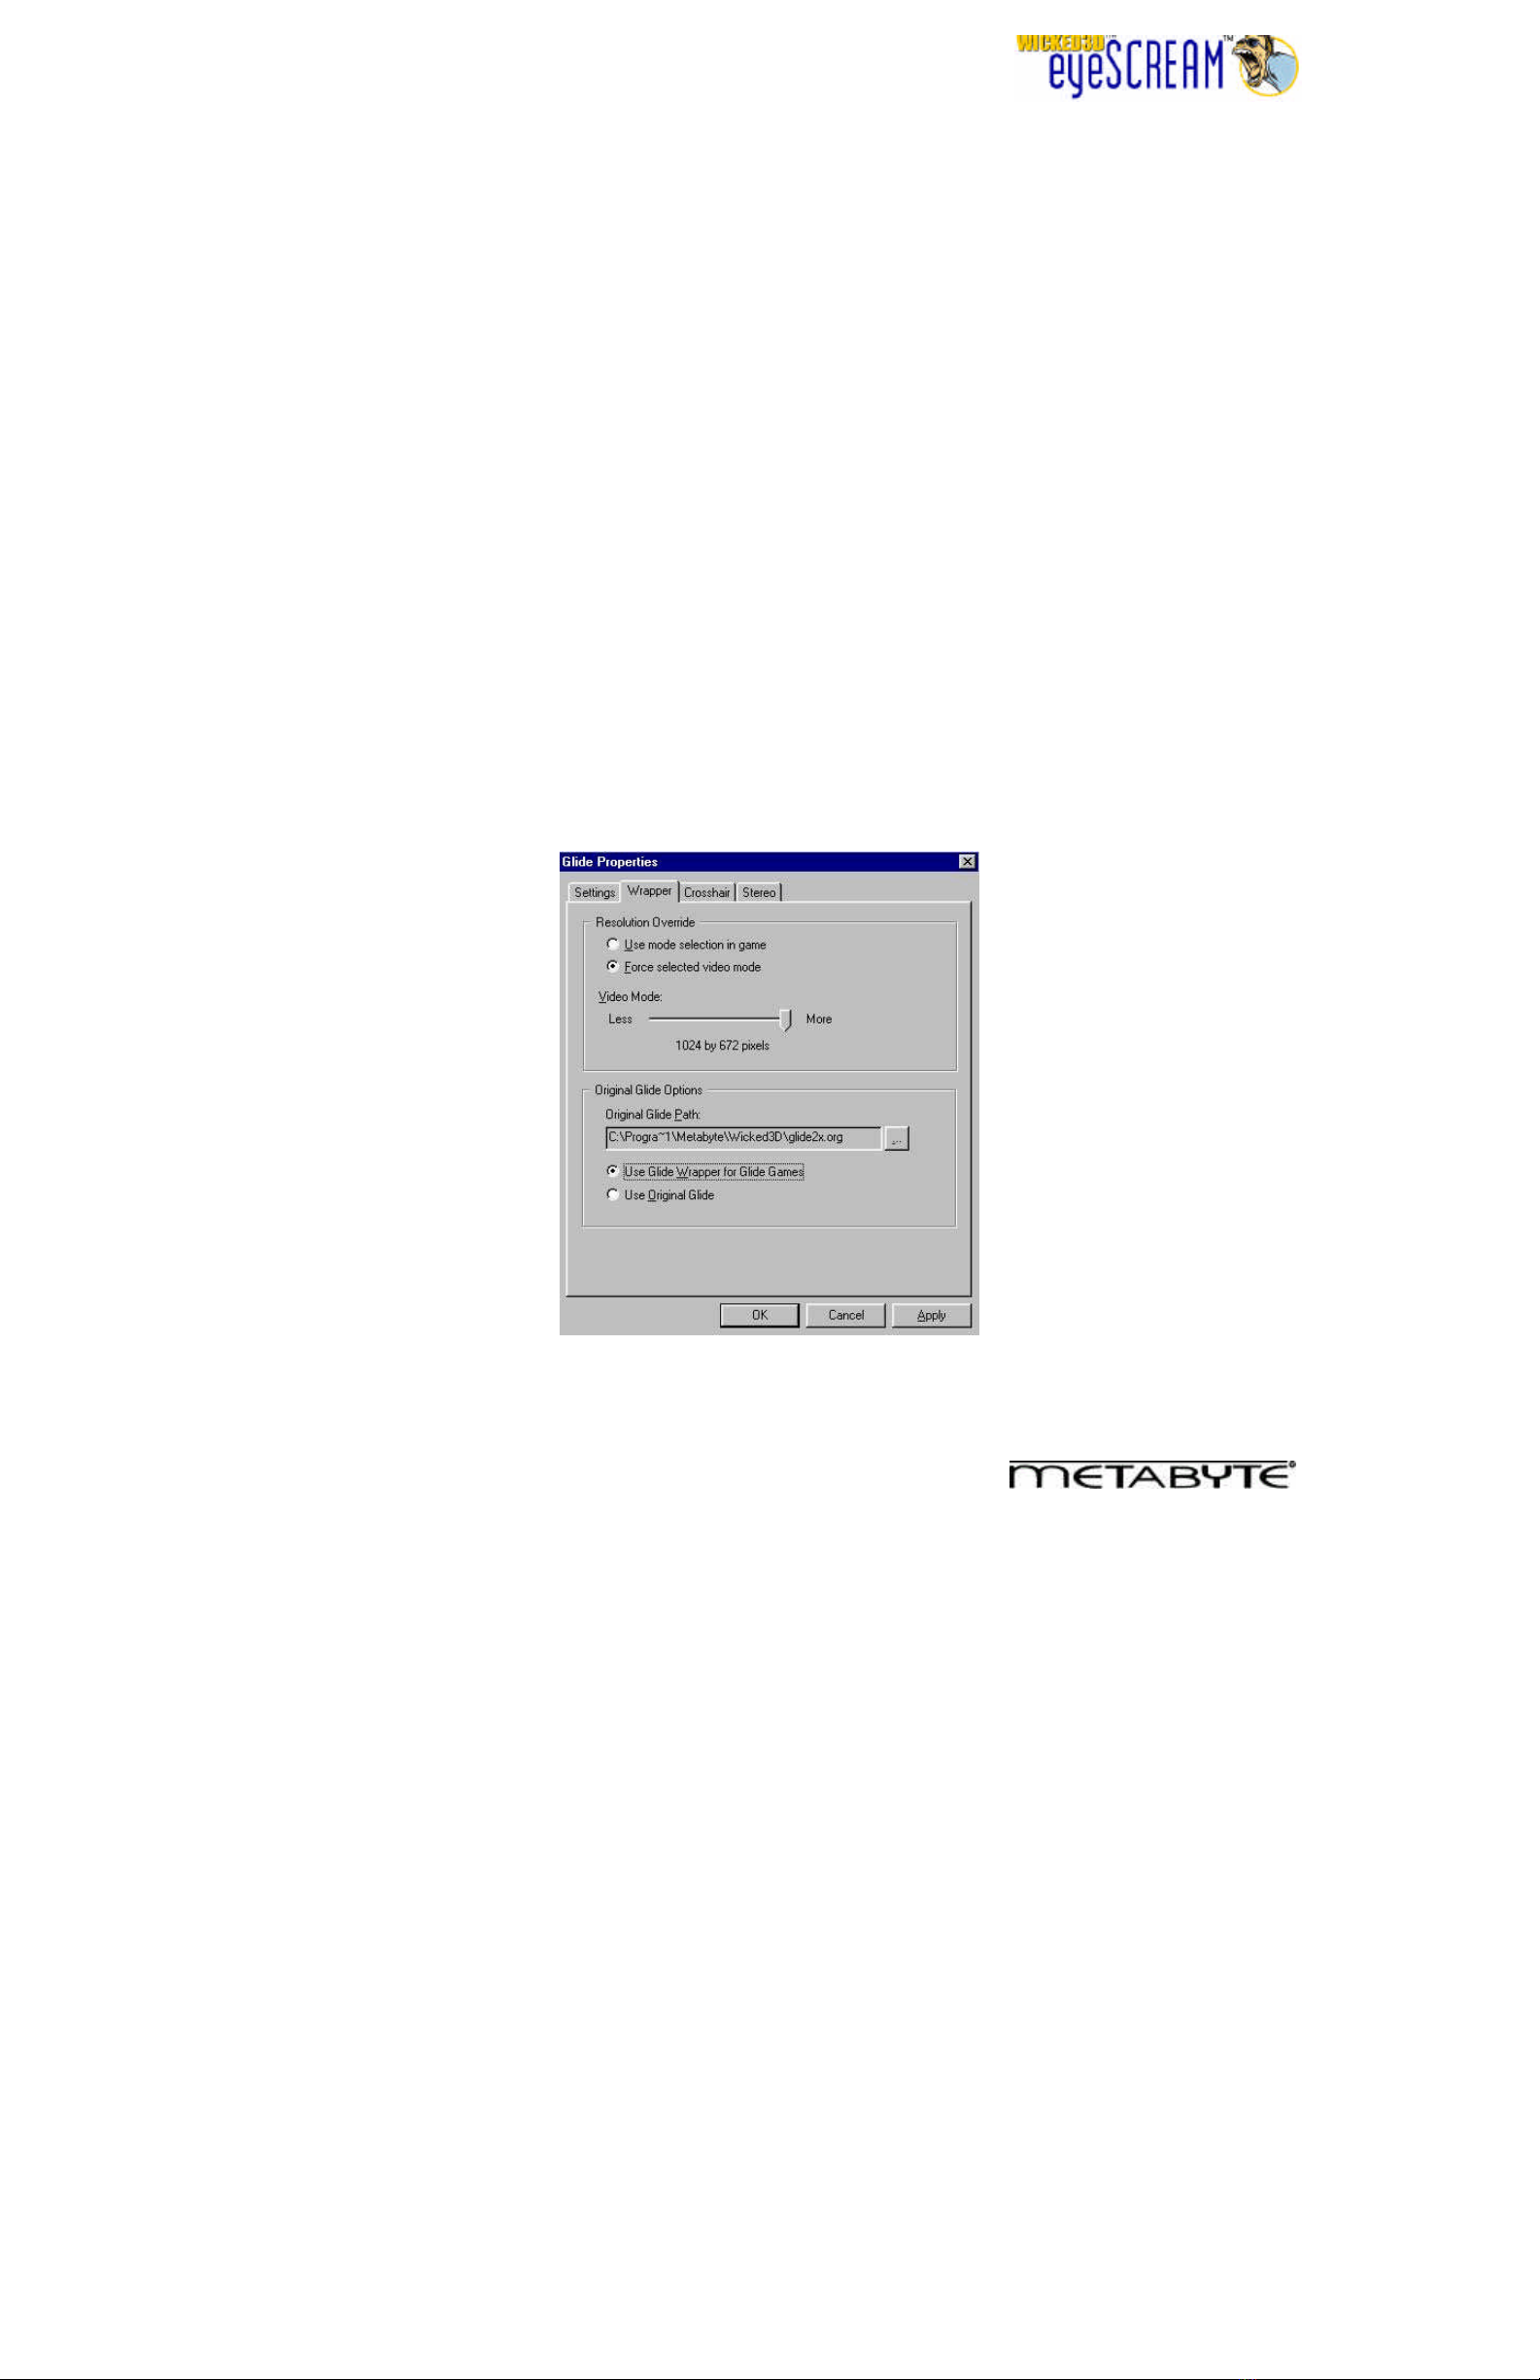
3. Click on the “Wrapper” tab. You should see the following Glide Wrapper properties sheet:
Glide Wrapper Properties Tab
10
4. To enable Resolution Override, select the “Force selected video mode” radio button.
5. Select the resolution you want the game to run at with the Video Mode slider bar. Note that stereo
gameplay looks much better at higher resolutions.
6. To activate the Glide Wrapper, in the “Original Glide Options” section, make sure that the “use Glide
Wrapper for Glide Games” radio button is selected. Note that eyeSCREAM stereo and Resolution
Override functionality require the Glide Wrapper to be used.
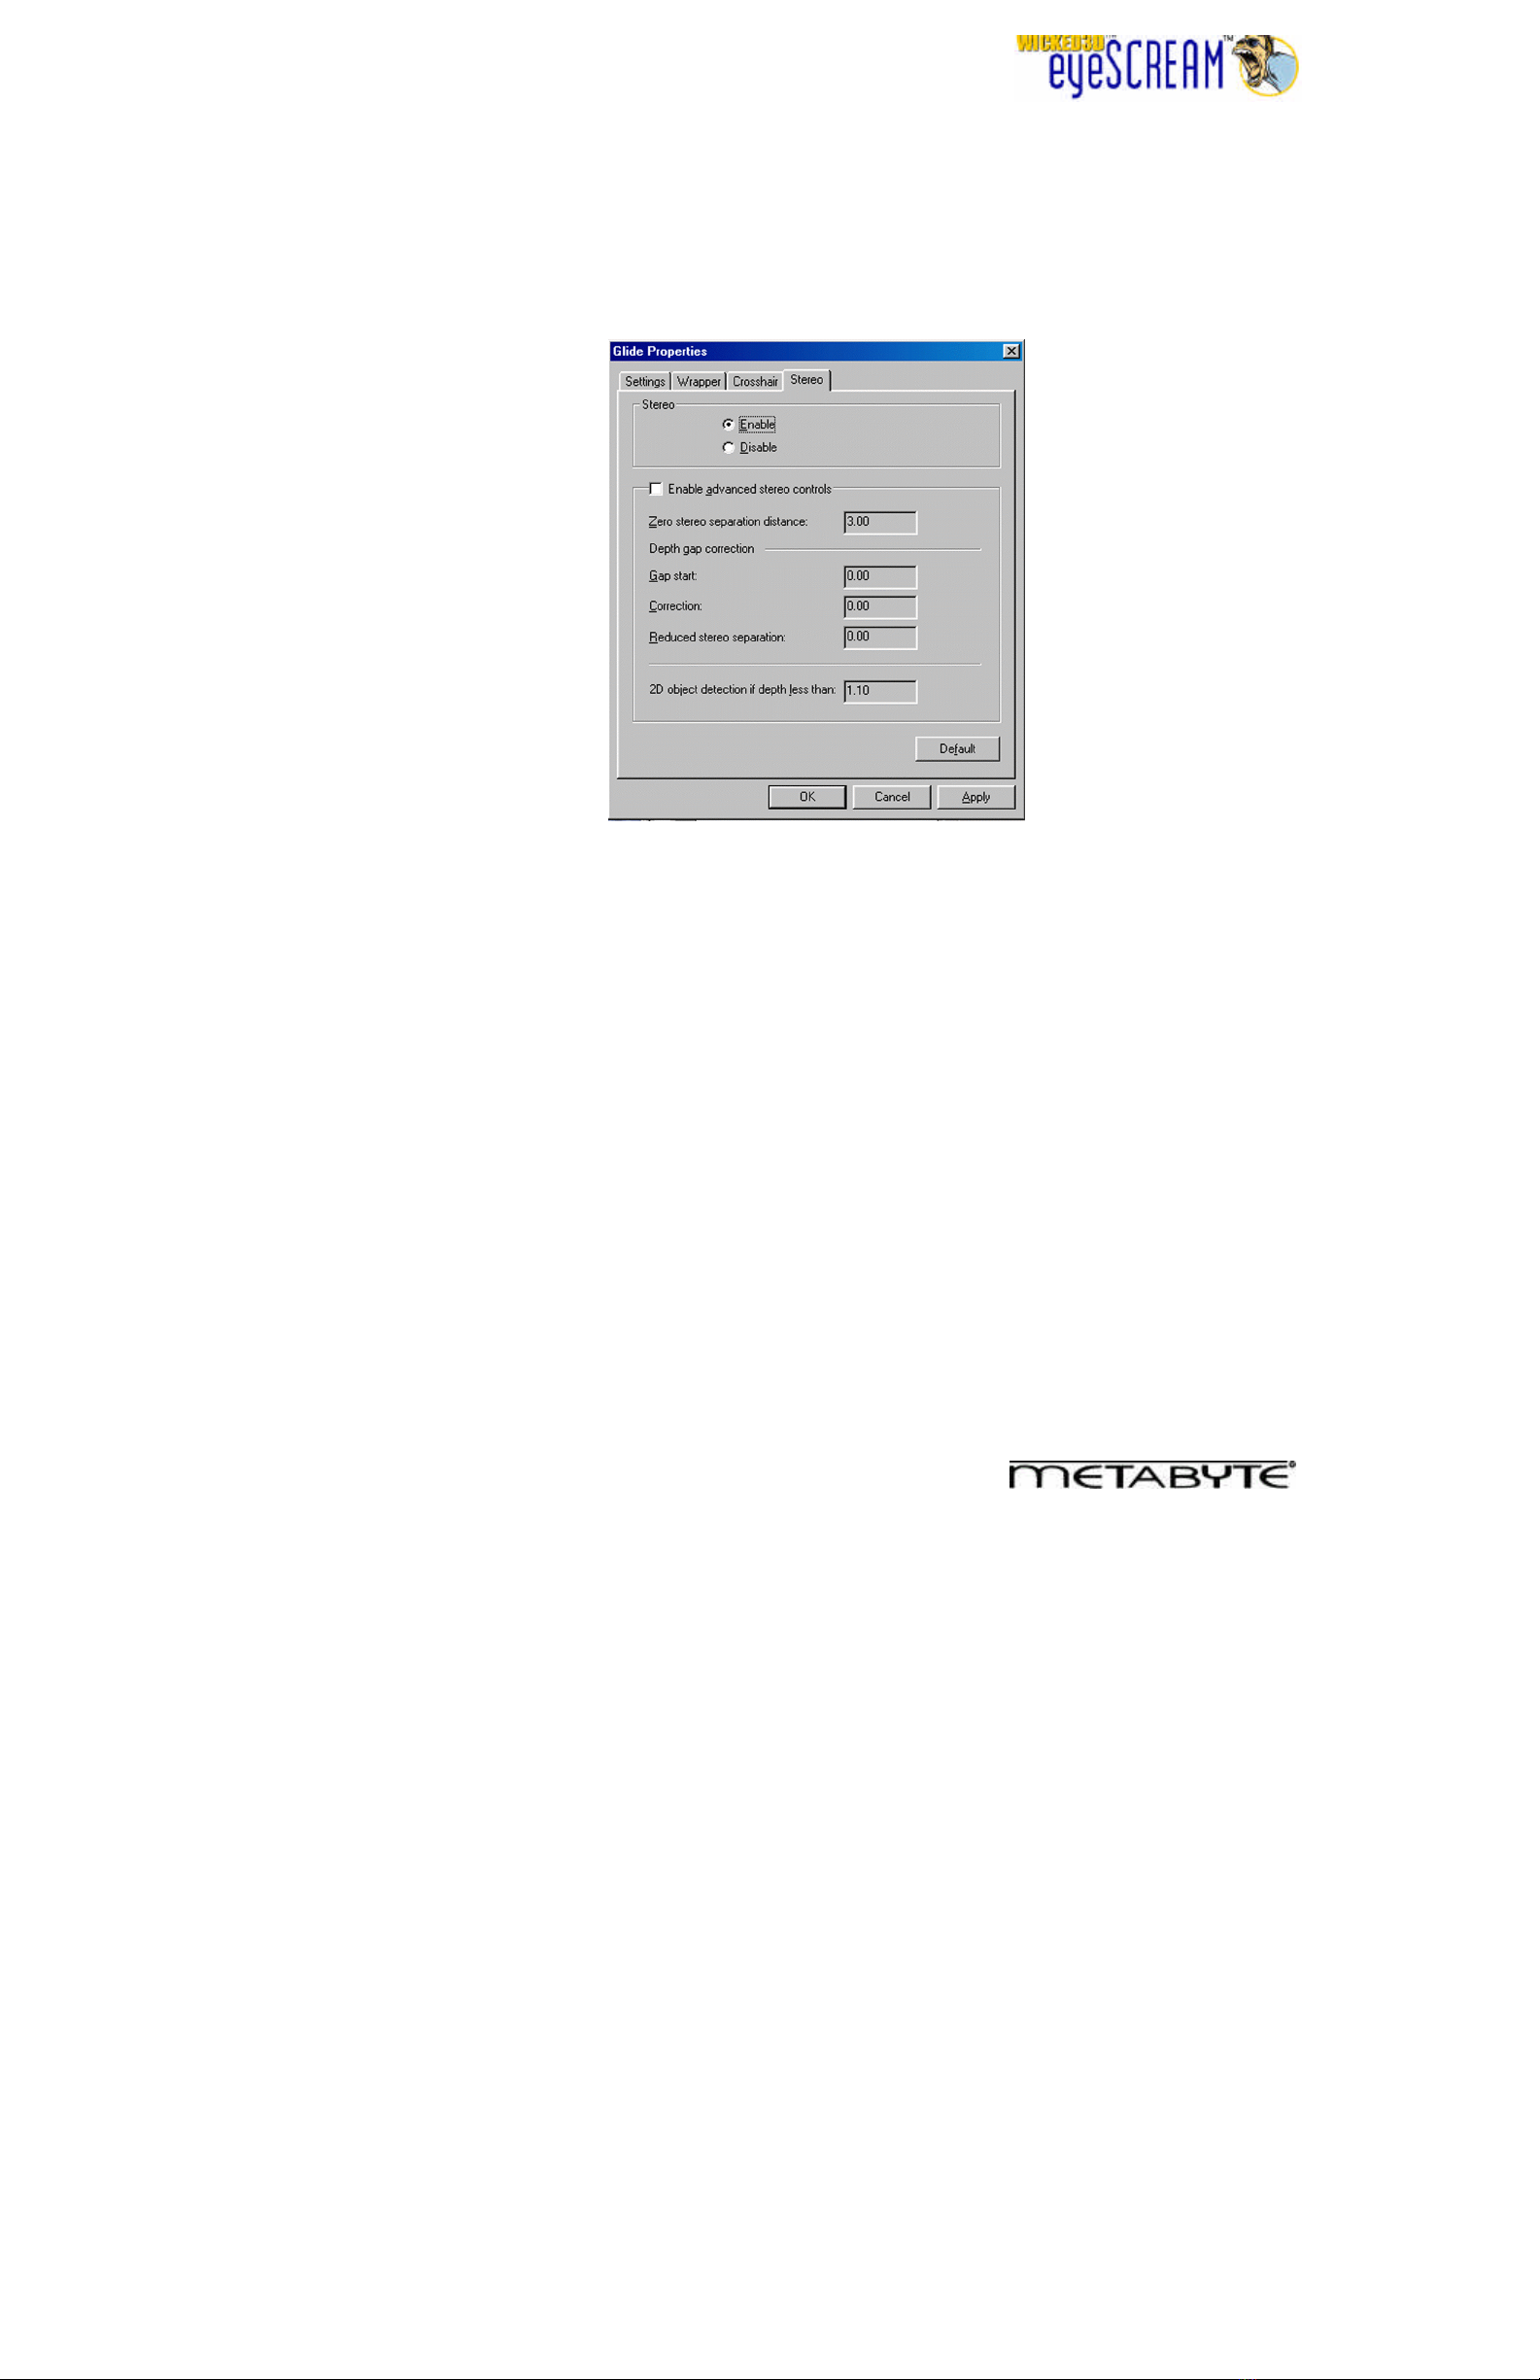
7. Click on the Stereo tab to show the Glide Stereo options:
8. Select the “Enable” radio button to turn stereo on by default when the game starts. If you choose
“Disable”, you can still use the Toggle Stereo hotkeys to turn on stereo within the game.
9. Click OK to exit the Glide Properties Sheets and OK to exit the eyeSCREAM Display Properties Sheet.
10. Check for a stereo.cfg file for the game that you want to play. If one exists, copy it to the game directory.
11. Run the Glide game.
12. The game should start with both eyeSCREAM stereo and Resolution Override activated. You may see
a splash screen notifying you that Resolution Override is being activated.
13. If the Glide Wrapper does not detect a stereo.cfg file, you will get a warning message. If this occurs,
press C to bypass this message.
14. Check to see that the images are vertically aligned. If necessary, use the Hotkeys to vertically align the
images.
15. Experience 3D gameplay like never before!
Congratulations!
You should now have a basic understanding of the Wicked3D eyeSCREAM system and how to use it to
make your favorite games come alive. For detailed explanations of all the advanced features of the
eyeSCREAM system, please consult the Wicked3D eyeSCREAM User Guide.
Table of contents


