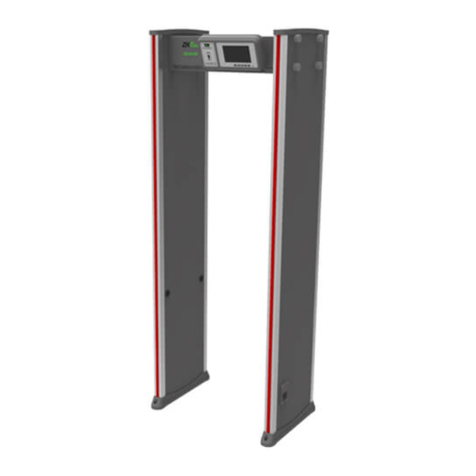
Metal Defender MD-33 User manual

2
MEDICAL SAFETY
Metal Defender makes every effort to ensure its products are safe for use. Extensive
research by Metal Defender has produced no information which would indicate that its
products have any adverse effects on medical implants, pregnancy, recording media or
magnetic strips. Metal Defender makes every effort to cooperate with medical device
manufacturers and to communicate with agencies such as the United States Food and Drug
Administration and Health Canada as a means of assuring product safety. The
electromagnetic fields produced by Metal Defender products are similar to those
encountered in the daily environment and meet U.S. and International standards for
electromagnetic emissions.
Metal Defender recognizes that certain medical devices may have additional requirements
which may require special care. Any recommendations or directives issued by personal
physicians or medical device manufacturers should be followed. If, for any reason, (e.g.
doctors orders, etc.), a patron objects to being scanned with a metal detector, it is
recommended that alternative procedures be used.
The following should be considered when developing a security checkpoint screening plan.
• Traffic Flow - Traffic flow should remain consistent and encourage unrestricted traffic
flow as a means of minimizing the time a person remains within the archway of a walk-
through metal detector.
• Alternative Screening - Alternative screening methods such as scanning with a handheld
metal detector, hand searching or denial of access should be clearly defined in checkpoint
screening procedures as approved alternatives to screening with the walk- through metal
detector.
• Personnel Training - Security screening personnel should be instructed in the care of
persons with special medical needs and use of alternative screening methods that meet the
requirements of medical practitioners or medical device manufacturers.

3
Index
Medical Safety –pg.2
General Description of MD-33 –pg.5
Installation Environment –pg.6
Functions and Features –pg.7
Parts of the Detector –pg.8
Assembly Instructions –pg.9
Installation Instructions –pg.10
Panel Interface –pg.11
Understanding the Zones –pg.12
Operating Instructions –pg.13
Technical Specs –pg.14
Package Contents –pg.14
FAQ –pg.15
Suggested Single Lane Configuration –pg.17
Suggested Multi Lane Configuration –pg.18
Warranty Information –pg.19
Replacement Parts –pg.20

4
1. Please assemble and deploy on a flat, vibration-free surface in order to avoid false alarms
caused by shaking the security gate.
2. Wait 1 minute after you turn on the metal detector in order to get the best detection
results.
3. Please make sure that people walk through the unit at the standby time or alarm time
setting (Preset at 1 second), and pass one by one. Do not crowd around the gate, it may
cause interference with the infrared sensors. Patrons should pass through one at a time
and allow a minimum of 1 second after the person walks through.
4. Do not hit or collide with the gate, if this happens there will be a false alarm.
5. If the unit gets dirty, wipe it gently with a cloth dipped in water or alcohol. Do not use
other chemicals.
6. Each unit has a 2 year warranty.

5
GENERAL DESCRIPTION OF MD-33
Basic Description
The MD-33 is a digitally controlled pulse induction metal detector.
Memory
All program selections and settings are maintained in electrically erasable non- volatile
memory. The unit will maintain all settings even when disconnected from power. No
battery is required for memory retention.
Superior Target Pinpointing
The MD-33 is an advanced Digital Signal Processor (DSP)-based Pinpointing walk-through
metal detector that provides superior target detection with excel- lent metal discrimination
capabilities. Multiple targets are pinpointed on the left, center or right side of the body
from head to toe within 33 distinct areas using a unique array of Light Emitting Diodes
(LED’s) located on the exit side of each panel. Independent zone by zone calibration
capability insures optimal archway field uniformity, regardless of installation challenges.
Improved Sensitivity
An improved multi-coil design allows programming for the detection of the Sensitivity
smallest of metallic targets regardless of shape and orientation.
Controls/Displays
The MD-33 utilizes backlit Liquid Crystal Displays (LCD’s) and LED bar Displays graphs for
continuous on-line operating status and self-diagnostic reporting. All controls and settings
are simplified with menu selections and touchpad controls.
ADA Compliant
Meets ADA standards
Optional Accessories
Optional accessories include a dolly, casters, and an extended battery.

6
Installation Environment
1. Large stationary metal items near the installation environment
When installing the units, they should be positioned away from stationary or large fixed
metal objects 4.5 feet or more; otherwise it will affect the sensitivity of the unit and may
cause false alarms. Some stationary metal objects include: aluminum / stainless steel doors
and windows, walls with steel bars, HVAC vents, banisters.
2. Movable metal items near the installation environment
Movable large metal objects should be positioned more than 4-4.5 feet away from the
security gate to prevent any false alarms. Any entrance gates, security doors, rolling gates,
elevators, or cars can interfere with the unit and cause false alarms.
3. Unit should be installed on smooth, flat surface
Please make sure that the unit is installed on a smooth flat surface to prevent any shaking
of the unit or any false alarms.
4. Electromagnetic radiation and electromagnetic interference
Since the unit uses bilateral transceiver technology, any sources of electromagnetic
interference and electromagnetic radiation can cause false alarms. The recommended
distance from the unit to any source of items that emit electromagnetic radiation or
interference is 3-6 feet. Here are some possible sources of electromagnetic interference
and electromagnetic radiation: Electrical control box, radio equipment, radios, computer
and peripheral equipment, video surveillance, high-power motors, power transformers, AC
power cord, thyristor control circuit (power switching power supply, inverter welding
machine), engine with a motor machine.
5. When deploying several units together, please make sure that each unit is set to a
different frequency
If many units are used in close proximity with one another, each unit would have to be set
to a different frequency. The degree of influence depends on the distance between each
metal detector and the operating Frequency of each unit. When installed, the distance
between the 2 units should not less than 2 feet.

7
Functions and Features
1. Pin-point positioning: 33 overlapping mesh detecting areas, bilateral emission, bilateral
receiving, can accurately detect the location of the metal on the patron’s body.
2. Microprocessor technology: Electromagnetic waves are produced by a microcomputer
control circuit with precisely controlled scans. The user can adjust the unit by use of the
control panel.
3. Sound and light alarm: 3 options for adjustable volume: high, low, or mute.
4. Adjustable sensitivity for each zone: Each zone has 100 sensitivity levels (0 to 99).
5. Digital pulse technology: Digital signal processing filter systems, has excellent anti-
jamming capability.
6. Password protection: The user can only make adjustments to the unit after entering the
correct password. Password is 4-digits and can be set and changed by the user.
7. Counting Statistics: Counts the quantity of the passed people and the times of alarm.
8. Harmless: Harmless to heart pacemakers, pregnant women, magnetic floppy disk ect.
9. Weather resistant: Made of PVC composite material, IP55 rated.
10. Easy installation: The system is an integrated design which only takes 20 minutes to
complete the installation or removal.
11. ADA compliant: The MD-33 meets ADA standards.

8
Parts of the Detector
1. Main board
2. Panel
3. Built-in infrared sensor probe
4. Infrared sensor
5. Waterproof feet
6. Power socket

9
Assembly Instructions

10
Installation Instructions
1. Open the packages of the main head unit and 2 panels.
2. Put the main head unit display panel facing down, and the left and right side
of the door as the above picture. Connect the left / right door by bolts and
nuts.
3. Securely plug the left and right probe line into the corresponding socket on
the motherboard.
4. Install the main head unit cover screws.
5. Lift the metal detector gate to a vertical position and move it to the work
zone.
6. Connect the power socket to power supply, the unit is now in working state.

11
Panel Interface
1. Pass number: Counts the number of people that pass through the unit
2. Alarm Times: Counts the number of times the unit detects metal
3. Standby indicator: the security door is in non-alarm-status indication (green).
4. Alarm Indicator: the security door is in alarm status indicator (red).
5. Signal interference indicator: From left to right (from weak to strong) total of
nine indicators.
6. [SENSITIVITY]:the sensitivity settings.
7. [ALARM DELAY]:the alarm time settings.
8. [FREQUENCY]:the frequency settings.
9. [VOLUME]:the alarm volume settings.
10. [+]:Numerical increase.
11. [ -]:Numerical reduction.
12. [PROGRAM]: Enter the menu Settings. If you keep pressing the “Program”
key for more than 5 seconds, it will reset.
13. [ENTER]:Confirm (and save). If you keep pressing the ”Enter” key for more
than 5 seconds, it will switch off the power. If you repeat this action, it will
switch on the power again.

12
Understanding the Zones
A - Alarm Zone Indicator
On the panel door there are 3 vertical zone columns, each containing 11 zones, for a total of
33 zones. Whenever any metal is detected on a patron, the corresponding zone will light up
and the audible alert will sound. If metal is found on the right side of their body, the right
LED indicator will light up. If Metal is found in the center of the body, both right and left
panels will light in the corresponding zone.
Infrared Sensors
After the power is turned on, the small black discs inside the channel passageway will
activate. The unit scans as the person walks through. This activation of the unit will only
take place when the infrared sensors measure a person walking through.

13
Operating Instructions
1. The main interface is displayed after boot up: “Pas. 0000 Alm. 000”.
2. Press [PROGRAM] button on the main interface, Enter the password screen and press [∧]
button to change number, press [∨] key to switch zones, press [ENTER] key to confirm
code.
3. After confirming the password, the password interface will show “Password OK!”. If
incorrect, the display will show “Pwd. Error!”
4. Under “Password OK!” interface, press [ENTER] key to enter “Press Item Keys”, the main
settings menu interface. Press [PROGRAM] key to enter new code settings interface, will
display “New Pwd. 1***”. Press [∧], [∨] keys set new code, press [ENTER] key to save.
Exits after setting code.
5. On “Press Item Keys”, the main settings menu interface:
a. Press [Sensitivity] key to enter sensitivity settings interface, will show “Sens. Lvl1,2:
XX”. Press [∧] key to adjust setting, press [∨] key to enter next zone sensitivity settings,
such as “Sens. Lvl3,4: XX”, until shows “Sens. Base: XX” to set the overall sensitivity. The
higher the number, the higher the sensitivity.
b. Press [Alarm Delay] key to enter alarm time settings. Will show “Alarm Delay:1”.
Press [∧], [∨] keys to change number, the number will change between 1-3.
c. Press [Frequency] key to enter alarm time settings. Will show “Frequency:1”. Press
[∧], [∨] keys to change number, the number will change between 1-8.
d. Press [Volume] key to enter alarm time settings. Shows “Volume: High”. Press [∧], [∨]
keys to switch between “HIGH, LOW, NONE”.
6. The above steps can also be used from any interface mode.

14
Technical Specifications
Power Supply: 110-240V/50~60HZ
Power: <20W
Net Weight: 147.7lb
Operating environment: -20 ~45
Channel dimensions: 78in (height) × 27 9/16in (width) × 23 13/16in (depth)
Dimensions: 88in (height) × 32in (width) × 28in (depth)
Package dimensions (door): 90in (length) × 29in (width) × 10 1/4in (height)
Package dimensions (main chassis): 30 3/4in (length) × 19in (width) × 10 5/8in (height)
Factory Parameters
Factory password
1234
Master Password
8888
Alarm time
1 second
Volume of Alarm
High
Language
Chinese/English
Package Contents
Hex tool, 8 sets of bolts, Key to Head Unit, Manual

15
FAQ
What does the signal strength indicator mean?
This is how the unit detects metal. This indicates the density and presence of metal.
Sometimes if there are any overhead pipes, hvac vents, metal doors, metal cabinets or
florescent light fixtures this may trigger this indicator to light up. Ideally you would want to
keep 2-3 feet from these items and find a location where this indicator won’t light up
continuously.
What if I cannot put in a location where the signal strength indicator will not go off? If you
cannot find a fitting location where the signal strength indicator will not turn off, that is ok,
it will just make the unit less sensitive. It will still pick up metal from passerbys, but the
sensitivity levels will have to be adjusted higher. A good indication is to adjust your
sensitivity 2 points higher for every LED that remains lighted on the signal strength
indicator. If your desired sensitivity setting is 70, and if your unit’s signal strength indicator
continuously has 2 LED’s lit at all times, adjust your sensitivity to 74 to accommodate for
the surrounding metal around the unit. Sometimes, even moving the unit a few inches or
even 90 degrees can help decrease the LED indicator.
What is the right sensitivity setting for me?
The best way to determine what sensitivity setting would work best for you is to start on
the lowest sensitivity setting –01 and find an article of metal that you wish to pick up. Walk
through with the object and increase gradually until the detector picks up the metal. Start
with a smaller piece of metal you wish to detect and work from there. If set for smaller
traces of metal, the unit will alarm for larger pieces too. (The unit’s sensitivity is defaulted
at 70).
Examples of minimum sensitivities settings and what will set unit off:
99 –Paper clip, 90 –Coin cell batteries, 80 –Ring/Zippers/Buttons
75 –Box cutter, 70 –Gun/Knife, 65 –Cell Phone, 60 –Belt Buckles/Keys

16
I set up my unit, but it will not sound when I walk through with metal?
Always remember that the control panel with the buttons and LED should always be facing
away from the people walking through. Continue with the flowchart and make sure that
your alarm time length is not set at y-00. If set at y-00, the unit is on mute mode and will
not give an audio alarm when metal is detected. Secondly, please make sure that the
internal AC plug is plugged into the panel where the internal power source is plugged in.
Also, please make sure that the correct serial ports inside the head unit are securely
fastened in the proper locations.
There seems to be a lot of alarm detections occurring, more than we want or expected.
Why is this?
Before implementing a metal detector into your security, one must have a plan as to how
the equipment is going to best work for them. The best way is to consult who is going to be
monitoring the unit and what is the purpose of the unit. For example, if you are looking to
catch people stealing small computer IC chips in their pockets, you are going to need a high
sensitivity to detect them. One must have a plan as to which items are needed to be put
aside before walking through. If you are not sure, or would like a product specialist to assist
creating a plan, feel free to contact us at (815) 467-6464.
The passerby units are not adjusting or are continuously increasing. What should I do?
The black circular discs on the inside of the panels are the infrared sensors. These pick up
when a person walks through the unit. If the unit is not picking up the passerbys, the
sensors may have fingerprints or dirt on them. With a cloth towel with rubbing alcohol or
window cleaner, rub around the sensor to clean. Also, please check and make sure that the
cables are securely fastened to the metal detector leg panels and PC board. If this
connection is loose, the unit may not work.

17
SUGGESTED SINGLE LANE CONFIGURATION

18
SUGGESTED MULTI-LANE CONFIGURATION

19
2 YEAR WARRANTY INFORMATION
Metal Defender warrants that each piece of security equipment manufactured by Metal
Defender is protected by the following limited parts and labor warranty for a period of 24
(twenty-four) months (the “Warranty”). During this 24-month period Metal Defender will
inspect and evaluate all equipment returned to its authorized repair station or factory to
determine if the equipment meets Metal Defender’s performance specifications. Metal
Defender will repair or replace at no charge to the owner all parts determined faulty. This
Warranty does not cover batteries nor any and all failures caused by abuse, tampering,
theft, failure due to weather, battery acid or other contaminants and equipment repairs
made by an unauthorized party.
THIS WARRANTY IS EXPRESSLY IN LIEU OF ALL OTHER WARRANTIES, EXPRESSED OR
IMPLIED, INCLUDING THE WARRANTY OF MERCHANTABILITY OR FITNESS FOR A
PARTICULAR PURPOSE. THE BUYER ACKNOWLEDGES THAT ANY ORAL STATEMENTS ABOUT
THE MERCHANDISE DESCRIBED IN THIS CONTRACT MADE BY SELLERS’ REPRESENTATIVES, IF
ANY SUCH STATE-MENTS WERE MADE, DO NOT CONSTITUTE WARRANTIES, SHALL NOT BE
RELIED UPON BY THE BUYER, AND ARE NOT A PART OF THIS CONTRACT FOR SALE. THE
ENTIRE CONTRACT IS EMBODIED IN THIS WRITING. THIS WRITING CONSTITUTES THE FINAL
EXPRESSION OF THE PARTIES’ AGREEMENT AND IS A COMPLETE AND EXCLUSIVE
STATEMENT OF THE TERMS OF THIS AGREEMENT.
The parties agree that the Buyers’ sole and exclusive remedy against Seller shall be for the
repair and replacement of defective parts. The Buyer agrees that no other remedy
(including, but not limited to, incidental or consequential damages for lost sales, lost
profits, injury to person or property) shall be available to him.

20
Replacement Parts
Replacement Legs
Please Call Us Directly For Price:
(815-290-5354) (815-467-6464)
Replacement Head Unit
Please Call Us Directly For Price:
(815-290-5354) (815-467-6464)
Speaker
$19.99
Zone Card
$22.99
Fuse
$15.99
Power Supply
$34.99
Motherboard
$79.99
Power Cords
$21.99
Set of Nuts + Bolts
$14.99
Battery Back Up
$165.00
Casters
$140.00
Leg Feet (pair x2)
$59.99
Infrared Sensors (pair x2)
$19.99
Other manuals for MD-33
1
Table of contents
Other Metal Defender Metal Detector manuals


