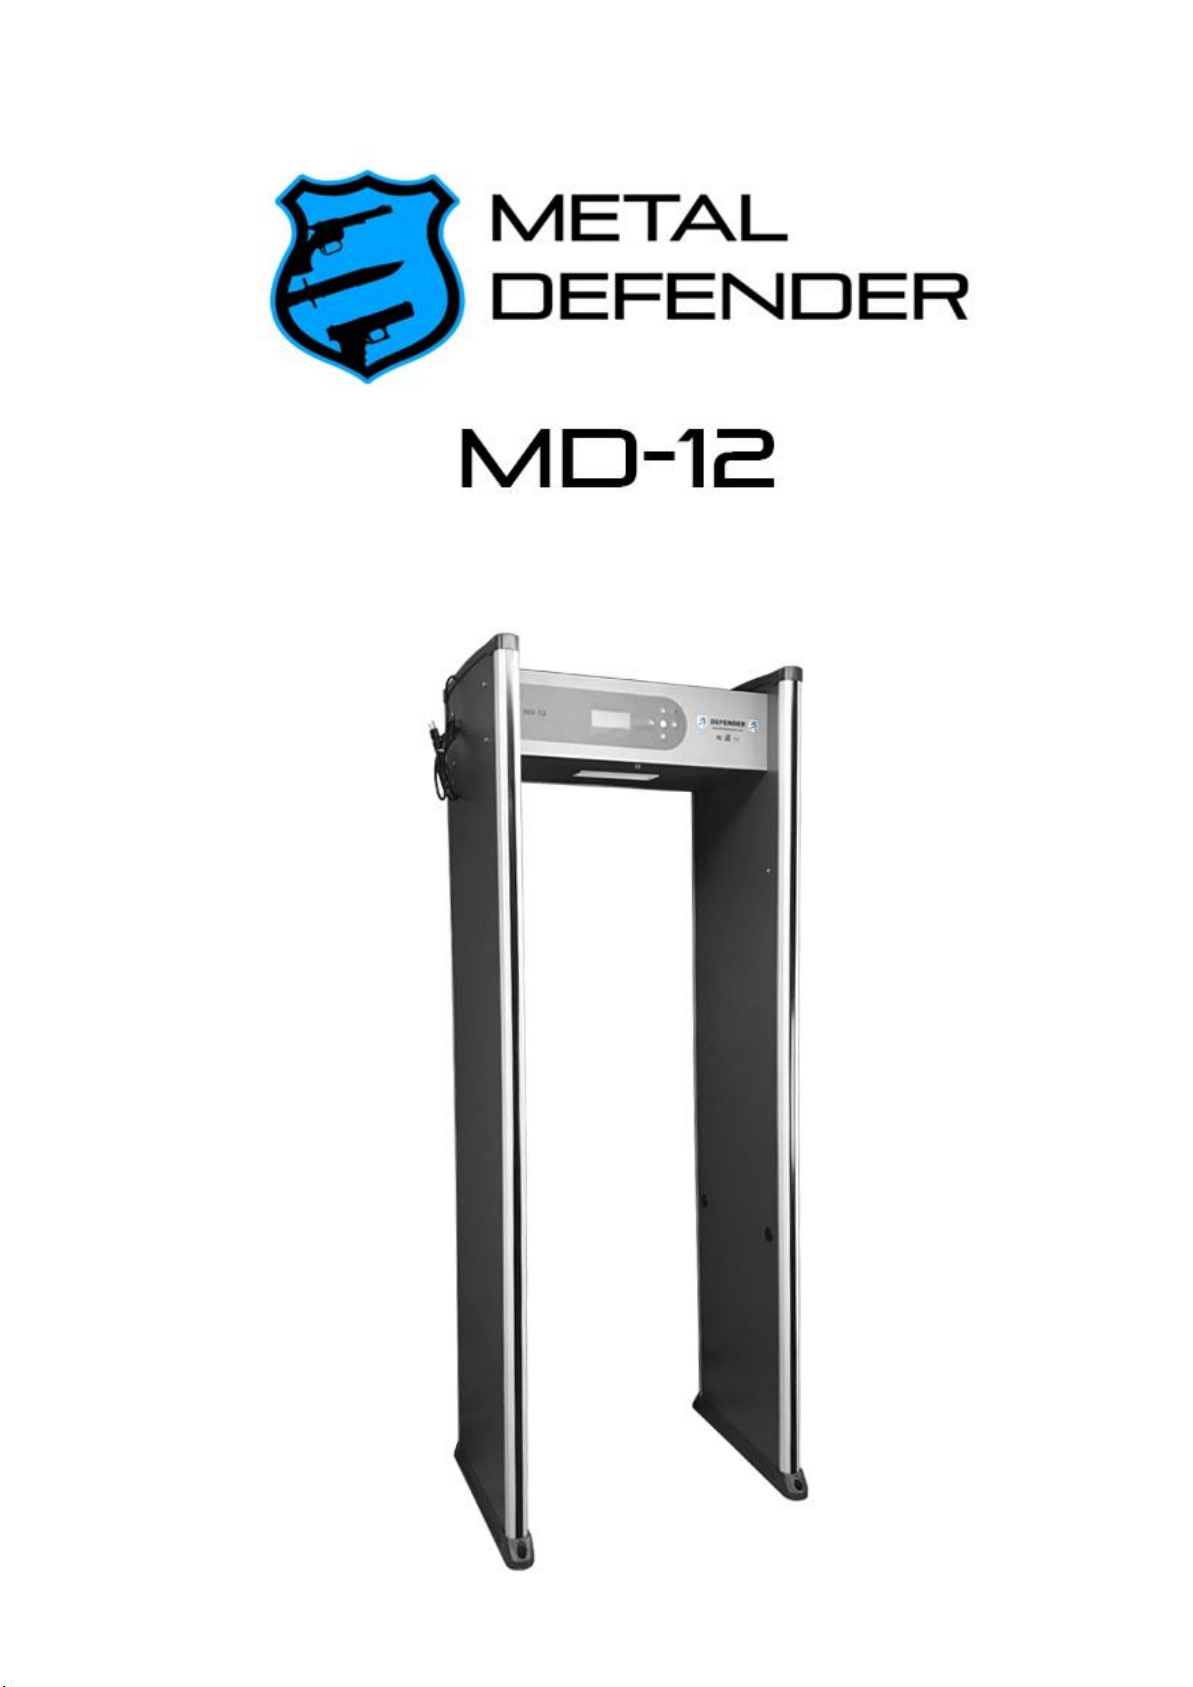
Metal Defender MD-12 User manual

1
User Manual

2
Index
Precautions –pg. 1
Product Description –pg. 2
Interference –pg.3
Performance and Features –pg. 4
Parts –pg. 5
Installation –pg. 6
Installation –pg. 7
Panel Interface –pg. 7
Zone Description –pg. 8
Display Panel –pg. 9
Operating Procedure –pg. 10
Operating Procedure –pg. 11
Adjustment of Article Detection –pg. 12
Technical Parameters –pg. 13
Factory Defaults –pg. 14
Packing List –pg. 14
Contact
(815) 467-6464
sales@metaldefender.com

1
Please read the following carefully b
e
fore op
er
at
i
on:
The following precautions are intended to tell you how to operate this
product appropriately and safely. Please read this part carefully and make
sure that you understand completely before you read other parts of this
manual.
1. The unit can be used indoor and outdoor. If using outside, please use a
canopy to protect against rain and moisture.
2. Choose a location that is smooth and stable. Do not touch the detector
during security screening to avoid a false alarm.
3. Make sure there are no large metal objects or strong magnetic field
around the detector within 6 feet (2 Meters).
4. Keep the detector far from any power lines and communication cables.
5. Do not install the unit in wet or high temperature environment.
6. Do not disassemble the unit without help from a technician.
7. Please wait 1 minute for the unit to self-diagnose when starting the
machine.
8. Follow the user manual when installing to make sure the wire connection
is correct inside the unit prior to powering on the unit.

2
P
r
odu
c
t D
e
s
cri
pt
i
on
Metal Defender walk through metal detectors employ advanced digital
detection technology designed specifically for the use of detecting metal and
alloy materials hidden on a human body. The unit’s sensitivity can be adjusted:
the highest sensitivity could detect an object the size of a paper clip and alert
personnel to the zone where the metal is hidden.
The user could also adjust the individual zones to exclude common metal
objects carried on a day to day basis including: coins, keys, jewelry, belt
buckles. The MD-12 is perfect for environments where theft protection is
needed: industrial and mining enterprises, banks, e-recycling and
refurbishment, and warehouses as well as environments where it is necessary
to prevent the carrying of dangerous items: Airports, prisons, customs
warehouses, amusement parks, and stadiums. The Metal Defender metal
detector is your easy to use, reliable, cost effective choice for security metal
detection.

3
Interference
The interferences that can interfere with the operation of this detector are
described as follows:
Mechanical Interference
Revolving Door: The distance between the revolving door and this detector
should be 1000 mm. Make sure the door is opened outwards. For two doors,
this detector should be installed on one of them, and we advise you to lock the
other door. For Metal door, we advise you to cut one corner of the metal door
frame to insulate its metal loop. After installing this detector, rotate the door
back and forth to check the installation effect.
Electronic Interference
There are many objects that can produce electronic interference to this
detector such as elevators, motors, TV sets, computer monitors, telephone
wire and mobile phones. Keep these objects away from this detector.
The Moving Object
If this detector is installed too close from the road, the go and from large
vehicles will influent its normal work. Therefore, we advise you to keep this
detector away from the road as far as possible when install it.
Parallel-In Application Requirement
While in parallel- in application, the minimum distance between the two
detectors should be over 700 mm to avoid any interference with each other.

4
Performance and Features
The metal detector can be operated through the operating panel. The unit can
precisely display the detected metal hidden on the body and the alarm zone
can be directly displayed through the LED zone indicators. An audible alarm
will simultaneously go off.
In maximum sensitivity, it can detect metal the size of a paperclip. The
sensitivity for each zone can be adjusted in the range of 0-255. Zones can be
adjusted to not detect items such as belt buckles or cuff links.
By applying digital, analog, and left-right balancing technology, the unit can
effectively prevent false alarms.
Password protection ensures only authorized personnel can alter settings in
the walk through unit.
Records number of people passed through as well as the number of triggered
alarms.
Harmless to heart pacemaker, pregnant woman, magnetic soft disc and tape,
etc.
The power supply for the whole machine is located on the top of the base unit,
which can be controlled with operating panel.
Advanced alloy material increases fire and water resistance.
It only needs 10 minutes to install or disassemble the detector for its
integration design.

5
Parts of the Detector
1. Base Unit
2. Alarm Indicator
3. Probe
4. Infra Sensor
5.Water-Proof Feet

6
Installation
Please read through the precautions prior to installation, so as to ensure a
normal operation of the product and avoid external interference.
1). Unscrew the control panel case and open it.
2). As in figure 2-3, connect the control panel case to left door and right door
at the location of the bolt hole openings, tighten the bolts with the provided
nuts.
3). Connect the left and right communication lines inside the control panel to
each of the door panels, then connect the power line to the door panel where
you will be drawing power from.
4). Secure the top panel of the control unit case with the provided screws,
push up the assembled unit to rest on the feet as in Figure 4.
5). Insert the power plug and turn on the unit by flipping the switch.
Figure 2 Figure 3 Figure 4

7
Panel Interface
1. LCD Display Interface: It displays each parameter during debugging;
alarm records and the amount of the pass throughs
2. Up Key: Number adjustment (increase)
3. Down Key: Number adjustment (decrease)
4. Left Key: Menu upward key or cursor left key
5. Right Key: Menu downward key or cursor right key
6. Enter Key: Enter function setting during debugging
7. Indicator: Red means power down status; green means working status

8
Zone Description
Alarm Zone Indicator
There are 12 groups of zones distributed in
the left and right doors. When metal is
detected, an LED will light up in the zone that
the metal was detected in.
Infrared Sensor
The infrared sensor can prevent false alarms
when no one is passing through. If an alarm
is triggered by someone passing through,
they should be scanned with a hand wand.

9
LCD D
i
sp
l
ay Pan
el
1. Function main menu: 6 sub menus.
Sensitivity: There are 12 zones on the metal detector. The sensitivity for each zone
may independently be adjusted in the range of 0-255 with larger numbers for higher
sensitivity. The sensitivity for the 12 independent zones will be correspondingly
changed while adjusting the integral sensitivity.
Alarm: The alarm can be set to trigger for 1, 2, or 3 seconds.
Occasion: Set the sensitivity level quickly.
Frequency: Working Frequency.
Language: Change language.
Password: The factory password is “000000”, which can be changed for preventing
unwanted operation by non administrator.

10
Operating Procedure
1. Press the ENT key to enter debugging interface, it will ask to enter the password, which is
the factory password or the new password for previous operation.
2. Press the ENTER key again: if the password is correct, it will enter the main menu
setting (A), otherwise, it will display (B) :
3. If the password is forgotten, you may enter the universal password 888888 by “LEFT
and RIGHT” key ( for switching ) and new password through the “Password Change
Setting” displayed in the main menu.
4. After entering the correct password and being redirected to the main menu, select
“SENSITIVITY” by using the “LEF T and RIGHT” keys, then press the ENTER key to enter.
Select the zone for adjustment by using the “LEF T and RIGHT” keys and change the
sensitivity value with the “UP and DOWN” keys. When you select "13 TOTAL VAL-230",
you can adjust the integral sensitivity. Press the ENTER key after changing.

11
6. Select “ALARM” with the “LEFT and RIGHT” keys in “F UNCTION”, and press the
ENTER key to enter. Press the “Up and Down” keys to change the alarm time, and press
the ENTER key after changing.
7. Select “OCCASION“ with the “LEFT and RIGHT” keys in “FUNCTION ”, and press the
ENTER key to enter. Press the “Up and Down” keys to change the working Location,
and press the EN TER key after changing.
8. Select “FREQ“ with the “LEF T and RIGHT” keys in “FUNCTION”, and press the ENTER
key to enter. Press the “Up and Down” keys to change the working frequency, and
press the ENTER key after changing.
9. Select “LANGUAGE“ with the “LEFT and RIGHT” keys in “FUNCTION”, and press the
ENTER key to enter. Press the “Up and Down” key to change the working frequency,
and press the ENTER key after changing.

12
10. Select “PASSWORD” with the “LEFT and RIGHT” keys in “FUNCTION”. Directly
change the cursor position with the “LEFT and RIGHT” keys and enter the new
password by adjusting the numeral with the “UP and DOWN” key, then press the
ENTER key.
Adjustment of Object Detection
How to exclude the small objects while still detecting the big larger objects:
1.) Choose a small metal object that is about the size of the items you wish to exclude
from detection, such as a key or ring.
2.) Turn up the sensitivity and pass through the unit with the sample and it will alarm.
3.) Turn down the sensitivity appropriately and pass through the unit with the sample.
If it still alarms, turn down the sensitivity until it no longer detects the sample.
(Please remember, if the sensitivity of some zones need to be turned down, you only
need to adjust the sensitivity for that zone, not the integral sensitivity)
After the adjustments have been made, this detector will not alarm when it has
detected small metal objects but w ill detect the larger metal objects precisely.

13
Technical Parameters
Input Power: AC 220V/50HZ~60HZ
Net Weight: 71kg
Power: < 20W
Working Environment: 0℃~45℃
Alarm: Visible and audible alarm
Sensitivity Adjustment: 0~255 grades sensitivity adjustment
Alleyway Size: 2000mm×700mm×605mm
Overall Size: 2230mm×830mm×730 mm

14
Factory Defaults
Length of Alarm Time: 1 second
Sensitivity of Zone 1~12: 230
Total Sensitivity Value: 230
Password: 000000
Package Contents
Power cord
8 sets of screws
Key for Head Unit
Manual
Table of contents
Other Metal Defender Metal Detector manuals
Popular Metal Detector manuals by other brands

Bounty Hunter
Bounty Hunter HandyMan Nail Finder S3019-H operating manual

Harbor Freight Tools
Harbor Freight Tools 67378 Owner's manual & safety instructions

Gold Century
Gold Century GC-1019 owner's manual

Tesoro
Tesoro Cibola Getting started

Bounty Hunter
Bounty Hunter Mach-1 user manual

BallistiGlass
BallistiGlass BallistiScan quick start guide