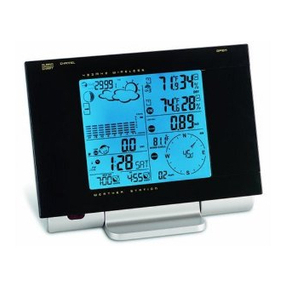
Meteotime WM5300 User manual

Meteotime
Weather station
with Thermo-Hygrometer
WM5300

MUST READ BEFORE GETTING STARTED
Your Meteotime Weather Station is different to traditional weather stations which measure the prevailing conditions
only, the date of this weather station is based on the METEOTIME which is wor ed out on a daily basis by highly
professional meteorologists using state-of-art instruments.
The Meteotime Weather Station is engineered in such a way that it is able to receive the coded METEOTIME signal
containing the weather information. The information is broadcasted via the stations for radio-controlled cloc s DCF77
(localed in Germany). For this reason, your Meteotime Weather Station is also a radio-controlled cloc with all the
nown advantages, such as always showing the exact time, and automatic change to daylight saving time in winter
and in summer.
You are able to receive weather forecasts for 60 meteorological regions within Europe for up to 4 days in advance,
and offer a 2-day-advance forecasts for an additional 30 regions.
Watch the symbol GOOD RECEPTION or BAD RECEPTION on the isplay. Once you have foun
the right location for GOOD RECEPTION, you may leave the Meteotime Weather Station there, it
will collect its ata by ra io controlle signal. Within a few minutes time an the ate will
appear. However, the transfer of the very large amount of ata (forecast for all regions an
ays) will take much longer.
To completely receive all ata will take up to 24 hours form the time of the initial setup.

FEATURES
This pac age comes with a main unit which is Meteotime Weather Station, and a remote outdoor Thermo-hygrometer
sensor.
This Meteotime Weather Station has equipped the thermo-hygrometer sensor to measure the indoor temperature and
humidity, and also has a wireless outdoor thermo-hygrometer sensor to measure the outdoor temperature and
humidity.
Key Features:
Weather Status for today and coming three days for 470 cities
Precipitation Probability for Today
Wind Speed and Wind Direction for today
3 channel outdoor 433MHz wireless Thermo-hygrometer (channel 1 sensor is included, additional sensors are
required for channels 2 and 3)
Indoor Thermo-hygrometer
Maximum and minimum memories of temperature and humidity readings
Temperature and humidity trends (UP/ FLAT/ DOWN),
Temperature in degree C only.
Regional Day-time temperature and Night-time Temperature information
7-languages abbreviation (English/ Espanol/ Francais/ Italiano/Dutch /Swedish/ Deutsch)
Critical Weather Alert
Maximum of 5 cities weather Information can be selected and displayed
Personalized a place name / city.
Radio-controlled Cloc and Calendar (24 hours format only)
Time-zone setting
Dual alarm (wee day alarm/single alarm, Alarm sound for 2 minutes)
Pre- alarm (Programmable) for outdoor sensor – Channel 1 only.
Battery Low Indicator for Main Unit and Wireless Sensor
Powered by 2 x AA batteries for main unit, and 2 x AAA batteries for the outdoor sensor
DATA TRANSFER
METEOTIME sends the data during precisely defined time slots in accordance with UTC. (UTC, i.e. for Central Europe
during the winter UTC+1, during the summer UTC+2; for Great Britain and Portugal during the winter UTC, during the
summer UTC+1)

Transmission times (UTC) Forecast for
10:00 p.m. – 03:59 a.m. the actual (new) day (TODAY)
04:00 a.m. – 09:59 a.m. the next day (TOMORROW)
10:00 a.m. – 03:59 p.m. the following day (the day after TOMORROW)
04:00 p.m. – 06:59 p.m. the day following this (Two days after TOMORROW)
07:00 p.m. – 09:59 p.m. the 30 additional regions
In the even that the reception during the above time slots is completely or at times interfered with or has bro en down,
these forecasts, or parts of them, will be missing.
This Meteotime Weather Station has the ability to measure the indoor and outdoor temperature and humidity.
INTRODUCTION
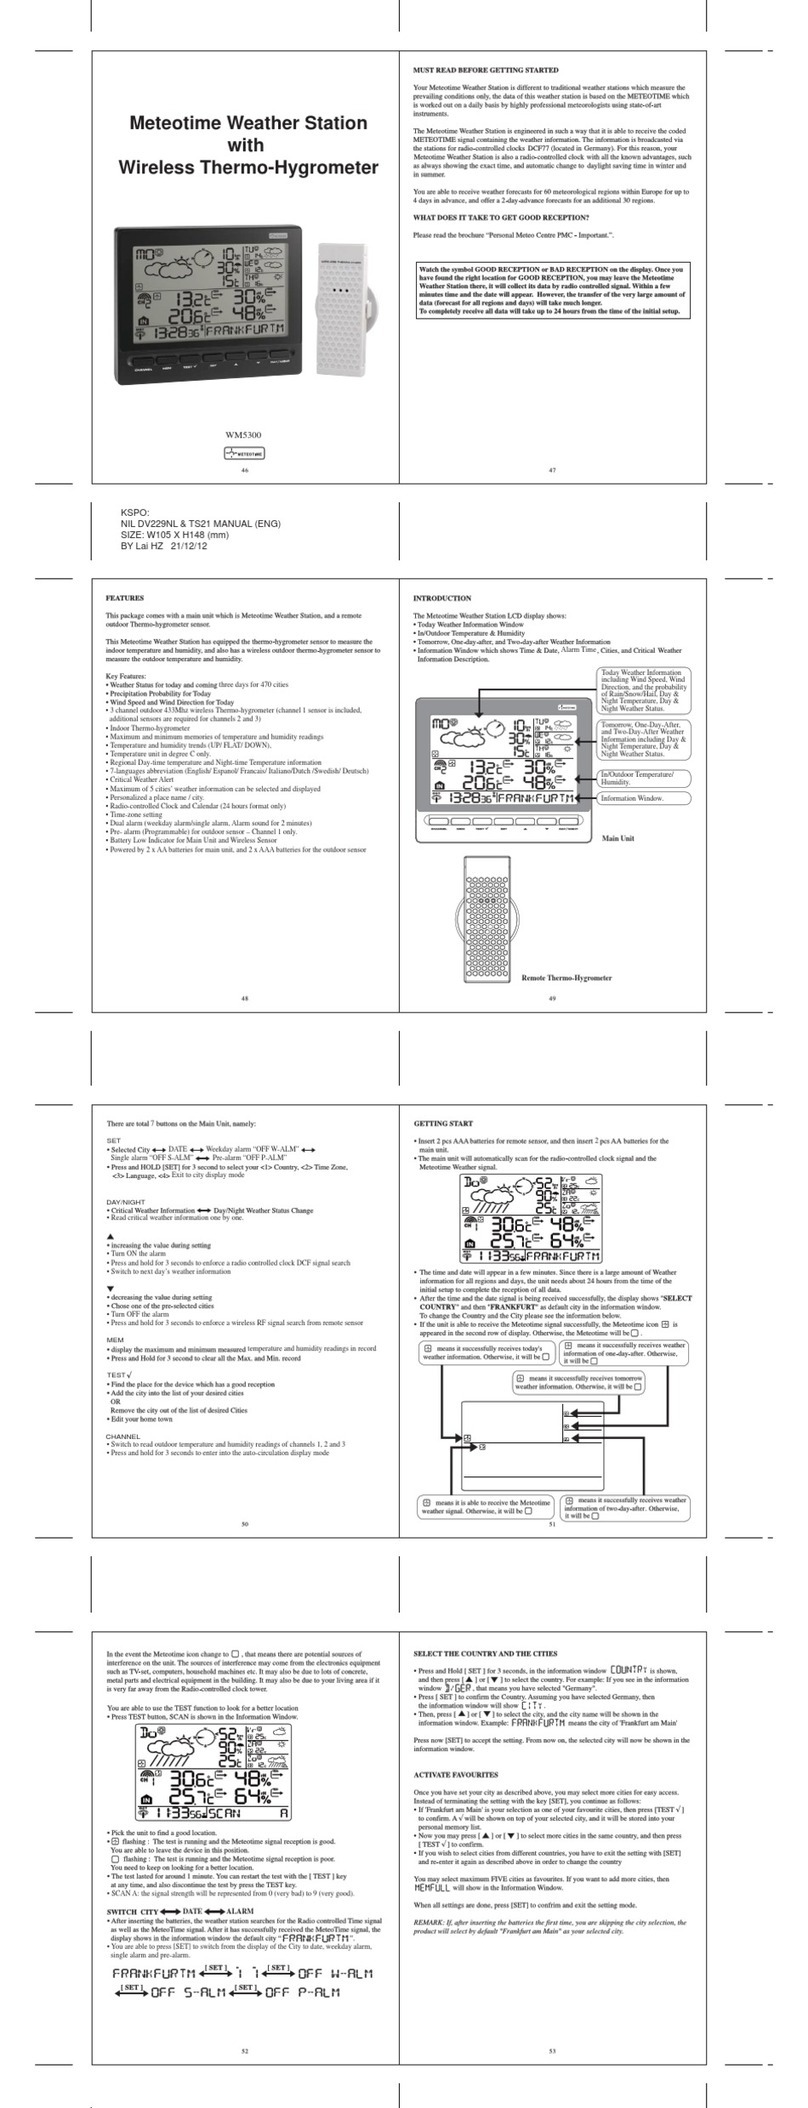
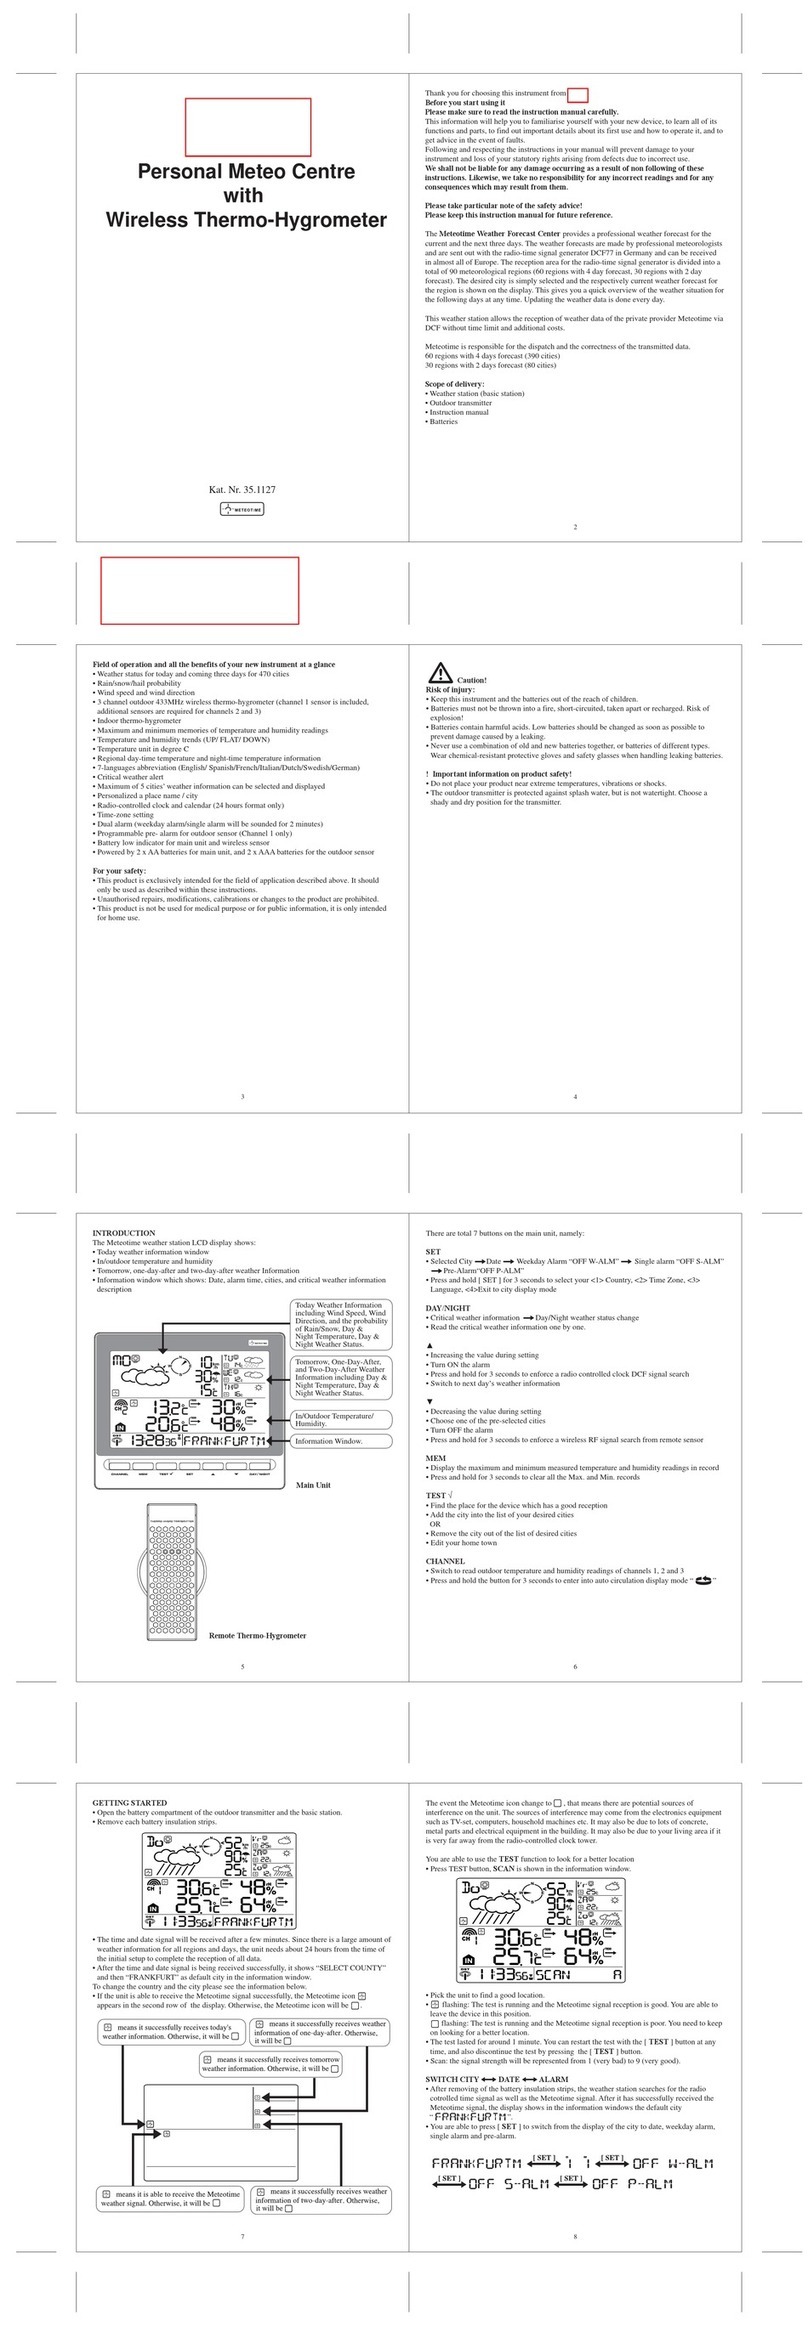
The Meteotime Weather Station LCD display shows:
Today Weather Information Window
In/Outdoor Temperature & Humidity
Tomorrow, One-day-after, and Two-day-after Weather Information
Information Window which shows Date, Alarm time, Cities, and Critical Weather Information Description.
Main Unit
Information Window
Tomorrow, One-Day-After, and
Two-Day-After Weather Information
including Day & Night Temperature, Day
& Night Weather Status.
In/Outdoor Temperature & Humidity
Today Weather Information including
Wind Speed, Wind Direction, and the
probability of Rain/Snow/Hail, Day &
Night Temperature, Day & Night
Weather Status

Remote Thermo-Hygrometer
There are total 7 buttons on the Main Unit, namely:
SET
Selected City Date Wee day alarm “OFF W-ALM” Single alarm “OFF S-ALM” Pre-alarm “OFF P-ALM”
Press and HOLD [SET] for 3 second to select your <1> Country, <2> Time Zone, <3> Language, <4>Exit to city
display mode
DAY/NIGHT
Critical Weather Information Day/Night Weather Status Change
Read the critical weather information one by one.
▲
increasing the value during setting
Turn ON the alarm
Press and hold for 3 seconds to enforce a radio controlled cloc DCF signal search
Switch to next day’s weather information
▼
decreasing the value during setting
Chose one of the pre-selected cities
Turn OFF the alarm
Press and Hold for 3 seconds to enforce a wireless RF signal search from remote sensor
MEM
display the maximum and minimum measured temperature and humidity readings in record

Press and Hold for 3 second to clear all the Max. and Min. record
TEST √
√√
√
Find the place for the device which has a good reception
Add the city into the list of your desired cities OR Remove the city out of the list of desired Cities
Edit your home town
CHANNEL
Switch to read outdoor temperature and humidity reading of channels 1, 2 and 3.
Press and hold for 3 seconds to enter into“ ” display mode
GETTING START
Insert 2 pcs AAA batteries for remote sensor, and then insert 2 pcs AA batteries for the main unit.
The main unit will automatically scan for the radio-controlled cloc signal and the Meteotime Weather signal.
The time and date will appear in a few minutes. Since there is a large amount of Weather information for all
regions and days, the unit needs about 24 hours from the time of the initial setup to complete the reception of
all data
After the time and date signal is being received successfully, the display shows “SELECT COUNTRY” and then
“FRANKFURT” as default city in the information window.
To change the Country and the City please see the information below.
If the unit is able to receive the Meteotime signal successfully, the Meteotime icon is appeared in the
second row of display. Otherwise, the Meteotime will be .

In the event the Meteotime icon change to , that means there are potential sources of interference on the unit. The
sources of interference may come from the electronics equipment such as TV-set, computers, household machines
etc. It may also be due to lots of concrete, metal parts and electrical equipment in the building. It may also be due to
your living area if it is very far away from the Radio-controlled cloc tower.
You are able to use the TEST function to loo for a better location
Press TEST button, SCAN is shown in the Information Window.
Pic the unit to find a good location.
flashing: The test is running and the Meteotime signal reception is good. You are able to leave the
device in this position.
flashing: The test is running and the Meteotime signal reception is poor. You need to eep on loo ing
for a better location.
means it successfully receives today’s
weather information. Otherwise, it will be
means it is able to receive the Meteotime
weather signal. Otherwise, it will be
means it successfully receives tomorrow
weather information. Otherwise, it will be
means it successfully receives weather
information of one-day-after. Otherwise, it will be
means it successfully receives weather
information of two-day-after.
Otherwise, it will
be

The test lasted for around 1 minute. You can restart the test with the [ TEST ] ey at any time, and also
discontinue the test by press the TEST ey.
SCAN A: that signal strength will be represented from 0 (very bad) to 9 (very good).
SWITCH CITY
DATE
ALARM
After inserting the batteries, the weather station searches for the Radio controlled Time signal as well as the
MeteoTime signal. After it has successfully received the MeteoTime signal, the display shows in the information
window the default city “ ”.
You are able to press [ SET ] to switch from the display of the City to date, wee day alarm, single alarm and
pre-alarm.
[ set ]
D
,
26
M
,
5
[ set ] OFF W-ALM [ set ] OFF S-ALM [ set ] OFF P-ALM
SELECT THE COUNTRY AND CITY / CITIES
Press and Hold [ SET ] for 3 seconds, in the information window is shown, and then press [ ▲ ] or
[ ▼ ] ey to select the country. For example: if you see in the information window , that means you
have selected “Germany”.
Press [ SET ] to confirm the Country. Assuming you have selected Germany, then the information window will
show .
Then, press [ ▲ ] or [ ▼ ] ey to select the city, and the city name will be shown in the information window.
Example: means the city ‘Fran furt am Main’
Press now [ SET ] KEY to accept the setting. From now on, the selected city will now be shown in the information
window.
ACTIVATE FAVOURITES
Once you have set your city as described above, you may select more cities for easy access. Instead of terminating
the setting with the ey [ SET ], you continue as follows:
If ‘Fran furt am Main’ is your selection as one of your favorite cities, then press [ TEST √ ] ey to confirm. A √ will be
shown on top of your selected city, and it will be stored into your personal memory list.
Now you may press [ ▲ ] or [ ▼ ] to select more cities in the same country, and then press [ TEST √ ] ey to
confirm.
If you wish to select cities from different countries, you have to exit the setting with [ SET ] and re-enter it again as
described above in order to change the country.
You may select maximum FIVE cities as favorites. If you want to add more cities, then will show in the
Information Window.

When all settings are done, press [ SET ] to confirm and exit the setting mode.
REMARK: If, after inserting the batteries the first time, you are s ipping the city selection, the product will select by
default “Fran furt am Main’ as your selected city.
DISPLAY OF FAVOURITES
If you have selected more than one city as favorite, as an example Fran furt am Main, Paris and Stoc holm, then you
are able to scroll through these cities by pressing [ ▼ ] when the Information Window shows the CITY NAME (Press SET
until it displays the City Name).
[▼] [▼]
REMOVE A CITY FROM THE LIST OF FAVOURITES
Press and Hold [ SET ] for 3 seconds, is shown in the Information Window, then press [ ▲ ] or [ ▼ ]
to select the country.
Press [ SET ] ey to confirm the Country
Then, press [ ▲ ] or [ ▼ ] to go to your selected city with the √
Press [ TEST √ ] to remove the √ . Now this city is removed from the favorites
Repeat this if you wish to remove more cities from your list
Now you may also press [ ▲ ] or [ ▼ ] to select another favorite city.
Once you have made all your changes, press [ SET ] to quit. will be shown in the information window. After 4
seconds, it will go to the City-Date-Time Mode.
PERSONALIZED A PLACE NAME
Press and Hold [ SET ] for 3 second. In the information window, is shown, and then press [ ▲ ] or
[ ▼ ] ey to select the country. Let’s said you have selected the country Germany which is represented in
.
Press [ SET ] ey to confirm the Country (let’s said we select Germany right now), and then the information
window will show .
Then, press [ ▲ ] or [ ▼ ] ey to select the city, and the city name will be shown in the information window
such as means the city ‘Fran furt am Main’, and you would li e to enter a new city which
is near the region of Fran furt am Main.
Press the ‘MEM’ ey ; a cursor flashes on the first position of the Information Window
Then following input commands then apply:
KEY Function
'▲' or '▼' Selection of a letter

SET <1> Accept the selected letter and jumps to the next position. OR
<2> If you have not entered any letter (in other words, if only the cursor is flashing at the last
position), confirm the entry with this ey and your place will also be included in the memory with
immediate effect
TEST One position bac in the data entry process
** The place that you have selected to enter your own description will still exist under its own name.
Press [ SET ] ey to confirm and exit
SET THE TIME ZONE an LANGUAGE
Press and Hold [ SET ] for 3 second, is shown in the Information Window.
Press [ SET ] again, then is shown in the Information Window, press [ ▲ ] or [ ▼ ] ey to
adjust the time zone.
Press [ SET ] again, then the LANGUAGE will be shown in the Information Window, press [ ▲ ] or [ ▼ ] ey to
select your desired language. There are total seven languages for selection, namely German, English, Spanish,
French, Italian, Dutch, Swedish.
Press [ SET ] again and will be shown at the information window. After 4 seconds, it will go to the
City-Date-Time Mode.
REMARK: If you do not have any selection into the Setup mode up to 60 seconds, it will automatically exit the setup
mode The Information Window will show City / Sunrise & Sunset Time / Time & Date
SWITCH TO NEXT DAYS’ WEATHER INFORMATION
For each press of the UP [ ▲ ] button, the user can switch and view the weather information from today to tomorrow,
one-day-after and two-day-after.

SWITCH DAY WEATHER INFORMATION
NIGHT WEATHER INFORMATION
The device is able to automatically switch to DAY-WEATHER and NIGHT-WEATHER respectively. The user can press the
[ DAY/NIGHT ] button to see the DAY-Weather (for 10-second period) if currently show the NIGHT-WEATHER, or vice
verse.
[ DAY/NIGHT ]

CRITICAL WEATHER INFORMATION
Meteotime Weather signal contains the Critical Weather Information such as Gust, Frozen Rain, Heavy Snow, Thunder,
Strong UV, Dense Fog, Bise, Mistral, etc. for today and coming three days. A critical weather alert signal will be
turned on in case that day has critical weather that the user must now.
Sometimes there are more than one critical weather information in the 4-days. Press [ DAY/NIGHT ] ey to read the
critical weather information one by one. The special icon of the day will be flashed when you read the Information.

Press [ SET ] ey to go bac to the display of CITY
DATE
WEEKDAY ALARM
SINGLE
ALARM
PRE-ALARM. If you would li e to read the Weather Information in the information window, then press
[ DAY/NIGHT ] Key to display Day Night Weather information and also the Critical Weather Information.
If no ey is pressed, the critical weather information will be toggle to display, so as to ma e sure you are aware of the
critical weather details
LOW BATTERY INDICATION
When it is time to replace batteries, the respective low-battery indicator (see graphics) will appear next to the
weather forecast for the display unit or next to the outdoor temperature for the outside sensor.
WEATHER STATUS
There are total 15 weather status for Day and 15 weather status for Night.
Significance Day Night Significance Day Night
Sunny (Clear at
night)
Heavy Rain
Light Cloudy
Frontal Storms
Mostly Cloudy
Heat Storms

Overcast
Sleet Showers
Stratus Clouds
Snow Showers
Fog
Sleet
Showers
Snow
Light Rain
REMOTE SENSORS STATUS
The wave icon above the current channel icon shows the connection status of the corresponding remote sensor:
Icon Status
Searching for the signals from the remote sensor
Corresponding remote sensor signal received successfully
No signals received for over 1 hour
SEARCH FOR REMOTE SENSORS
The main unit can be manually activated to search for the signals from remote sensors by pressing and holding
DOWN (▼) button.
VIEWING REMOTE (CHANNEL) TEMPERATURE AND HUMIDITY
Static Display:
Press [ CHANNEL ] eys to select measurements from different remote sensors, each is mode to a unique
channel 1,2, or 3

Channel Auto-Scan Display:
Press To enable an automatic scan of all channels, press and hold CHANNEL, until the icon is displayed.
The measurements from each remote channel will be alternately displayed with a 5 seconds viewing.
NOTE: the channel auto-scan feature can be active only if there are more than one remote sensors
operating an are set to ifferent channels.
MAXIMUM AND MINIMUM TEMPERATURES
The maximum and minimum recorded indoor and outdoor temperatures and humidity will be automatically
stored in the memory of the main unit. To display them, press [MEM] button and the respective indicators, [MAX]
or [MIN] will be displayed.
To clear the memory, hold [MEM] button for 3 seconds. The maximum and minimum temperature records will be
erased.
ALARM FEATURE
Week ay Alarm:
This is a repeat alarm that will activate daily from Monday to Friday at a set time.
Single Alarm:
This is a single alarm that will activate once at a set time
HOW TO SET ALARM
Press [SET] to toggle between wee day, single alarm time or pre-alarm.
If the alarm is disarmed, the time will be displayed as “OFF W-ALM”
Hold [SET] for 3 seconds, the hour digits will blin .
Enter the hour by using UP [▲] or DOWN [▼] button.
Press [SET] to confirm, the minute digits will blin .
Enter the hour by using UP [▲] or DOWN [▼] button.
Press [SET] to exit and the respective alarm icons [ ] , [ ] and [ ]will be activated.
HOW TO STOP ALARM
When alarm is on, the respective alarm icons [ ] and [ ] will be flashing. Press UP [▲] or DOWN [▼] button to
stop the alarm immediately.
To turn off the alarm, press UP [▲] or DOWN [▼] button to change the alarm time display as “OFF W-ALM”
If no button is pressed, the alarm will be sounded for 2 minutes and then deactivated automatically.

SETTING THE ICE WARNING ALARM (PRE-ALM)
If Wee day (W) or Single day (S) alarm is set, the Ice Warning Alarm (Pre-ALM) can be programmed.
Press and hold [SET] button for 3 seconds once to enter into the Ice Warning Alarm setting mode on “PRE-ALM”
display mode.
The number 15 will flash, meaning that if selected, the alarm will sound 15 minutes earlier than the Wee day or
Single alarm.
Select the desired Ice Warning Alarm interval in 15 minutes increments between 15 and 90 minutes, using UP
[▲] or DOWN [▼] button.
Press [SET] button to confirm and exit from the alarm setting mode.
SPECIFICATION ON IN/OUTDOOR TEMPERATURE AND HUMIDITY MEASUREMENT
Temperature Display Range : -40 degree C to 70 degree C
Temperature Resolution : 0.1 degree C
Temperature Operating Range (Main Unit) : -5 degree C to + 50 degree C
Temperature Operating Range (Sensor Unit) : -20 degree C to + 60 degree C
Temperature Accuracy : +/- 1 degree C
Humidity Display Range : r.H. 1% to 99%
Humidity Resolution : 1%
Humidity Accuracy : +/-5% (within 25% - 80% at 25 C)
RF Transmission Frequency : 433 Mhz
RF Transmission range : Maximum 30 meters (Open Area)
Main Unit is powered by AA batteries x 2 pcs.
Outdoor Thermo-hygrometer is powered by AAA batteries x 2 pcs.
LIABILITY DISCLAIMER
•
The electrical and electronic wastes contain hazardous substances. Disposal of electronic waste in wild country and/or in
unauthorized grounds strongly damages the environment.
•
Please contact your local or/and regional authorities to retrieve the addresses of legal dumping grounds with selective collection.
•
All electronic instruments must from now on be recycled. User shall ta e an active part in the reuse, recycling and recovery of
the electrical and electronic waste.
•
The unrestricted disposal of electronic waste may do harm on public health and the quality of environment.
Consi eration of uty accor ing to the battery law
Old batteries do not belong to domestic waste because they could cause damages of
health and environment. End-user are committed by law to bring bac needed batteries
to distributors and other collecting points.

•
As stated on the gift box and labeled on the product, reading the “User manual” is highly recommended for the benefit of the
user. This product must however not be thrown in general rubbish collection points.
•
The manufacturer and supplier cannot accept any responsibility for any incorrect readings and any consequences that occur
should an inaccurate reading ta e place.
•
This product is designed for use in the home only as indication of the temperature.
•
This product is not to be used for medical purposes or for public information.
•
The specifications of this product may change without prior notice.
•
This product is not a toy. Keep out of the reach of children.
•
No part of this manual may be reproduced without written authorization of the manufacturer.
EC-DECLARATION OF CONFORMITY
Product: WM5300
This product contains the approved transmitter and complies with the essential requirements of Article 2 of the R & TTE
Directive 1999/5/EC, if used for its intended use and that the following standard(s) has/have been applied:
Electromagnetic compatibility and Radio spectrum Matters
ETSI EN 300 220-2 V2.3.1 (2010-02)
ETSI EN 300 330-2 V1.5.1 (2010-02)
Electromagnetic compatibility
ETSI EN 301 489-1 V1.9.2 (2011-09)
ETSI EN 301 489-3 V1.4.1 (2002-08)
Low voltage directive
EN 60950-1:2006+A11:2009+A1:2010+A12:2011
Additional information:
The product is therefore confirm with the Low Voltage Directive 2006/95/EC and R&TTE Directive 1995/5/EC and
carries the respective CE mar ing.
RTTE Compliant Countries:
All EU countries, Switzerland
And Norway
Other manuals for WM5300
1
Table of contents
Other Meteotime Weather Station manuals
