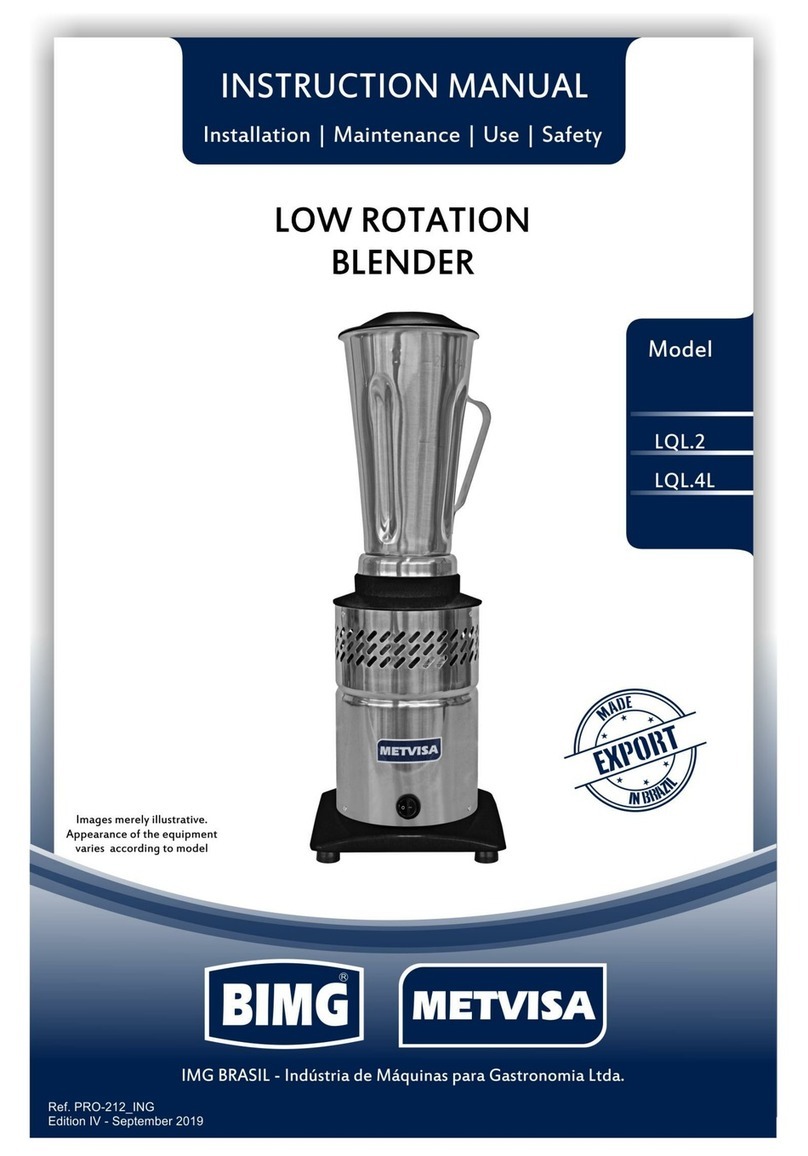
METVISA LQ.4 Series User manual

1

2
TABLE OF CONTENTS
1.
Safety Information................................................................................................. 3
1.1
General warnings................................................................................................................ 3
2.
Technical Characteristics .................................................................................... 4
2.1
Main Components ............................................................................................................. 4
2.2
Technical Data .................................................................................................................. 5
3.
Installation............................................................................................................. 6
3.1
Arrangement of the Device .............................................................................................. 6
4.
Use of the Device ................................................................................................. 7
4.1
Utility................................................................................................................................... 7
4.2
Commands ......................................................................................................................... 7
4.3
Operating Procedures ........................................................................................................ 8
5.
Cleaning and Maintenance................................................................................. 10
5.1
Cleaning Procedures and Products Used ........................................................................ 10
5.2
Maintenance and Procedures in Case of Malfunctions .................................................. 11
6.
Annexes ............................................................................................................. 13
Electrical Schematic 110 V 60 ........................................................................................ 13
Electrical Schematic 220 V 50 Hz or 60 Hz .................................................................... 14
Exploded Design ............................................................................................................ 15
List of Replacement Parts ............................................................................................... 16
ATTENTION!
The characteristics, pictures and figures presented in this manual should be considered for
information. IMG BRASIL reserves the right to make such modifications as may be deemed
necessary without prior notice.

3
1. Safety Information
1.1 General Warnings
• Cautions / precautions must be observed when installing, using, maintaining and discontinuing use
of this device;
• Before carrying out any operation (assembly, utilization (use), maintenance and reuse after
prolonged use of the equipment), read the manual carefully;
• The equipment must be used by trained personnel familiar with the use and safety standards
described in this manual;
This device is not intended for use by persons (including children) with reduced physical, sensory or
mental capacities, or people with lack of experience and knowledge, unless they have received
instructions regarding the use of the device or are under the supervision of a person responsible for
their safety;
• It is recommended that children be supervised to ensure that they are not playing with the
equipment;
• In case of change of the personnel that will work with the equipment, the new operator must be
educated about the standards and the operation of the same one;
• The operator must use the Adequate PPE's (equipment for individual safety). As for example: use
touches the hair avoiding that they lock in the moving parts of the machine;
• The operator must always be aware of situations that can cause a risk of accidents and avoid them.
For example: avoid working with loose uniform sleeves, where they can lock in moving parts, causing
accidents;
• After being held to read and answered all the questions, this manual must be stored carefully in
place of easy access, known by all the people who will operate the equipment and made available for
the people who carry out maintenance, to any queries. Whenever any questions arise, be sure to
check the manual. Do not operate the device in any way with doubts;
• Before starting cleaning and any maintenance, it is essential to disconnect the device from the
power supply;
• Periodically check the condition of the cables and electrical parts;
• In the installation, it is essential to make this manual available to the professionals who will do the
same;
• Never place hands, fingers or objects inside the cup while the device is on, as this could cause an
accident;
• Never turn on the device with the cup uncovered, and also don't remove the cup while the device in
operation;
• Do not leave the equipment switched on unattended.
ATTENTION!
Do not perform repairs on your own. Refer servicing to qualified service personnel. Use only
original parts in your device.

4
2. Technical Features
2.1 Main Components
For the equipment described in this manual, safety in use, cleaning, maintenance and
maximum hygiene are guaranteed by the design and special project for all parts, as well as by using
stainless steel and other materials suitable for contact with food.
The device was built with the following features:
• Cover made of non - toxic plastic (polyethylene - PE). Material resistant to citric acid (found in lemon
and orange juice), is easy to maintain, hygienic and resistant to corrosion;
• Cup manufactured in stainless steel 304, which resists the attack of several corrosive agents, such
as the majority of the organic acids, organic substances in general, alkalis, oxy-salts, etc..
Note: stainless steel 304 is attacked by sulfuric acid, and also cannot withstand hydrochloric
acid, diluted sulfuric acid, chlorides and halides in general.
• Cabinet made of 430 stainless steel, which has higher corrosion resistance than other steels. It's a
material resistant to the attack of several corrosive agents;
• The blades are made of 301 hardened stainless steel, which increases wear resistance. Very
resistant to aggressive agents such as fruit and vegetable juices, some mild acids and alkalies, water
vapor free of contaminants, etc.
• Cup base and support for LQ equipment.4/6/8/10 are produced in high strength aluminum for
LQL equipment.4/6/8/10 are produced in non-toxic ABS plastic that is resistant to impact.
See the following for the main components of the device:
Note: for the exploded view
drawing with spare parts list, see
the annexes (pag. 20 and 21).

5
2.2 Technical Data
Model
Nominal Measures
Length.xHt.xWidth
(mm)
Net
weight
(kg)
Voltage
(V)
Rated
current
(A)
Capacity
(L)
LQ4110M604
230x615x230
11.1
110
6.8
4
LQ4220M501
230x615x230
11.8
220
3.5
4
LQ4220M502
230x615x230
11.8
220
3.5
4
LQ4220M504
230x615x230
11.8
220
3.5
4
LQ4220M604
230x615x230
11.1
220
4.0
4
LQ6110M604
230x680x230
11.2
110
6.8
6
LQ6220M501
230x680x230
11.9
220
3.5
6
LQ6220M502
230x680x230
11.9
220
3.5
6
LQ6220M504
230x680x230
11.9
220
3.5
6
LQ6220M604
230x680x230
11.2
220
4.0
6
LQ8110M604
230x760x230
11.7
110
9.0
8
LQ8220M501
230x760x230
12.7
220
5.1
8
LQ8220M502
230x760x230
12.7
220
5.1
8
LQ8220M504
230x760x230
12.7
220
5.1
8
LQ8220M604
230x760x230
11.7
220
5.1
8
LQ10110M604
230x840x230
12.1
110
9.0
10
LQ10220M501
230x840x230
13.5
220
5.1
10
LQ10220M502
230x840x230
13.5
220
5.1
10
LQ10220M504
230x840x230
13.5
220
5.1
10
LQ10220M604
230x840x230
12.1
220
5.1
10
LQL4110M604
230x615x230
9.4
110
6.8
4
LQL4220M501
230x615x230
9.7
220
3.5
4
LQL4220M502
230x615x230
9.7
220
3.5
4
LQL4220M504
230x615x230
9.7
220
3.5
4
LQL4220M604
230x615x230
9.4
220
4.0
4
LQL6110M604
230x680x230
9.6
110
6.8
6
LQL6220M501
230x680x230
9.8
220
3.5
6
LQL6220M502
230x680x230
9.8
220
3.5
6
LQL6220M504
230x680x230
9.8
220
3.5
6
LQL6220M604
230x680x230
9.6
220
4.0
6
LQL8110M604
230x760x230
9.8
110
9.0
8
LQL8220M501
230x760x230
10.0
220
5.1
8
LQL8220M502
230x760x230
10.0
220
5.1
8
LQL8220M504
230x760x230
10.0
220
5.1
8
LQL8220M604
230x760x230
9.8
220
5.1
8
LQL10110M604
230x840x230
10.2
110
9.0
10
LQL10220M501
230x840x230
10.3
220
5.1
10
LQL10220M502
230x840x230
10.3
220
5.1
10
LQL10220M504
230x840x230
10.3
220
5.1
10
LQL10220M604
230x840x230
10.2
220
5.1
10
Noise level: 82 dB.
ATTENTION!
Features like: model, serial number and voltage of the equipment are provided on the label
(figure below). Before installation, check that the power supply voltage of the appliance
corresponds to that of the mains.

6
3. Installation
3.1 Equipment Layout
The connection to the mains and the arrangement for operation must be carried out by a
qualified professional. Check that the voltage of the eqiuipment matches the mains voltage.
• It is essential to make this manual available to the professionals who carry out the
installation.
To ensure correct operation and safety, the machine must be positioned in an airy
environment and on a sufficiently wide, level, dry and stable support surface, away from heat sources
and water taps, and at a medium height of 80 cm. Install your appliance by leaving a distance of at
least 20 cm around it so that it has sufficient space for inspection, maintenance, cleaning and use.

7
ATTENTION!
The installation and location of the appliance must be in accordance with the regulations on the
prevention of risks and safety at work (regulatory standard in force in your country).
The manufacturer shall not be liable for any direct or indirect damages caused by non-
compliance with these standards and other instructions presented in this manual.
4. Use of the Device
4.1 Utility
This appliance is intended exclusively for the grinding of food products with the addition of
liquid.
4.2 Commands
The appliance is composed of only the on/off switch, positioned on the front of the cabinet.

8
See button description:
• On/Off Button - used to turn the device on and off. In position "1" turns on, in position "0" turns off.
4.3 Operating Procedures
Before operating your device, make sure that the items that come into contact with the food
(cup, lid and overcap) are perfectly clean. Perform cleaning with the appliance disconnected from the
electrical network. Follow the cleaning instructions in item 5 of this manual.
Make sure the cup protection is securely attached to the glass. Make sure that the cup is
firmly inserted in the coupling and cup holder. Also check that the supply voltage of the device (110 V
ou 220 V) complies with that of the power grid.
After verifying these items, follow the operating procedures of the device:
• Connect the power cord to the power grid;
• Add the liquid according to your recipe, but always comply with the "MAX" level indicated on the cup.
In possession of the pre-cut pieces of food (approximately 2 cm), place them in the cup;
ATTENTION!
To avoid damaging the device, never turn it on with the glass empty. Before connecting it,
insert liquid in the minimum amount at twice the height of the blade.

9
• Before plugging in your device, always lock the cover with the overcap on the cup;
• To start processing, press the on/off button in the "1" (on) position;
• To add ingredients during processing, remove the overcap by turning it counterclockwise and pulling
it up vertically. Use the opening in the cover without needing to remove it;
• Allow time necessary to process food properly;
• After the process is completed, turn the device off by pressing the on/ off button in the "0" position
(off) and remove the device from the socket.
IMPORTANT
When processing a liquid that is hot, remove the overcap to allow steam to escape. For your
safety, the temperature of the processed products must not exceed 40° C.
If food sticks to the wall of the cup, turn off the appliance and unplug the device from the
socket. Use a spatula to remove food from the wall of the cup.
To add ingredients or for viewing the food being processed, remove only the overcap.
Never turn on the device with the cup uncovered, and also don't remove the cup while the
device is in operation.
ATTENTION!
Do not put your fingers, hands or objects (such as spoons and knives) into the glass as this
may cause accidents.
ATTENTION!
Do not leave the appliance running for more than 3 uninterrupted minutes. If processing has
not finished after that time, let it stand for 10 minutes before putting it back into operation.
To avoid damaging the device, never turn it on with the glass empty.
Ice crushing is not recommended. For grinding of solid foods add liquid, otherwise
overheating may occur, damaging the cup sealing system, wear and/or breaking of the
blades and other components of the device.
If you notice that the device cannot process the food or that it stops processing, decrease
the amount or size of the food in the pre-cut before inserting it into the cup.
Failure to comply with these guidelines will be considered an unsafe act and abusive use of
the device.
In the case of any irregularities contact your nearest authorized service center.

10
5. Cleaning and Maintenance
5.1 Cleaning Procedures and Products Used
Your equipment is built with first-line materials, so use it correctly and you will get great
satisfaction. Keep your equipment always clean and well taken care of, as this will make it have a
much longer shelf life.
A daily cleaning of the machine must be carried out for good operation and durability.
ATTENTION!
Before performing maintenance or cleaning, make sure that the on/off switch is in the "0"
(off) position and the plug is disconnected from the power grid.
ATTENTION!
Do not use a water jet to clean the appliance.
IMPORTANT
This equipment is not intended to be fully immersed in water for cleaning.
Follow the instructions below to find out which parts can be immersed and the special care
to be taken with the other parts.
To remove heavier dirt from the cup, follow the instructions below:
1. Insert the cup into the coupling and cup holder;
2. Add lukewarm water and a few drops of neutral detergent into the glass;
3. Place the cover and turn the device on for a few seconds;
4. When the appliance is turned off, remove the cup from the holder and rinse in running water.
The removable parts (cover and top cover) must be removed from the appliance and washed
with neutral soap and water. Clean the corners thoroughly, eliminating food residue.
The rest of the appliance should only be cleaned with a damp cloth as many times as possible
to prevent food residues from drying out and sticking to the parts. Dry all cleaned parts with a soft, dry
cloth.
Never use abrasive products or sponges and substances containing acids or chlorine to clean
the metallic parts, as they may scratch or damage the surface of the parts causing corrosion points.
Do not spill water on the engine and electrical parts for cleaning, otherwise, turning it on may cause
electric shock or even burn the device.

11
ATTENTION!
Take care when cleaning the cup, because the blades are extremely sharp. Handle with care,
otherwise it could cause accidents. The same attention is paid to any other sharp
component of the device.
IMPORTANT
The manufacturer shall not be liable for any direct or indirect damages caused by non-
compliance with these standards and instructions presented in this manual.
ATTENTION!
It is extremely important that the products used in the cleaning ensure maximum
cleanliness and are not toxic.
5.2 Maintenance and Procedures in Case of Malfunctions
The operator must be instructed to perform routine inspections, making minor adjustments,
the cleaning and to observe signs of breakdowns that could occur. Examples include: checking for
extraneous noise; loss of power of the appliance; the non-performance by the appliance of the service
to which it proposes; among others. Actions such as these are essential to ensure a longer equipment
life.
ATTENTION!
When maintenance is made (even if small adjustments), always unplug the appliance from the
mains.
ATTENTION!
The blades may be re-sharpened when they lose their cut. To do this, contact the nearest
technical assistance.
It is recommended to carry out preventive maintenance every 6 months, checking and
adjusting clearances, cleaning internal parts, etc.. When detecting broken or malfunctioning parts,
always replace using original parts.
By carrying out preventive maintenance, the inconvenience of keeping the device still when
needed most is eliminated, the cost of maintenance is reduced and the risk of accidents is reduced.

12
ATTENTION!
Preventive maintenance requires a trained professional.
Make sure the device is disconnected from the power grid.
Whenever an item related to the safety of the device is removed (e.g. when performing
maintenance), put it back in its proper place and confirm that it is performing its function
correctly.
When a breakdown or non-compliance is detected, refer your device to the nearest technical
assistance. See technical assistance on our website: www.metvisa.com.br

13
6. ANNEXES
Electrical Scheme
Voltage 110 V - 60 Hz
ATTENTION: The ground connection varies according to the type of plug.
For electrical installation observe the current standards of the country, especially with regard to
ground connection (if applicable).

14
Electrical Scheme
Voltage 220 V - 50 Hz or 60 Hz
NOTE: In the above Electrical Schematic, white wires are represented by pink.
ATTENTION: The ground connection varies according to the type of plug.
For electrical installation observe the current standards of the country, especially with regard to
ground connection (if applicable).

15
Exploded Design

16
Replacement parts
Position
Code
Description
Qty.
Application for
Model
1
BAS045
Square Plastic Base
01
LQL.4/6/8/10
ALF025
Square Aluminum Base
01
LQ4/6/8/10
2
GAB090
Cabinet
01
*
3
MTE260
Electric Motor 1/2 cv 60 Hz 127 V
01
LQ/LQL.4/6
MTE261
Electric Motor 1/2 cv 60 Hz - 220 V
01
LQ/LQL.4/6
MTE027
Electric Motor 1/2 cv 50 Hz - 220 V
01
LQ/LQL.4/6
MTE258
Electric Motor 3/4 cv 60 Hz - 127 V
01
LQ/LQL.8/10
MTE259
Electric Motor 3/4 cv 60 Hz - 220 V
01
LQ/LQL.8/10
MTE087
Electric Motor 3/4 cv 50 Hz - 220 V
01
LQ/LQL.8/10
4
RBT002
Rivet
08
*
5
SUC017
Plastic Cup Holder
01
LQL.4/6/8/10
ALF204
Aluminum Cup Holder
01
LQ4/6/8/10
6
CJT689
Full Coupling
01
*
6.1
ADA022
Coupling
01
*
6.2
PRN002
Screw
01
*
7
CJT845
Full Stainless Steel LQ/LQL Cup.4
01
LQ/LQL.4
CJT847
Full Stainless Steel LQ/LQL Cup.6
01
LQ/LQL.6
CJT849
Full Stainless Steel LQ/LQL Cup.8
01
LQ/LQL.8
CJT852
Full Stainless Steel LQ/LQL Cup.10
01
LQ/LQL.10
7.1
TAP103
Overcap of the blenders
01
*
7.2
TAP157
Black Plastic Cover - LQ/LQL.4/6
01
LQ/LQL.4/6
TAP158
Black Plastic Cover - LQ/LQL.10/8
01
LQ/LQL.10/8
7.3
COP123
Pointed Cup - LQ / LQL.4
01
LQ/LQL.4
COP126
Dotted Cup - LQ / LQL.6
01
LQ/LQL.6
COP129
Pointed Cup - LQ / LQL.8
01
LQ/LQL.8
COP132
Pointed Cup - LQ / LQL.10
01
LQ/LQL.10
7.4
CJT690
Full Bearing of the Cup - LQ / LQL.4/6
01
LQ/LQL.4/6
CJT850
Full Bearing of the Cup - LQ / LQL.8/10
01
LQ/LQL.8/10
7.4.1
POS015
Hexagonal Nut
01
*
7.4.2.
LMT002
Stainless Steel Blade
01
LQ/LQL.4/6
LMT037
Stainless Steel Blade
01
LQ/LQL.10/8
7.4.3
VRG002
V'ring
01
*
7.4.4
ARE007
Celeron Graphite Washer Ø 8
02
*
7.4.5
POE010
Bearing Nut
01
*
7.4.6
ARE018
Celeron Graphite Washer Ø 1/4"
01
*
7.4.7
CJT140
Bearing with Bushing
01
*
7.4.8
EIX205
Axis of the Cup
01
*
8
PRS008
Hexagonal Screw
03
*
9
ARL003
Flat washer.
03
*
10
CRC477
Closing Plate Key Selector
01
*
11
CBE020
Electrical Cable - Type 1
01
*
CBE007
Electrical Cable - Type 2
01
*
CBE001
Electrical Cable - Type 4
01
*
12
TCE021
Print cable
01
*
13
CHE064
On/Off Switch
01
*
14
BCH057
Celme Key frame
01
*
15
PEP014
Square Base Blender Foot
04
*
16
TCE013
Female Terminal (Yellow)
01
*
17
TCE004
Terminal Fit (Blue)
04
*
18
CBE092
V/A Amendment Terminal (Earth)
01
*

17
Notes

18
Notes

19
This manual suits for next models
47
Table of contents
Other METVISA Blender manuals

