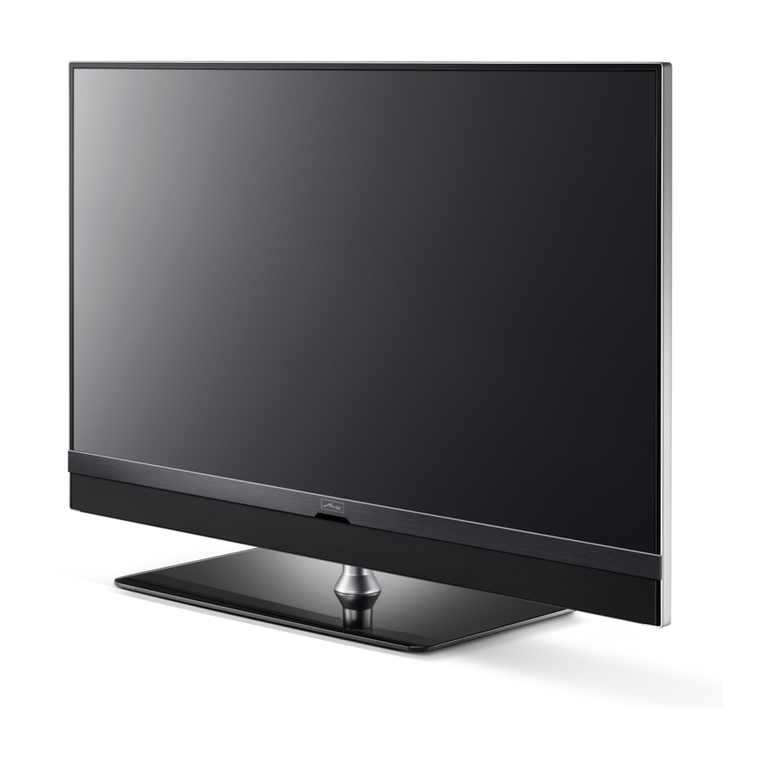
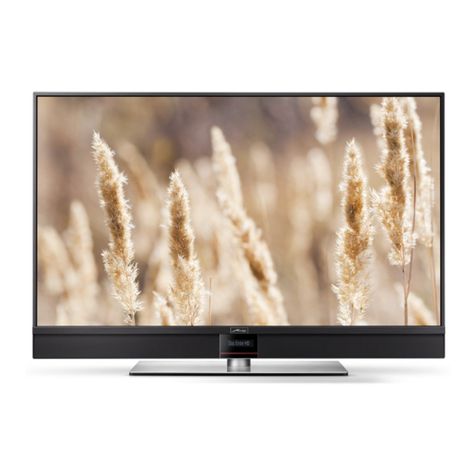
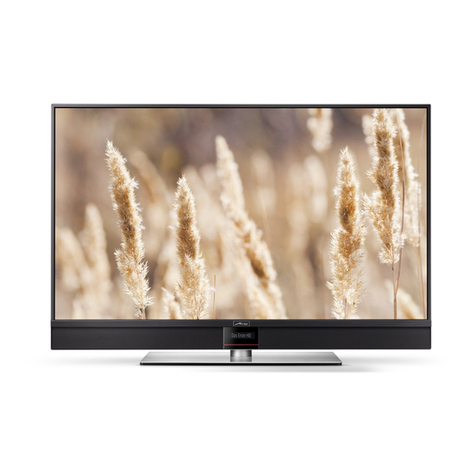
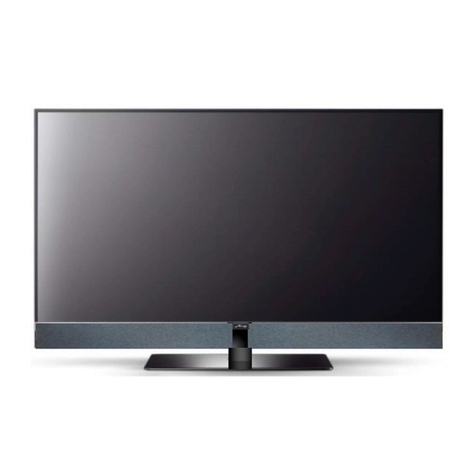
Metz Clarea User manual

14/34/20
Solea / Clarea / Pureo / Merio
LED-TV
Operating instructions
www.metz.de

Dear Customer,
thank you very much for choosing a Metz product.
We have created menu navigation in this TV set that provides you
with an easy- to-understand user interface.
You can access the help menu during all modes of operation in order
to make adjustments to your settings.
But before switching on for the first time, you should at any rate read
chapters 1 to 5 and 9 of the user's guide.
In the box
• TV set with cable cover
• Remote control + two AAA batteries
• Power cord
• Operating instructions
• Datasheet
• Unit base
Operating instructions for the following LCD TV sets:
see accompanying datasheet.
Explanation
Hint, note
Beware of health risks!
"Metz-Werke GmbH & Co KG hereby declares that the following de-
vices [Solea 42TW46, 47TW46, 55TW46,Clarea 42TW08, 47TW08,
55TW08, Pureo 32TW07, 42TW07, 47TW07, 55TW07 and Merio
32TW13] comply with the basic requirements and other relevant re-
gulations of Guideline 1999/05/EC.
Web address where you can find the declarations of conformity:
www.metz.de.
+
2

1 Proper use . . . . . . . . . . . . . . . . . . . . . . . . . . . . . . . . . . . . . . . . . . . .6
2 Installation instructions . . . . . . . . . . . . . . . . . . . . . . . . . . . . . . . .6
3 Safety instructions . . . . . . . . . . . . . . . . . . . . . . . . . . . . . . . . . . . . .7
4 Connecting, switching on and off . . . . . . . . . . . . . . . . . . . . . . . . .9
5 The remote control . . . . . . . . . . . . . . . . . . . . . . . . . . . . . . . . . . . .10
6 Setting the language/country . . . . . . . . . . . . . . . . . . . . . . . . . . .13
7 Help (Guide) . . . . . . . . . . . . . . . . . . . . . . . . . . . . . . . . . . . . . . . . .14
8 Menu control . . . . . . . . . . . . . . . . . . . . . . . . . . . . . . . . . . . . . . . . .15
9 Channel search . . . . . . . . . . . . . . . . . . . . . . . . . . . . . . . . . . . . . . .16
9.1 Setting the reception type . . . . . . . . . . . . . . . . . . . . . . . . . . . .16
9.2 TV standard for analogue channels . . . . . . . . . . . . . . . . . . . . .17
9.2.1 Analogue TV channel search . . . . . . . . . . . . . . . . . . . . . . . . .18
9.2.2 Colour standard for analogue channels . . . . . . . . . . . . . . . .19
9.3 DVB-T, antenna supply . . . . . . . . . . . . . . . . . . . . . . . . . . . . . . .20
9.3.1 DVB-T channel search, automatic . . . . . . . . . . . . . . . . . . . . .21
9.3.2 DVB-T channel search, manual . . . . . . . . . . . . . . . . . . . . . . .22
9.4 DVB-C channel search, automatic . . . . . . . . . . . . . . . . . . . . . .23
9.4.1 DVB-C channel search, manual . . . . . . . . . . . . . . . . . . . . . . .24
9.5 Setting the SAT system, antenna system . . . . . . . . . . . . . . . . .25
9.5.1 Setting up the sat system, unicable . . . . . . . . . . . . . . . . . . .26
9.5.2 Setting the sat system, LNB supply voltage . . . . . . . . . . . . .27
9.5.3 Set SAT system, DiSEqC system . . . . . . . . . . . . . . . . . . . . . .28
9.5.4 Set SAT system, selecting a satellite . . . . . . . . . . . . . . . . . .29
9.6 SAT channel search, automatic . . . . . . . . . . . . . . . . . . . . . . . .30
9.6.1 SAT channel search, manual . . . . . . . . . . . . . . . . . . . . . . . . .31
9.7 Updating channel search data . . . . . . . . . . . . . . . . . . . . . . . . .32
10 List of TV Channels . . . . . . . . . . . . . . . . . . . . . . . . . . . . . . . . . .33
11 Edit channel list . . . . . . . . . . . . . . . . . . . . . . . . . . . . . . . . . . . . .34
11.1 Moving channels . . . . . . . . . . . . . . . . . . . . . . . . . . . . . . . . . .34
11.2 Delete channel . . . . . . . . . . . . . . . . . . . . . . . . . . . . . . . . . . . .34
12 Programme selection and information . . . . . . . . . . . . . . . . . . .35
12.1 Programme selection . . . . . . . . . . . . . . . . . . . . . . . . . . . . . . .35
12.2 Programme selection using the TV channel list . . . . . . . . . .35
12.3 Programme information (… on now) . . . . . . . . . . . . . . . . . . .36
13 Everyday handling . . . . . . . . . . . . . . . . . . . . . . . . . . . . . . . . . . .37
13.1 Changing picture settings . . . . . . . . . . . . . . . . . . . . . . . . . . .37
13.2 Volume settings . . . . . . . . . . . . . . . . . . . . . . . . . . . . . . . . . . .37
13.3 Changing the sound settings . . . . . . . . . . . . . . . . . . . . . . . . .37
14 Time settings . . . . . . . . . . . . . . . . . . . . . . . . . . . . . . . . . . . . . . .38
14.1 Setting the sleep timer . . . . . . . . . . . . . . . . . . . . . . . . . . . . . .38
14.2 Setting the automatic on and off times . . . . . . . . . . . . . . . . .39
14.3 Setting the Time and Date . . . . . . . . . . . . . . . . . . . . . . . . . . .40
14.4 Recording control (setting lead and delay times) . . . . . . . . .41
15 Subtitles . . . . . . . . . . . . . . . . . . . . . . . . . . . . . . . . . . . . . . . . . . .42
16 Picture settings . . . . . . . . . . . . . . . . . . . . . . . . . . . . . . . . . . . . .43
16.1 General picture settings . . . . . . . . . . . . . . . . . . . . . . . . . . . . .43
16.1.1 Selecting power options . . . . . . . . . . . . . . . . . . . . . . . . . . .44
16.1.2 Configuring picture profiles . . . . . . . . . . . . . . . . . . . . . . . .46
16.1.3 Assigning a selected picture profile . . . . . . . . . . . . . . . . . .47
16.1.4 Setting zoom/automatic zoom/panorama/image
position/overscan . . . . . . . . . . . . . . . . . . . . . . . . . . . . . . . .48
16.1.5 MPEG noise reduction . . . . . . . . . . . . . . . . . . . . . . . . . . . . .49
16.1.6 Noise reduction . . . . . . . . . . . . . . . . . . . . . . . . . . . . . . . . . .50
16.2 Picture settings for program . . . . . . . . . . . . . . . . . . . . . . . . . .51
16.2.1 Adjusting the signal for a programme . . . . . . . . . . . . . . . .52
17 Sound settings . . . . . . . . . . . . . . . . . . . . . . . . . . . . . . . . . . . . . .53
17.1 Volume, bass, and treble . . . . . . . . . . . . . . . . . . . . . . . . . . . .53
17.1.1 Automatic volume adjustment . . . . . . . . . . . . . . . . . . . . . .54
3
17.1.2 Headphone volume . . . . . . . . . . . . . . . . . . . . . . . . . . . . . . .55
17.1.3 Tone settings generally . . . . . . . . . . . . . . . . . . . . . . . . . . . .56
17.2 Sound settings for program . . . . . . . . . . . . . . . . . . . . . . . . . .57
17.2.1 Volume correction . . . . . . . . . . . . . . . . . . . . . . . . . . . . . . . .57
17.2.2 Sound settings for programme position . . . . . . . . . . . . . .58
17.3 Program mute, preset value sound 2 . . . . . . . . . . . . . . . . . .59
17.4 Audio/language selection . . . . . . . . . . . . . . . . . . . . . . . . . . .60
17.5 Analogue output . . . . . . . . . . . . . . . . . . . . . . . . . . . . . . . . . . .61
17.6 Switching the loudspeaker on/off . . . . . . . . . . . . . . . . . . . . .62
17.6.1 Selecting the sound output . . . . . . . . . . . . . . . . . . . . . . . .63
17.7 Connecting headphones . . . . . . . . . . . . . . . . . . . . . . . . . . . .65
17.8 Sound 1, Sound 2 . . . . . . . . . . . . . . . . . . . . . . . . . . . . . . . . . .65
18 Video text . . . . . . . . . . . . . . . . . . . . . . . . . . . . . . . . . . . . . . . . . .66
18.1 Calling up video text . . . . . . . . . . . . . . . . . . . . . . . . . . . . . . .66
18.1.1 Double font size . . . . . . . . . . . . . . . . . . . . . . . . . . . . . . . . .66
18.2 Video text comfort functions . . . . . . . . . . . . . . . . . . . . . . . . .66
18.2.1 Structure . . . . . . . . . . . . . . . . . . . . . . . . . . . . . . . . . . . . . . .66
18.2.2 Cursor on (cursor page selection) . . . . . . . . . . . . . . . . . . .67
18.2.3 Search by keyword . . . . . . . . . . . . . . . . . . . . . . . . . . . . . . .67
18.2.4 Large TV screen / Small TV screen . . . . . . . . . . . . . . . . . . .67
18.2.5 Show hidden text . . . . . . . . . . . . . . . . . . . . . . . . . . . . . . . .68
18.2.6 Setting markers for a video text page . . . . . . . . . . . . . . . . .68
18.2.7 Select next video text page marker . . . . . . . . . . . . . . . . . .68
18.2.8 Video text, delete markers . . . . . . . . . . . . . . . . . . . . . . . . .69
18.2.9 Video text, subtitles . . . . . . . . . . . . . . . . . . . . . . . . . . . . . .69
19 Radio mode . . . . . . . . . . . . . . . . . . . . . . . . . . . . . . . . . . . . . . . . .70
19.1 DVB radio . . . . . . . . . . . . . . . . . . . . . . . . . . . . . . . . . . . . . . . .70
19.2 Internet radio . . . . . . . . . . . . . . . . . . . . . . . . . . . . . . . . . . . . .71
20 The F-button . . . . . . . . . . . . . . . . . . . . . . . . . . . . . . . . . . . . . . . .72
21 Start Up . . . . . . . . . . . . . . . . . . . . . . . . . . . . . . . . . . . . . . . . . . . .74
21.1 Initial program position . . . . . . . . . . . . . . . . . . . . . . . . . . . . .74
21.2 Quick start . . . . . . . . . . . . . . . . . . . . . . . . . . . . . . . . . . . . . . . .75
22 Parental control . . . . . . . . . . . . . . . . . . . . . . . . . . . . . . . . . . . . .76
22.1 Child-safe basic settings . . . . . . . . . . . . . . . . . . . . . . . . . . . .76
22.2 Activate parental control . . . . . . . . . . . . . . . . . . . . . . . . . . . .76
23 AV Connecting AV devices . . . . . . . . . . . . . . . . . . . . . . . . . . . . .78
23.1 HDMI CEC function . . . . . . . . . . . . . . . . . . . . . . . . . . . . . . . . .80
23.2 HDMI ARC function . . . . . . . . . . . . . . . . . . . . . . . . . . . . . . . . .80
24 EPG (Electronic Programme Guide) . . . . . . . . . . . . . . . . . . . . . .81
24.1 Collecting EPG data . . . . . . . . . . . . . . . . . . . . . . . . . . . . . . . .82
24.2 Exclusion of one or more channels from the EPG . . . . . . . . .83
24.3 Sort EPG list by … . . . . . . . . . . . . . . . . . . . . . . . . . . . . . . . . . .84
24.4 EPG: Selecting a programme . . . . . . . . . . . . . . . . . . . . . . . . .84
24.5 EPG: Sending reminder for a programme . . . . . . . . . . . . . . .85
24.6 EPG: Recording a programme (single or series) . . . . . . . . . .85
25 Metz Media System . . . . . . . . . . . . . . . . . . . . . . . . . . . . . . . . . .86
25.1 Network (LAN or WLAN) . . . . . . . . . . . . . . . . . . . . . . . . . . . . .87
25.1.1 Network configuration – automatic LAN or WLAN
configuration . . . . . . . . . . . . . . . . . . . . . . . . . . . . . . . . . . . .87
25.1.2 Testing the network connection . . . . . . . . . . . . . . . . . . . . .88
25.2 HbbTV . . . . . . . . . . . . . . . . . . . . . . . . . . . . . . . . . . . . . . . . . . .89
25.2.1 Accessing HbbTV . . . . . . . . . . . . . . . . . . . . . . . . . . . . . . . . .90
25.2.2 Exiting HbbTV . . . . . . . . . . . . . . . . . . . . . . . . . . . . . . . . . . . .90
26 Internet Portal . . . . . . . . . . . . . . . . . . . . . . . . . . . . . . . . . . . . . .91
27 Opening the Media Player . . . . . . . . . . . . . . . . . . . . . . . . . . . . .92
27.1 Using the media player . . . . . . . . . . . . . . . . . . . . . . . . . . . . . .92
27.1.1 Photos – 15-photo overview . . . . . . . . . . . . . . . . . . . . . . . .92
27.1.2 Start show . . . . . . . . . . . . . . . . . . . . . . . . . . . . . . . . . . . . . .93
4

27.2 Music . . . . . . . . . . . . . . . . . . . . . . . . . . . . . . . . . . . . . . . . . . . .93
27.3 Videos . . . . . . . . . . . . . . . . . . . . . . . . . . . . . . . . . . . . . . . . . . .94
27.4 Data formats . . . . . . . . . . . . . . . . . . . . . . . . . . . . . . . . . . . . . .94
28 USB recording to hard disk / PVR functions . . . . . . . . . . . . . .95
28.1 Hard disk instructions . . . . . . . . . . . . . . . . . . . . . . . . . . . . . .95
28.2 Format external hard disk . . . . . . . . . . . . . . . . . . . . . . . . . . . .96
28.3 Settings for the internal/external hard disk . . . . . . . . . . . . .98
28.3.1 Programmateur PVR, réglages de base . . . . . . . . . . . . . . .99
28.3.2 Basic settings for series timers . . . . . . . . . . . . . . . . . . . .100
28.4 Delayed television viewing (Time shift) . . . . . . . . . . . . . . .101
28.4.1 Saving time shift buffer as recording . . . . . . . . . . . . . . . .102
28.4.2 Direct recording of a program . . . . . . . . . . . . . . . . . . . . . .103
28.4.3 Configuring a programme as a series recording . . . . . . .103
28.4.4 Recording plan
(Overview of programmed recording timers) . . . . . . . . . .104
29 The PVR Archive . . . . . . . . . . . . . . . . . . . . . . . . . . . . . . . . . . . .105
29.1 Playing programs from the PVR archive . . . . . . . . . . . . . . .105
29.2 Pause playback, Rewind, Fast-Forward . . . . . . . . . . . . . . .105
29.3 Deleting programs from the PVR archive . . . . . . . . . . . . . .106
29.4 Slow motion . . . . . . . . . . . . . . . . . . . . . . . . . . . . . . . . . . . . .106
29.5 Delete protections . . . . . . . . . . . . . . . . . . . . . . . . . . . . . . . .107
29.5.1 Activating deletion protection . . . . . . . . . . . . . . . . . . . . .107
29.5.2 Désactiver le protégé . . . . . . . . . . . . . . . . . . . . . . . . . . . .107
29.6 Parental control . . . . . . . . . . . . . . . . . . . . . . . . . . . . . . . . . .108
29.7 Continuous playback . . . . . . . . . . . . . . . . . . . . . . . . . . . . . .108
29.7.1 Activating endless playback: . . . . . . . . . . . . . . . . . . . . . .108
29.7.2 Deactivating endless playback: . . . . . . . . . . . . . . . . . . . .108
29.8 Change file name . . . . . . . . . . . . . . . . . . . . . . . . . . . . . . . . .109
30 The “File Manager” . . . . . . . . . . . . . . . . . . . . . . . . . . . . . . . . .110
31 Software update . . . . . . . . . . . . . . . . . . . . . . . . . . . . . . . . . . . .111
32 Operation without remote control . . . . . . . . . . . . . . . . . . . . .113
33 Inserting / removing a CA module . . . . . . . . . . . . . . . . . . . . .114
34 Glossary . . . . . . . . . . . . . . . . . . . . . . . . . . . . . . . . . . . . . . . . . .115
35 Upgrade Kits . . . . . . . . . . . . . . . . . . . . . . . . . . . . . . . . . . . . . . .117
36 Problem, Possible causes, Remedy . . . . . . . . . . . . . . . . . . . .118
37 Technical data . . . . . . . . . . . . . . . . . . . . . . . . . . . . . . . . . . . . .120
38 Cleaning the device . . . . . . . . . . . . . . . . . . . . . . . . . . . . . . . . .121
5

1 Proper use
This TV set is exclusively designed for the reception and playback of
picture and sound signals.
The TV set is designed for dry rooms (living rooms and offices).
The room climate should be in a range from +5°C to +35°C with a
maximum of 75% air humidity.
The TV set may not be used in rooms with higher air humidity
(e.g. bathroom, sauna, etc.).
The TV set must not be used in rooms with a high concentration of
dust (e.g. a workshop).
If, as an exception, you operate the TV set outdoors, then please
make sure it is protected against moisture (rain, water spray, dew).
2 Installation instructions
• Make sure no bright light or sunshine falls on the screen. This can
lead to reflections that impair the brilliance of the picture.
• The most favourable viewing distance is three times the screen
diagonal, in sets with
- 26” screen approx 2 m - 42” screen approx. 3.2 m
- 32” screen approx 2.4 m - 47” screen approx. 3.5 m
- 37” screen approx 2.8 m - 55” screen approx. 4.2 m
This distance can also be reduced by one half for HDTV.
• Antenna connecting cables and other components between the
permanently installed antenna-/broadband plug and the radio
receiver (e.g. TV set, video recorder) must comply with the Euro
standard EN 60966-2-4.
• To connect the antenna and HDMI, you should use cables with
good quality HF shielding to ensure effective contact with the
connection ports. Shielding of > 85 dB is required for the antenna
connection cable.
• If unauthorised cables and components are used, the operating
permit of the radio receiver lapses.
• Use only Metz device stands to set up the TV set on a horizontal,
non-slip surface.
• Heavy smoking in the vicinity of the LCD TV set can lead to nicotine
and soot deposits behind the front panel glass and as a result to
an impairment of the picture quality. Such deposits can only
be removed by an expert. In extreme cases this can lead to
permanent damage of the panel, making replacement of the panel
necessary. Cleaning or replacement of the panel is not covered by
the guarantee.
If you want to mount the TV on the wall, we recommend using a
Metz wall mount. If you decide a commercial wall mount
solution, we ask to be noted that the connection must be
executed properly. Due to the device the use of a Metz adapter
plate may be required. The wall mount should only be
performed by qualified persons. When using a third-party-
solution we wish to emphasize that we have to exclude
warranty, if the unit should be damaged caused by Installing the
Wall Mount.
6

The TV set should not be mounted on the ceiling.
To prevent injuries, the TV set must be fastened safely to the
floor / wall in accordance with the installation instructions.
3 Safety instructions
Set up the TV set on a firm, level and stable base!
Your set is designed for operation in dry rooms. If, as an
exception, you operate the TV set outdoors, then please make
sure that it is protected against moisture (rain, water spray,
dew).
Do not expose TV set to dripping or splashes (e.g. rain)!
Unplug electrical equipment before cleaning!
Do not hold the remote control directly in front of your eyes and
press a key! Infrared light!
The TV set may only be run with a power voltage of
230-240V~ 50Hz.
For maintenance and repair work the mains plug or the device
plug-and-socket of the power cable of the TV set – in the
meaning of the applicable standard – are to be regarded as the
means for disconnection from the mains and kept in working
order
.
When laying the power cord make sure there are no objects
resting on it and that no-one can trip over it!
Candles and other open flames must be kept away from this
product at all times to prevent fire spreading.
The unit may only be opened and repaired by a qualified
specialist.
RISK OF FATAL INJURIES !
Please contact your authorised dealer if any repairs are
7

• A cold device may only be turned on in a cold room once any
condensation on the screen has evaporated.
• TV sets require adequate cooling. The openings at the back may
not be covered by curtains, etc.
The ventilation slits on the bottom of the set must remain freely
accessible, since this is how the device draws in cool air.
• Make sure there is an adequate cooling air flow if you put your
device into a built-in cabinet.
• Do not set up/suspend your device directly next to or above a
heater; this could impair the device cooling.
• No burning candles or vessels with liquid may be placed on or
above the TV set.
Hot wax and liquids that get into the interior of the device destroy
the electric components of your TV set.
In these cases the electrical safety of the device can no longer be
guaranteed.
• Thunder storms are a danger for electrical devices. If lightning hits
the power cable or antenna, the device can be damaged, even if it
is switched off. During thunder storms disconnect the mains plug
and antenna plug from the socket or the TV set.
• No rechargeable batteries may be inserted in the battery
compartment of the remote control. Only two
LR03/AM4/AAA 1.5 V micro batteries may be used.
• This TV set is exclusively designed for the reception and playback
of picture and sound signals.
• Do not display still pictures, logos, 4:3 formats with margins,
etc for a long period. There is a risk that these still pictures could
lead to markings on the screen.
• Soot and dust deposits can accumulate behind the front panel
glass of the LCD TV set without a visible source of soot being
present. These soot and dust deposits are also known as
“fogging” or “magic dust”. There are scattered instances of this
phenomenon, but especially during the warm-up period and after
renovation work or in new constructions. Various factors are
mentioned as the cause, see too the reports on the Internet.
In such cases cleaning or replacement of the panel is excluded
from the guarantee, since it does not involve a set defect, but
rather an external influence.
• The screen surface should only be cleaned with a soft, dry
cleaning cloth (e.g. microfibre cloth).
• To remove stubborn dirt or smears, it is possible to clean the
screen with a slightly damp, soft cloth. Also see Chap. 29.
Never use cleaning solution on the screen surface! If any
cleaning solution penetrates beneath the screen's lower frame,
it will result in irreparable damage to the components.
8

4 Connecting, switching on and off
Power connection
Connect the TV set to the wall socket with the accompanying
power cord.
Antenna connection (back of unit on the bottom)
Connect the TV to the antenna box with an antenna cable.
Switching on for the first time
Switch on the TV set with the power switch on the device
.
The orange or blue-red stand-by display is illuminated.
When the TV set is switched on for the first time, the
"Installation Wizard" appears. It guides you through the
settings that you have to make to start-up the TV set if
the settings have not been done by the dealer. This
includes the language, country, reception type and so on
(see chapter 6).
Switching on
Switch on the TV set with the power switch on the device
.
The orange or blue-red stand-by display is illuminated.
After about 10 seconds the TV set switches automatically to
program position 1 or the preset initial program position,
see Chap. 21.
If no other command is received from the remote control,
a message will appear after approx. 10 minutes asking for one of
the remote control keys to be pressed. Unless a button is pressed
on the remote control, the TV will switch to stand-by mode after
10 minutes.
Power connection,
back,
DVB-S2 DVB-C/-T
Antenna connection
+
Power switch
Solea:
power switch
back right.
9

Switching on from stand-by mode
Use the numeric keys of the remote control to select any program.
Program position 1 is selected with the key or if programmed, there is a switch to the
initial program position, see Chapter 21.1.
Switching off with the remote control
Press the remote control key .
The TV switches to stand-by mode and the LED display lights up.
When the LED display turns yellow or blue-red, the TV is in the process of collecting data for
electronic program listings.
Switching off with the power switch
If the red LED display is illuminated or “EPG” appears in the display, the TV set is still
gathering data for the electronic program guide.
5 The remote control
The remote control conveys commands to the TV set via infrared light. The remote control
must always be directed at the TV set. Other infrared controlled devices or systems
(e.g. infrared headphones) within its range could be destroyed.
Direct sunlight on the TV set may lead to disruptions, because the TV set is unable to
recognise the infrared signals of the remote control. To enable the TV set to be controlled by
the remote control, it cannot be switched off with the power switch.
No rechargeable batteries may be inserted in the battery compartment of the
remote control!
Only two LR03/AM4/AAA 1.5 V micro batteries may be used.
The batteries that are used must not be exposed to excessive heat such as sunshine,
fire or the like!
10

ON, at program position 1 or
at the programmed initial program position (Chapter 20.1)
OFF, enter stand-by setting
If an external hard disk is connected:
When set to Play:
Rewind
When set to time shift:
Skip backwards -20 seconds
Open archive / in archive: Play
When set to Play: Fast forward
When set to time shift: Skip forwards one minute
Start direct recording / EPG direct recording
In TV mode: Start time shift
In TV mode: Freeze frame, if "Timeshift" has been switched off in the function overview
When set to Play: Still picture/Pause
When set to Play
:
press and hold: slow motion
Stop (when set to Play: Return to archive / when set to time shift: Switch to “Live”)
Freeze frame
Select internal and external signal source (AV devices)
Select HbbTV.
Call up picture settings
Call up sound settings
Display date, time info on program.
When set to time shift: Display playback position
Open "Functions" (function keys)
F
11

Select list of TV stations
V+ Volume +
+P Progr. +
V– Volume –
–P Progr. –
Cursor control key/Change value
Confirmation key
In the menu: Save
Mute/sound stop
Back to last program
In the menu: Go back
Leave Menu/Settings
Call up video text
Call up the electronic program guide
Open "Functional overview" menu
EXIT
TEXT
EPG
OK
12

6 Setting the language/country
Language selection in the menu
You can select the language under "Configuration".
All texts in the menus and in the Help (information) will be shown in the chosen language.
Setting the country
The setup location or country (e.g. Germany) must be entered after setup. This assigns the
device its basic settings (e.g. channel raster, sequence of channel filing, etc).
Setting the language/country:
• Press button to open the "Functional overview".
• Select "Menu" with the cursor and press the button.
• Select "Configuration" with the cursor and press the button.
• Select "Language" or "Country" with the cursor in the context menu and press the
button.
• Select your desired language or country with the cursor.
• Press the button to confirm your selection.
• Press the button to exit the menu.
EXIT
Radio PortalPVR Archive
TV
Functional overview 20:10
MusicPhotosVideos
Analogue NetworkUSBHDMI
Filemanager
Remove USB Device
Manual
Parental control
Menu
Autom. On/Off
■ MANUAL
Network AV devices
Sound
Picture
Menu 20:10
Radio station list
TV station list
Subtitle Service
Parental control
Recordings/EPG
DVB-T
Analog-TV
DVB-C
DVB-S
■ MANUAL
OK
OK
OK
Configuration
OPERATION LEVEL H H H
Language
Country
Deutschland
Opertation
Start characteristics
Time settings
BACK
■ MANUAL■ EXPERT■ COMFORT■ SIMPLE
Language
Deutsch
English
Nederlands
Italiano
Français
Español
Deutsch
Configuration
EXIT
13

7 Help (Guide)
In designing the TV set we took care to configure it in a way that would make it fun for you as
a user to get to know the device in the easiest, most convenient manner possible.
The Help Guide can answer many of the questions you might encounter once you have set
up and switched on your TV.
Just press the blue button when the menu is displayed. The table of contents for the
"Guide" appears on the screen. The "Guide" can also be programmed as a function button.
The “Guide” menu or help
You can select the point you are interested in the table of contents or key word index with
the cursor control key.
Move cursor to the right or down,
browse the index forwards ...
Move cursor to the left or up,
browse the index backwards ...
... then press the key , so that you can read the explanatory text.
All underlined words, whether in the table of contents, key word index or explanatory text
can be selected with the cursor. After pressing the key , the explanation is displayed.
You can browse the pages consulted backwards with the yellow button and forwards
with the green button.
Radio PortalPVR Archive
TV
Functional overview 20:10
MusicPhotosVideos
Analogue NetworkUSBHDMI
Filemanager
Remove USB Device
Manual
Parental control Menu
Manual
Autom. On/Off
■ MANUAL
OK
14

8 Menu control
The "Functional overview" gives you a selection of the TV's various functions.
Press the button to access the Functional overview.
Once you have opened the Functional overview, you can select the individual functions
using the cursor.
Confirm your choice by pressing the button.
To change your TV settings, select "Menu" in the Functional overview and open it with the
button.
Select the menu item that you would like to change and press the button.
Change the parameters for the selected menu item with the cursor buttons and confirm by
pressing the button.
The METZ logo shows the values set at the factory.
If you want to go back a step in the Functional overview or in the menu, press the
button.
Exit the menu with the button.
EXIT
Radio PortalPVR Archive
TV
Functional overview 20:10
MusicPhotosVideos
Analogue NetworkUSBHDMI
Filemanager
Remove USB Device
Manual
Parental controlAutom. On/Off
■ MANUAL
Menu
15

9 Channel search
9.1 Setting the reception type
This TV set is equipped for up to four different reception types:
Analog-TV: The broadcasting technology that has existed for decades and which in
the meantime can only be received via cable.
DVB-T: The digital broadcasting technology that can be received via the up to now
customary house antenna or room antenna (depending on reception conditions).
Ask your local TV dealer about this, or find out more at “www.ueberall-tv.de”.
DVB-C: The digital broadcasting technology that can be received via a cable connection.
Ask your local cable provider.
DVB-S(2): The digital broadcasting technology that can be received via a satellite. Ask your
local TV dealer about this, or find out more at
„www.lyngsat.com/europe.html“
Set the reception type that you have set up.
Setting reception type:
• Press button to open the "Functional overview".
• Select "Menu" with the cursor and press the button.
• Select the window with the cursor for the desired receiving mode, e.g. "DVB-C" and press
the button.
Radio PortalPVR Archive
TV
Functional overview 20:10
MusicPhotosVideos
Analogue NetworkUSBHDMI
Filemanager
Remove USB Device
Manual
Parental control
Menu
Autom. On/Off
■ MANUAL
Network AV devices
Sound
Picture
Menu 20:10
Radio station list
TV station list
Subtitle Service
Parental control
Recordings/EPG
DVB-T
Analog-TV
DVB-C
DVB-C
DVB-S
■ MANUAL
OK
OK
Configuration
16

9.2 TV standard for analogue channels
There are various TV standards worldwide for pictures and sound. If the TV standard is set
incorrectly, the sound reproduction is disrupted. In the case of the TV standard “L” the
picture is also broadcast according to a different standard, as a result of which the
TV standard must be selected before the channel search.
The B/G TV standard is set at the factory.
Setting the TV standard:
• Press button to open the "Functional overview".
• Select "Menu" with the cursor and press the button.
• Select "Analog-TV" with the cursor and press the button.
• Select "Search settings" or "TV-standard" with the cursor in the context menu and press
the button.
• Select the desired TV standard in the context menu with the cursor and press the
button.
Radio PortalPVR Archive
TV
Functional overview 20:10
MusicPhotosVideos
Analogue NetworkUSBHDMI
Filemanager
Remove USB Device
Manual
Parental control
Menu
Autom. On/Off
■ MANUAL
Network AV devices
Sound
Picture
Menu 20:10
Radio station list
TV station list
Subtitle Service
Parental control
Recordings/EPG
DVB-T
Analog-TV
DVB-C
Analog-TV
DVB-S
■ MANUAL
OK
OK
Configuration
OK
Analog-TV
OPERATION LEVEL H H H
Analog-TV
BACK
Search settings
Analogue station search
■ MANUAL■ EXPERT■ COMFORT■ SIMPLE
TV-standardSearch settingsAnalog-TV B/G
D/K
I
L
B/G
EXIT
17

9.2.1 Analogue TV channel search
The entire reception range is automatically searched during the channel search.
The channels found are filed in the channel table, which is presented at the end of search
process. You can move or
delete channels that are found if you are not satisfied with the order. See Chapter
“11 Edit channel list”.
Carrying out a channel search:
• Press button to open the "Functional overview".
• Select "Menu" with the cursor and press the button.
• Select "Analog-TV" with the cursor and press the button.
• Select "Analogue station search" with the cursor in the context menu and press the
button.
• Press the button and start the program search.
Once your channel search is complete the results are shown in a list of TV channels.
Radio PortalPVR Archive
TV
Functional overview 20:10
MusicPhotosVideos
Analogue NetworkUSBHDMI
Filemanager
Remove USB Device
Manual
Parental control
Menu
Autom. On/Off
■ MANUAL
Network AV devices
Sound
Picture
Menu 20:10
Radio station list
TV station list
Subtitle Service
Parental control
Recordings/EPG
DVB-T
Analog-TV
DVB-C
Analog-TV
DVB-S
■ MANUAL
OK
OK
Configuration
OK
Analog-TV
OPERATION LEVEL H H H
Analog-TV
BACK
Search settings
Sendersuche analog
■ MANUAL■ EXPERT■ COMFORT■ SIMPLE
Start station search
EXIT
Analogue station search
Analog-TV
18

9.2.2 Colour standard for analogue channels
The colour standard is set to “Automatic” at the factory. Normally the TV set recognises the
colour standard automatically.
If this automatic function in rare instances does not produce a satisfactory result, the colour
standard can also be set manually for each program position.
Setting the colour standard:
• Press button to open the "Functional overview".
• Select "Menu" with the cursor and press the button.
• The "Picture" window is highlighted in red — press the button and open the context
menu.
• Select "Pict.set.,prog.posn." with the cursor in the context menu and press the
button.
• Select "Picture format" with the cursor in the context menu and press the button.
• Select colour standard from the context menu with the cursor and press the button.
• Press the button to exit the menu.
EXIT
Radio PortalPVR Archive
TV
Functional overview 20:10
MusicPhotosVideos
Analogue NetworkUSBHDMI
Filemanager
Remove USB Device
Manual
Parental control
Menu
Autom. On/Off
■ MANUAL
Network AV devices
Sound
Picture
Menu 20:10
Radio station list
TV station list
Subtitle Service
Parental control
Recordings/EPG
Configuration
DVB-T
Analog-TV
DVB-C
DVB-S
■ MANUAL
OK
OK
OK
Picture
OPERATION LEVEL H H H
Picture settings, general
Pict.set.,prog.posn.
Picture profile adjustment
BACK
Color intens. 60%
Picture profile gen. (Standard)
MPEG noise reduction gen. (medium)
Noise reduction gen. (Automatic)
Picture format Automatic
Picture sharpness
Signal adjustment
■ MANUAL■ EXPERT■ COMFORT■ SIMPLE
Pict.set.,prog.posn.
Picture format Auto. mode
Picture
EXIT
19

9.3 DVB-T, antenna supply
If an active antenna is used for the DVB-T reception, an antenna supply can be set.
On: The antenna supply is switched on permanently. This setting must be
selected if a TV set with two DVB-T receivers is supplied via only one
active antenna.
Set: The antenna supply is only active if a DVB-T program position has been
selected (e.g. selection of a change-over relay with simultaneous use of
DVB-T antenna & broadband cable).
Off: Setting with passive antenna or joint antenna systems.
Setting the antenna supply:
• Press button to open the "Functional overview".
• Select "Menu" with the cursor and press the button.
• Select "DVB-T" with the cursor and press the button.
• Select "Antenna" and "Supply voltage" with the cursor in the context menu and press the
button.
• Select the desired antenna source with the cursor and press the button.
• Press the button to exit the menu.
EXIT
Radio PortalPVR Archive
TV
Functional overview 20:10
Music
Photos
Videos
Analogue NetworkUSBHDMI
Filemanager
Remove USB Device
Manual
Parental control
Menu
Autom. On/Off
■ MANUAL
Network AV devices
Sound
Picture
Menu 20:10
Radio station list
TV station list
Subtitle Service
Parental control
Recordings/EPG
DVB-T
Analog-TV
DVB-C
DVB-T
DVB-S
■ MANUAL
OK
OK
Configuration
OK
DVB-T
OPERATION LEVEL H H H
DVB-T
BACK
Antenna
Automatic search
Manual search
General settings
■ MANUAL■ EXPERT■ COMFORT■ SIMPLE
Supply voltageAntennaDVB-T
EXIT
Off
switched
on
off
20
This manual suits for next models
3
Table of contents
Other Metz LED TV manuals

Metz
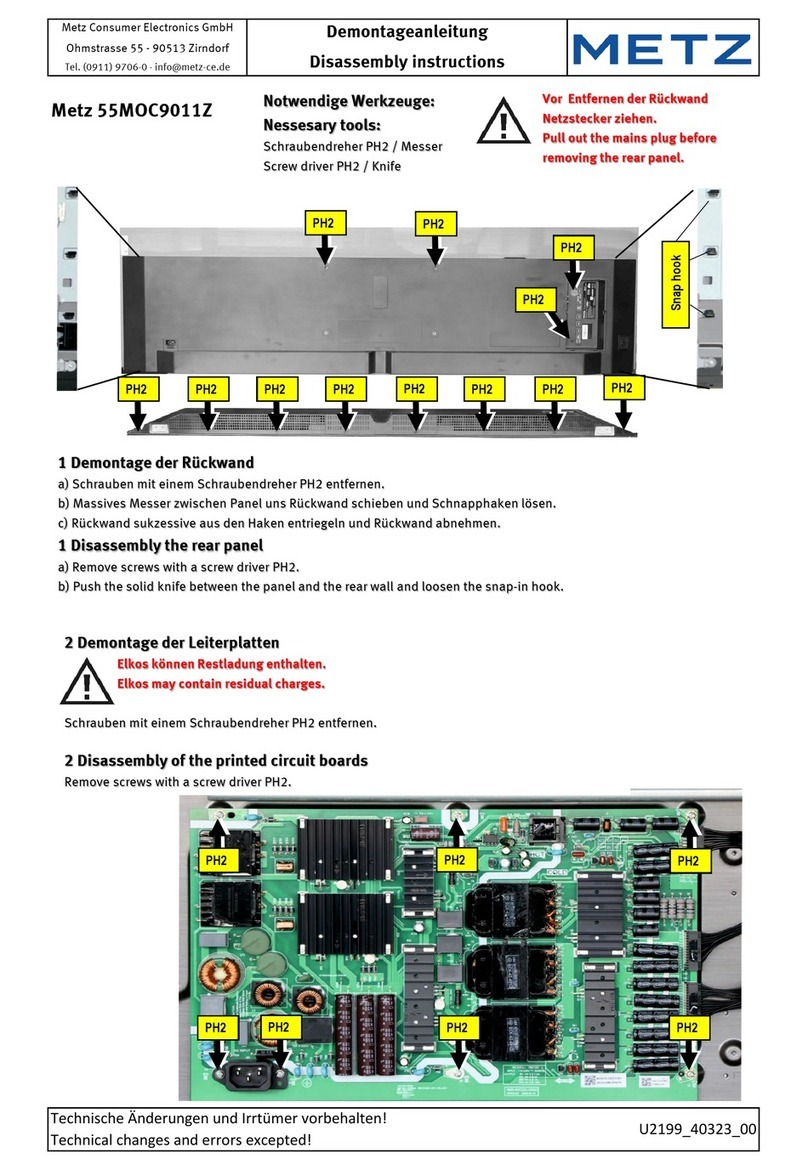
Metz 55MOC9011Z Installation instructions

Metz
Metz Calea 43TY62 User manual

Metz
Metz 65MOC9000Z Installation instructions

Metz
Metz 55MOC9010Z Installation instructions

Metz
Metz Cosmo Series User manual

Metz
Metz 601-M2 User manual

Metz
Metz Linea FHDTV 100 User manual

Metz
Metz 55MOC9010Y Installation instructions

Metz
Metz Taris 43TY89 UHD twin R Installation instructions

Metz
Metz MTB7000 Series User manual