MFB MFB-501 Pro User manual

Operating Manual
Drum computer
Operating manual
MFB-501 Pro
Drum Machine
1

General
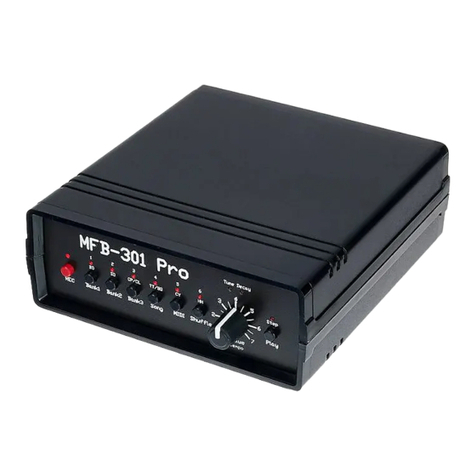
The MFB-501 Pro is an advanced re-issue of our model MFB-501. It has been
expanded b adding the claps from our model MFB-401 as well as b eight
sample-slots. The MFB-501 Pro’s sequencer can be programmed step b step with
individual parameter settings per step. Thanks to its complete MIDI-
implementation, the unit ma as well be used as a sound module.
Setup
Connect the power suppl that comes with the MFB-501 Pro to the Mini-USB-
jack. Alternativel , the unit can be powered from a power bank.
Connect the input MIDI In to a ke board or sequencer. Sound output is possible
from a stereo output (TRS, 6.3 mm)) and a headphone output (3.5 mm).
To avoid fault operation, please exactl follow the button combinations in the
sequence described to carr out the functions of the unit.
Sounds
Available are eight analog instruments which can be edited using these parameters:
1. BD Bass Drum Pitch, Deca , Attack, Level
2. SD Snare Drum Pitch, Deca , Noise Level, Level
3. CP Clap Deca , Attack, Level
4. TT Tom Pitch, Deca , Attack, Level
5. BO Bongo Pitch, Deca , Attack, Level
6. CL Claves Pitch, Deca , Attack, Level
7. CY C mbal Pitch, Deca , Mix Noise/Metal, Level
8. HH Hi-hat Pitch, Deca , Mix Noise/Metal, Level
In addition, there are eight sample-slots which are addressed b dedicated
sequencer tracks which can be edited in pitch and deca each. Each slot can use
one of 16 samples respectivel load one of 128 samples. The selection is carried
out from the sound settings.
Sample1 Bass Drum Sample2 Snare/Rim
Sample3 Clap Sample4 Tom/Conga
Sample5 Tom/Bongo Sample Clave/Crash
Sample7 Ride Sample8 Hi-hat
In each sample categor , the 16th sample can be swapped for a user defined
sample-sound via USB. The sample transfer is done using a terminal software from
a Windows computer. You will find a dedicated operating manual for this
procedure on the MFB website.
2

Playing sounds
The instruments can be pla ed manuall from the step-buttons 1/BD to 8/HH
which also serve to program the sequences. With Shift being pressed (LED lit red),
the step-buttons trigger Sample1 to Sample8, depending on which sample sounds
have been load into the corresponding slots.
Sound settings
Each sound can be edited in level, pitch, deca and an extra function respectivel a
sample pre-selection. This wa , ou can create a default setting, e.g. if a pattern is
being deleted. With the exception of the level control, these settings can onl be
adjusted with the sequencer being stopped.
Settings for the analog instruments
Shortl press Rec plus a step-button, e.g. 1/BD. Both LEDs are lit (Record green,
Instrument red). Next, select the sound function to be edited, e.g. Level, b
pressing function ke – Shuffle/Level (LED lit green).
Use the Value control to adjust the parameter in 16 steps. The value is displa ed
using the eight step LEDs: 1 red, 1 green, 2 red ... 8 green.
While turning the Value control, each new value will automaticall trigger the
corresponding sound to avoid the need for manual triggering.
The other parameters, Tune for pitch, Decay for the sound length and Extra for a
special sound shaping option, are edited in the same wa . The functions can be
selected one after another and the corresponding LEDs will be lit green. The
parameters are then adjusted using the Value control.
Shortl after the parameter’s value has been edited, the displa will jump back to
the LED of the corresponding instrument. This wa , ou can easil switch the
instrument b shortl pressing Rec and a different step-button, e.g. 2/SD,
Pressing Rec once more will end editing (LED turns off).
Sample settings
After pressing Shift (LED lit red), all eight active samples can be pla ed. Pressing
Rec plus a step-button shortl , e.g. 1/BD, will select the sample-slot Sample1.
Next, select the sound function to be edited, such as Level, using function-button
– Shuffle/Level (LED lit green). Editing and entering values works just like for the
analog instruments. However, the Extra function is not available for the samples.
Fine allows to tune the sample within a range of two semitones.
Hint: Tune and Fine(tune) can result in interesting sounds. However, audible
artifacts in certain frequencies ma occur.
3

Selecting a sample
Use the button SampleSel to load a sample from the corresponding bank into the
slot, when in edit mode. The selection is carried out using the Value control which
will trigger the new sample when being turned.
The banks of the sample-slots can be changed. If, for example, Sample1 shall be
pla ed instead of a clap, select slot 1 (Rec + 1/BD) first, then hold SampleSel and
press 3/C in addition. This wa , ou assign bank Sample3 to the first slot.
Pressing Rec once more will end editing (LED turns off).
Loading and saving settings
You can save up to eight different settings for the sounds, MIDI and the shuffle-
mode. To save these settings, shortl press the MIDI-button (LED lit),
followed b pressing Rec in combination with one of the eight step-buttons.
To load, press the MIDI-button shortl (LED lit), followed b pressing one of the
eight step-buttons.
Sequencer
Pressing Play starts and pauses the sequencer. The A/B button selects whether part
A (LED lit red), part B (LED lit green) of the pattern are being pla ed or parts A
and B alternating (LED changes between red and green).
The Value control sets the tempo of the sequencer while running.
Loading and saving patterns
The MFB-501 Pro offers three banks with 36 patterns each. To load a pattern, press
Bank1, Bank2 or Bank3 first (LED lit red), then select a pattern using the
function-buttons 1 to . Each pattern has a two digit number: 11 to 66.
Example: To select pattern 25 – press button 2 (LED lit green) and button 5 (LED
turns off).
To save a pattern hold Bank1, Bank2 or Bank3 and press Rec in addition. Next,
select a memor location using the function-buttons 1 to using the same method.
Deleting patterns
The currentl selected pattern will be deleted, if ou shortl press the Rec and Play
buttons at the same time.
4

Programming patterns
The MFB-501 Pro is programmed while the sequencer is running. As a first step,
use the A/B button to select, which part of the pattern is going to be programmed
respectivel edited. Next, start the sequencer b pressing Play. Next, shortl press
Rec in combination with an instrument-button, e.g. Rec + 1/BD. The eight step-
LEDs now displa the track of the instrument. For steps 1, 3, 5 ... to 15, the
corresponding LEDs will light up red. For steps 2, 4, 6 ... to 16, the corresponding
LEDs will light up green.
Even-numbered steps 1, 3, 5 ... can be entered directl . Odd-numbered steps 2, 4,
6 ... can be reached using the Shift button combined with the eight step-buttons
Example: A bass drum shall be placed on steps 1, 7 and 12. For step 1, press 1/BD
(LED 1 2 lit red). For step 7, press 4/TT (LED 7 8 lit red). For step 12, press Shift
and /CL (LED 11 12 lit green). With both steps being programmed b the same
button, being active, the corresponding LED will be lit red/green.
Pressing the step-button once more deletes the step (LED turns off).
To change over to the next instrument, shortl press Rec plus a different
instrument-button, while the sequencer is running. The step-input is carried out
similarl .
To change over to a sample, press Shift first (LED lit red). Next, use the button-
combination Rec plus one of the step-buttons to select a sample-slot, e.g. Rec +
Sample1.
Programming parameters per step
While a pattern is being programmed, individual parameter settings for pitch,
deca and extra can be adjusted for the step being set last. This wa , ou ma
create a tuned set of toms or bongos. The same procedure can be used to set
different values for Decay to create open and closed hi-hats.
With a step being set, Tune, Decay and Extra can be selected via the function-
buttons and adjusted b the Value control. This can be repeated for each following
step. However, a change for Level alwa s applies to all steps. Editing at a later
time is not possible. In order to edit an earlier step, it has to be deleted and set
anew.
Within a sample-track, it is not onl possible to edit Tune and Decay parameters
per step, but also to select a different sample (per step) from the active bank of the
slot using SampleSel.
Shortl pressing Rec once more stops the programming (LED off). The pattern is
now read to be saved.
5

Pattern length
The pattern length can be set an where between one and 16 steps. The last step is
set b first pressing Rec plus 1/BD. While holding Rec (but letting 1/BD go), press
8/HH next. Finall , let both buttons go and set the last step b pressing a step-
button, e.g. 7/CY (3/4 time).
Programming patterns via MIDI
In order to program melodies and percussion with different pitches, the pattern-
steps can be entered from a MIDI-ke board. This programming is also carried out
step b step and onl possible with the sequencer being stopped.
To do so, press Rec plus an instrument-button. When wanting to select a sample,
press Shift first (LED lit red) followed b Rec in combination with a button for a
sample-slot. If needed, a sample can be selected from the corresponding bank using
the SampleSel function (LED lit green) and the Value control. Deactivate
SampleSel (LED off) and the sample track is read .
You can now enter notes chromaticall ranging from A0 (note #45) to C2 (#60) via
MIDI to program the selected instrument in the pattern. Use the notes D0
respectivel D2 (#38/#62) to program rests (onl in this mode).
Each new pressed ke board- respectivel MIDI-note will set a new step in the
pattern. Upon completion of the 16th step, the sequencer automaticall exits
record-mode. Alternativel , the programming can be ended manuall b pressing
Rec. The notes that have been entered up to this point will be kept. Press Play to
listen to the programmed sequence.
Copy A → B
With part A of a pattern being programmed, it is often useful to cop it over to part
B to be able to carr out certain edits afterwards. To cop , press and hold Rec plus
the A/B button until the LED above Rec shortl lights up green and confirms the
operation.
6

Programming Songs
Several patterns can be combined to form a song respectivel a longer sequence
which is then pla ed in a pre-programmed order. Programming a song is onl
possible while the sequencer is stopped.
After pressing Song (LED lit red), shortl press Rec (LED lit red).
Next, select the patterns in the desired order, e.g. Bank1, 2x button 1 for pattern 11.
Use A/B to select the desired part of the pattern. Press Play to confirm the
procedure for each new pattern. The Pla -LED will shortl light up and turn off
after. Now, the next pattern can be programmed b bank > pattern number > A or
B. Subsequentl , this procedure needs to be confirmed b pressing Play again.
If a pattern shall be repeated multiple times, ou can simpl select the pattern first
and press Play multiple times, equaling the number of repetitions. Using this
procedure, ou can alwa s select between A- and B-parts before the next step.
Song programming is ended b pressing Rec (LED turn off).
Loading and saving Songs
With programming being completed, a song can be saved to one of nine memor
locations. To do so, first press Song then Rec (LEDs lit red). Next, use the
function-buttons 1 to 3 to select a memor location (11, 12, 13 / 21, 22, 23 / 31, 32,
33). Saving is completed b pressing Rec once more (LED turns off).
To load a song, press Song followed b a selection of the function-buttons 1 to 3.
The song will automaticall be loaded.
The song is now read to be pla ed. After pressing Song (LED lit red), the song
can be started b pressing Play. The LEDs of the function-buttons 1 to displa
the song progress.
Mute function
Individual instruments can be muted during pla back. With the sequencer running,
press Shuffle plus an instrument-button, such as 1/BD, to mute this instrument.
The LED is then lit red for an analog sound, respectivel green for the sample-slot
when pressing the button once more. B pressing the button one more time, the
instrument is re-enabled (LED turns off).
Shuffle
The MFB-501 Pro offers five shuffle-t pes which alwa s appl globall to all
patterns. With the sequencer being stopped, press Shuffle (LED lit red) to select a
shuffle-t pe using the function-buttons 2 to . Selecting button 1 deactivates the
shuffle.
7

Setting the MIDI-channel
The MIDI-channel is set b using a learn-function. The MIDI-button activates the
learn mode (LED lit red) while the sequencer is being stopped. Next, press an
note on the desired MIDI-channel using a connected MIDI-ke board. The LED
will turn off and the MIDI-channel is set.
MIDI velocity
The reception of velocit -data can be enabled or disabled. Press the MIDI-button
(LED lit red). Next, use function-button 1 to enable or disable the reception of
velocit -data (LED lit/unlit).
MIDI CC
The reception of MIDI controller-data (see list at the end of this manual) can be
enabled or disabled. To do so, press the MIDI-button (LED lid red). Next, use
function-button 2 to toggle between active (LED lit) and inactive states (LED off).
MIDI-clock / External synchronization
The MFB-501 Pro’s sequencer can be switched to use an external MIDI-clock or
an analog click instead of its internal clock-reference. To activate external
s nchronization, press the MIDI-button (LED lit red). Use function-button 3 to
switch s nchronization to MIDI-clock (LED lit green). Use function-button 4 to
toggle s nchronization to analog clock (LED lit green). With external
s nchronization being enabled respectivel disabled, the LEDs will turn off and the
selected mode becomes active. The three options are mutuall exclusive.
The analog clock’s s nc input is a TRS-jack (3.5 mm) which carries the clock on
its tip while the ring-contact receives start/stop commands.
Sound-reset via MIDI
The use of MIDI controllers will change the sound settings with a lasting effect. To
return to the stored state, first press the MIDI-button followed b shortl pressing
function-button 5.
Hint: The MFB-501 Pro offers a dedicated drum kit suited for d namic editing of
sound parameters. This kit is located at MIDI-note #72 and above. The drum kits
being triggered b lower MIDI-notes alread use certain pre-adjusted fixed MIDI
controllers internall .
8

Using the MFB-501 Pro as a sound module
B using the selected MIDI-channel, the MFB-501 Pro can be used as a sound
module from an external sequencer or a DAW. Instruments and samples are placed
in different kits which are spread across several octaves. Further MIDI-channels
can be used to pla certain sounds with different pitches and sometimes pol phonic
(see MIDI-implementation).
If ou onl want to trigger the instruments, the clock should be set to internal.
Alternativel , it is also possibl to s nchronize the sequencer and trigger individual
instruments externall in parallel.
USB-transfer of patterns and samples, firmware-updates
Given the MFB-501 Pro is connected to a Windows computer via USB with the
corresponding drivers being installed, patterns and samples can be exchanged via
USB. Also, firmware-updates can be carried out. A terminal software is needed to
carr out the data-transfer.
Please read the dedicated operation manual which is provided as a PDF-download
on MFB’s website.
Patterns can be saved on the computer but also be transferred back into the MFB-
501 Pro.
The sample-transfer will onl work in one direction: from the computer to the
MFB-501 Pro. For each sample slot 1 (Sample1) to 8 (Sample8), onl the last
(16th) sample of each bank can be replaced.
Sound selection 1-8 / Steps 1-16 Record
Function-buttons 1-6 Value entr Start/Stop
9

MIDI-implementation
MIDI-note Instrument/Function CC-number Function
Note # 36 BD MFB-501 CC# 03 BD Tune 0...127
Note # 37 HH MFB-501 CC# 11 SD Tune 0...127
Note # 38 SD MFB-501 CC# 19 TT Tune 0...127
Note # 39 OH MFB-501 CC# 21 BO Tune 0...127
Note # 40 CP MFB-401 CC# 86 CL Tune 0...127
Note # 41 LT MFB-501 CC# 84 CY Tune 0...127
Note # 42 CL1 MFB-501 CC# 89 HH Tune 0...127
Note # 43 HT MFB-501 CC# 64 BD Deca 0...127
Note # 44 CL2 MFB-501 CC# 67 SD Deca 0...127
Note # 45 LBMFB-501 CC# 75 CP Deca 0...127
Note # 46 CY MFB-501 CC# 20 TT Deca 0...127
Note # 47 HB MFB-501 CC# 78 BO Deca 0...127
Note # 48 BD MFB-502 CC# 87 CL Deca 0...127
Note # 49 HH MFB-502 CC# 85 CY Deca 0...127
Note # 50 SD MFB-502 CC# 90 HH Deca 0...127
Note # 51 OH MFB-502 CC# 02 BD Attack 0...15
Note # 52 CP MFB-502 CC# 13 SD Snapp 0...15
Note # 53 LT MFB-502 CC# 76 CP Attack 0...15
Note # 54 CY MFB-502 CC# 79 TT Attack 0...15
Note # 55 MT MFB-502 CC# 82 BO Attack 0...15
Note # 56 CY MFB-502 CC# 53 CL Attack 0...15
Note # 57 HT MFB-502 CC# 88 CY Mix 0...15
Note # 58 CY MFB-502 CC# 93 HH Mix 0...15
Note # 59 HT2 MFB-502 CC#32 Sample1 Tune 0...124
Note # 60 BD MFB-512 CC#33 Sample1 Deca 0...120
Note # 61 HH MFB-512 CC#34 Sample1 No 0...127
Note # 62 SD MFB-512 CC#35 Sample2 Tune 0...124
Note # 63 OH MFB-512 CC#36 Sample2 Deca 0...120
Note # 64 CP MFB-512 CC#37 Sample2 No 0...127
Note # 65 LT MFB-512 CC#38 Sample3 Tune 0...124
Note # 66 CY MFB-512 CC#39 Sample3 Deca 0...120
Note # 66 MT MFB-512 CC#40 Sample3 No 0...127
Note # 68 CY MFB-512 CC#41 Sample4 Tune 0...124
Note # 69 MT MFB-512 CC#42 Sample4 Deca 0...120
Note # 70 CY MFB-512 CC#43 Sample4 No 0...127
Note # 71 HT MFB-512 CC#44 Sample5 Tune 0...124
Note # 72 BD analog CC#45 Sample5 Deca 0...120
Note # 73 SD analog CC#46 Sample5 No 0...127
Note # 74 CP analog CC#47 Sample6 Tune 0...124
Note # 75 TT analog CC#48 Sample6 Deca 0...120
Note # 76 BO analog CC#49 Sample6 No 0...127
Note # 77 CL analog CC#50 Sample7 Tune 0...124
10

MIDI-note Instrument/Function CC-number Function
Note # 78 CY analog CC#51 Sample7 Deca 0...120
Note # 79 HH analog CC#52 Sample7 No 0...127
Note # 80 Sample1 CC#53 Sample8 Tune 0...124
Note # 81 Sample2 CC#54 Sample8 Deca 0...120
Note # 82 Sample3 CC#55 Sample8 No 0...127
Note # 83 Sample4
Note # 84 Sample5
Note # 85 Sample6
Note # 86 Sample7
Note # 87 Sample8
MIDI-channel +1
Note #36 - #60 = Sample1 Note #65 - #96 = Sample2
MIDI-channel +2
Note #36 - #60 = Sample3 Note #65 - #96 = Sample4
MIDI-channel +3
Note #36 - #60 = Sample5 Note #65 - #96 = Sample6
MIDI-channel +4
Note #36 - #60 = Sample7 Note #65 - #96 = Sample8
MIDI-channel +5
Note #36 - #60 = Sample 1-4, 4 voice pol phon Note #65 - #96 = Sample 5, 8 voice
pol phon
MIDI-channel +6
Note #36 - #60 = Sample 1-8 8 voice pol phon
11
Other MFB Drum manuals
